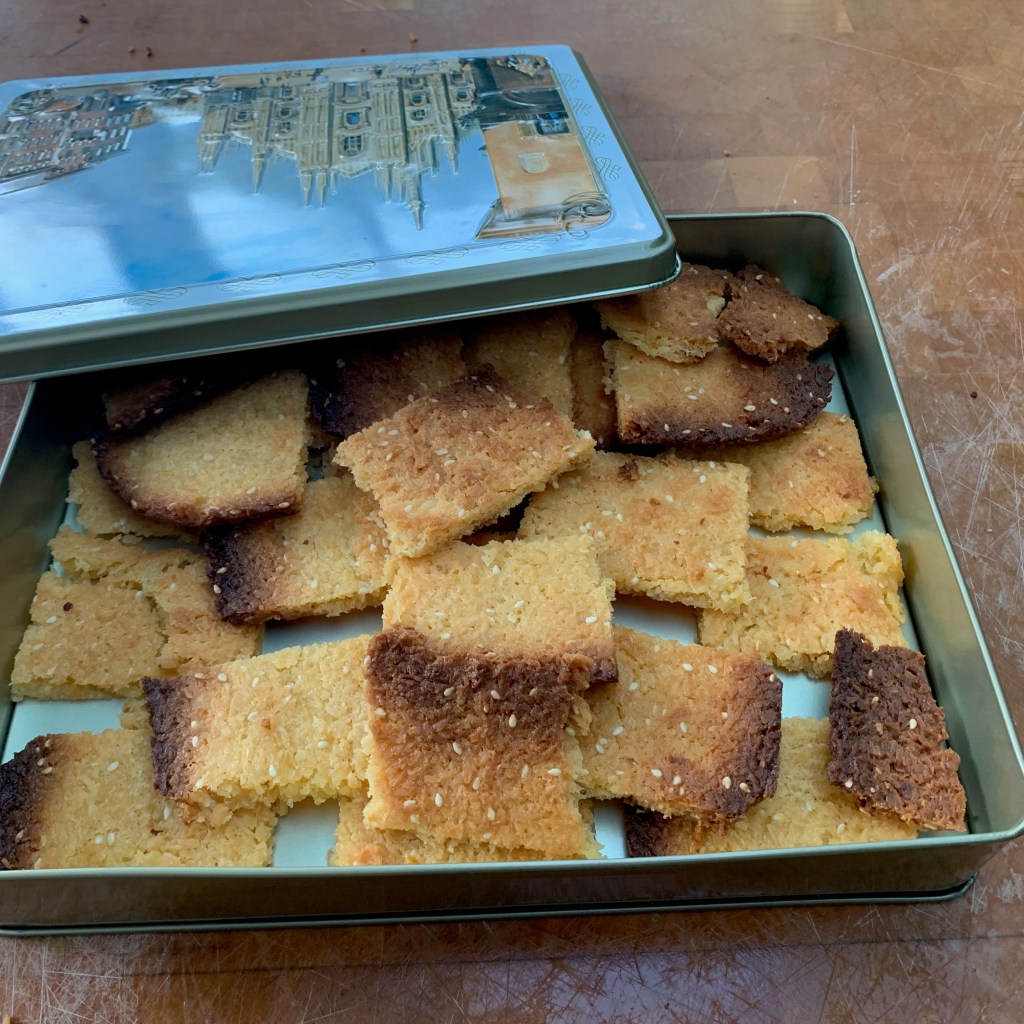
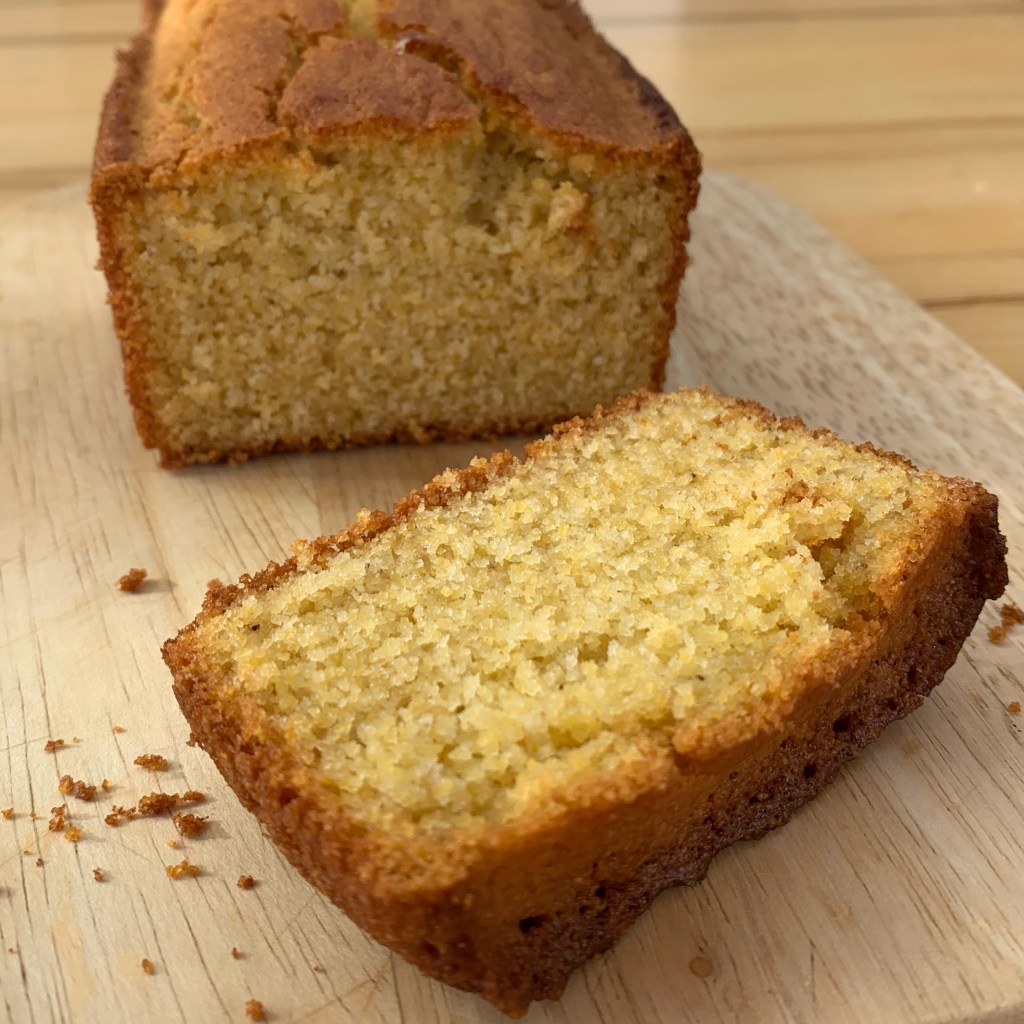
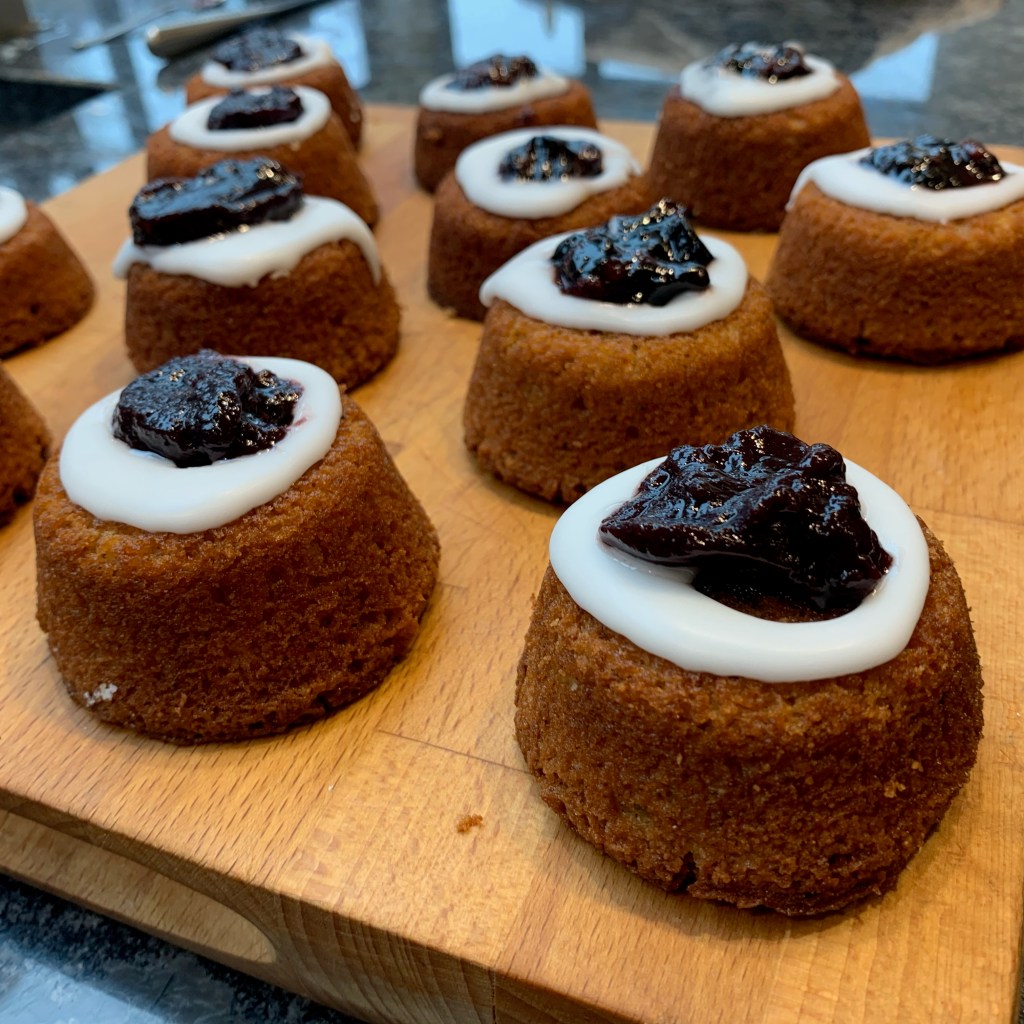
The words “diabetic baker” are something of an oxymoron: diabetics really shouldn’t be eating high carbohydrate foods, which pretty much rules out bread, cakes, biscuits, pies, pastries and just about any kind of baked goods. That makes my series of blog posts on baked goods from around the world a totally inappropriate project to have done (or, viewed more positively, a rash thumbing of my nose at the health gods).
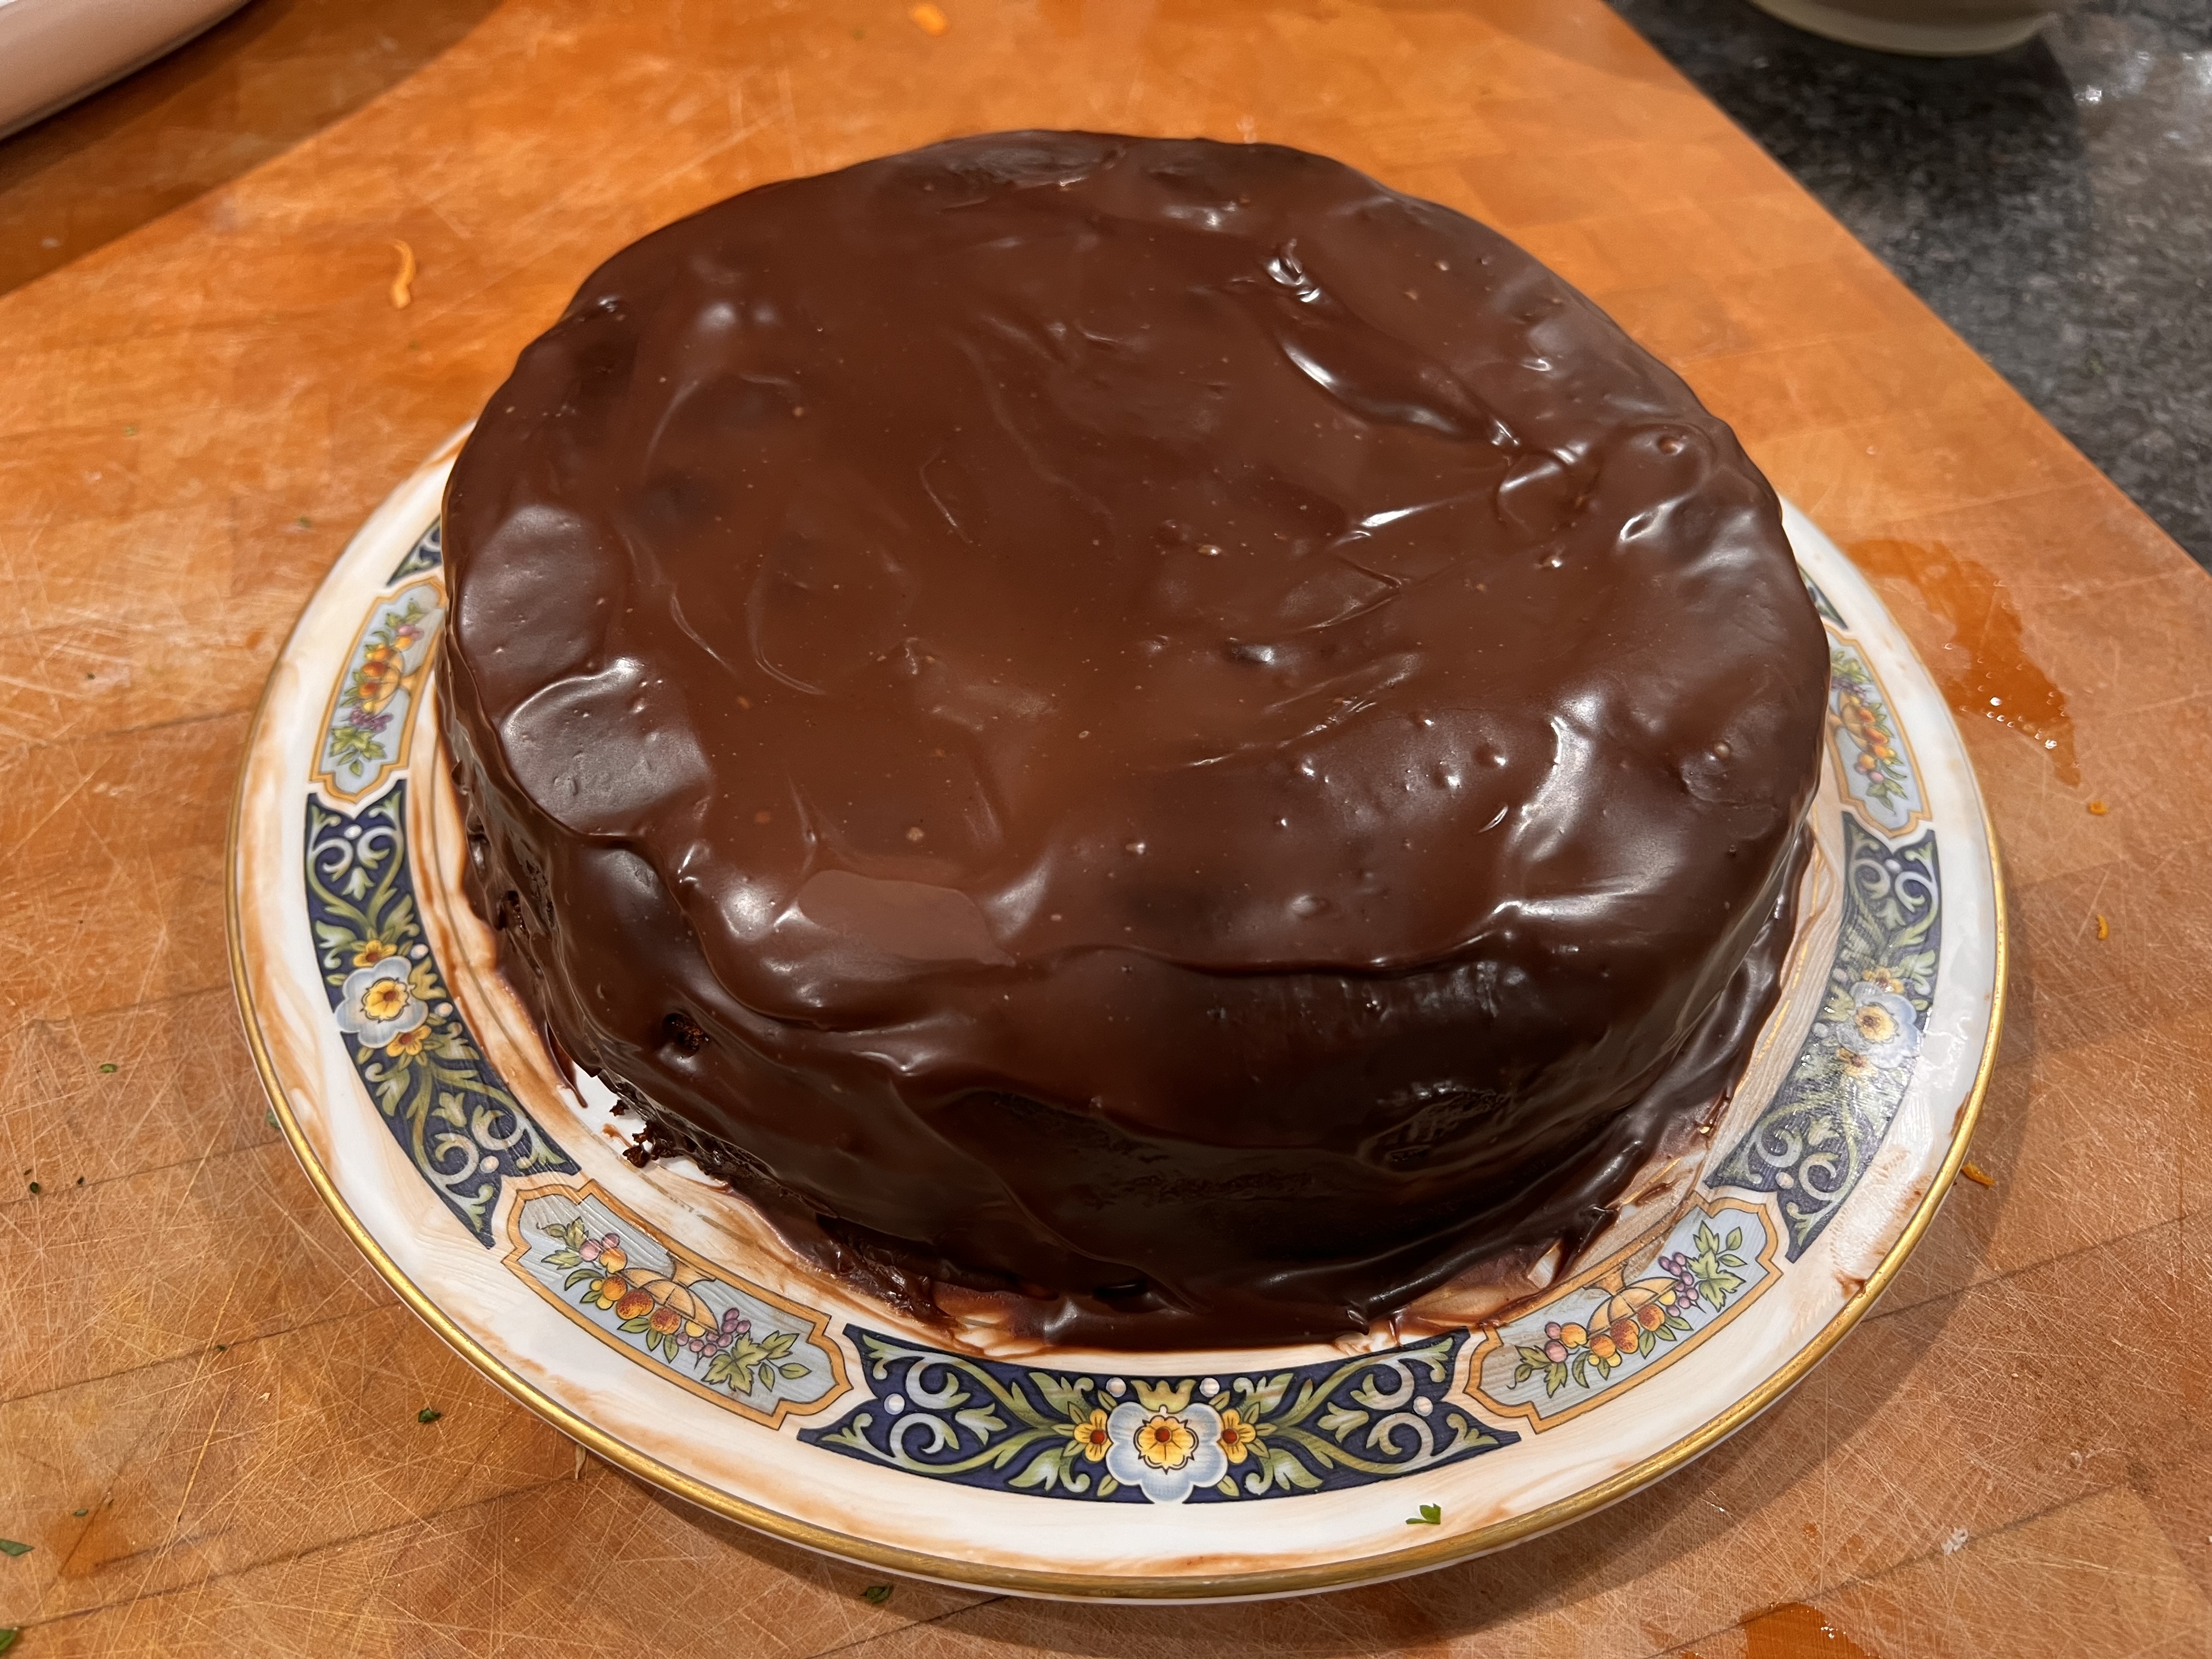
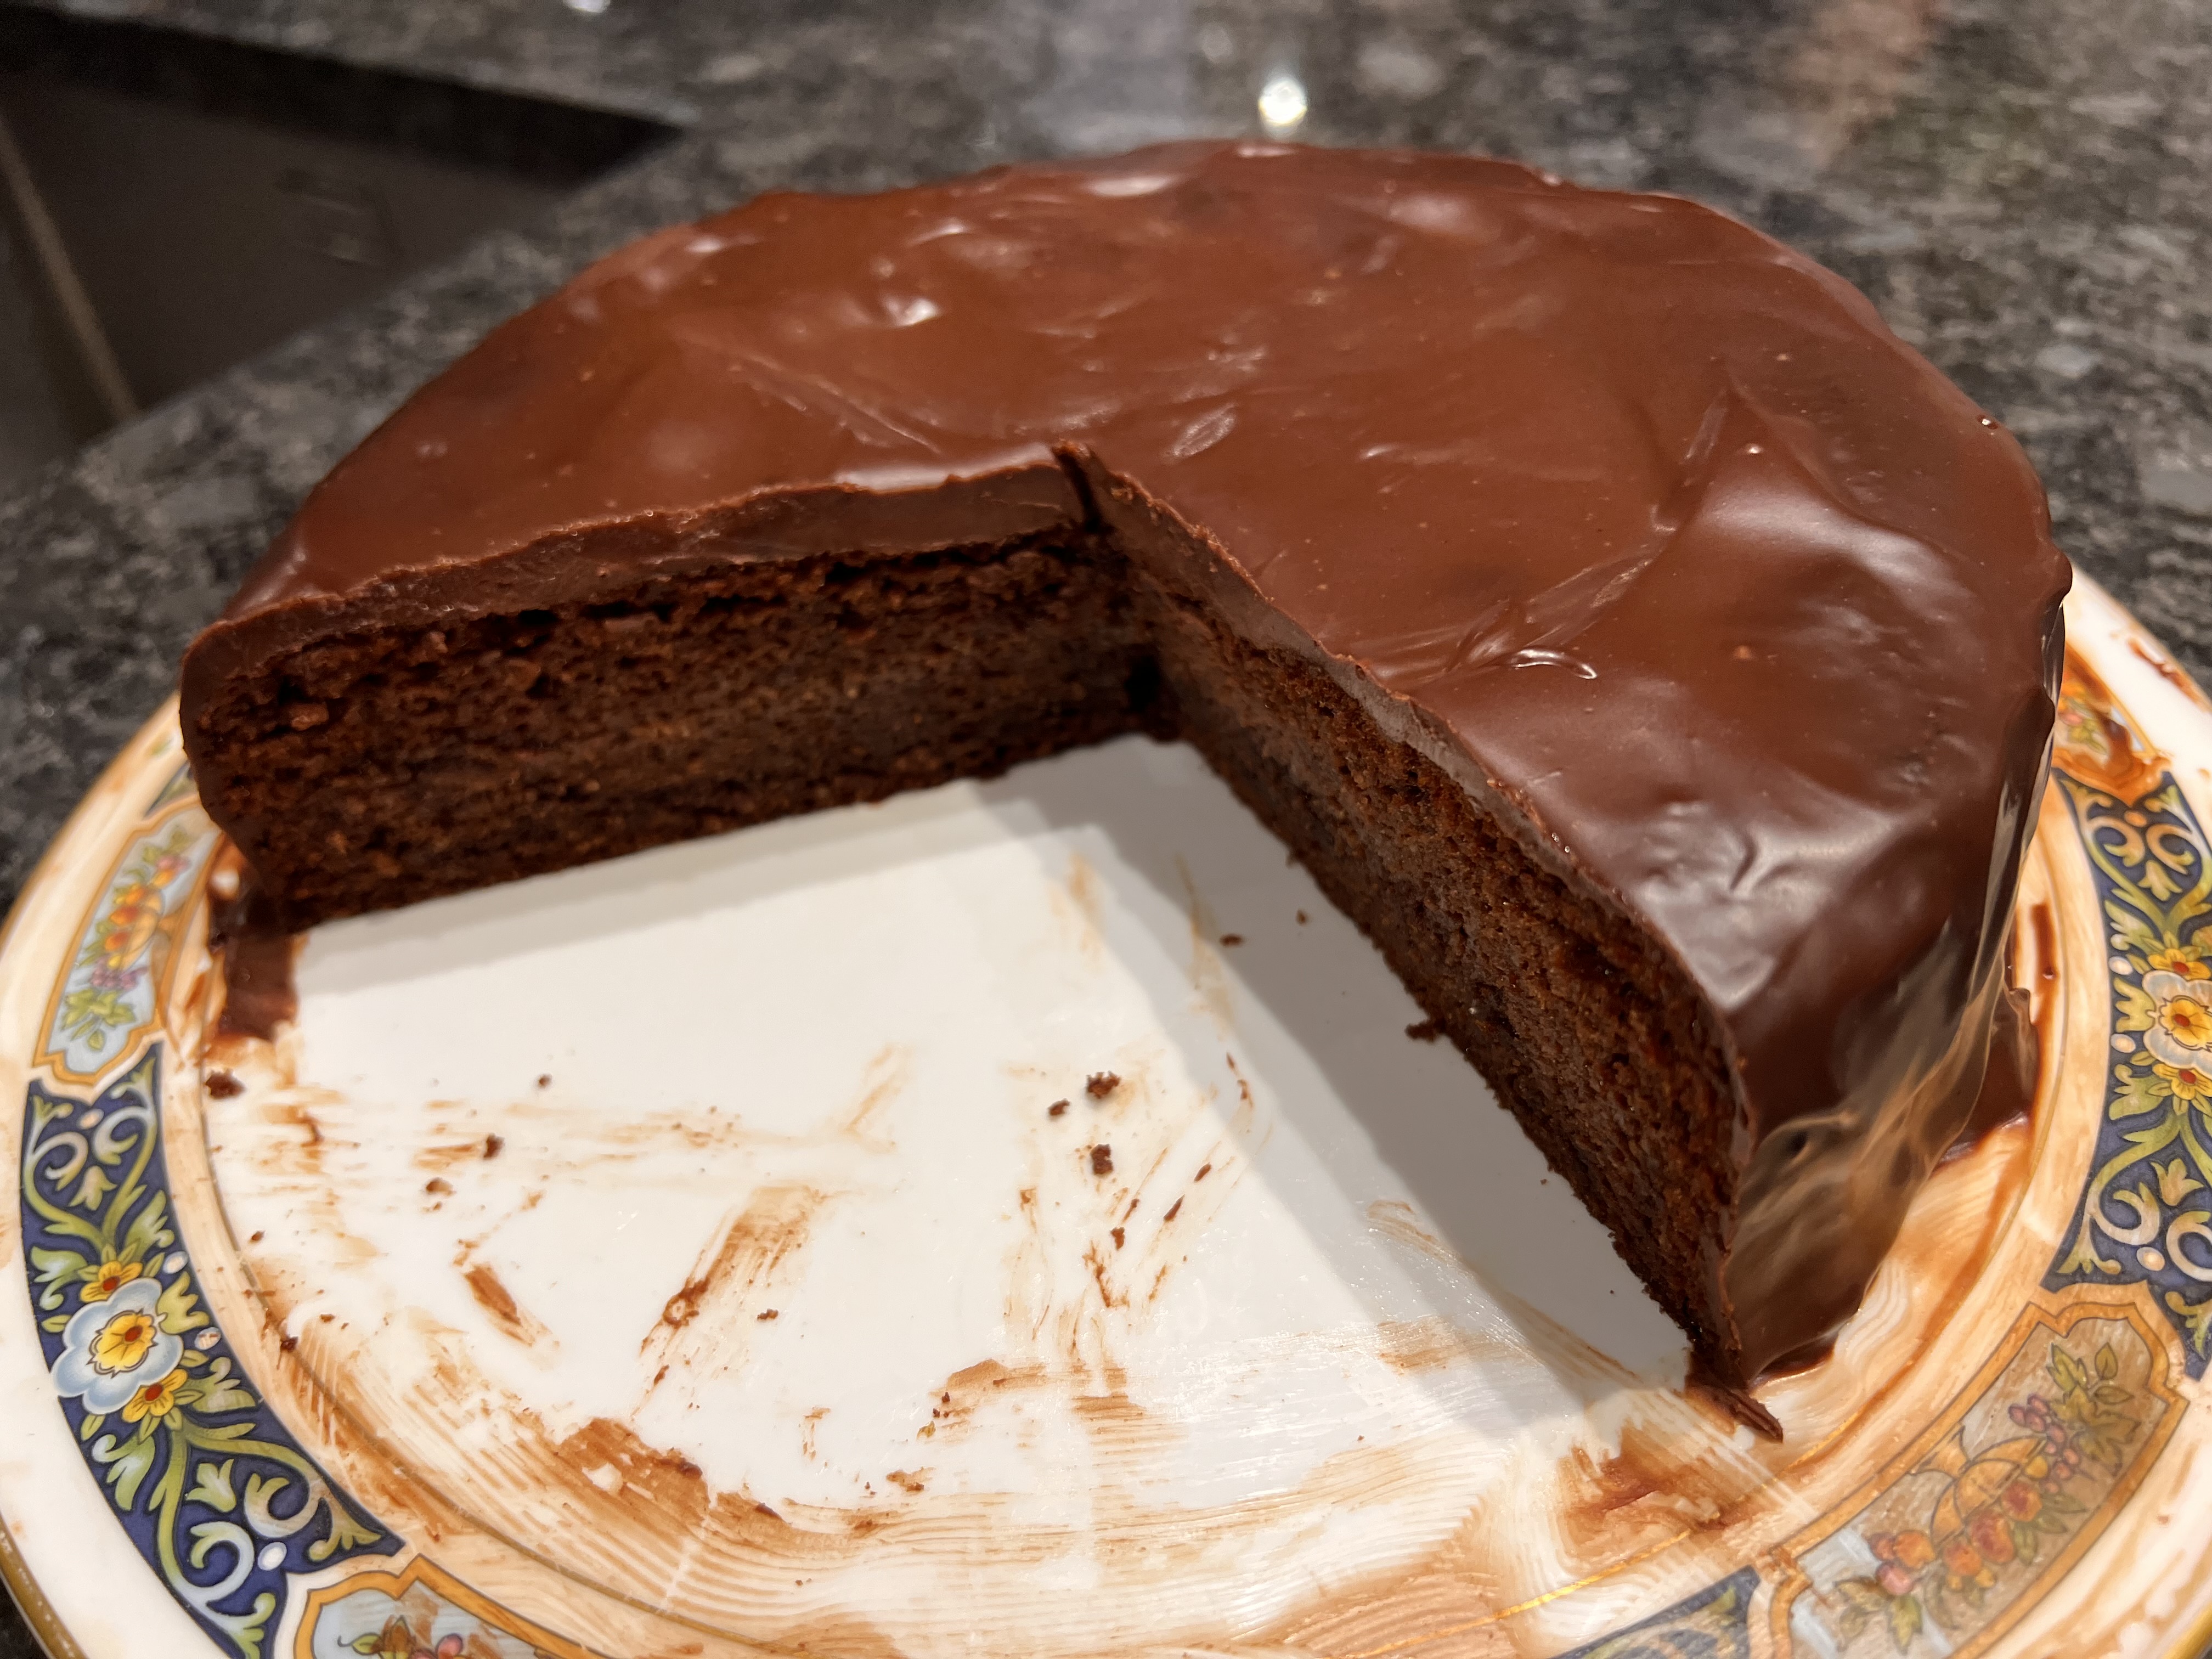
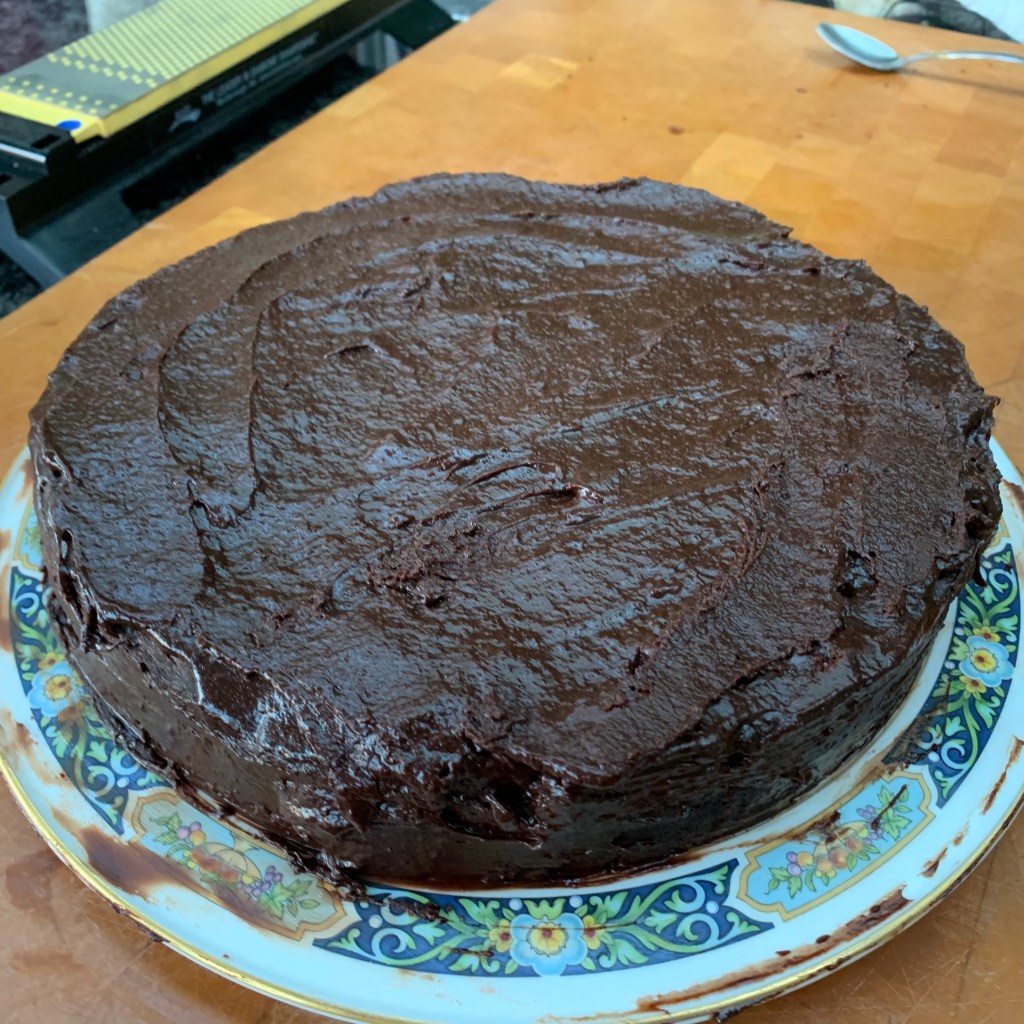
But there are times when you can cheat. I just ran an experiment to see how far I could minimise the carbohydrate content of my favourite cake – Sachertorte – and it was outstandingly successful.
Starting with my recipe for normal Sachertorte, I did four things:
Replace the flour with ground almonds
Replace the sugar with allulose
Replace the icing with a chocolate ganache
Keep careful control of the amount of apricot jam in the filling
With more time available and apricots in season, I could have made my own apricot compote with allulose, but there really wasn’t time.
If you aren’t aware of allulose (aka Psicose or D-ribo-2-hexulose): it’s a naturally occurring sugar which you can’t digest normally. It tastes something like 70% as sweet as sugar. I find that it has little or none of the aftertaste of most non-sugar sweeteners – and in a recipe with this one, with its strong-tasting dark chocolate, I could detect no aftertaste whatsoever. People have questioned whether there any health risks, but the US FDA have approved it with a maximum consumption of 33-36g per day for a 60kg adult (a portion of this cake uses under 20g, so I reckon it looks OK).
Comparing the two recipes, the carbohydrate budget looks like this. In rough numbers, the new recipe’s carbohydrate count is a quarter of the standard one.
Normal
Diabetic
Saving
Dark chocolate 300g
90g
90g
–
Sugar to allulose
150g
0
150g
Flour to ground almonds
76g
19g
57g
Remove icing
200g
0
200g
Apricot jam 90g to 60g
53g
35g
18g
Total for a 1kg cake
569g
144g
425g
Total for a (generous) 125g portion
71g
18g
53g
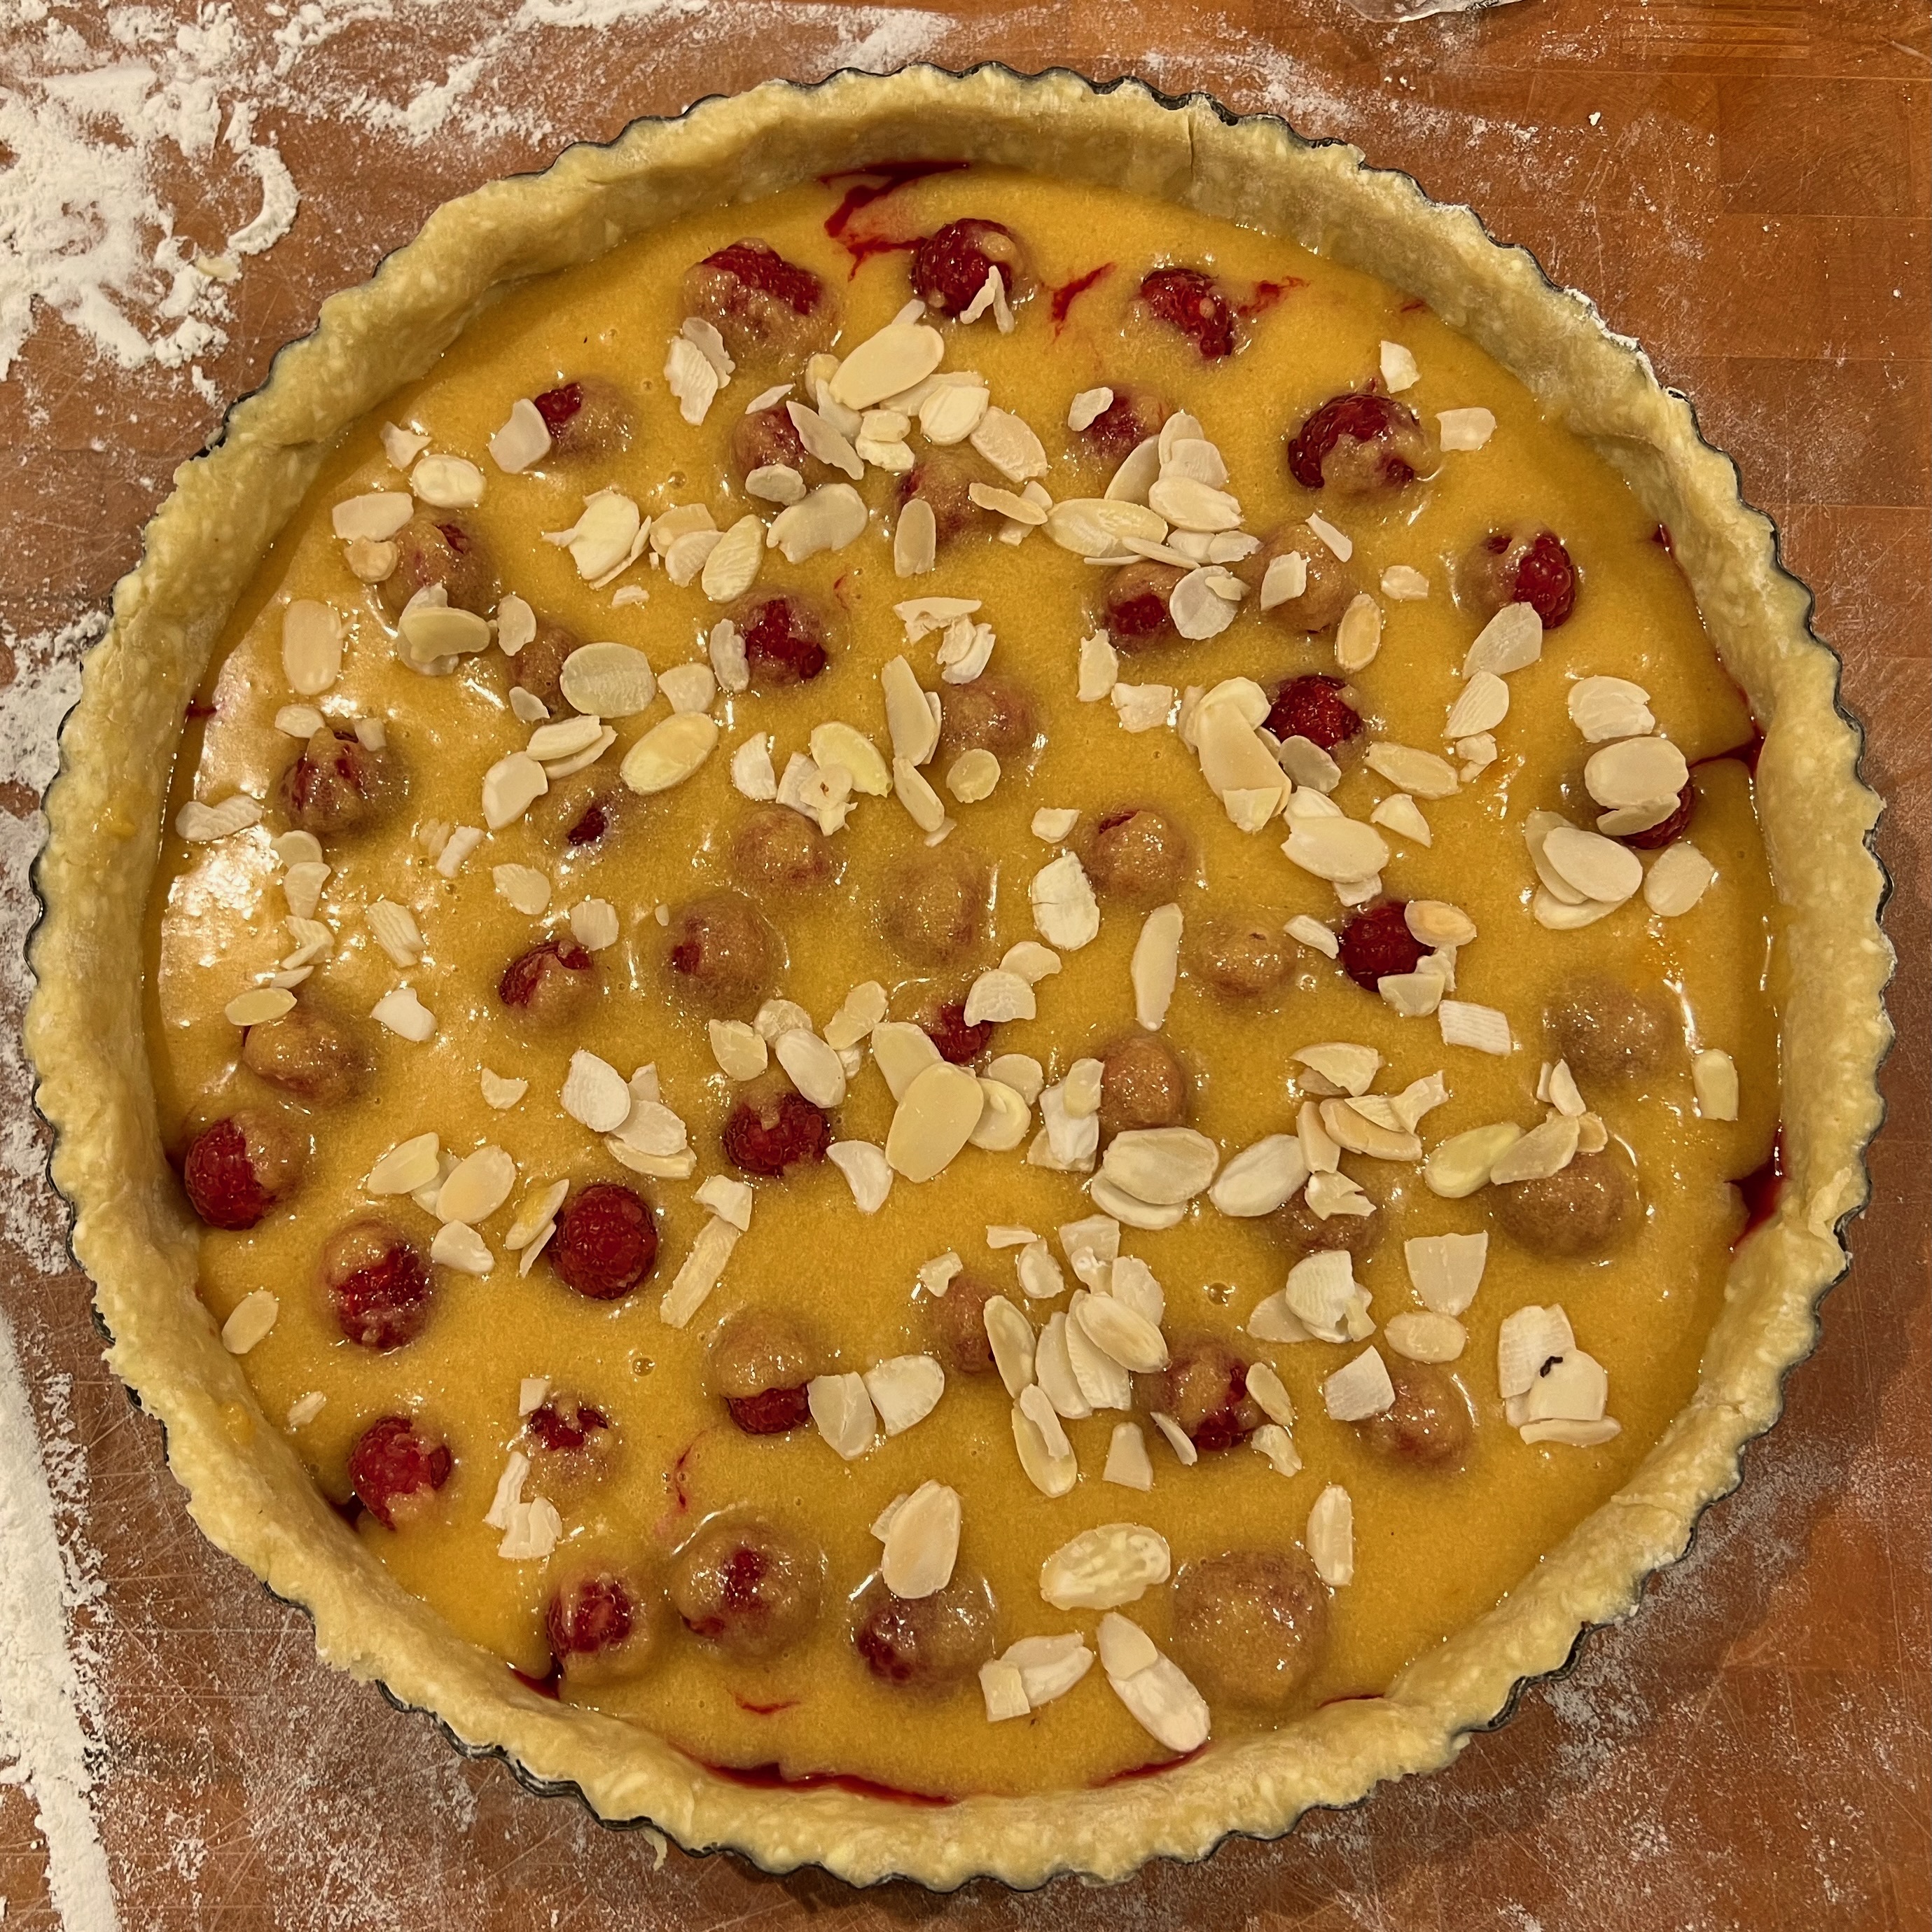
I can’t fault the results. My family proclaimed this to be better than the original, which we attribute to liking the extra flavour of the almonds and preferring the creaminess of the ganache to the extra sweetness of the chocolate icing. It’s a winner.
For completeness, here’s the modified recipe. Make it in a greased, 8-9 inch, removable-rim pan.
Ingredients
Cake
150g dark chocolate (70-80% cocoa solids)
150g allulose
30g granulated sugar
170g butter, softened
100g ground almonds
6 eggs
60g apricot jam mixed with the juice of half a lemon
1/2 tsp baking powder
vanilla essence or vanilla paste to taste (different brands are so different in strength that I can’t give an amount)
Ganache
150g dark chocolate (70-80% cocoa solids)
200g double cream
Method
Cake
Preheat the oven to 160°C fan. Grease the sides of an 8-9 inch, removable-rim cake tin with butter and line the bottom with baking paper or parchment.
Separate the eggs into yolks and whites
Melt 150g of the chocolate in a double boiler. Then leave it to cool.
Cream 120g of the allulose and the butter until the mixture is fluffy.
Beat in the egg yolks gradually until the mixture is light in colour.
Add the melted cooled chocolate.
Add the ground almonds. Add the baking powder and mix everything thoroughly.
Beat the egg whites until they are beginning to be stiff. Add the remaining 30g of allulose and beat on maximum speed until stiff but not dry.
Fold the resulting meringue mix into the cake mixture, about a fifth at a time. The weight of the almond-rich mixture will make this trickier than for a normal cake.
Bake the mixture in the pan for around 40 minutes.
Remove and cool on a rack.
Optionally, slice the top dome from the cake and set aside. Slice the remaining cake in half. Spread the jam on the bottom half and reassemble (optionally, spread jam on the top of the cake also).
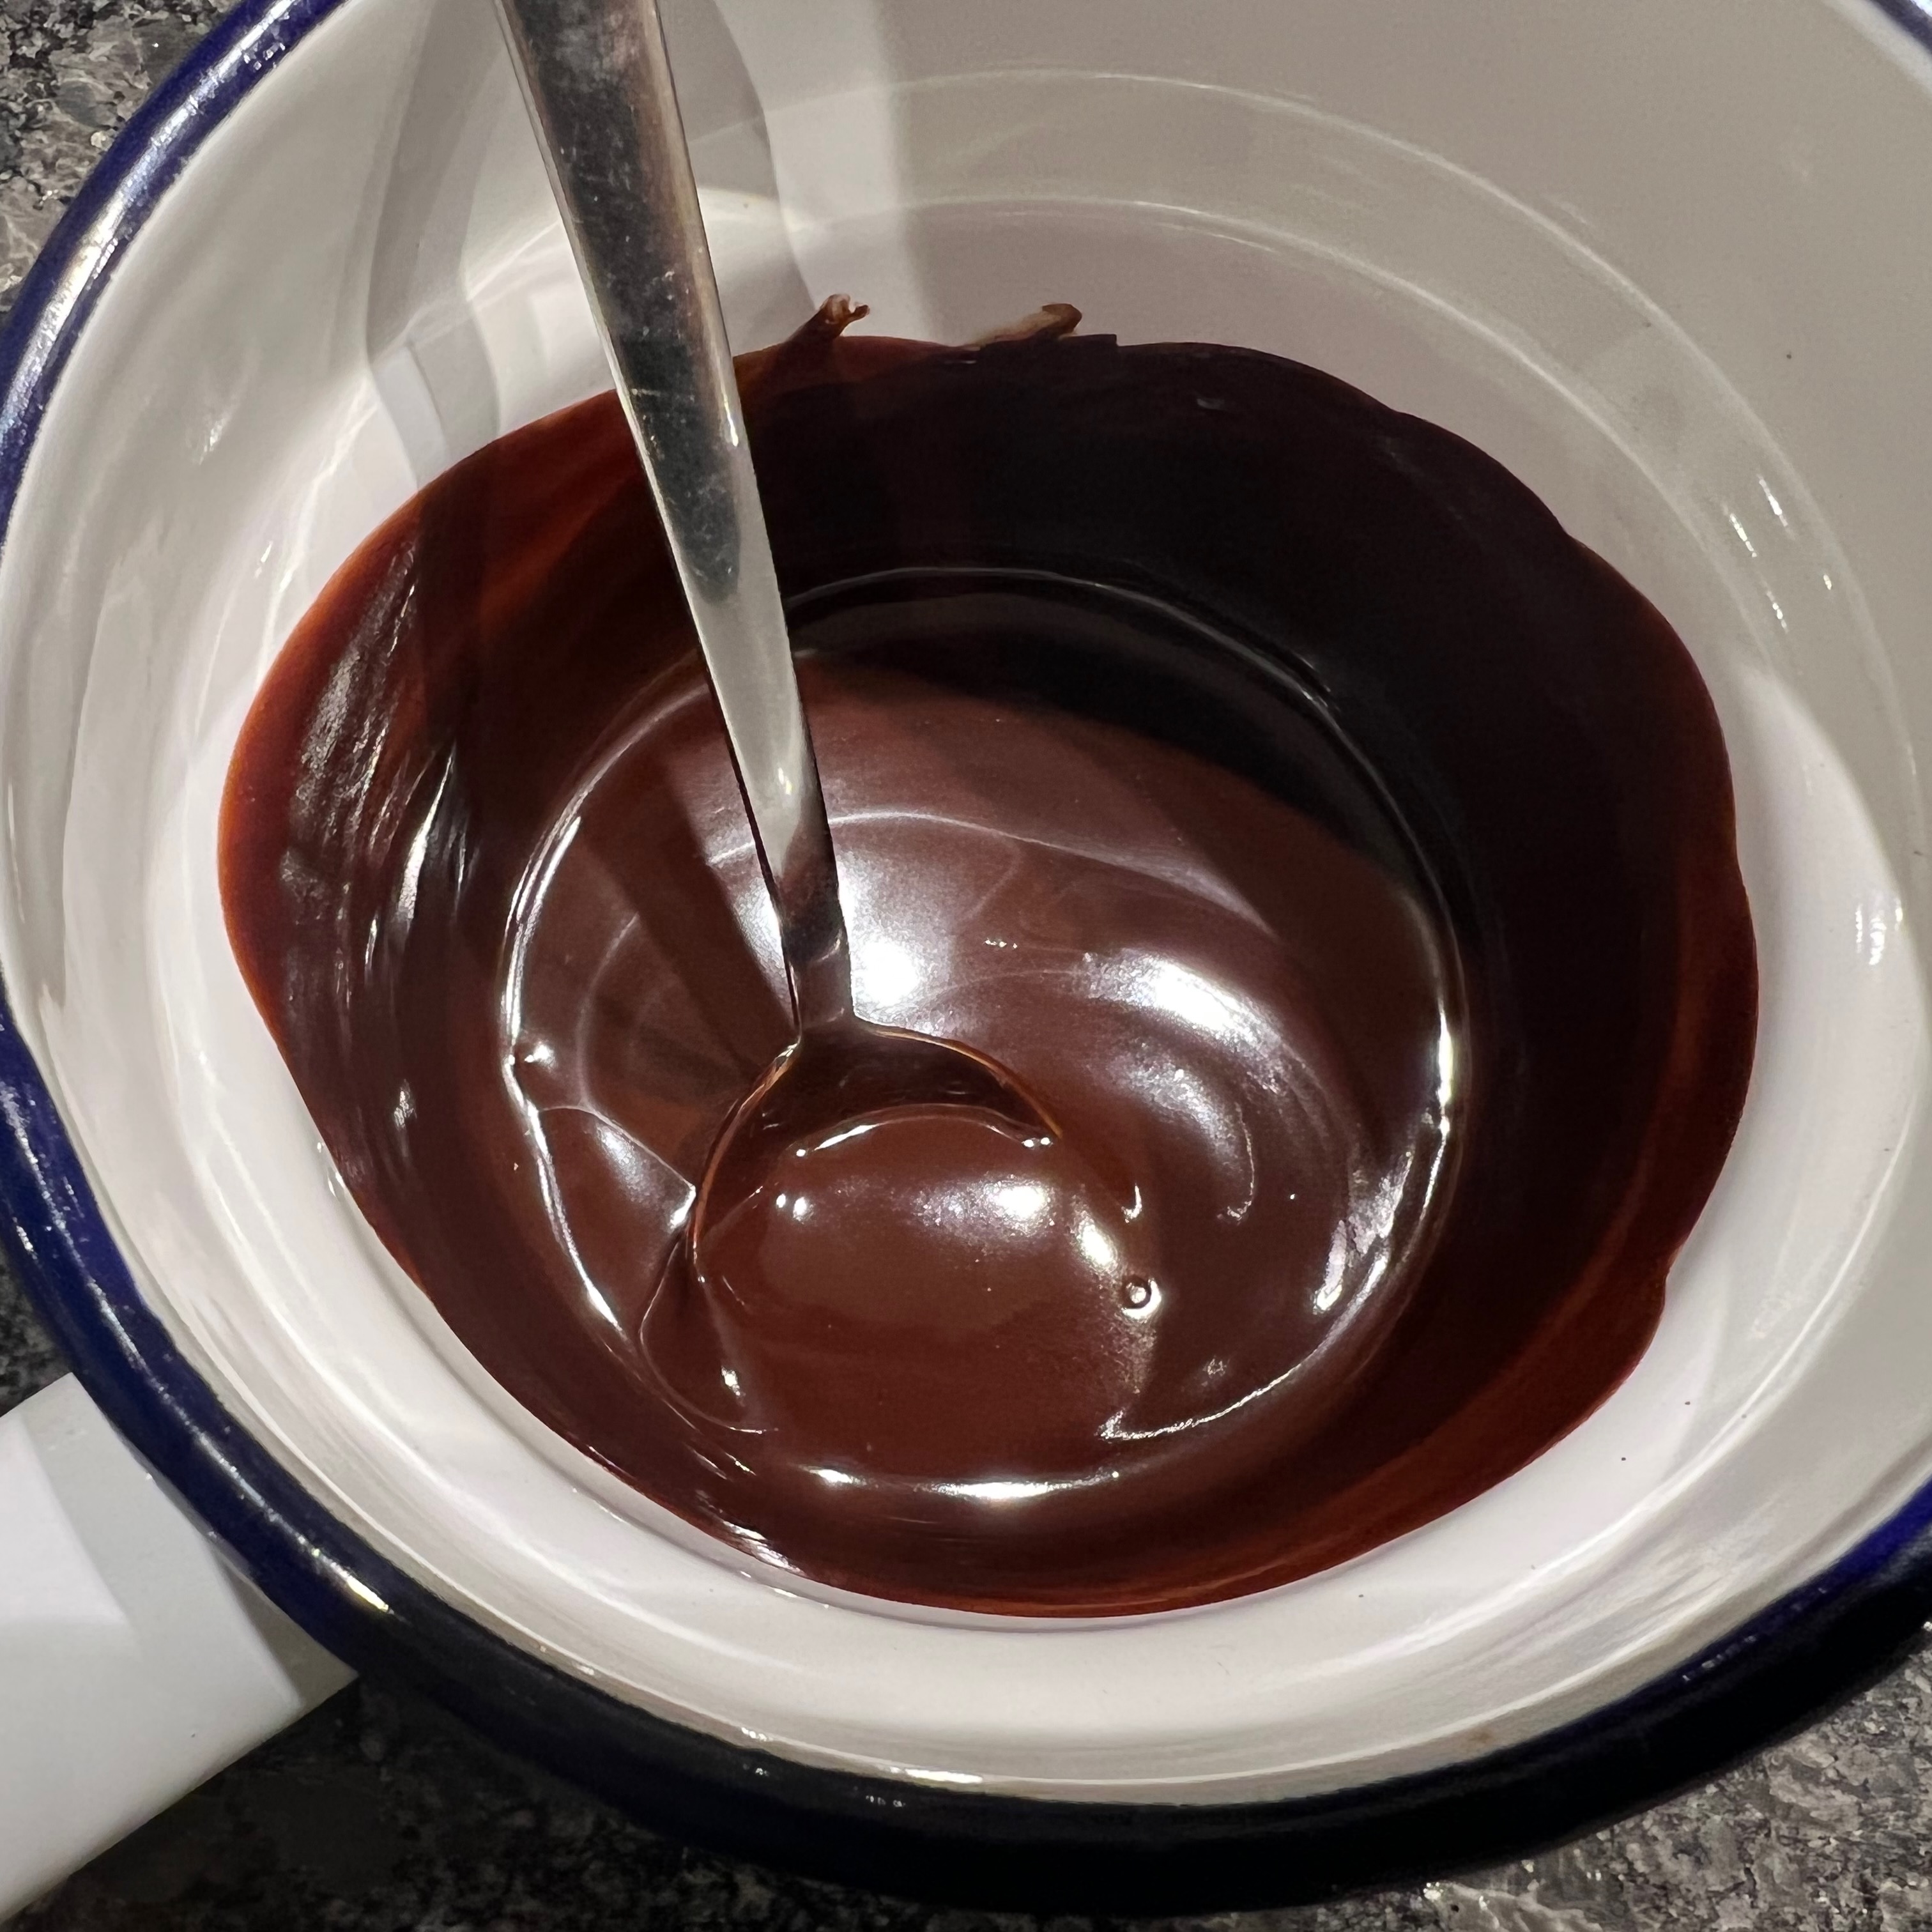
Ganache
Break or chop the chocolate into small pieces (less than 1cm square) and put in a reasonably heatproof bowl. Of course, if you’ve bought your chocolate in the form of chips/pellets, this has already been done for you.
Bring the cream close to the boil, and pour it over the chocolate.
Stir rapidly and continuously until the mixture is smooth.
Cool enough that the ganache no longer runs really easily, but is still spreadable with a glossy finish.
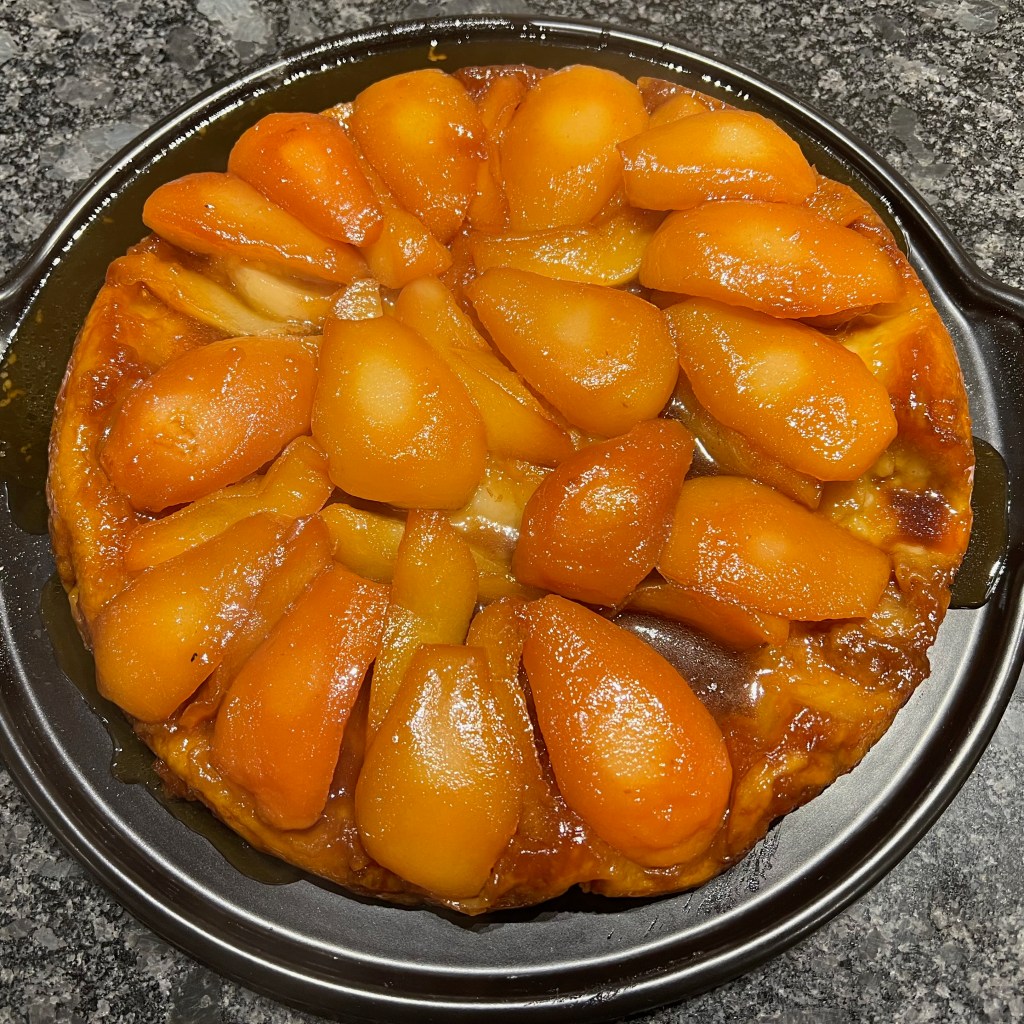
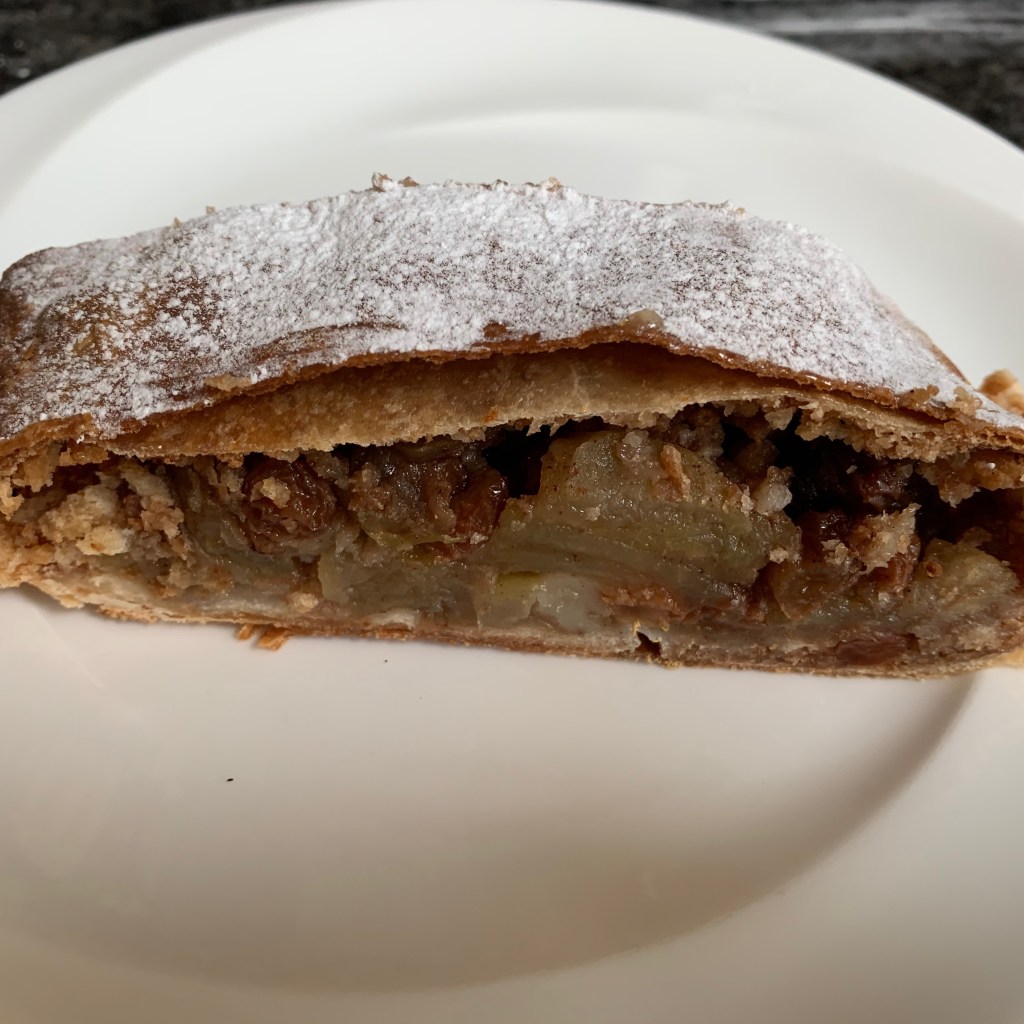
Canada: Butter tartDenmark: WienerbrødEngland: Bakewell tartFrance: Éclairs au chocolatFrance: Tarte TatinHungary: Apple strudelNetherlands: Apple pieParaguay: Pasta FrolaPoland: SernikPortugal: Pastéis de nataRomania: CornuleteTurkey: Baklava
Savoury dishes
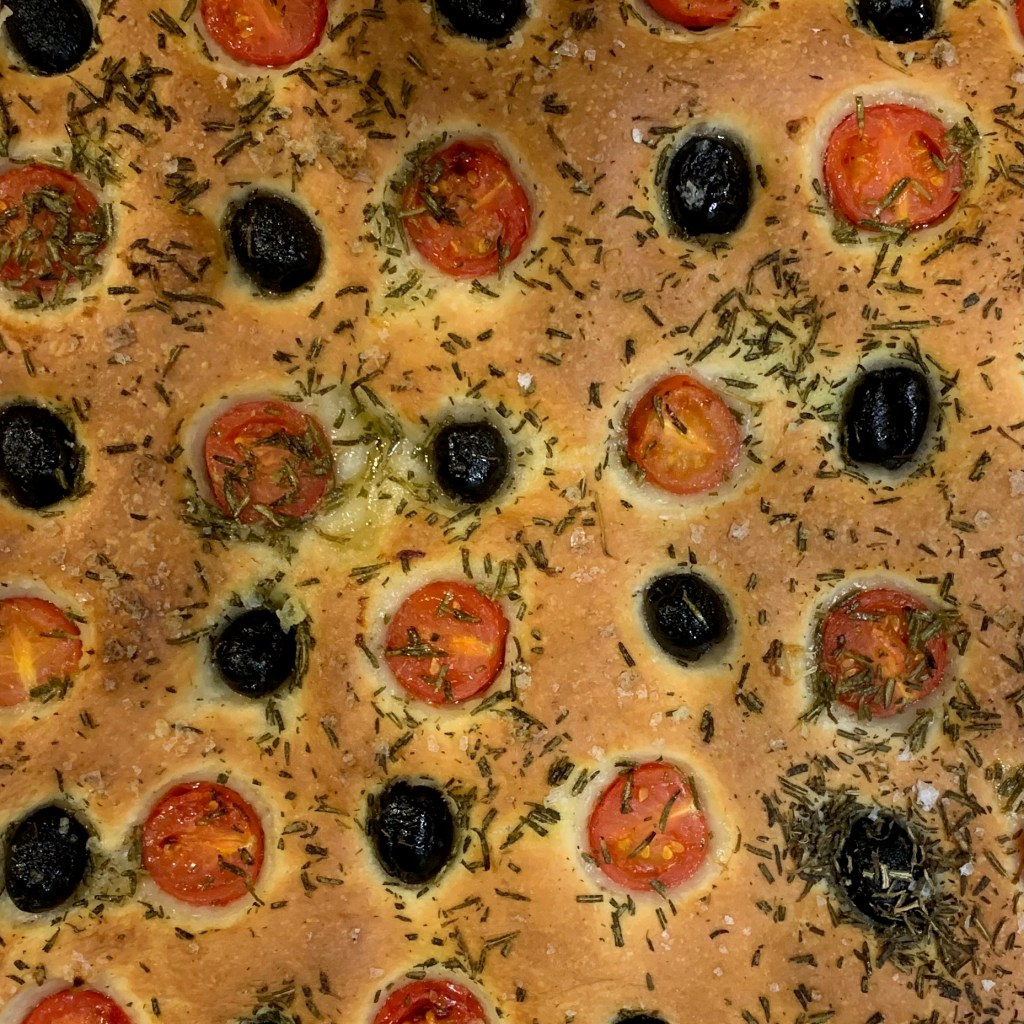
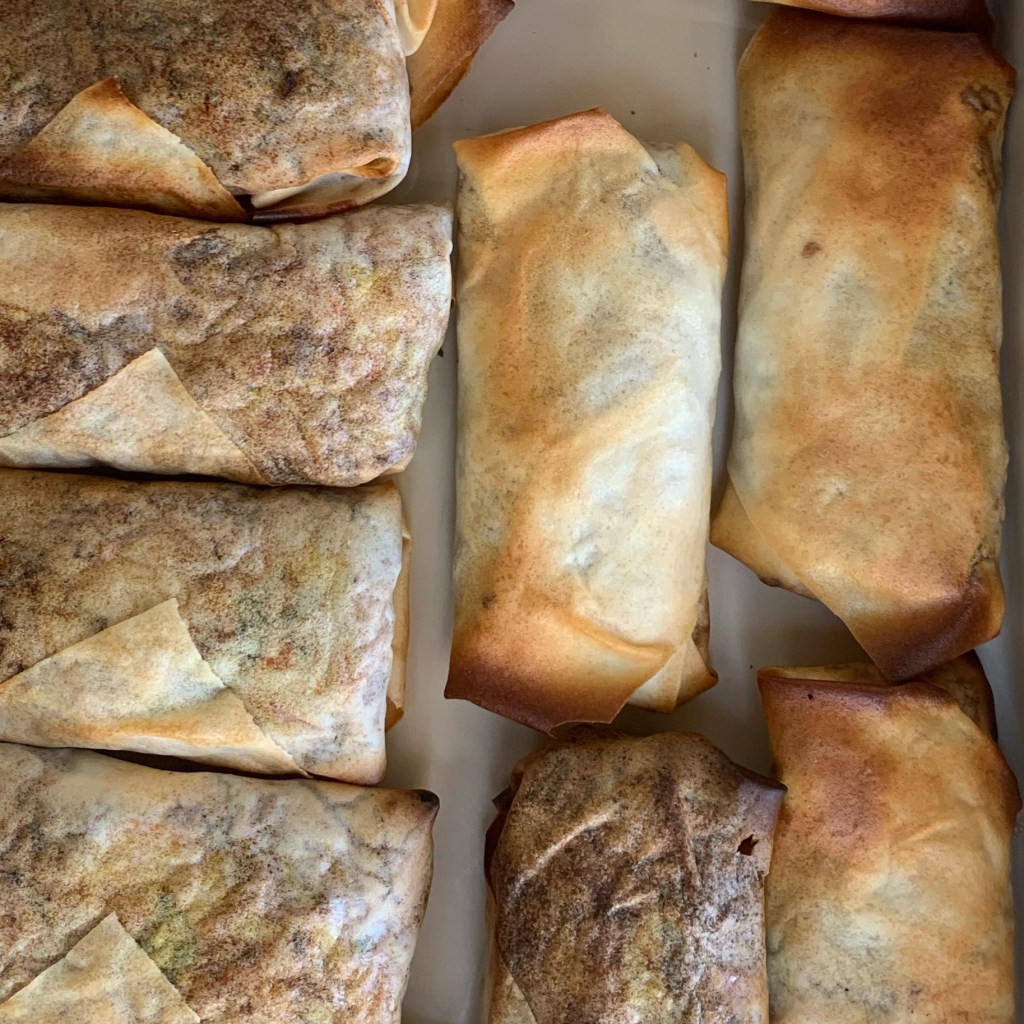
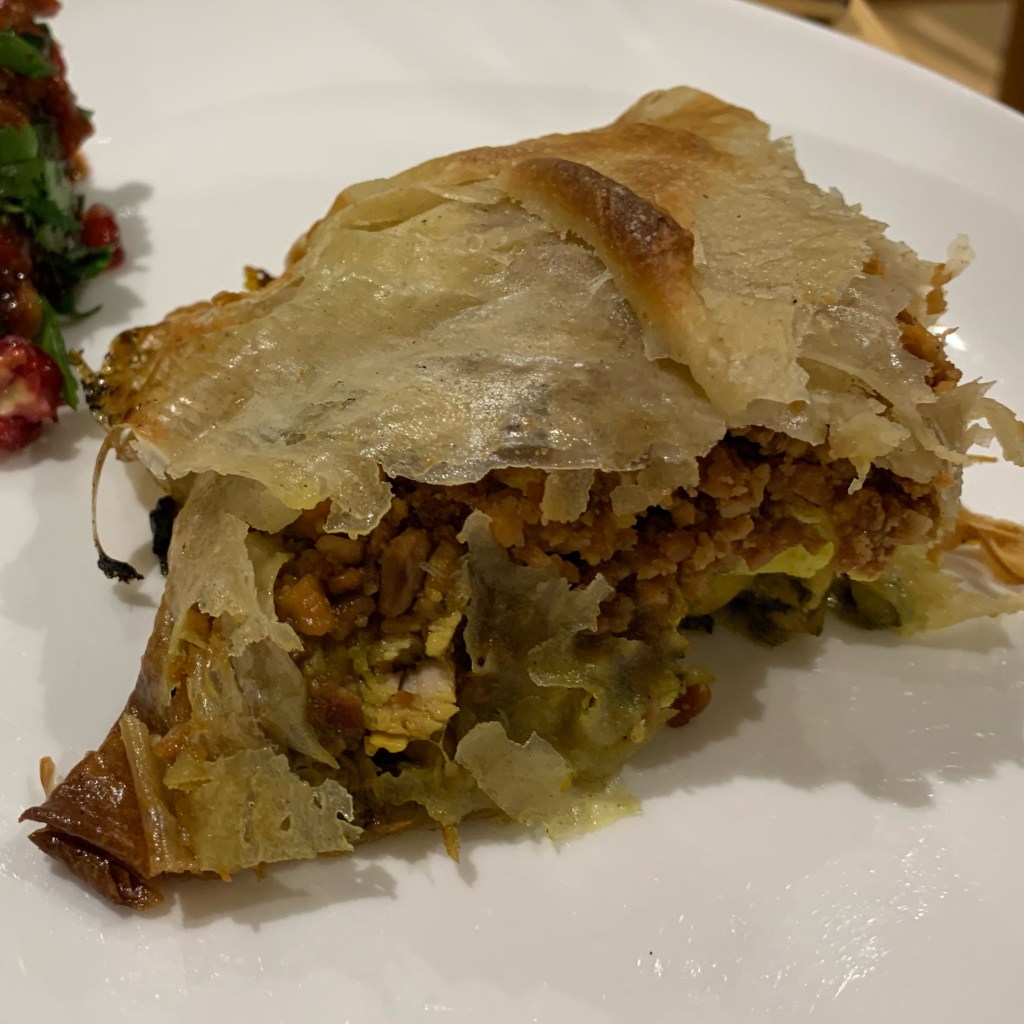
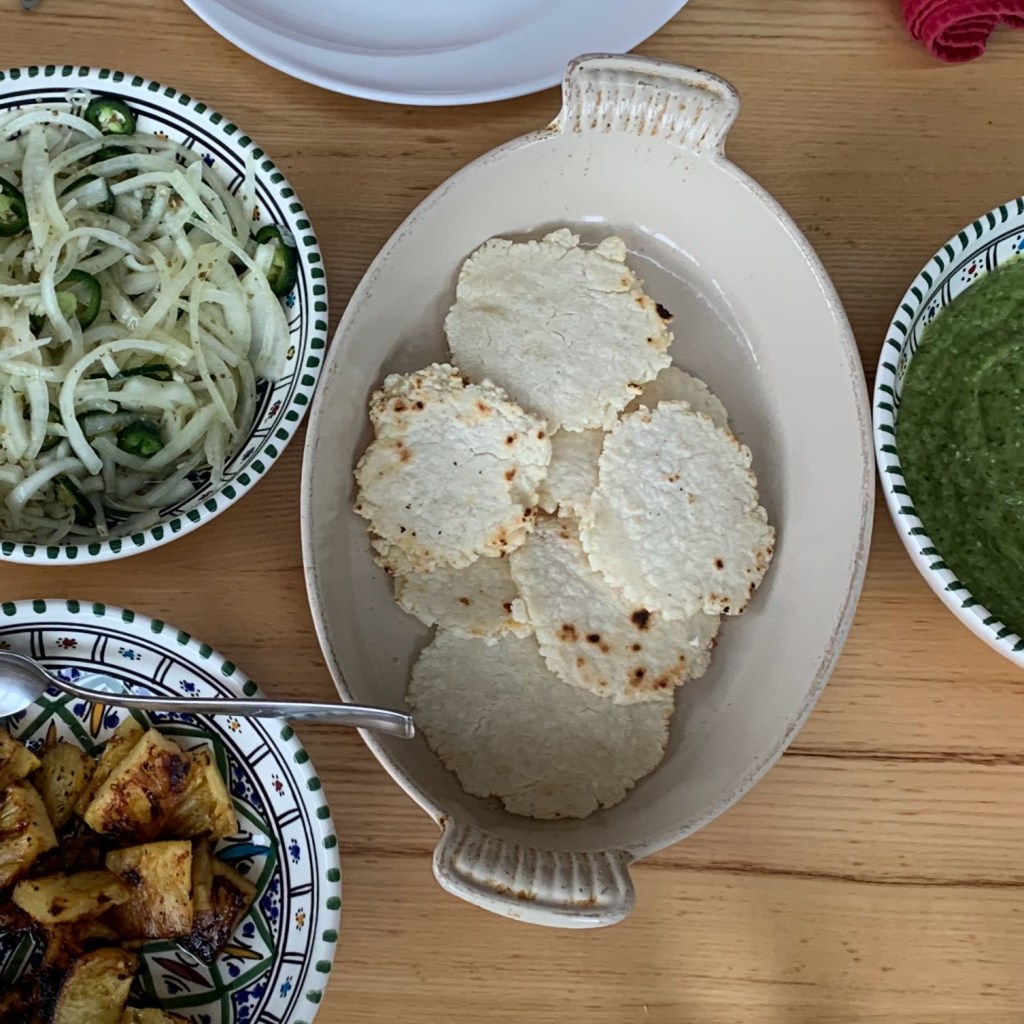
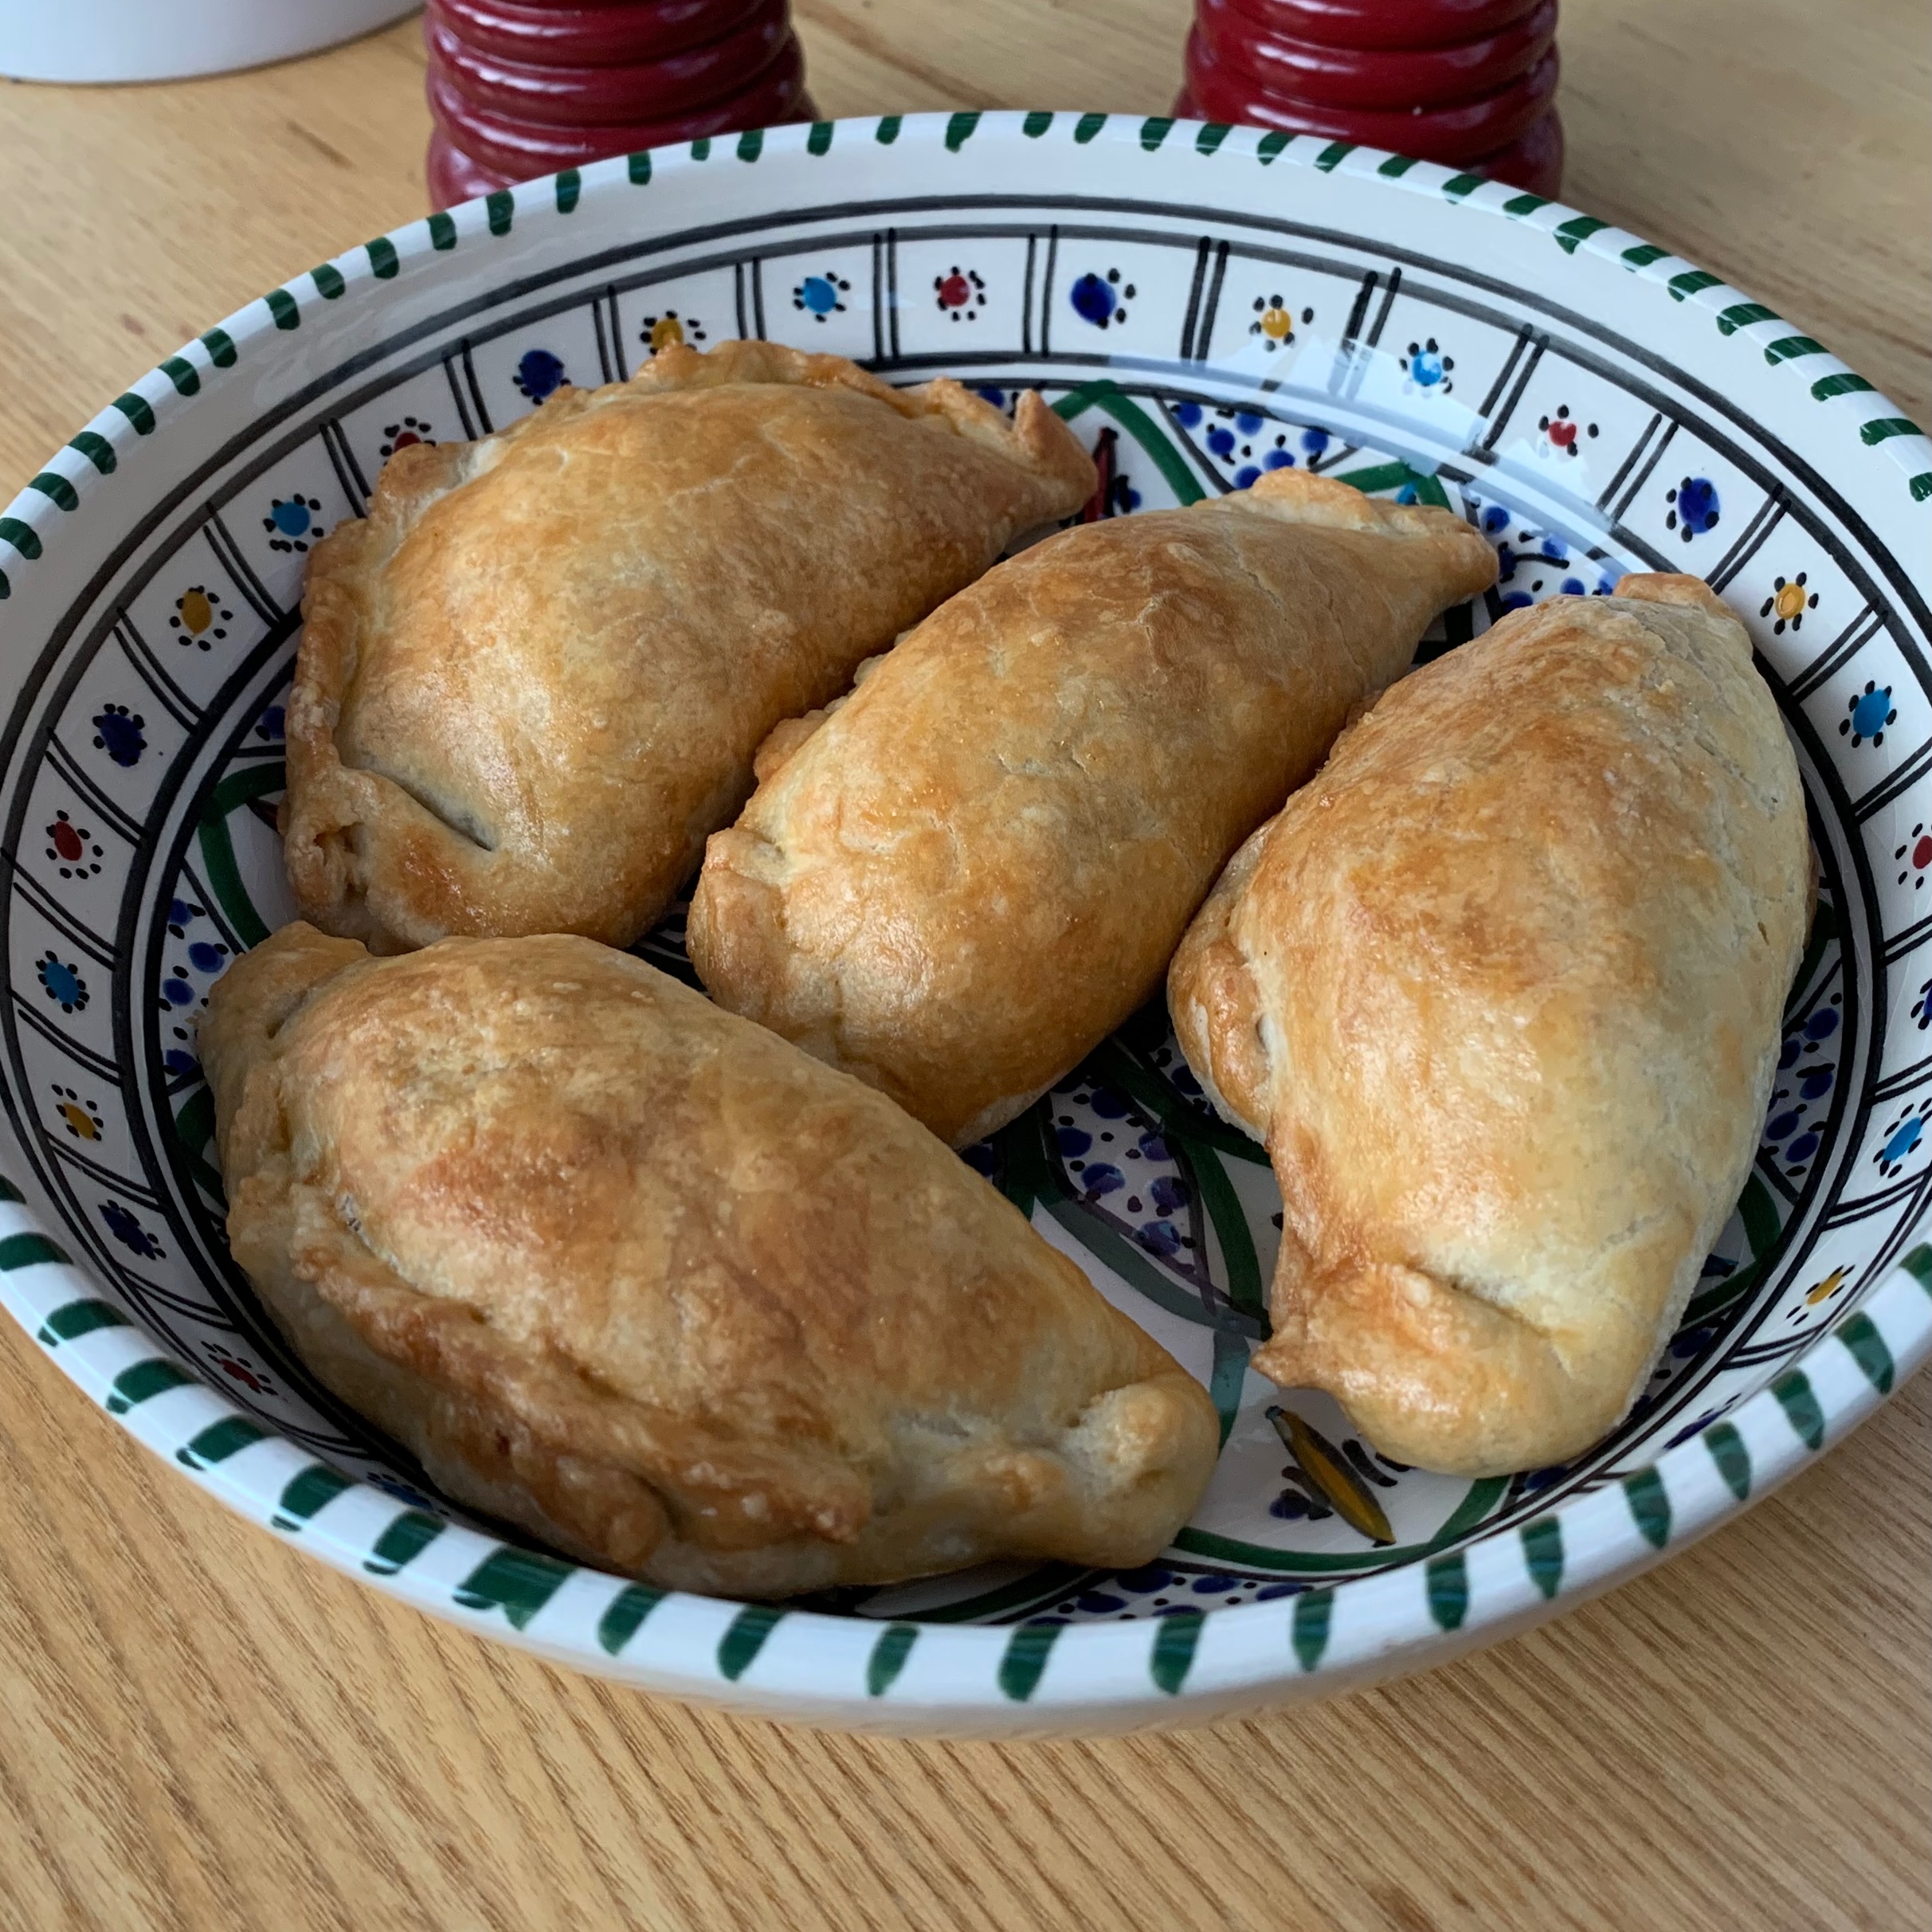
China: Char siu baoEngland: Game pieGreece: SpanakopitaItaly: FocacciaMalaysia: Baked spring rollsMalta: PastizziMorocco: BastillaMexico: Tacos al PastorPhilippines: EmpañadasSaudi Arabia: MurtabakSyria: FatayerVenezuela: Arepas
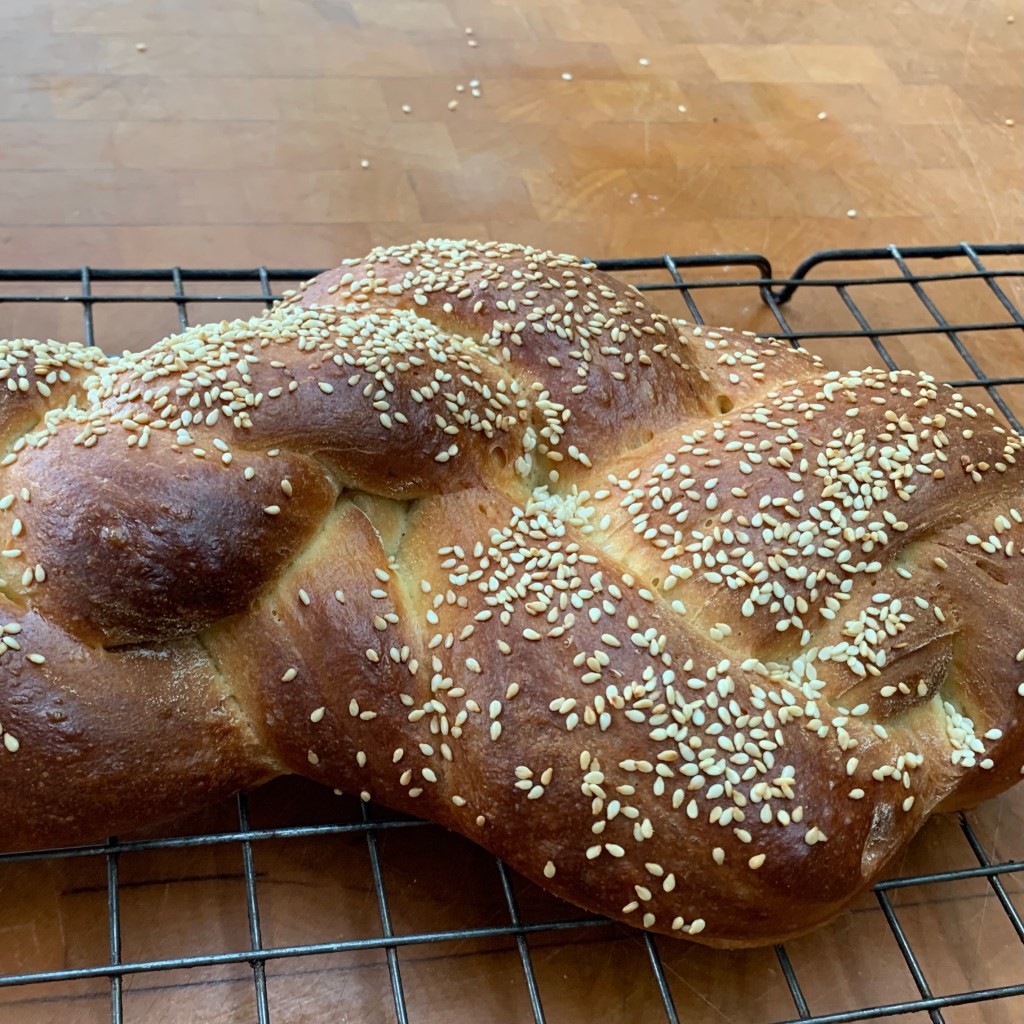
For my 80th and final bake, it’s time to come back to my home in London (which is very lovely, if a somewhat humbler edifice than the Reform Club, Phileas Fogg’s final destination).
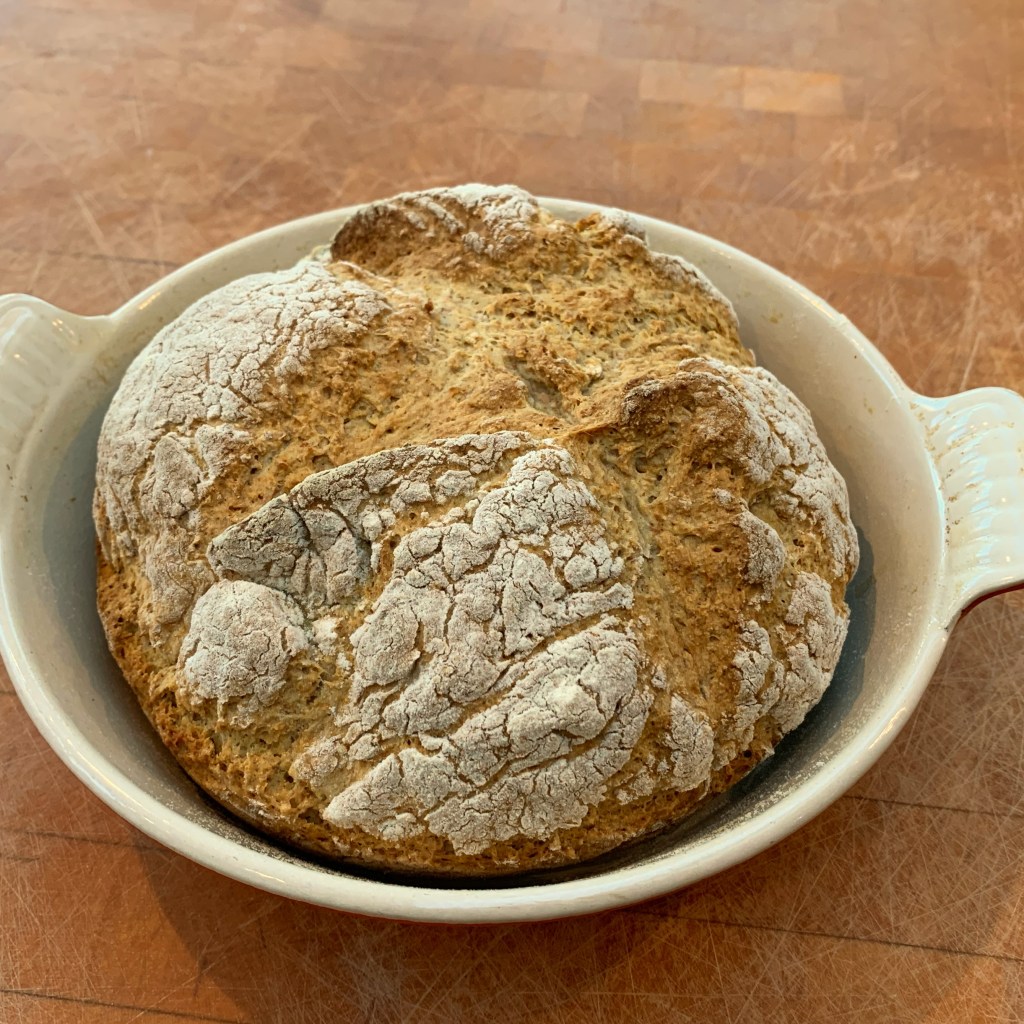
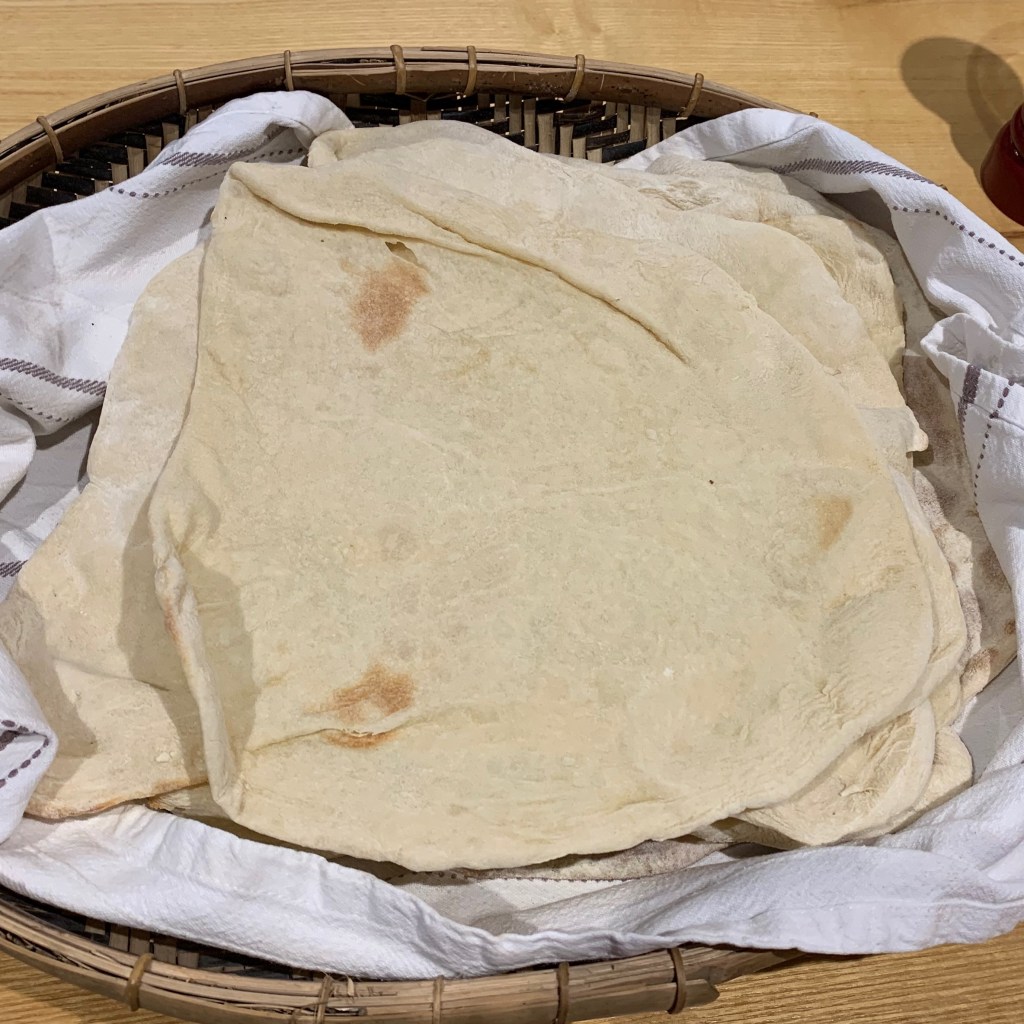
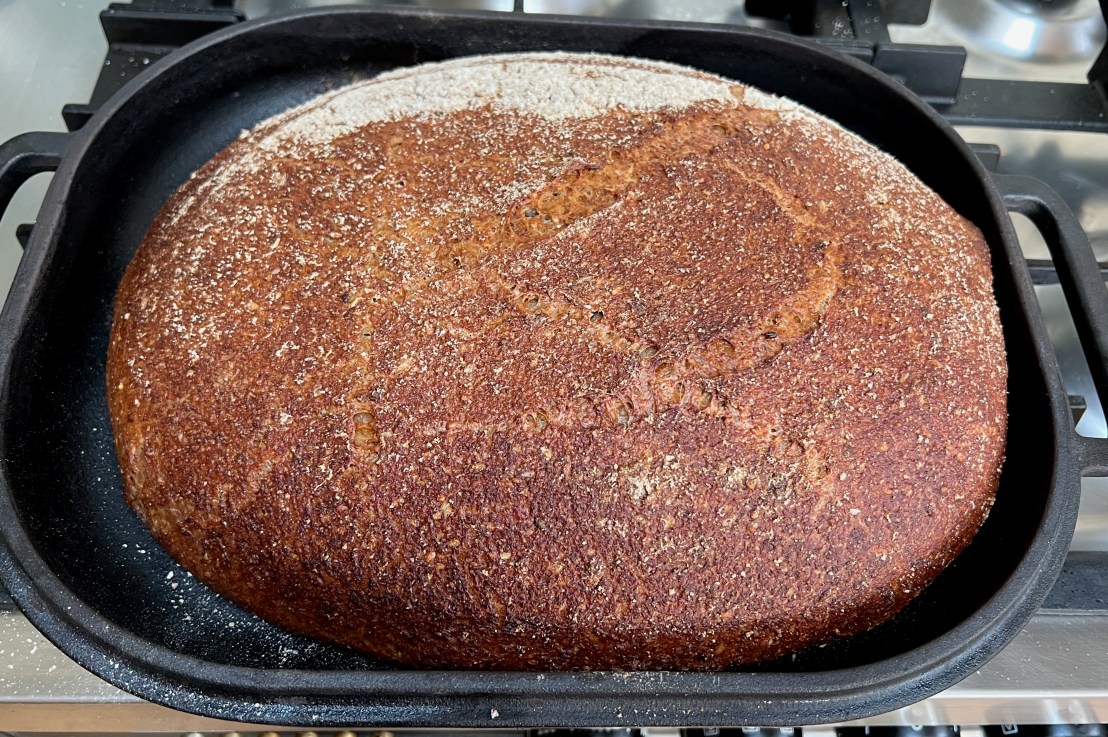
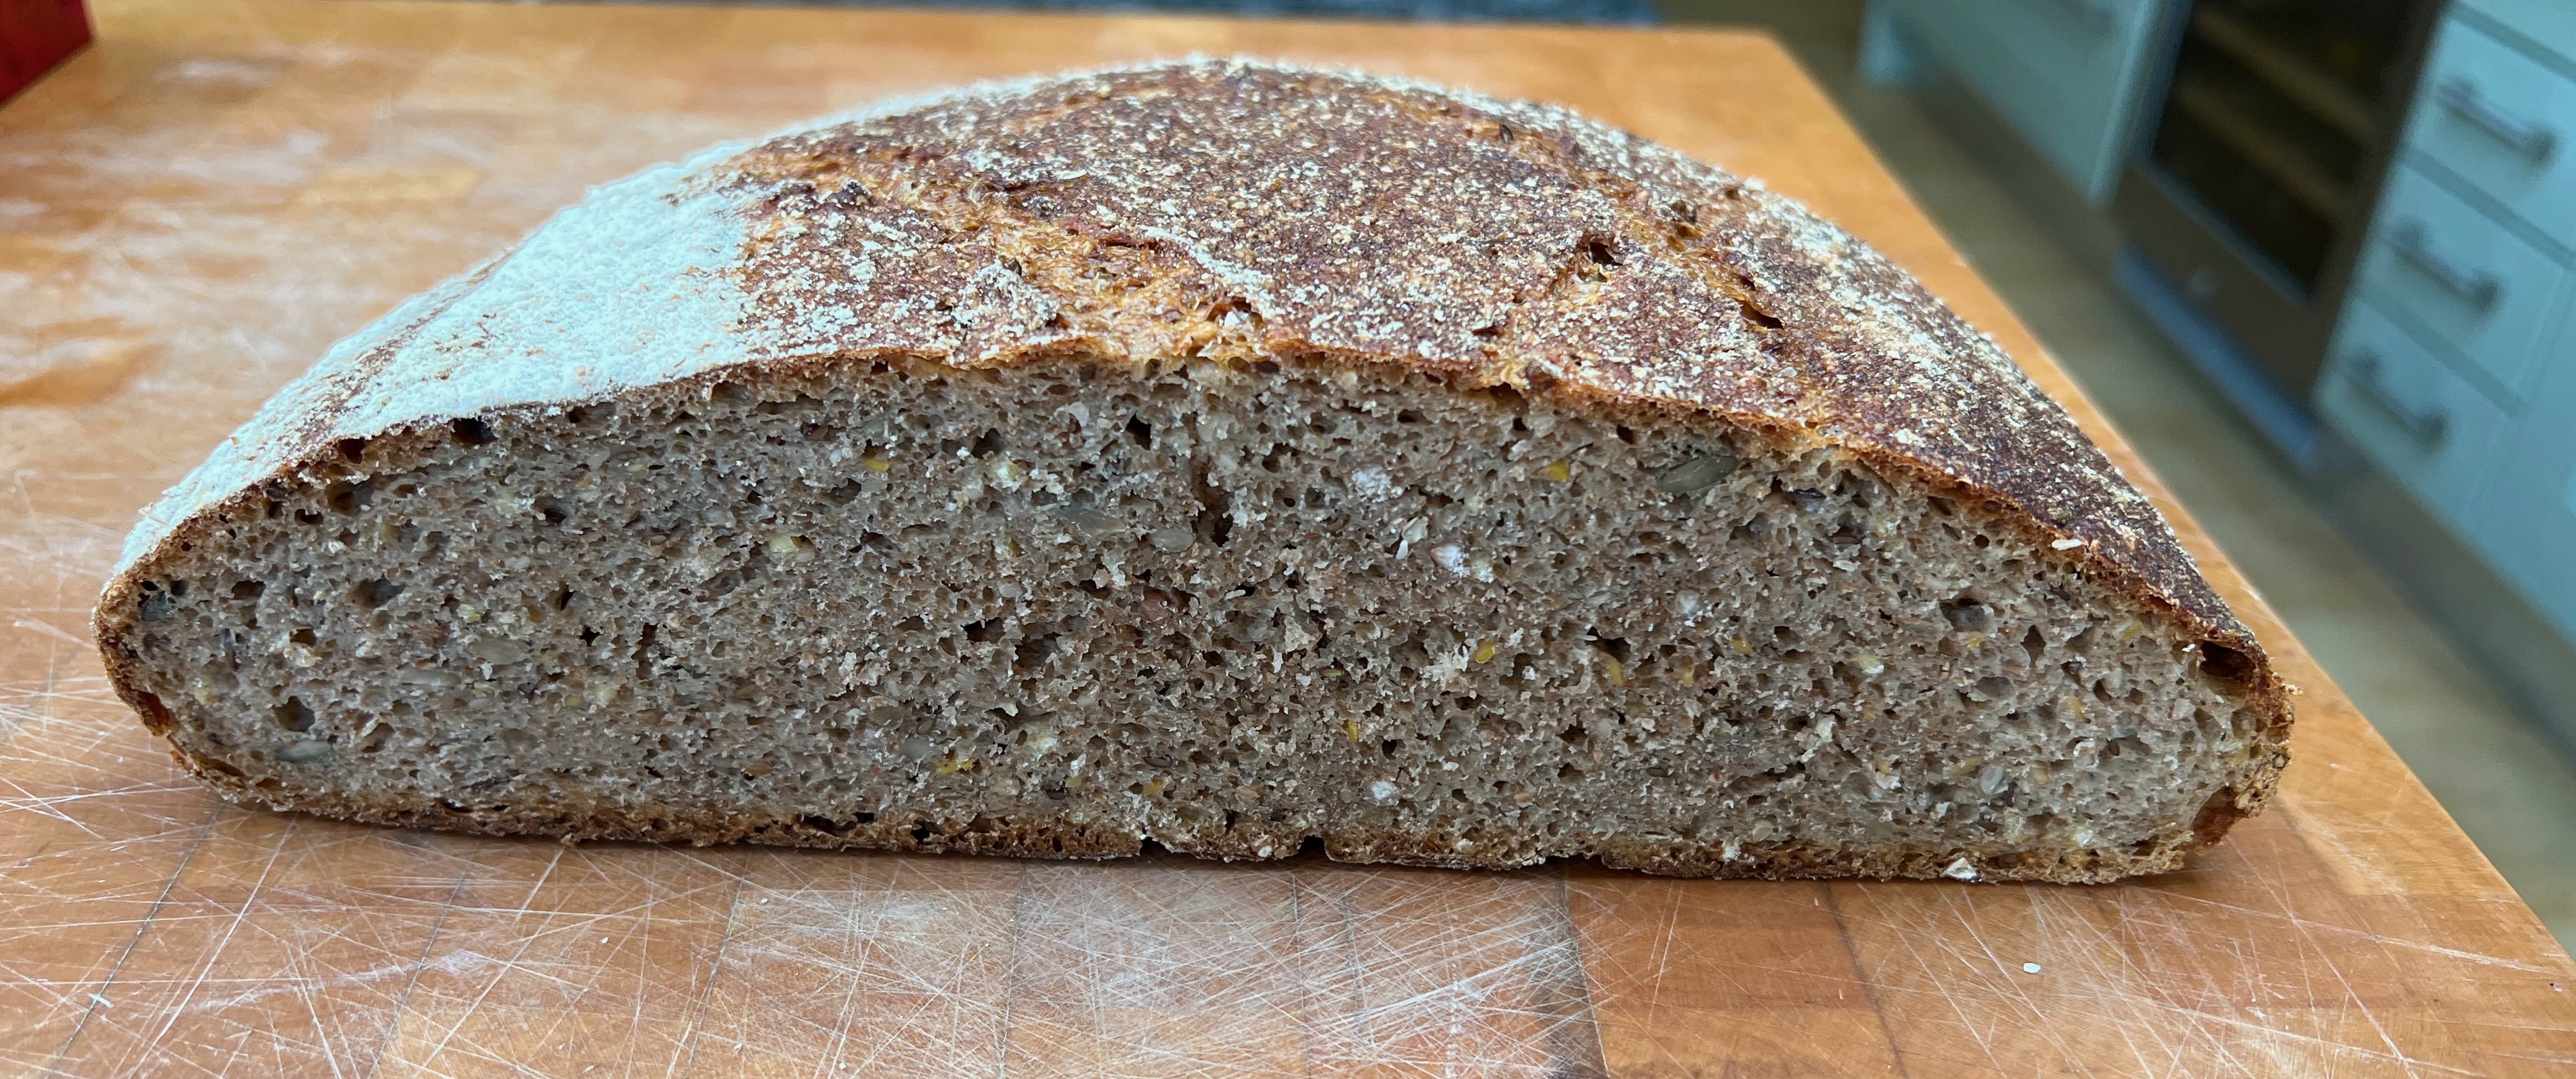
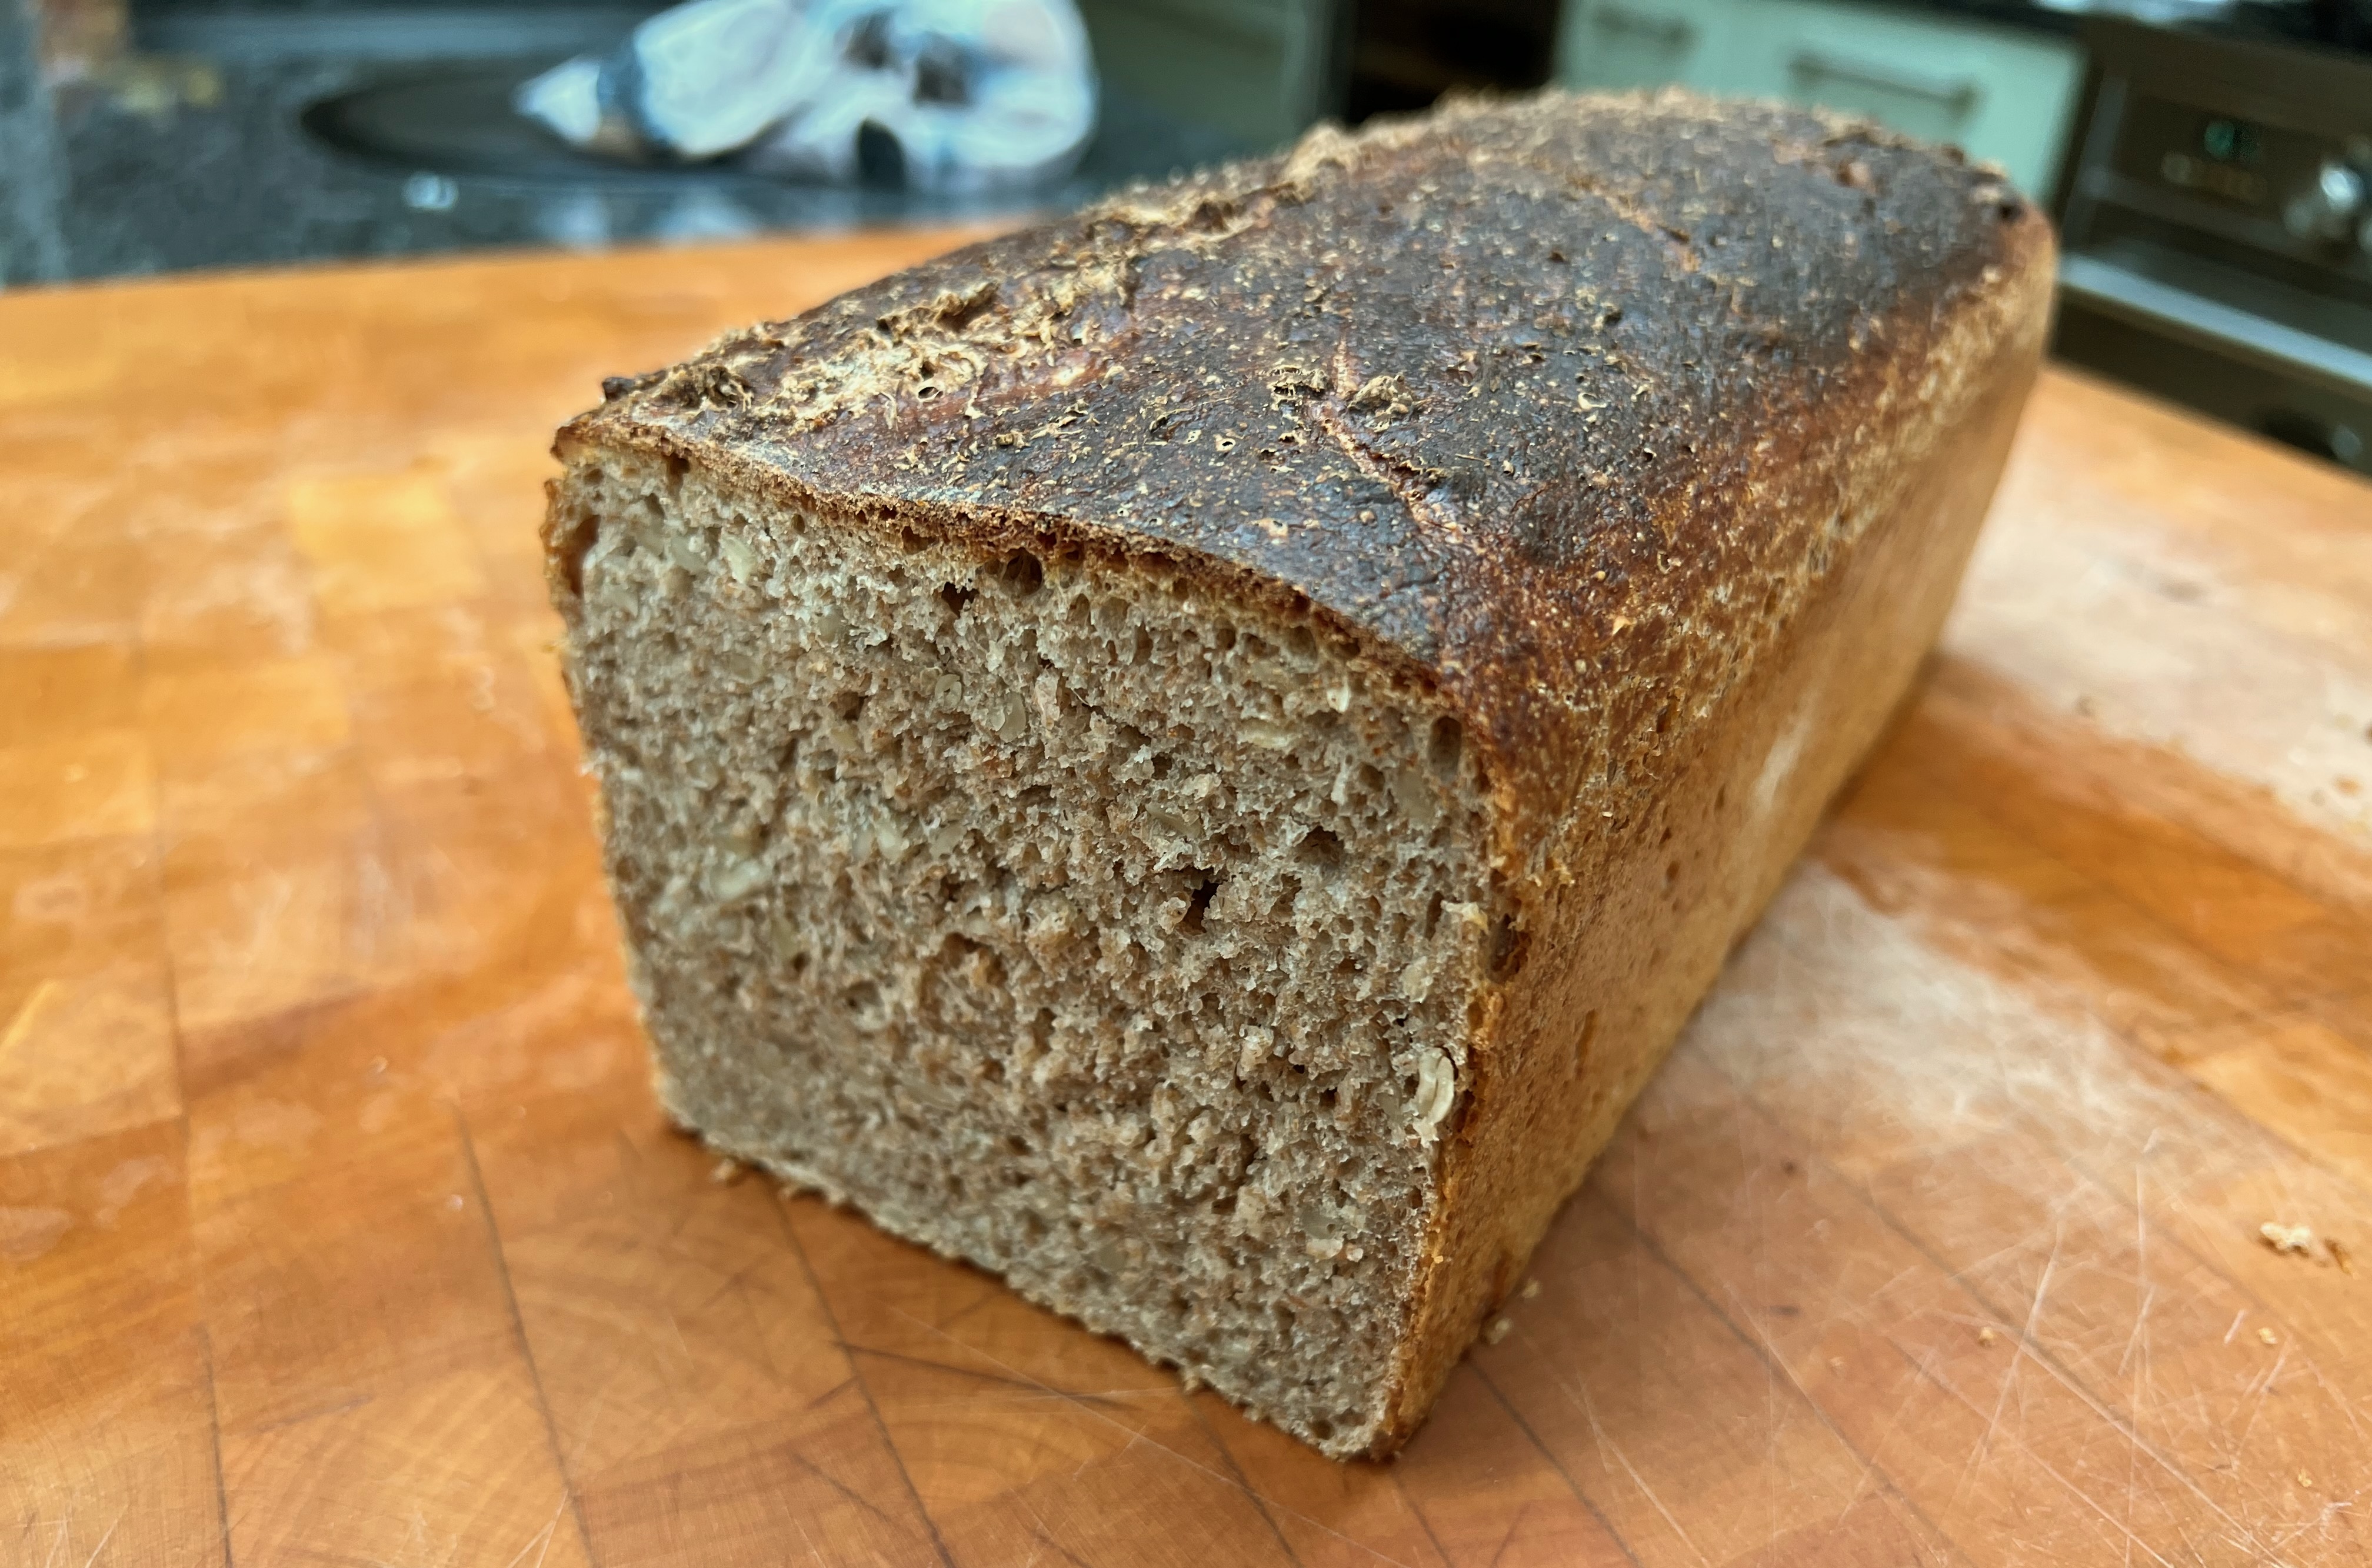
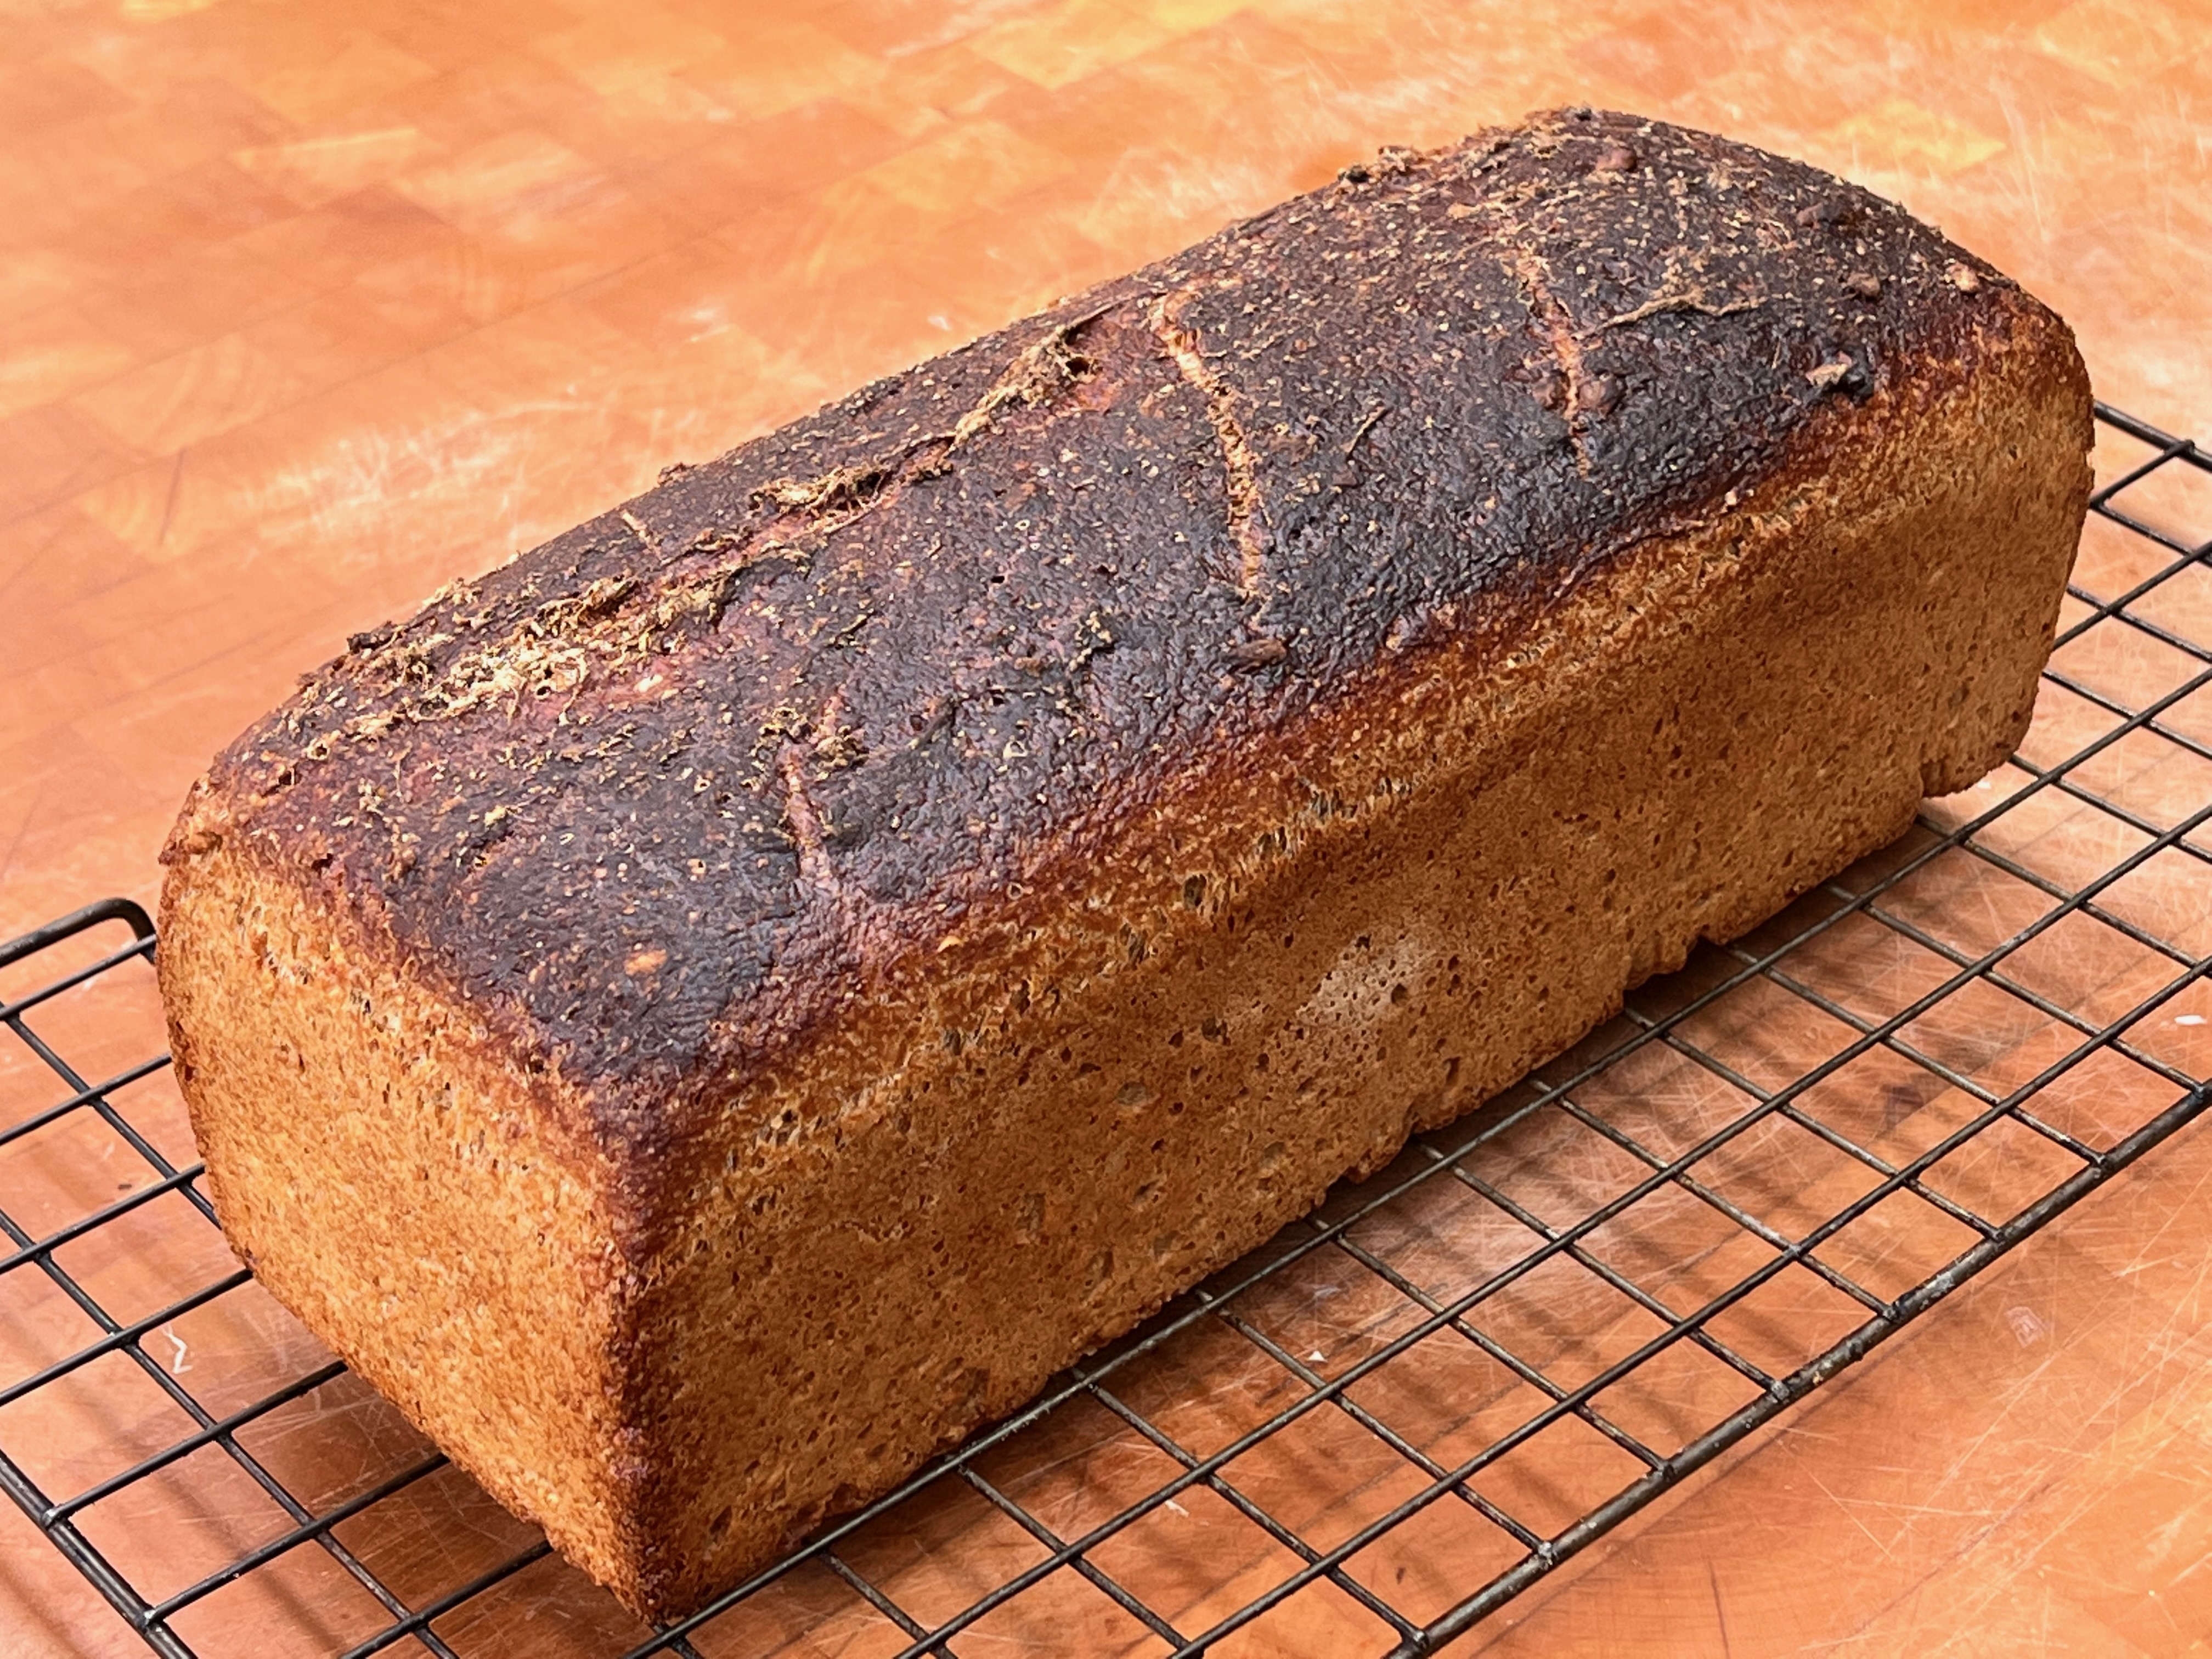
This sourdough recipe is the one that I’ve been making, in variations, almost every week since October 2019. I’ve made breads with more intense flavours (Estonian black bread and its Russian cousin Borodinsky bread are probably my favourites) and I’ve made breads with more wonderful texture (Persian Nân Barbari is the clear winner here). But this recipe fits into my working life with no fuss, particularly now that I have a high number of days working from home: the elapsed time is long, but the amount of actual work (including washing up effort, which seems to get forgotten in most cookbooks) has been pared down to the minimum. And it produces a healthy bread which is packed with flavour and which I’m happy to eat week after week.
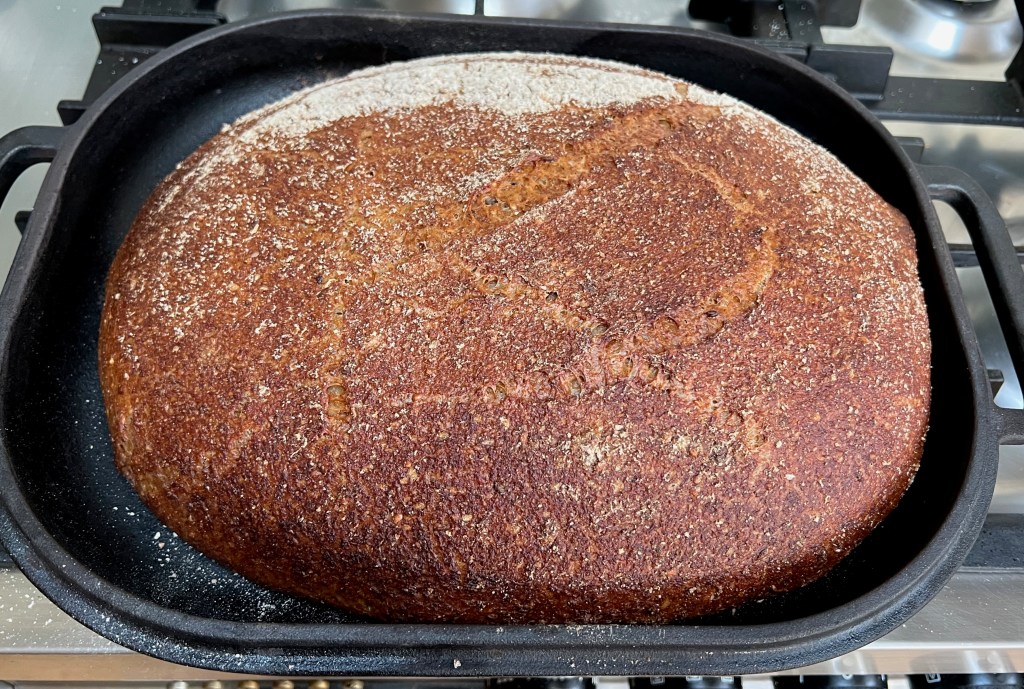
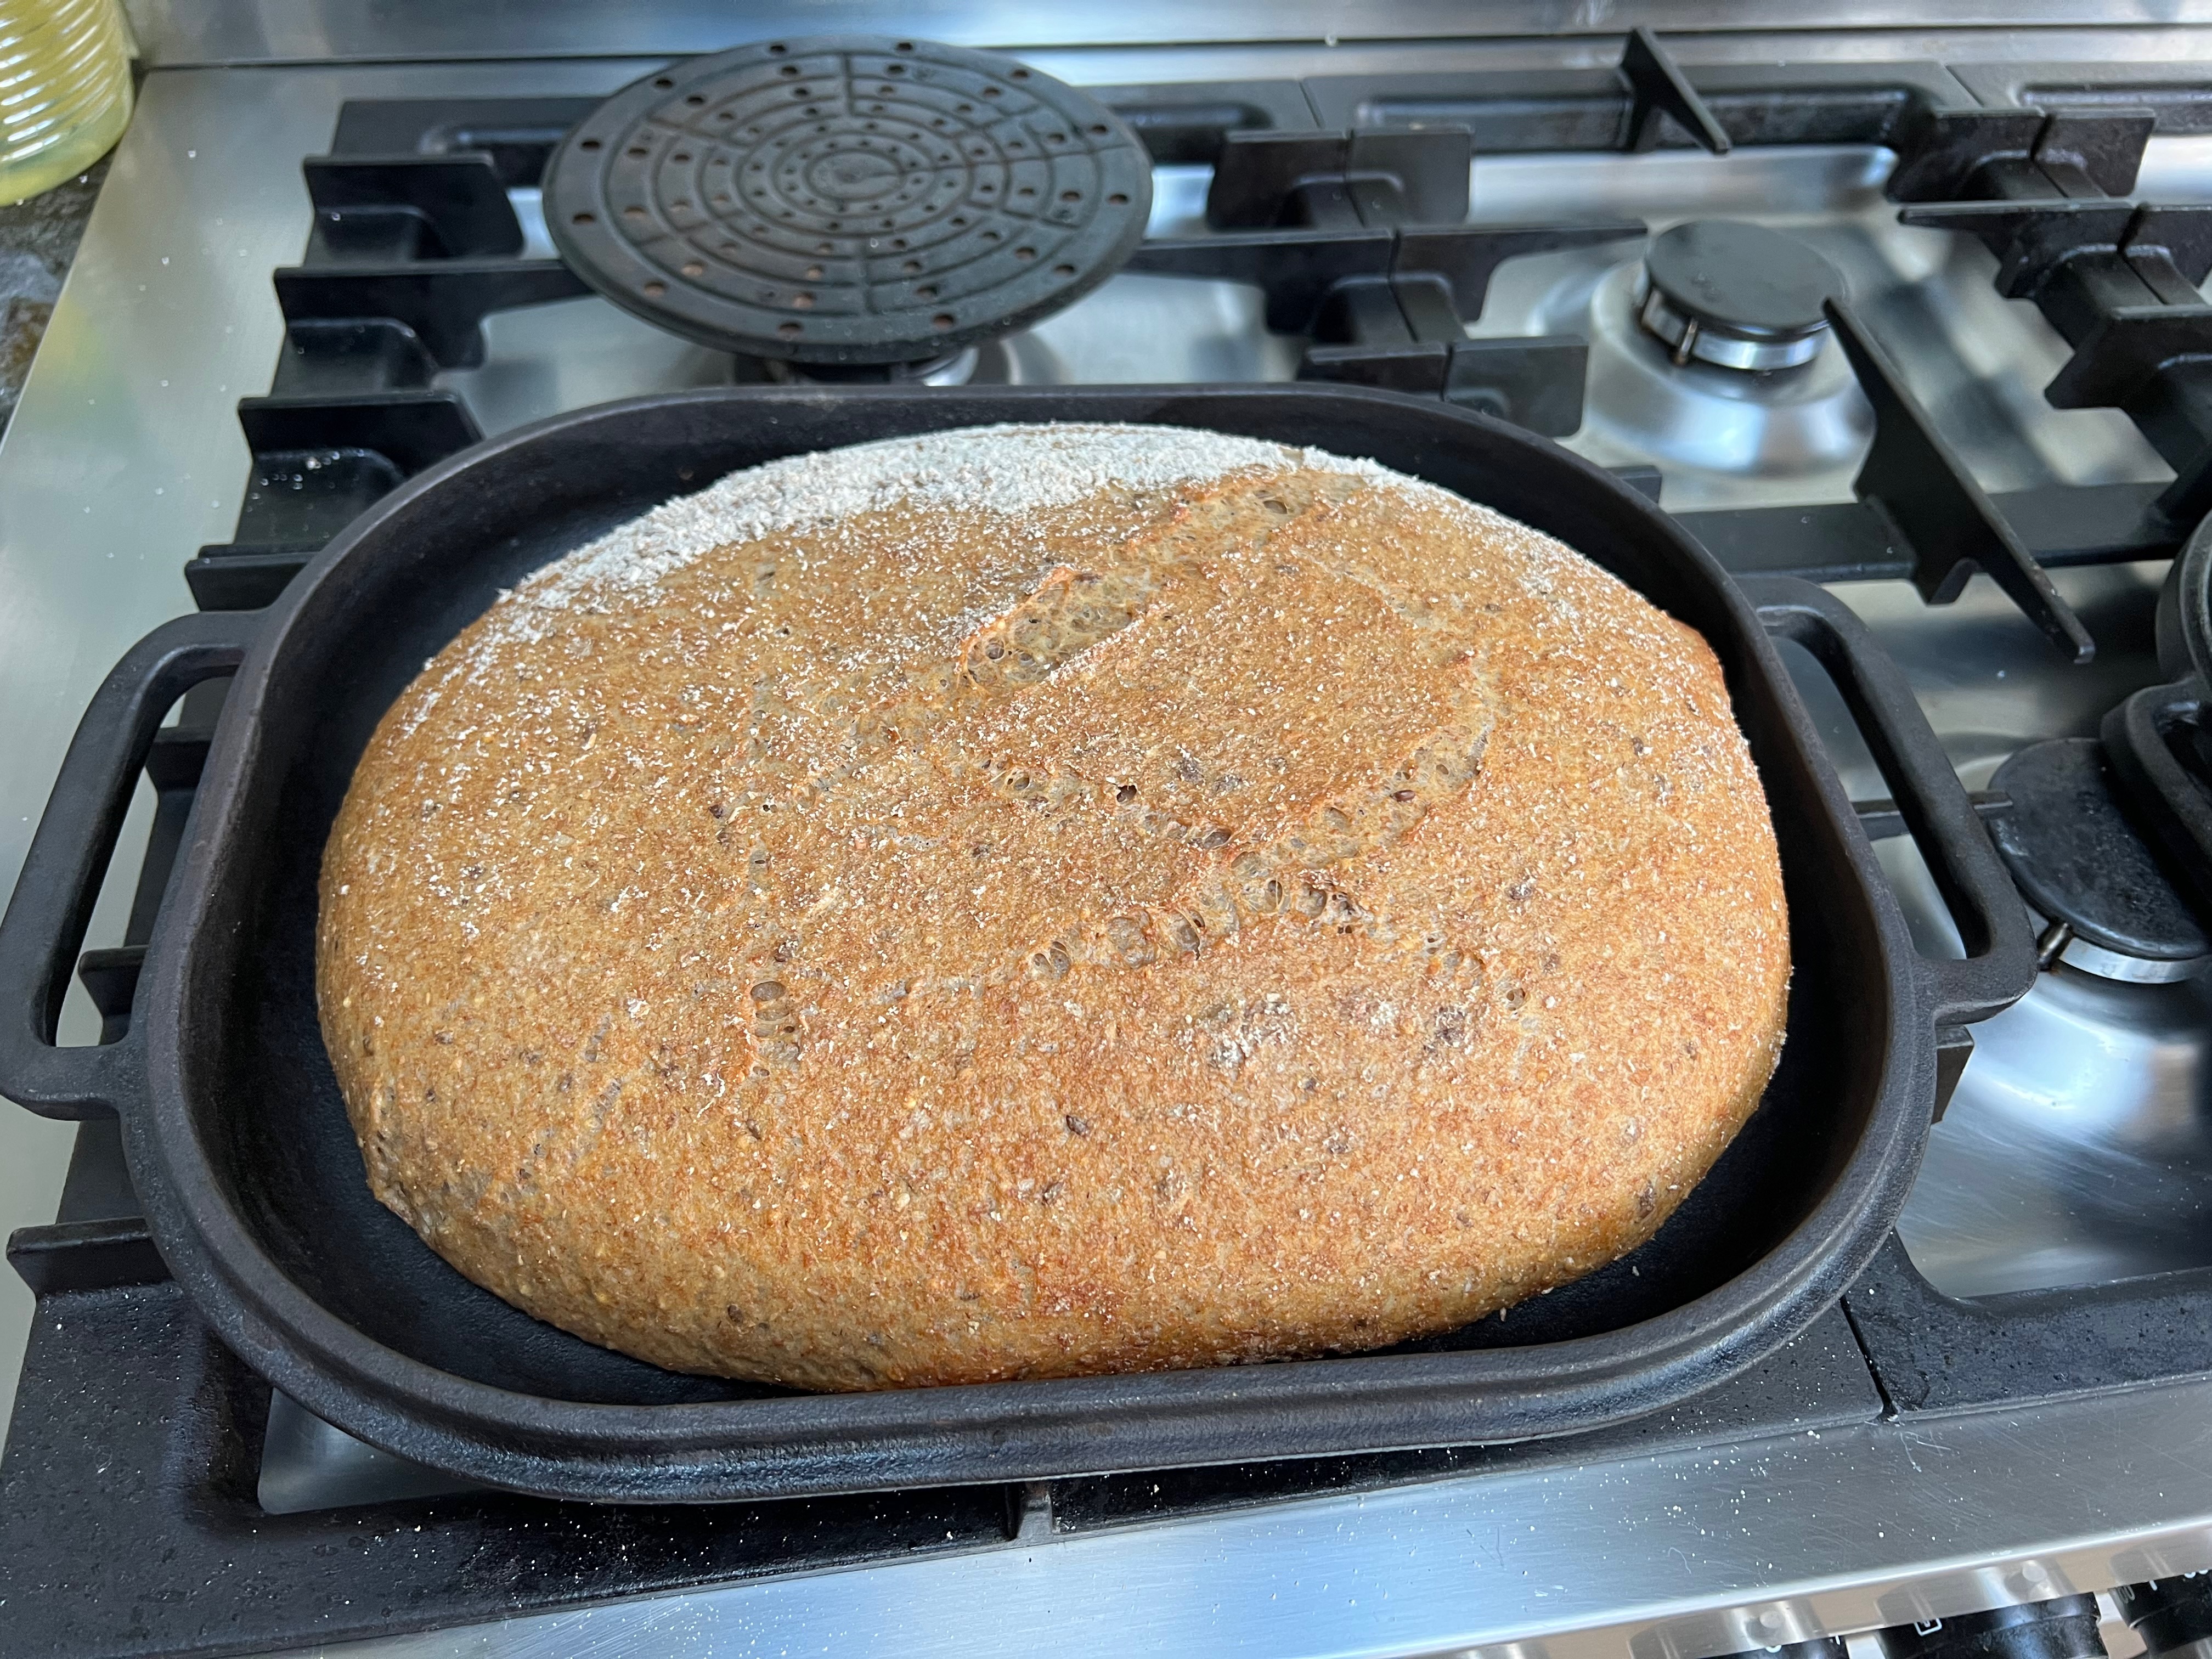
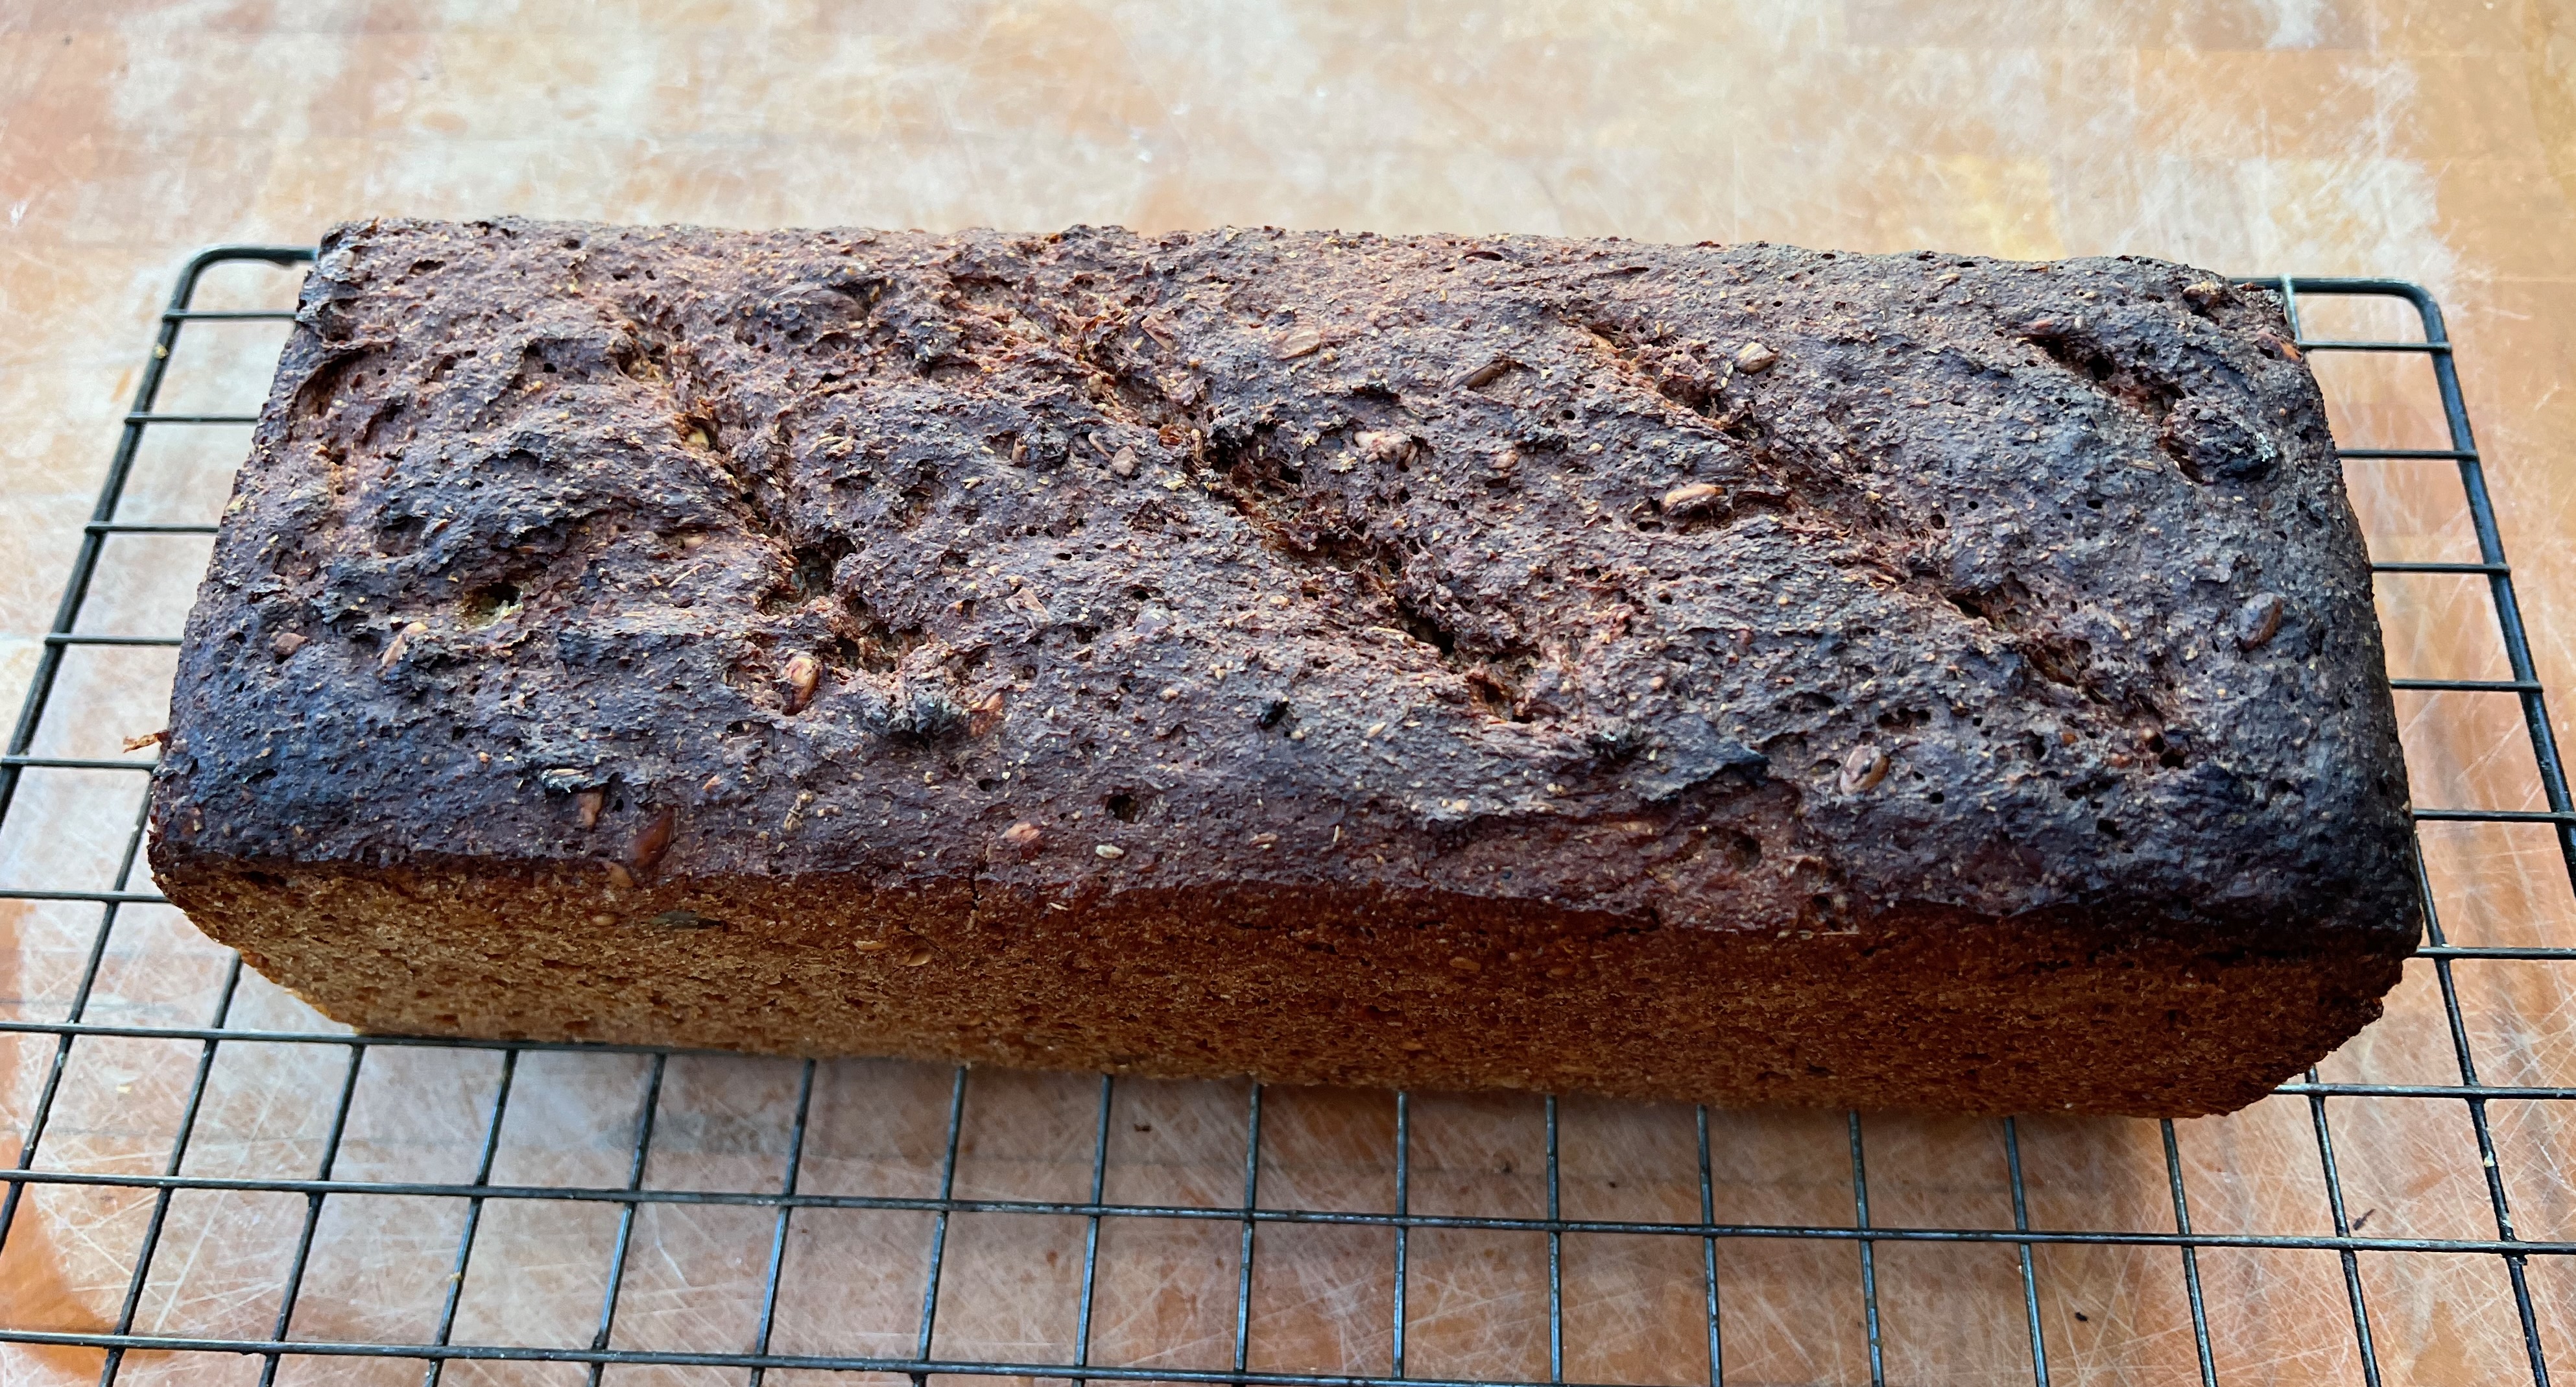
There are several variations possible. The flour mixture in this post is 50/50 strong white/wholemeal spelt, but you can vary the flavour by replacing the spelt by either dark or light rye or wholemeal wheat. Or you can go 60/40 for a less dense, more pillowy result. Or you can increase the amount of seven seed mix, or ditch it altogether and/or replace it with 20-30g of caraway seeds (whose flavour is very much a traditional accompaniment to light rye). In the loaf tin version pictured here, I had run out of seven seed mix so I used sunflower seeds only.
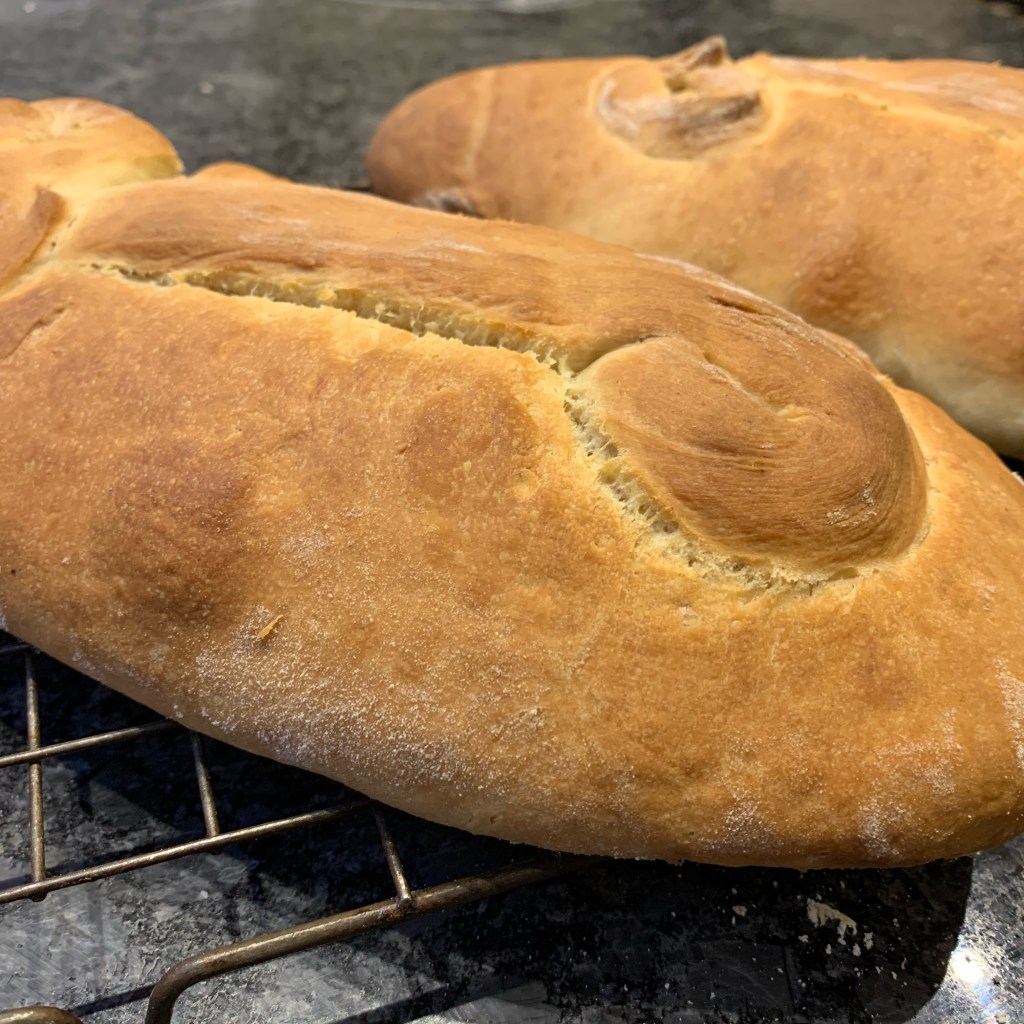
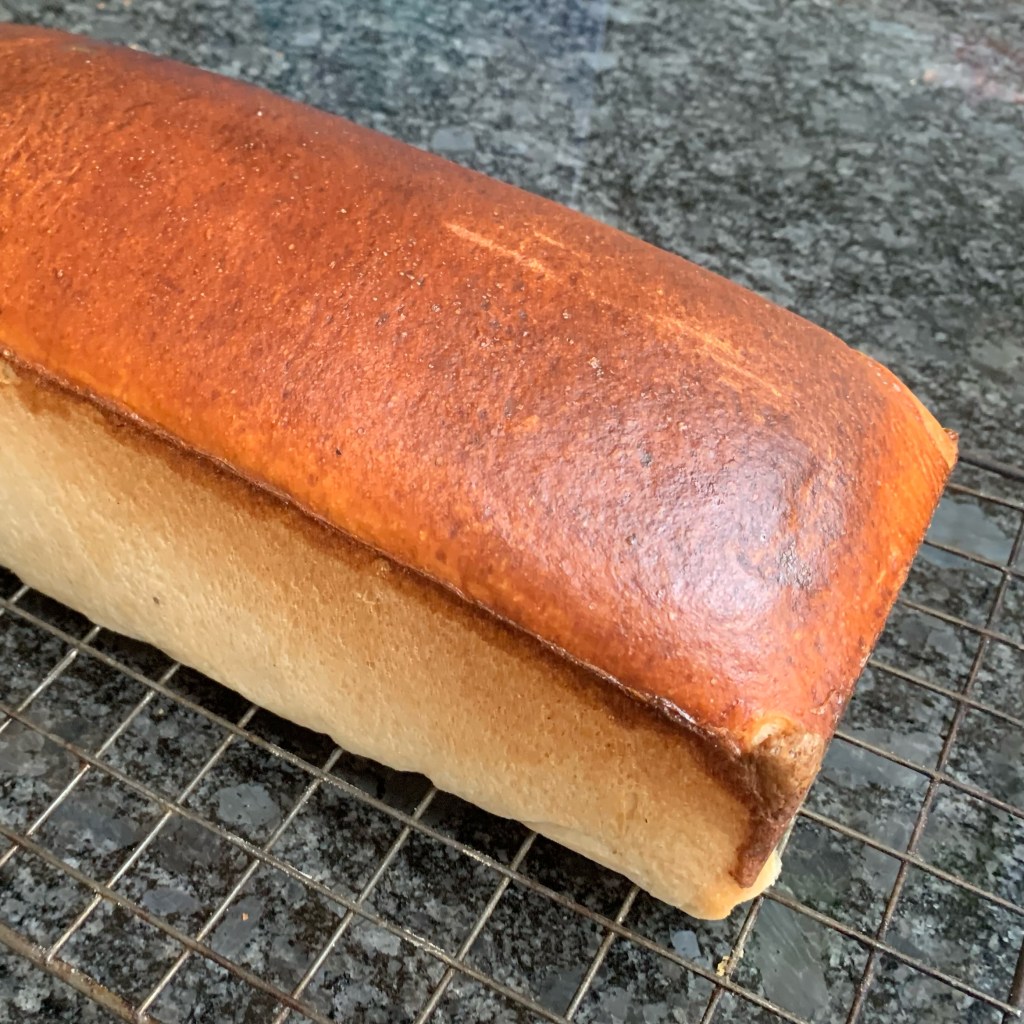
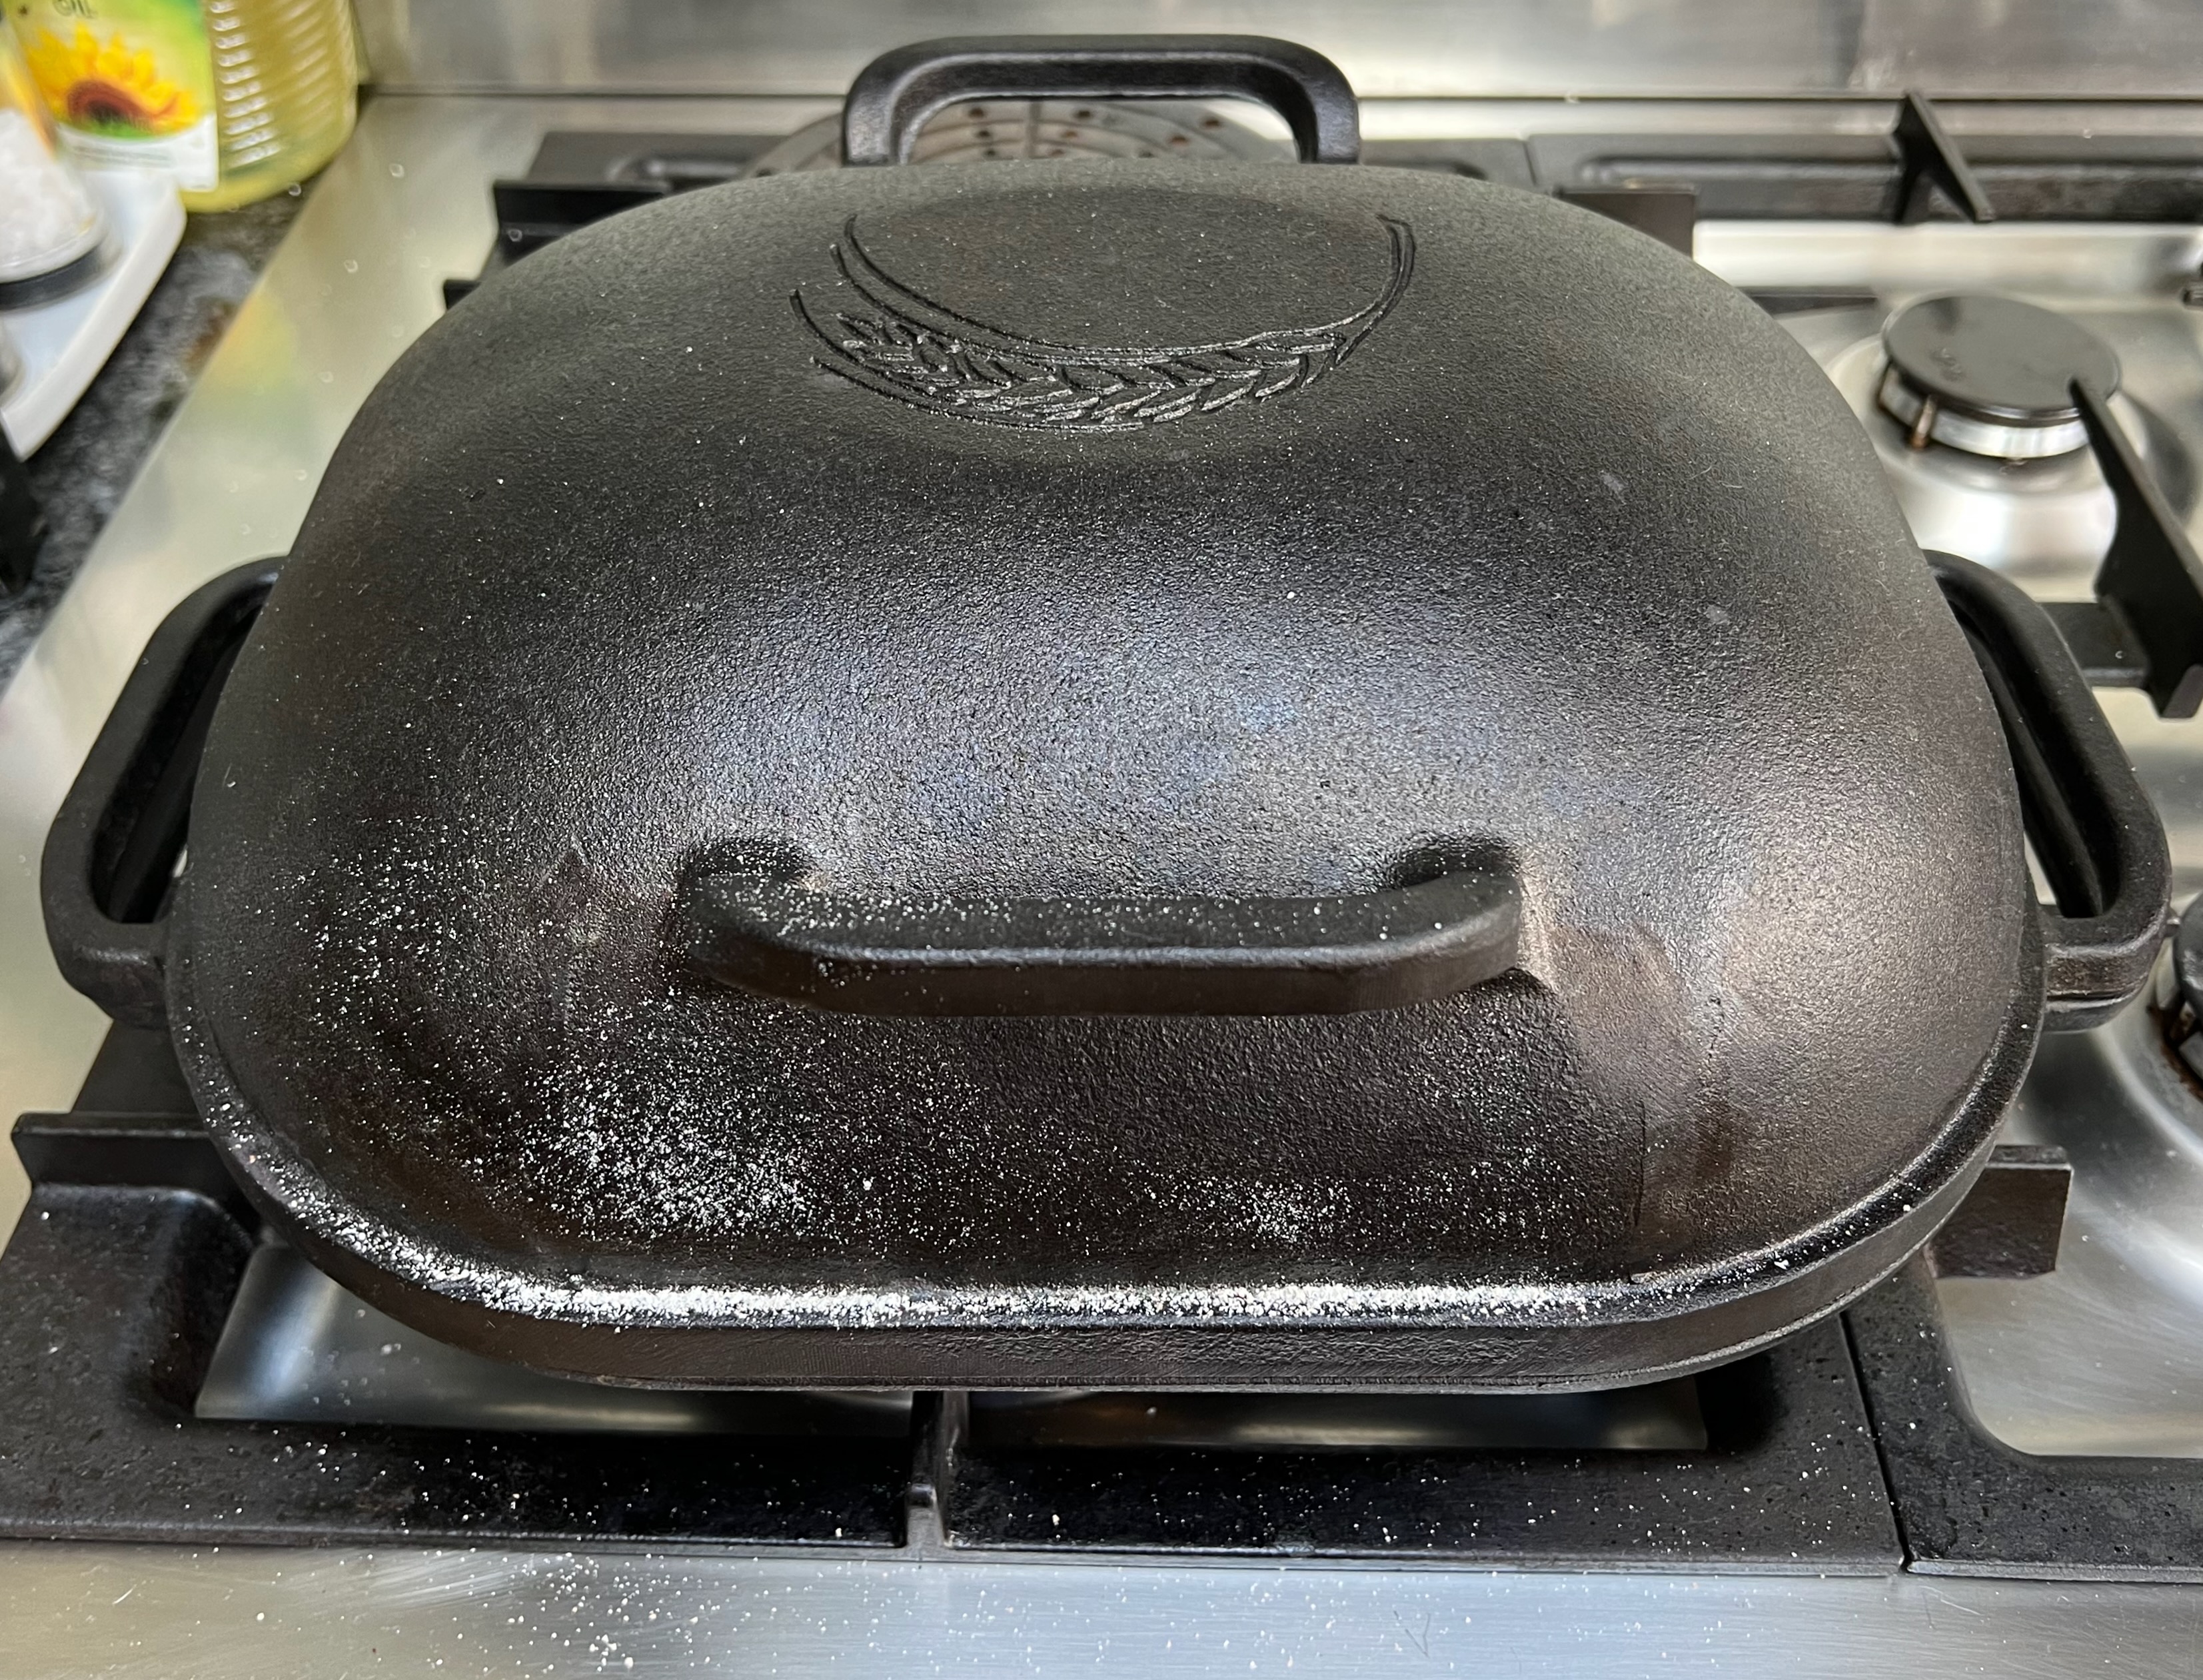
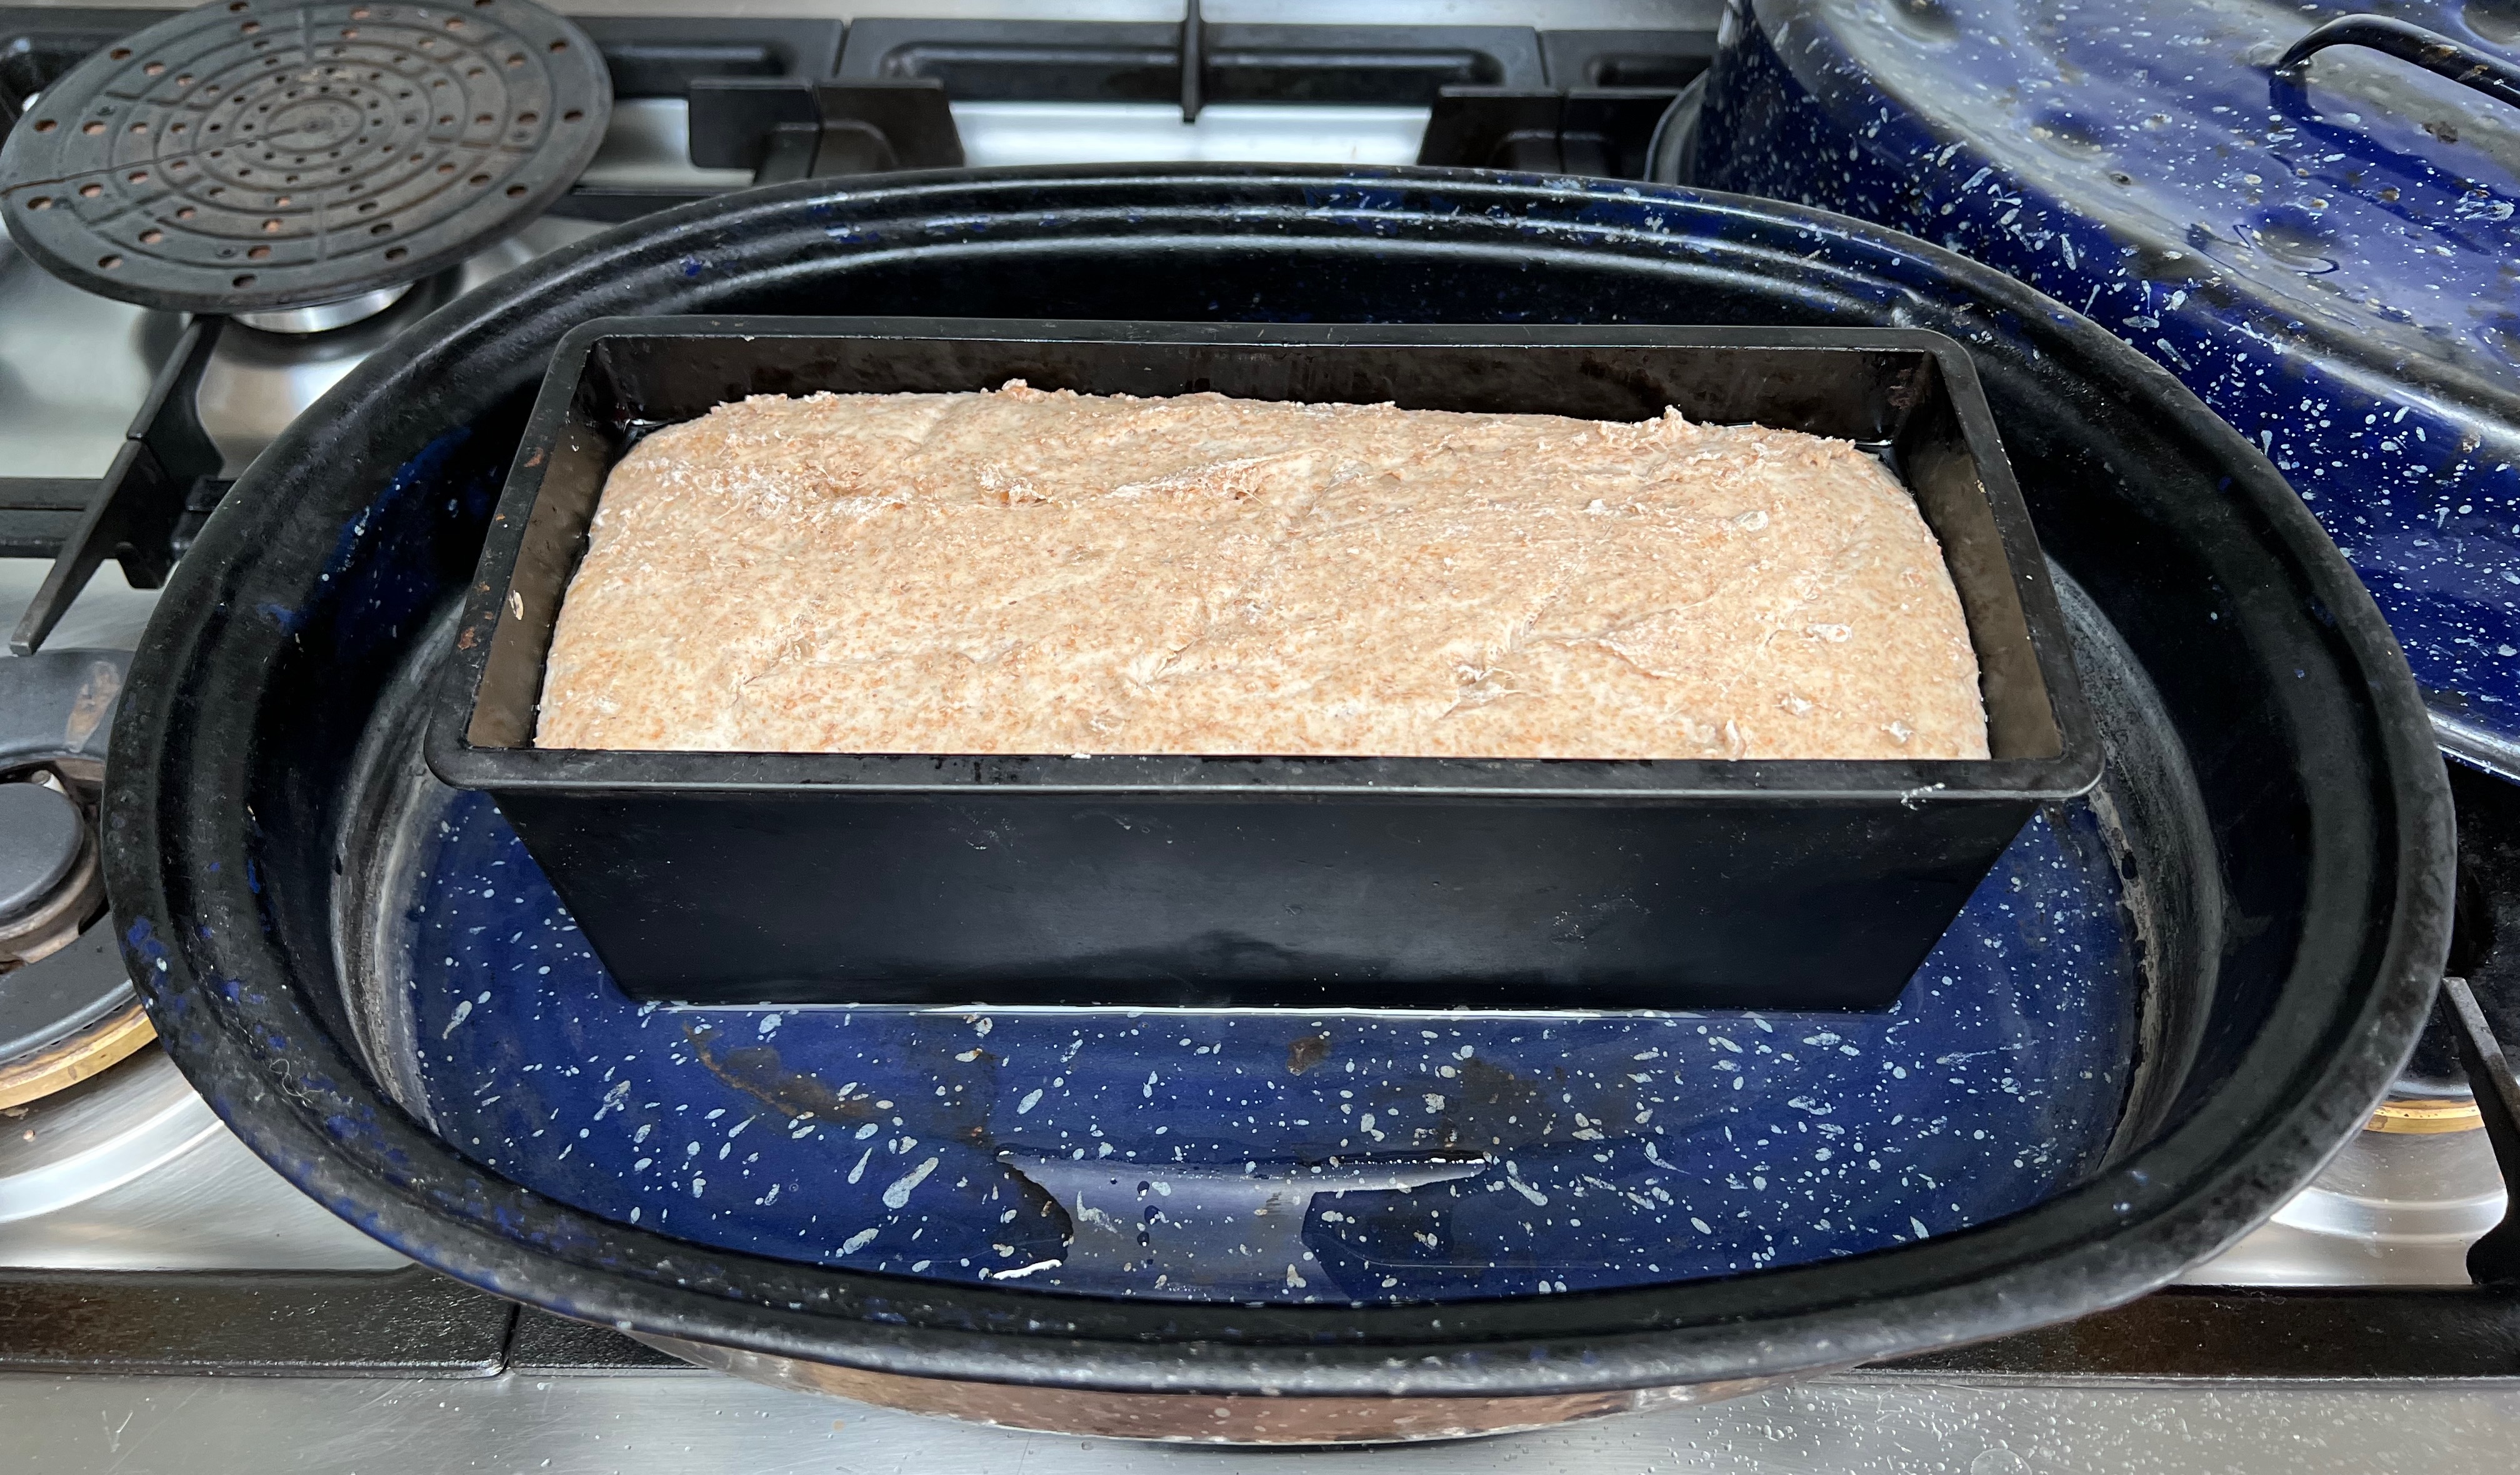
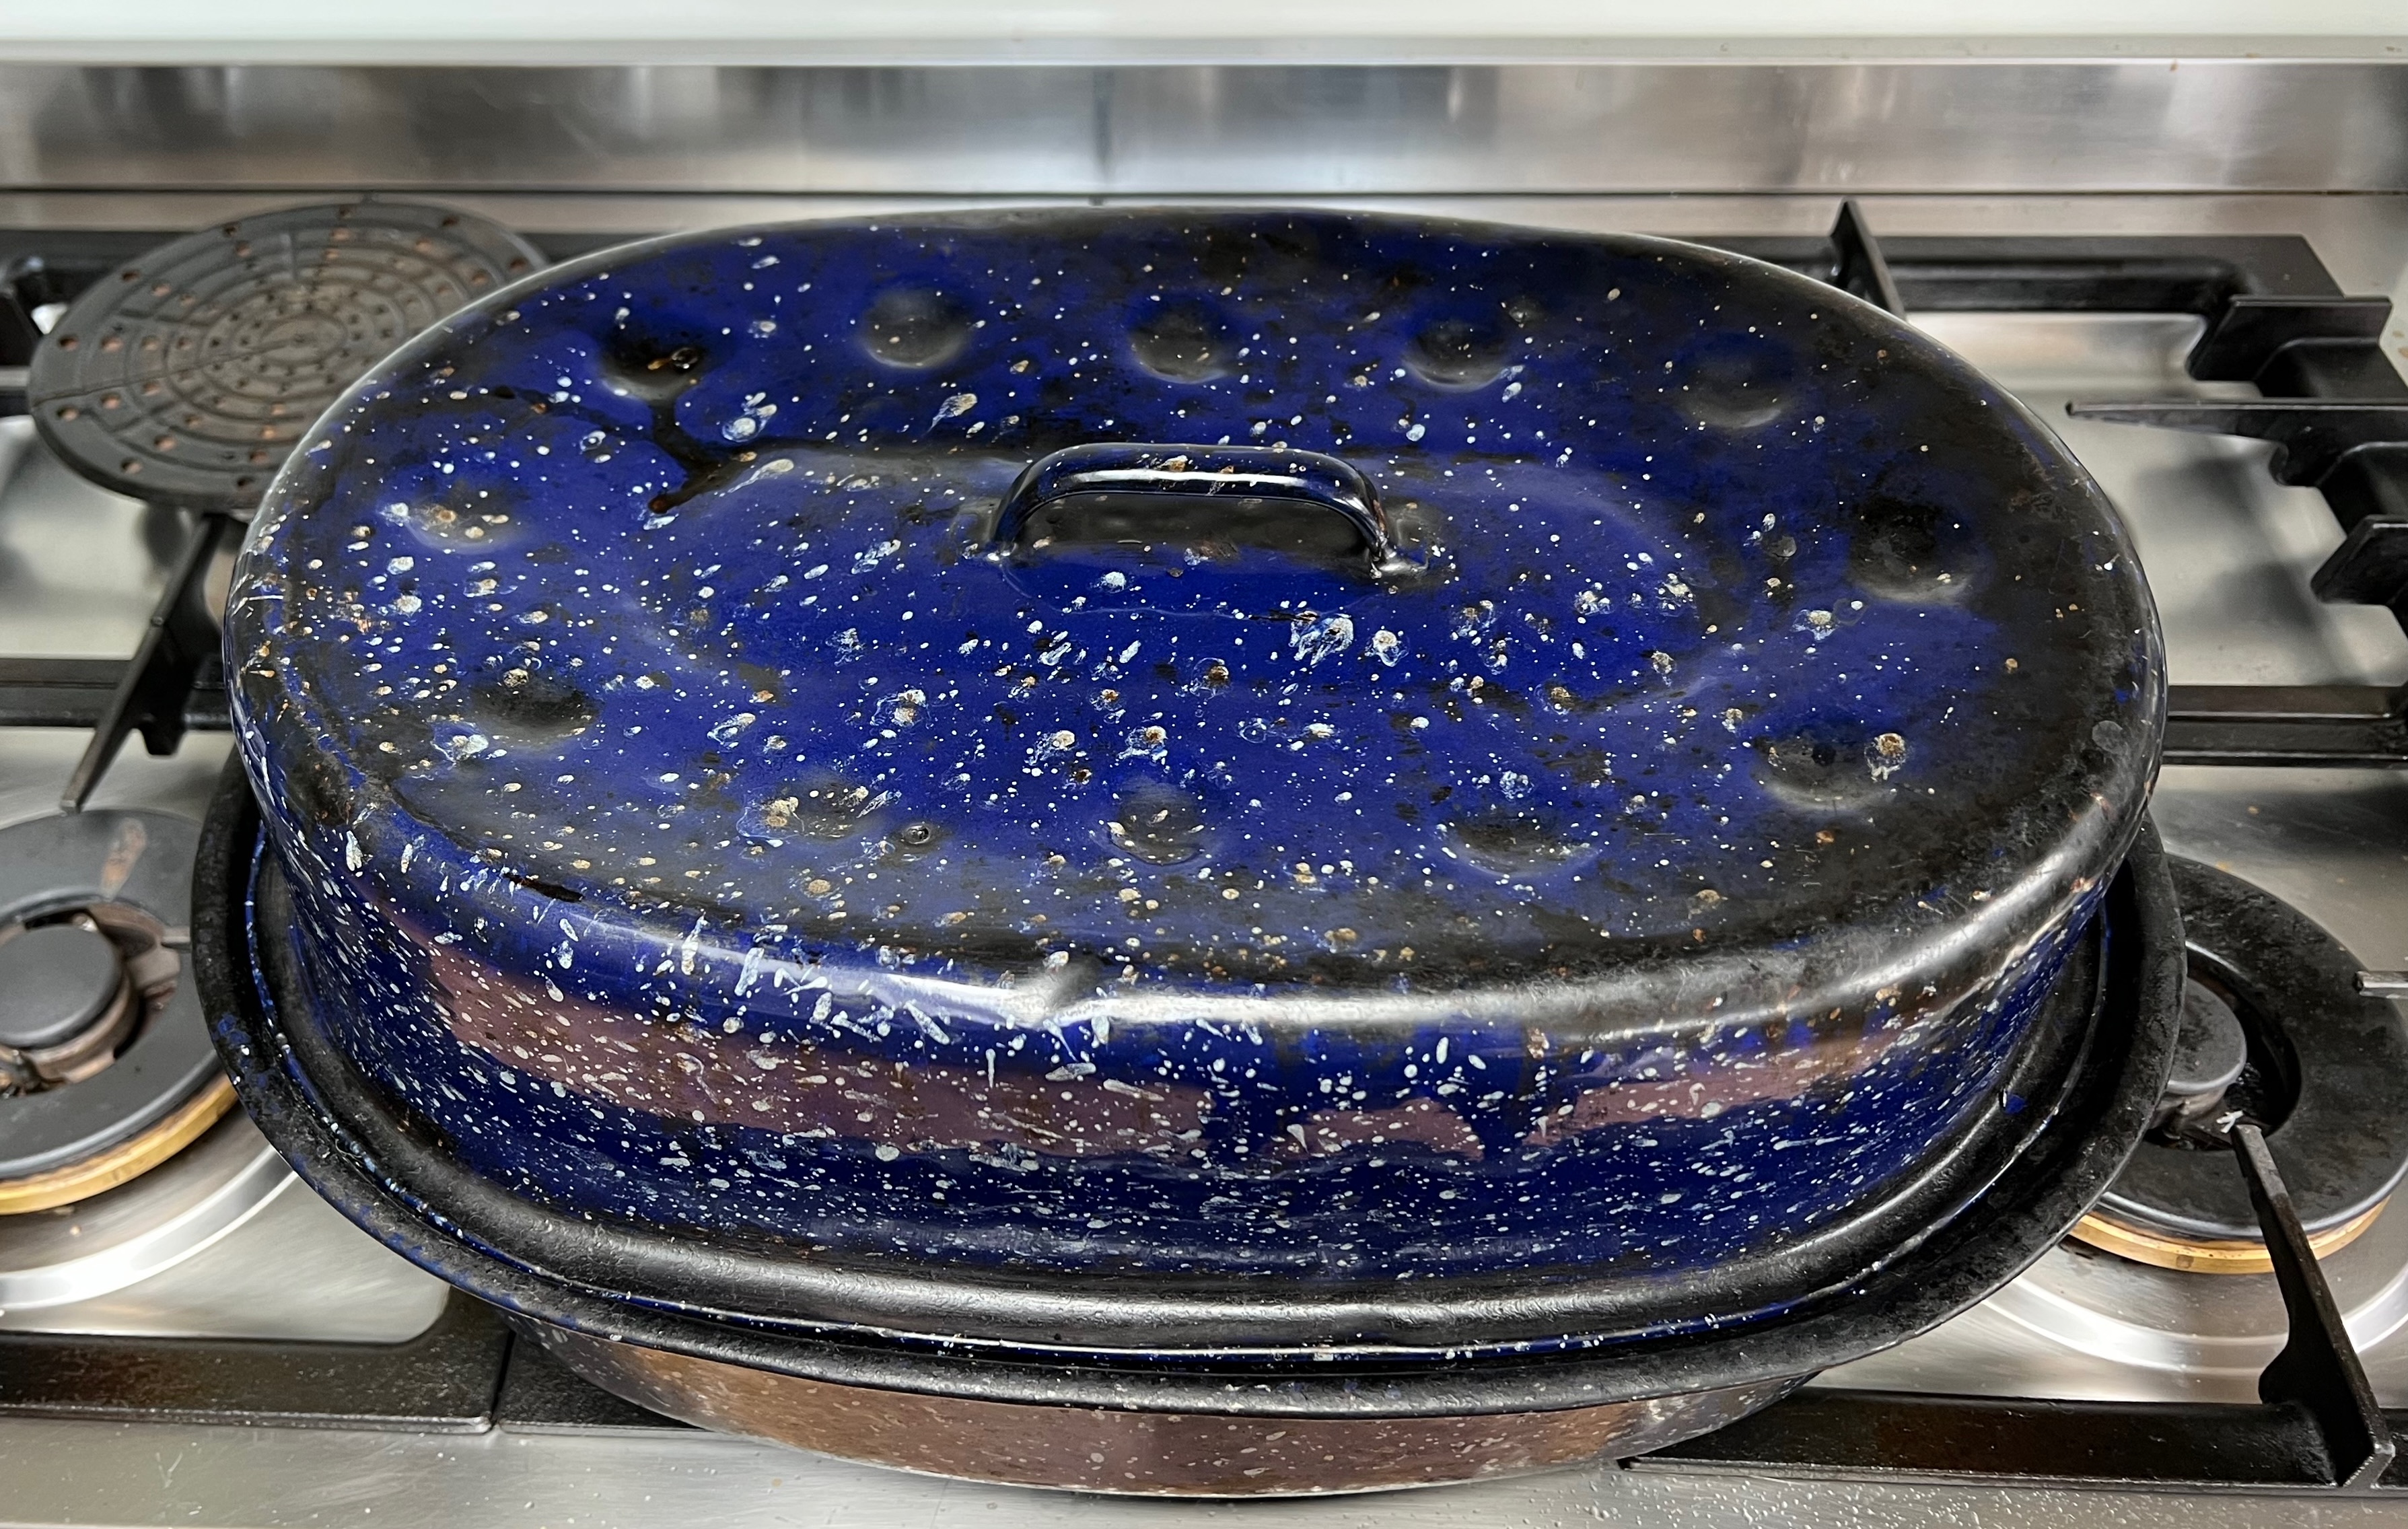
In terms of process, I have two variants. Most often, I use a two stage prove: the second rise is done in a cloth-lined basket after which I bake a free standing loaf in a cast iron Dutch oven made by US company Challenger. But if I’m in a hurry, I’ll just pour the kneaded dough into a greased baking tin, leave it to rise once and then bake.
The free-standing versionThe tin version
I adjust timings to suit the day’s schedule by choosing the temperature for the rises: fridge (around 3℃), room temperature (my kitchen is usually around 20℃) or “a warm place” (near my boiler, around 30℃). The fastest option is to heat an oven to 50℃ then turn it off, because you don’t want the yeast getting above 45℃.
Here are three typical timings: choose your favourite or make up your own. I deliberately haven’t put in numbers of hours because they’re incredibly variable; you just have to wait until it looks right.
Start the sponge first thing in the morning, make the dough at lunchtime and let it rise in a warm place ready to be baked after work.
Start the sponge at lunchtime, make the dough in the evening and leave it in the refrigerator overnight. Take it out and leave it at room temperature or in a warm place, ready to be baked in time for lunch.
Start the sponge in the evening, make the dough first thing in the morning, letting it rise in a warm place through the morning ready to be baked around lunchtime.
You can use any starter you like. Mine started life in October 2018 as a wheat-based starter, but after the first couple of months, I started refreshing it only with dark rye (which apparently makes for a less fussy starter). The method came from Andrew Whitley’s “Bread Matters”.
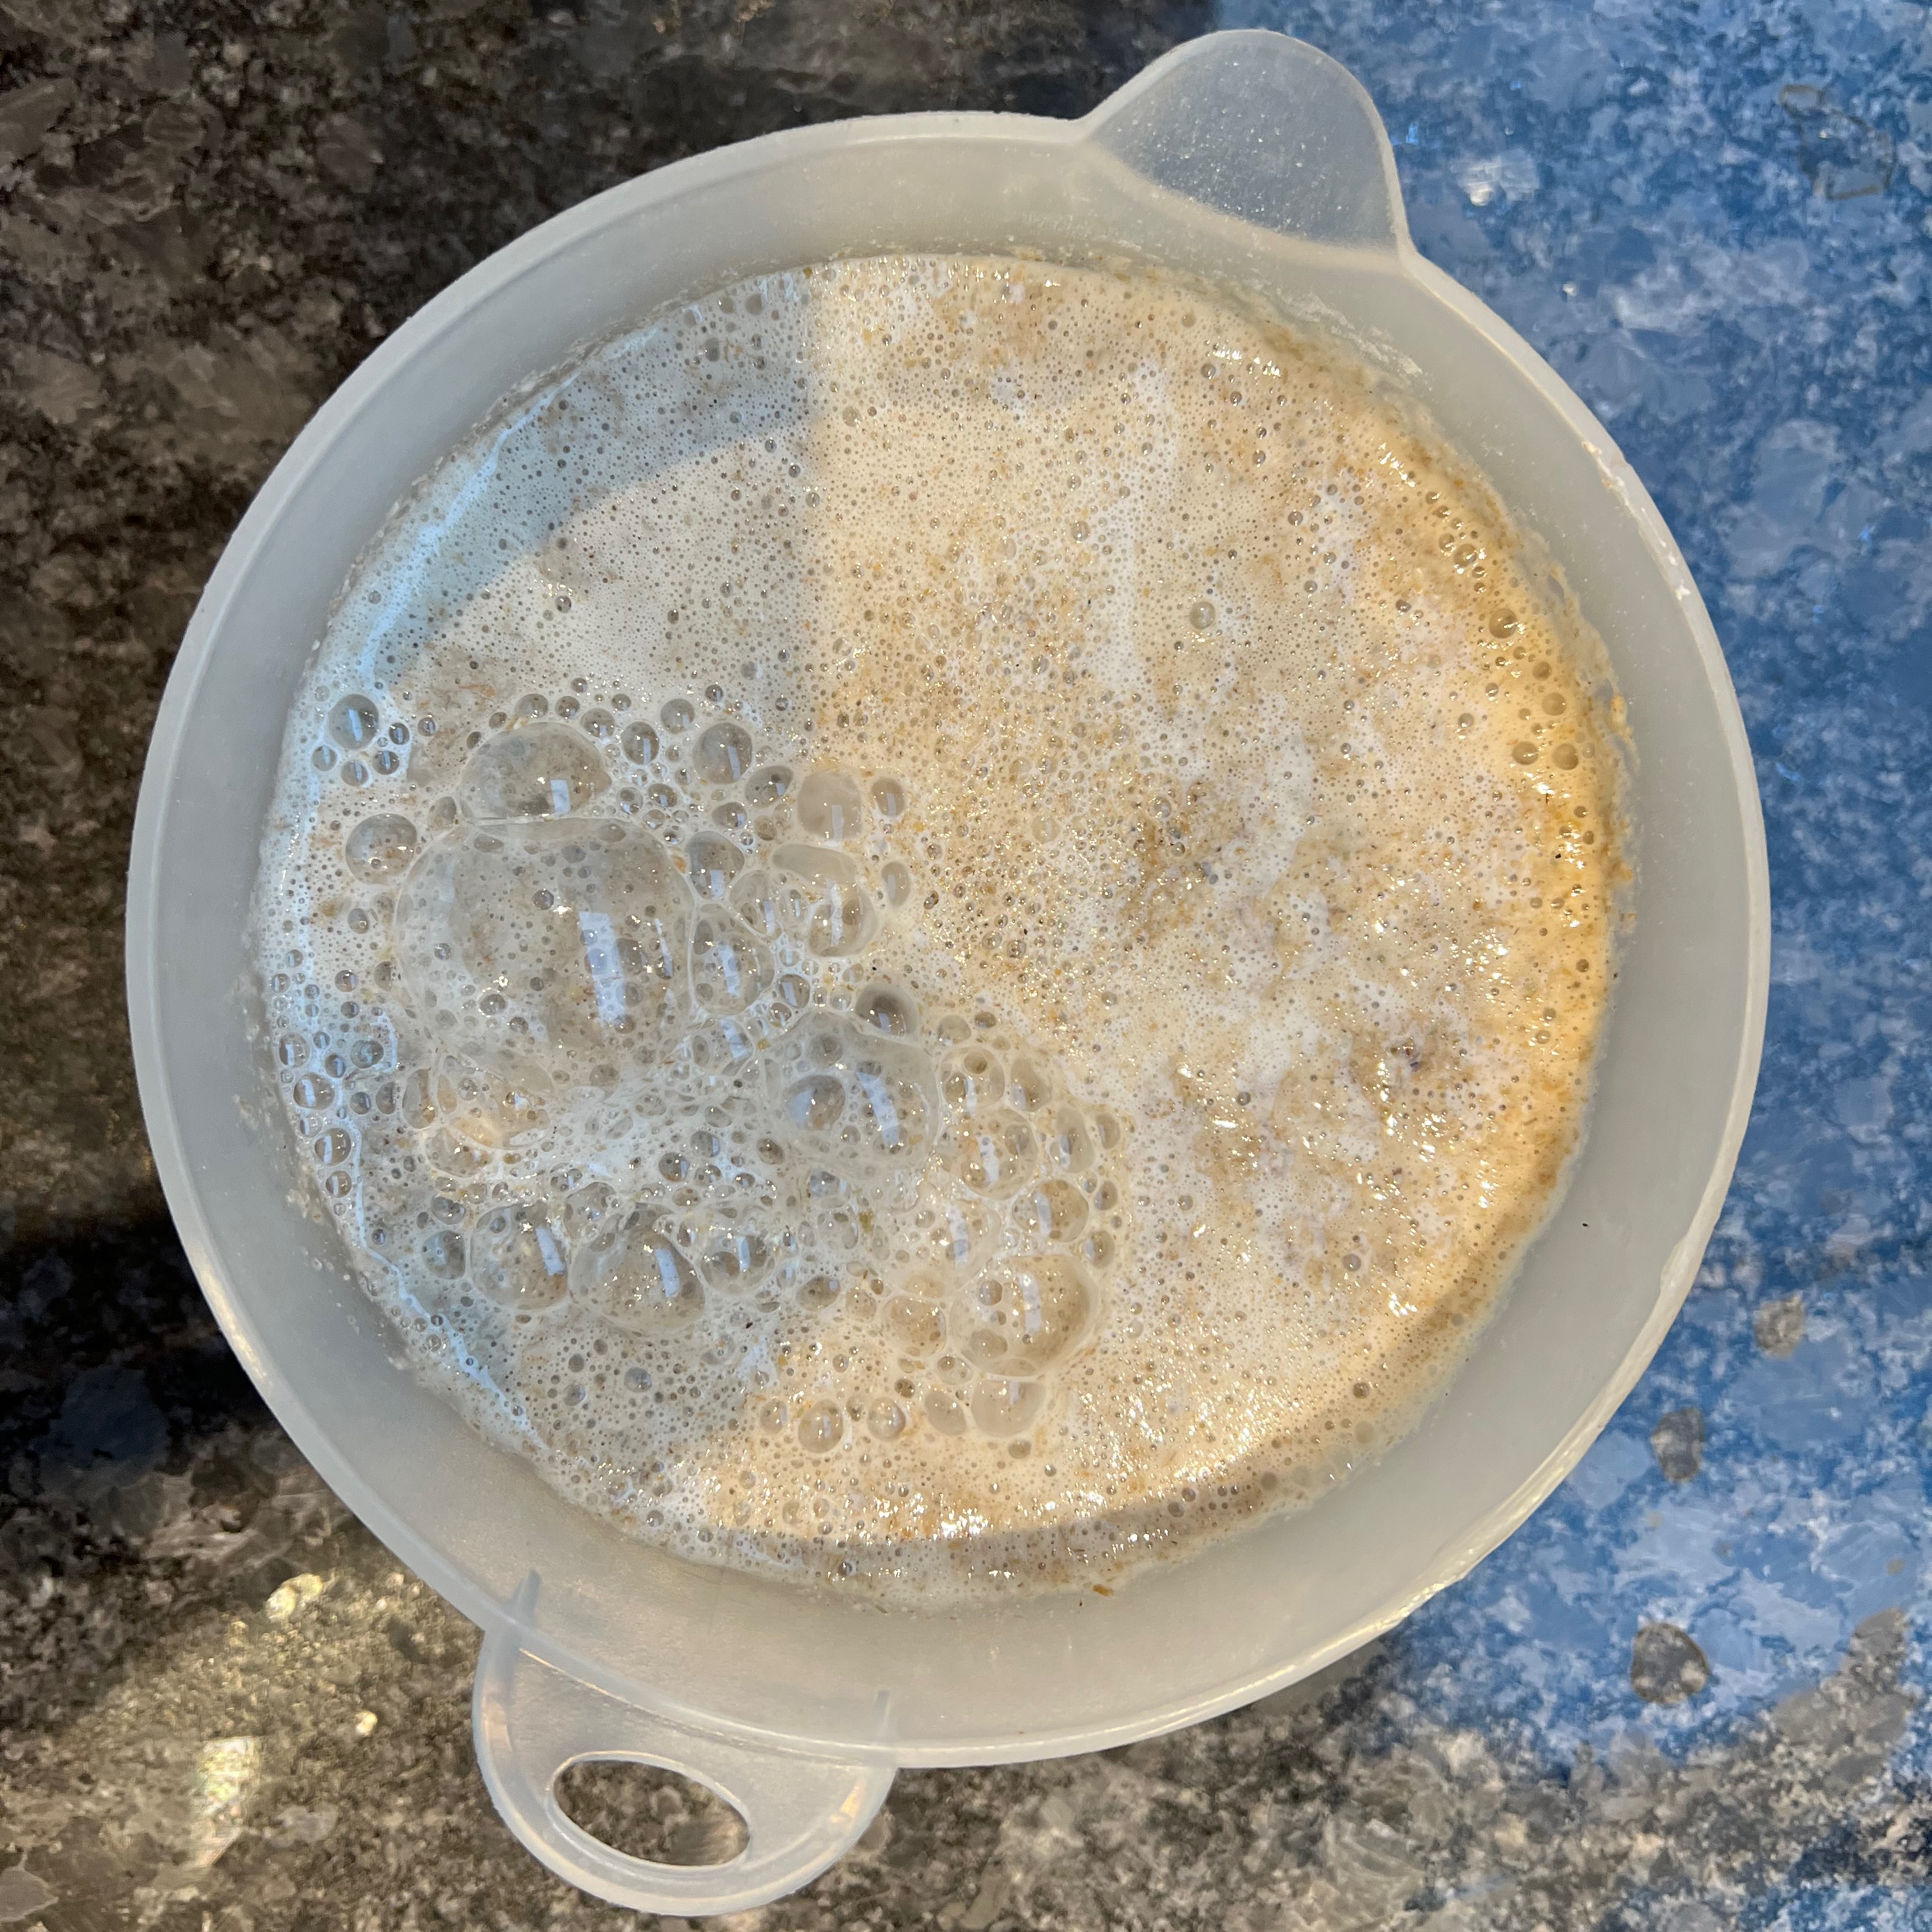
The sponge
This is the initial mixture used to give the yeast in the sourdough starter the chance to multiply. It seems to go many names as well as “sponge”: Andrew Whitley calls it a “production sourdough”; I’ve also seen “pre-ferment”, “bulk ferment” or just plain “ferment”. A thicker version appears to be called a “biga”.
90g sourdough starter
90g dark rye flour
180ml water
If a layer of clear liquid has separated from your sourdough starter, mix it in thoroughly (some books advise you to discard this: I’ve never needed to).
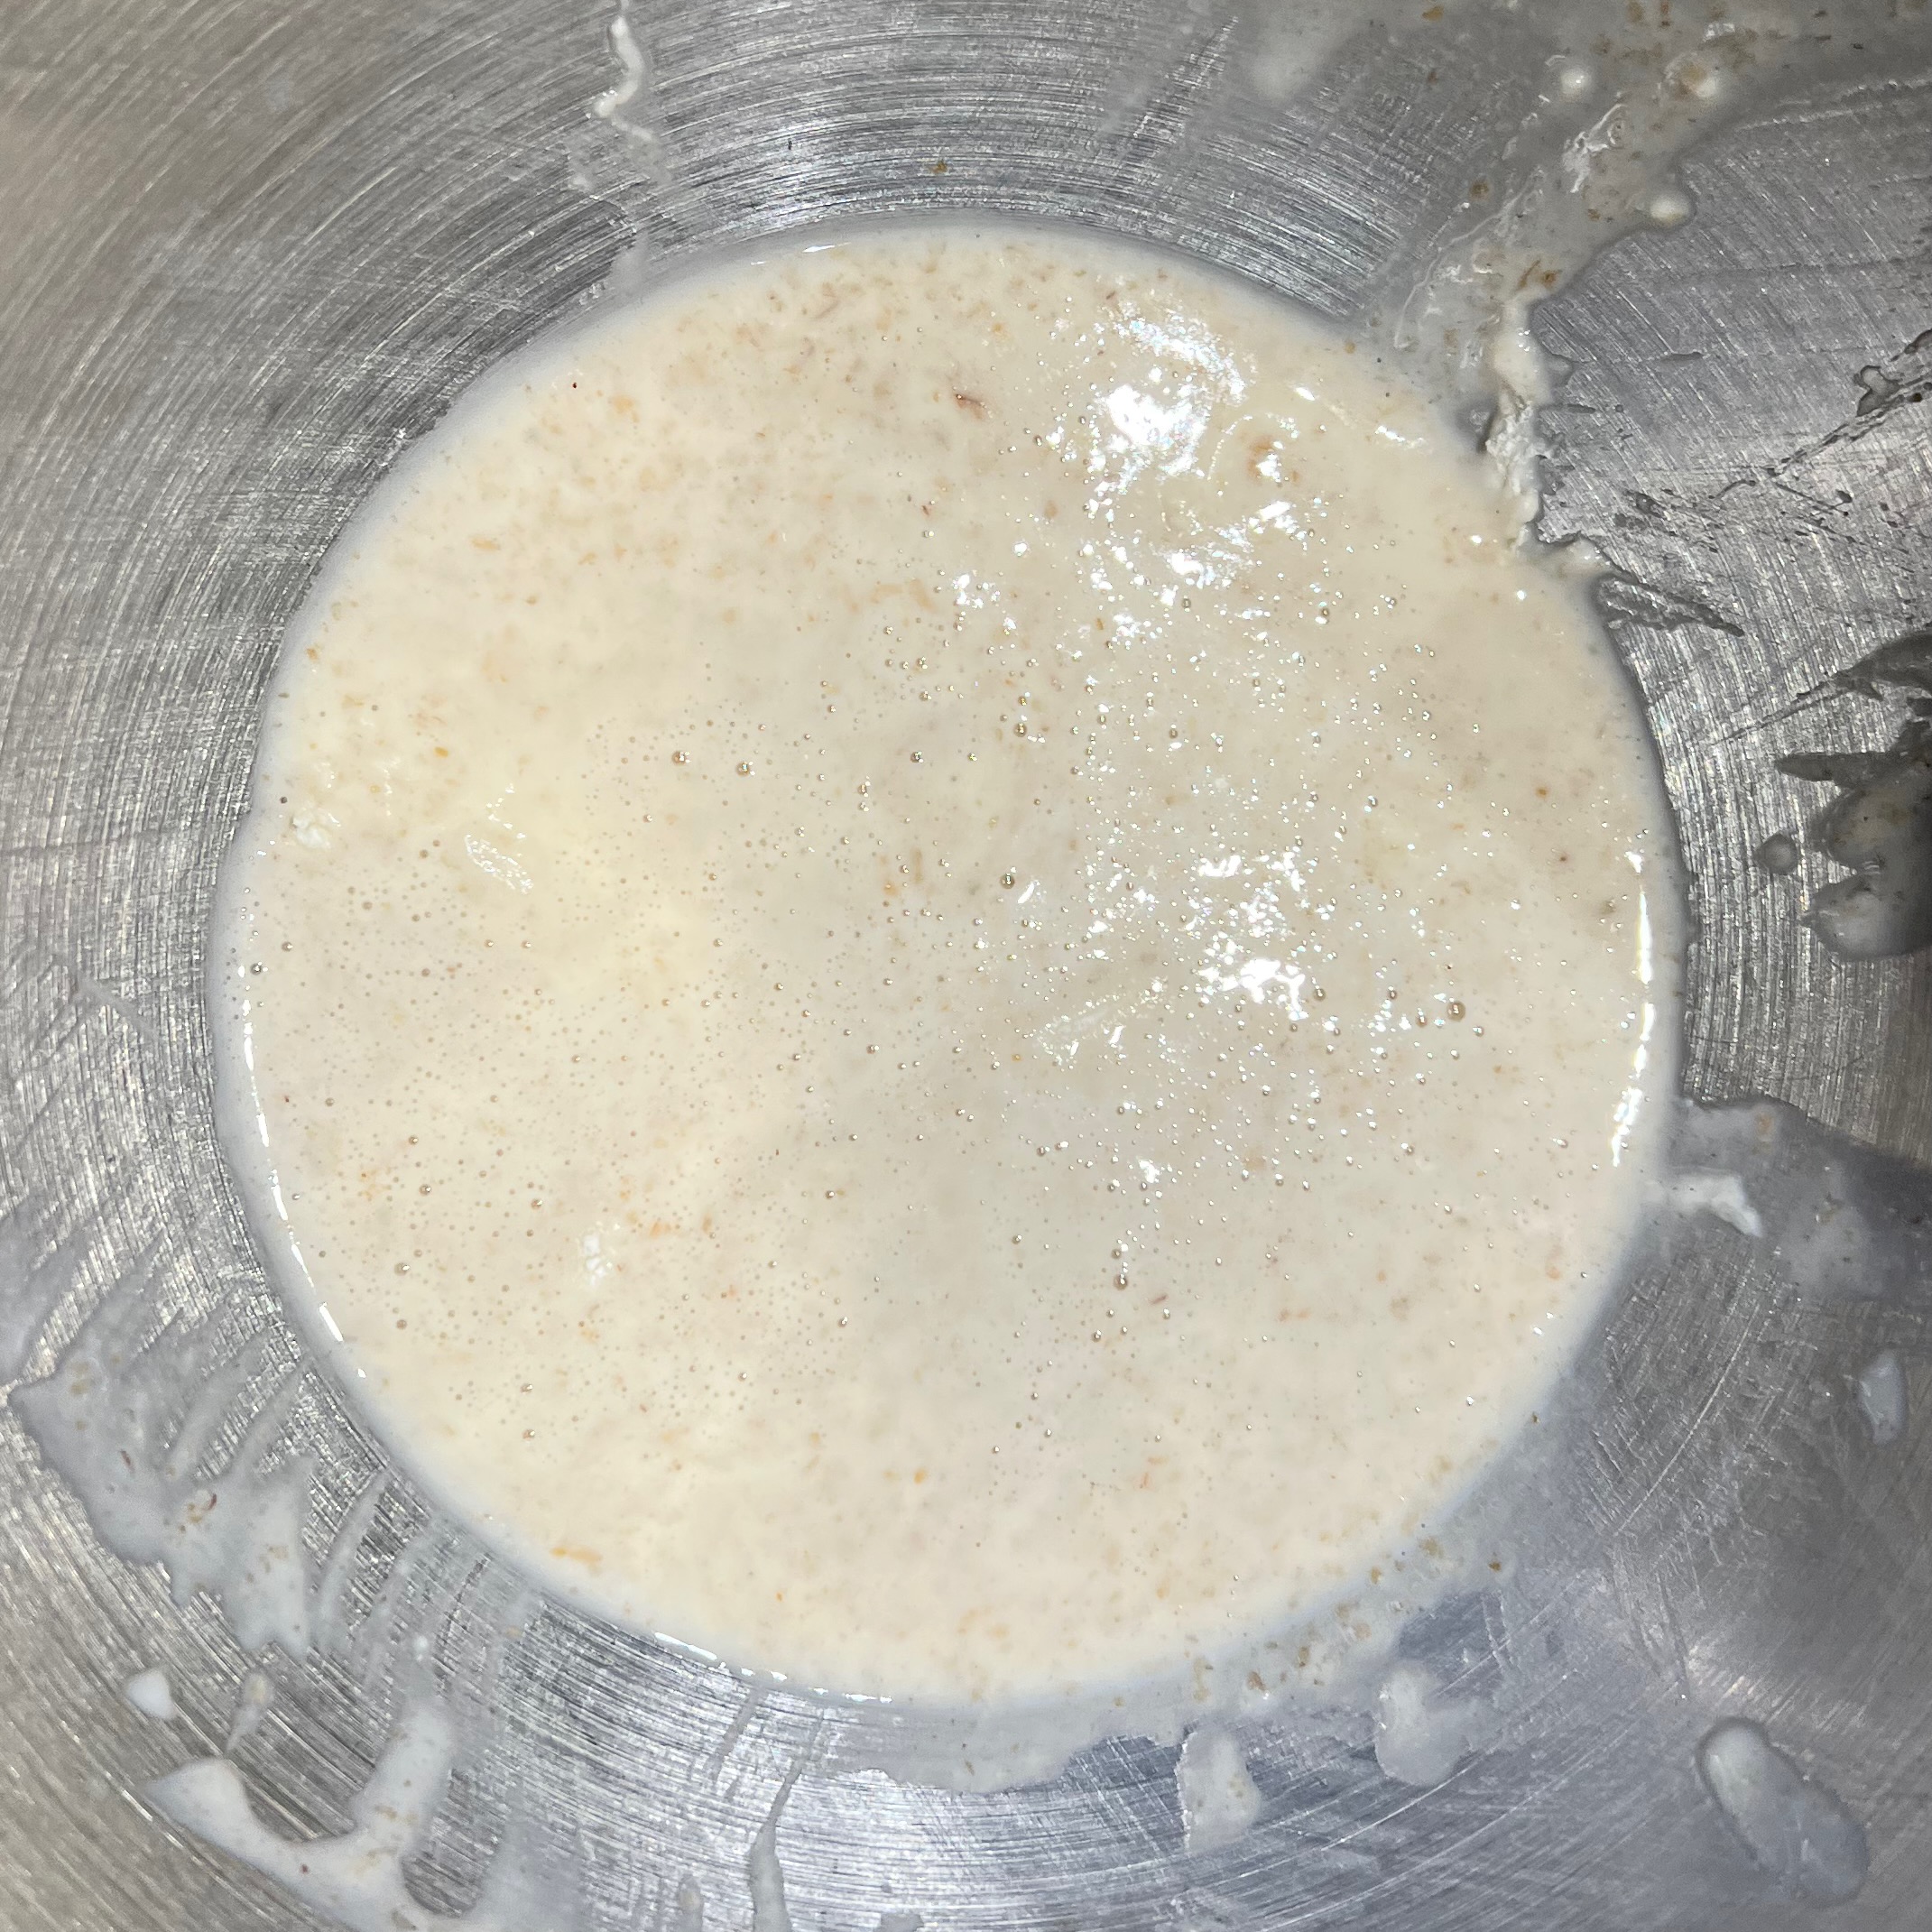
Mix thoroughly the starter, dark rye flour and water in a bowl. Leave to ferment at room temperature for several hours or overnight.
And don’t forget to refresh your starter:
30g dark rye flour
60 ml water
Adding the flour and water to your starter, mix thoroughly, cover and replace in the refrigerator.
Making the dough
350g Wholemeal spelt flour
350g Strong white bread flour
15g salt
100g Seven seed bread mix (like this one, or your favourite other mixture of seeds)
360ml warm water (warm but not hot to the touch, around 30-35℃)
Put the flours, salt and seeds into the bowl of a stand mixer and stir until reasonably evenly mixed.
Add the water to your sponge and mix.
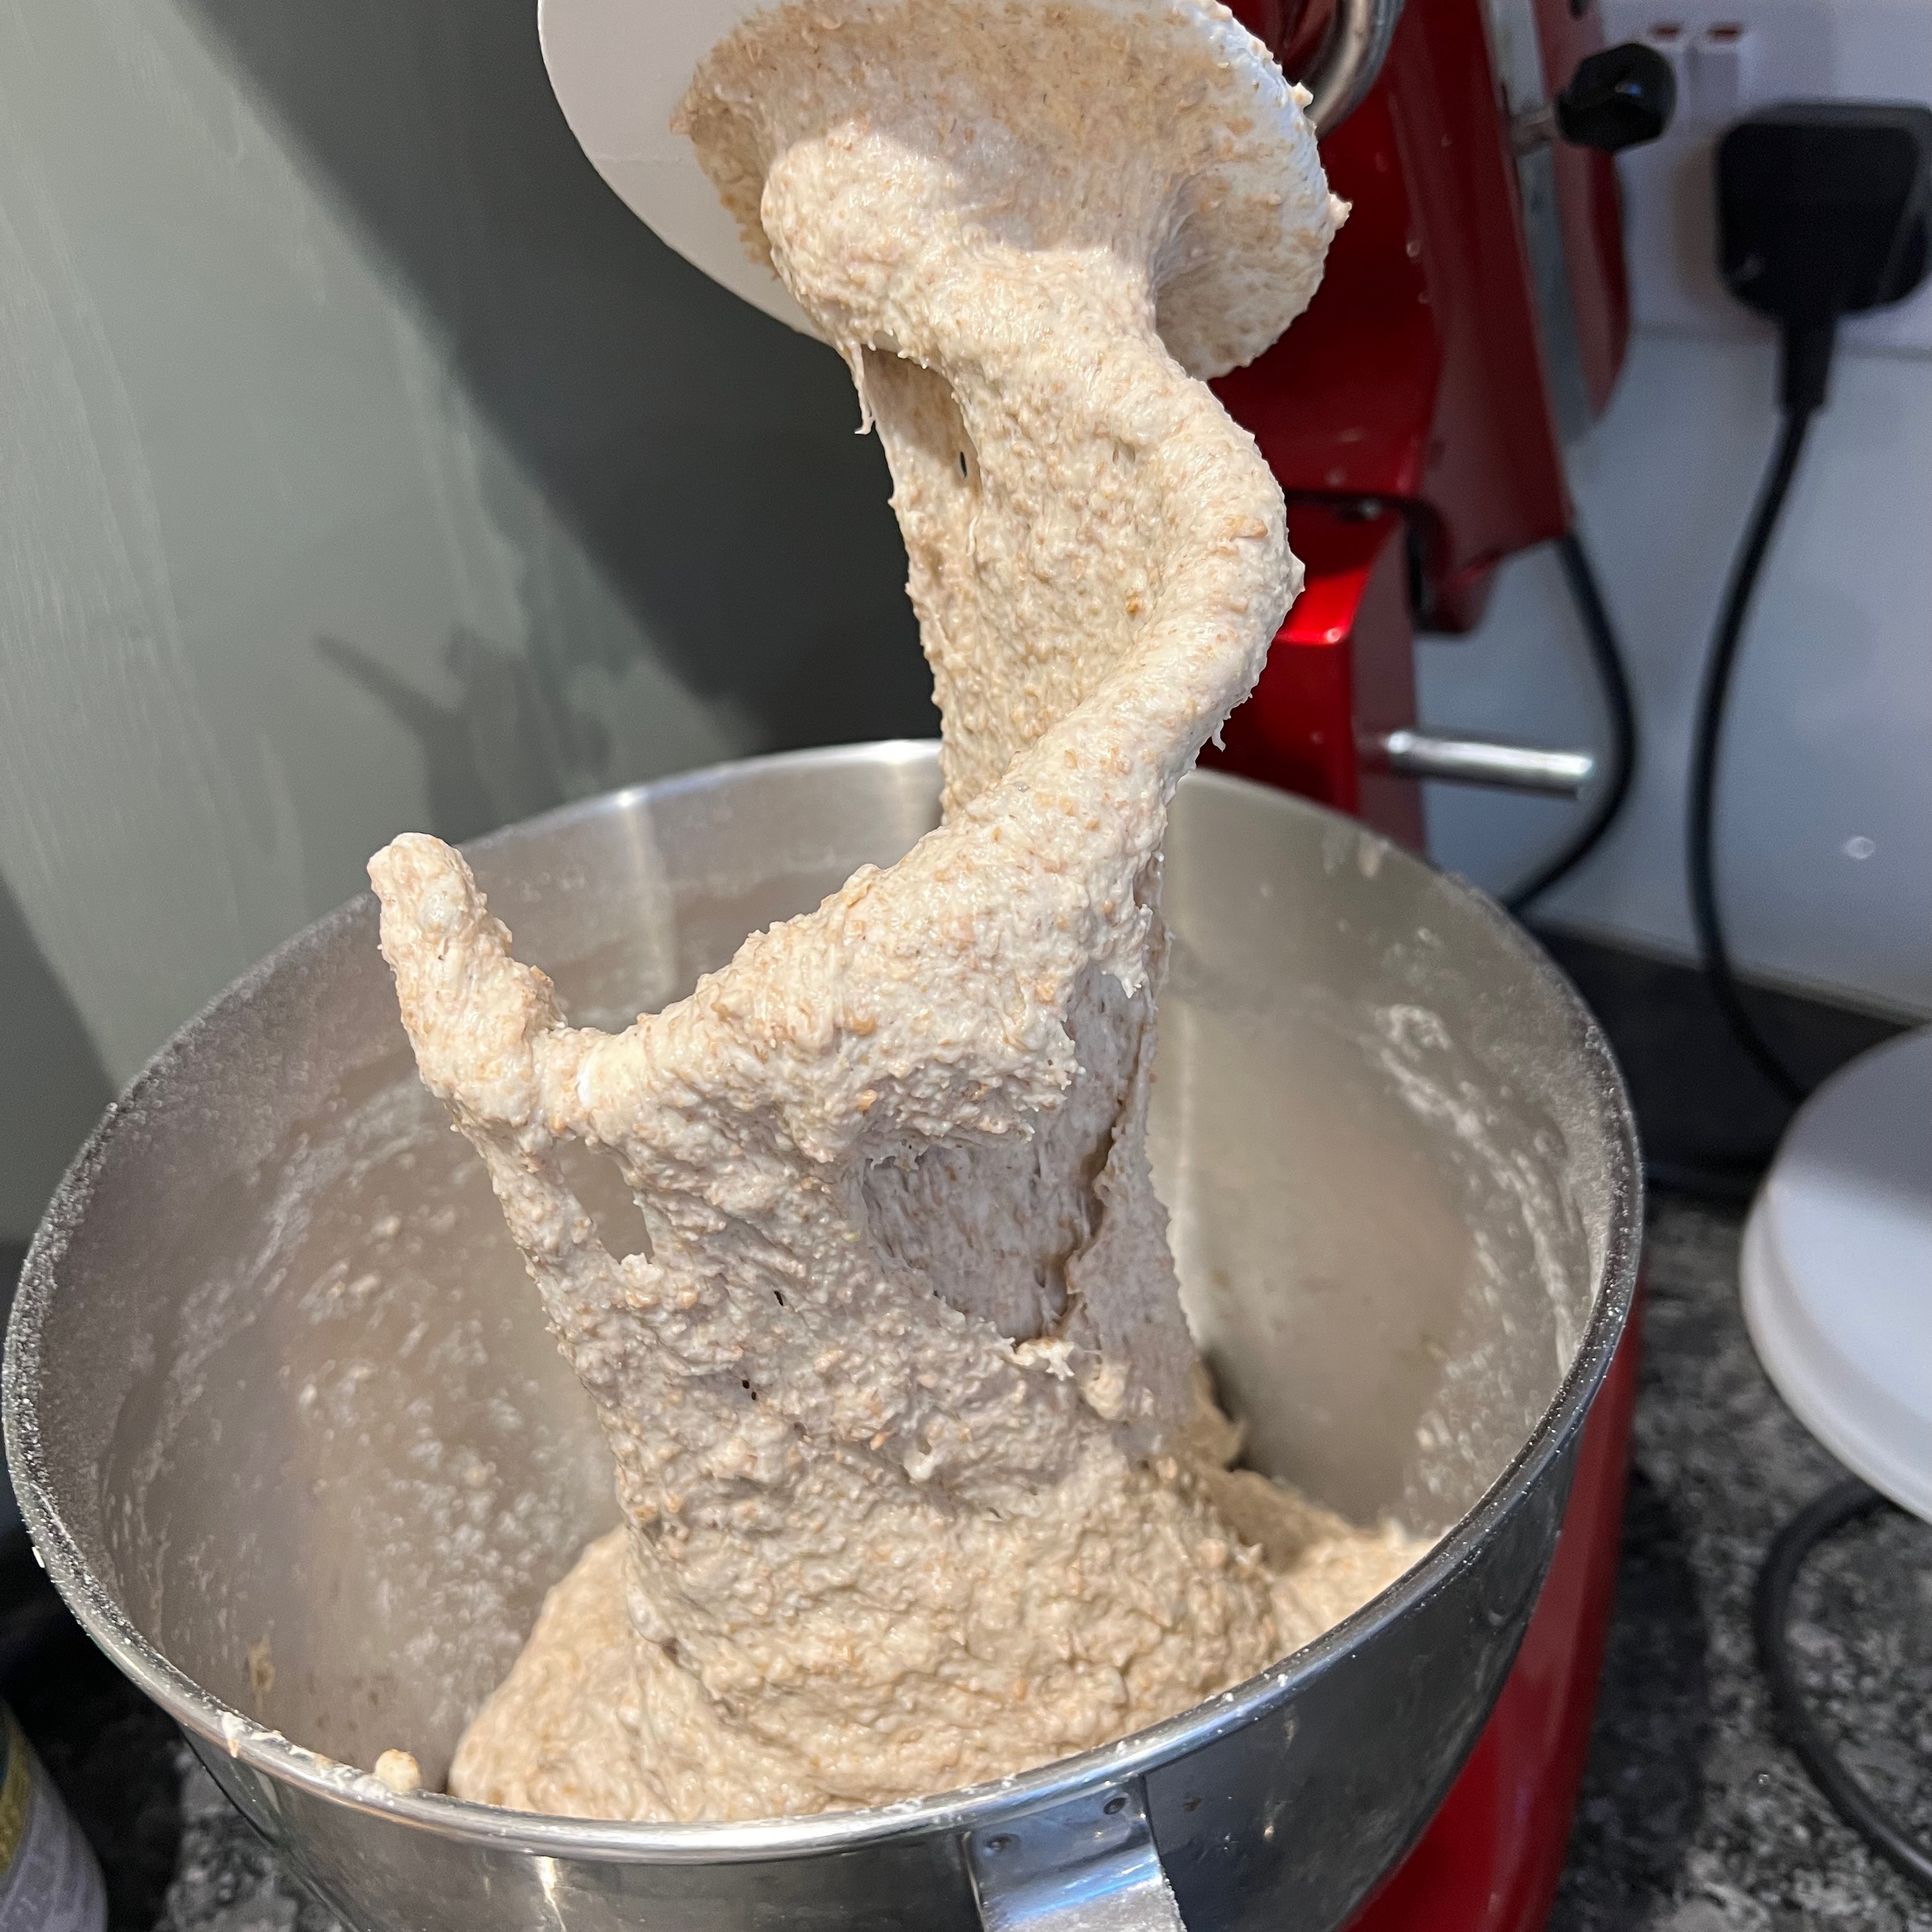
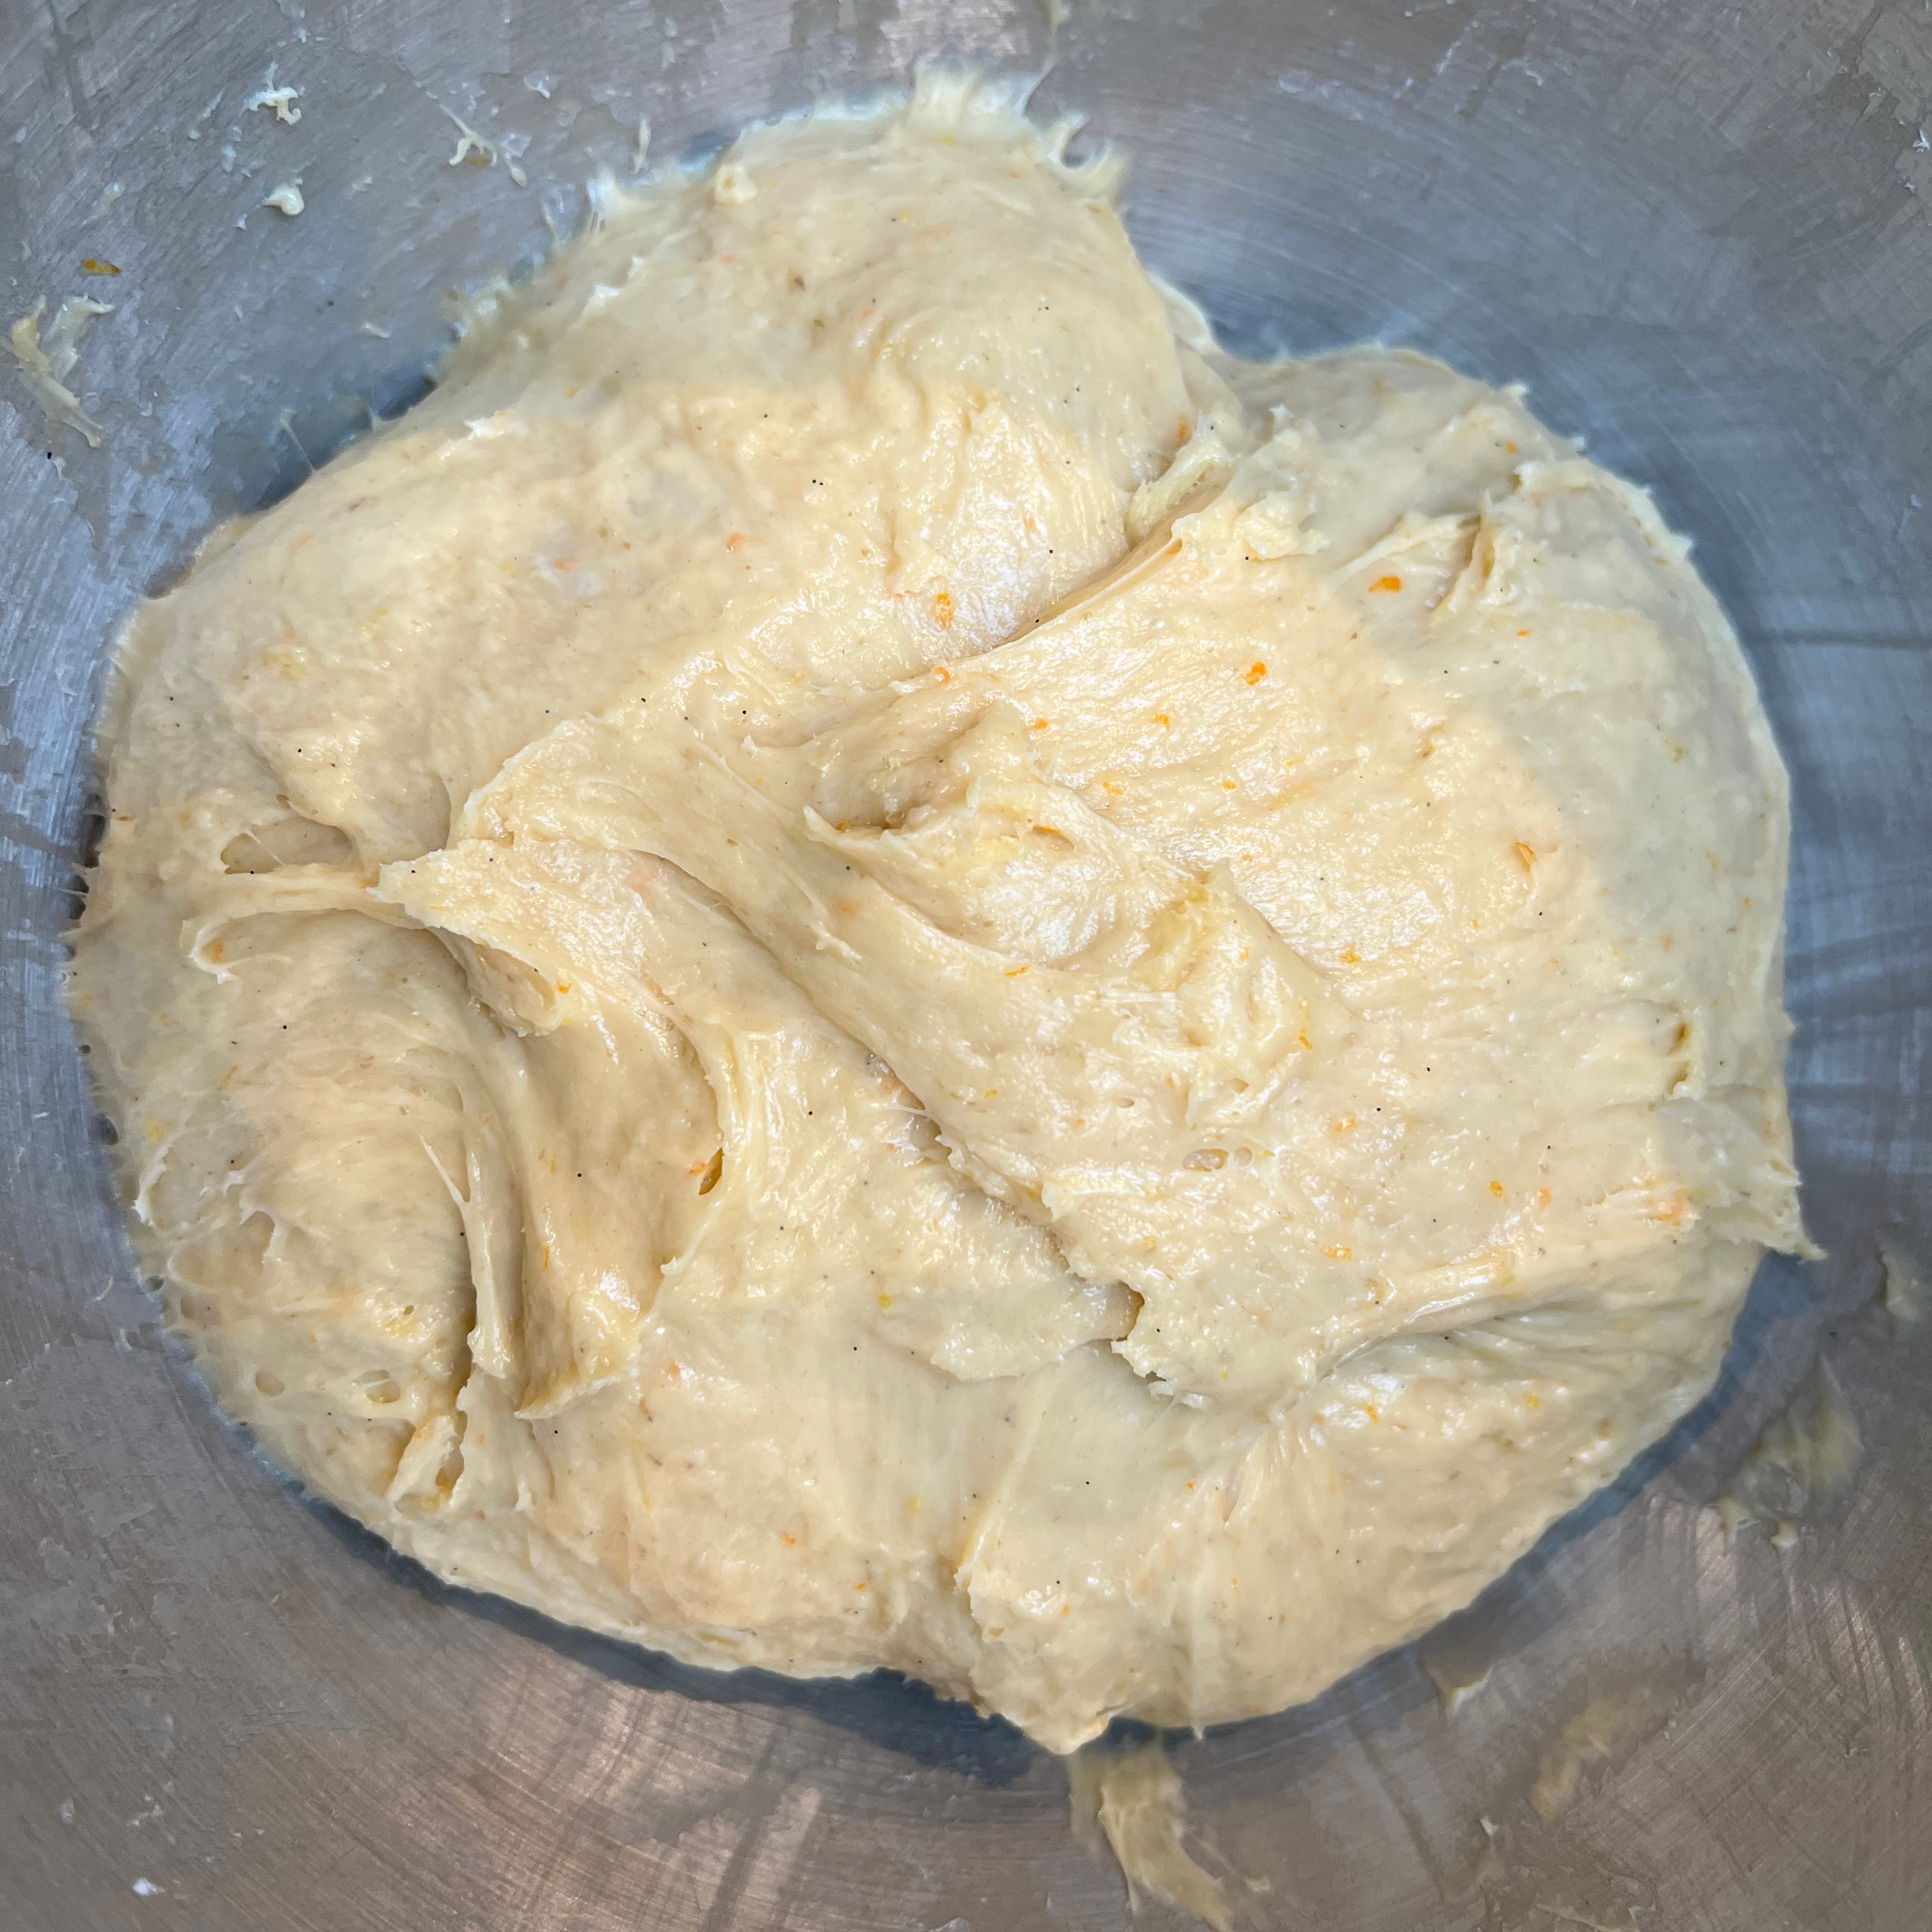
Add the wet mixture to the dry mixture. With a spoon, mix enough to ensure that you don’t have tons of dry flour at the bottom of the bowl where the mixer might not pick it up.
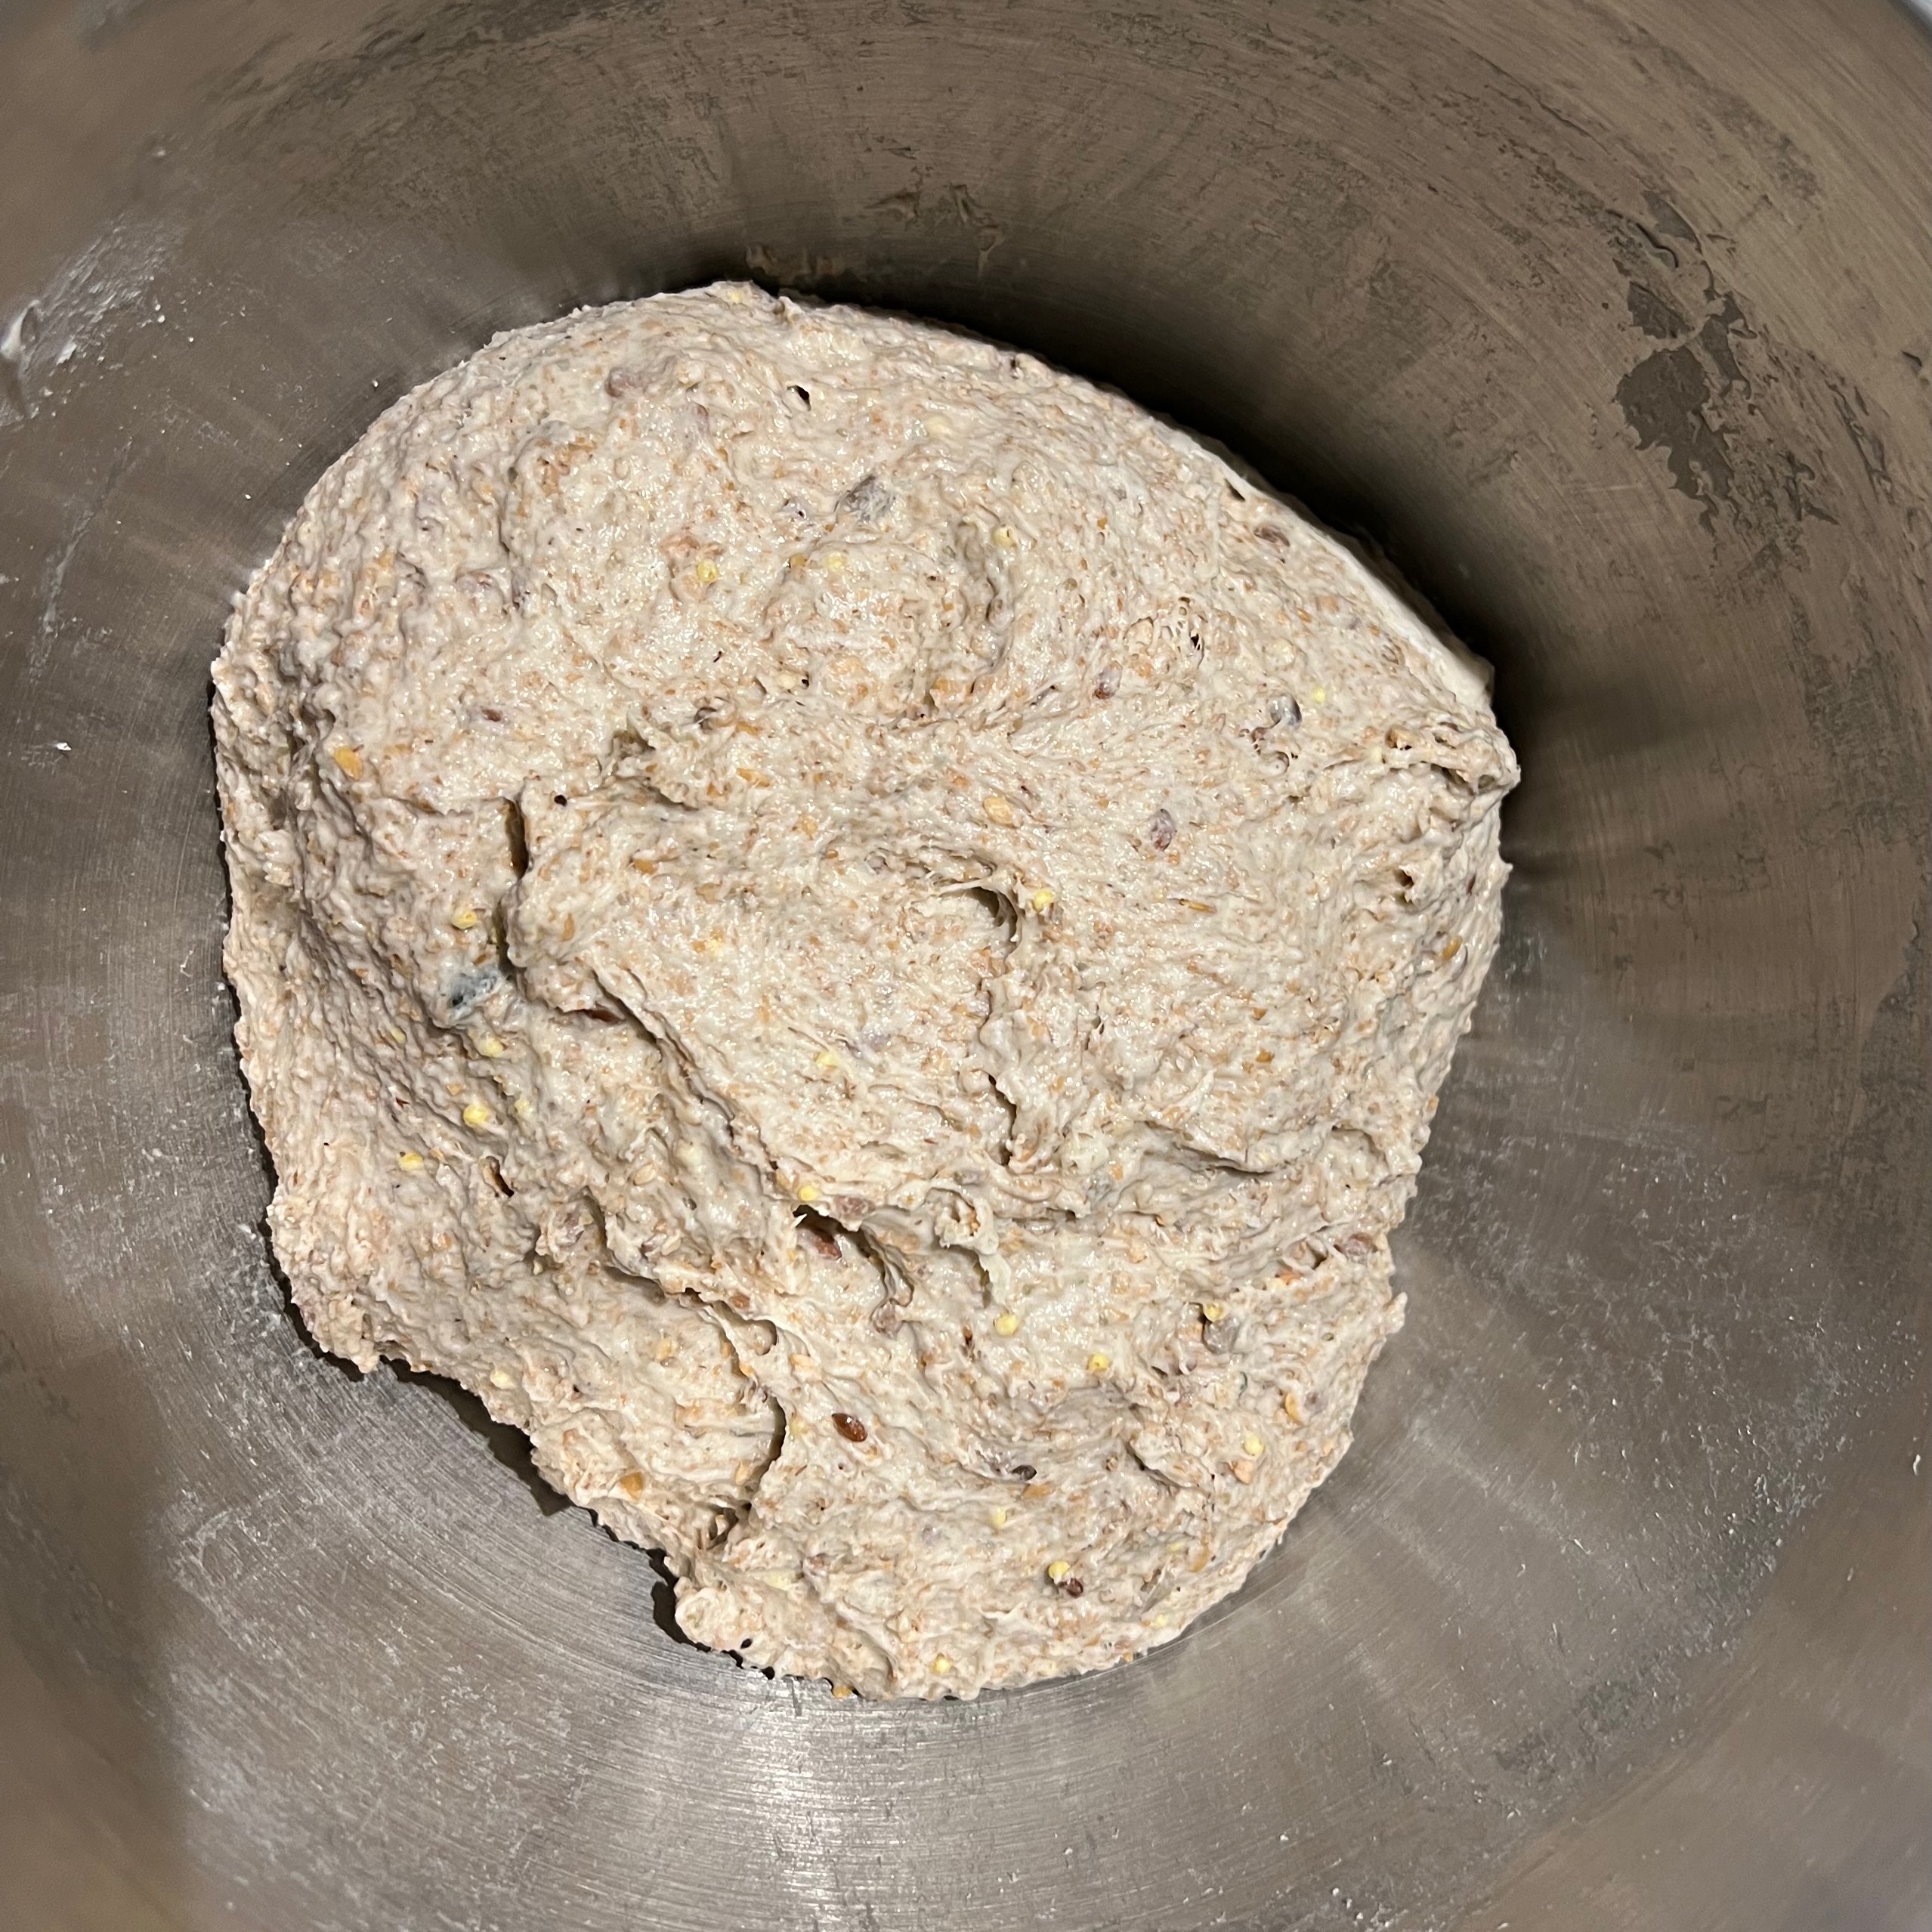
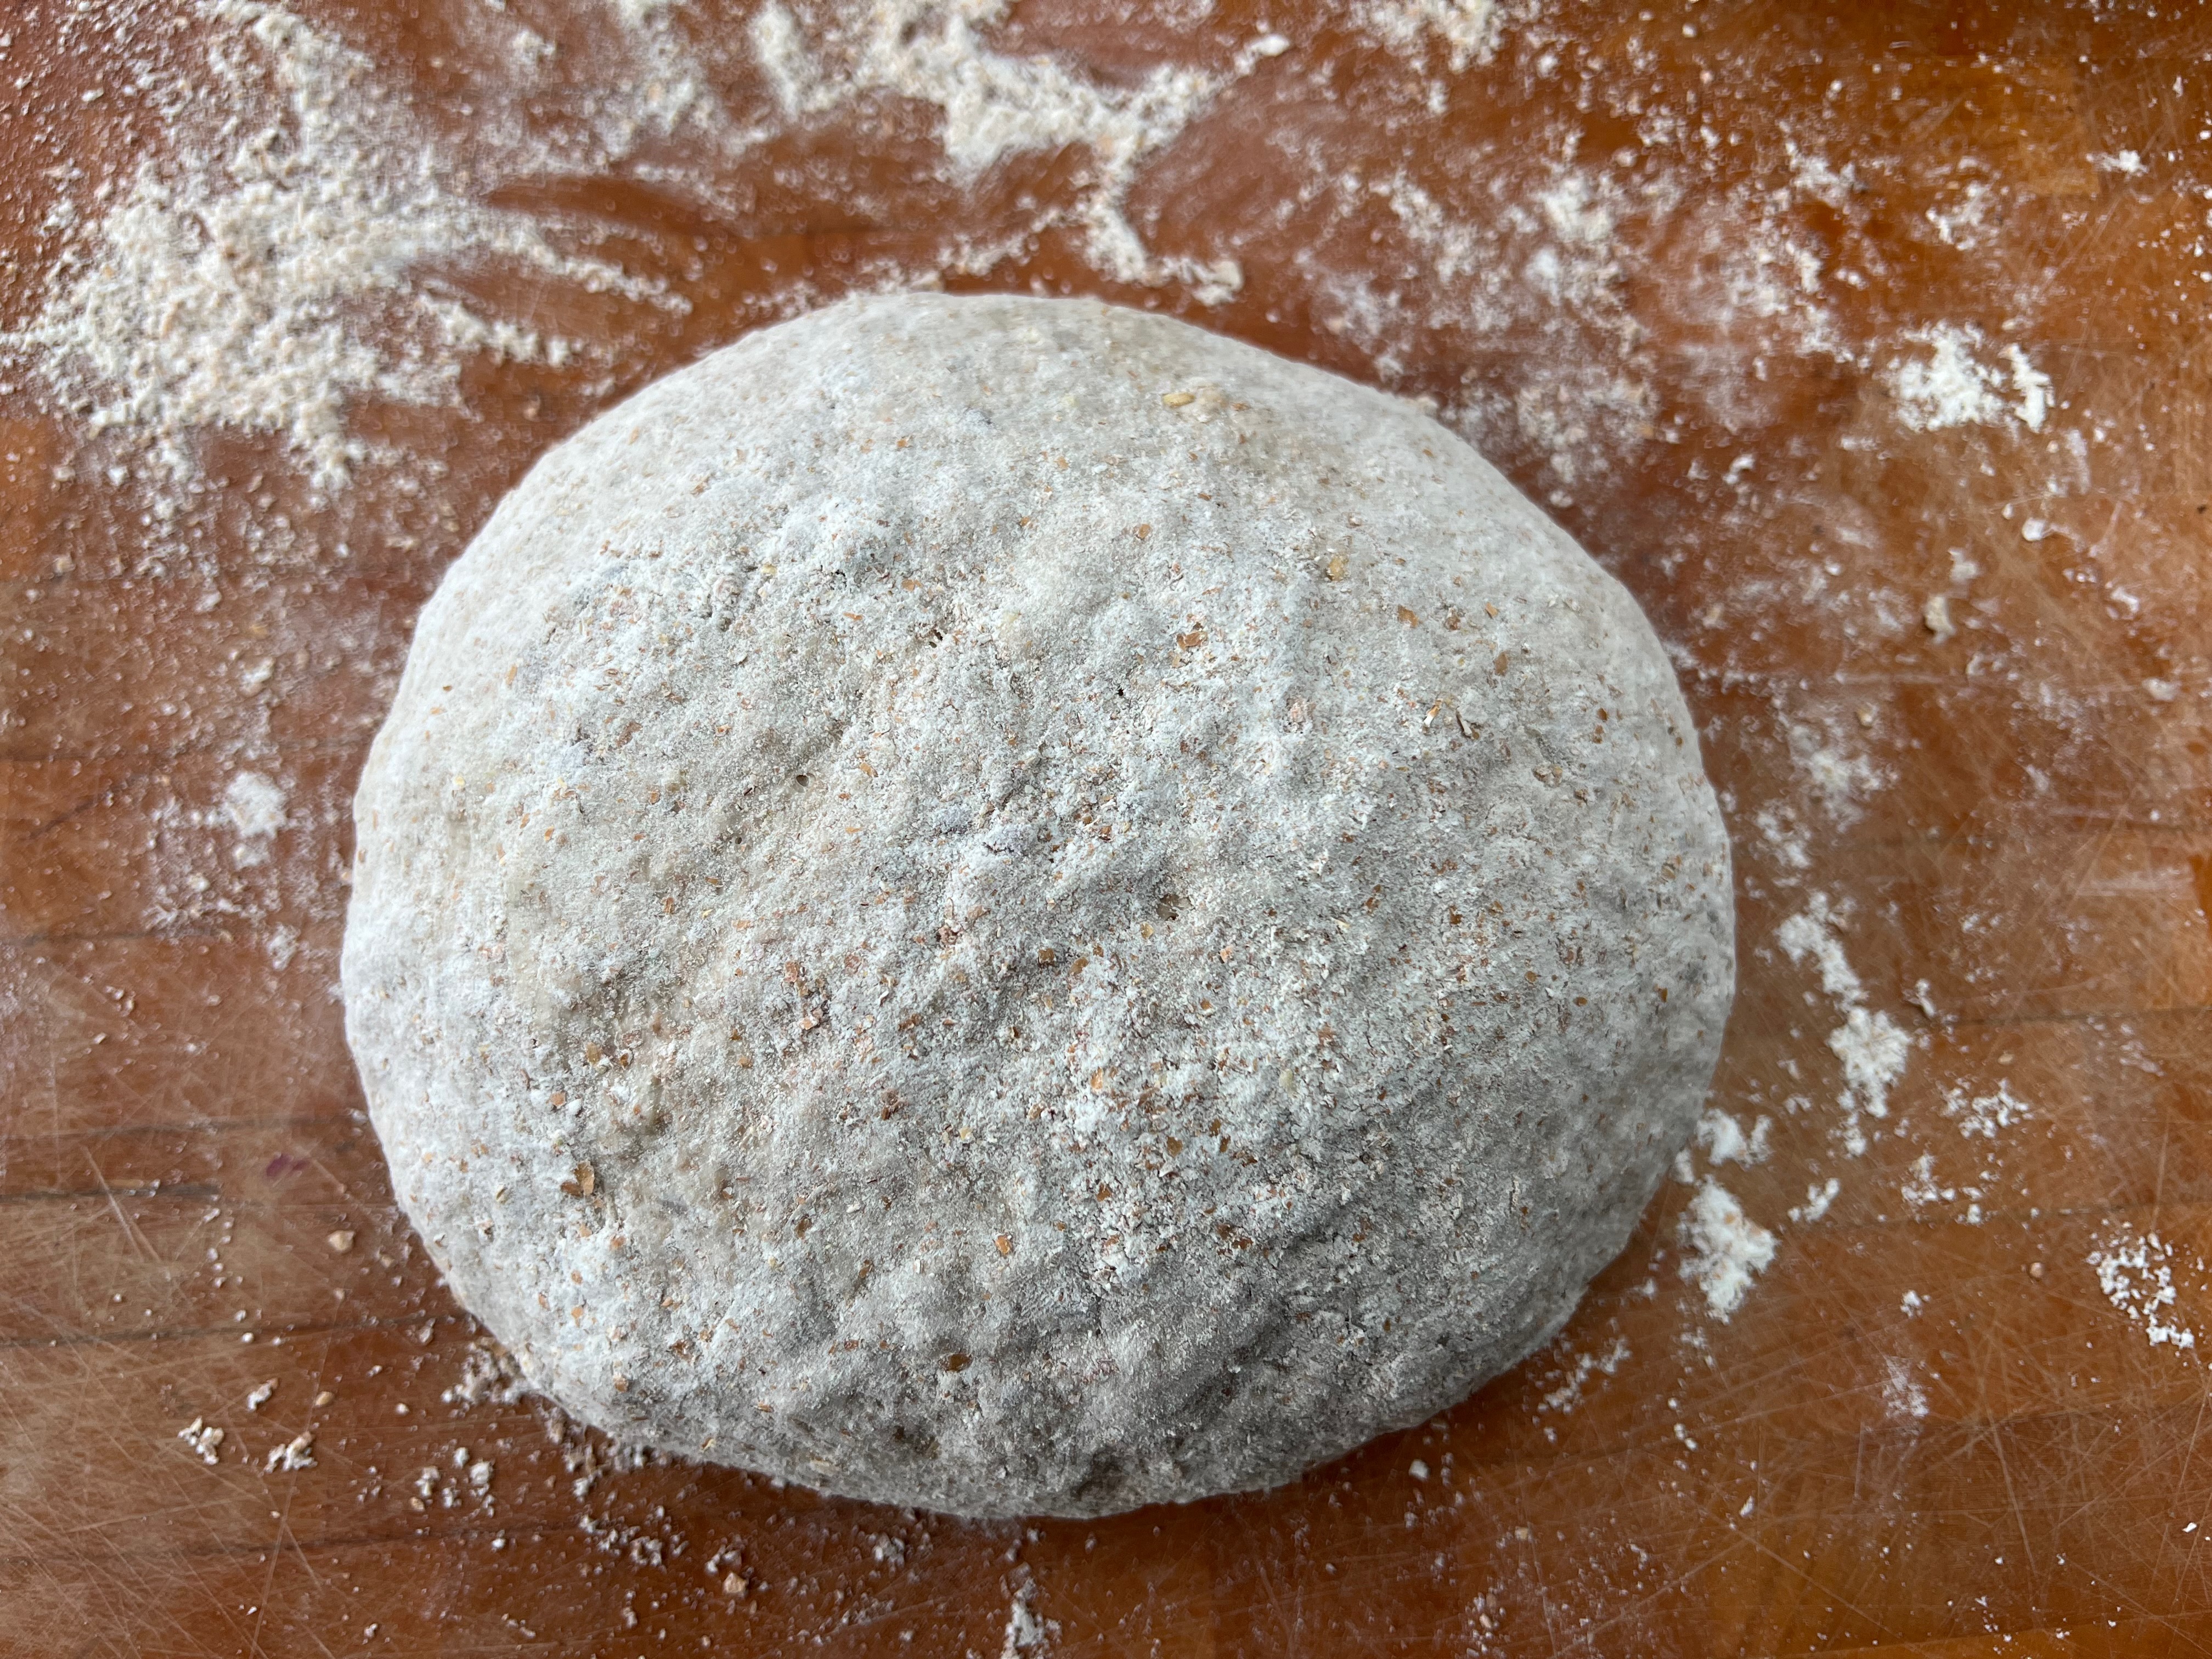
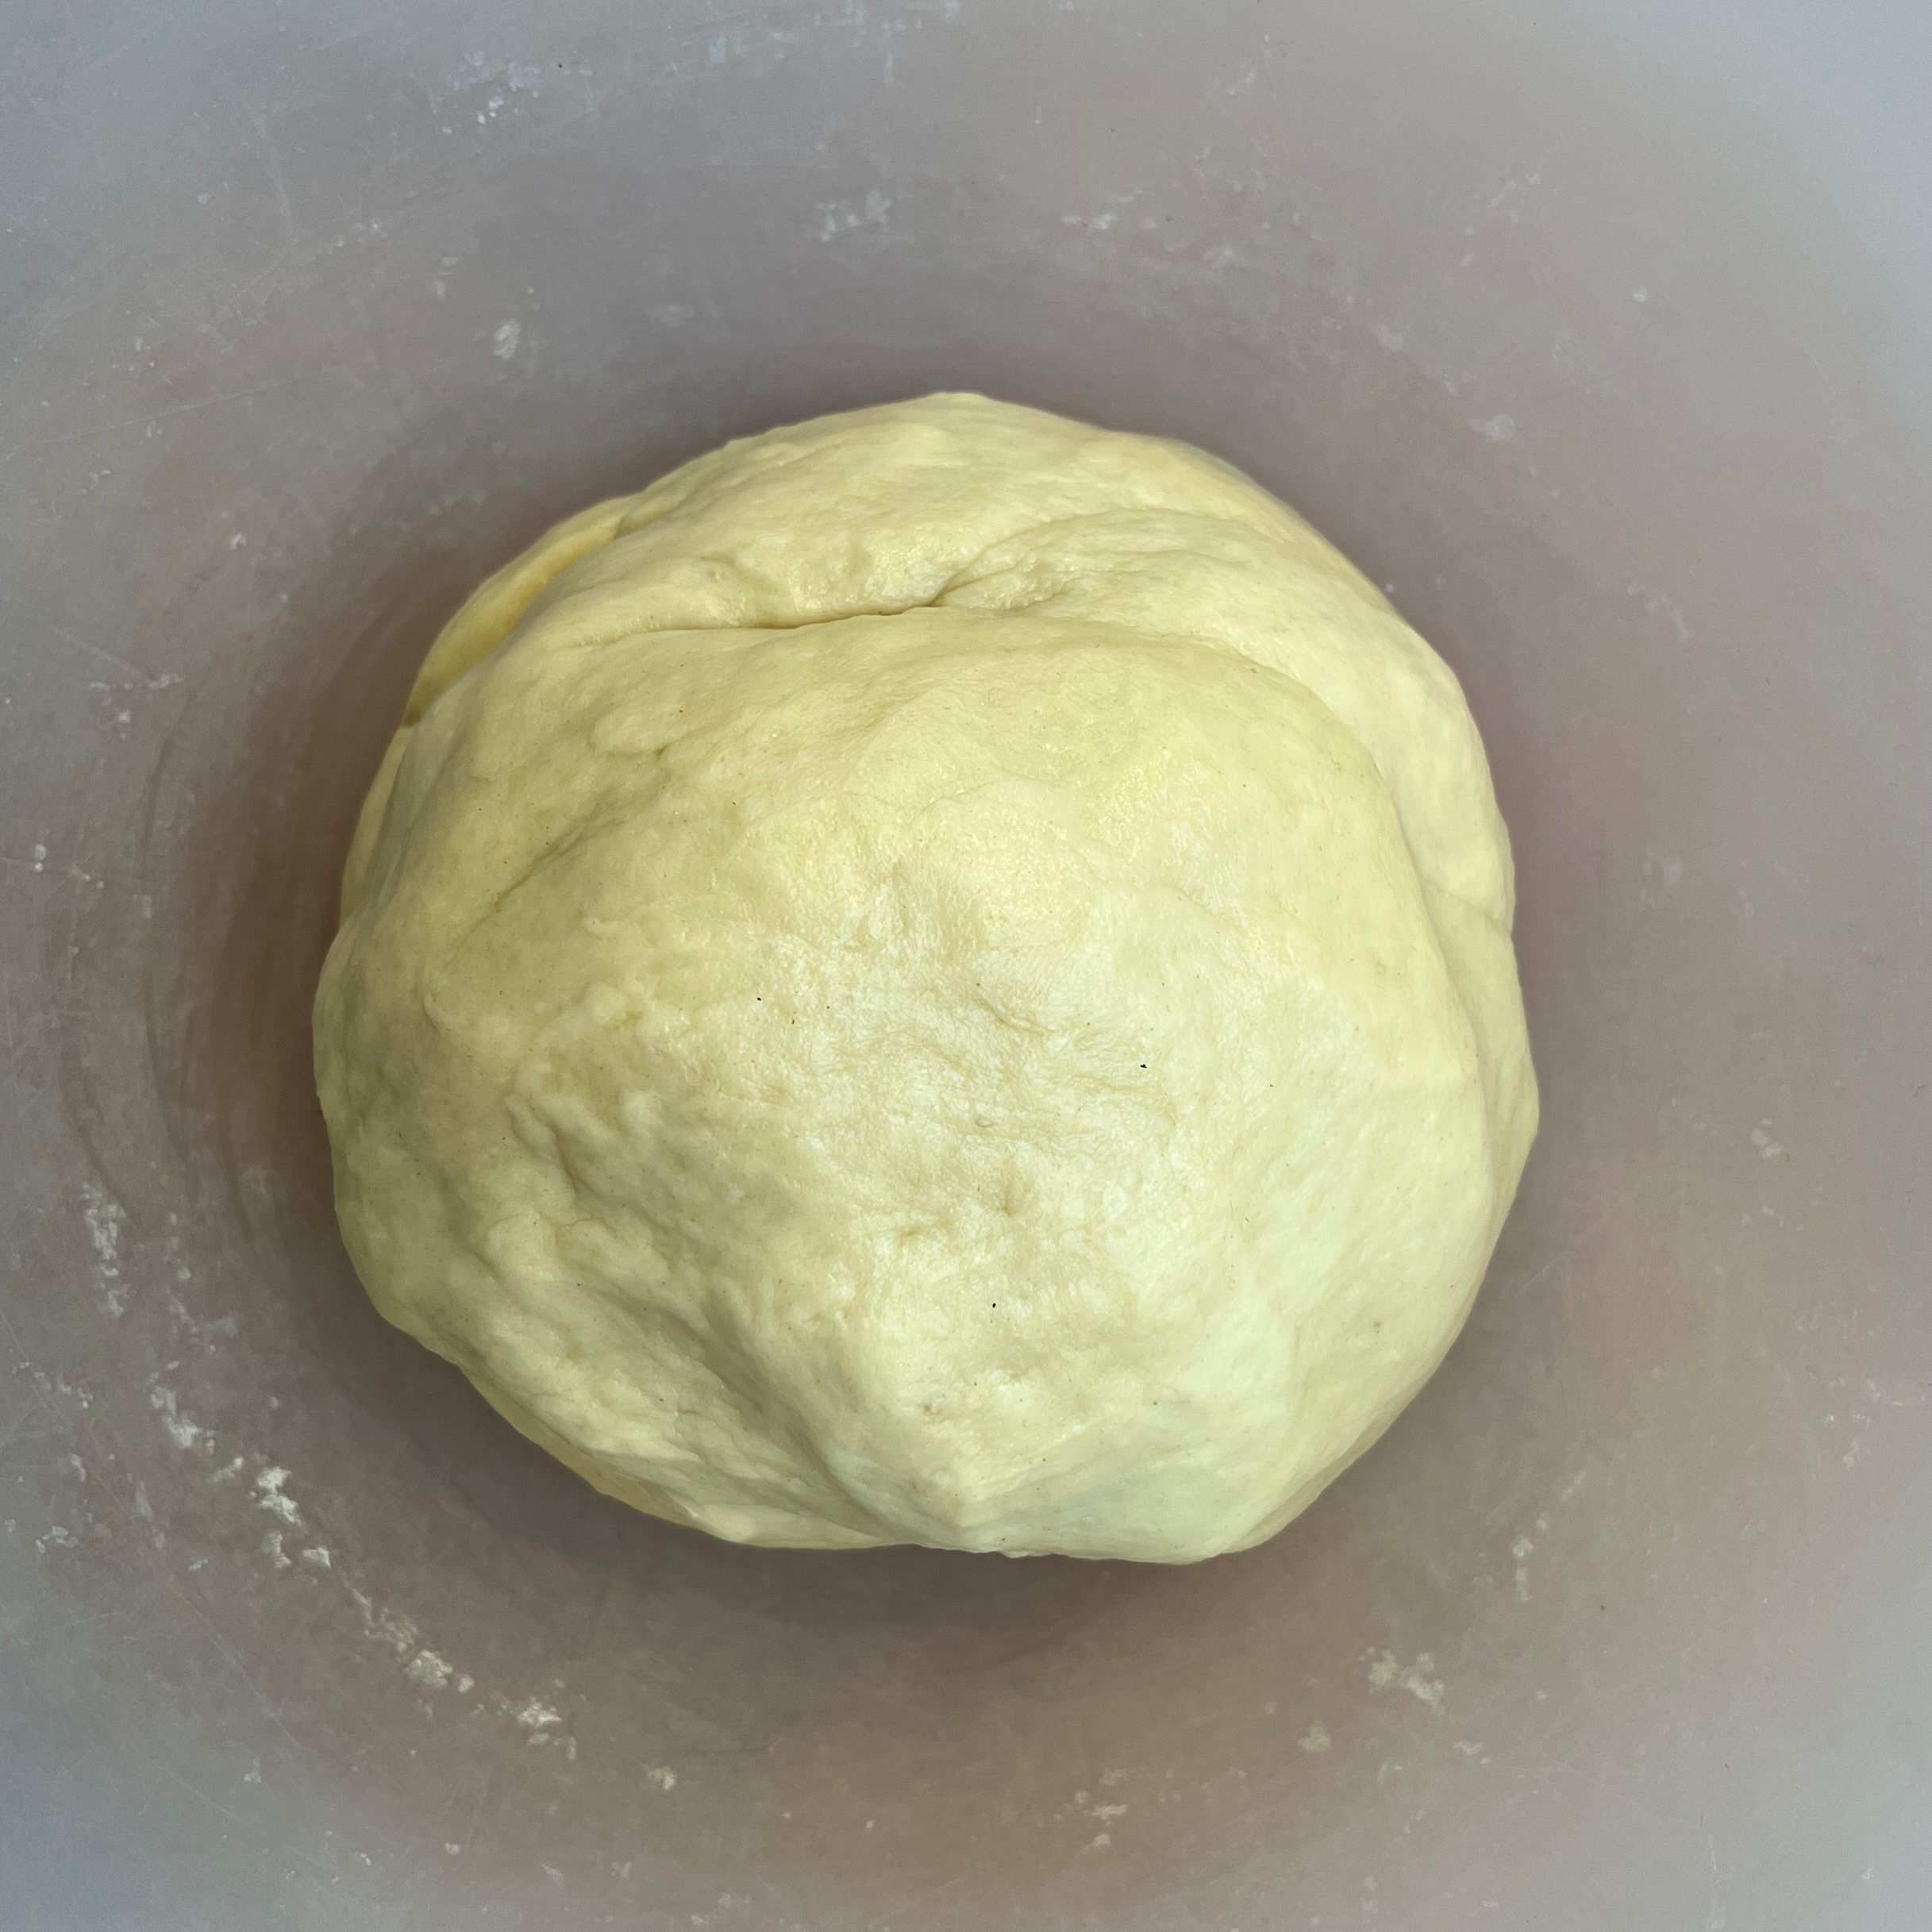
With the dough hook, knead for around 7 minutes: the dough should be very elastic and stretchy. Go for up to 10 minutes if you’re feeling uncertain.
Scrape down the sides of the bowl and make sure the dough is in a nice ball.
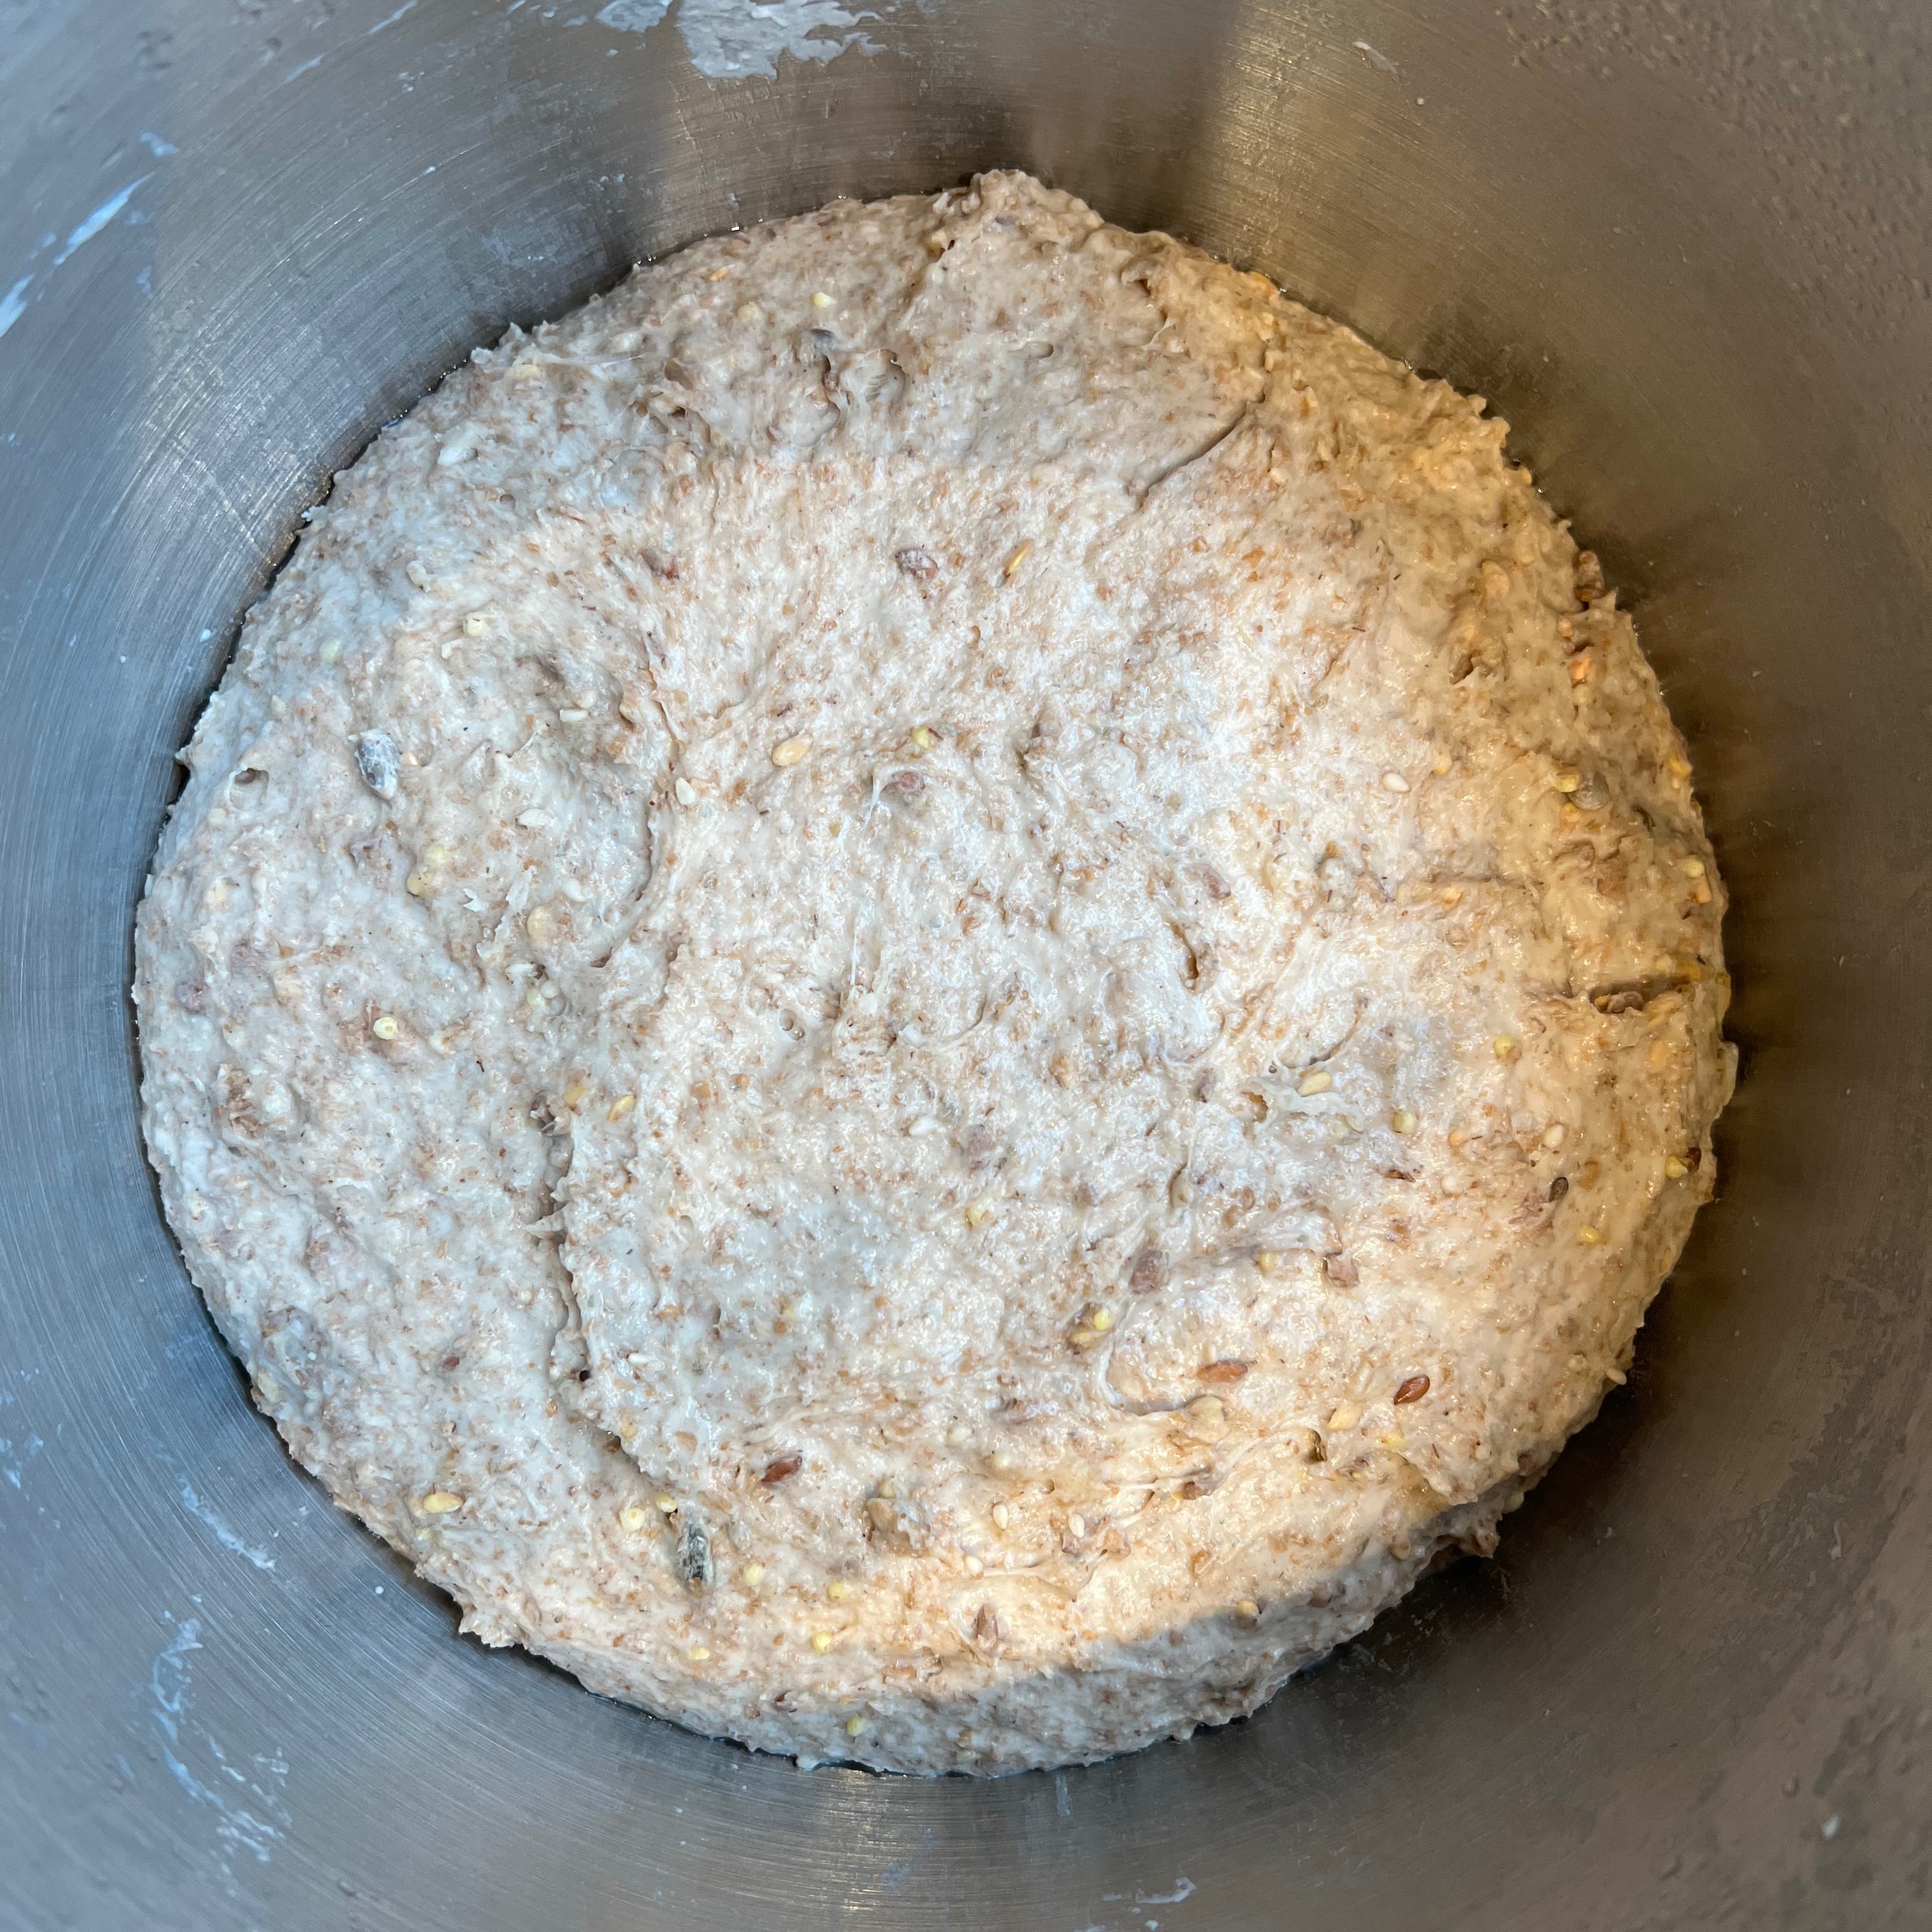
Stretchy dough in the mixer bowlAfter kneadingAfter rising
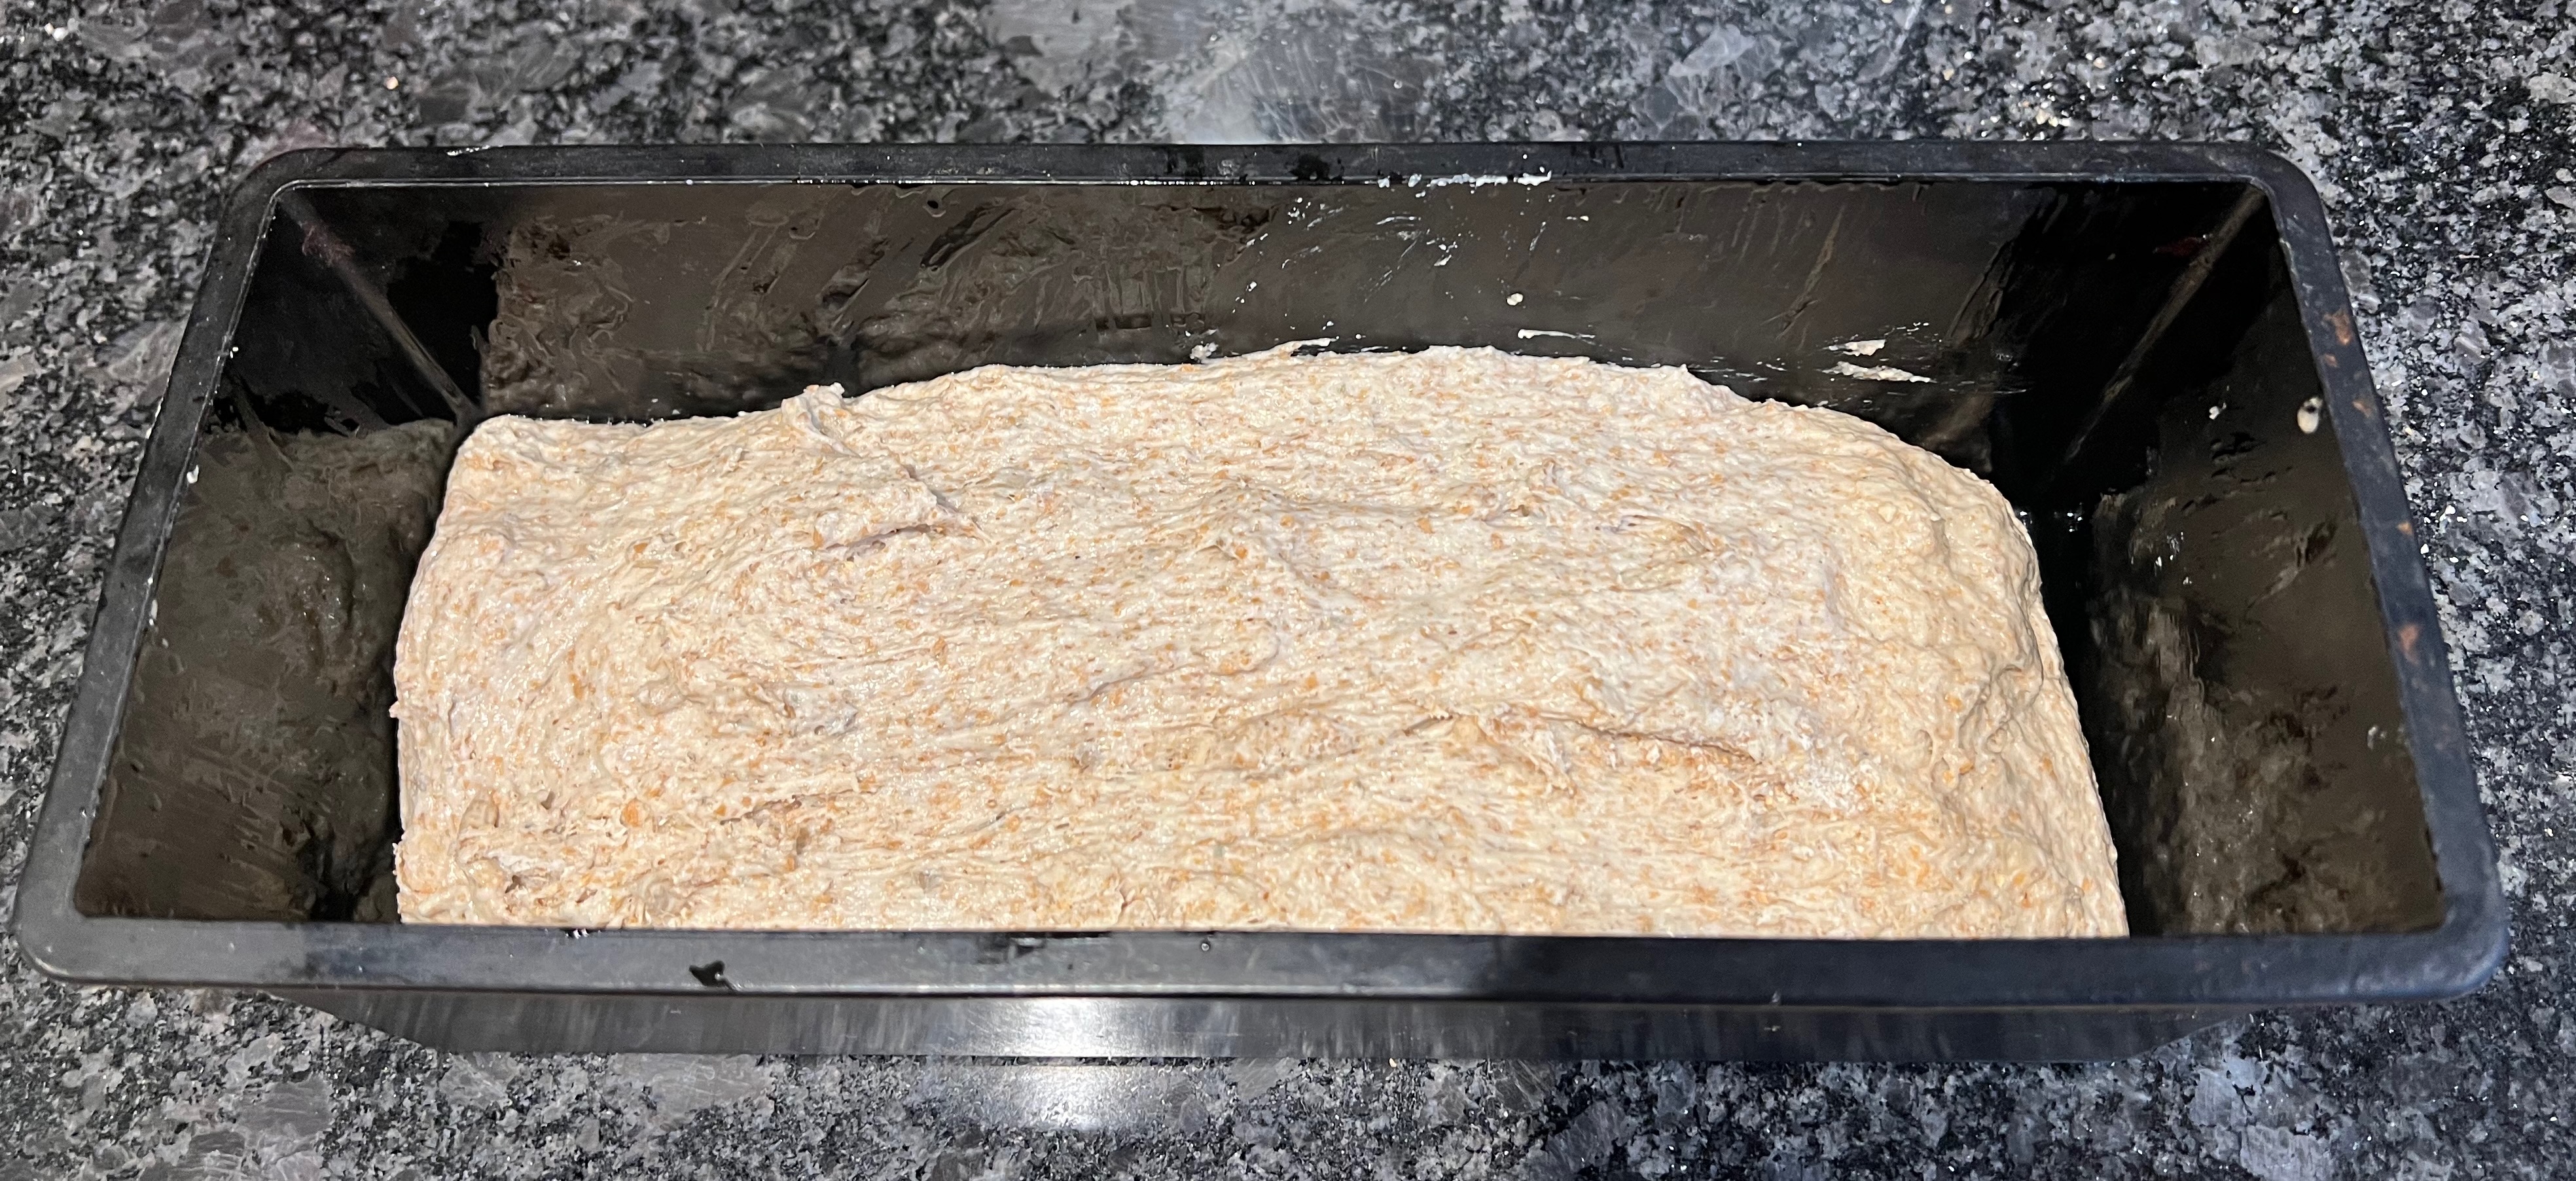
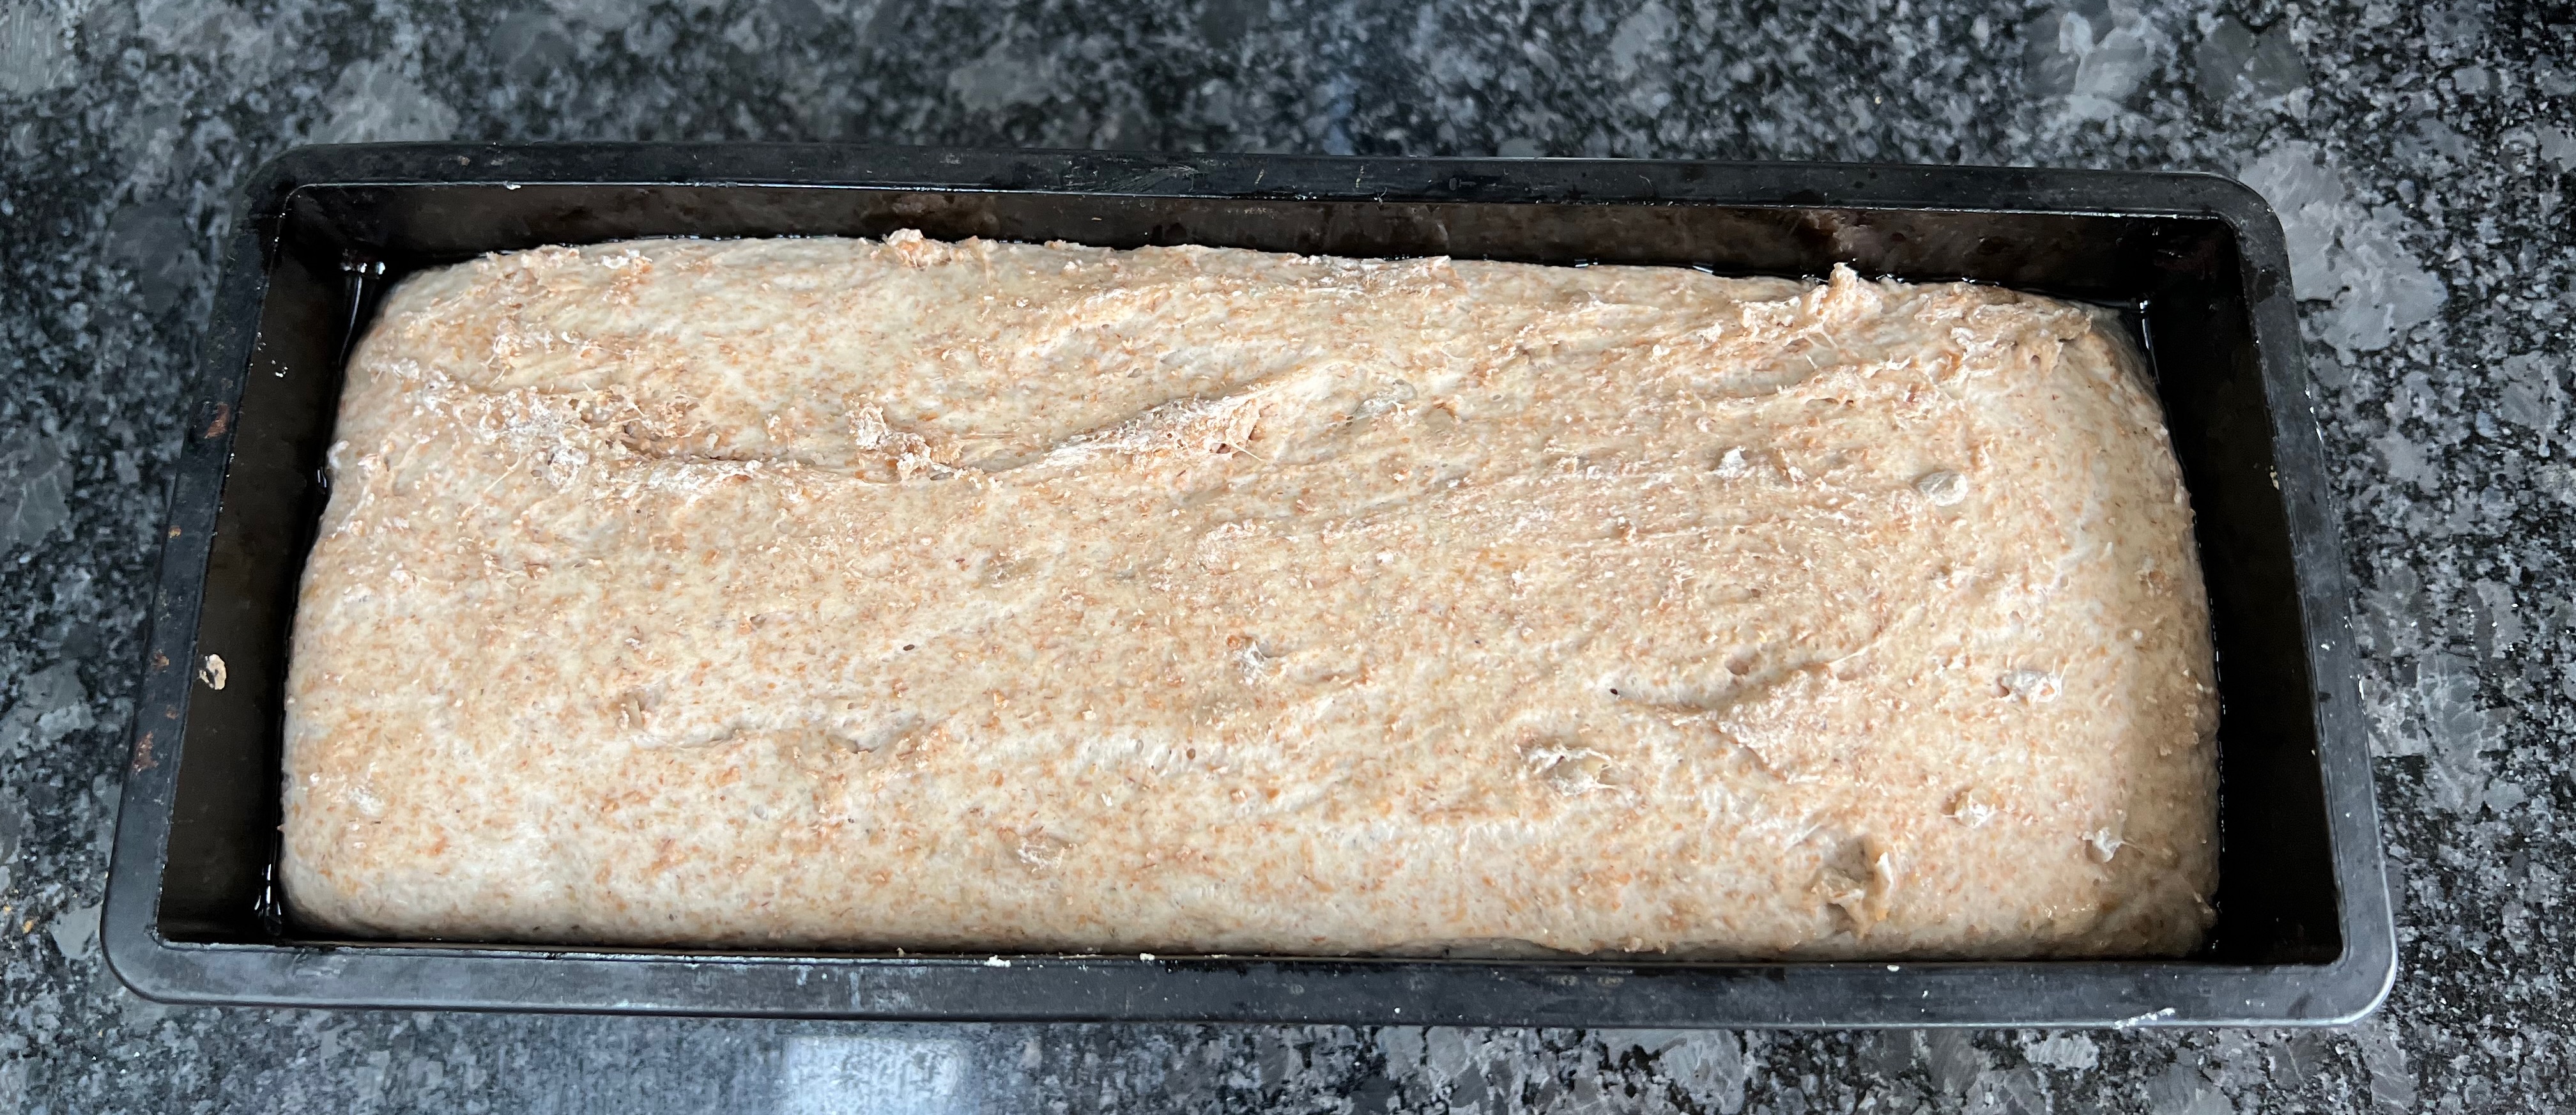
Preparing – tin version
Brush oil over the bottom and sides of your bread tin.
Transfer the dough into the bread tin, push it out to the sides and shape it into a loaf.
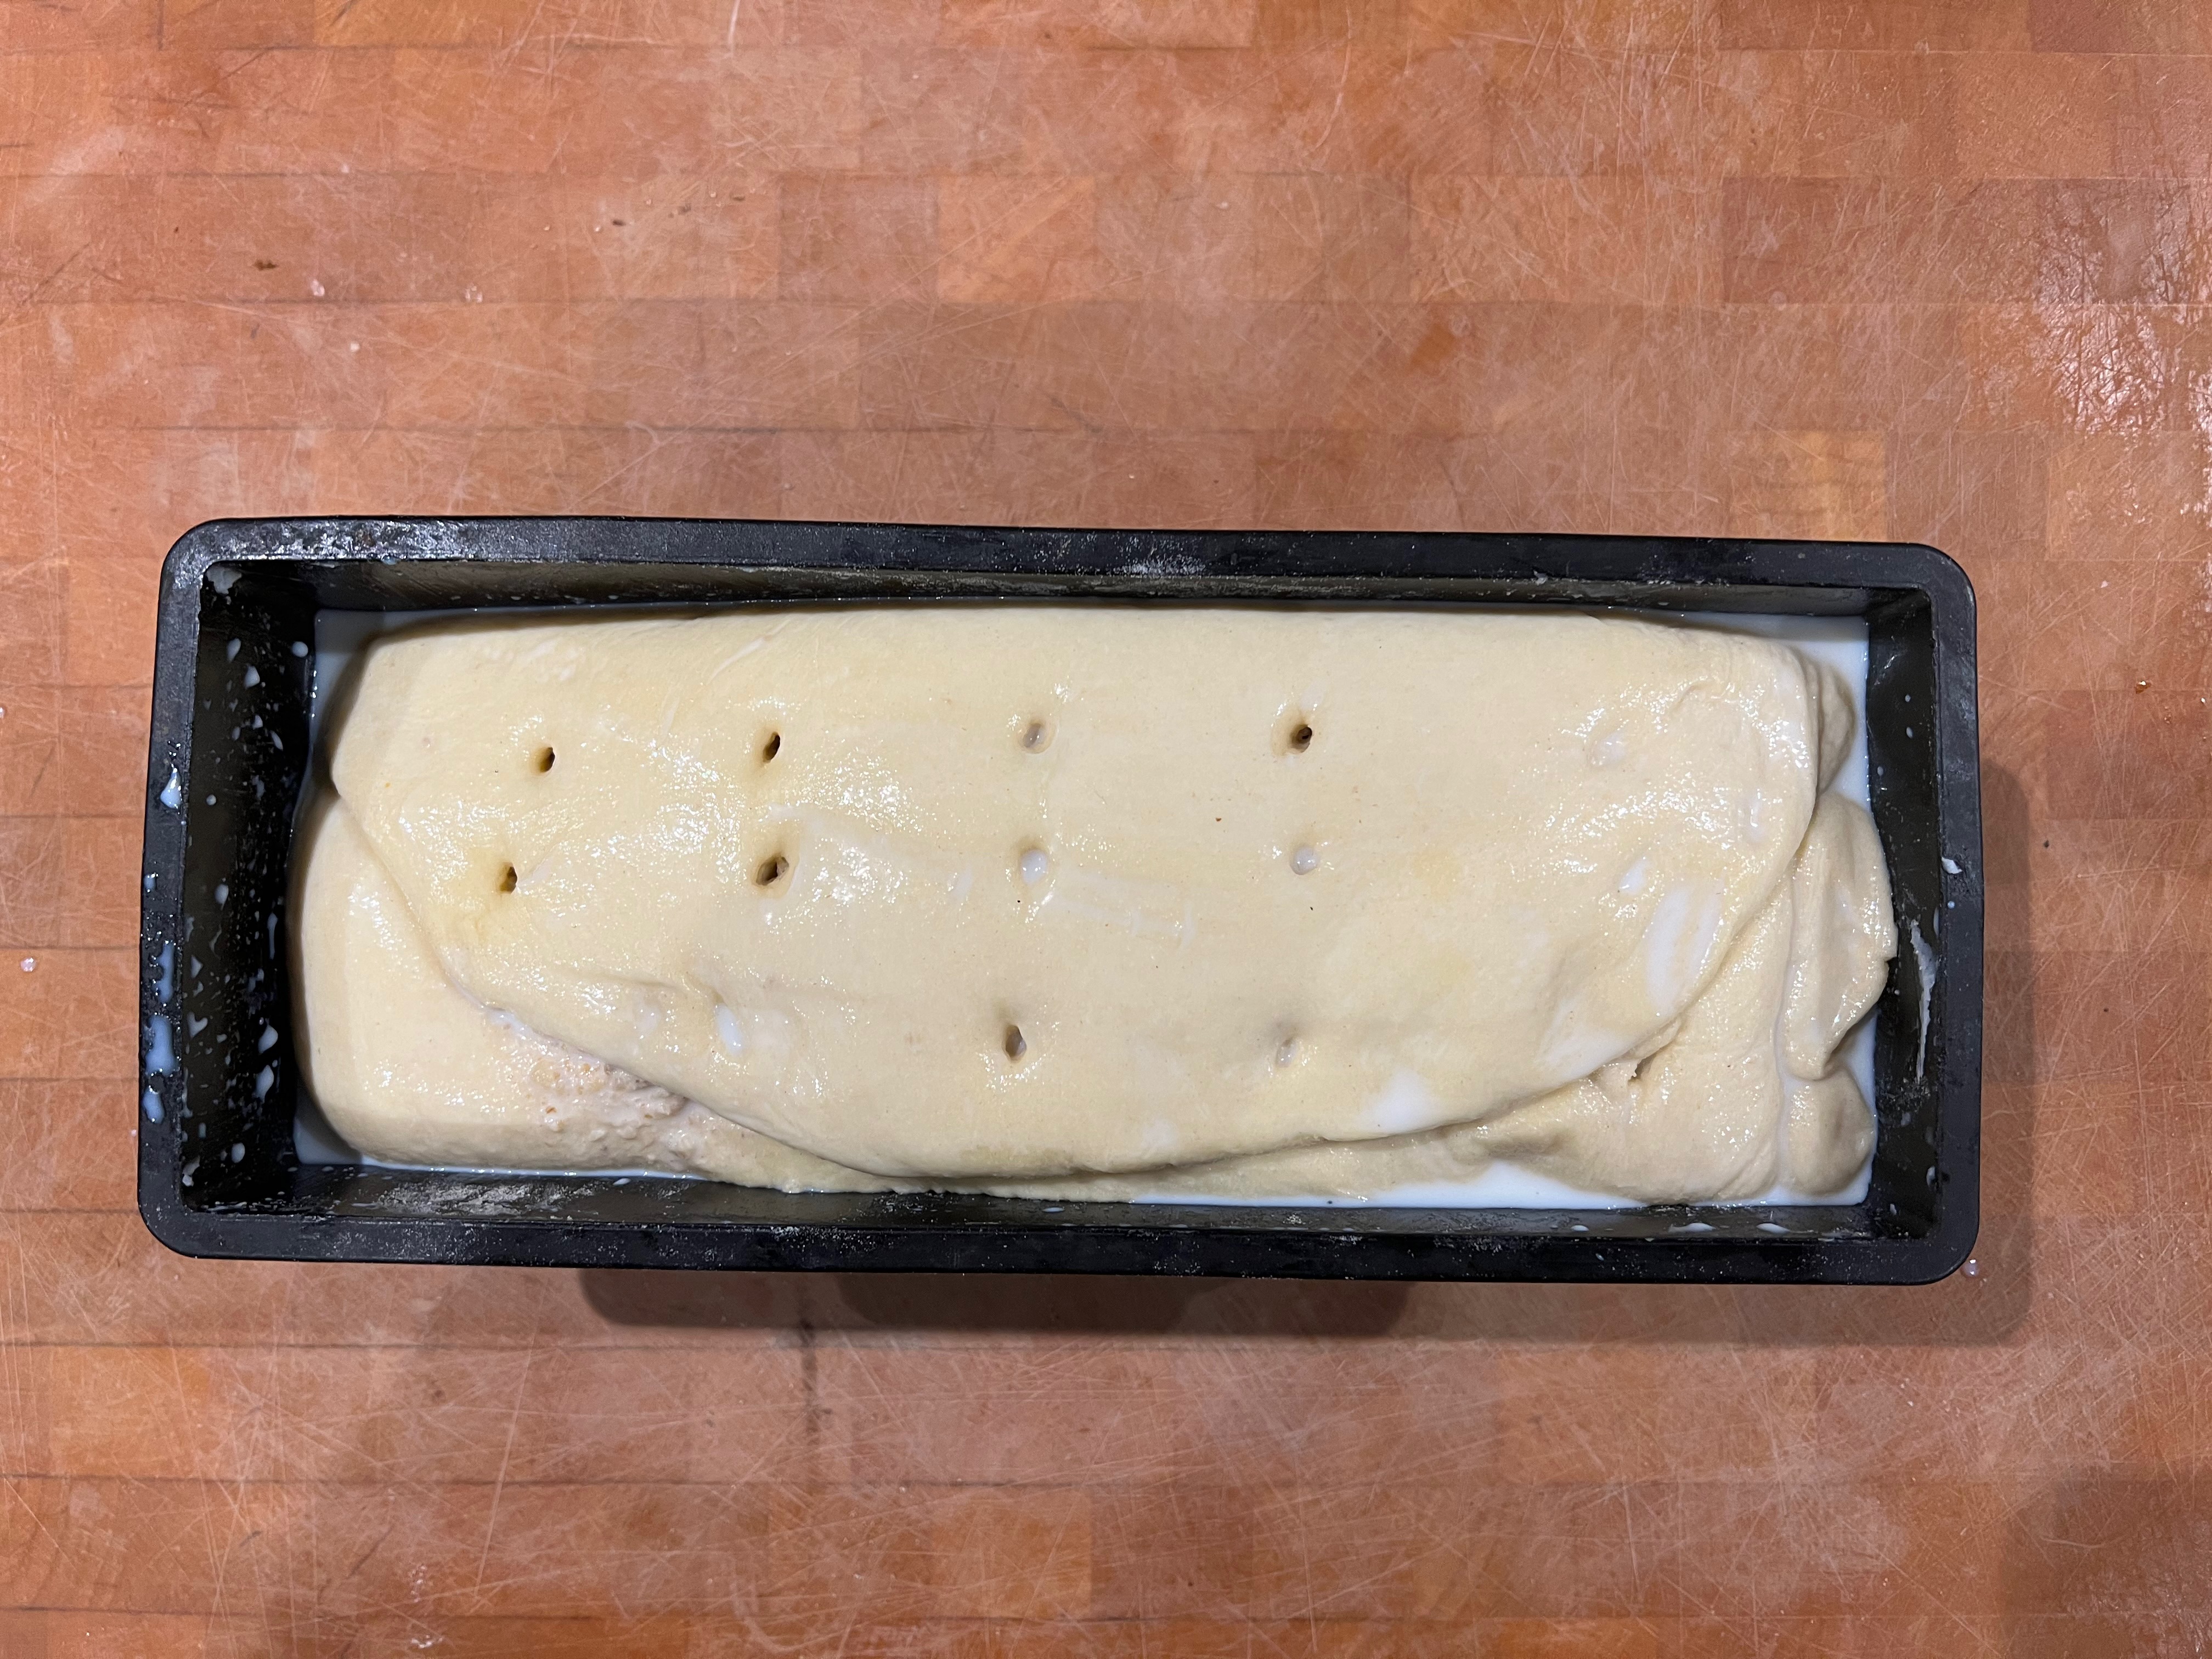
Cover the tin with its lid or cling film (or non-single-use alternative) and leave the loaf to rise until it reaches the level of the tin.
For baking, I’ve assumed here that you have a casserole or covered roasting pan big enough to enclose your bread tin and be used as a Dutch oven. If you don’t, forget anything about making steam and simply cover your bread tin with its lid (if it has one) or with foil.
Before riseAfter rise
Preparing – free standing version
Cover the bowl with cling film (or non-single-use alternative) and leave for several hours until approximately doubled in size.
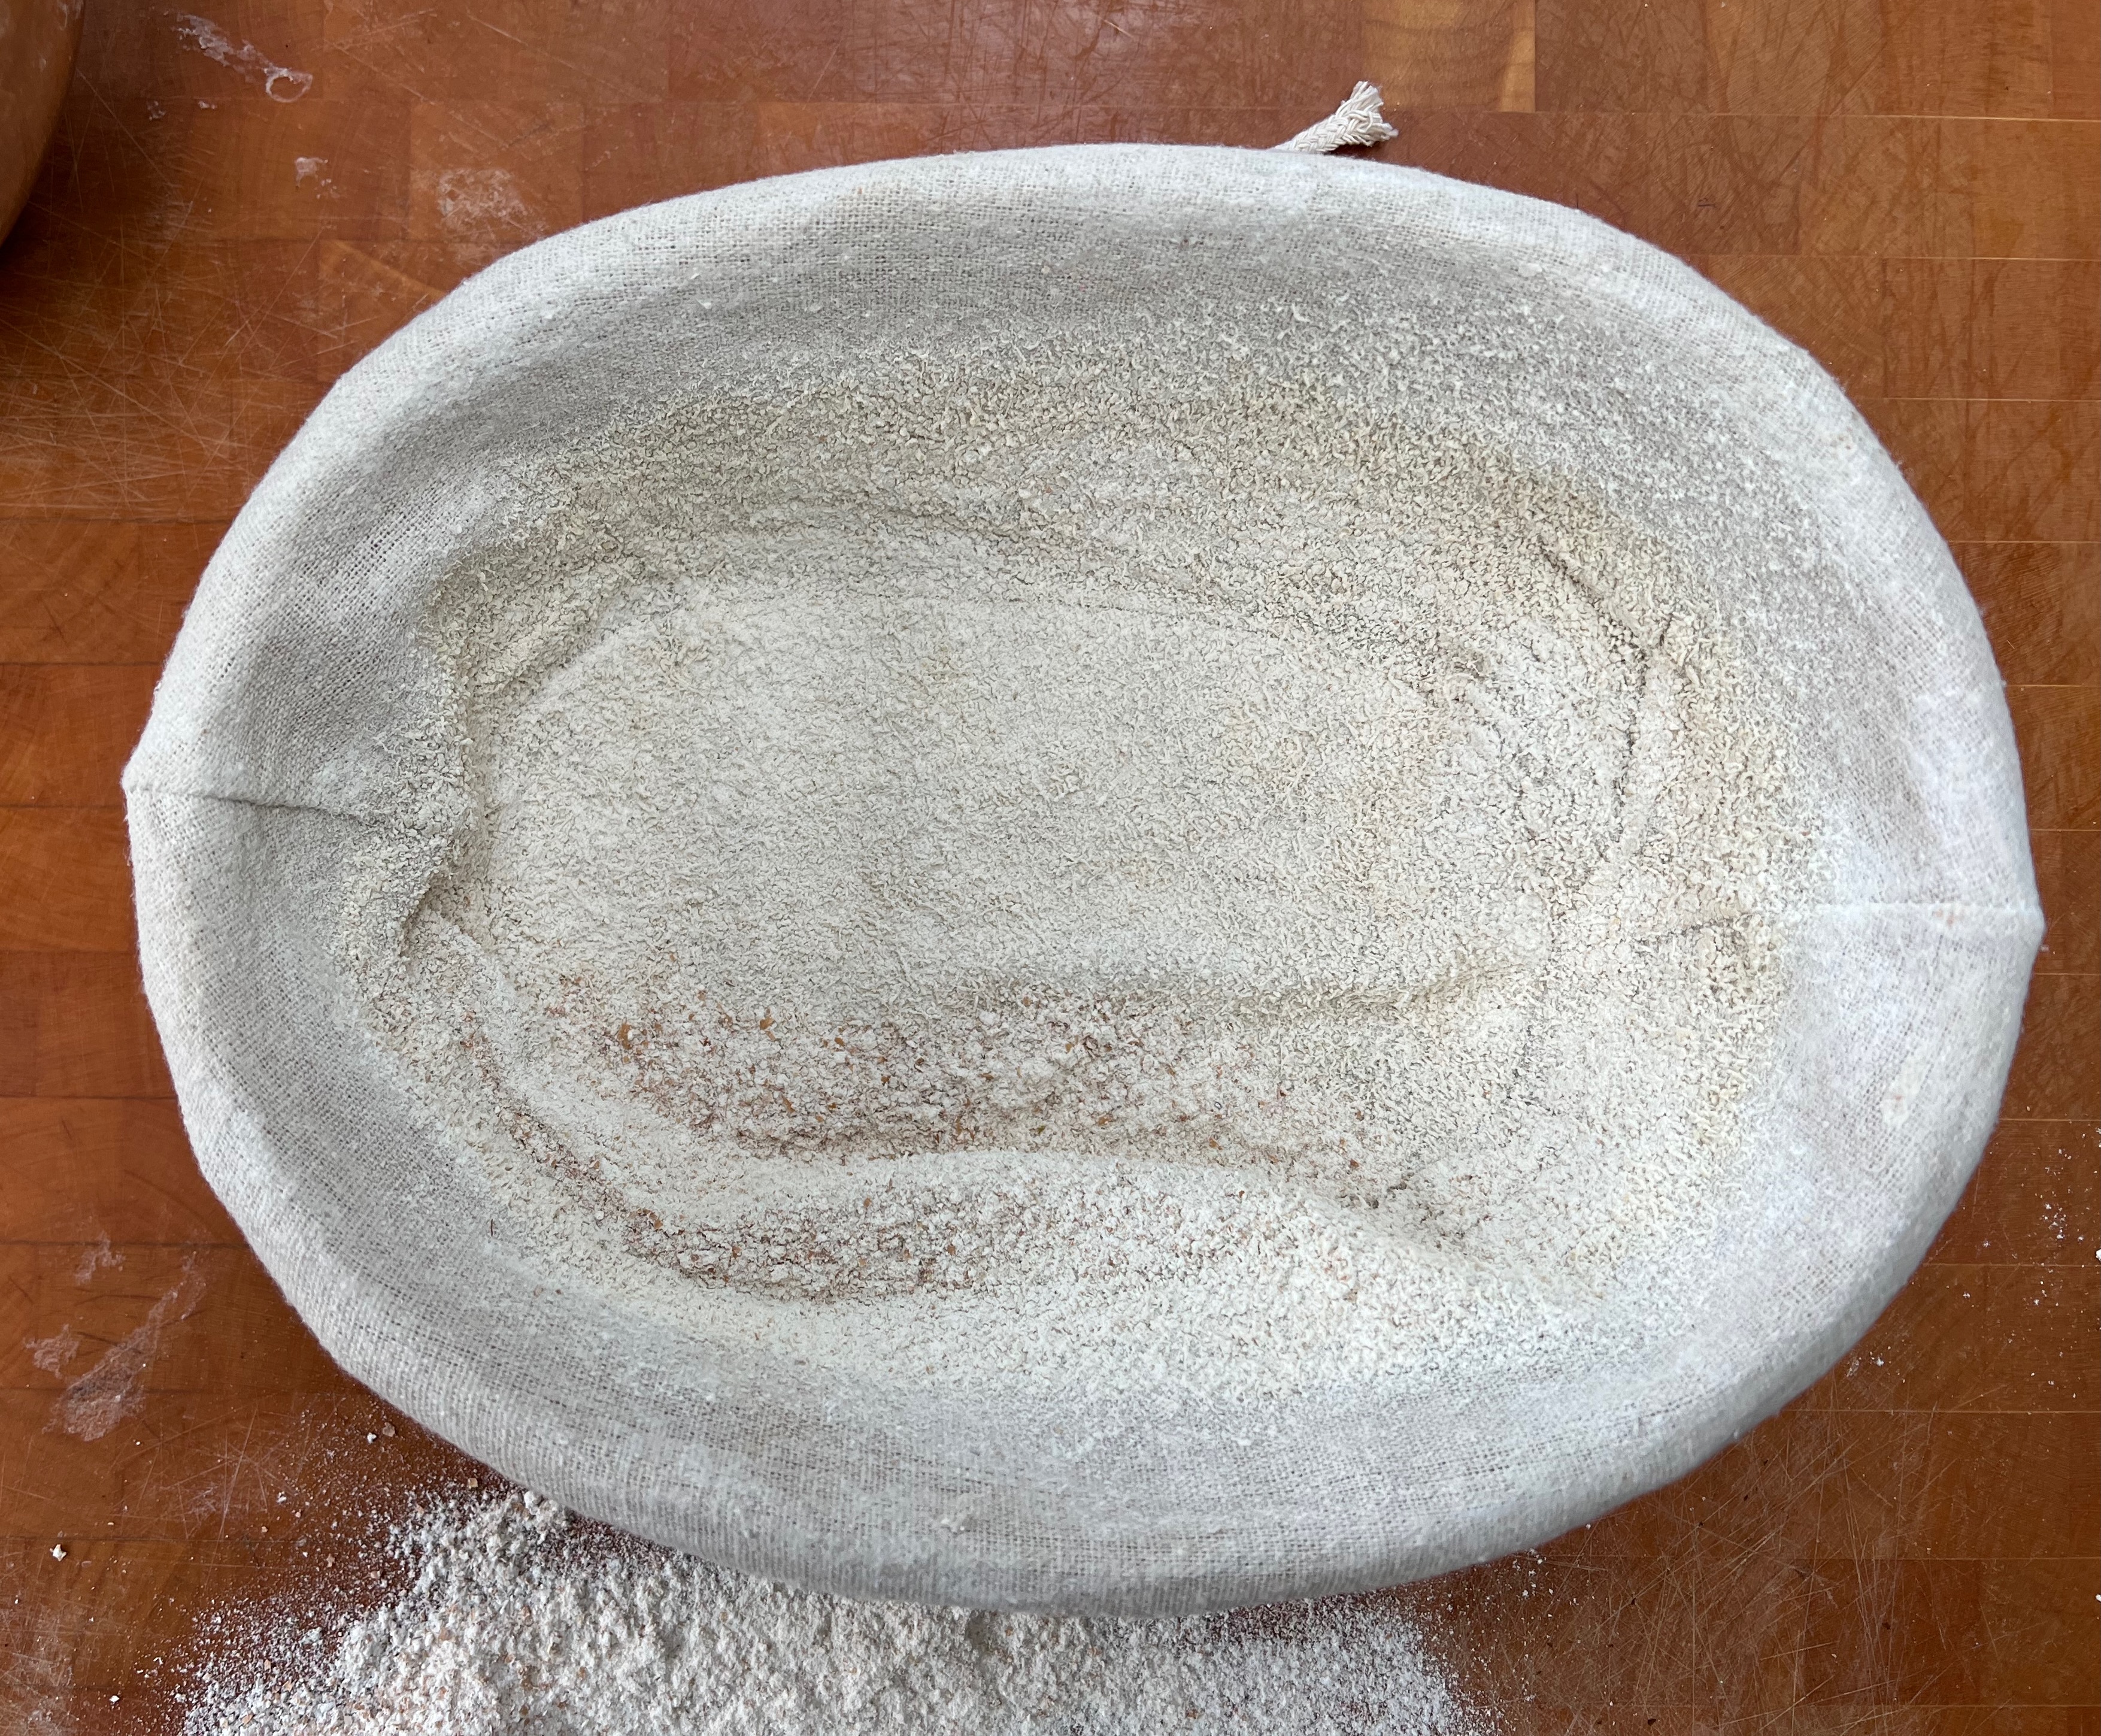
Pour some flour (I use the spelt flour, but it doesn’t really matter) into the bottom of your linen-lined proving basket and shake it out over a board. Put some more flour onto the board.
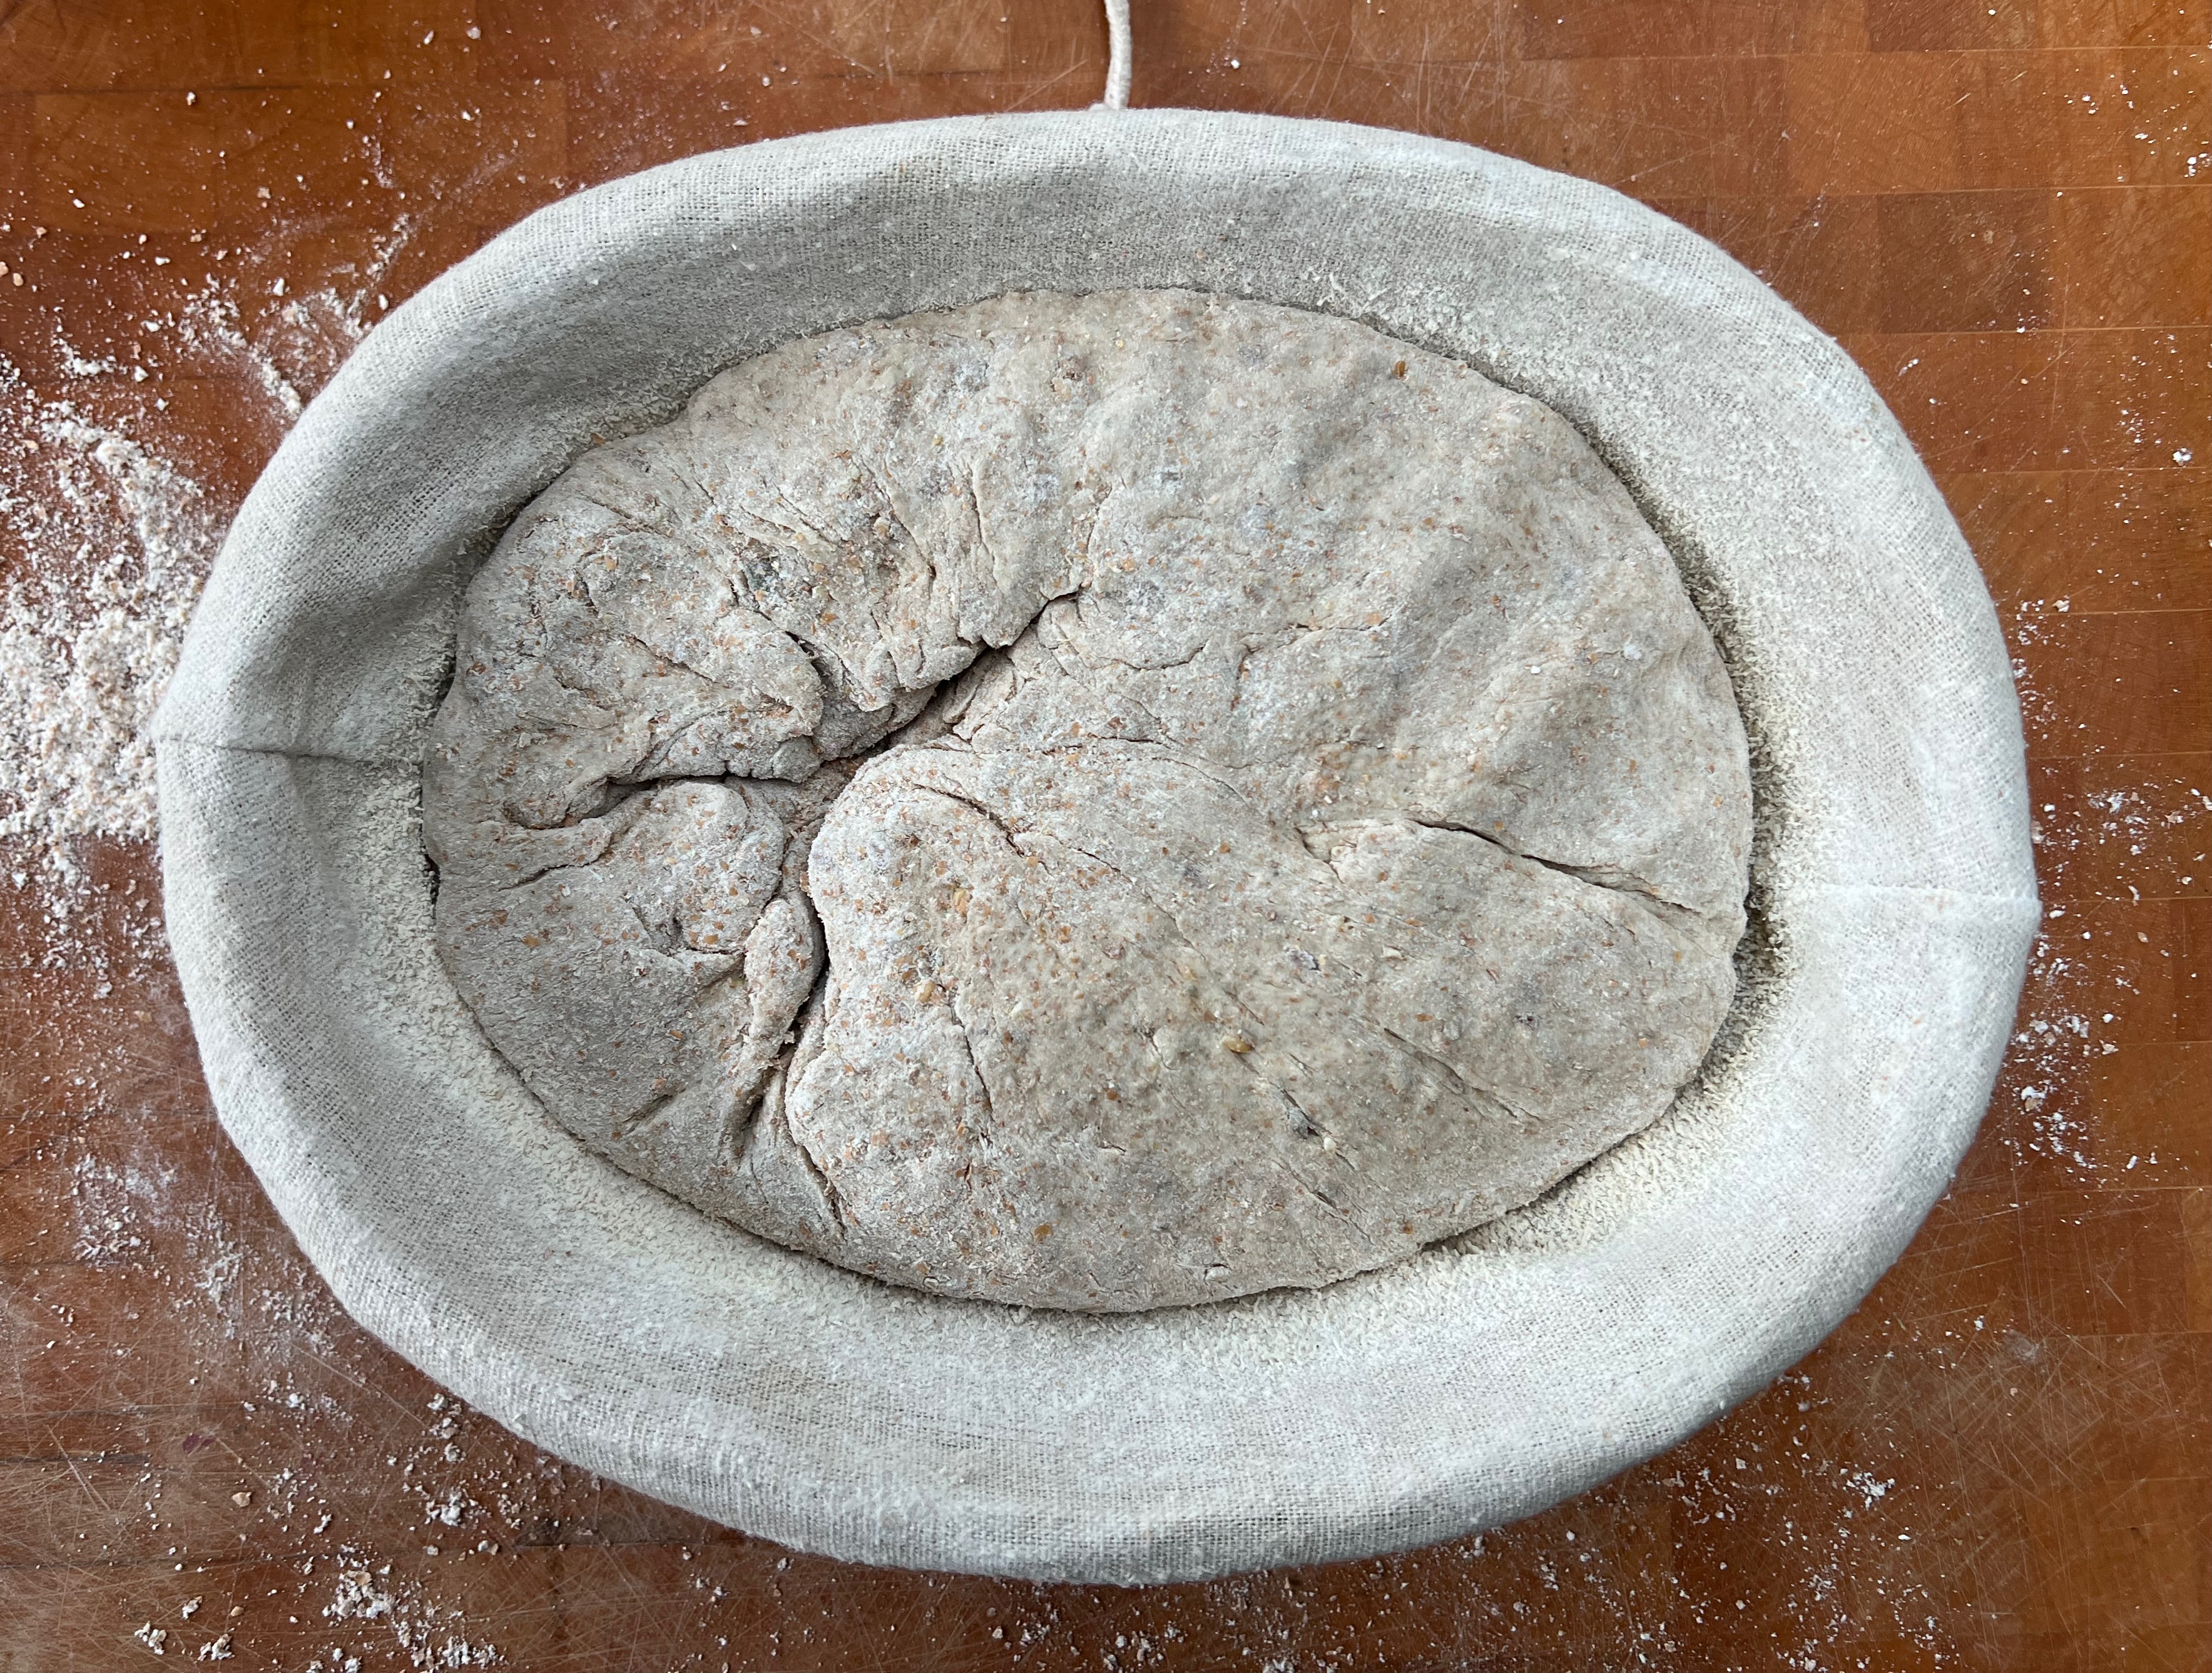
Transfer the dough from the mixer bowl onto the board. Flour your hands and work the dough into a loaf shape: you’ll probably need a metal scraper to scrape some of the dough off the board when it sticks.
Repeatedly stretch the top of your loaf, tucking the dough under. This will help get a well formed crust. You’re trying to end up with the smallest possible “key” – the gap at the bottom where all the folds have come together.
Put the loaf into your basket, smooth side down and cover with a tea towel. Leave to rise until it is close to the top of the basket.
Baking
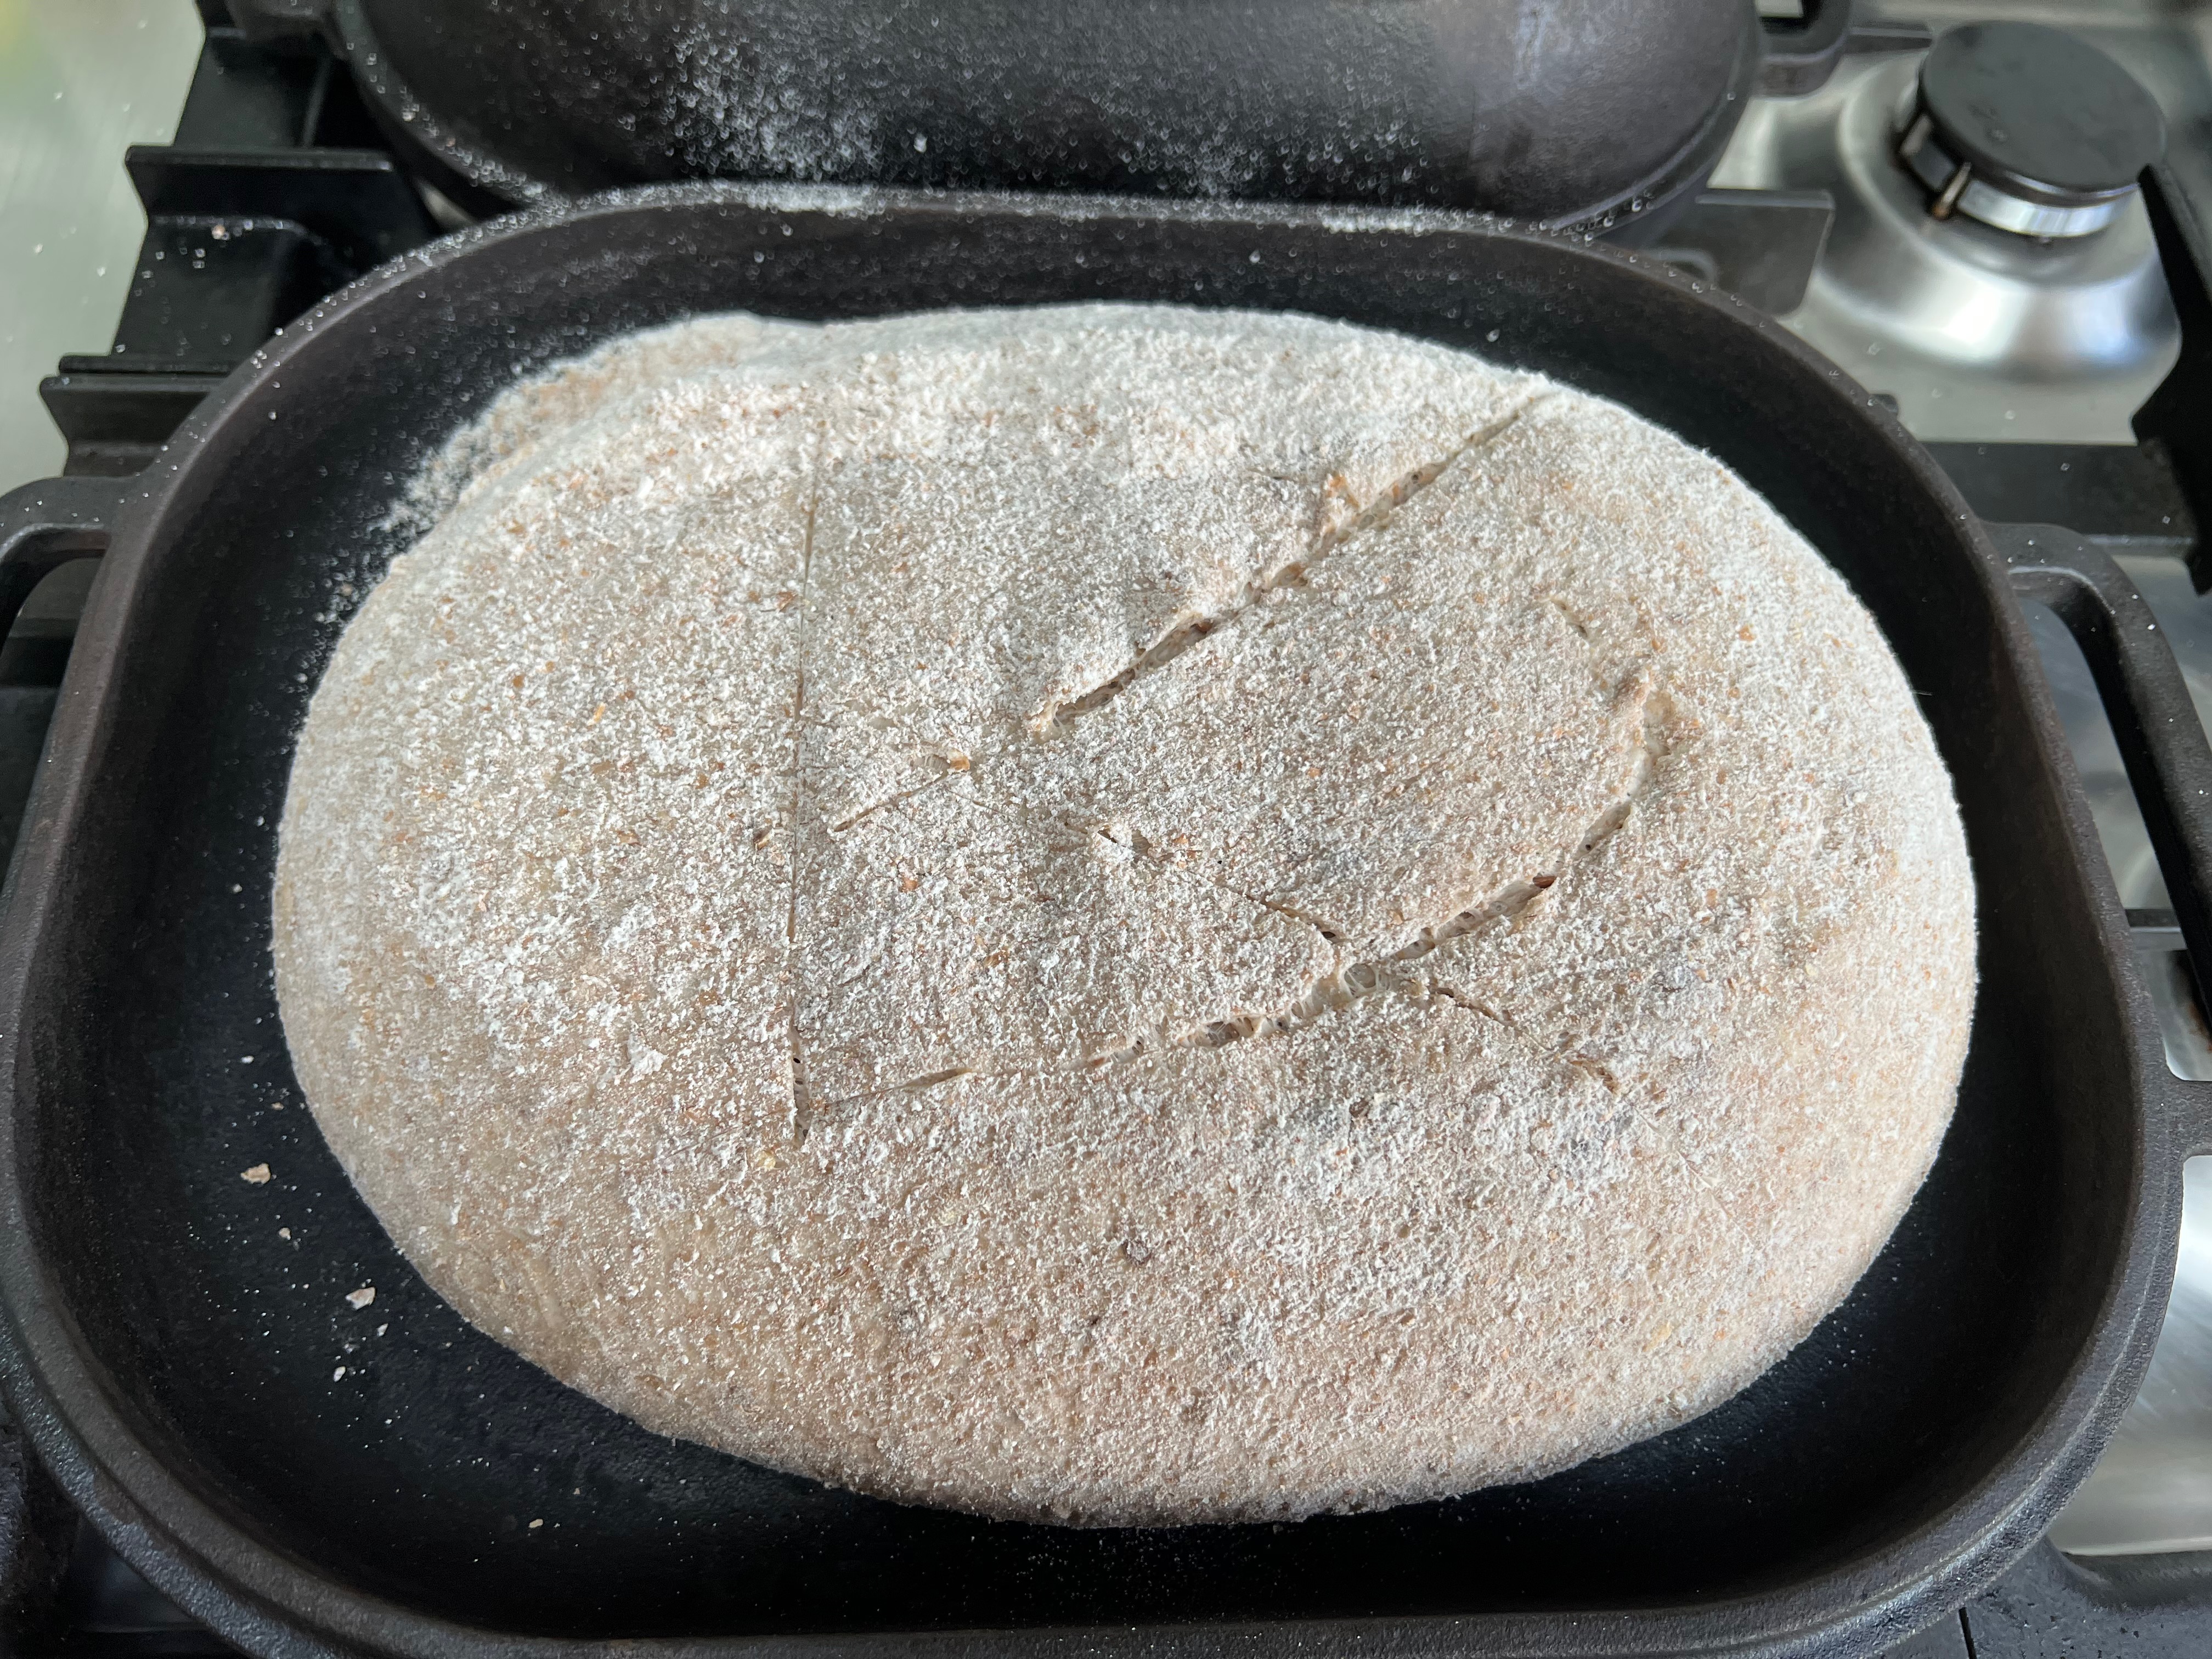
Half an hour or so before the loaf has risen, start to preheat your oven on the fan setting if there is one, with your Dutch oven in it if you’re using one. You want it to reach 250℃ by the time you start baking.
Score a few gashes into your loaf, in whatever pattern you like (I use two or three crossways gashes when using a tin, or I do a kind of signature for the free standing loaf, along the lines of the stylised “P” that Poilâne use).
Now work quickly: remove the tea towel (or cover of your tin), open the oven, remove the cover of your Dutch oven (if you’re using one), place your loaf in it, throw a few ice cubes around the side of your loaf (if using a tin, you can just use water) and cover. Close the oven and reduce the temperature to 225℃.
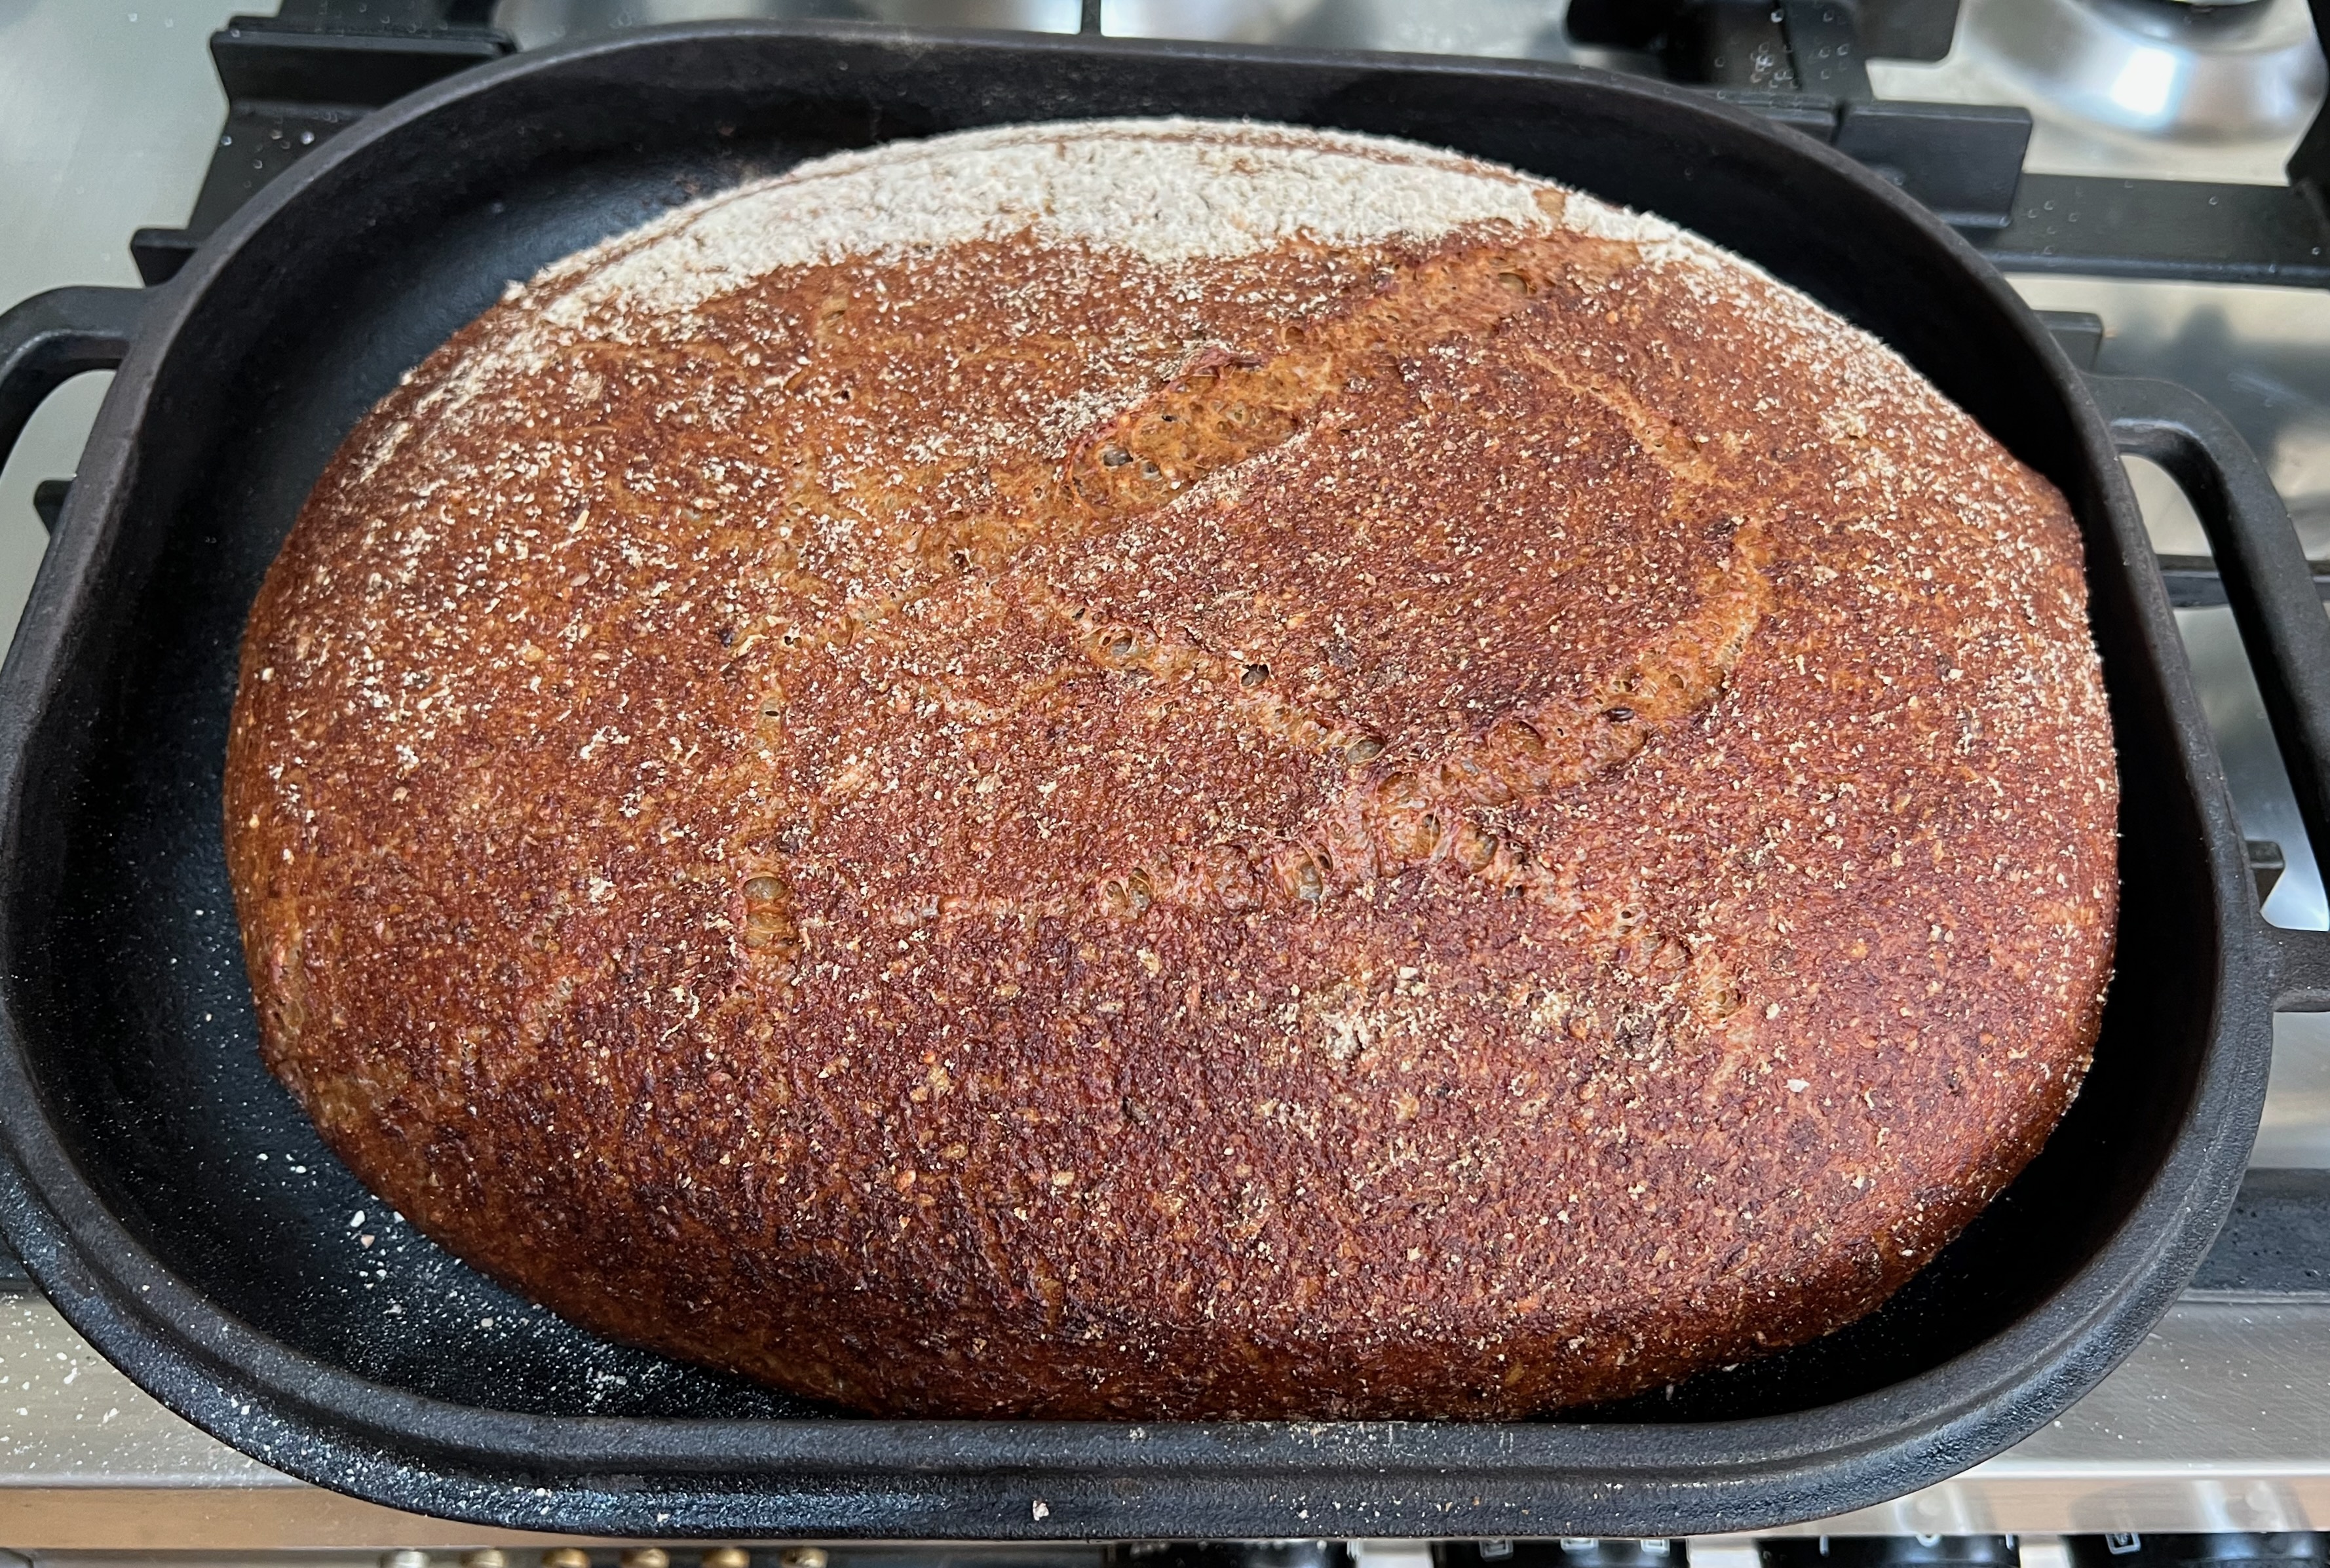
After 30 minutes, open the oven door, uncover your loaf and close the oven door again. Continue baking for around 20 minutes. By the end of this, the top of your loaf should be medium-to-deep brown and the internal temperature should be around 98℃.
Leave to cool on a rack for at least an hour before cutting and eating.
Half an hour or so before the loaf has risen, start to preheat your oven on the fan setting if there is one, with your Dutch oven in it if you’re using one. You want it to reach 250℃ by the time you start baking.
Score a few gashes into your loaf, in whatever pattern you like (I use two or three crossways gashes when using a tin, or I do a kind of signature for the free standing loaf, along the lines of the stylised “P” that Poilâne use).
Now work quickly: remove the tea towel (or cover of your tin), open the oven, remove the cover of your Dutch oven (if you’re using one), place your loaf in it, throw a few ice cubes around the side of your loaf (if using a tin, you can just use water) and cover. Close the oven and reduce the temperature to 225℃.
After 30 minutes, open the oven door, uncover your loaf and close the oven door again. Continue baking for around 20 minutes. By the end of this, the top of your loaf should be medium-to-deep brown and the internal temperature should be around 98℃.
Leave to cool on a rack for at least an hour before cutting and eating.
After 30 minutes bakeFinishedBefore going inShowing the closed Dutch oven
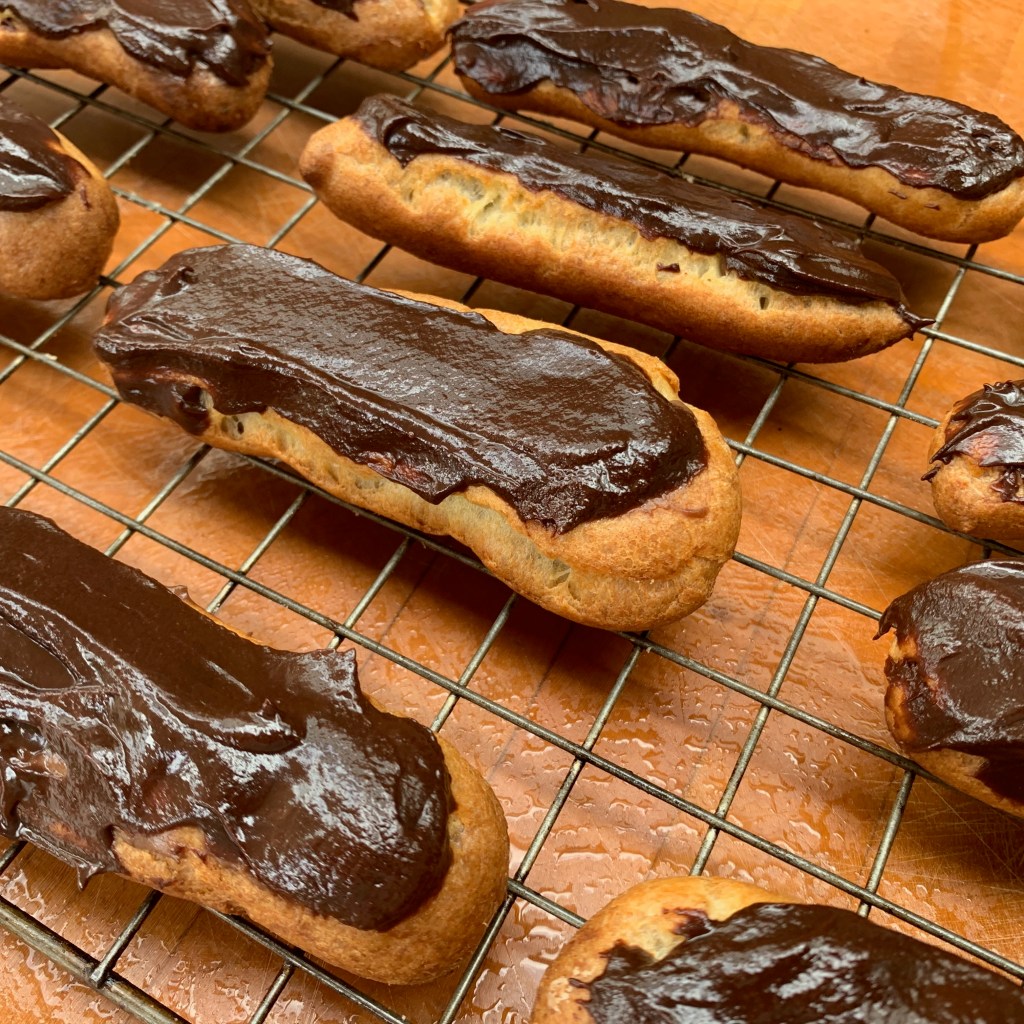
So that’s it! We’ve baked round the world, from the great cities of our planet – Paris, New York, Vienna – to the middle of nowhere in Pitcairn Island. We’ve made breads, cakes, biscuits, pastries, savoury dishes and a few random things that don’t fit into any category. We’ve done some super-easy bakes (soda bread) and some very challenging ones (chocolate eclairs, pannetone). Being diabetic, which means I shouldn’t really have been doing this blog at all, I’ve erred on the less sweet side, but there are a few very sweet dishes indeed. It’s been a grand ride and I’ve learned masses.
There will be one more post in this series, namely a recipe index. But otherwise, it’s goodbye, and time for me to revert this blog to its original intention of being about all my obsessions – travel, software, business, politics and anything else. If you’re interested, stay with me!
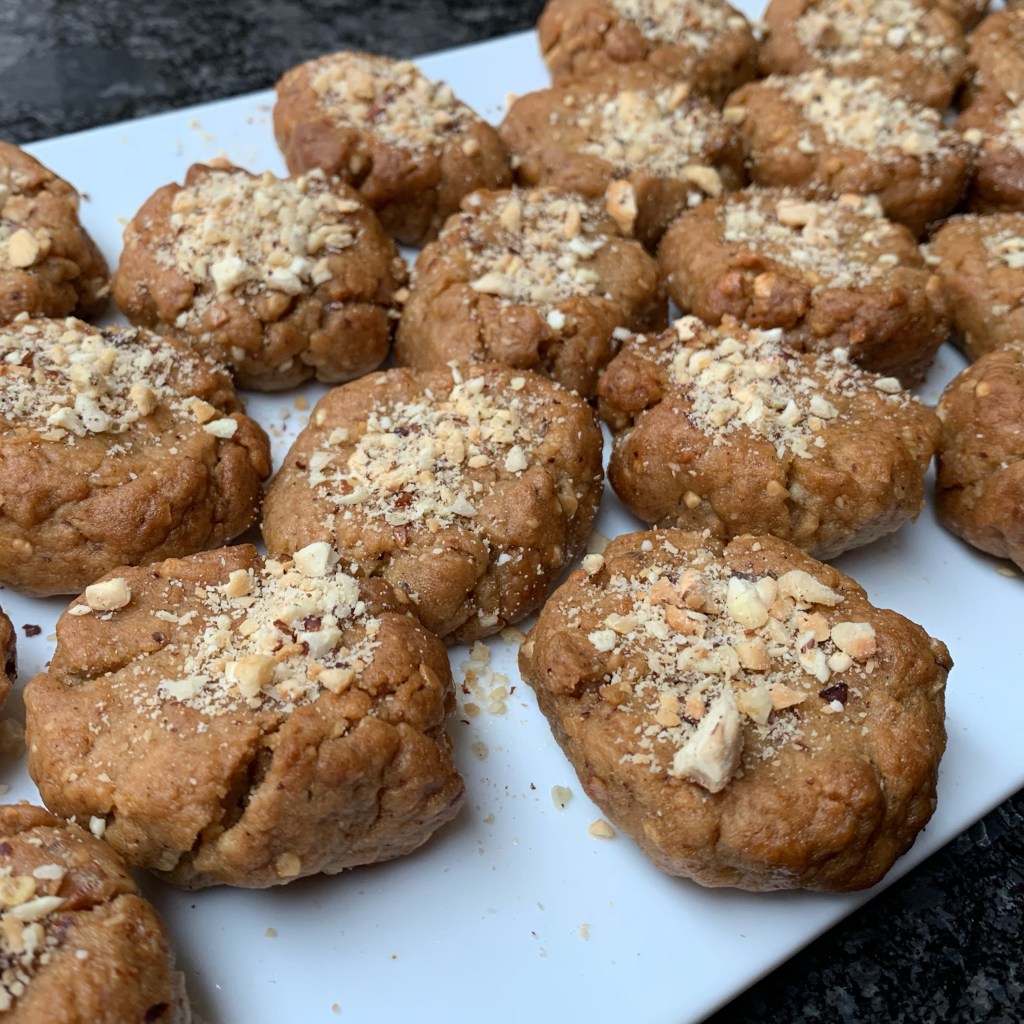
Austrians don’t necessarily like to think too hard about how close they became to being a Turkish province and quite how much they have to thank the Poles that this didn’t happen. In 1683, the Turks neared the city gates, to be defeated in the Battle of Vienna when the forces of the Holy Roman Empire were joined by the Polish army of King John III Sobieski.
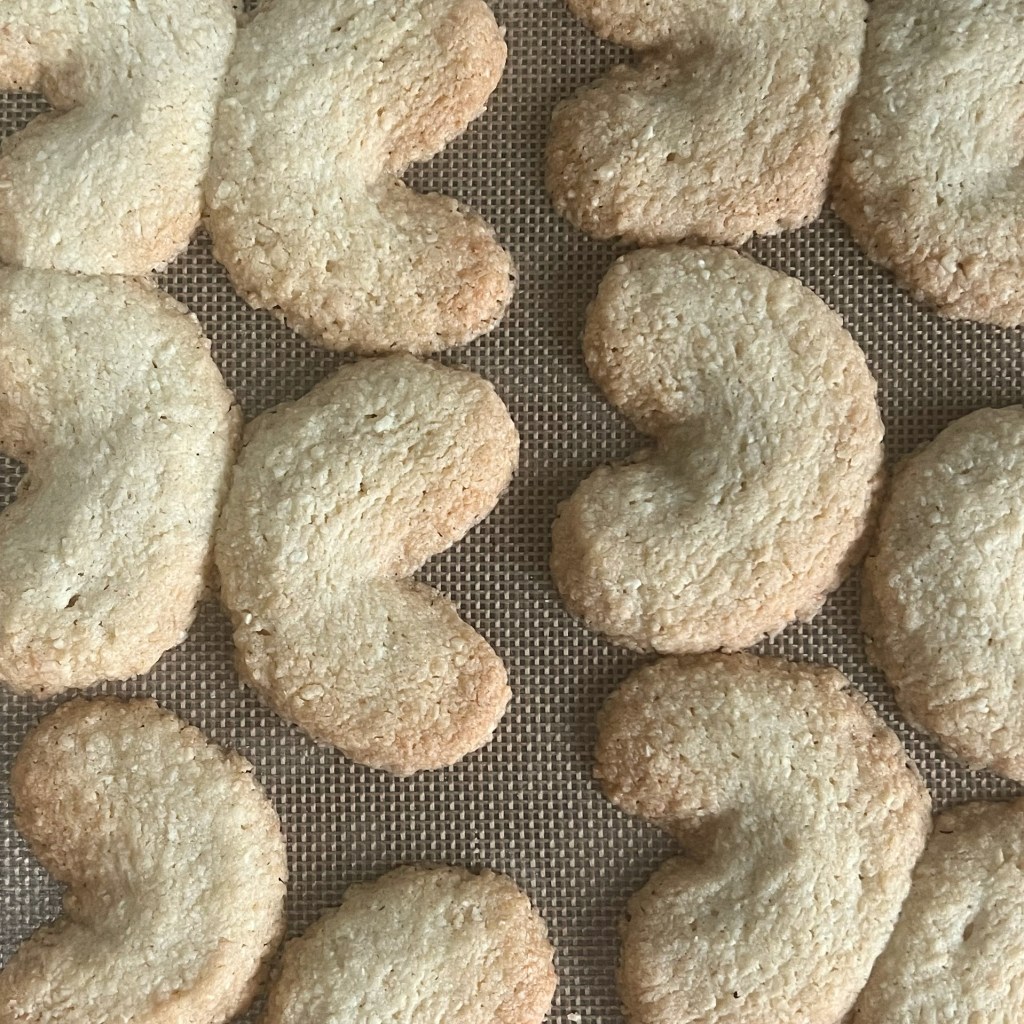
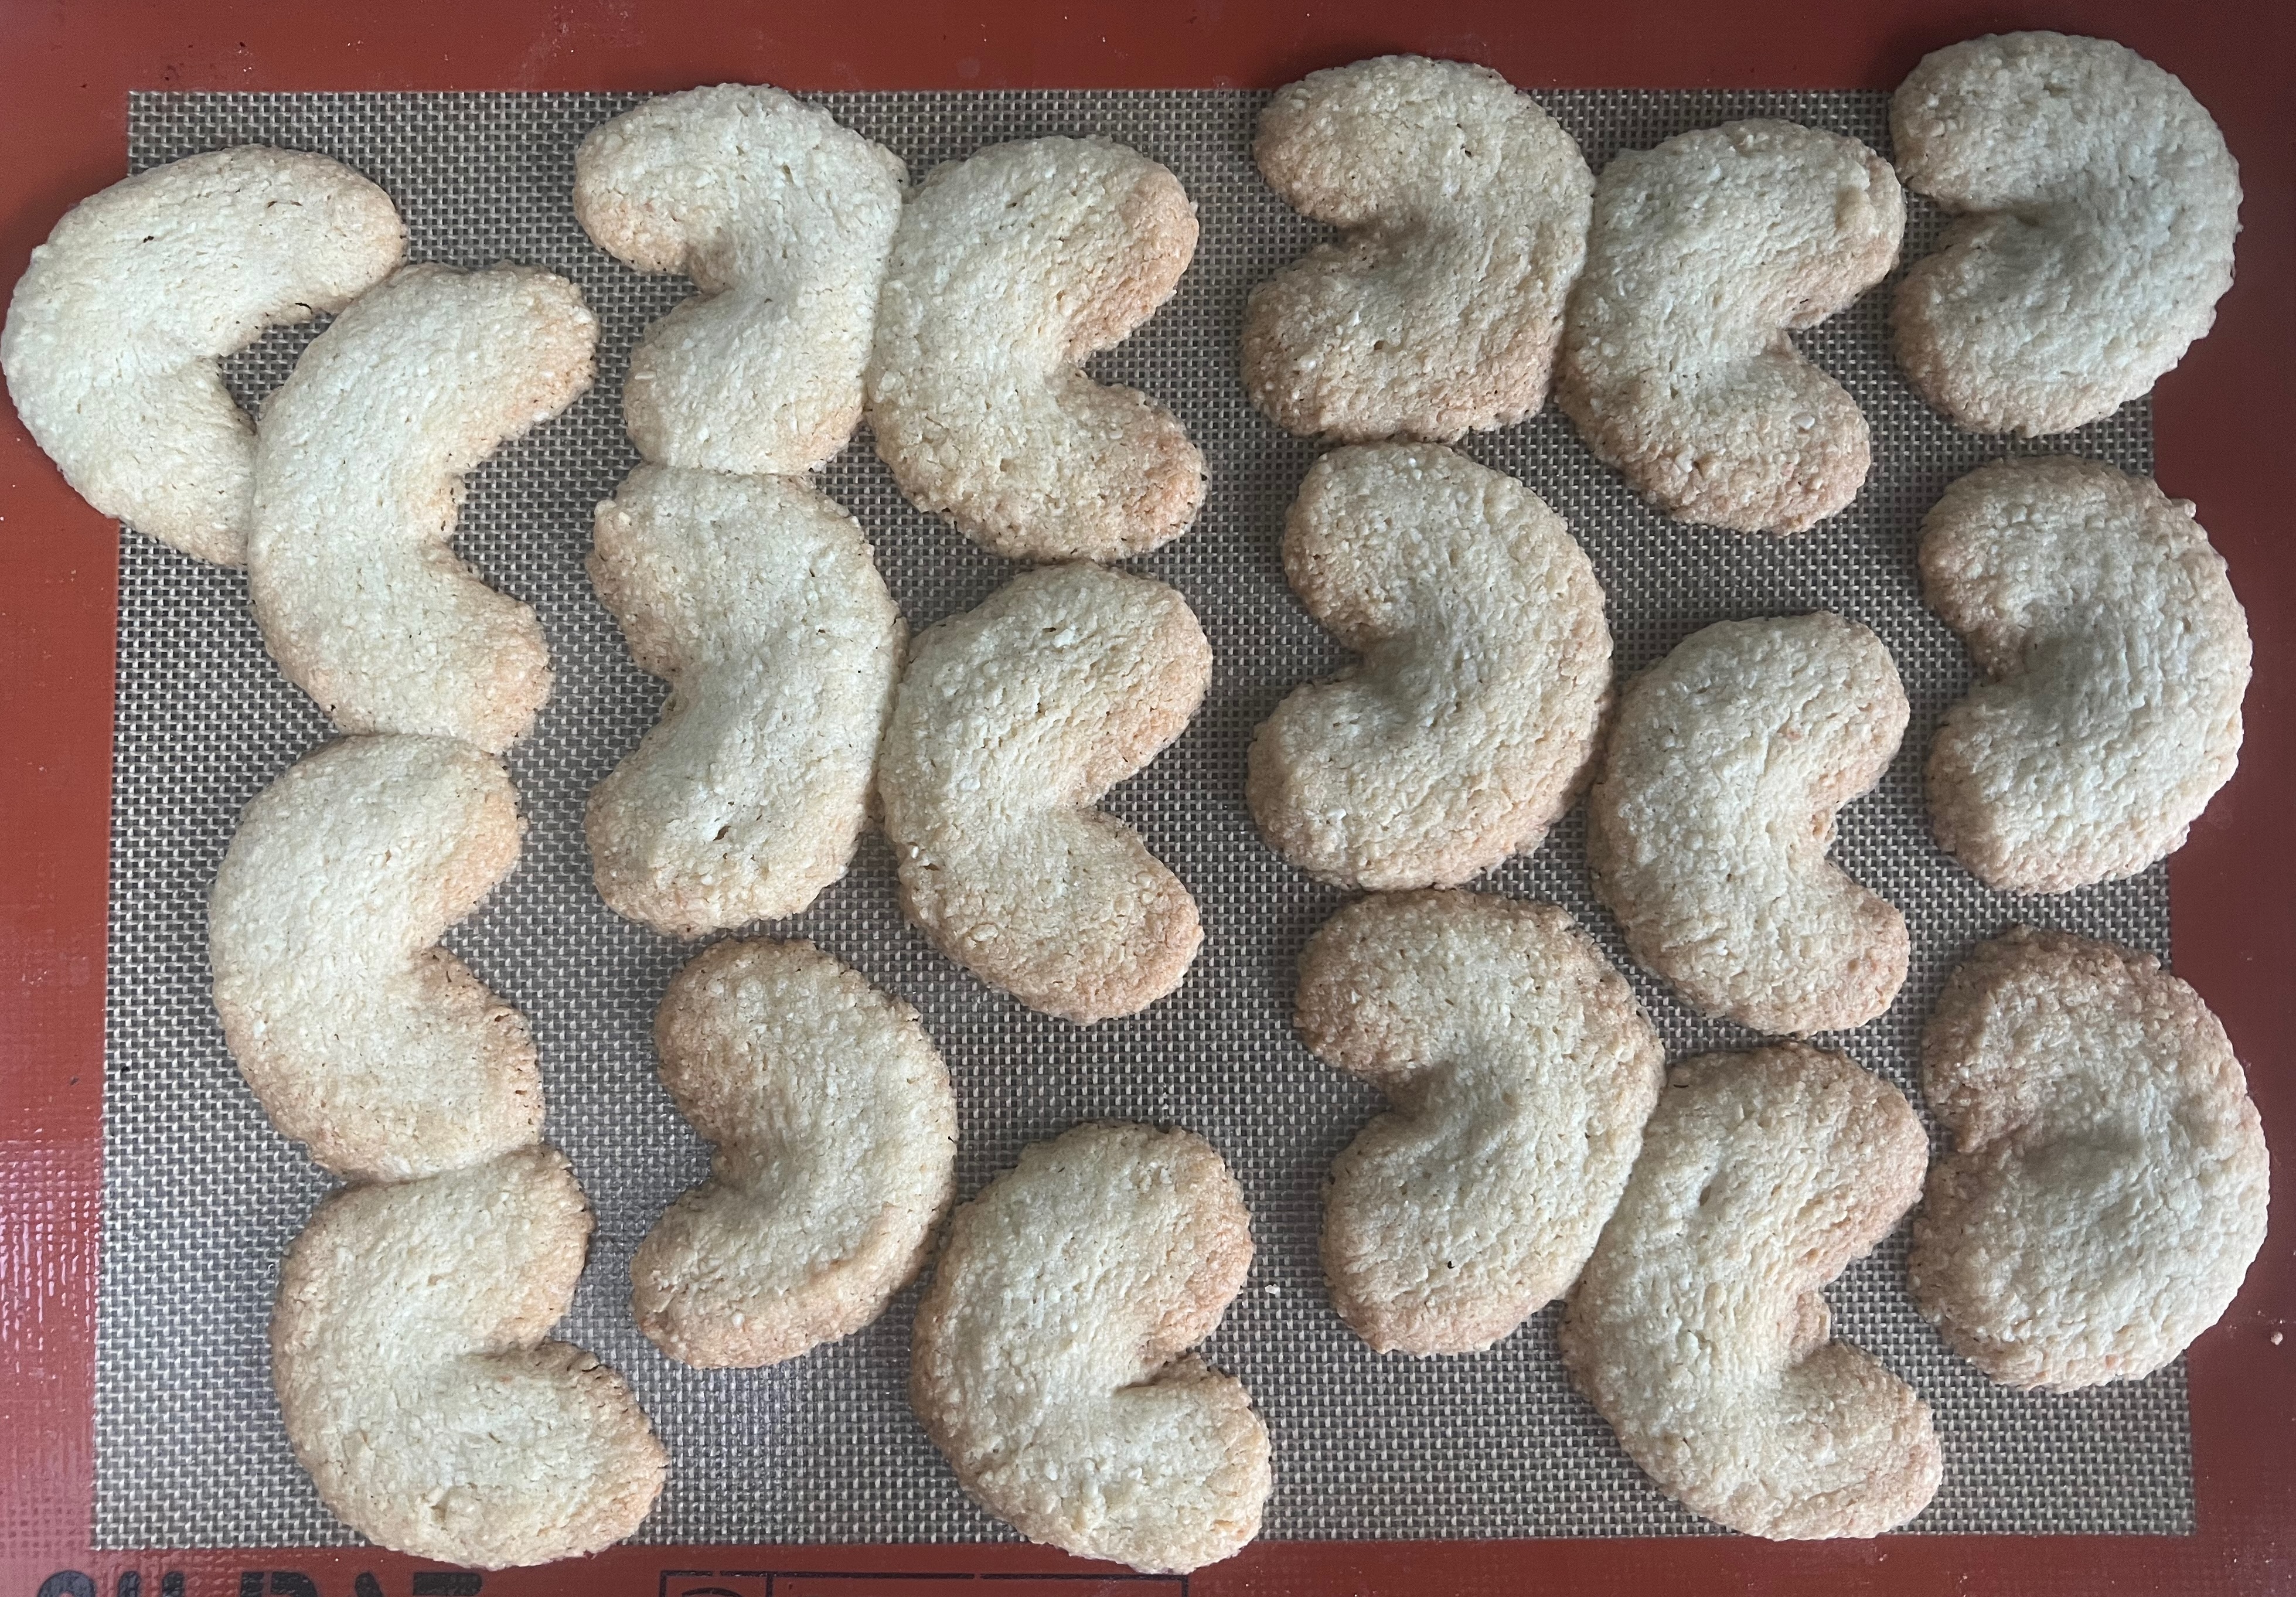
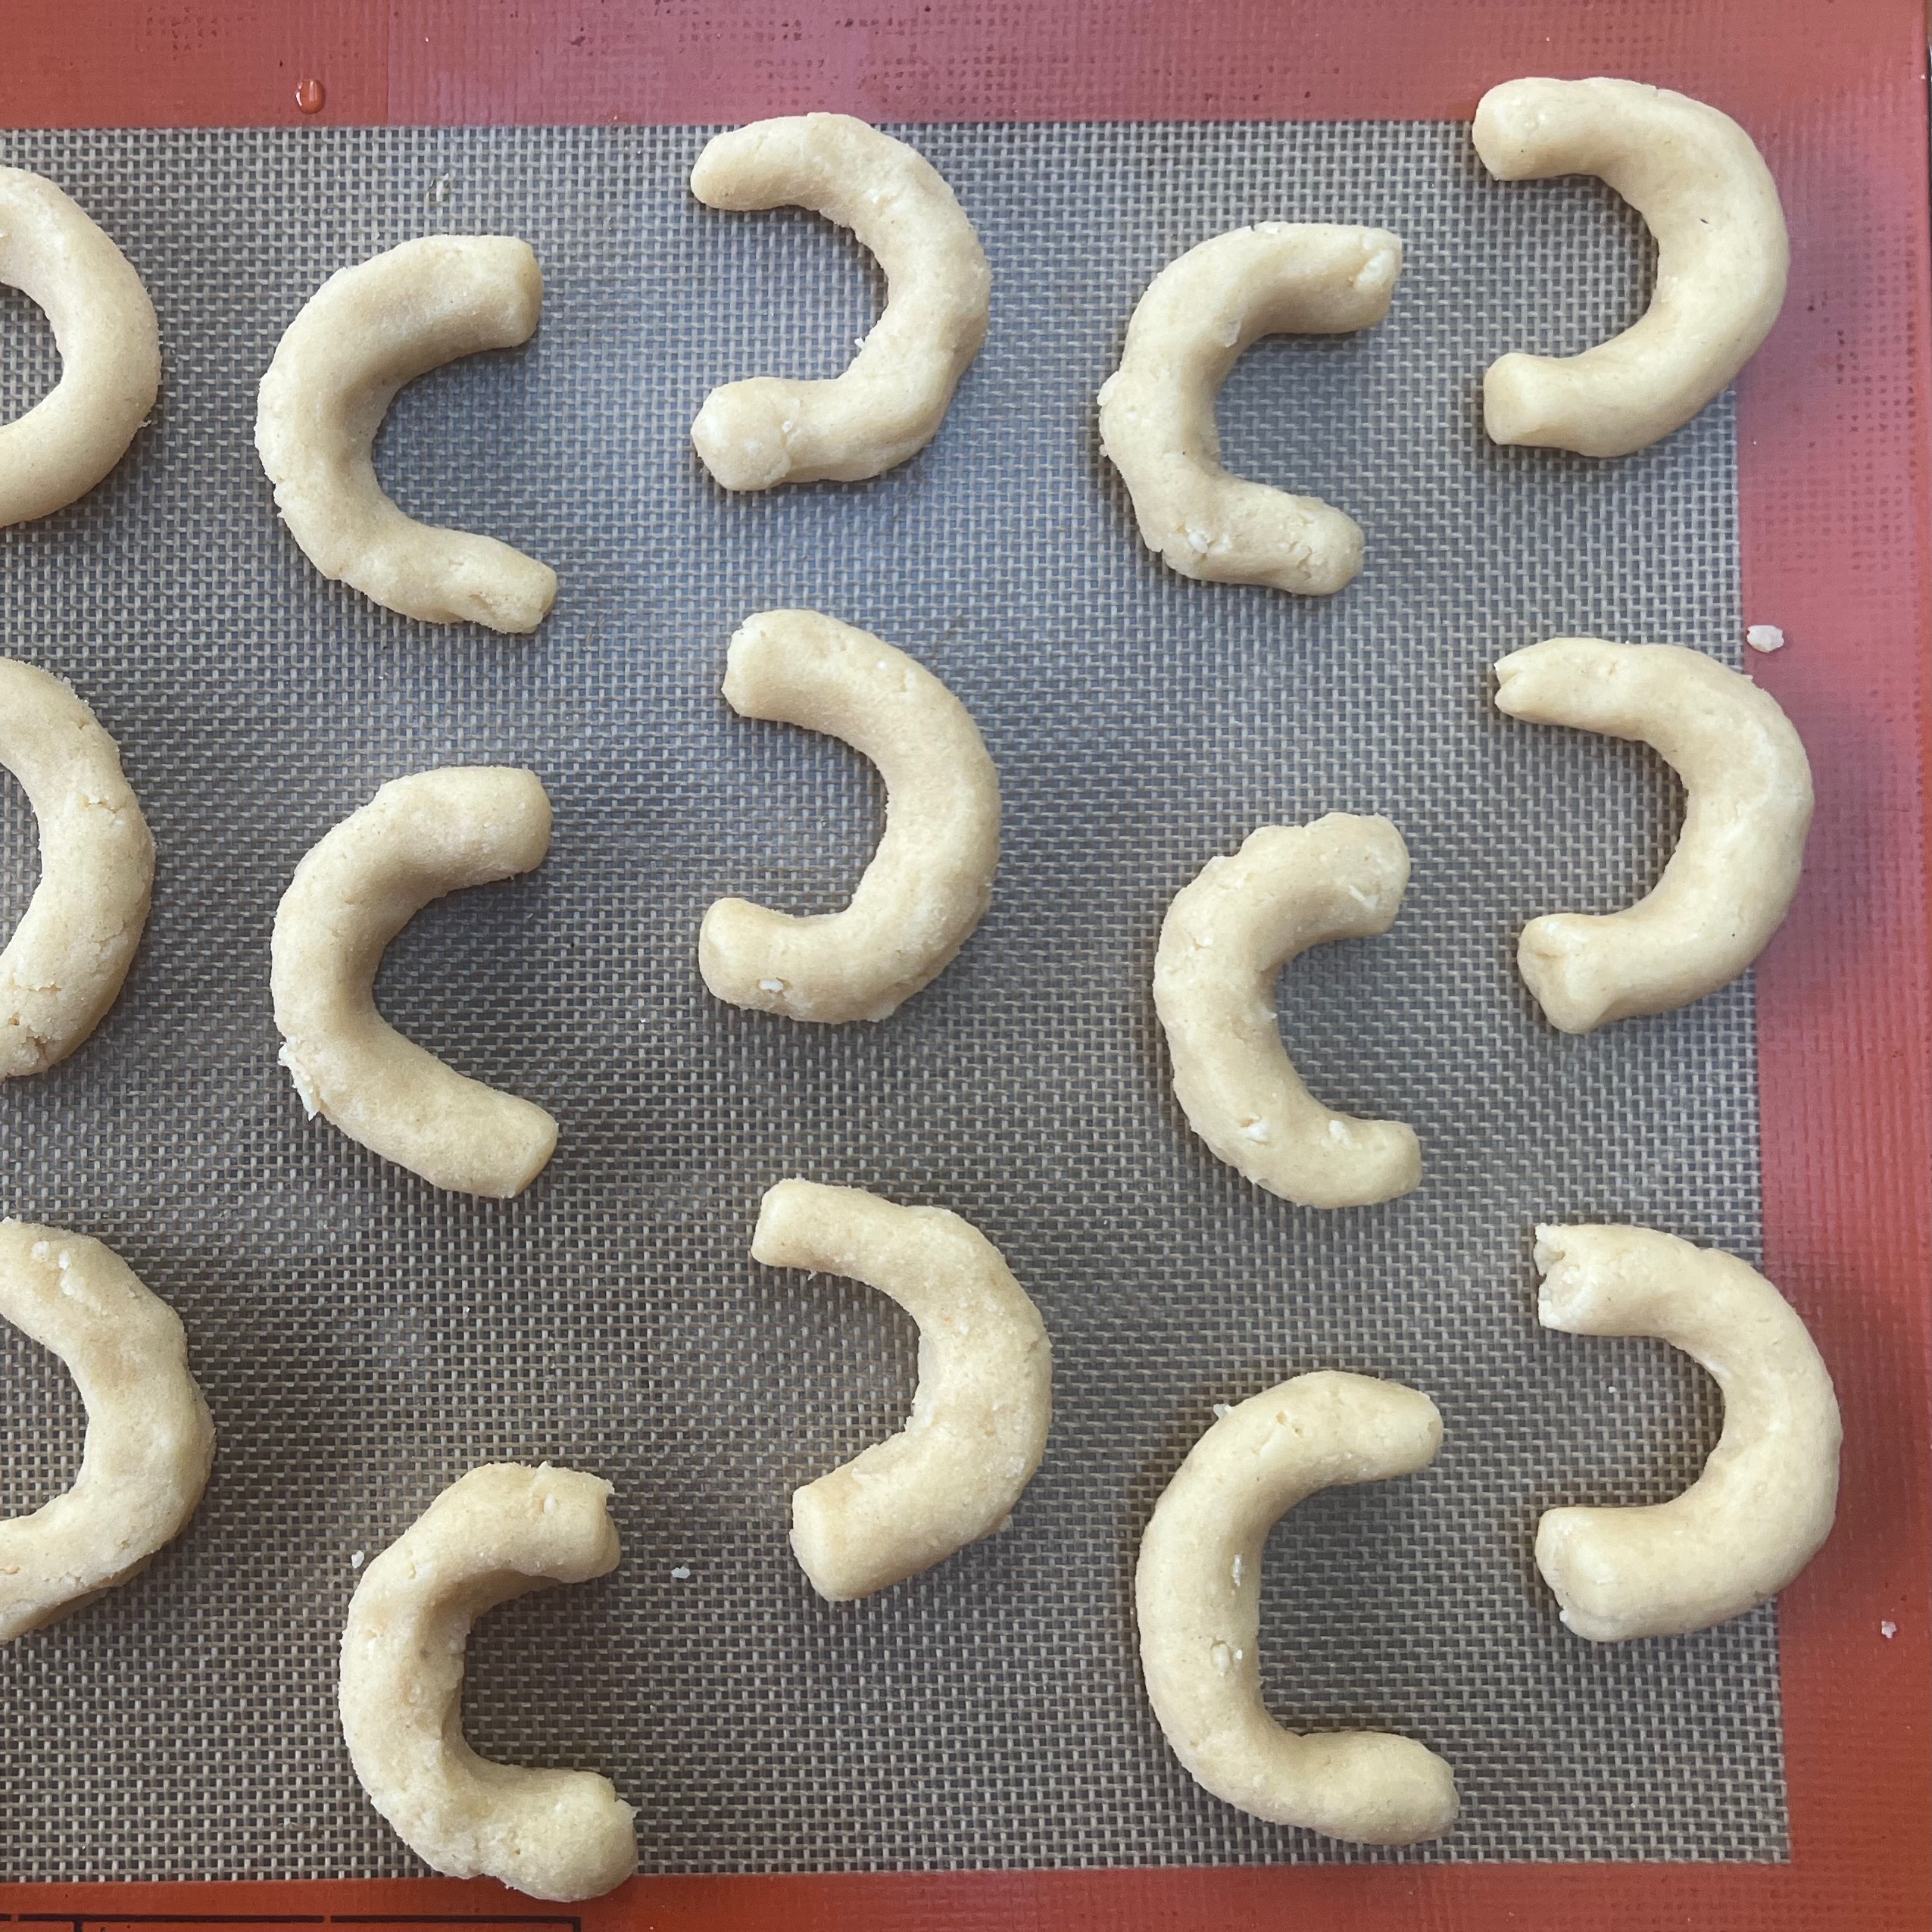
For some reason, however, the crescent moon of the Turkish flag lives on in Austrian culture in the shape of Vanillekipferl (vanilla crescents): delectable, crumbly nut-flavoured biscuits that are particularly popular as a Christmas treat. They’ve spread from their origins in Vienna all over Germanic countries and many Eastern European ones, including (of course) Poland.
My wife has Austrian blood in her if you go back a century or so and this recipe came down from one of her relatives. It’s similar to many Austrian recipes today. There are choices to be made: this uses almonds, but walnuts are a popular choice and you also see hazelnuts. Some recipes have a slightly higher ratio of flour to everything else, and some add an egg to the dough to bind it, giving you a slightly richer and considerably less crumbly result with greater structural integrity.
This looks like a straightforward recipe but it’s trickier than many biscuit/cookie recipes because it’s easy to get the texture wrong. Undergrind your nuts and you’ll get a grainy, rather lumpen biscuit which tastes fine but just doesn’t feel right. Overprocess or overwork the dough – especially if your hands are too warm – and the butter will come out and you lose the flavour. But if you get this right, Vanillekipferl have a crumbly butteriness that makes them a rare treat.
The quantities here give you 300g of dough which will yield 15-20 Vanillekipferl. It scales really easily – just multiply by as much as you want. But be aware that a standard size baking tray won’t take many more than 20, because they spread.
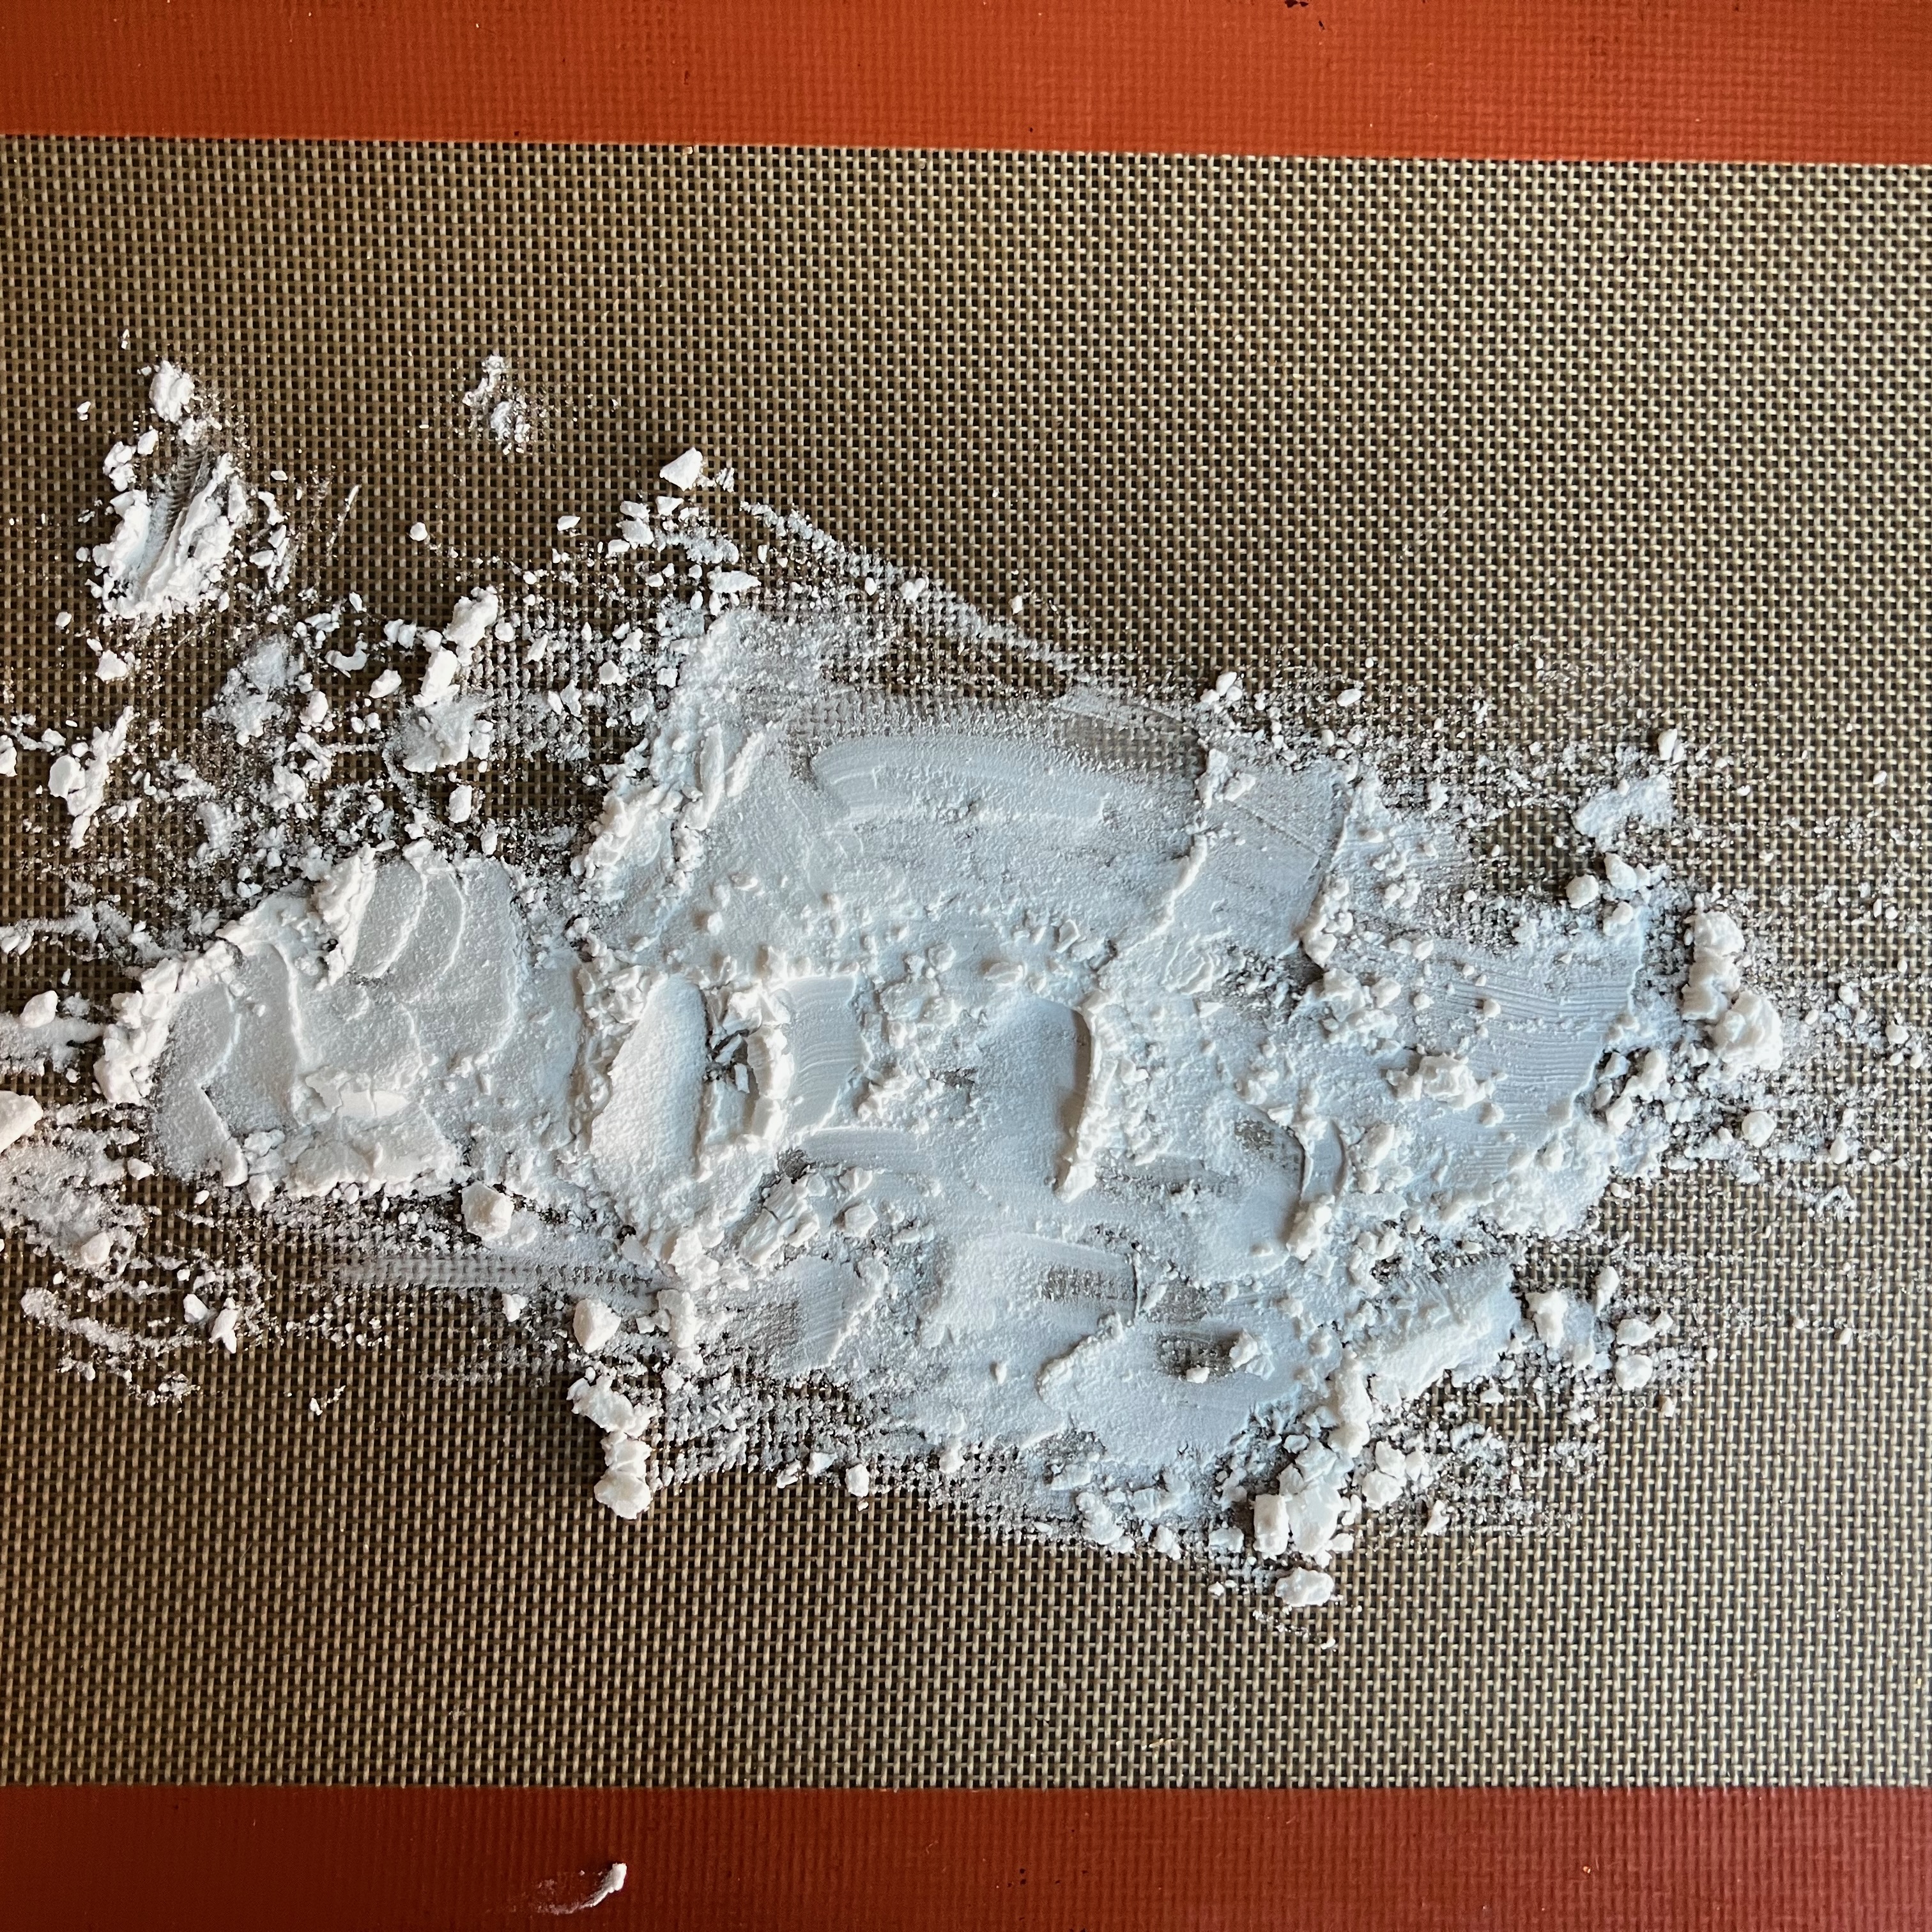
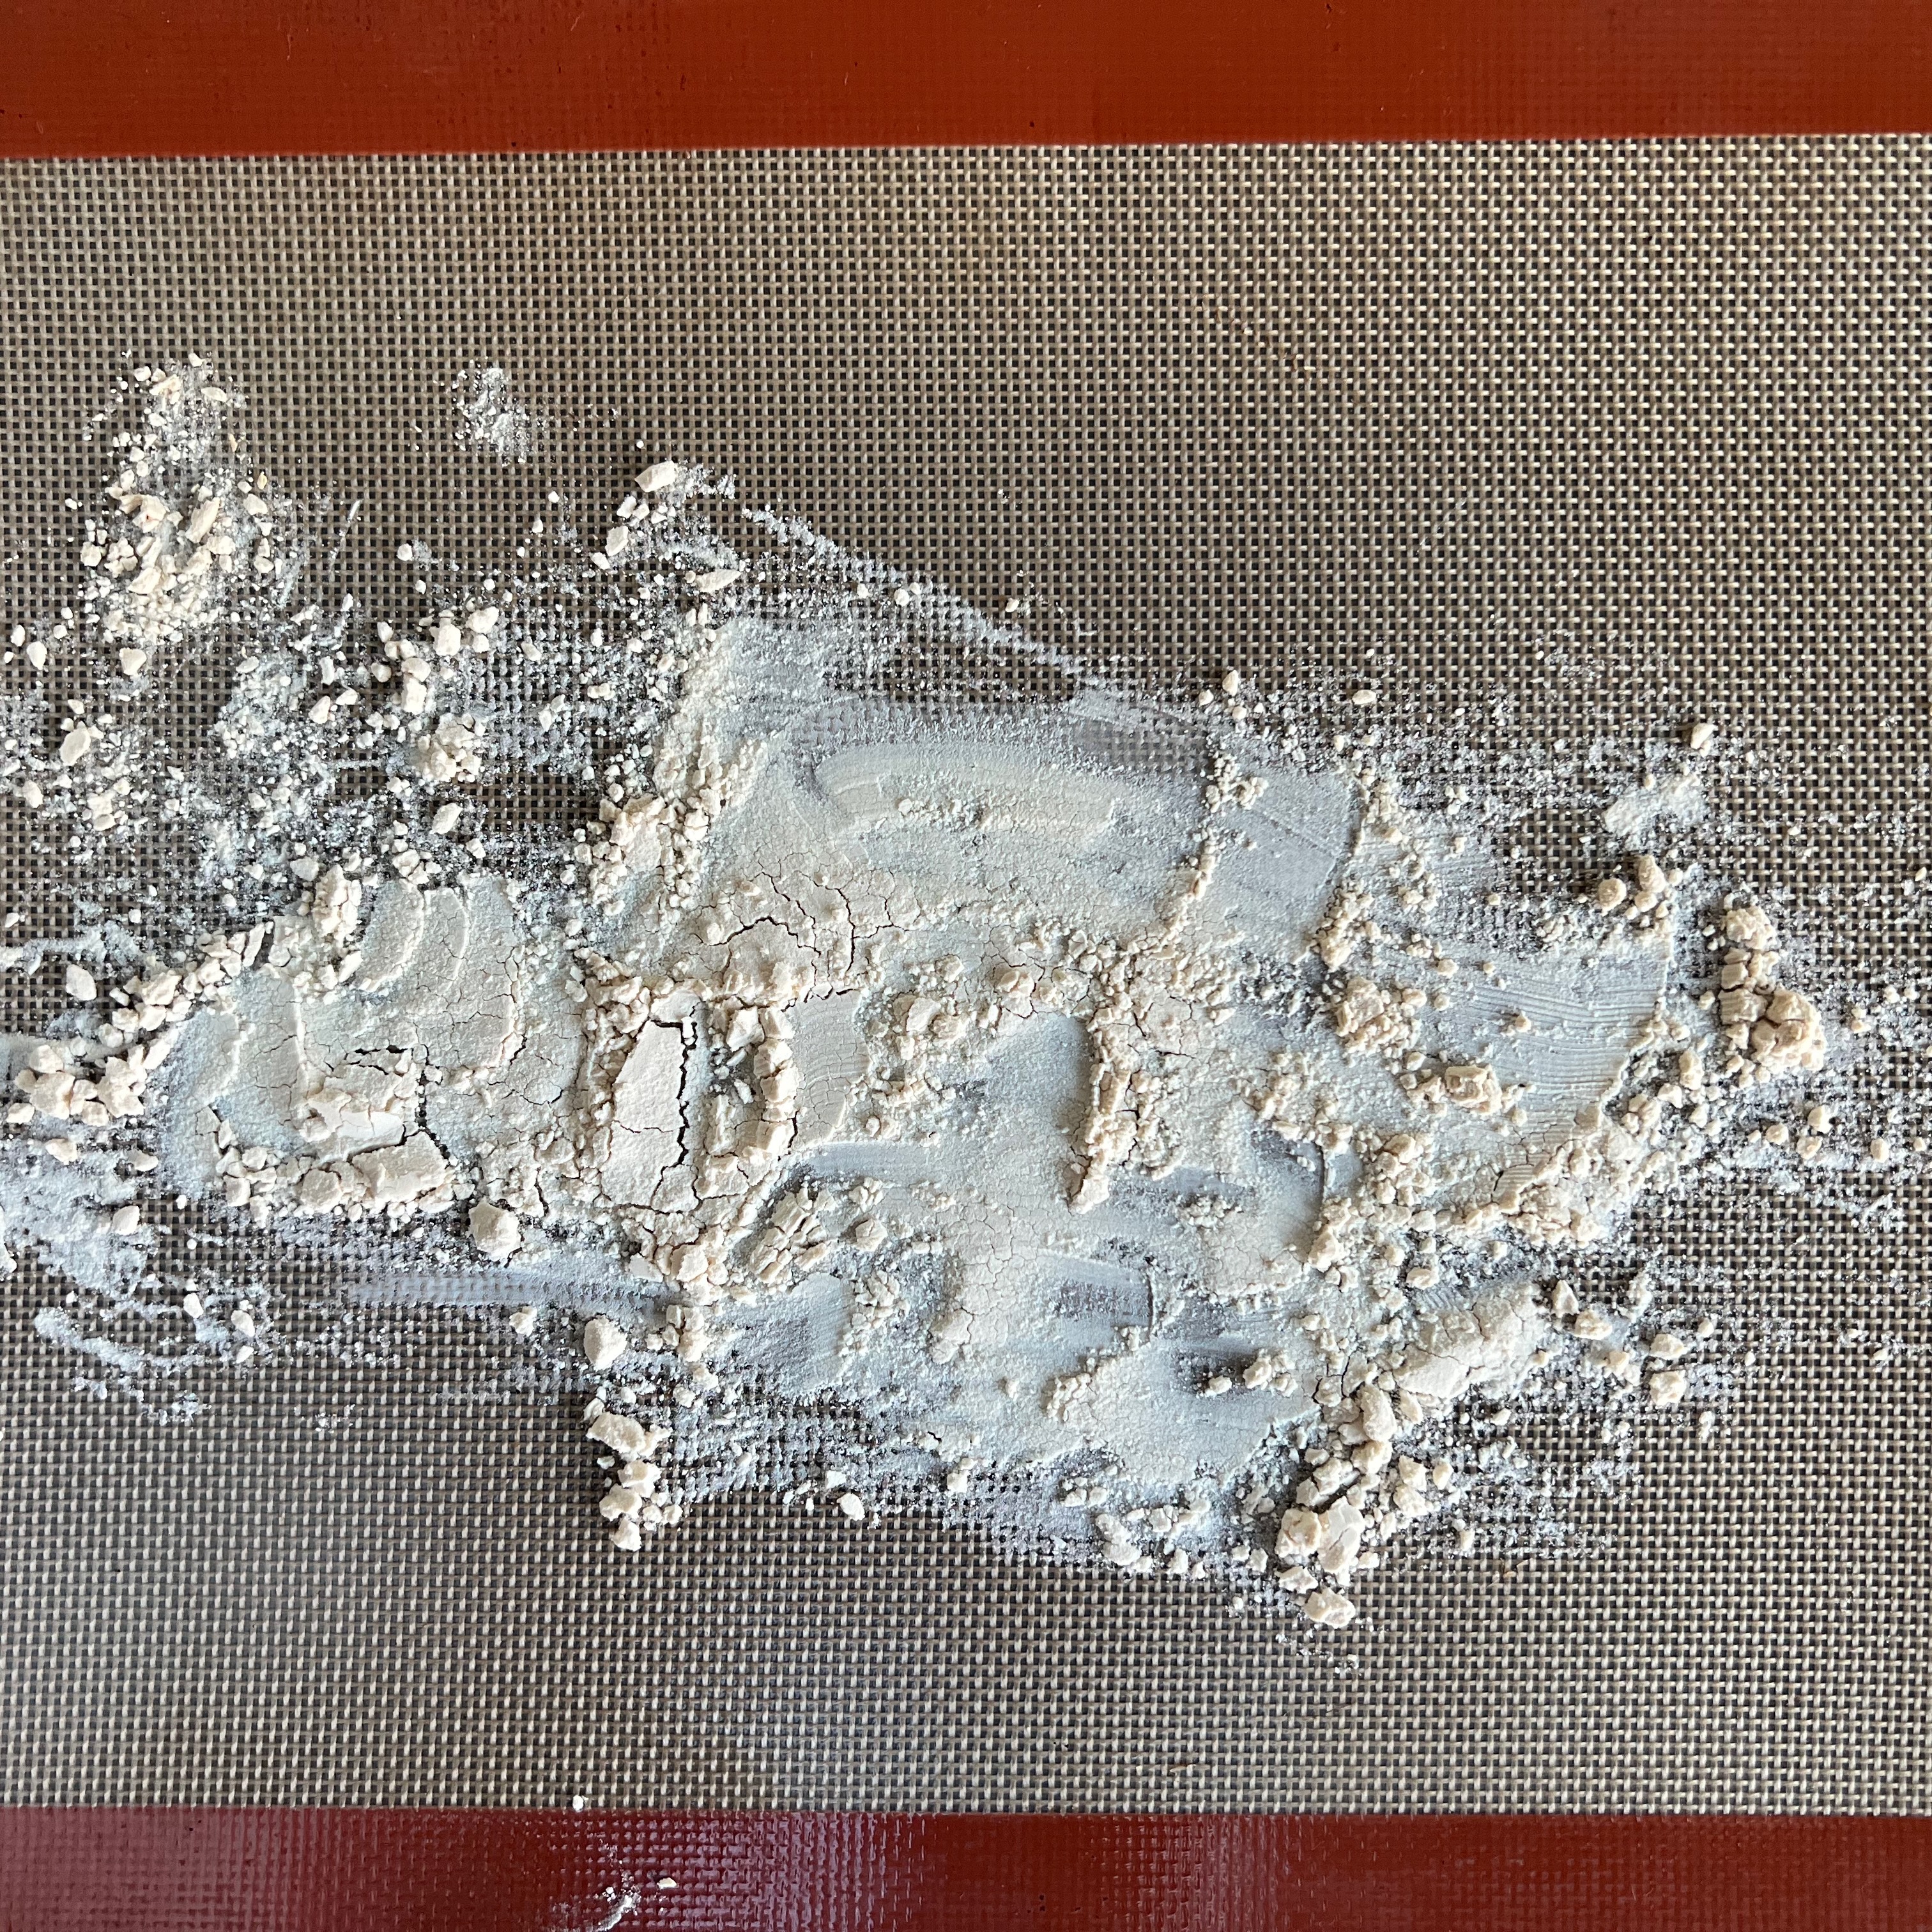
The ground almond mixture
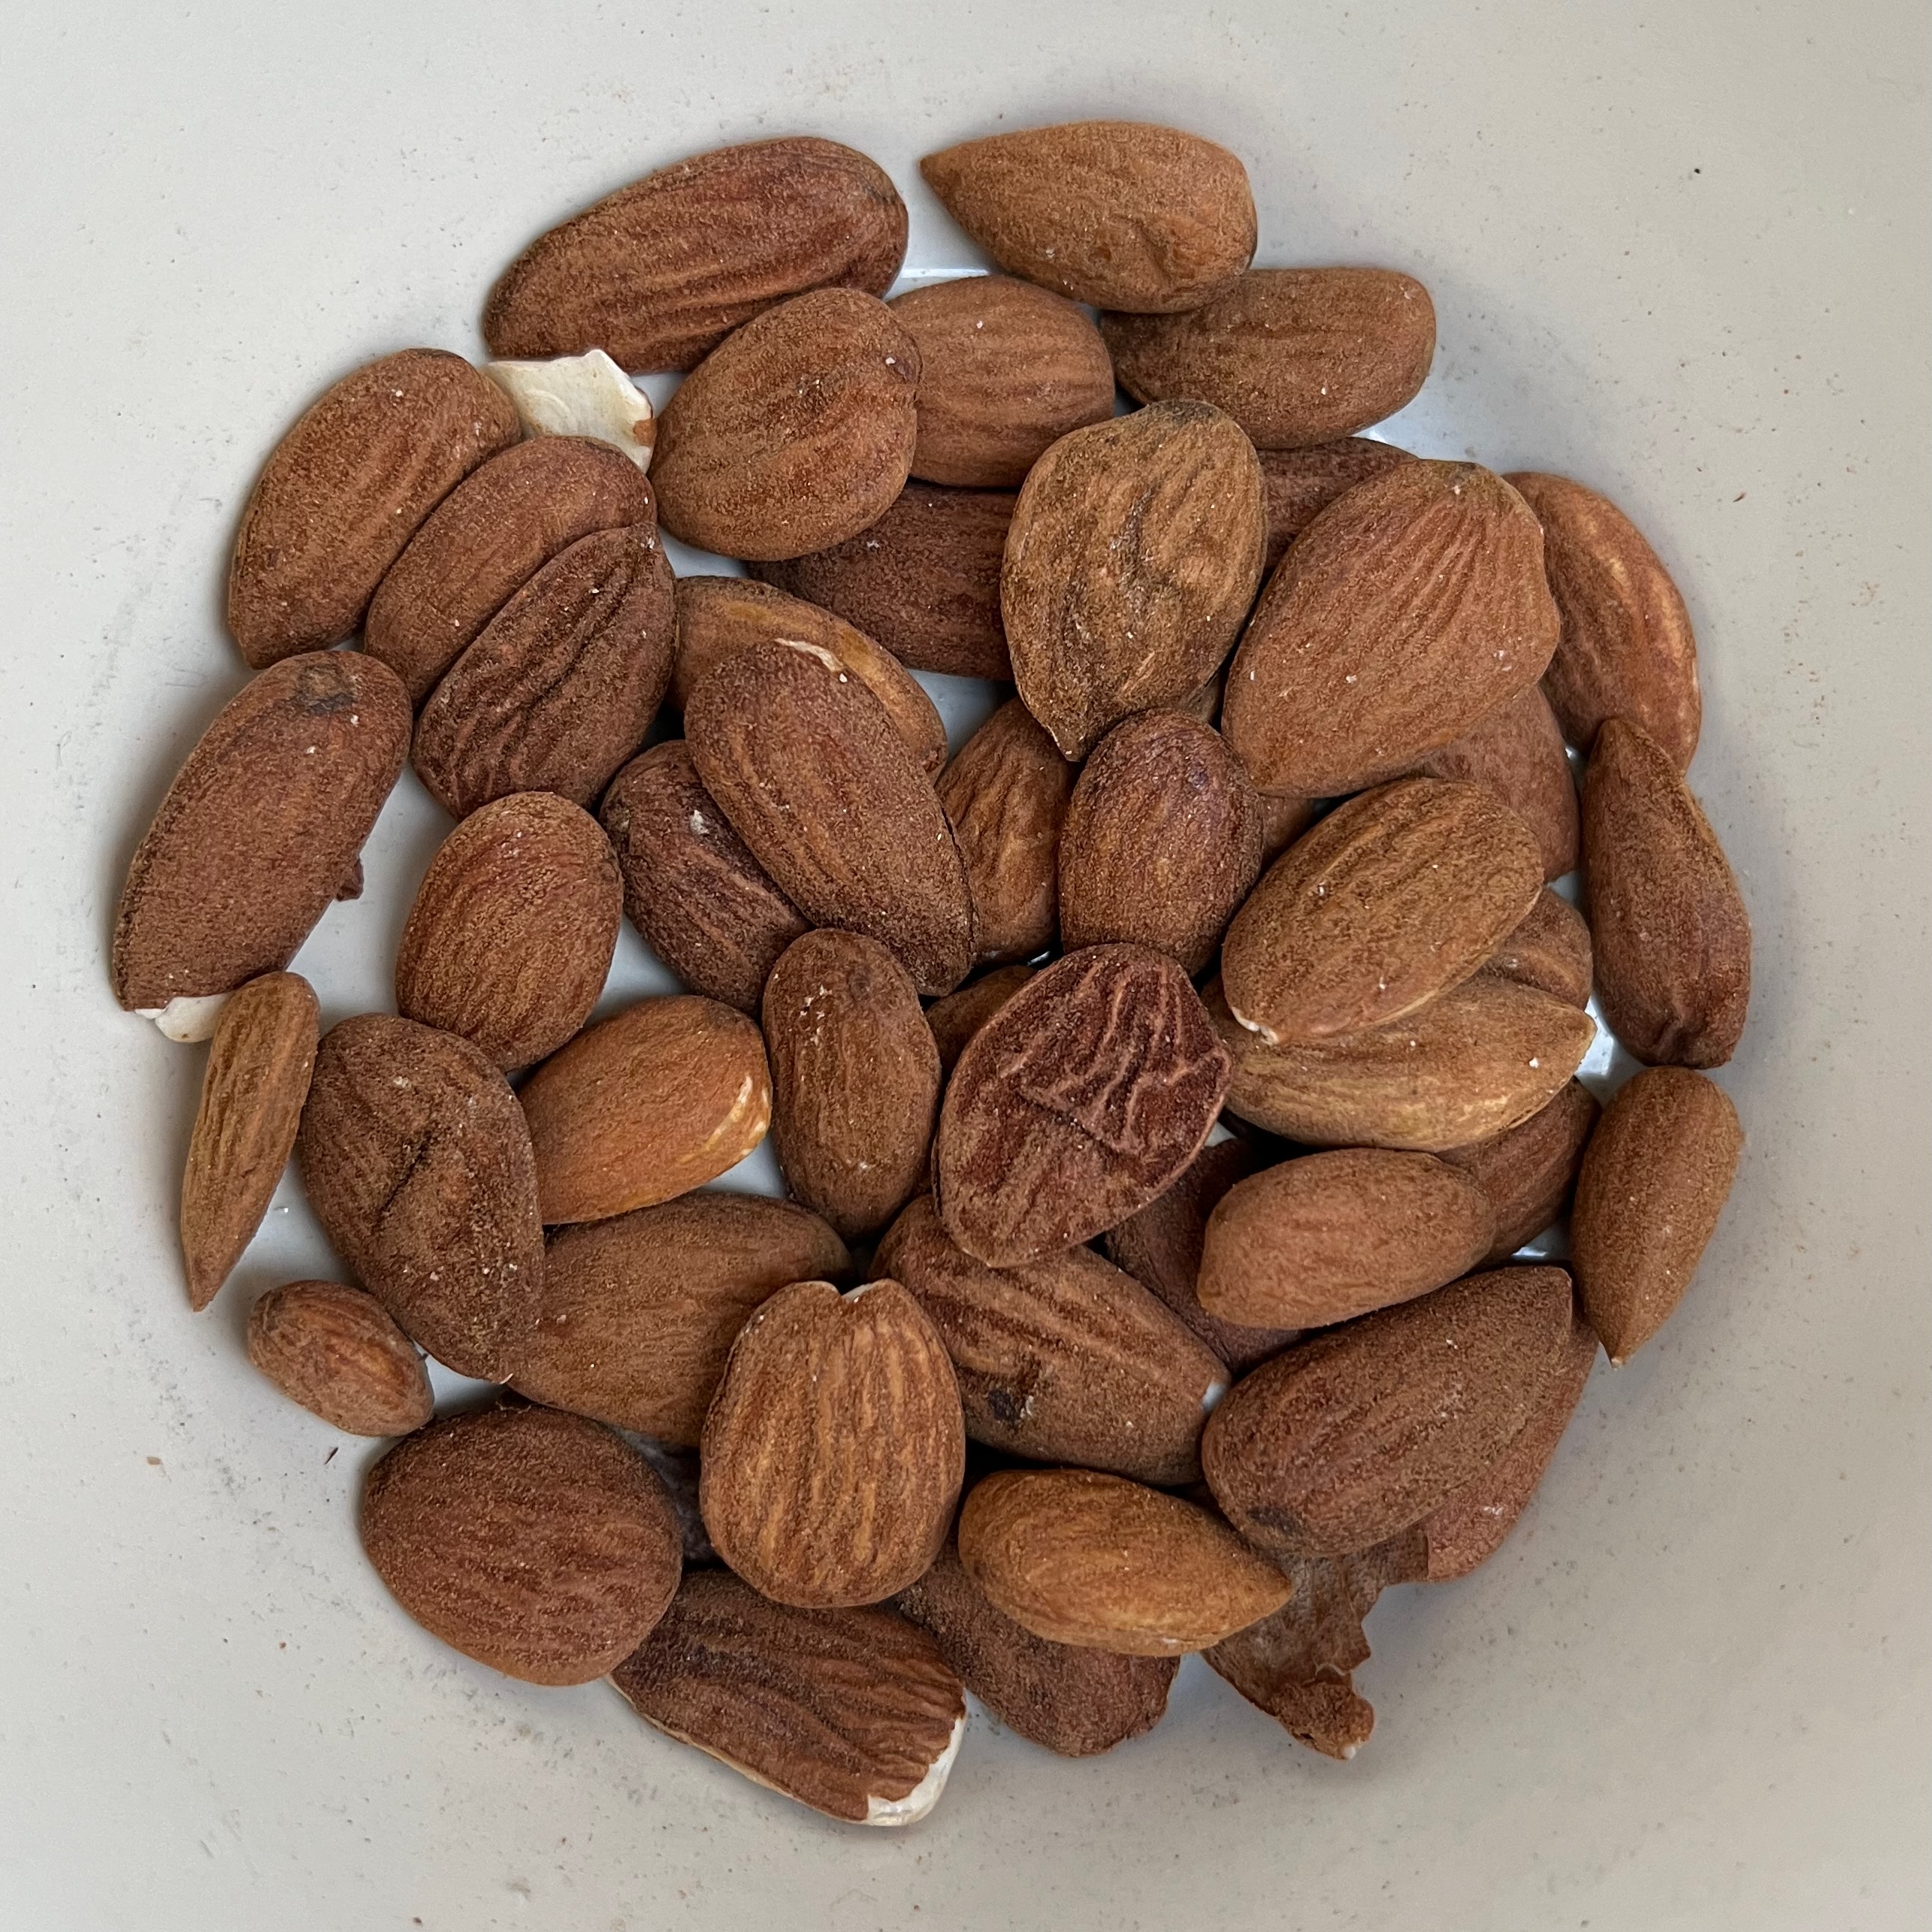
You don’t have to make grind your own almonds: you can just buy a pack of ground almonds and add sugar. But doing your own with good quality almonds will result in a better tasting biscuit.
I keep a jar of vanilla sugar, which is simply a jar of caster sugar with a couple of vanilla pods in it which has been left in the cupboard more or less indefinitely. Again, you don’t have to do this: you can either rely on adding more vanilla essence or buy a packet of pre-made vanilla sugar (which is what most Austrian recipes suggest).
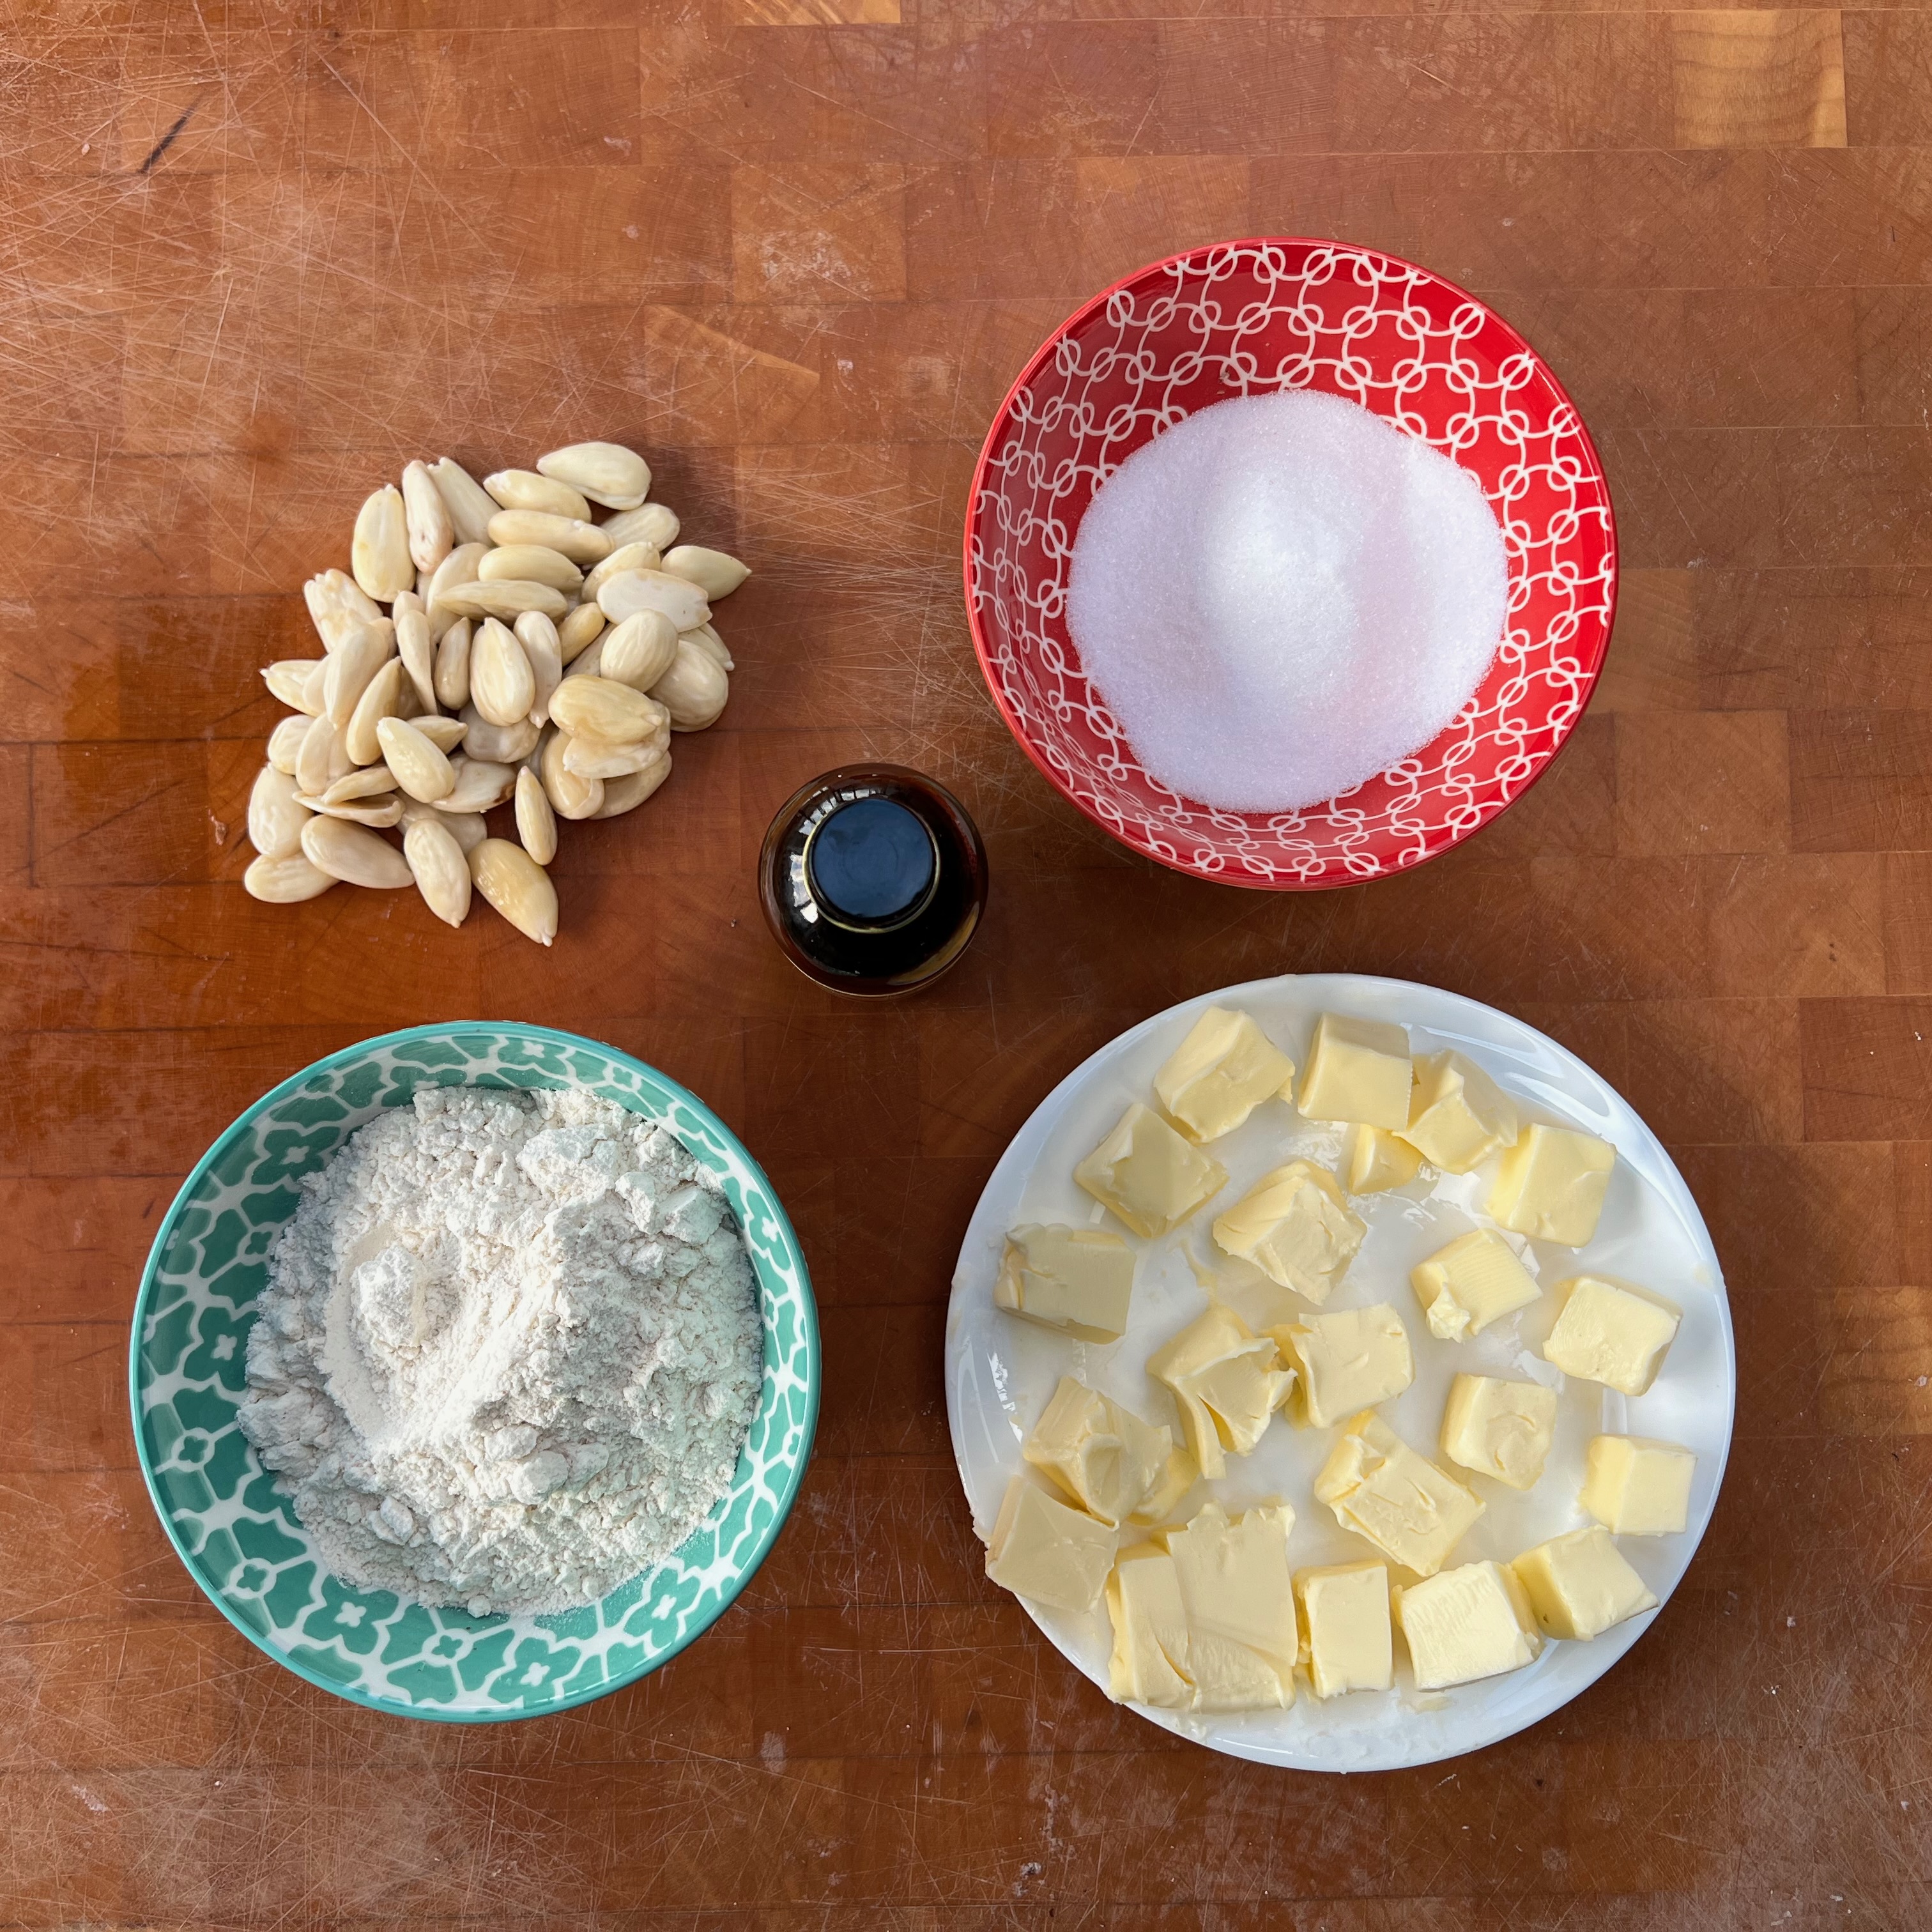
50g almonds in their shells
50g caster sugar (vanilla sugar if you have it)
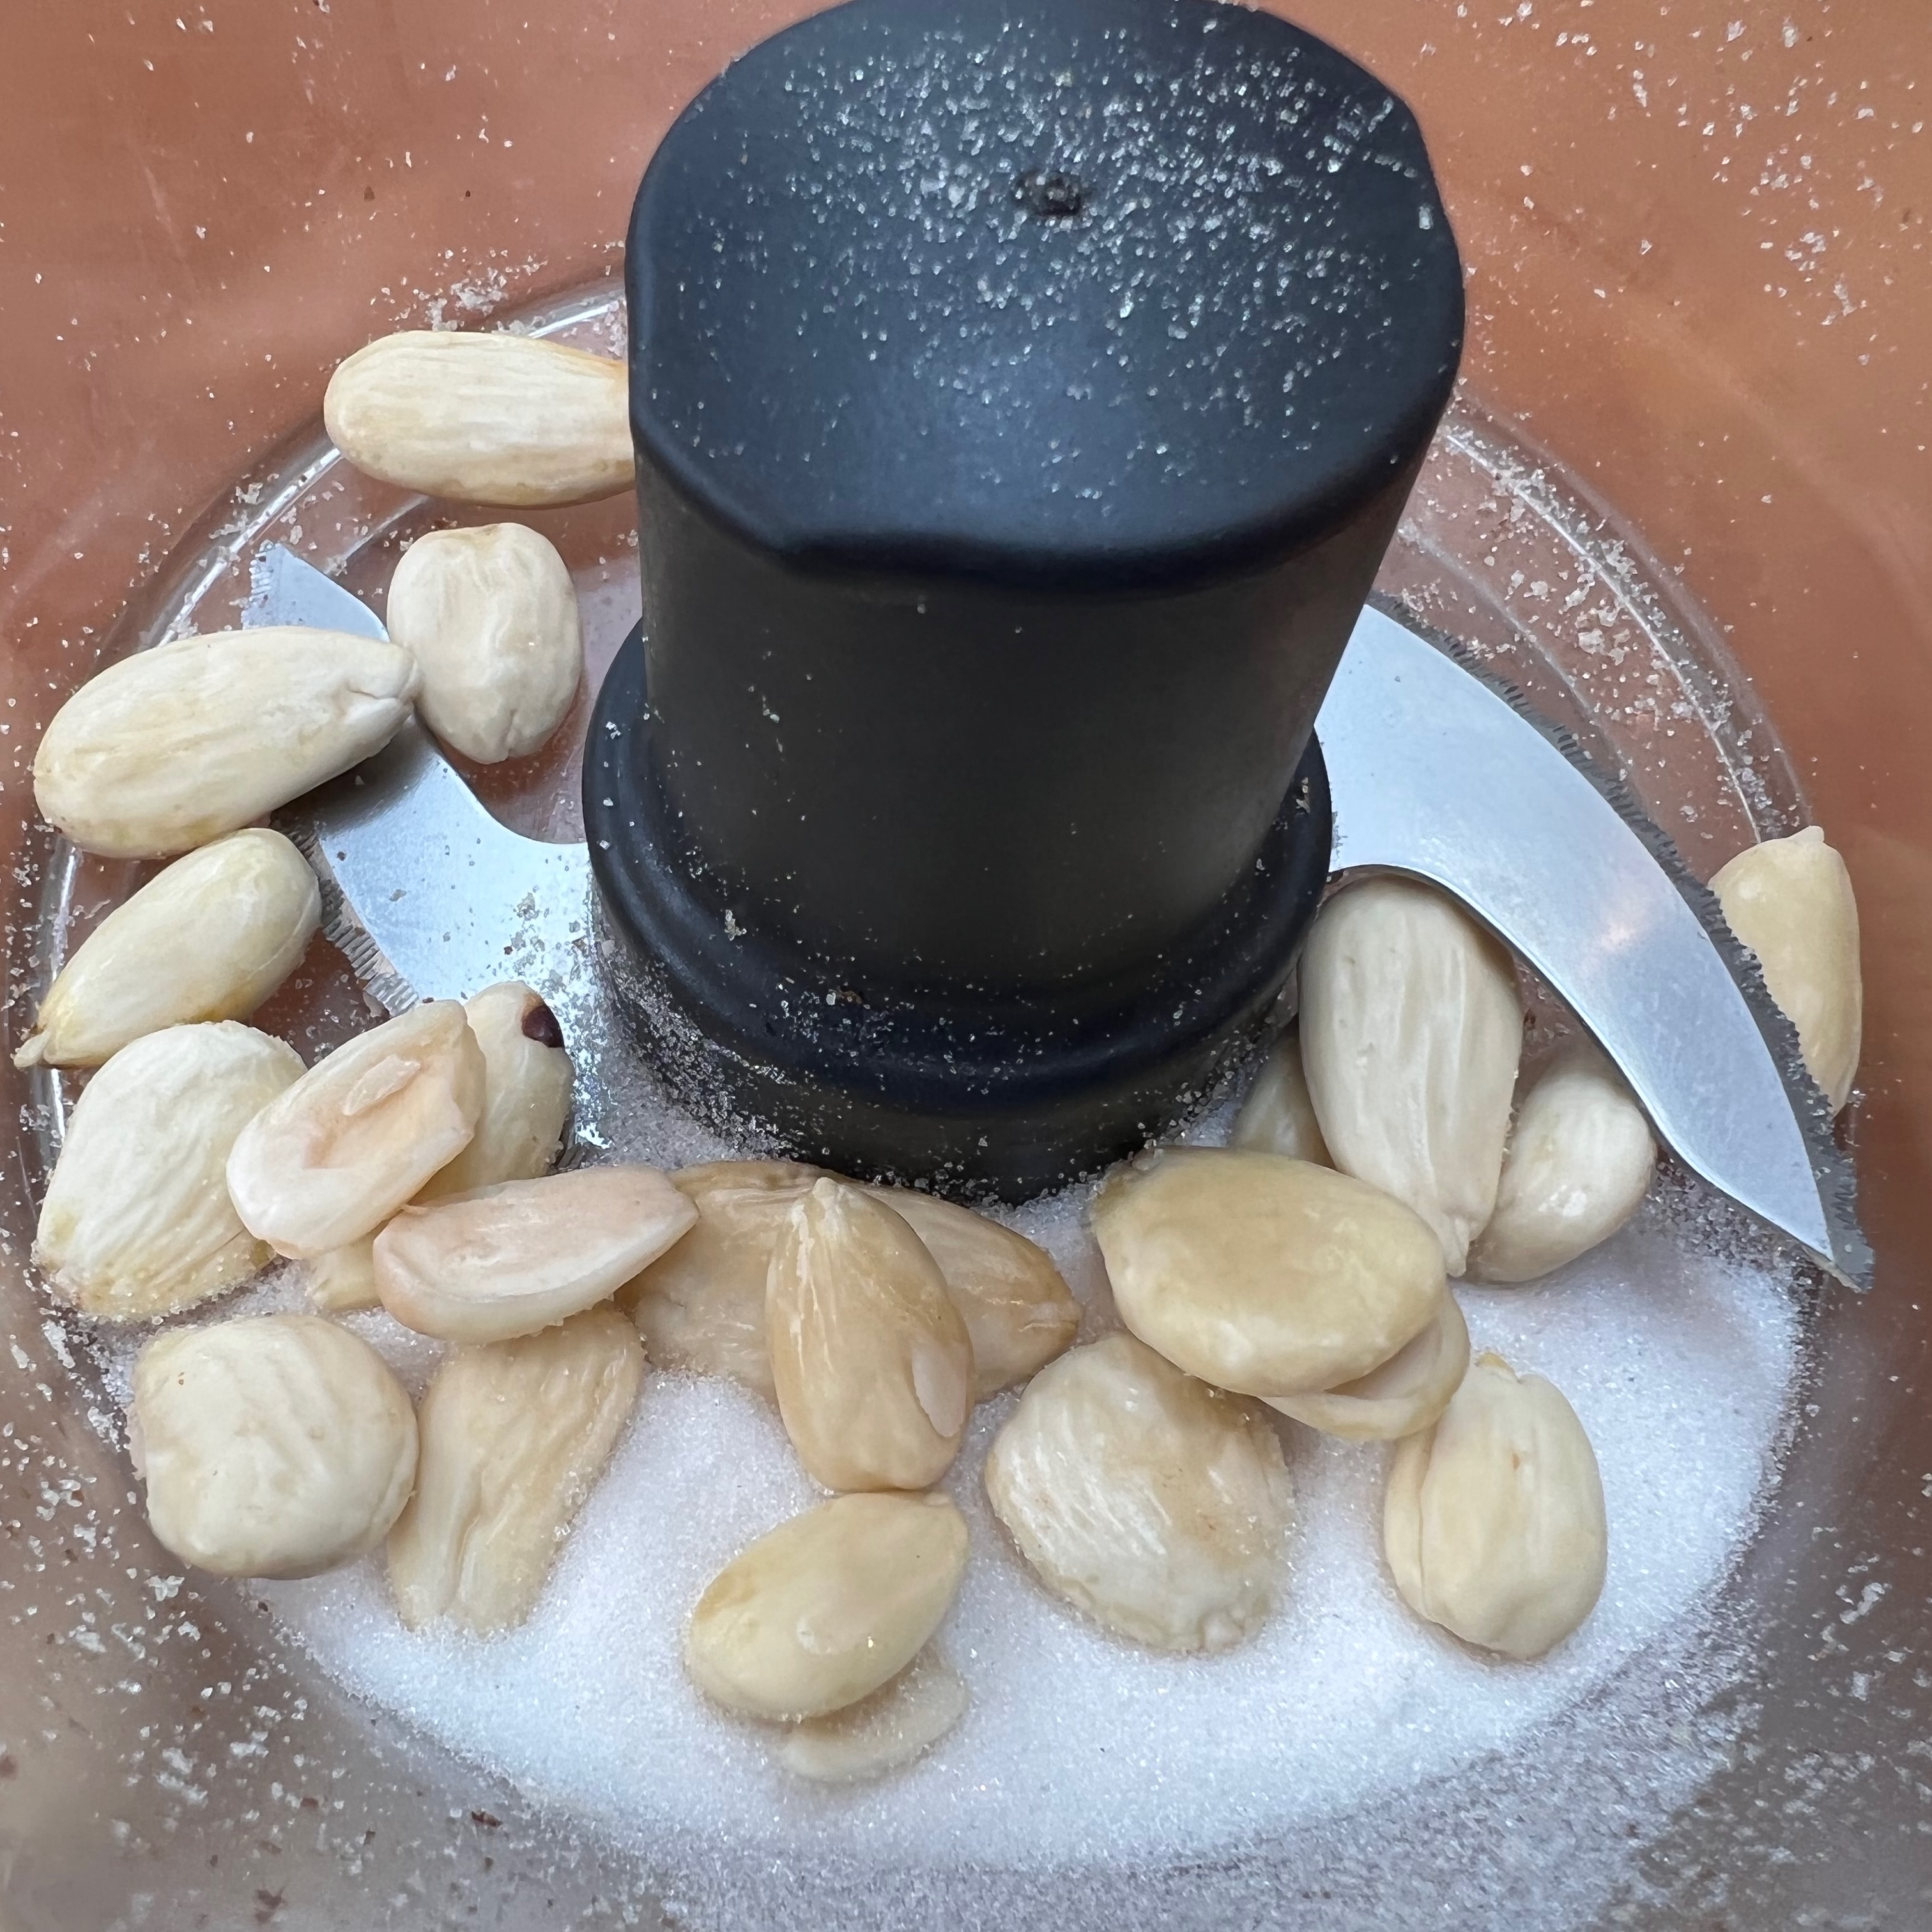
Put the almonds into a bowl and cover with boiling water.
Wait around 15 minutes, then discard the water and pop each almond out of its skin. When you’ve finished, pat the almonds dry with a tea towel or kitchen roll and discard the skins.
Put the almonds and sugar into the bowl of a food processor and process until the almonds have been ground very fine. This should take around 1-2 minutes. Leave them in the bowl – you’ll be adding the other ingredients shortly.
Making the Kipferl
100g butter
100g plain flour
Pinch of salt (⅛ tsp is plenty)
Vanilla essence to taste – but be generous
Preheat oven to 160℃ fan.
Line a baking tray with a Silpat sheet, or baking paper if you don’t have one.
Cut the butter into cubes (between 5-10mm).
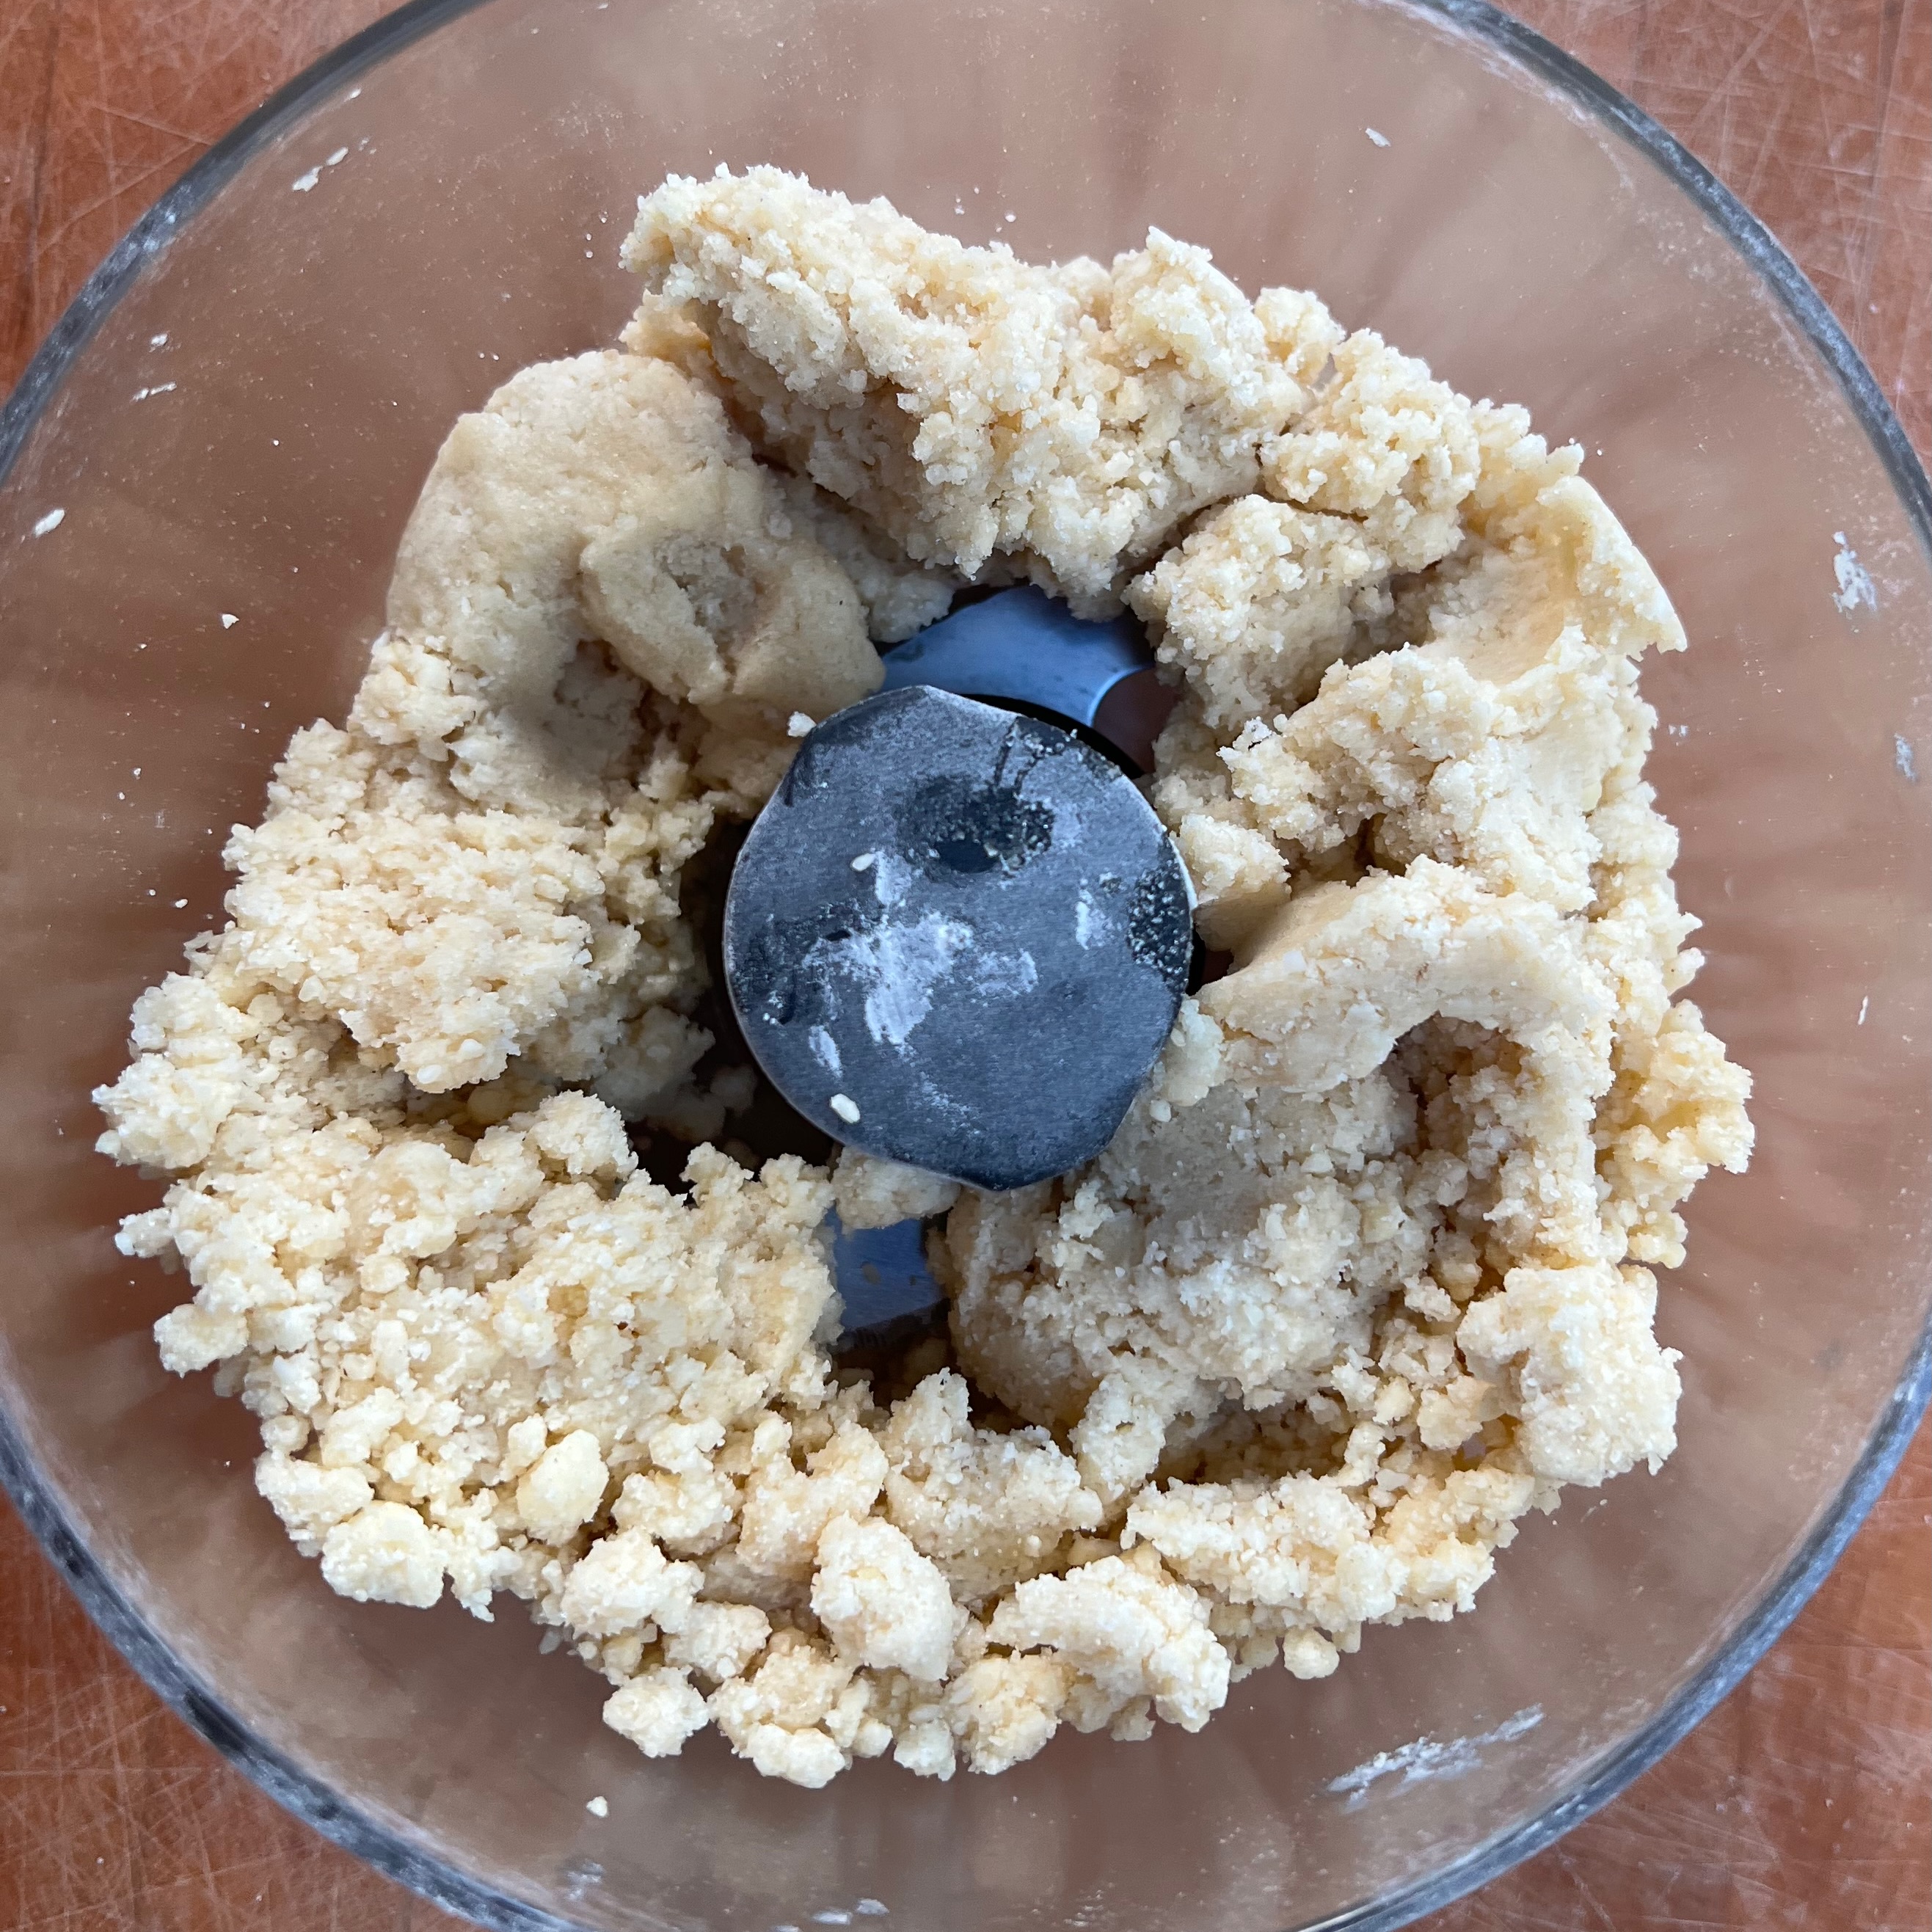
Add the butter, flour and vanilla essence to your food processor bowl with the almonds and sugar.
Process the mixture until it comes together into a smooth dough.
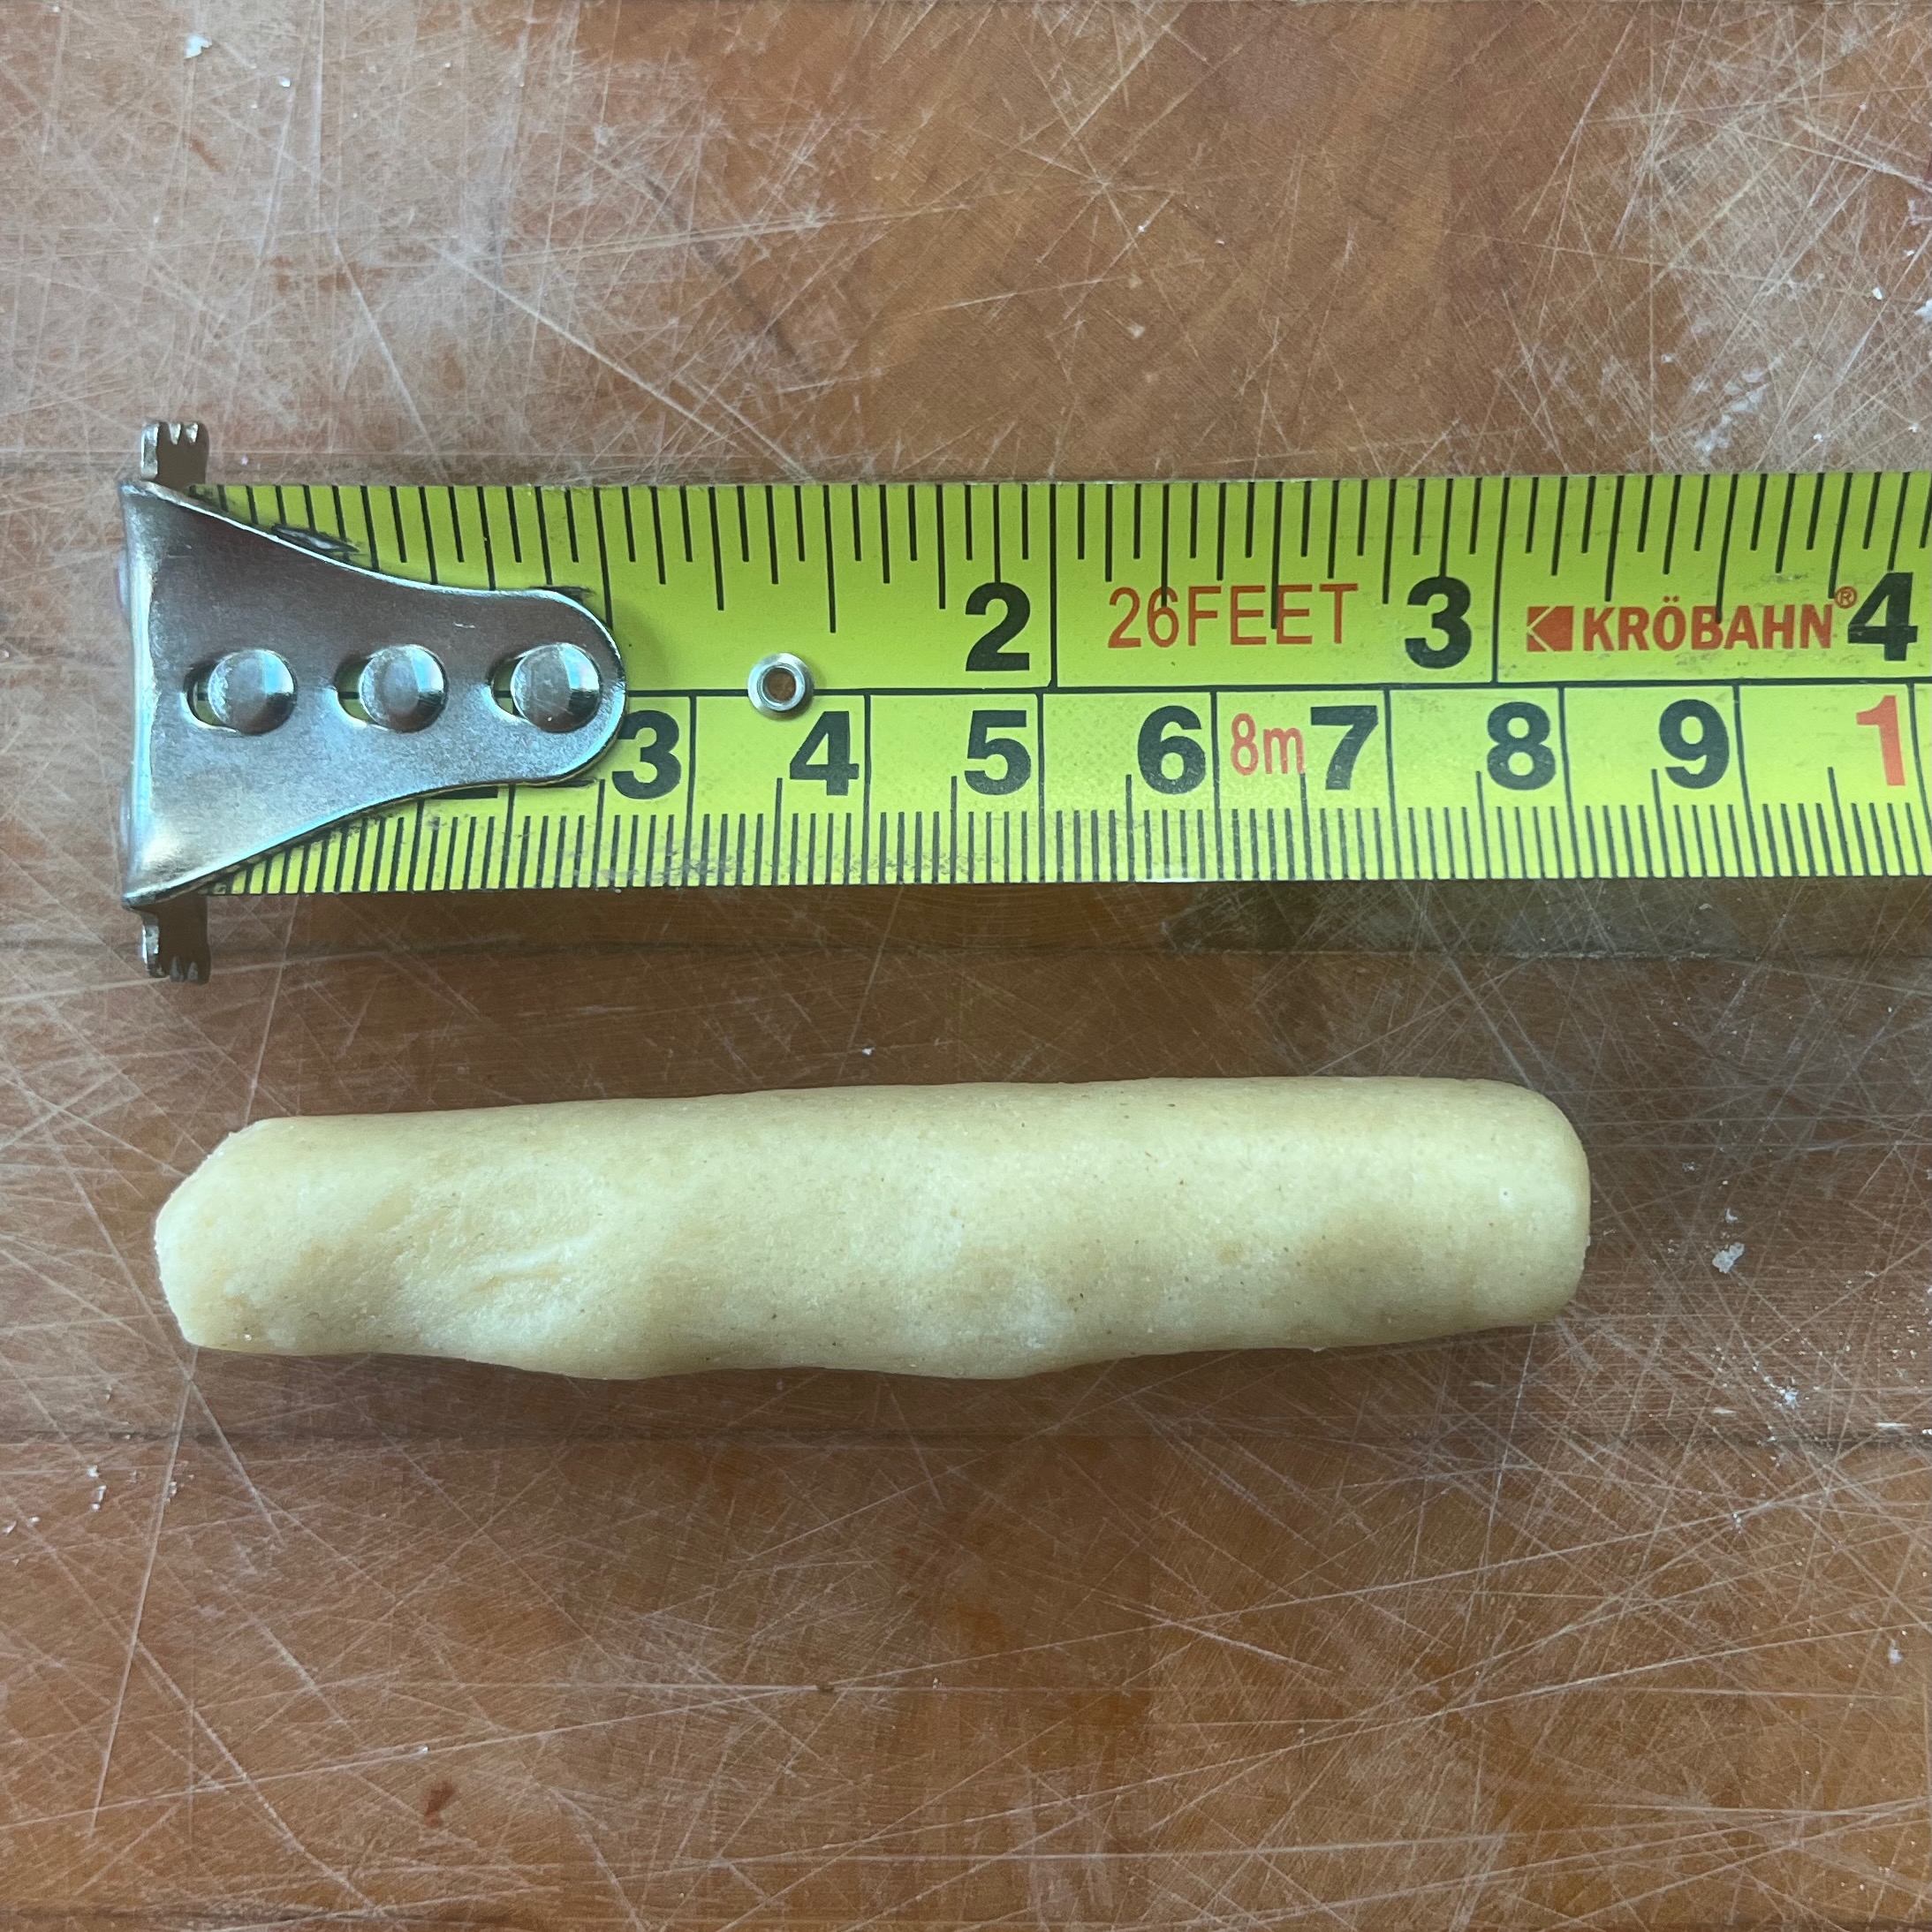
Take a small ball of dough, around 15-20g, compress it in your hands and roll it into a cigar shape around 8 cm long.
Form the dough into a crescent and place it onto your baking sheet. Make sure to keep at least a couple of centimetres between each crescent, because the Kipferl will spread in the oven more than you expect.
Repeat for the other Kipferl and bake until just beginning to go golden – this will take around 16-18 minutes. You want them fairly pale for the best flavour.
Remove from the oven, slide your Silpat sheet off the baking tray and leave to cool. Handle with care because the Kipferl are quite fragile.
If any of the Kipferl have merged together when they spread, separate them gently with a knife and serve.
I stop here, because the Vanillekipferl are plenty sweet enough for me already. But Austrian recipes now dust theKkipferl with icing sugar in one or both of the following stages:
Immediately after taking out of the oven. In this case, the icing sugar will be absorbed into the Kipferl.
After the Kipferl have been cooled. In this case, the icing will stay as a pretty powdery dusting on the top.
It would, of course, be close to criminal to miss out on having these with good coffee…
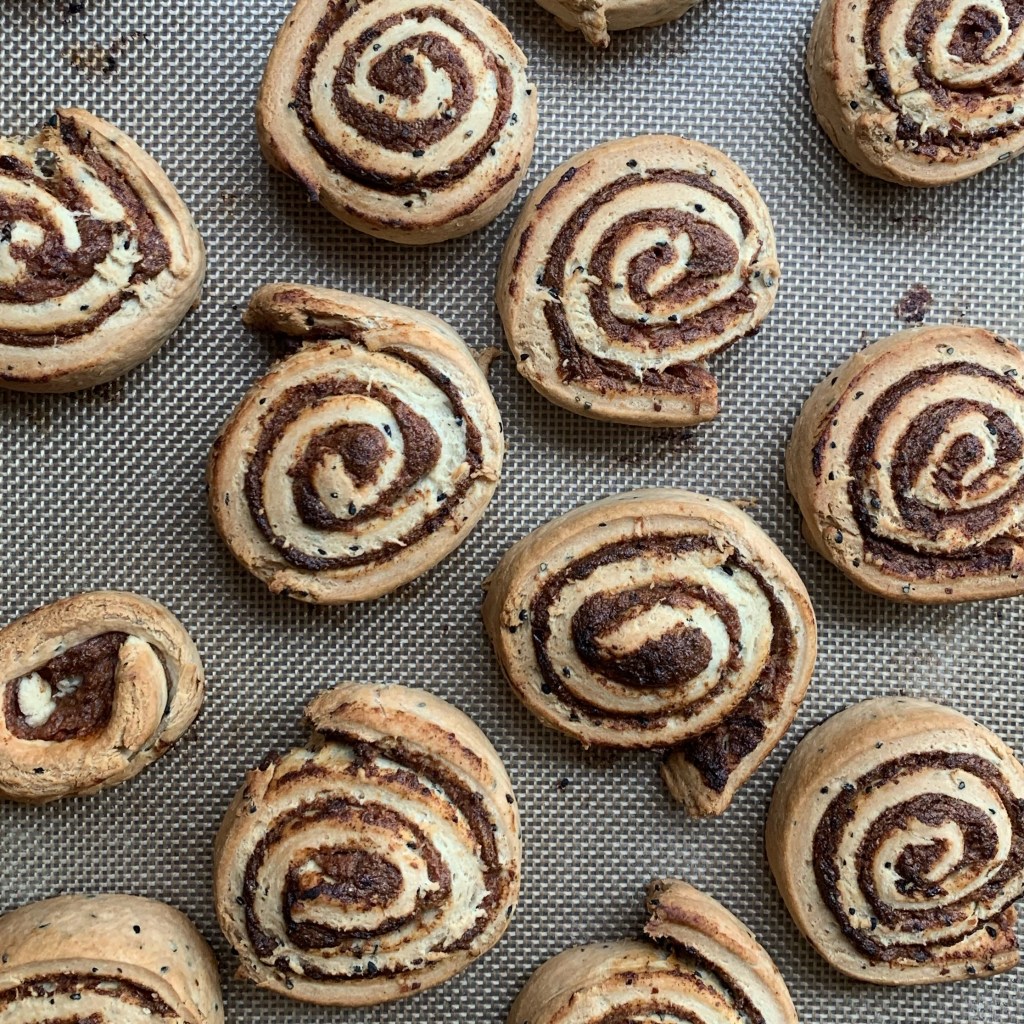
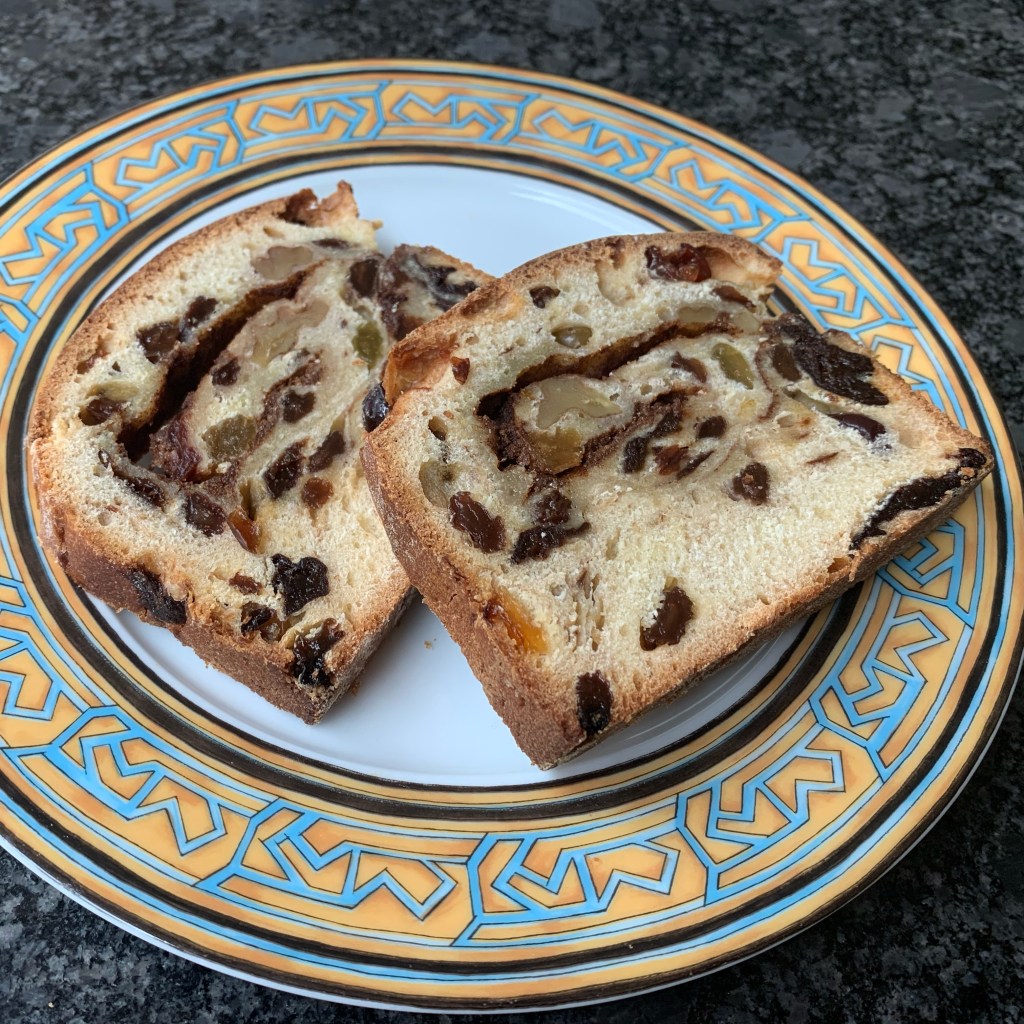
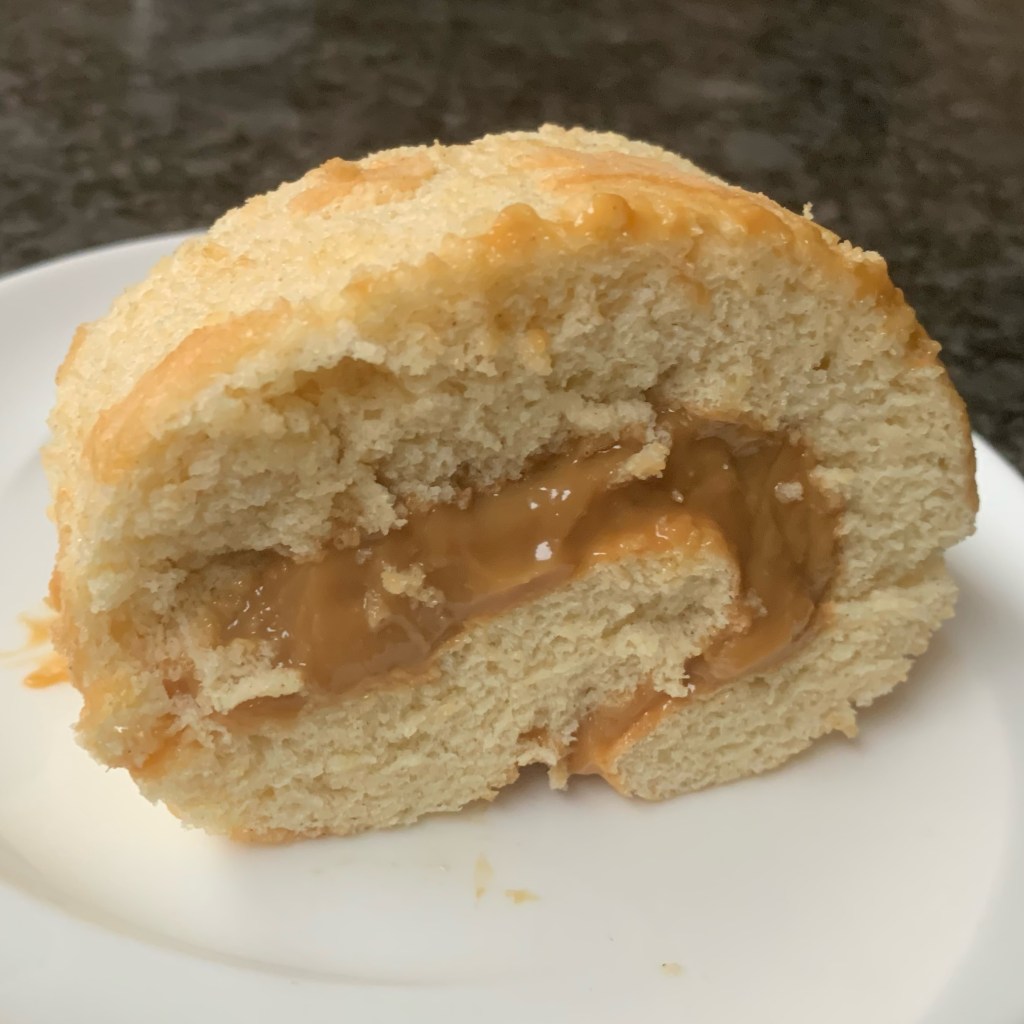
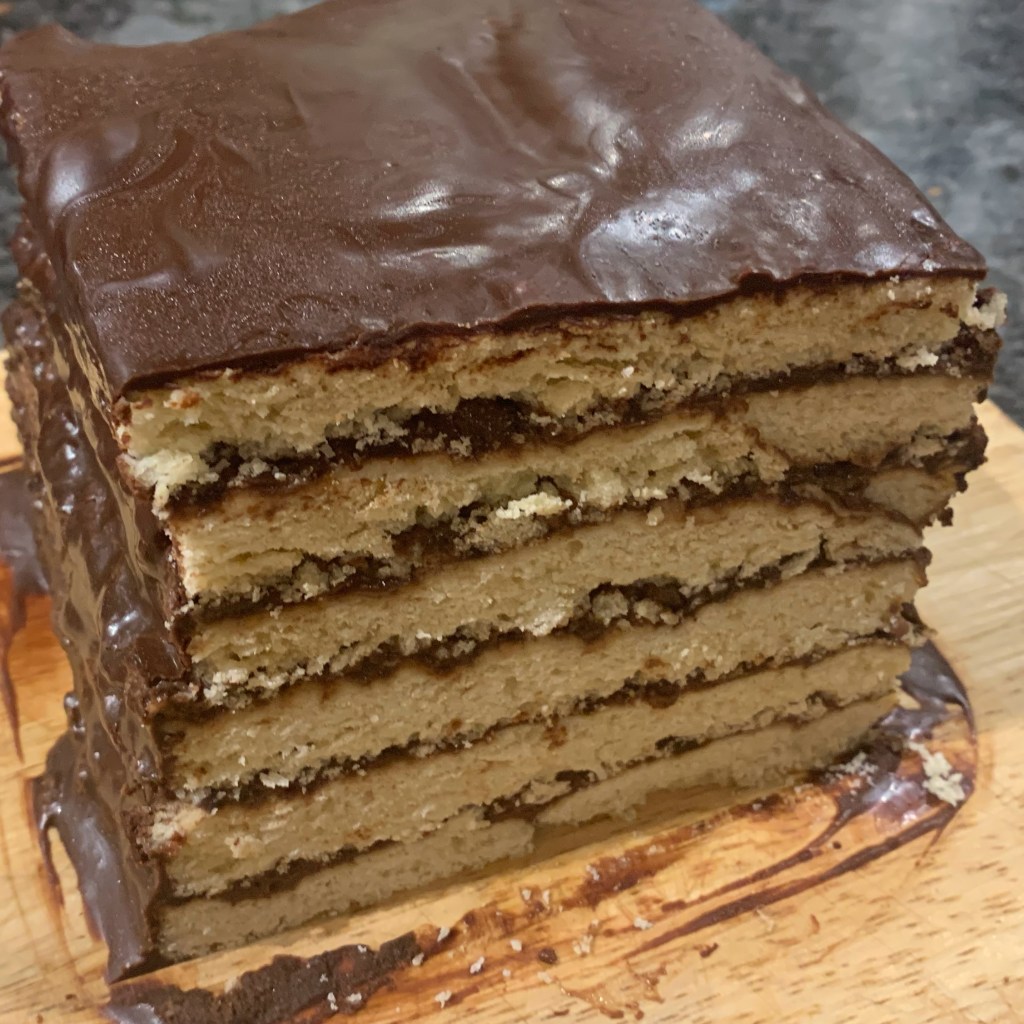
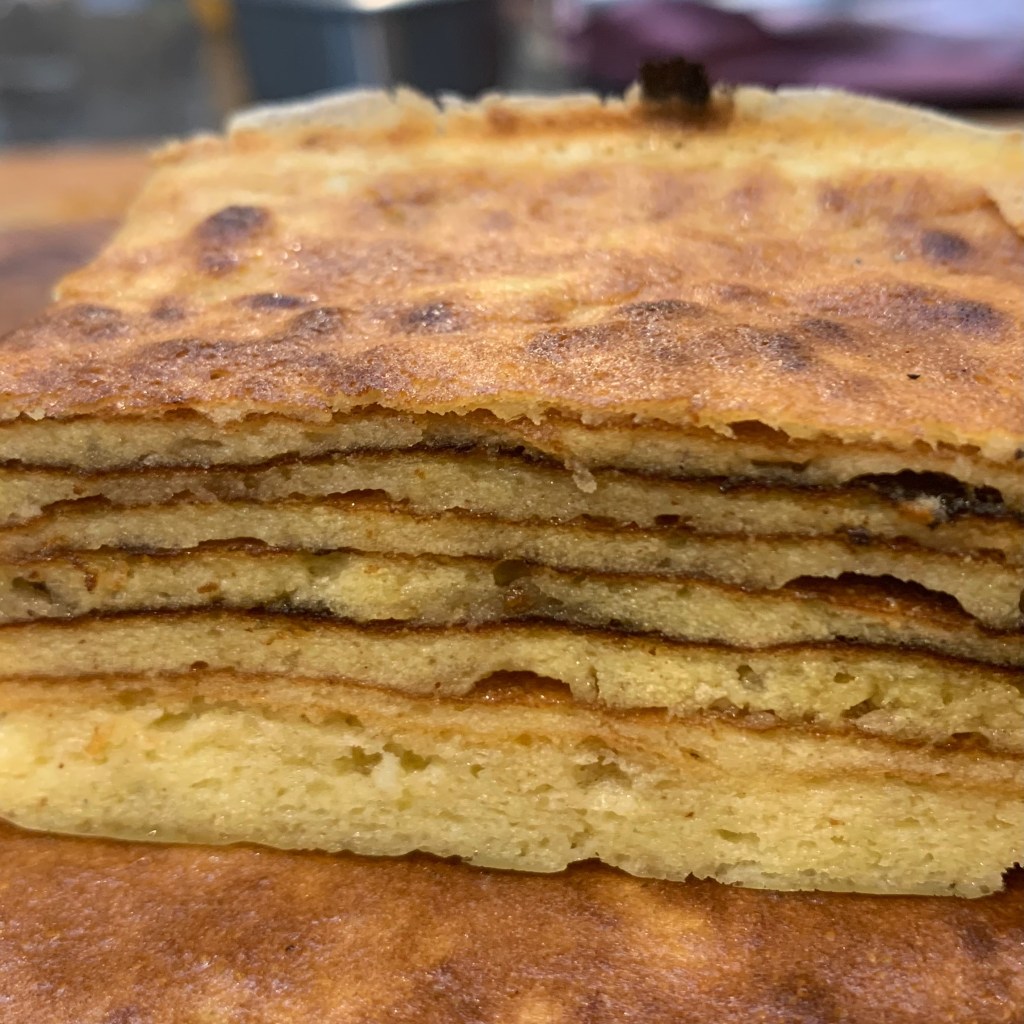
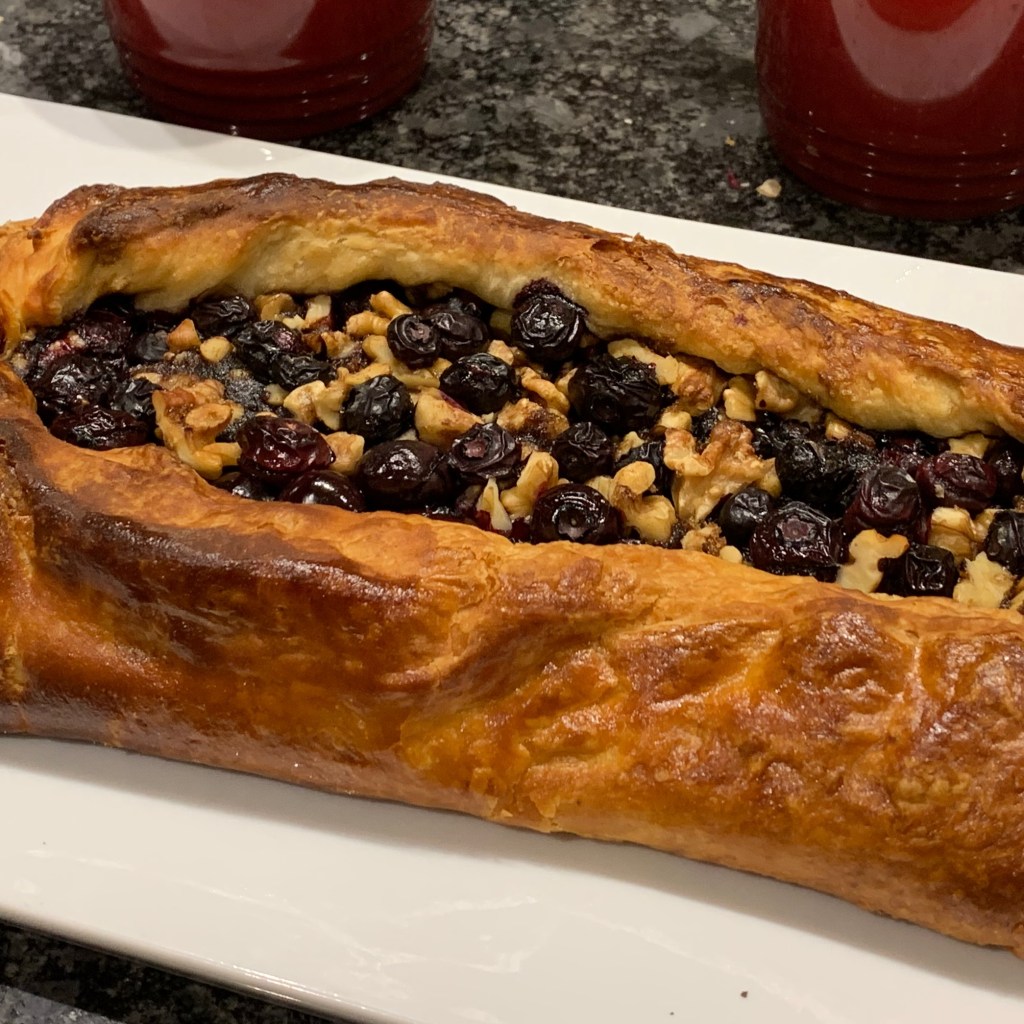
Think of it as the child of a love triangle of brioche, cinnamon bun and baklava, only with a lot less sugar. For Slovenian celebrations – Easter, Christmas, weddings, whatever – the Potica (the “c” is pronounced “ts”) is a favourite baked item. (I’m not really sure whether to call it a bread or a cake). There is even a special mould for it called a Potičnik, which is a relative of the bundt tin more commonly found in the UK or US, but with a different pattern around the top. However, if you don’t own a bundt tin, you can make a perfectly good Potica in a normal loaf tin, as I’ve done here: it just won’t be quite as striking.
The critical part here is to make a beautifully stretchy dough enriched with eggs, butter and some sugar, although really a lot less than you might expect from similar breads around the world. I’ve started with this recipe from Jernej Kitchen and I’m really impressed: it’s resulted in a truly lovely dough: smooth, elastic, non-greasy and deeply satisfying to work with.
Next, it’s the filling. Staying with Jernej, I’ve gone for walnuts and honey, which is probably the most popular version of Potica: apparently, you can choose any of the usual things that Eastern Europeans like in pastries: poppyseeds are a favourite of mine.
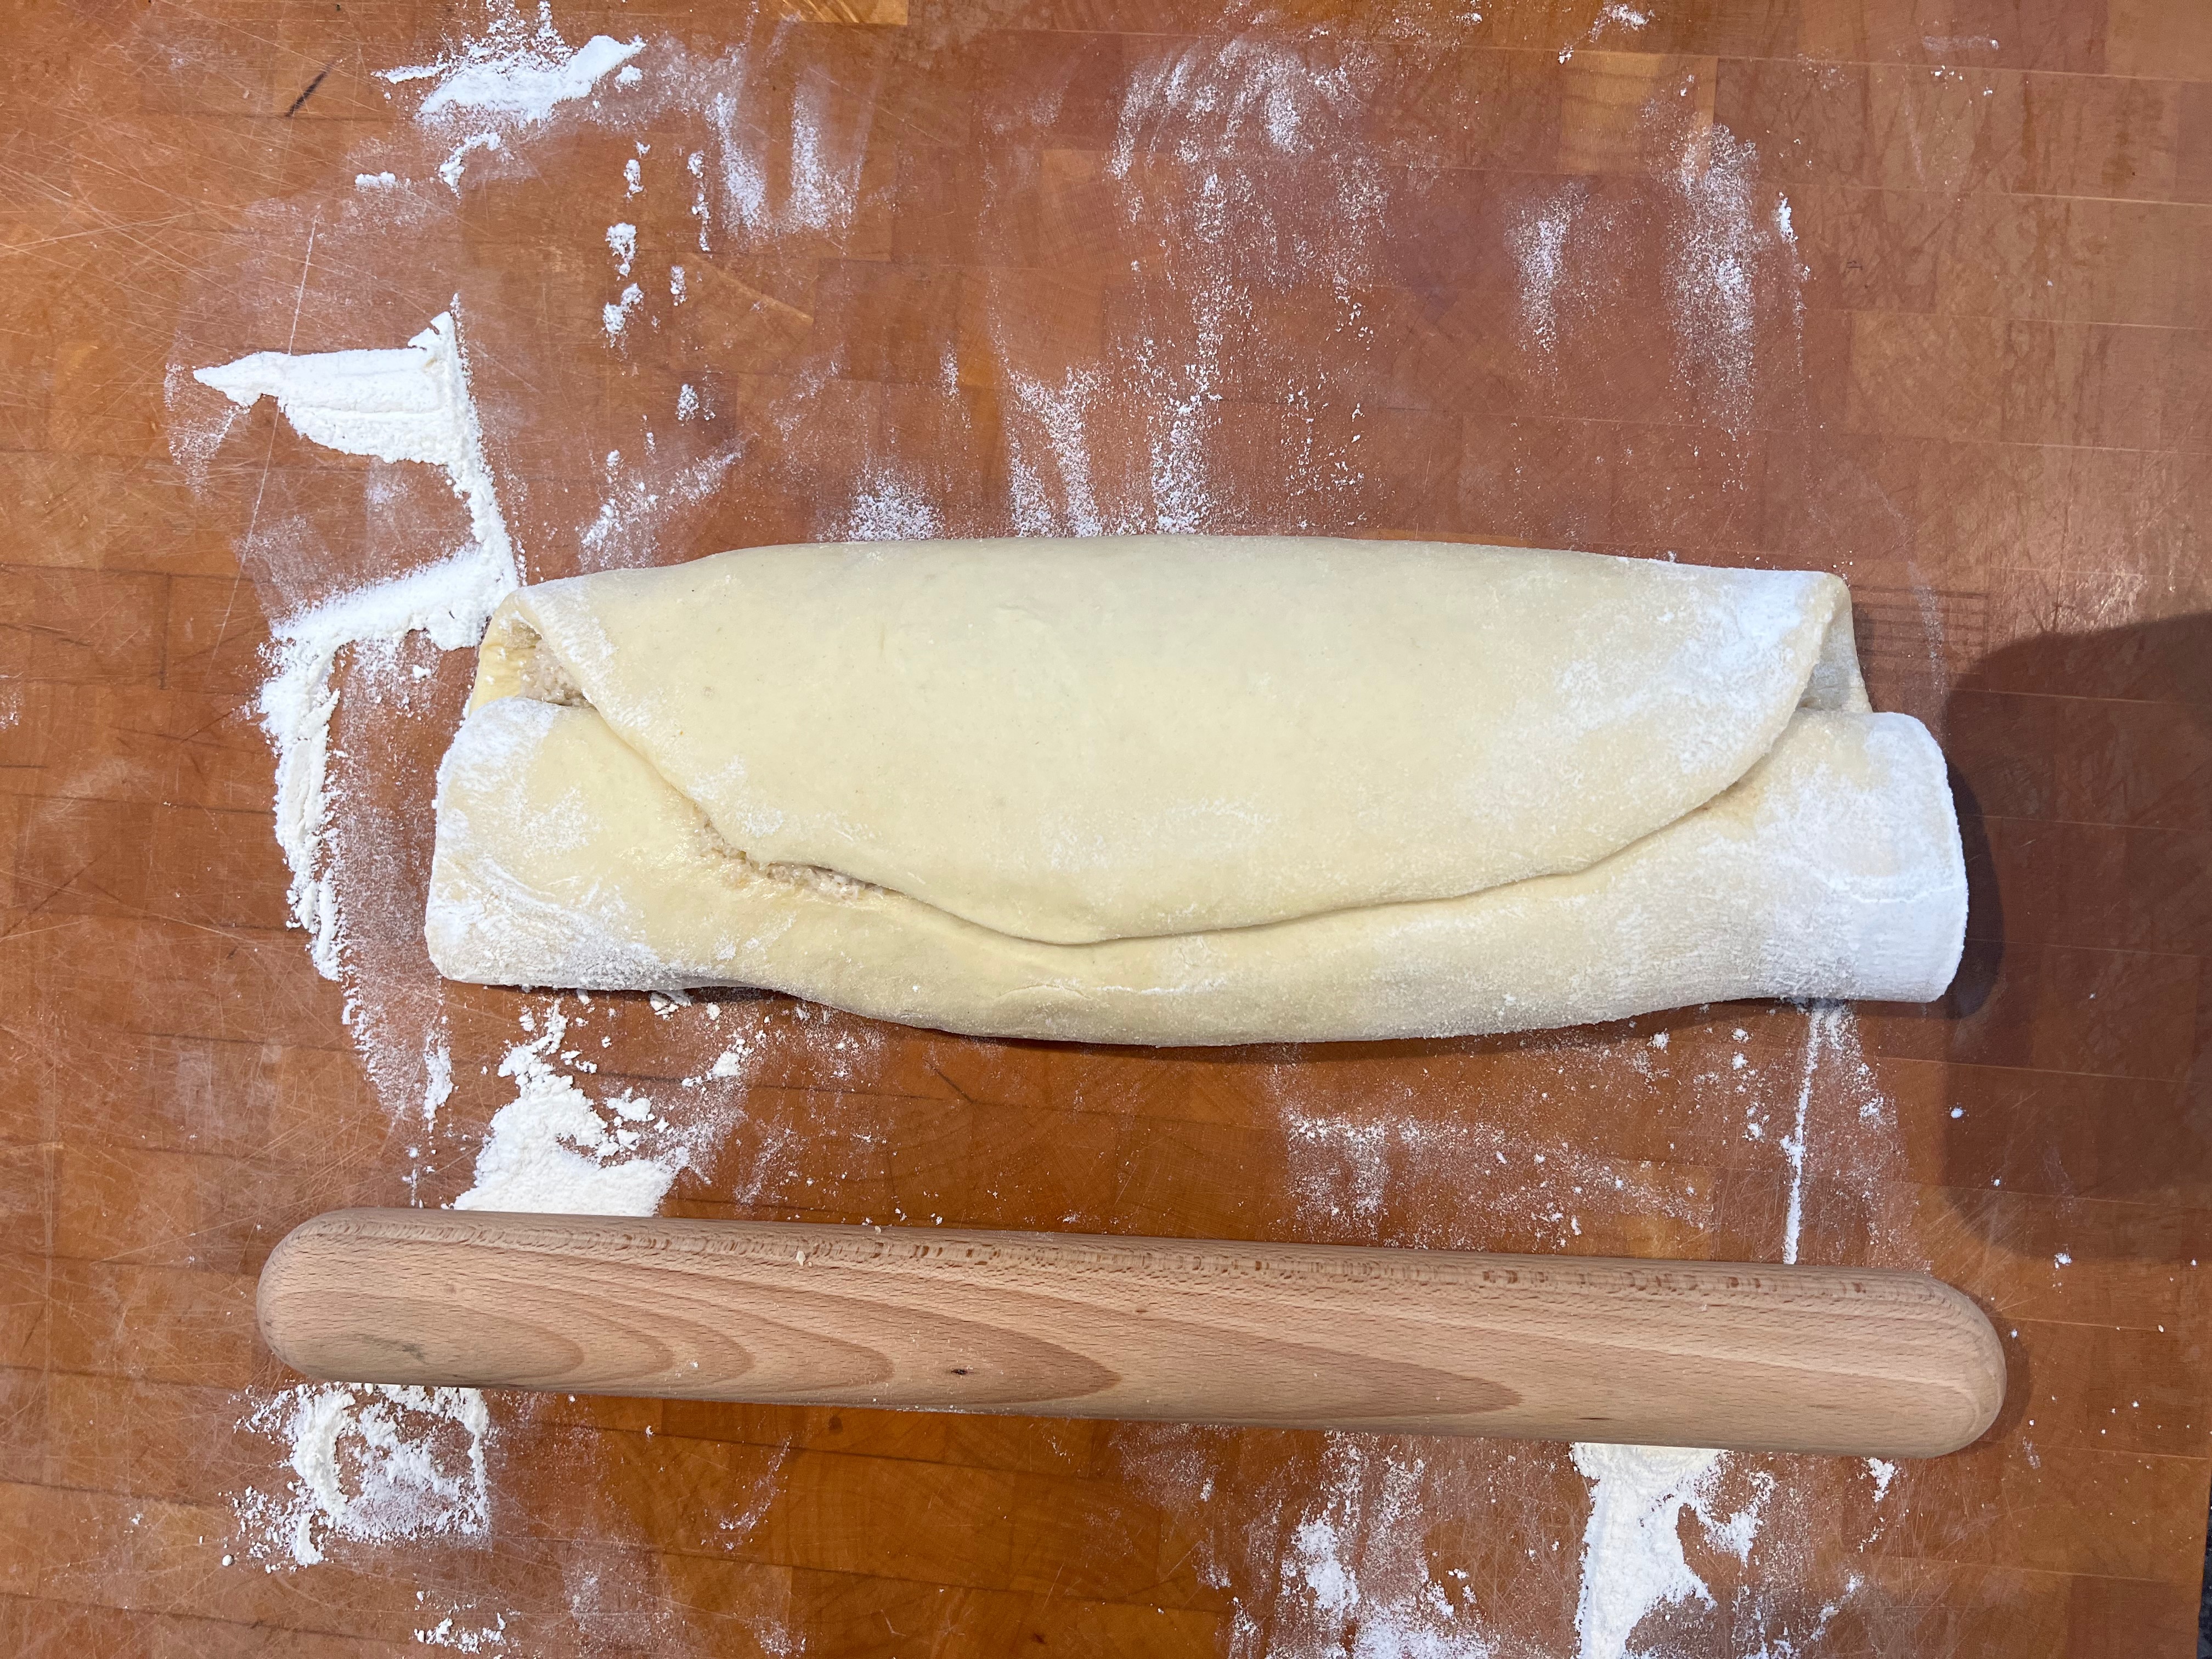
Finally, rolling and baking. Let’s be honest here: looking at the photos, it’s obvious that there aren’t nearly enough turns on my spiral of dough and filling. Partly, that’s the fault of the recipe suggesting that I roll it to 40cm long – I think doubling that would have been good – and partly, I wimped out of how thin the dough was. Next time, I’ll roll out the dough to as close as I can get to the full length of my board and then make strenous efforts to roll the whole thing as tightly as I can.
By the way, proving times are pretty flexible. Jernej gives a couple of options, both of which involve long proves in the fridge; I didn’t have time so I just proved at slightly above room temperature and watched carefully until the dough was risen how I wanted it, which I think worked fine.
The dough
5g dried yeast
25g sugar
270ml milk
500g strong white bread flour
2 eggs
65 g butter
8g salt
Put the milk into a bowl and warm until lukewarm (45s in my 900W microwave got the milk to 34℃).
Put the yeast, sugar and milk into a bowl and leave until frothy (10 minutes or so)
Put the flour into the bowl of your stand mixer
Separate the eggs: place the yolks in the bowl with the flour, setting aside the whites, which you’ll use for the filling.
Add the yeast mix to the bowl and mix with the standard paddle until well combined
Melt the butter and add it to the bowl with the salt.
Switch to the dough hook and knead at low speed until smooth and elastic – around 8-10 minutes.
Form the dough into a ball and place in a bowl and cover.
Leave until risen to around doubled in size – around 1-2 hours depending on the temperature of your kitchen.
The filling
300g walnuts
60g honey
30g granulated sugar (or caster)
100g single cream (Jernej went for 75 g heavy cream – single was what I had)
20g butter
20ml rum
½ tsp ground cinnamon
Zest of half a lemon
2 egg whites reserved from above
25g caster sugar
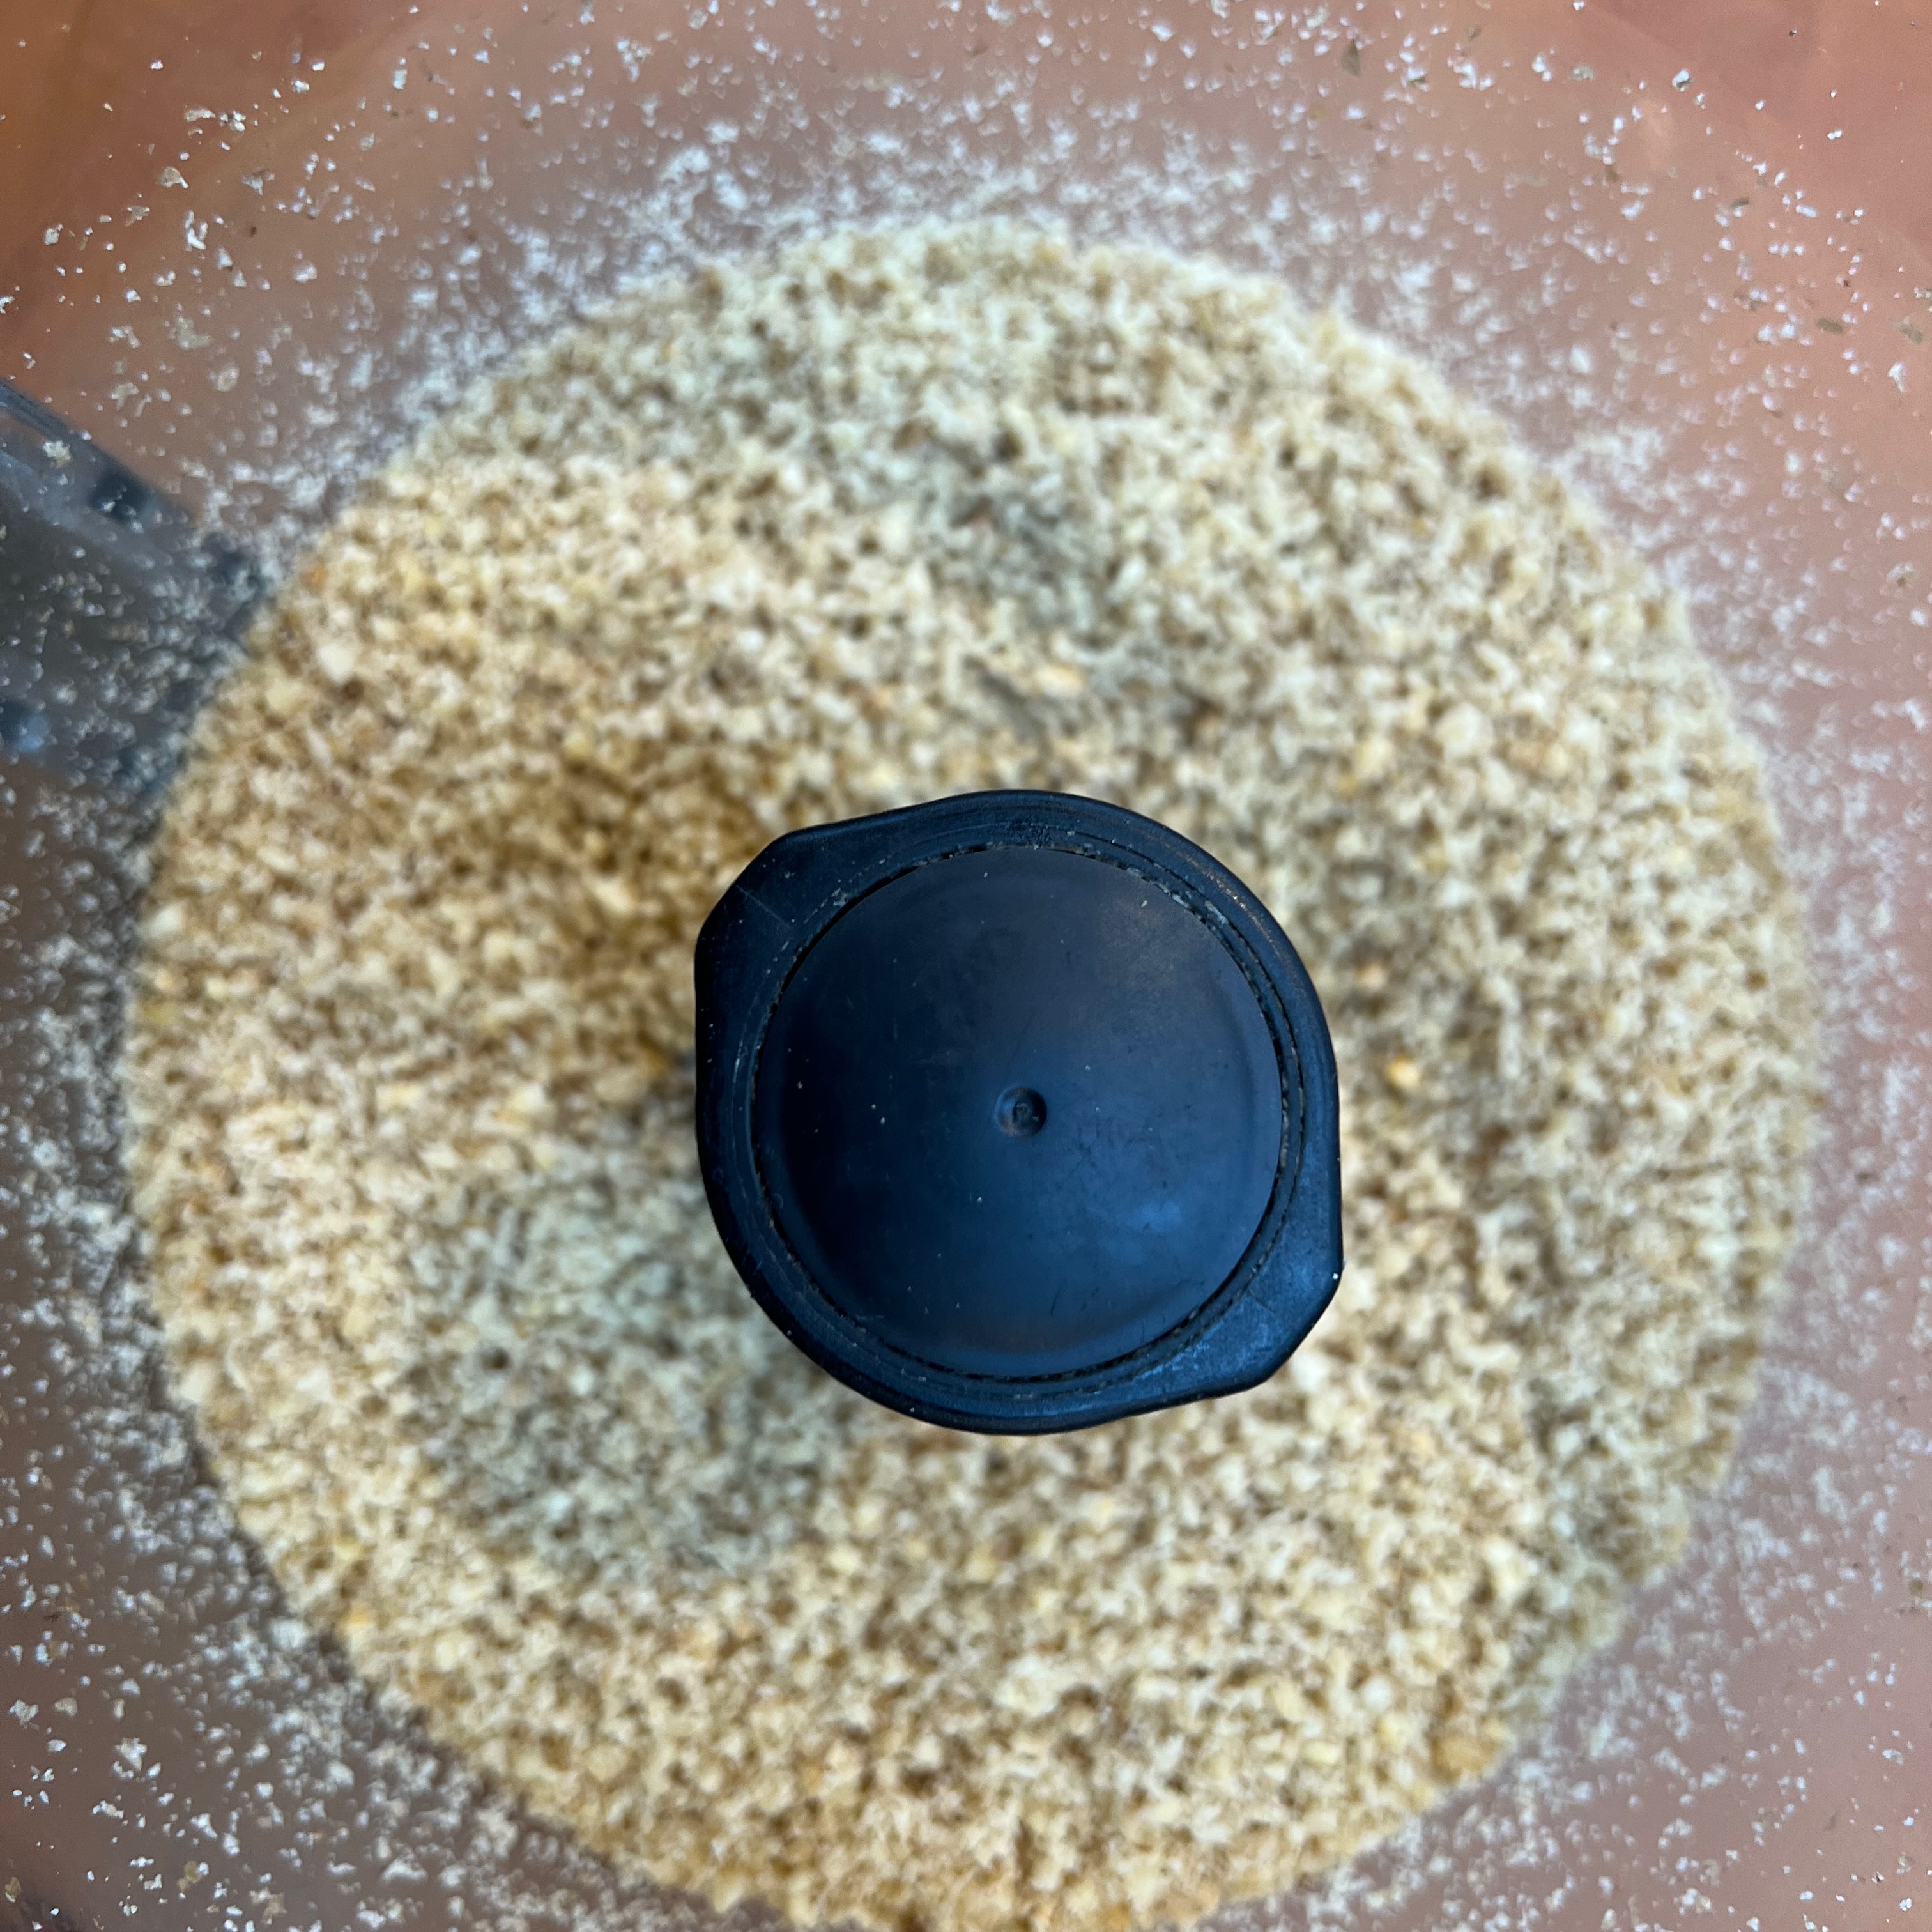
Put the walnuts into a food processor and grind until fine – but don’t overdo it: you don’t want oil coming out of the walnuts.
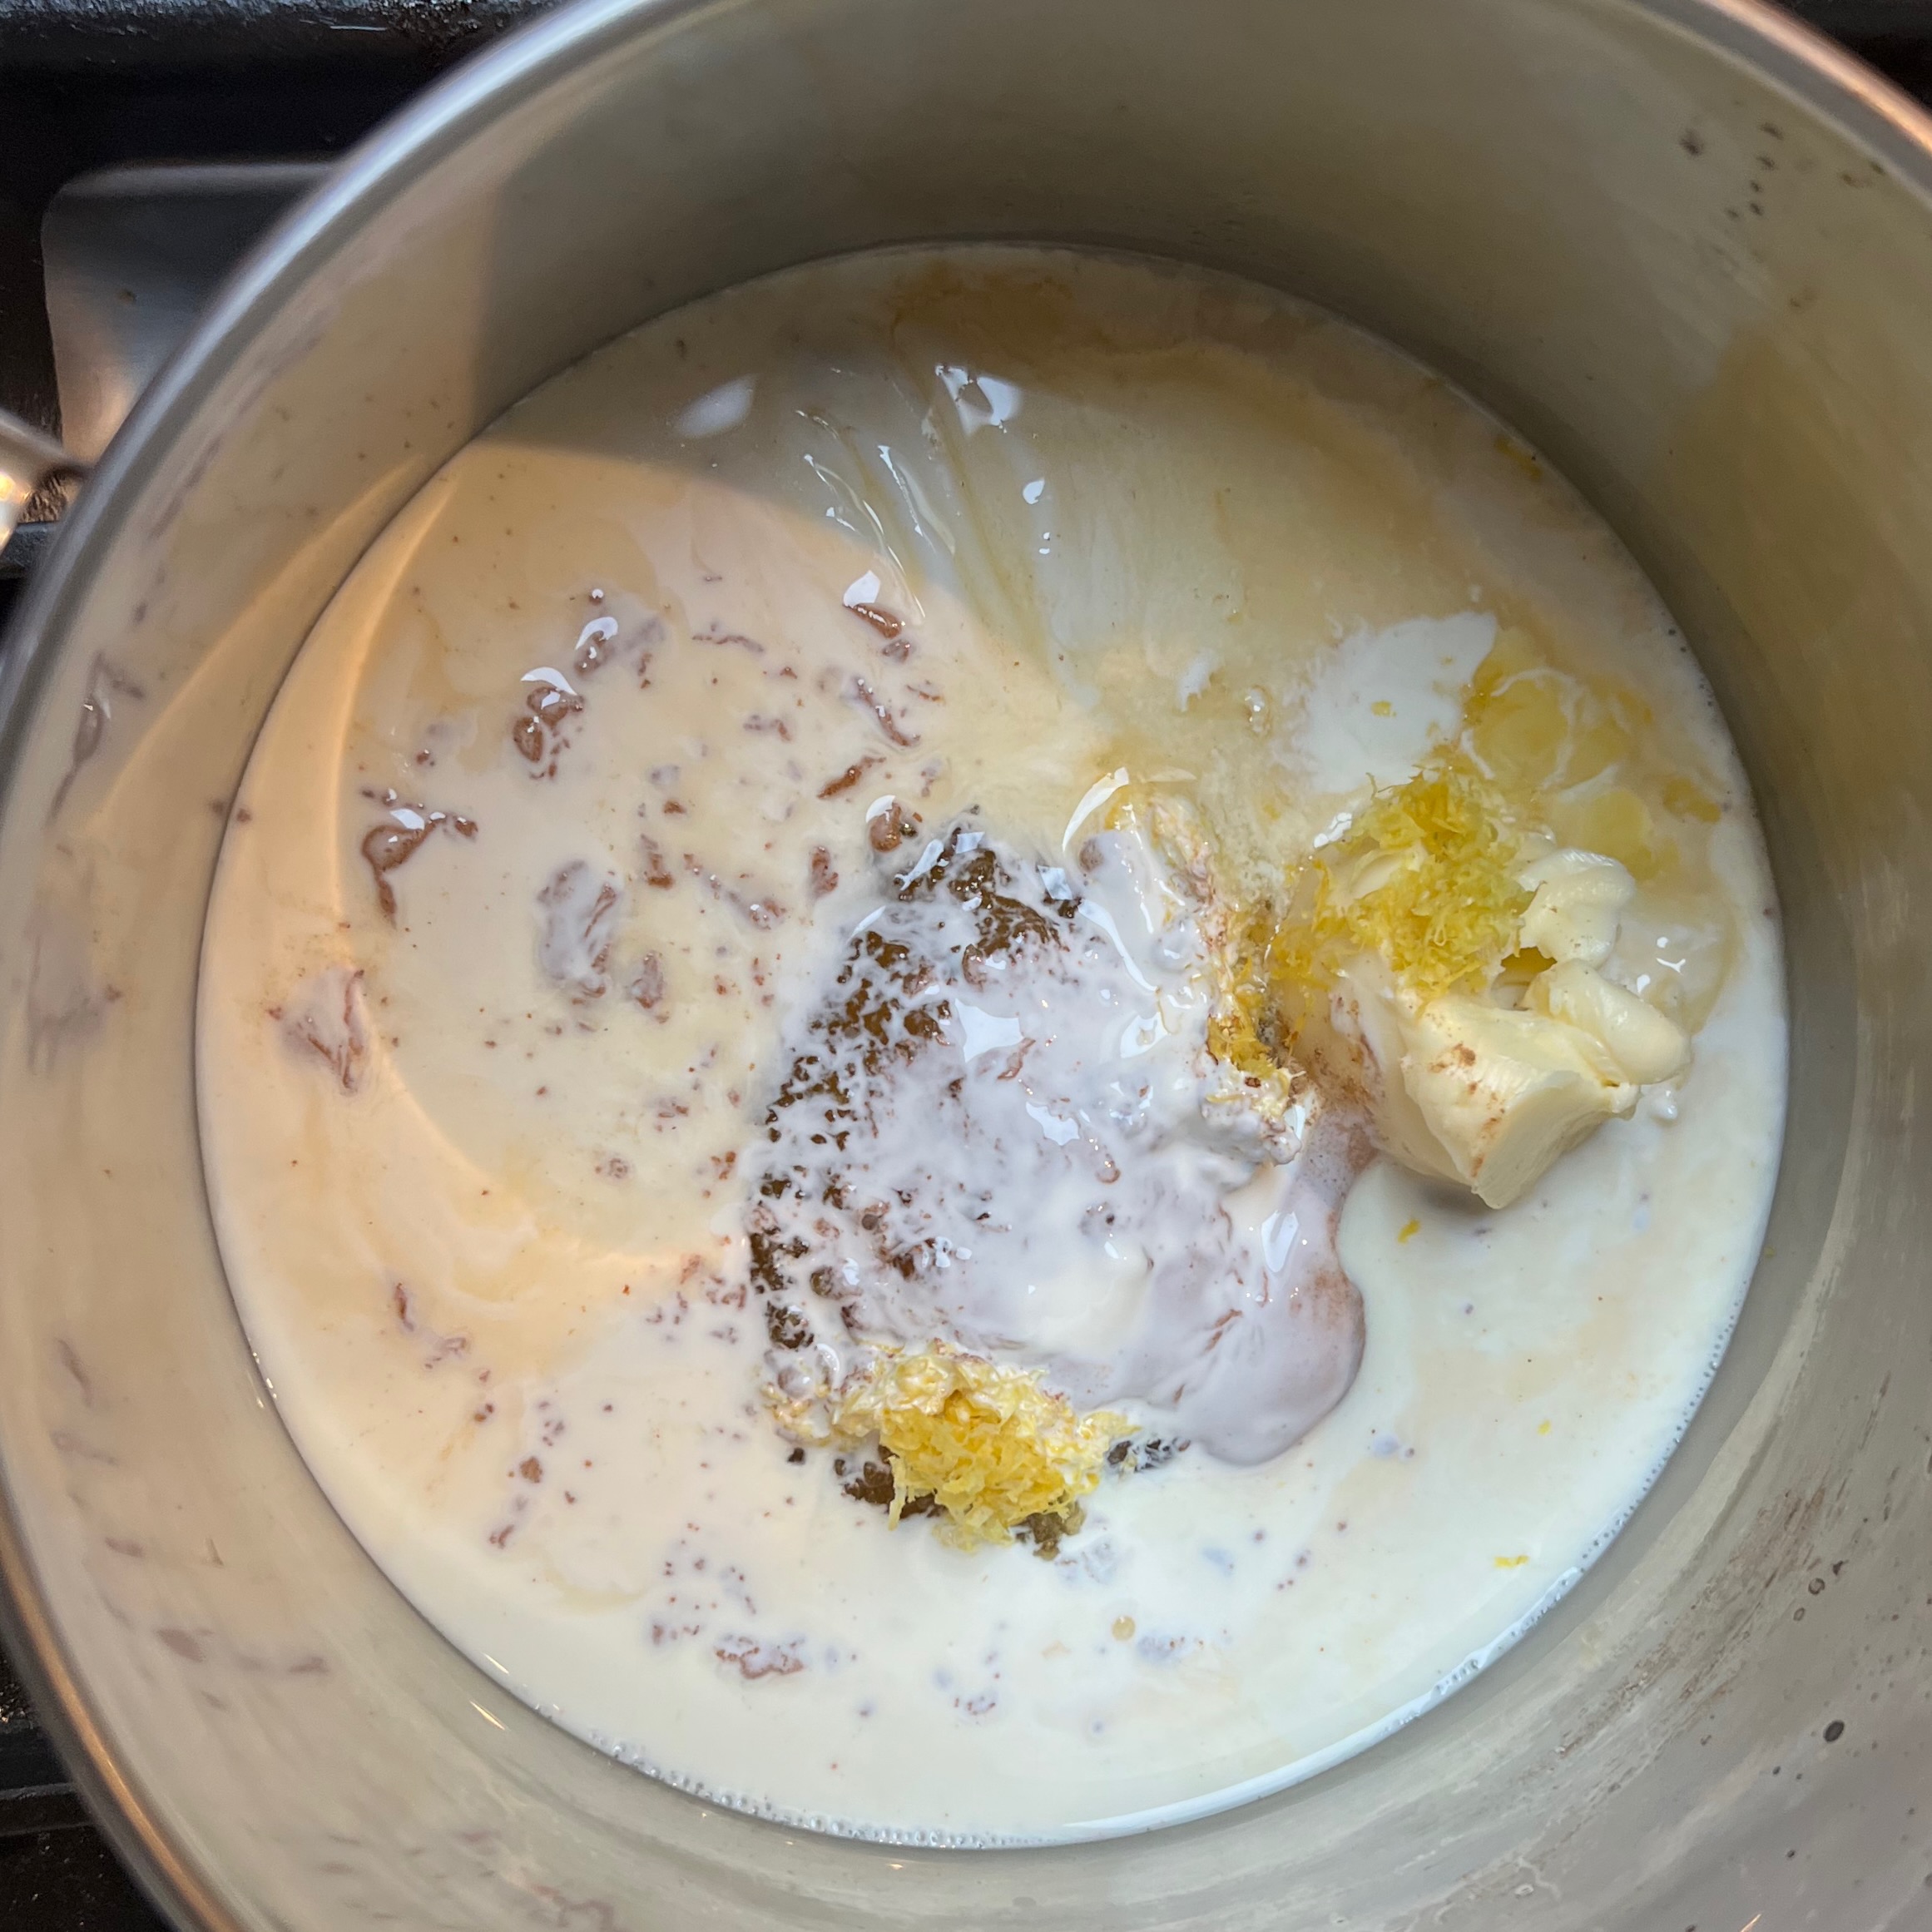
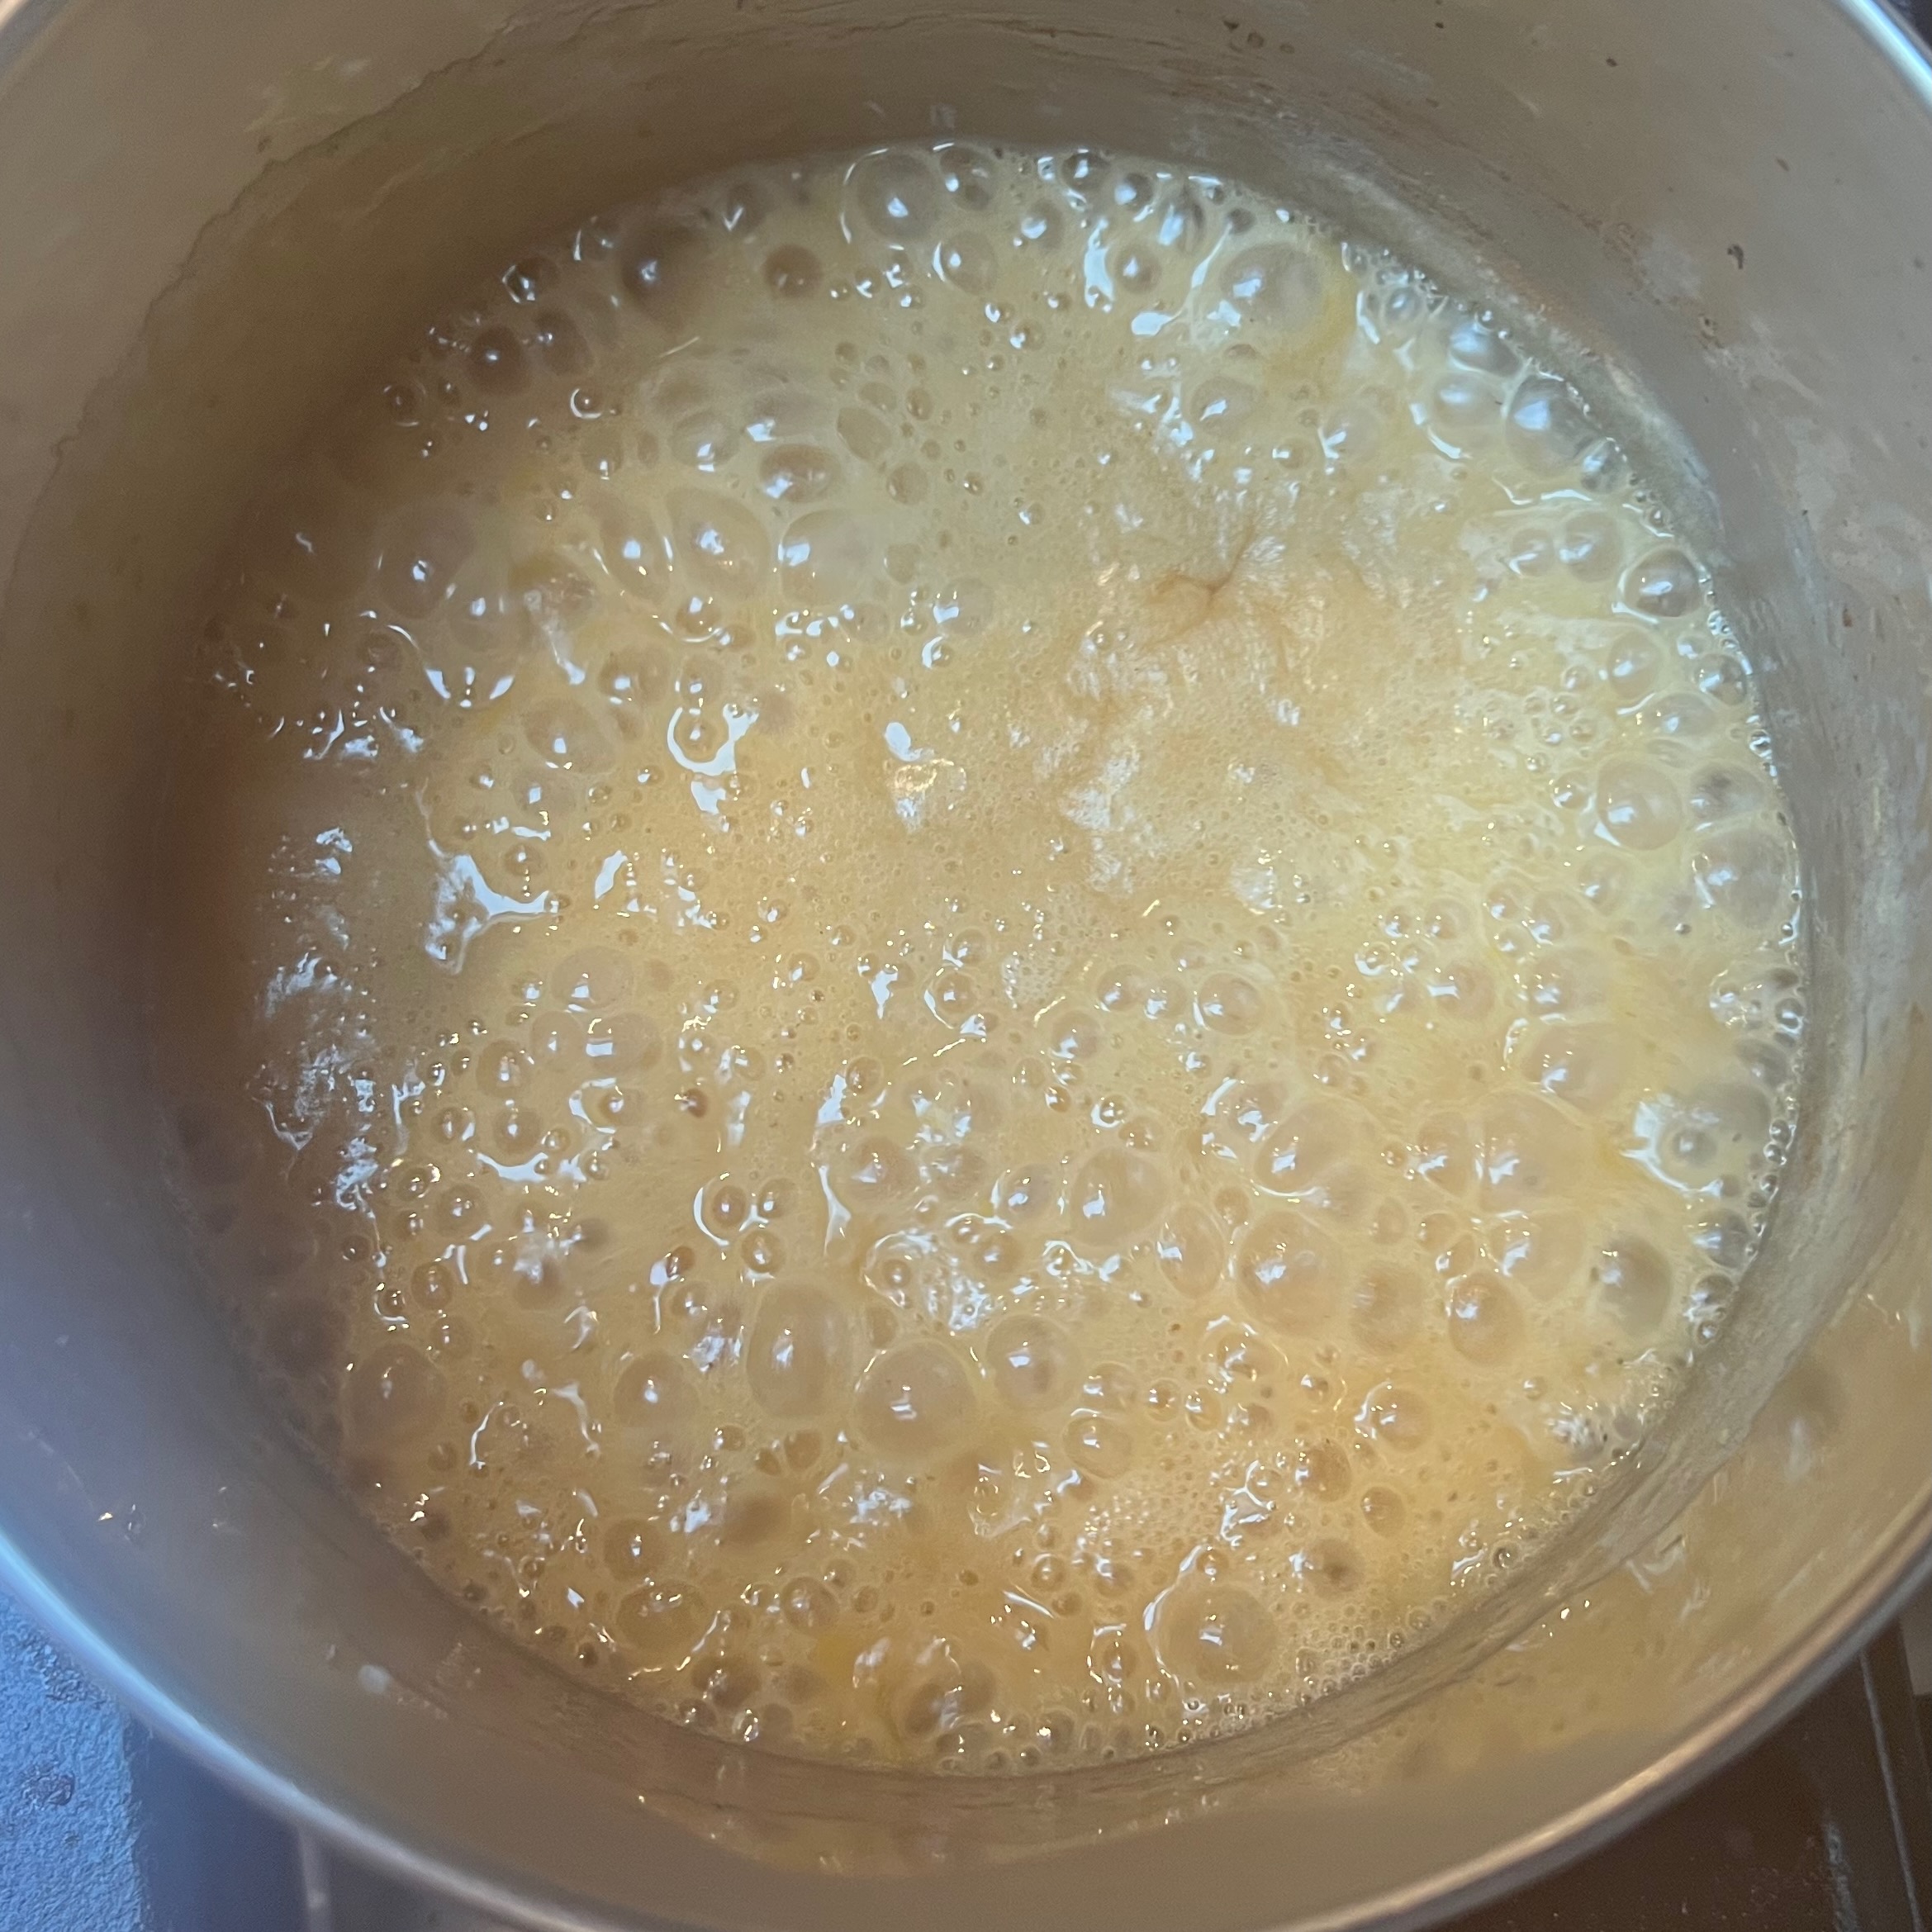
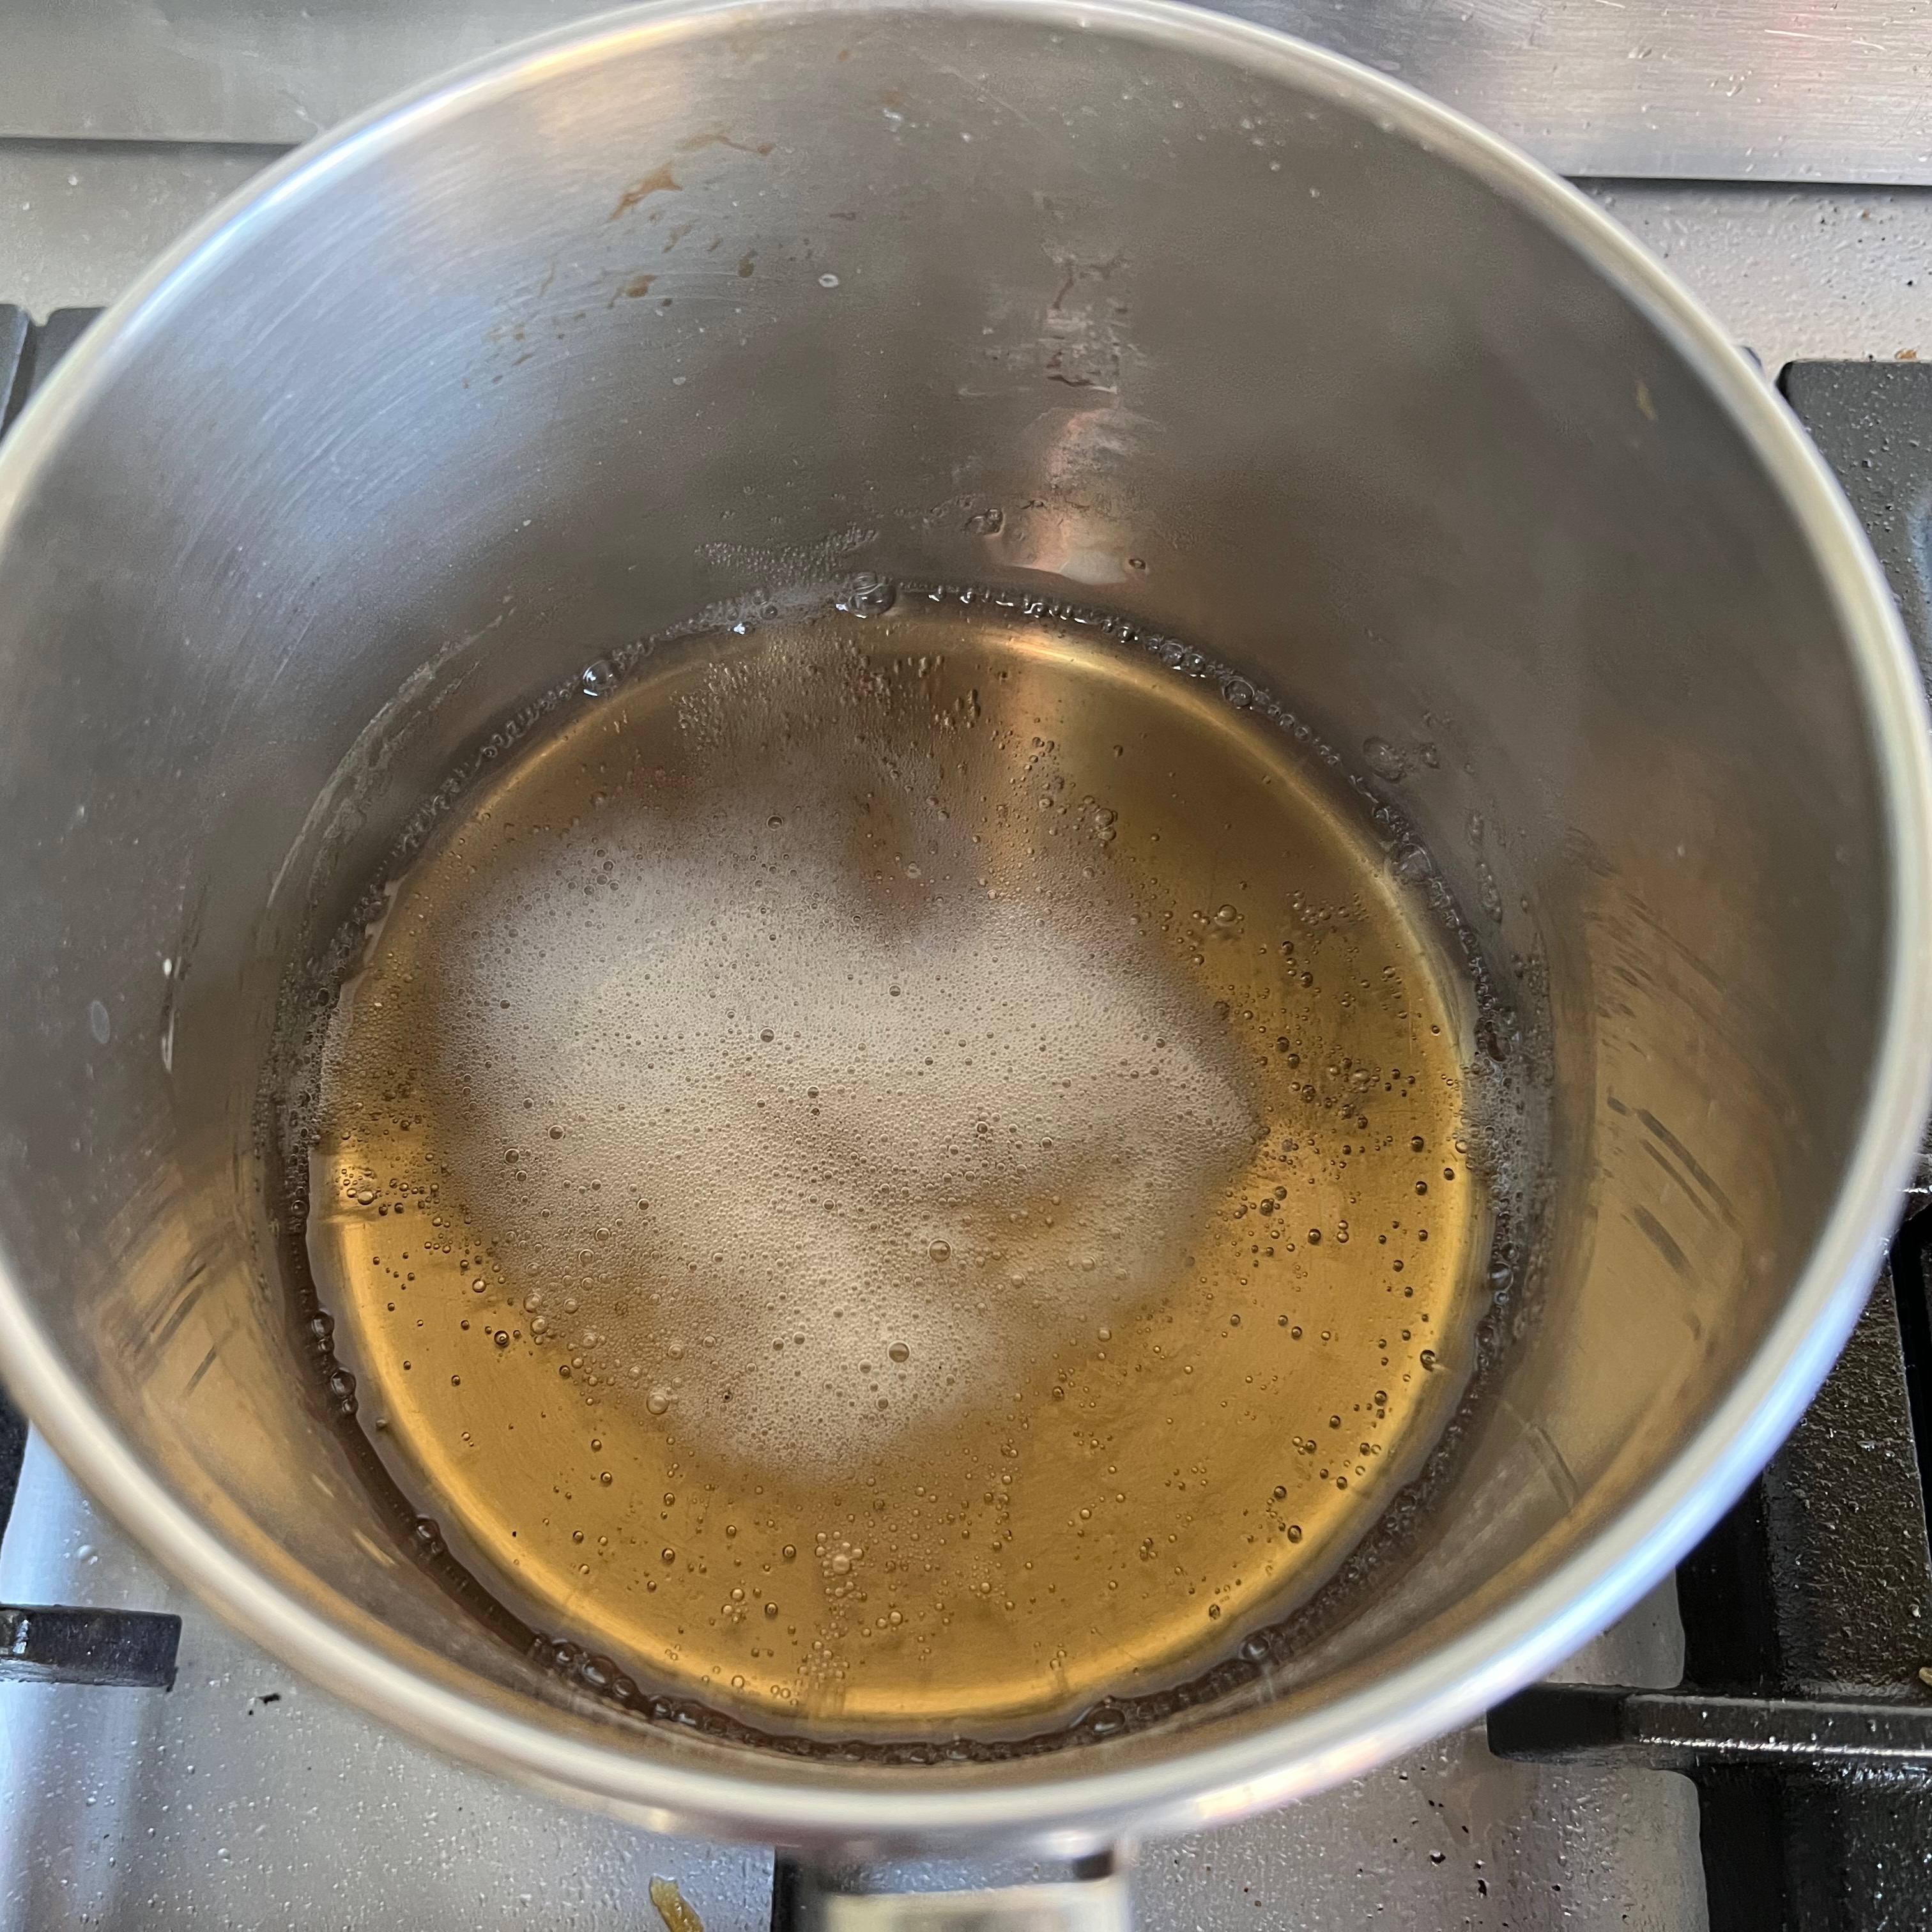
Put the honey, granulated sugar, cream, butter and rum into a saucepan and bring to the boil; simmer for a minute or so.
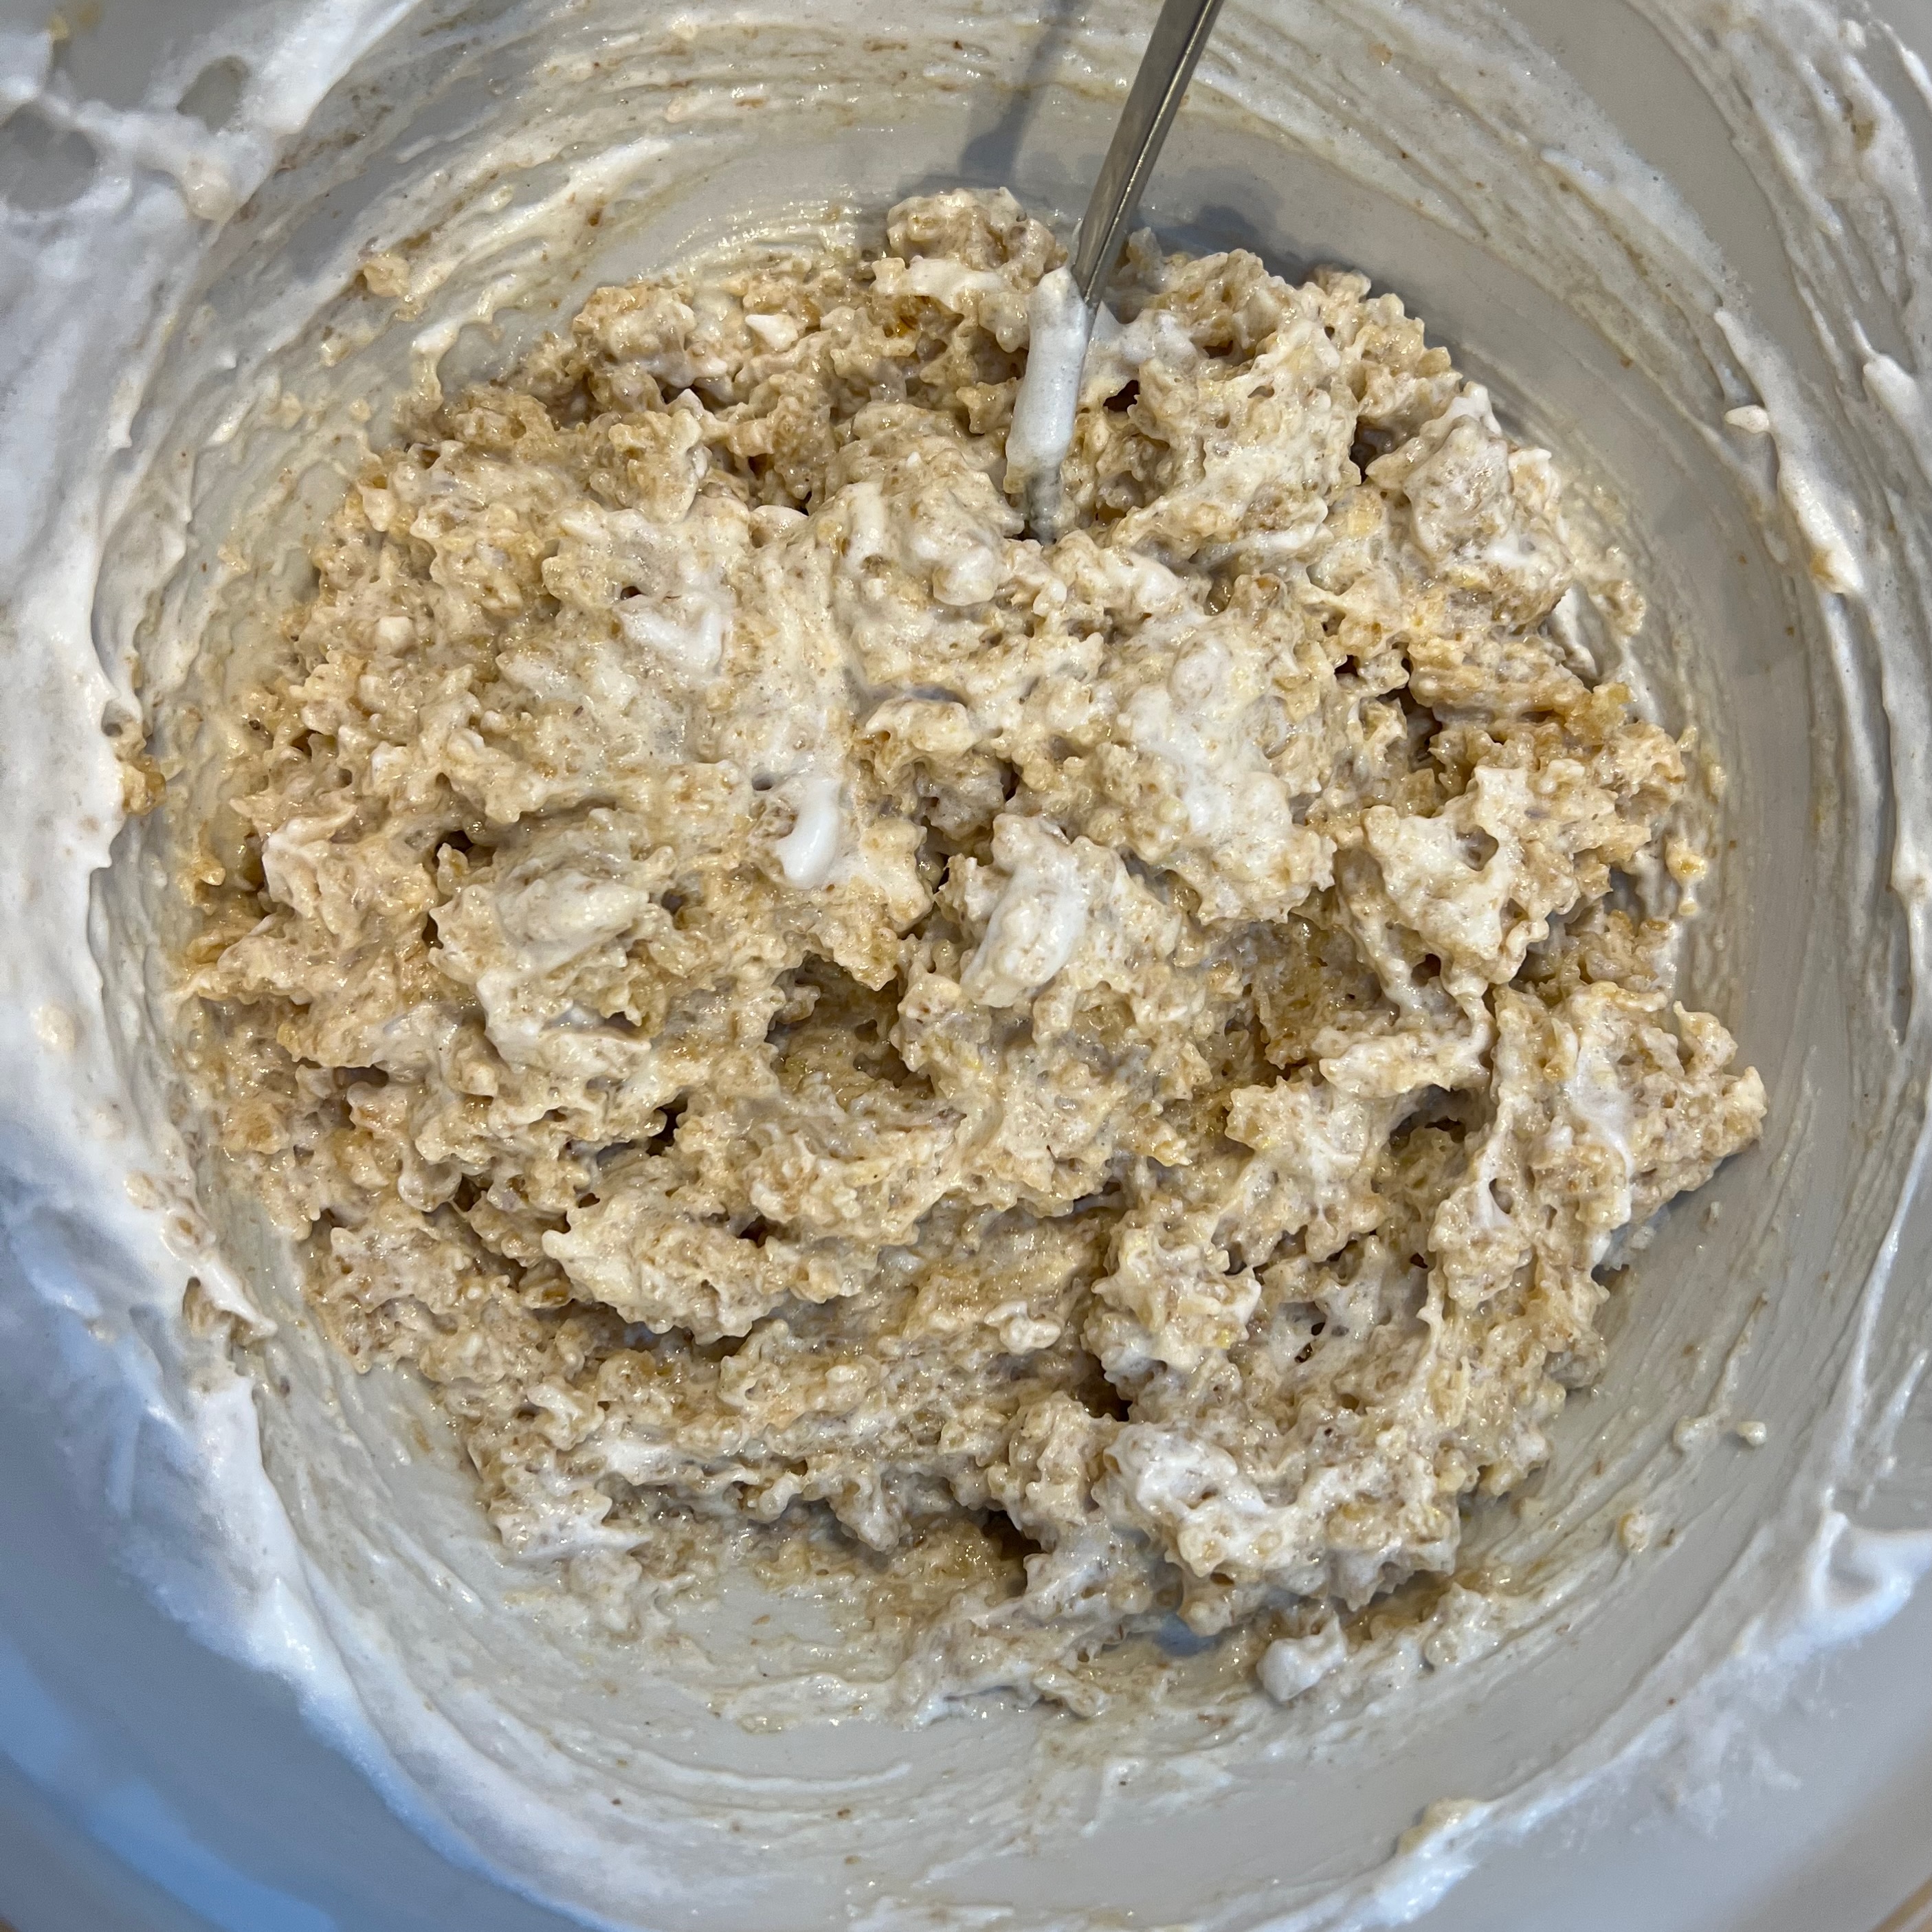
Add the mixture into your bowl with the walnuts, add the cinnamon and lemon zest and stir thoroughly.
Wait until around 10 minutes before your dough is sufficiently risen before the next step, which is to make a meringue.
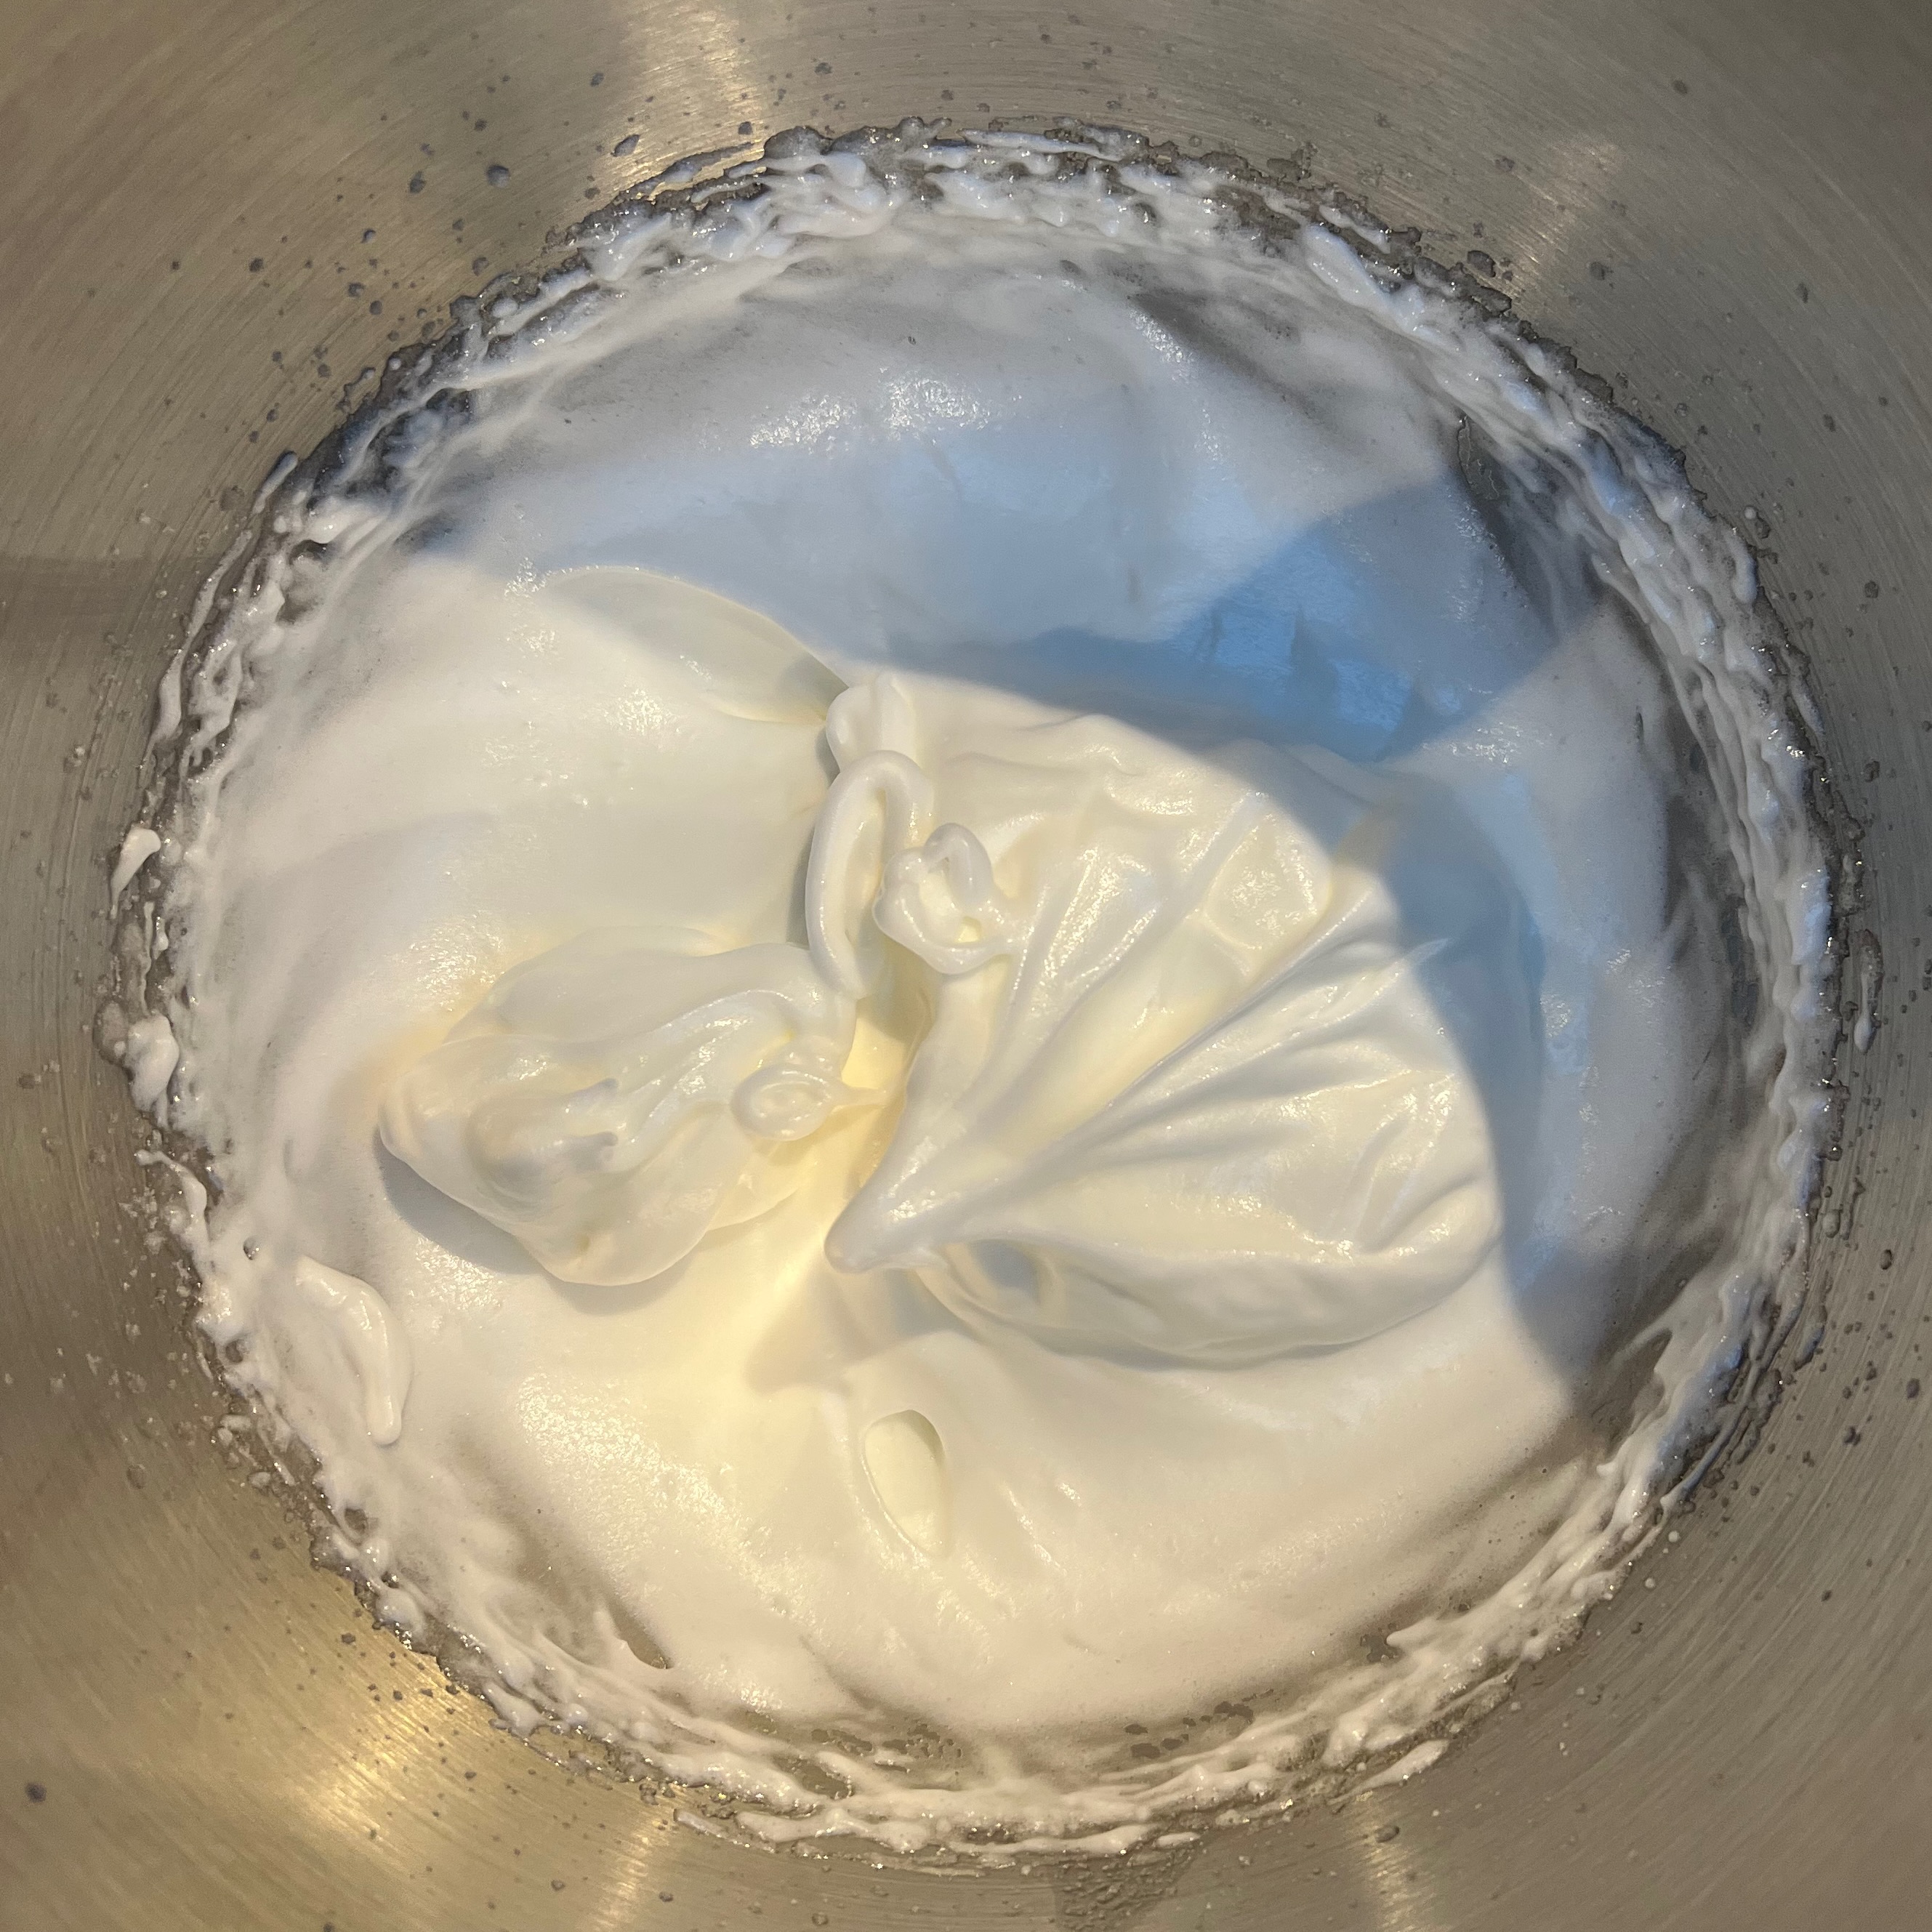
Beat the egg whites at high speed. Once they are soft and beginning to fluff, add the sugar gradually as you beat.
Continue beating at high speed until you have a stiff meringue.
Fold the meringue into the walnut mixture until smoothly combined.
Putting it together
A little milk for brushing
Preheat oven to 165℃ fan.
Grease your baking tin – a bundt tin if you have one, or a loaf pan if you don’t.
Flour your board.
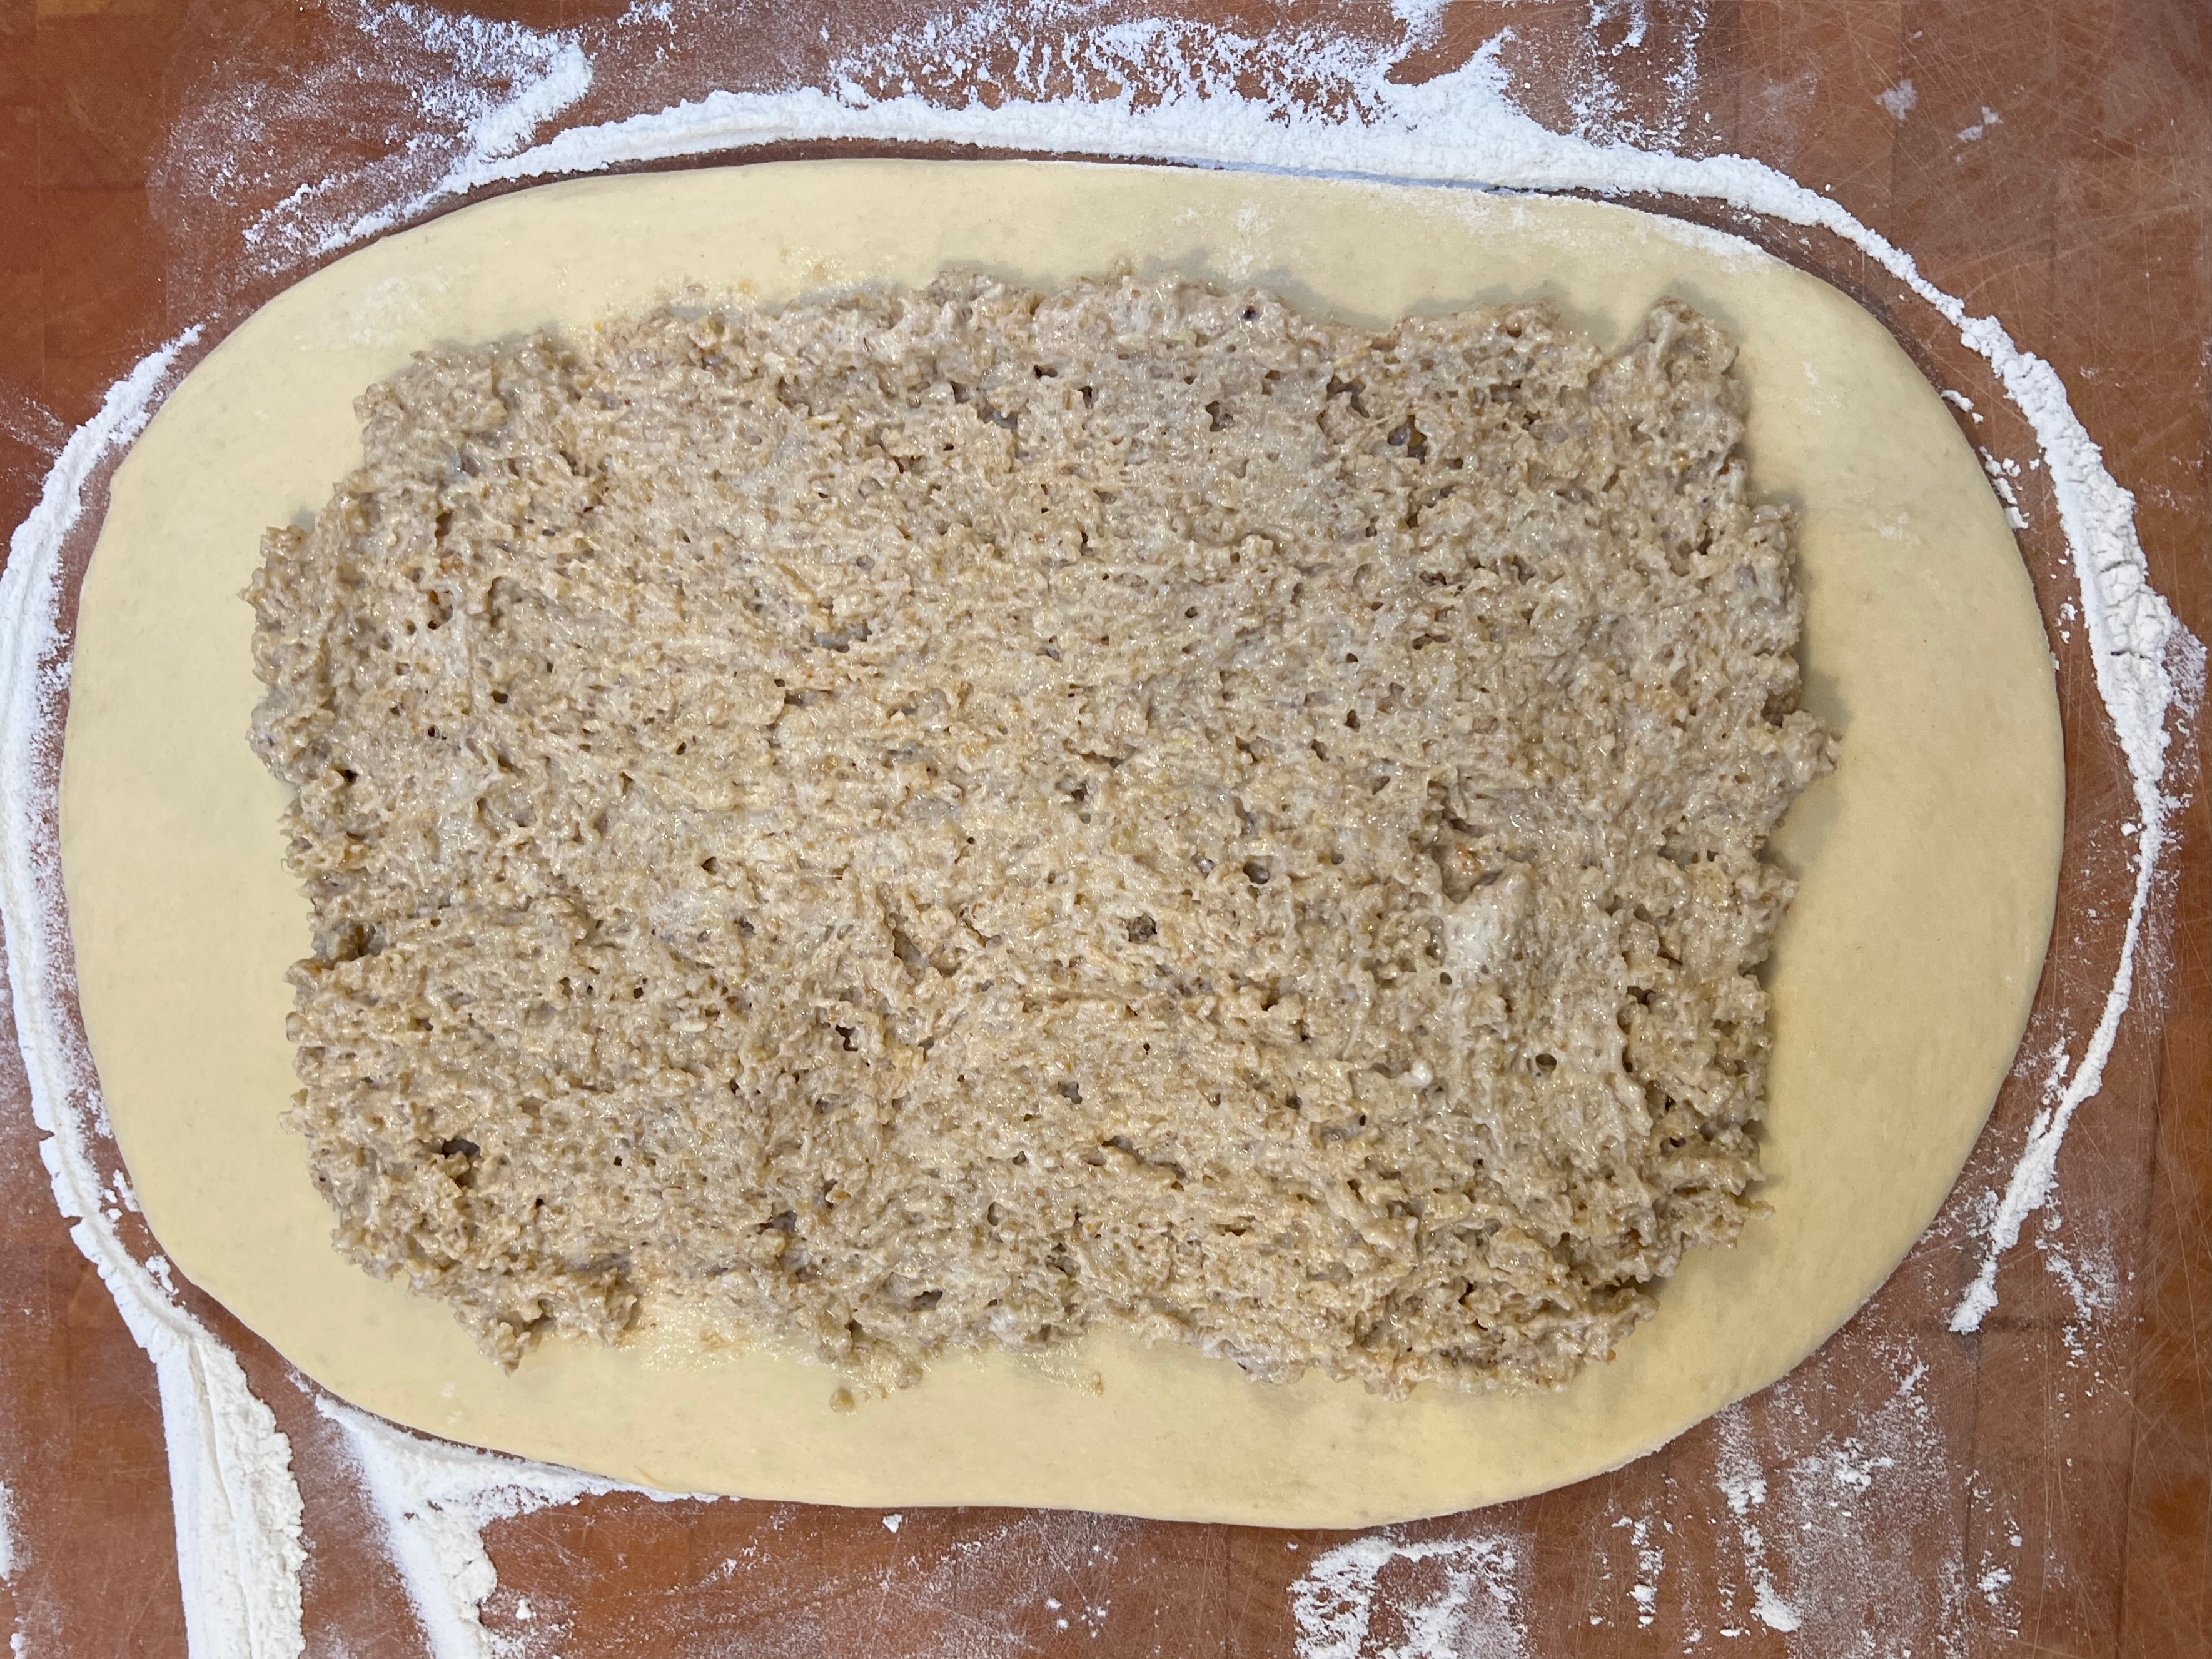
Roll out the dough into a rectangle. The width should be the length of your loaf tin, or around twice the width of your bundt tin. The length should be as long as you can reasonably make it without tearing the dough.
Spread the filling over the dough, leaving around 3-5cm around the edge.
Roll the dough up into a spiral, as tightly as possible: the more turns the better. Pinch the ends to stop the filling leaking out.
Transfer the dough to your tin, seam side up.
Cover and leave to rise until most of the way to the top of the tin. This took me 2 hours: it will take you more or less, depending mainly on the ambient temperature. Jernej suggests overnight in the fridge.
Poke holes in the dough with a skewer to allow moisture from the filling to escape with lower risk of the layers separating; I probably poked a dozen holes in total.
Brush with milk.
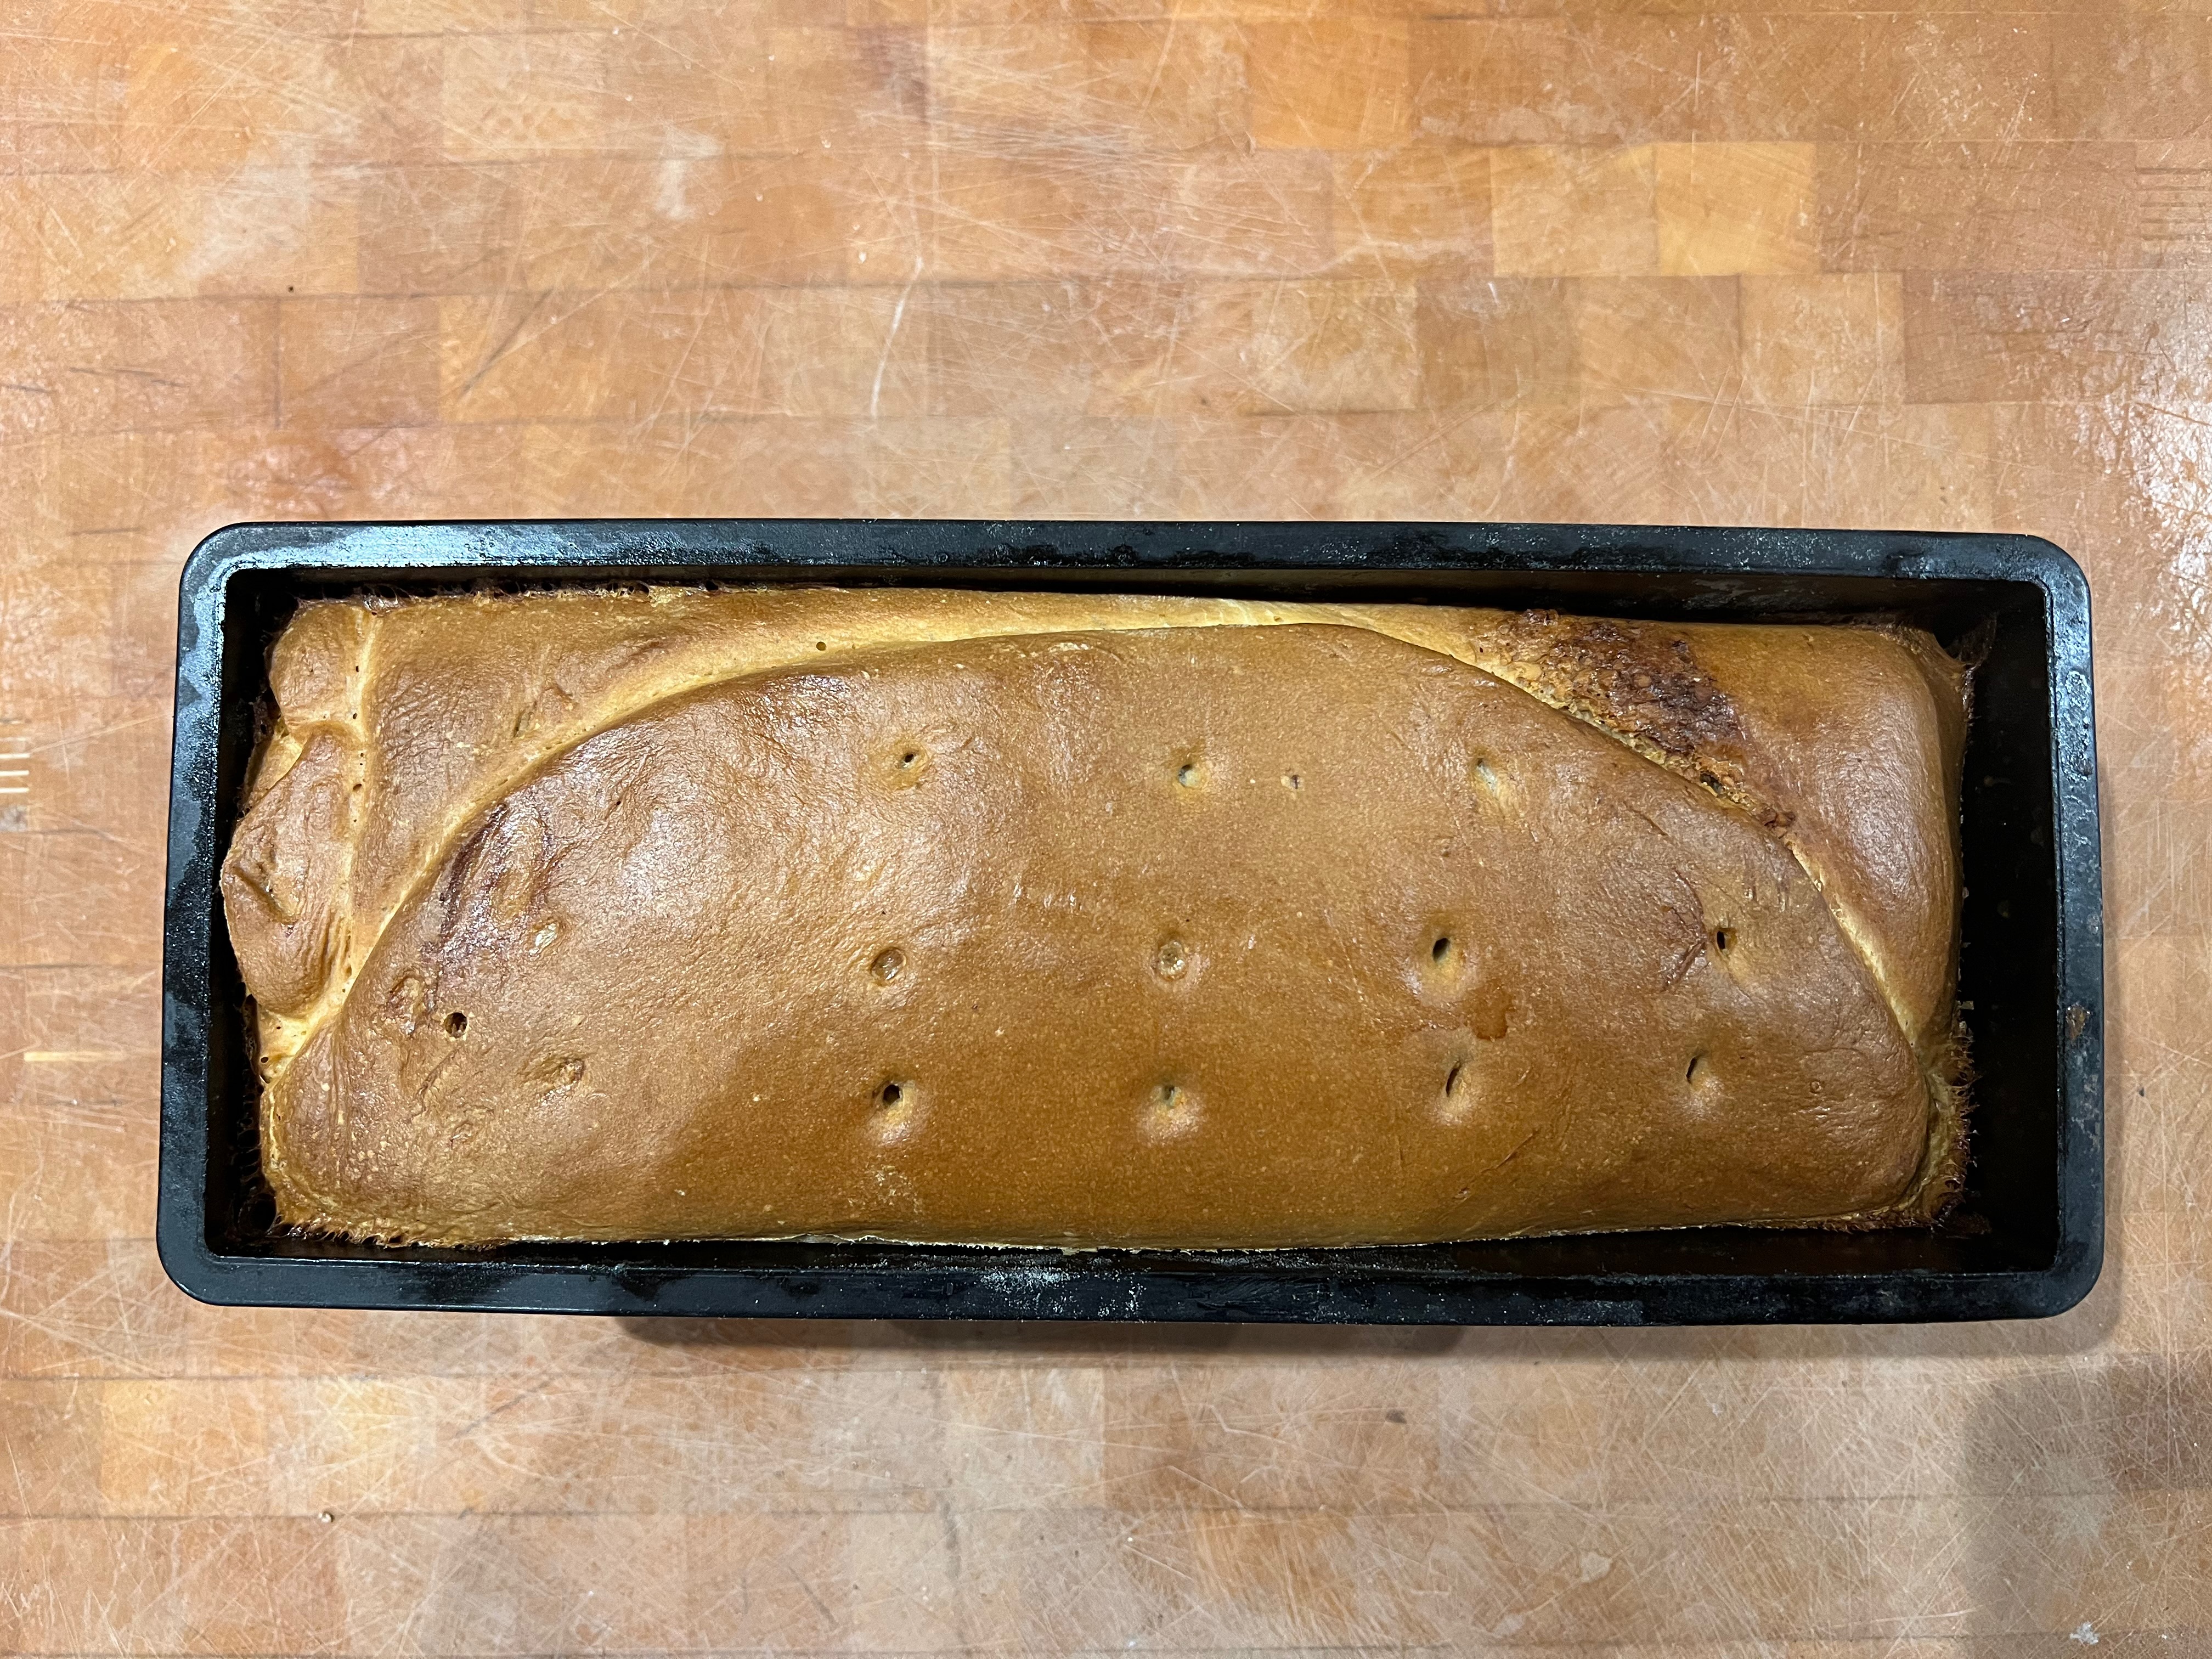
Bake for 45 min; then reduce the heat to 140℃ and bake until a deep gold colour – around 20 minutes more.
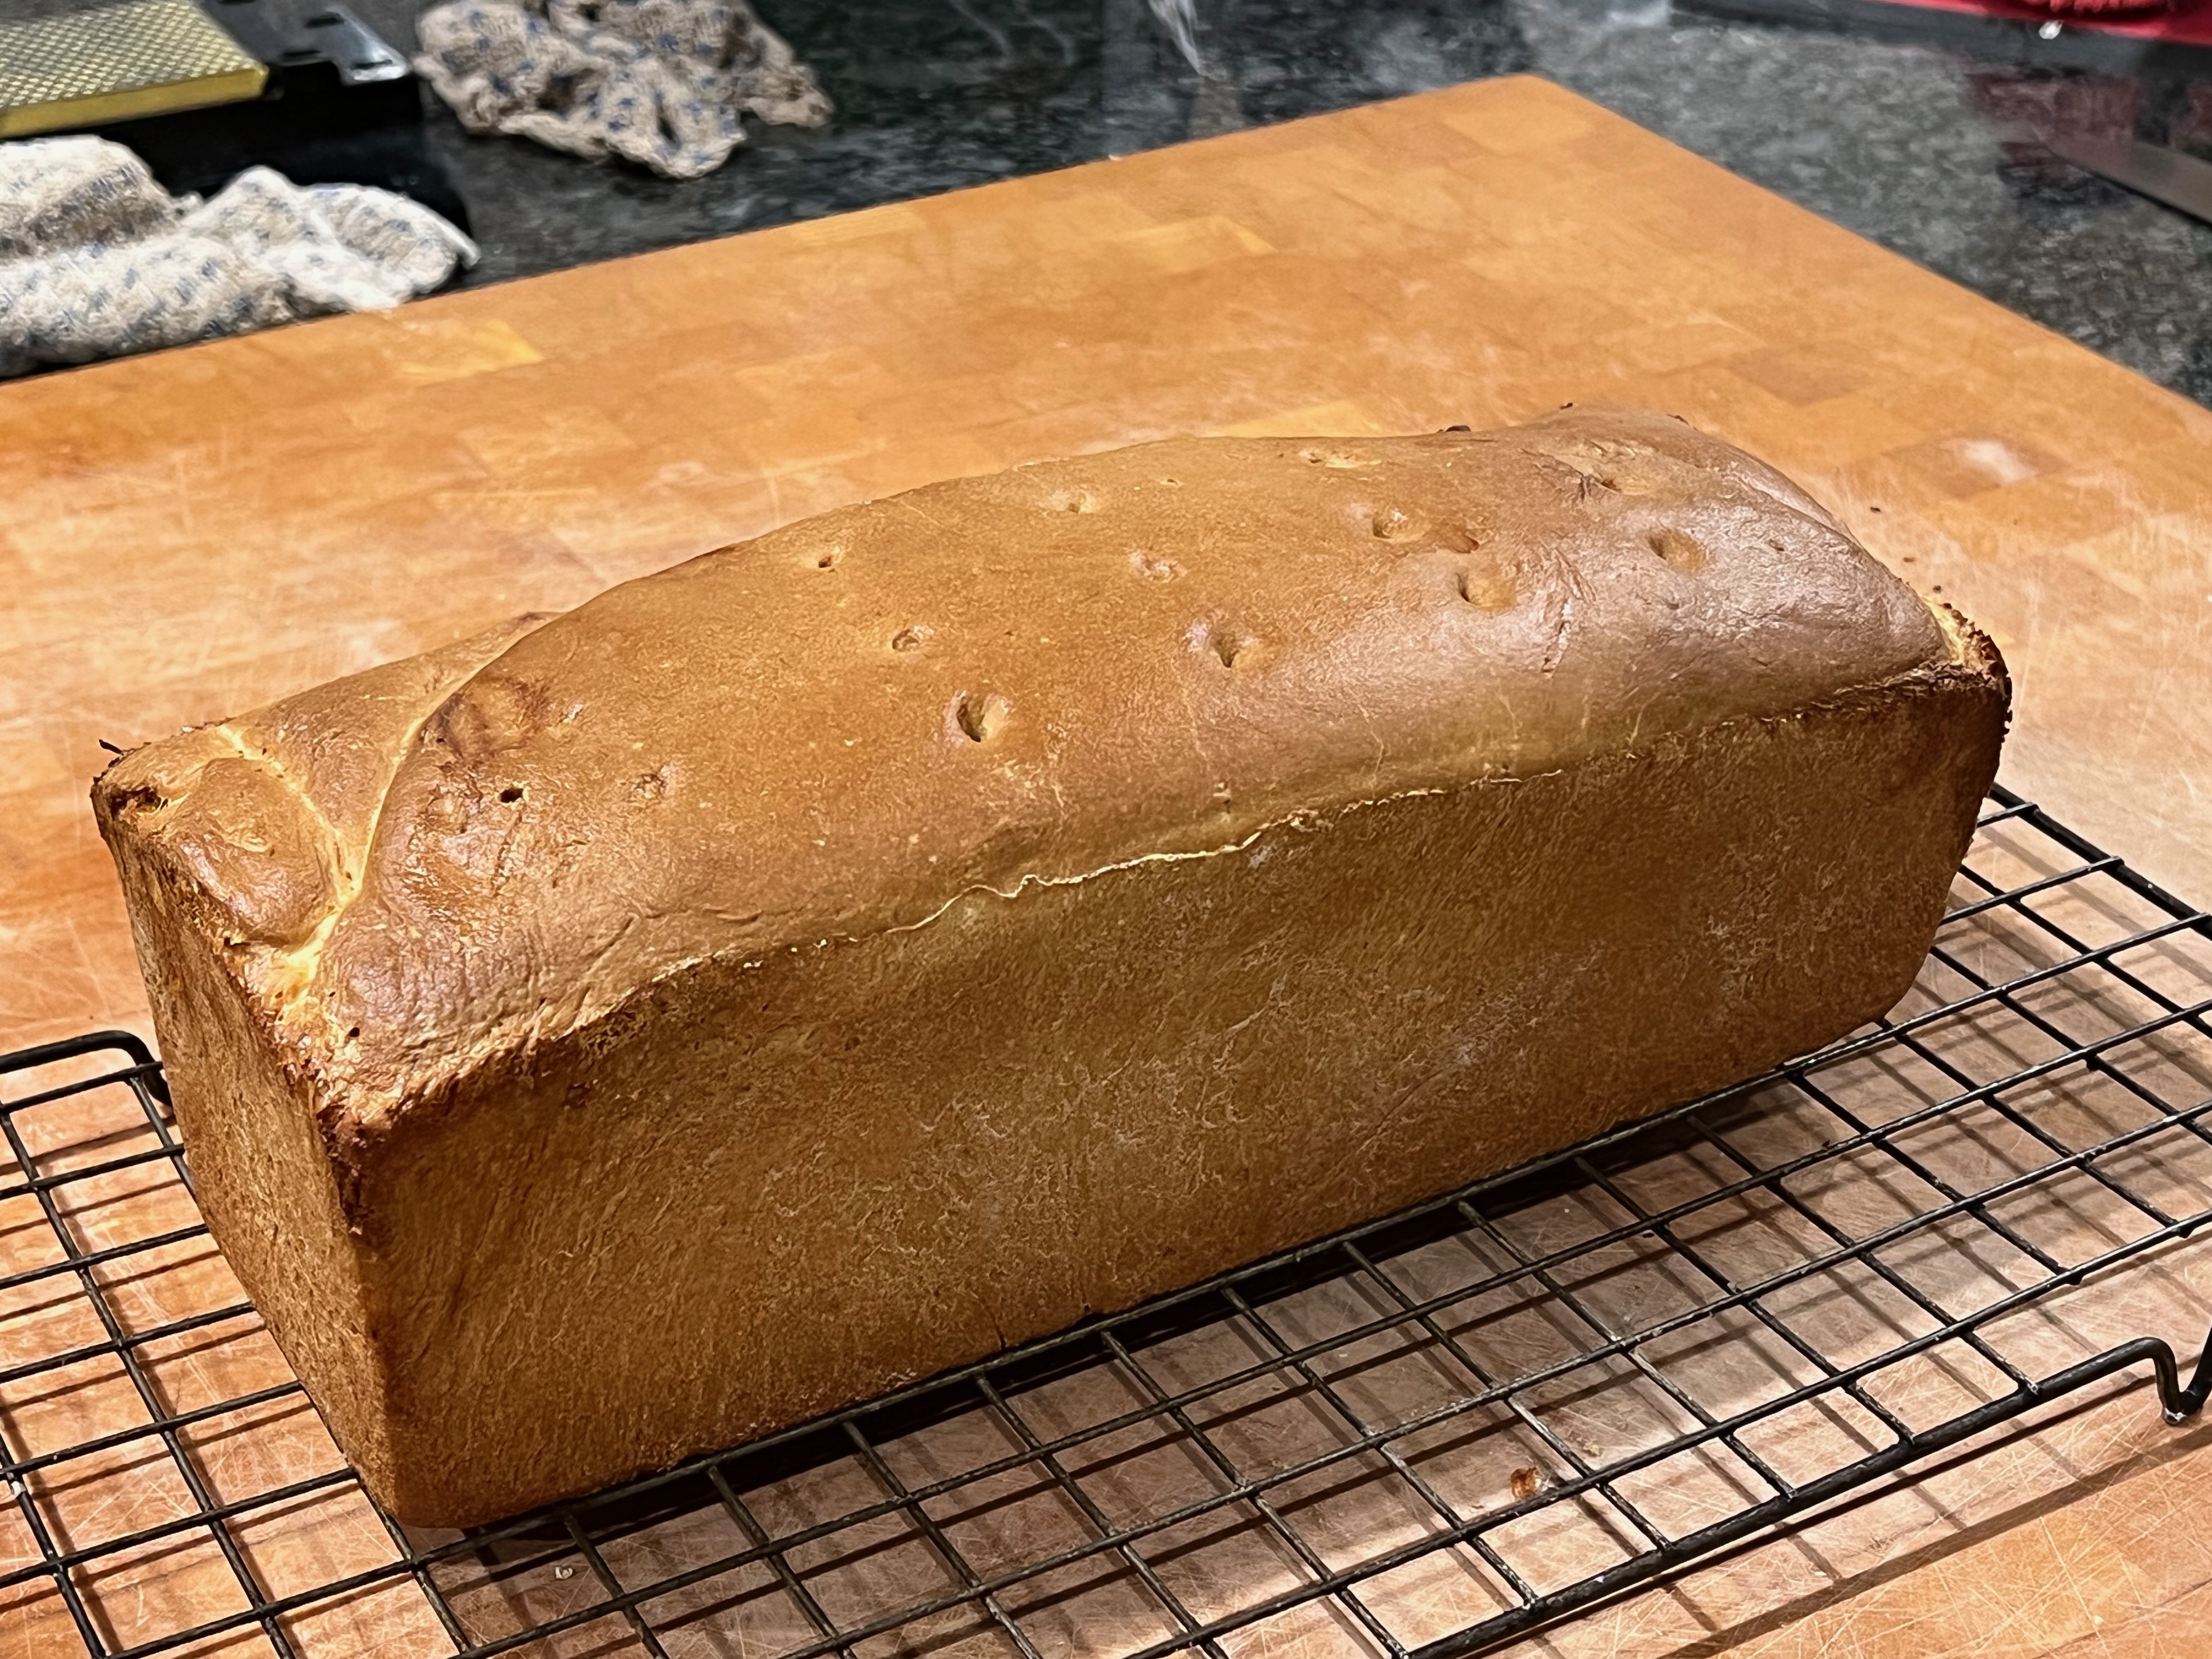
Remove from the oven, cool for a couple of minutes, then remove the loaf from the pan and leave to cool.
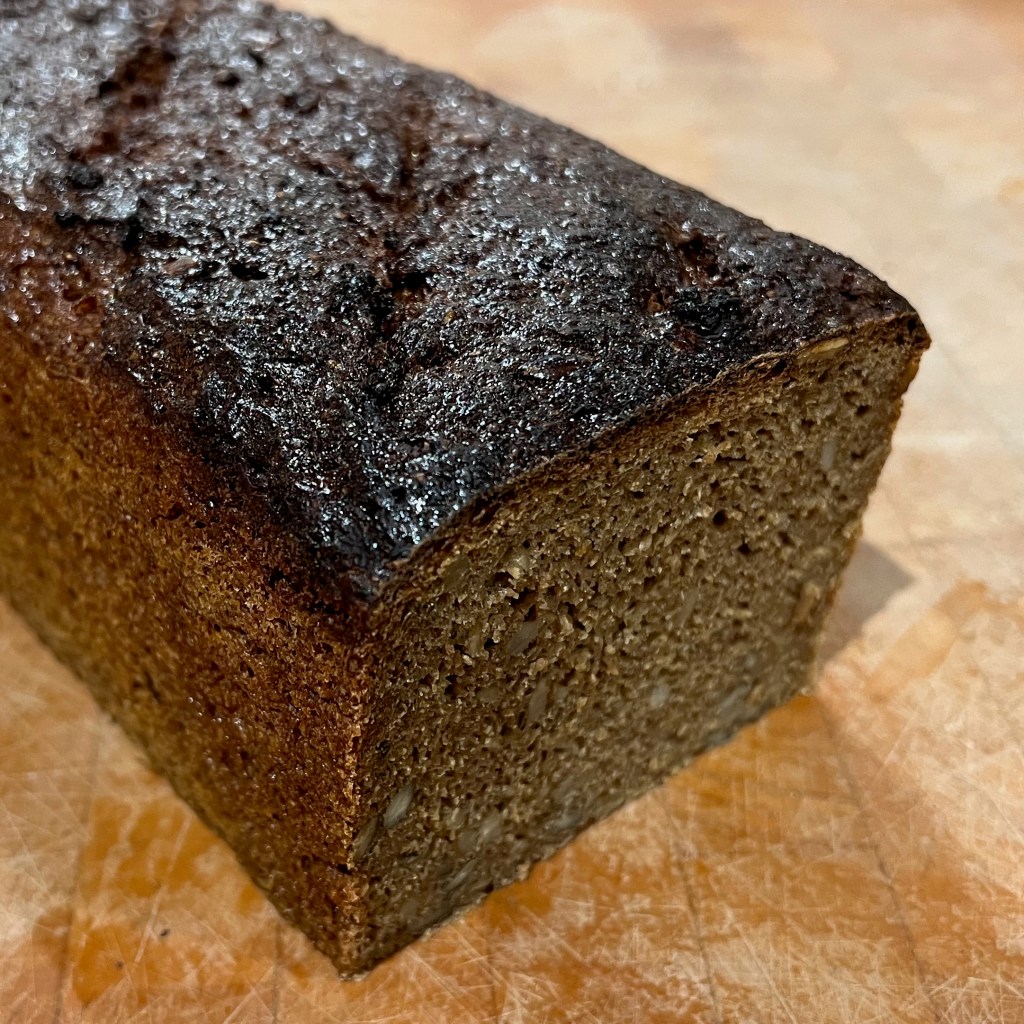
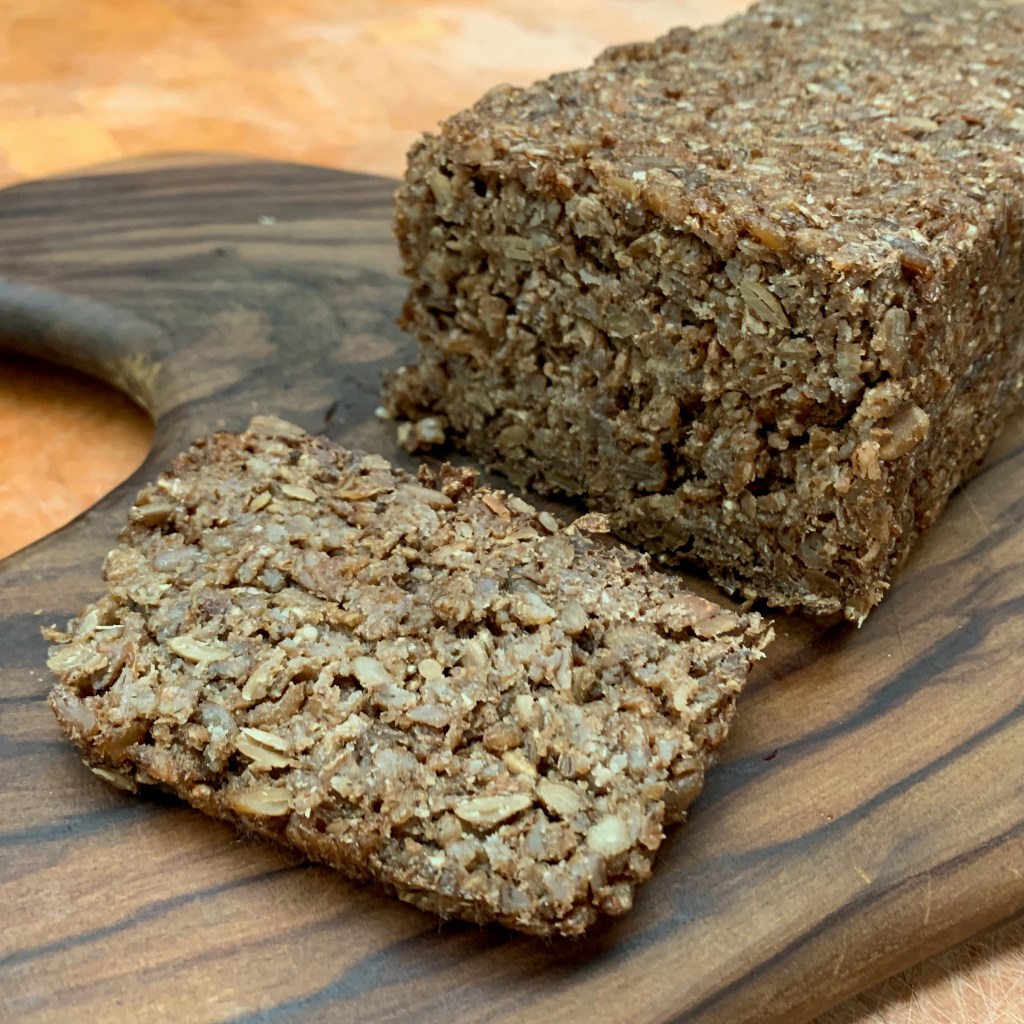
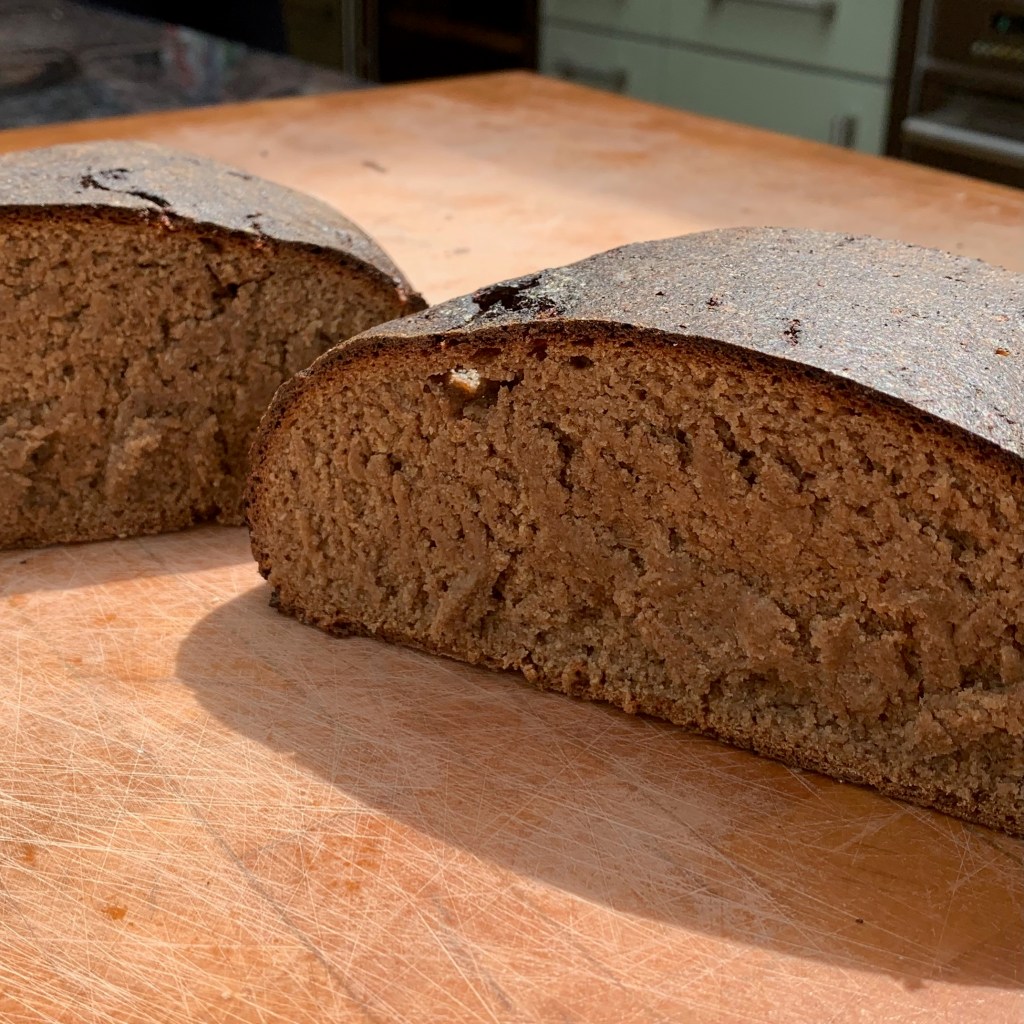
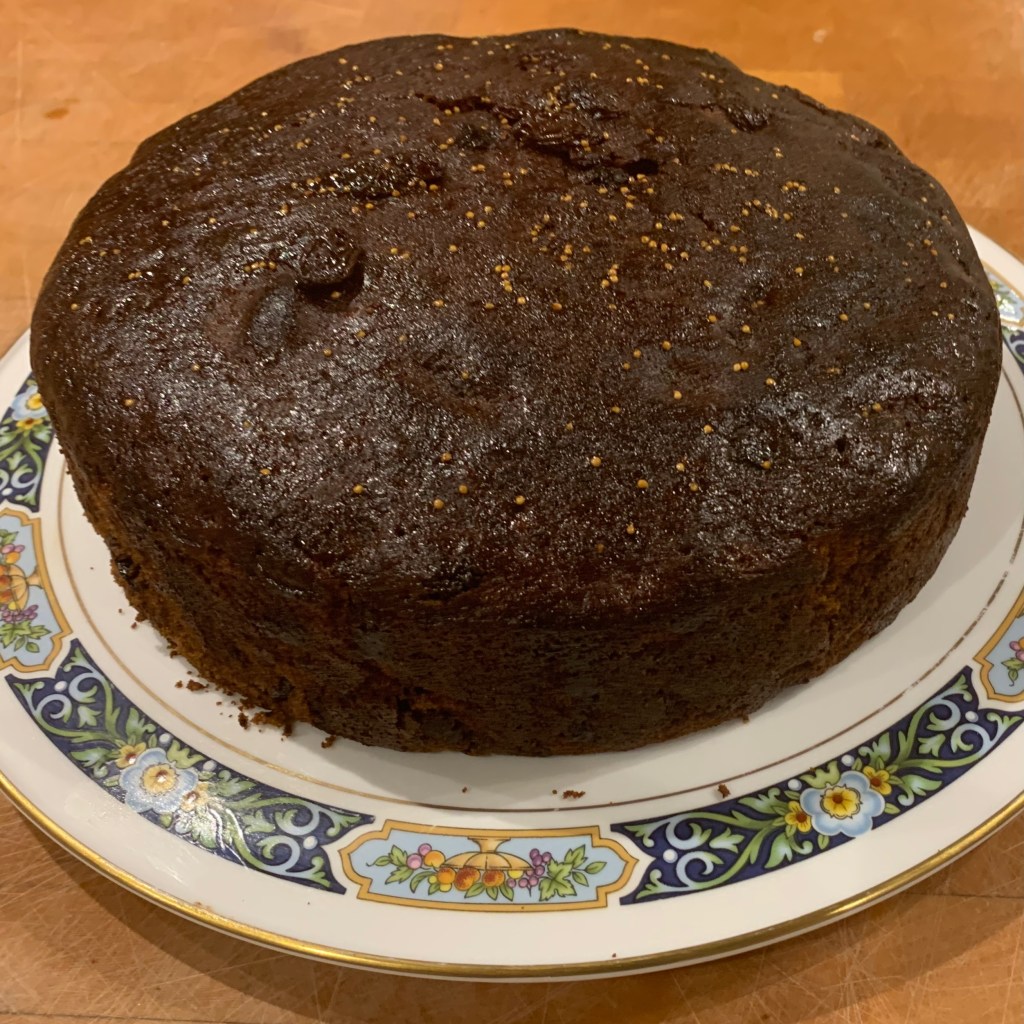
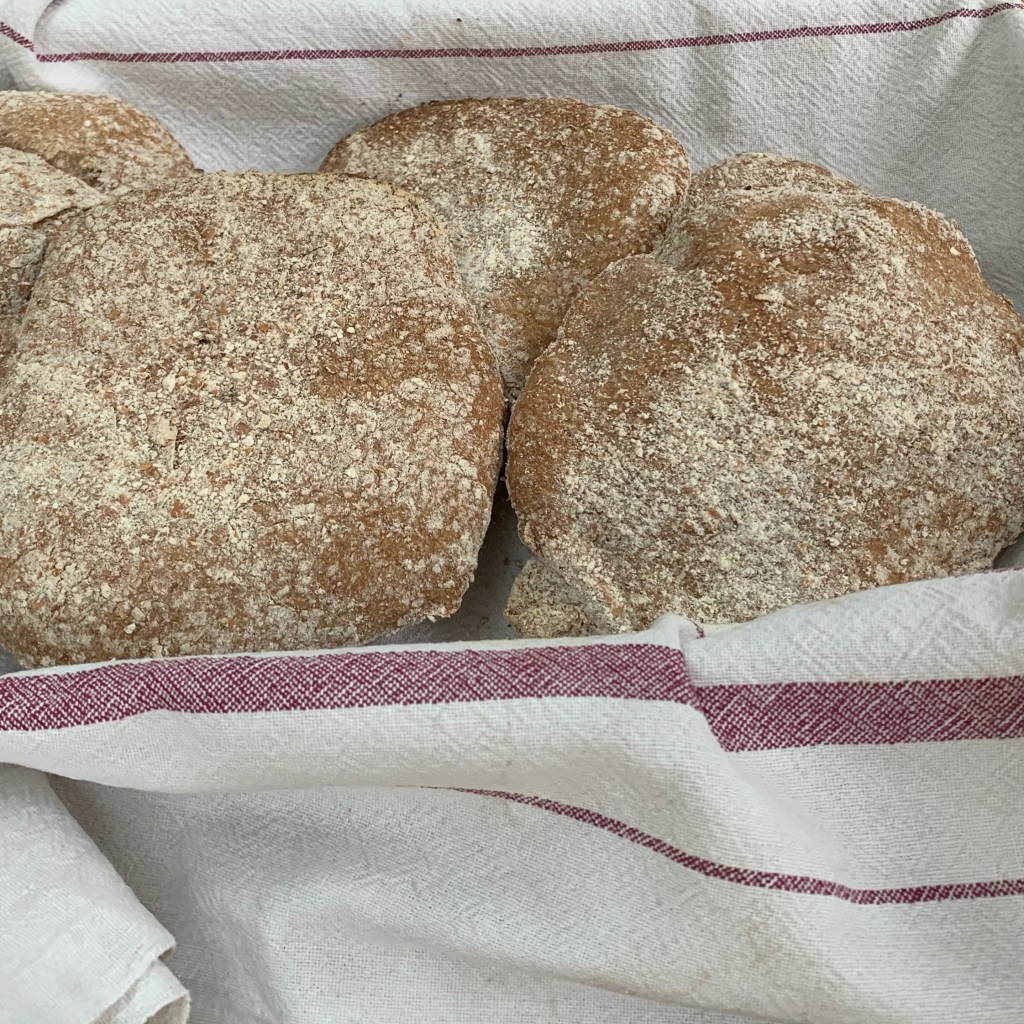
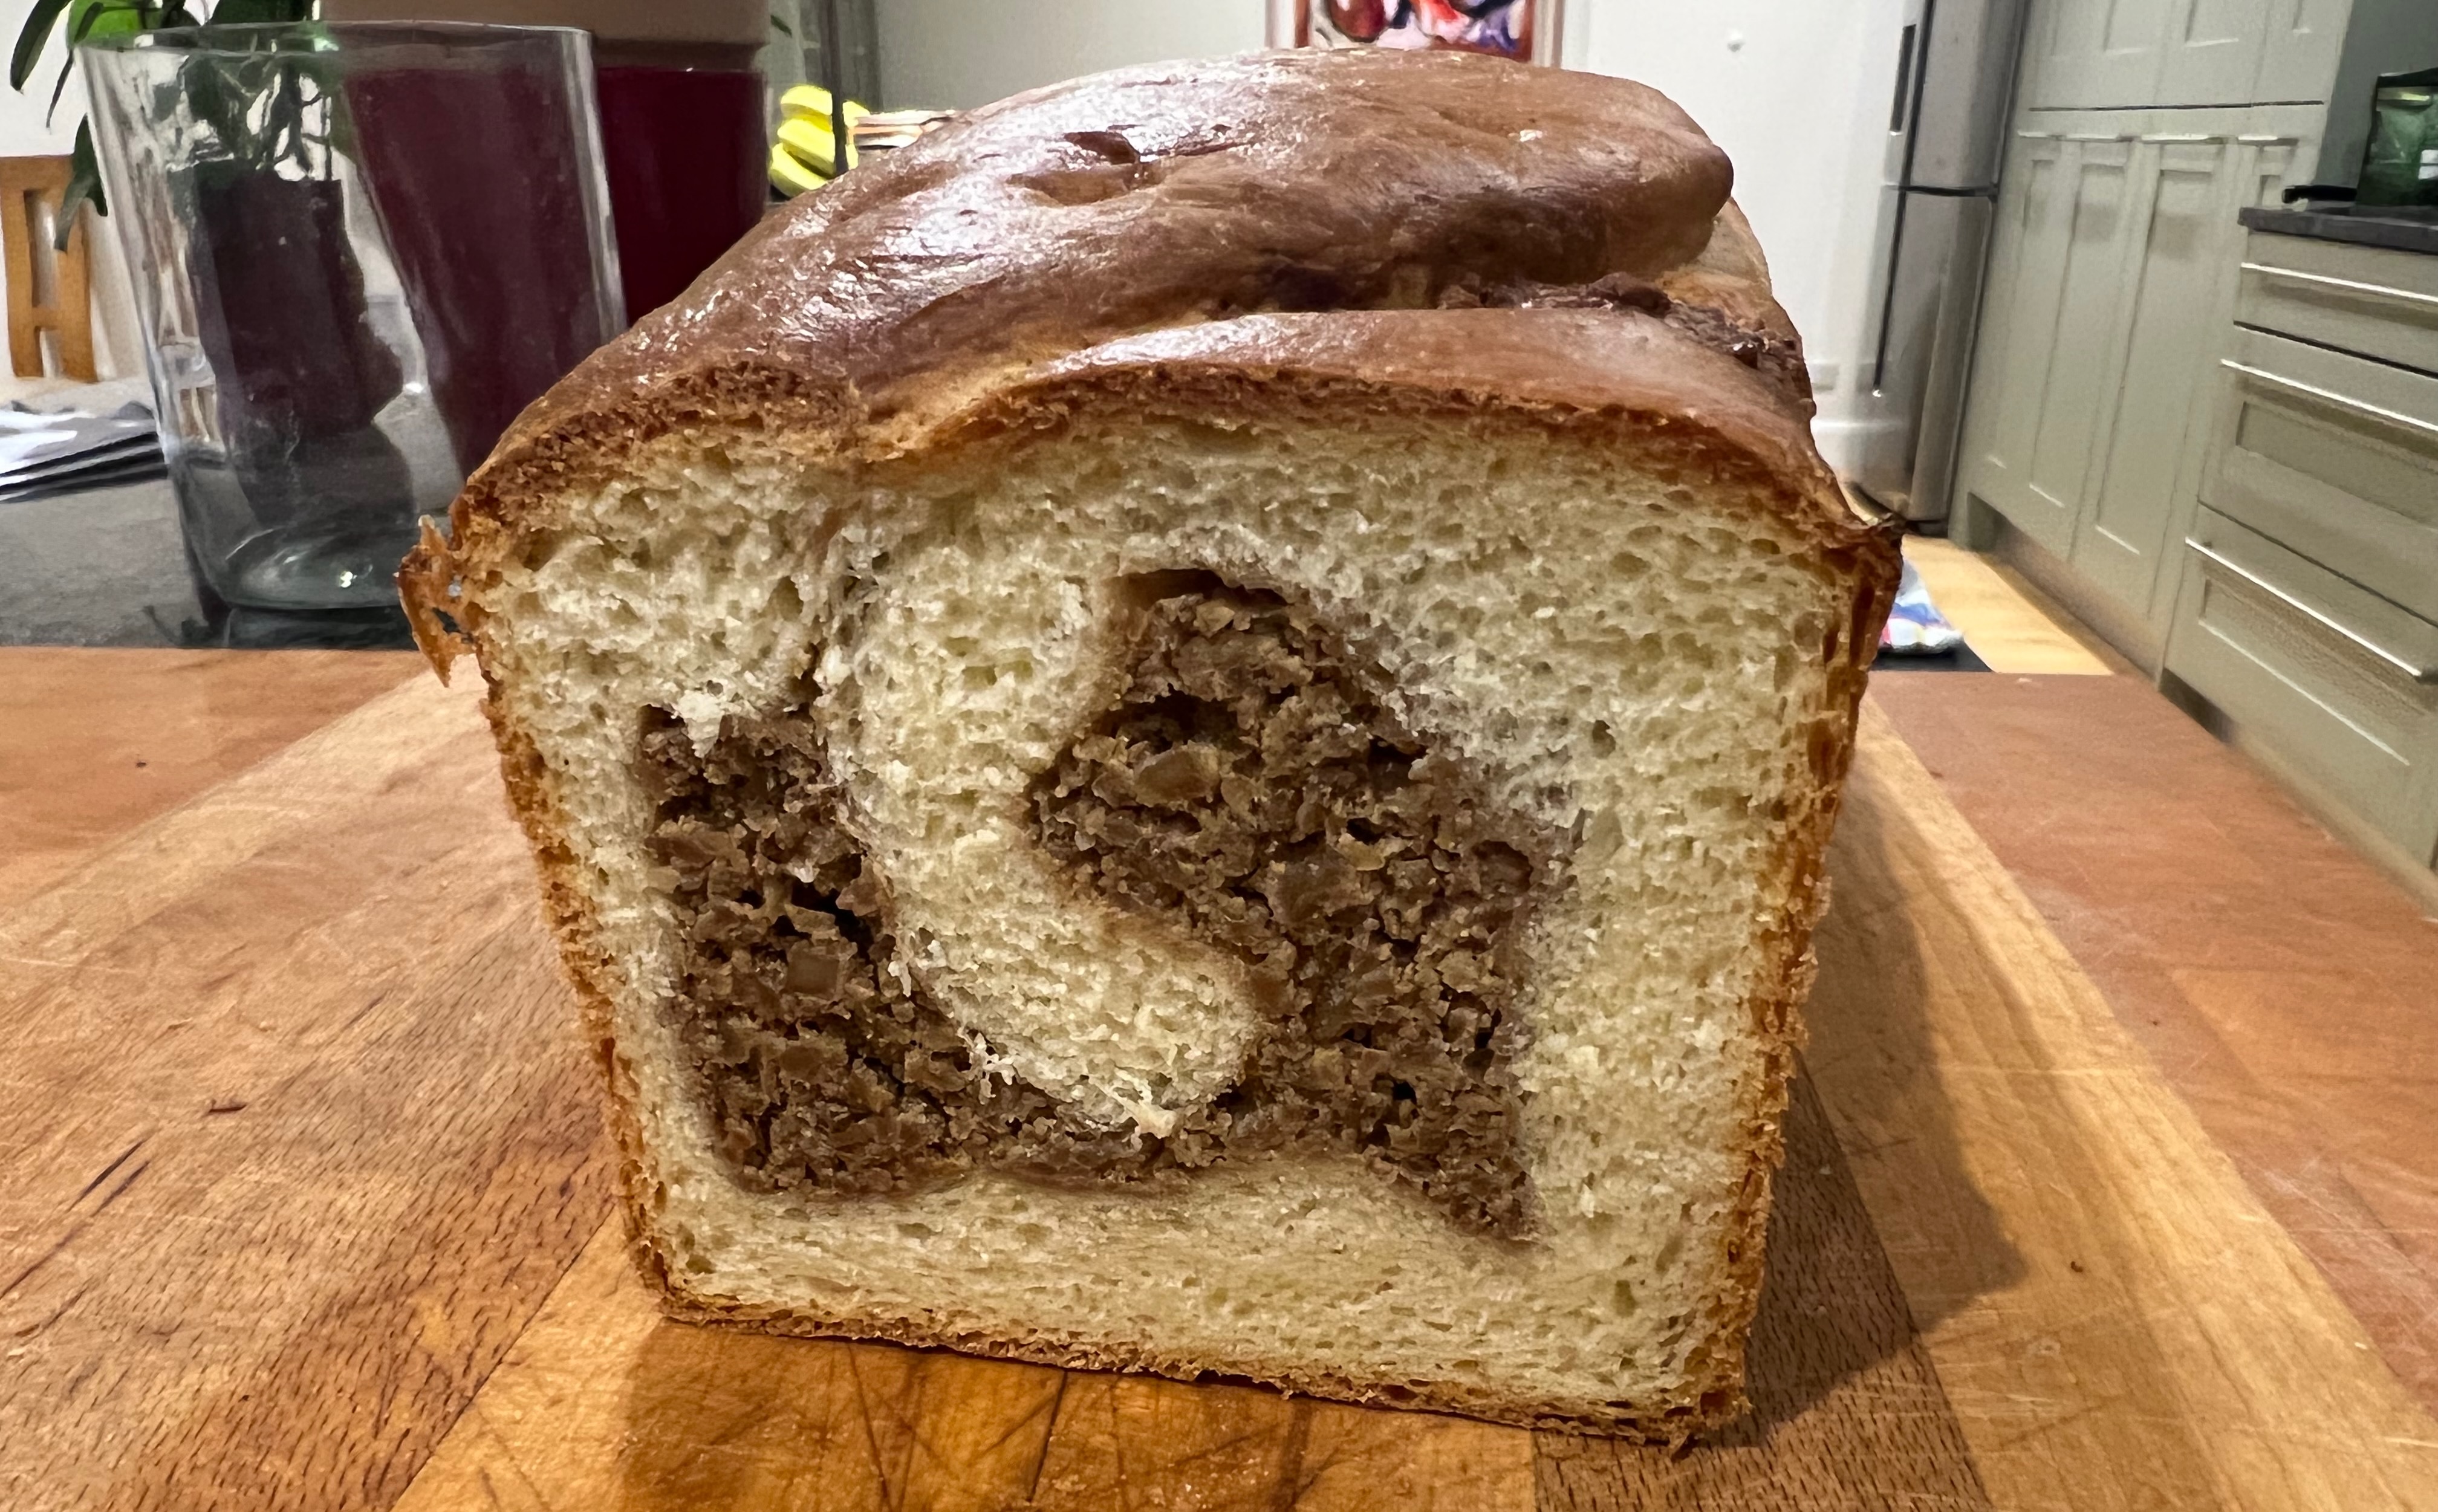
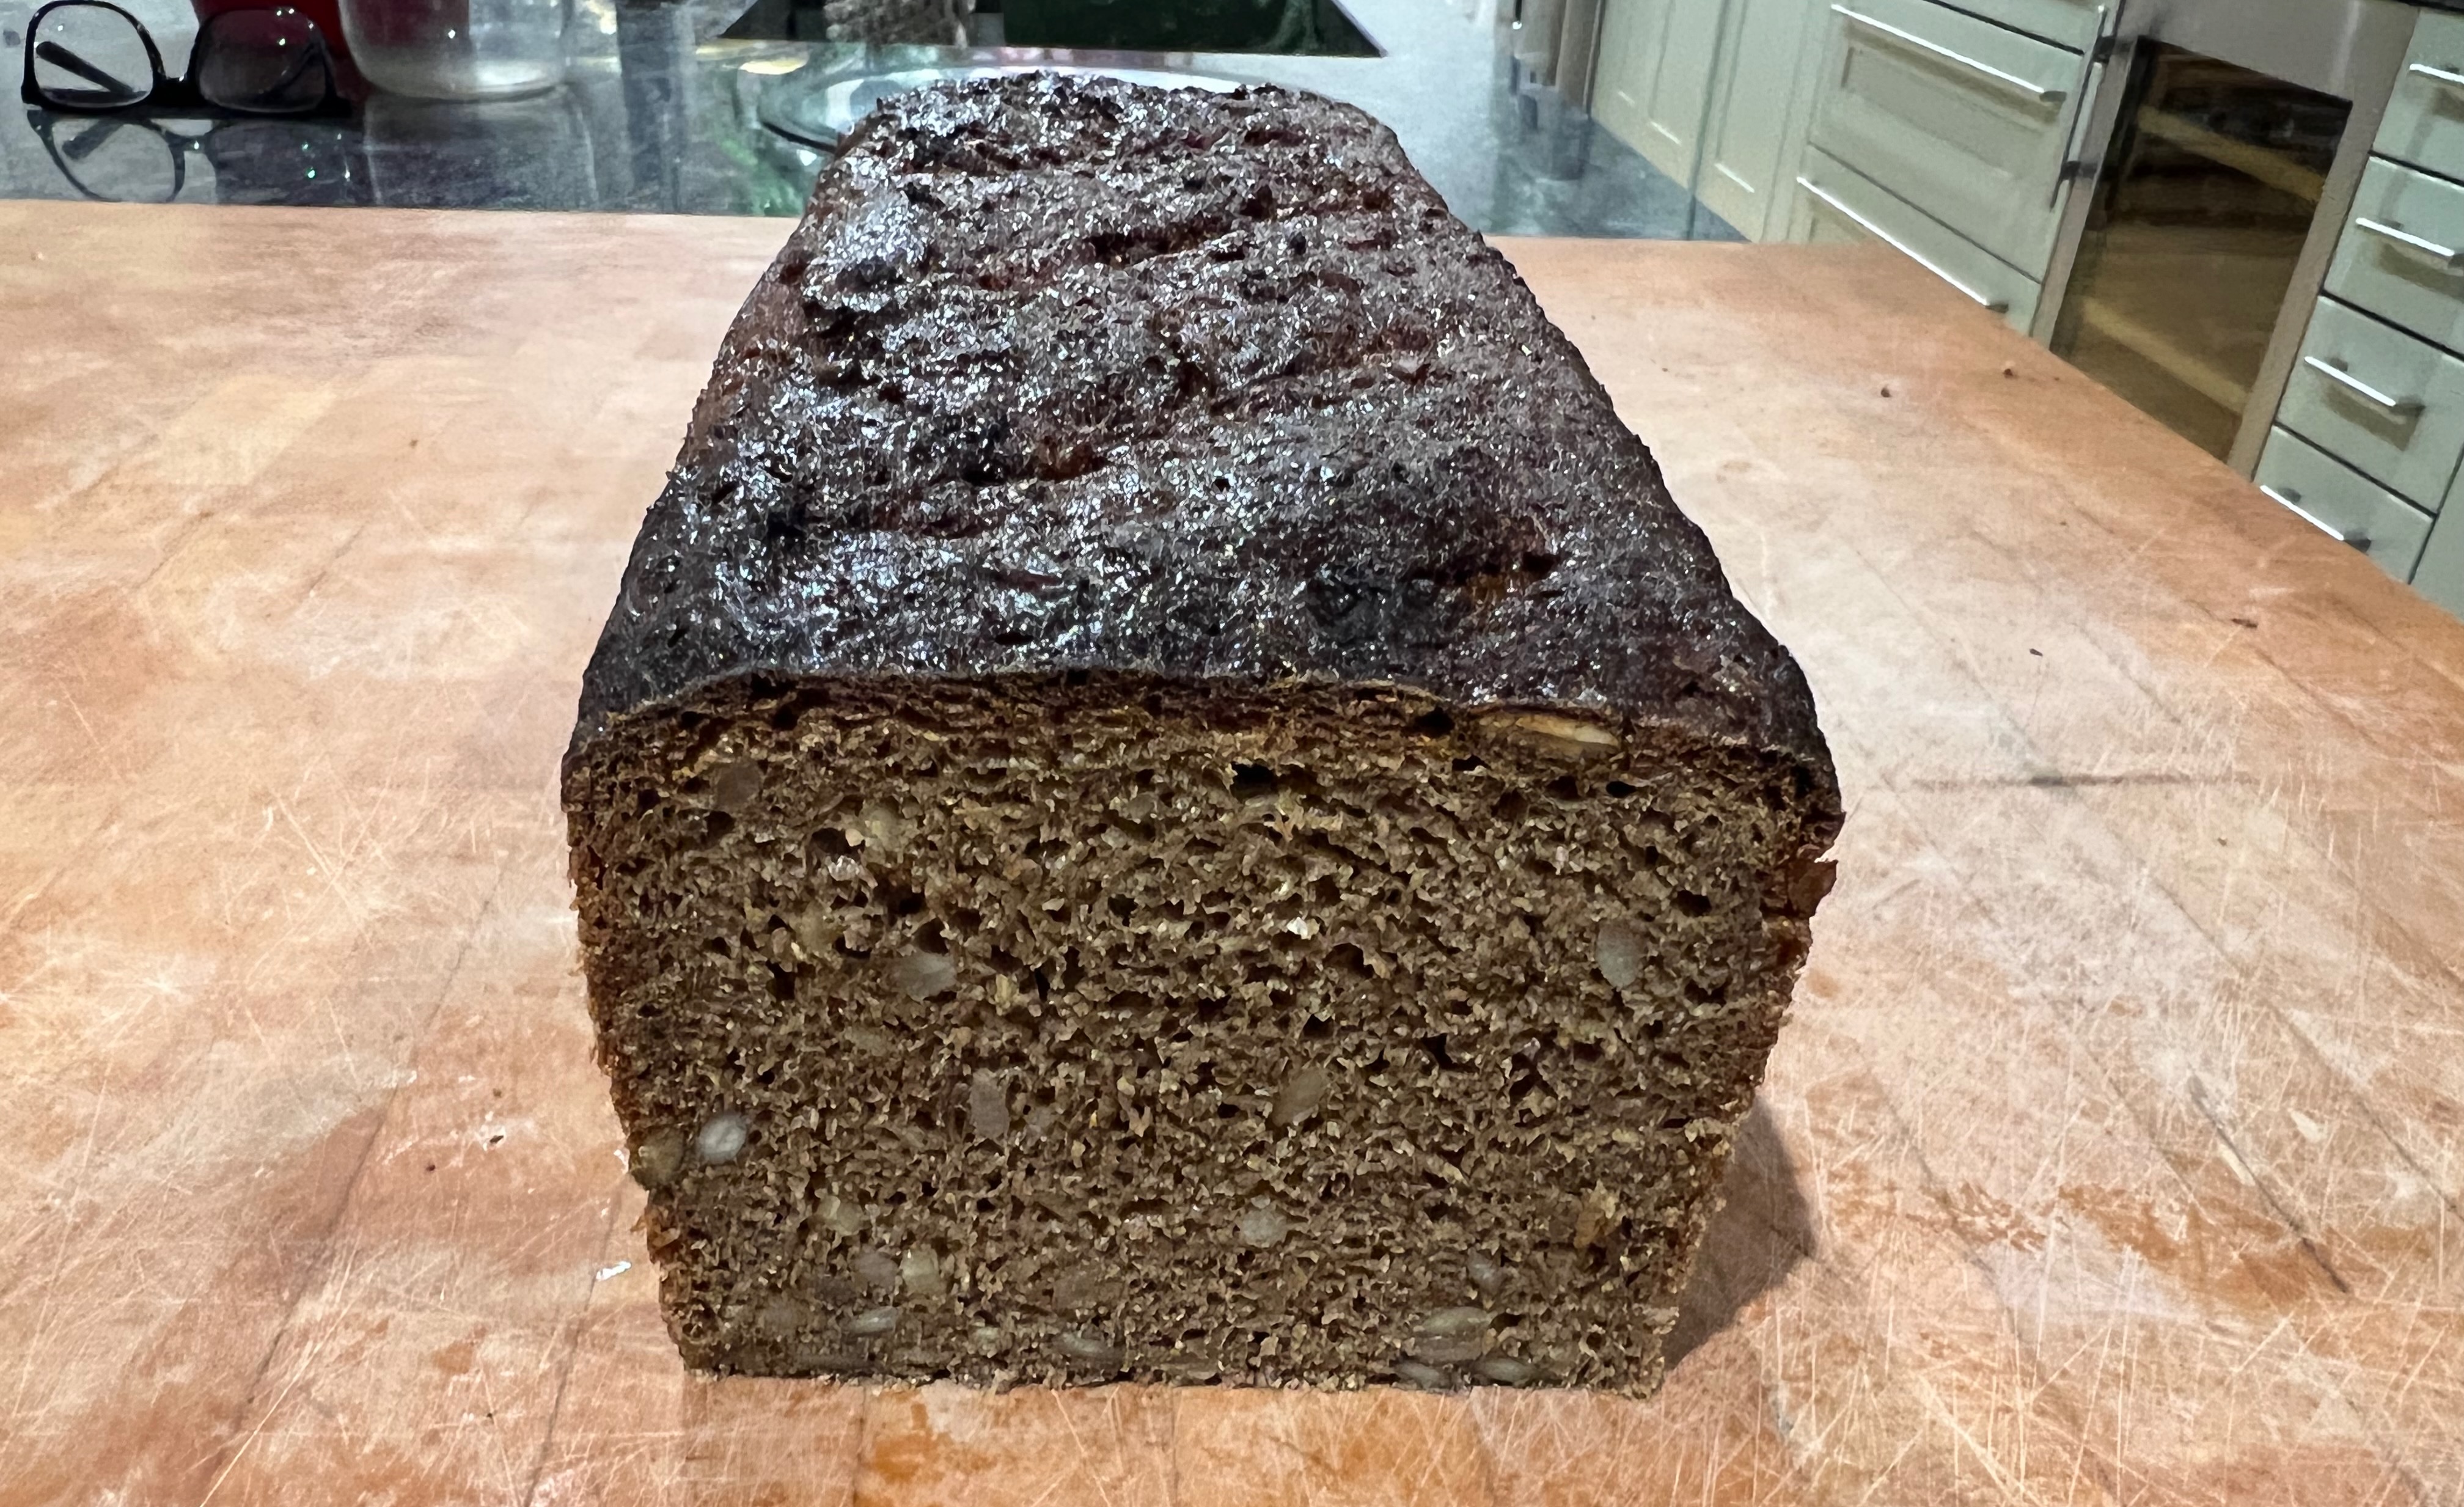
There have been several dark rye breads in this series, but after a recent visit to Estonia, I felt compelled to make the Estonian version, known simply as “Leib” (bread) or, if you’re feeling loquacious, “Must Leib” (black bread). It’s a soft, earthy and aromatic loaf that immediately hit the top of family favourites of any bread that I’ve made, displacing its Russian cousin Borodinsky bread; it also seems to keep particularly well. You need a couple of days elapsed time and it’s fairly hard work compared to many breads, not least because the dough is very sticky so you spend masses of time on washing up, but it was well worth the trouble and it’s definitely going to become a regular.
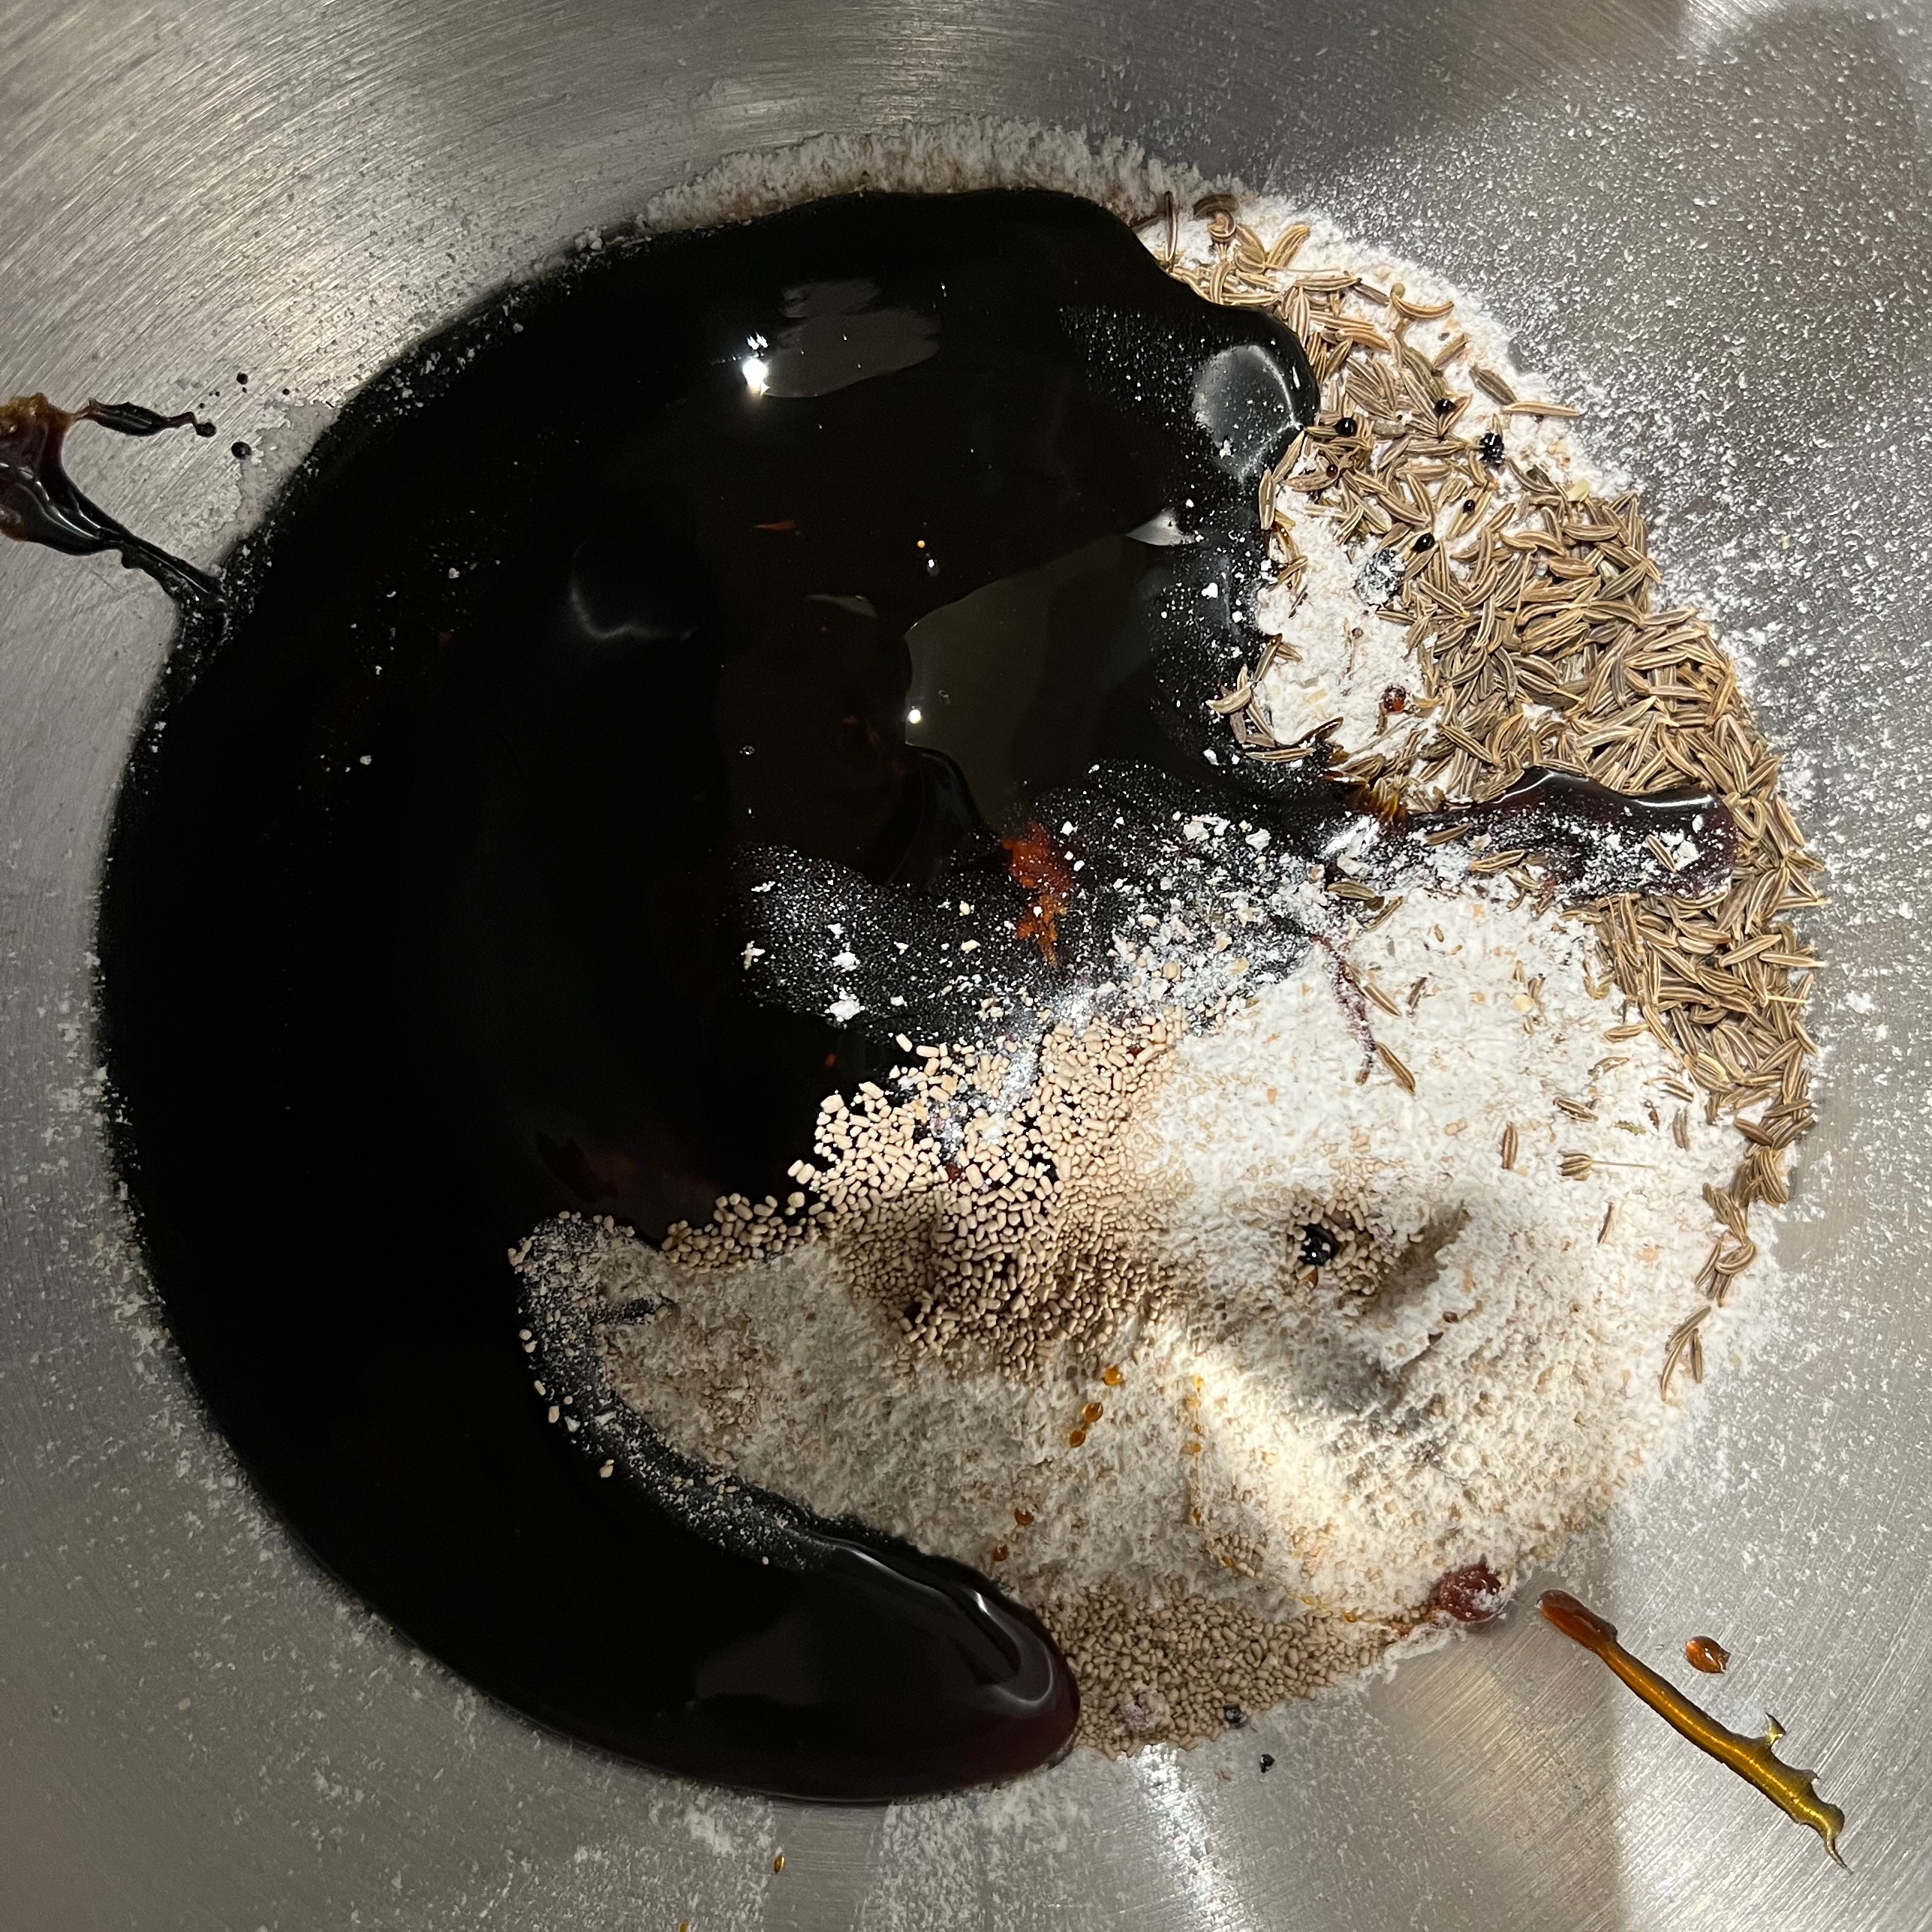
As ever, recipes vary: the common theme is the use of dark rye, caraway seeds and various other seeds (pumpkin and sunflower here; I’m sure others are possible), as well as the use of a fairly long fermentation time. I’ve started with a post on Deutsche Welle from their EU correspondent Georg Matthes, taking down the quantities around 20% to suit the size of my bread tin and changing a couple of ingredients to the ones readily available to me. By the way, my bread tin measures around 29cm x 11cm x 10cm, so around 3 litres, probably not far off an American 10 x 5 inch loaf pan.
Georg is surprisingly precise about fermentation time and temperature – 17 hours at 24℃ – which is fine if you are a professional baker with access to a temperature controlled environment but sounds scary to us amateurs. I have the choice of room temperature (around 20℃ in winter) or the cupboard containing my boiler (more like 30℃), so I ended up doing a kind of mix and match. It worked fine, so I suspect that things really aren’t all that sensitive.
I’ve given you the timings and sizes that I used successfully. Obviously, adapt as needed to your schedule, kitchen and available equipment.
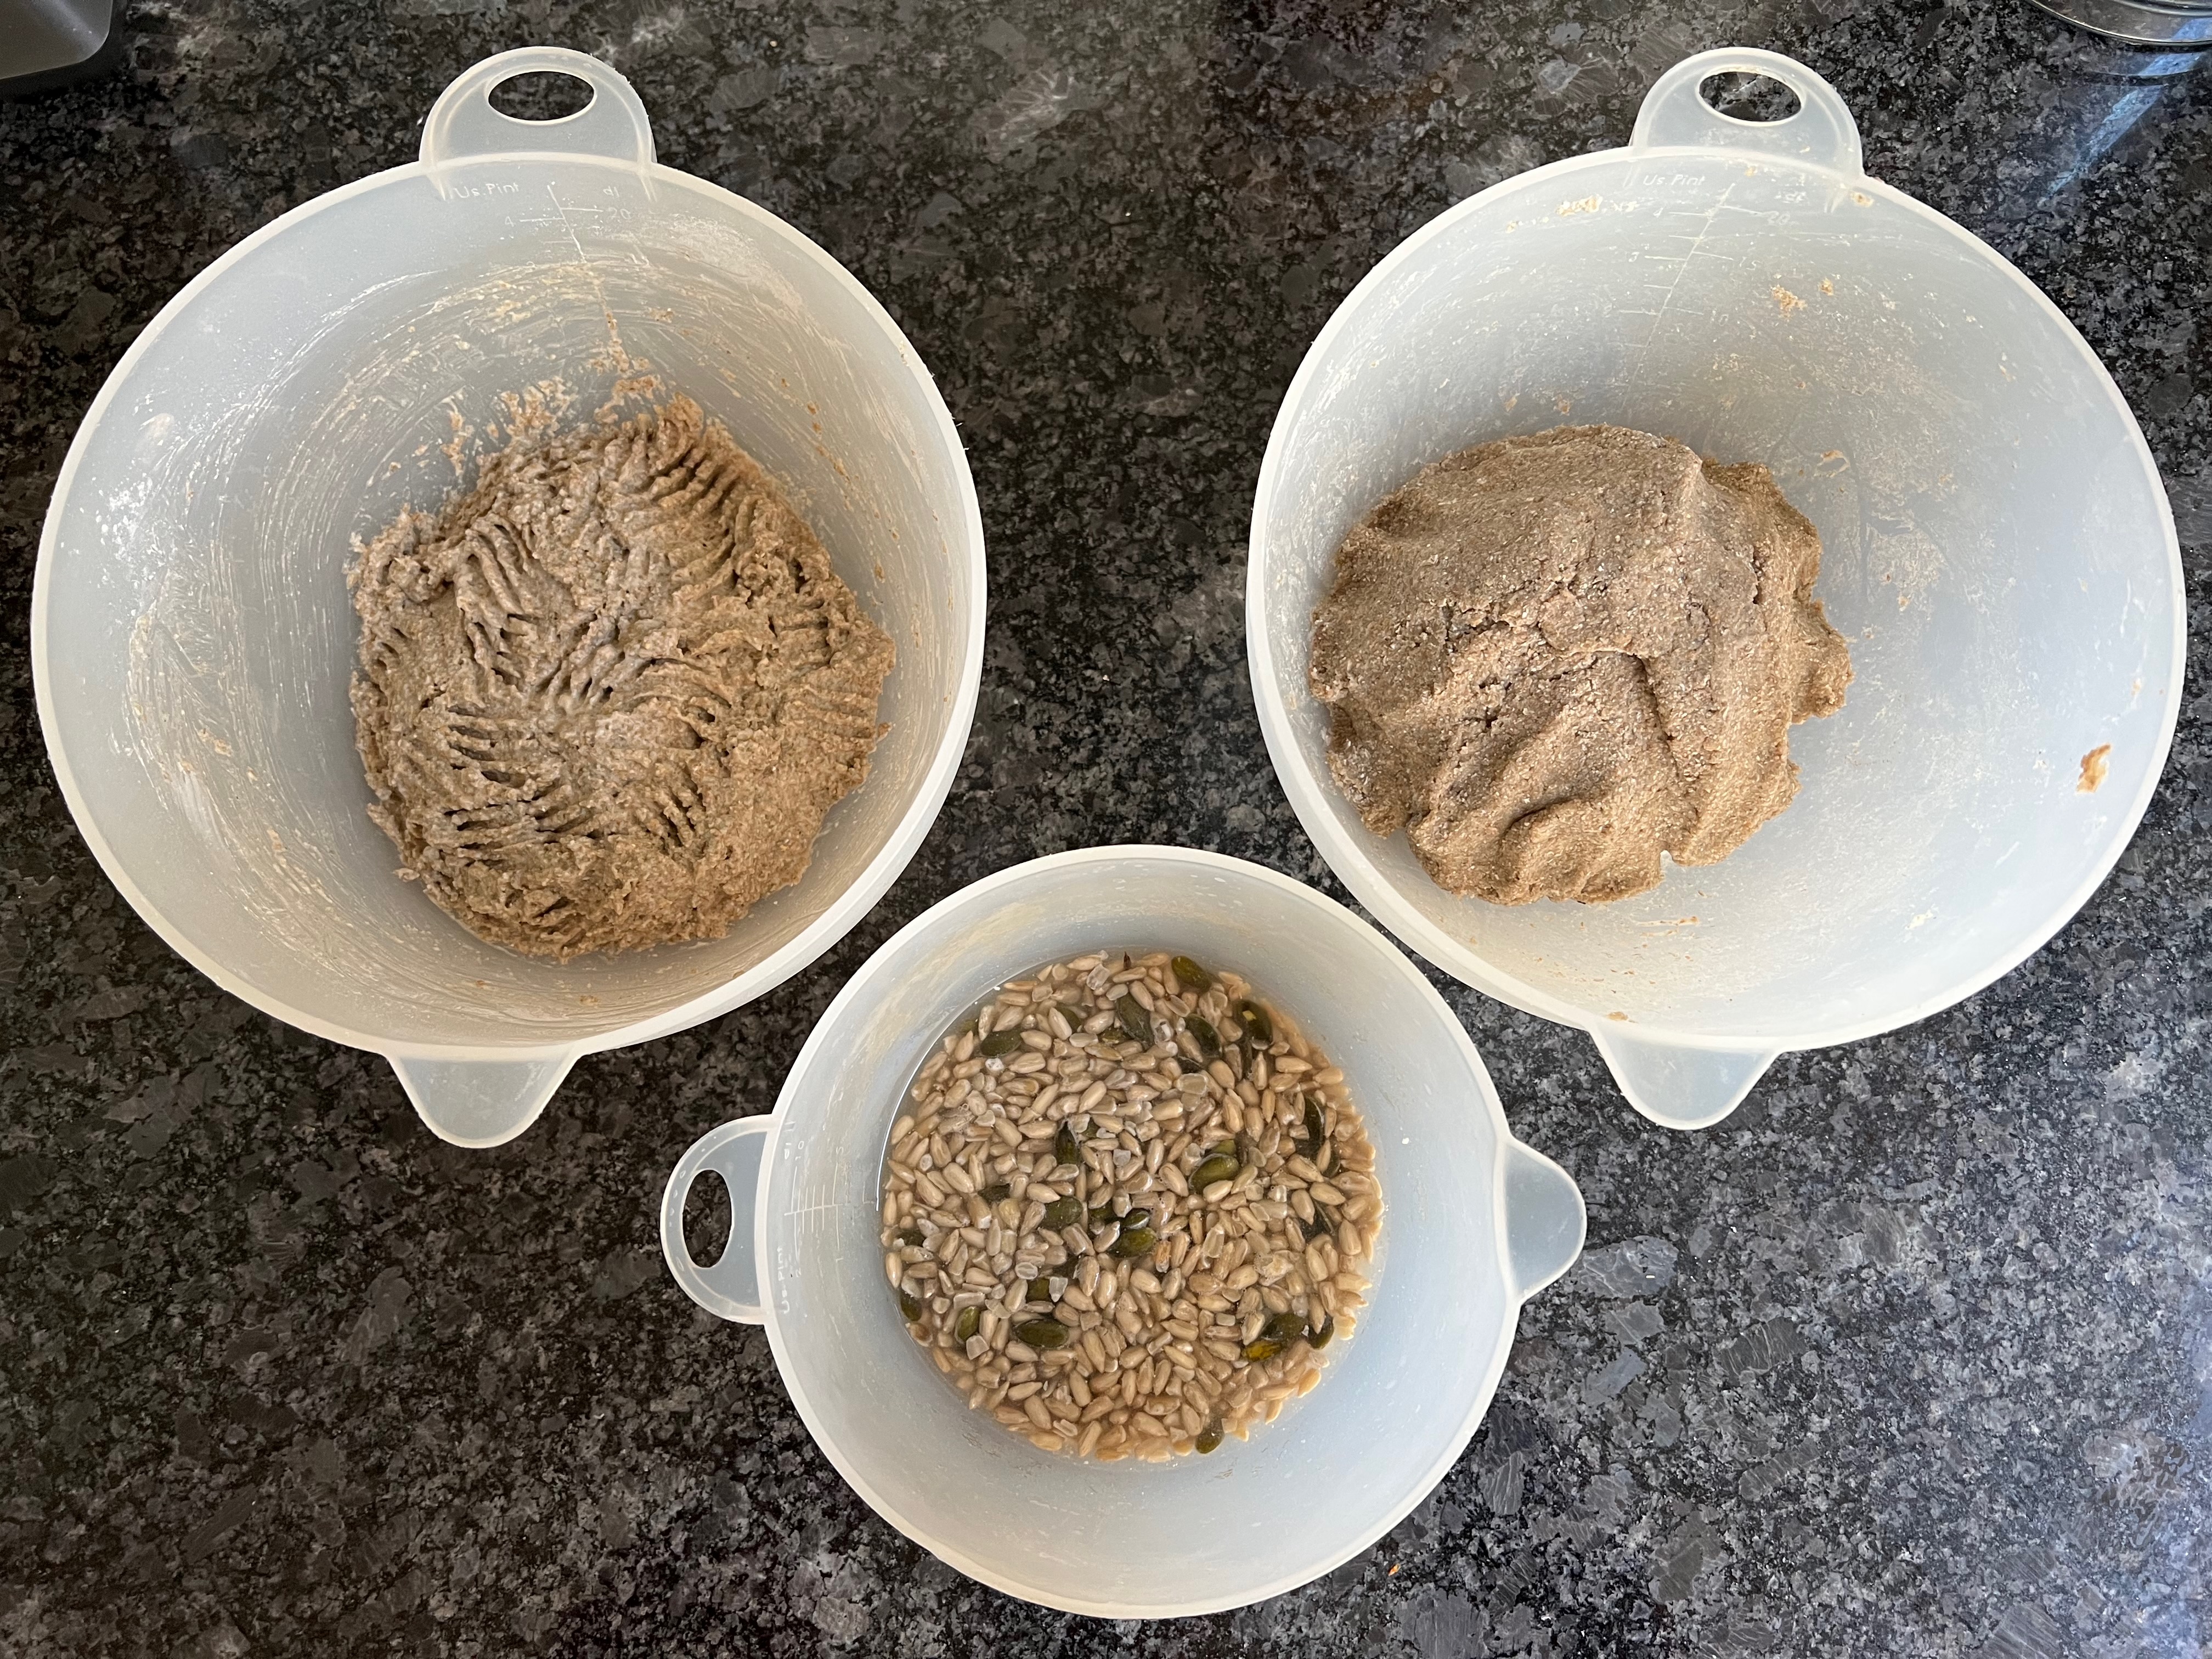
Day 1 – around noon
You’ll start by making three separate mixtures and leaving them to ferment. In each case, combine all the ingredients in a bowl, mix thoroughly, cover and leave.
Sourdough
50g sourdough starter (mine is dark rye)
200g dark rye flour
200ml water
Plain dough
280g dark rye flour
300 ml water
Seed mix
50g pumpkin seeds
75g sunflower seeds
8g salt
120ml boiling water
Day 2 – around 9am – mix and first rise
200g wholemeal wheat flour
10g dried yeast
35g malt extract
50g molasses
7g caraway seeds
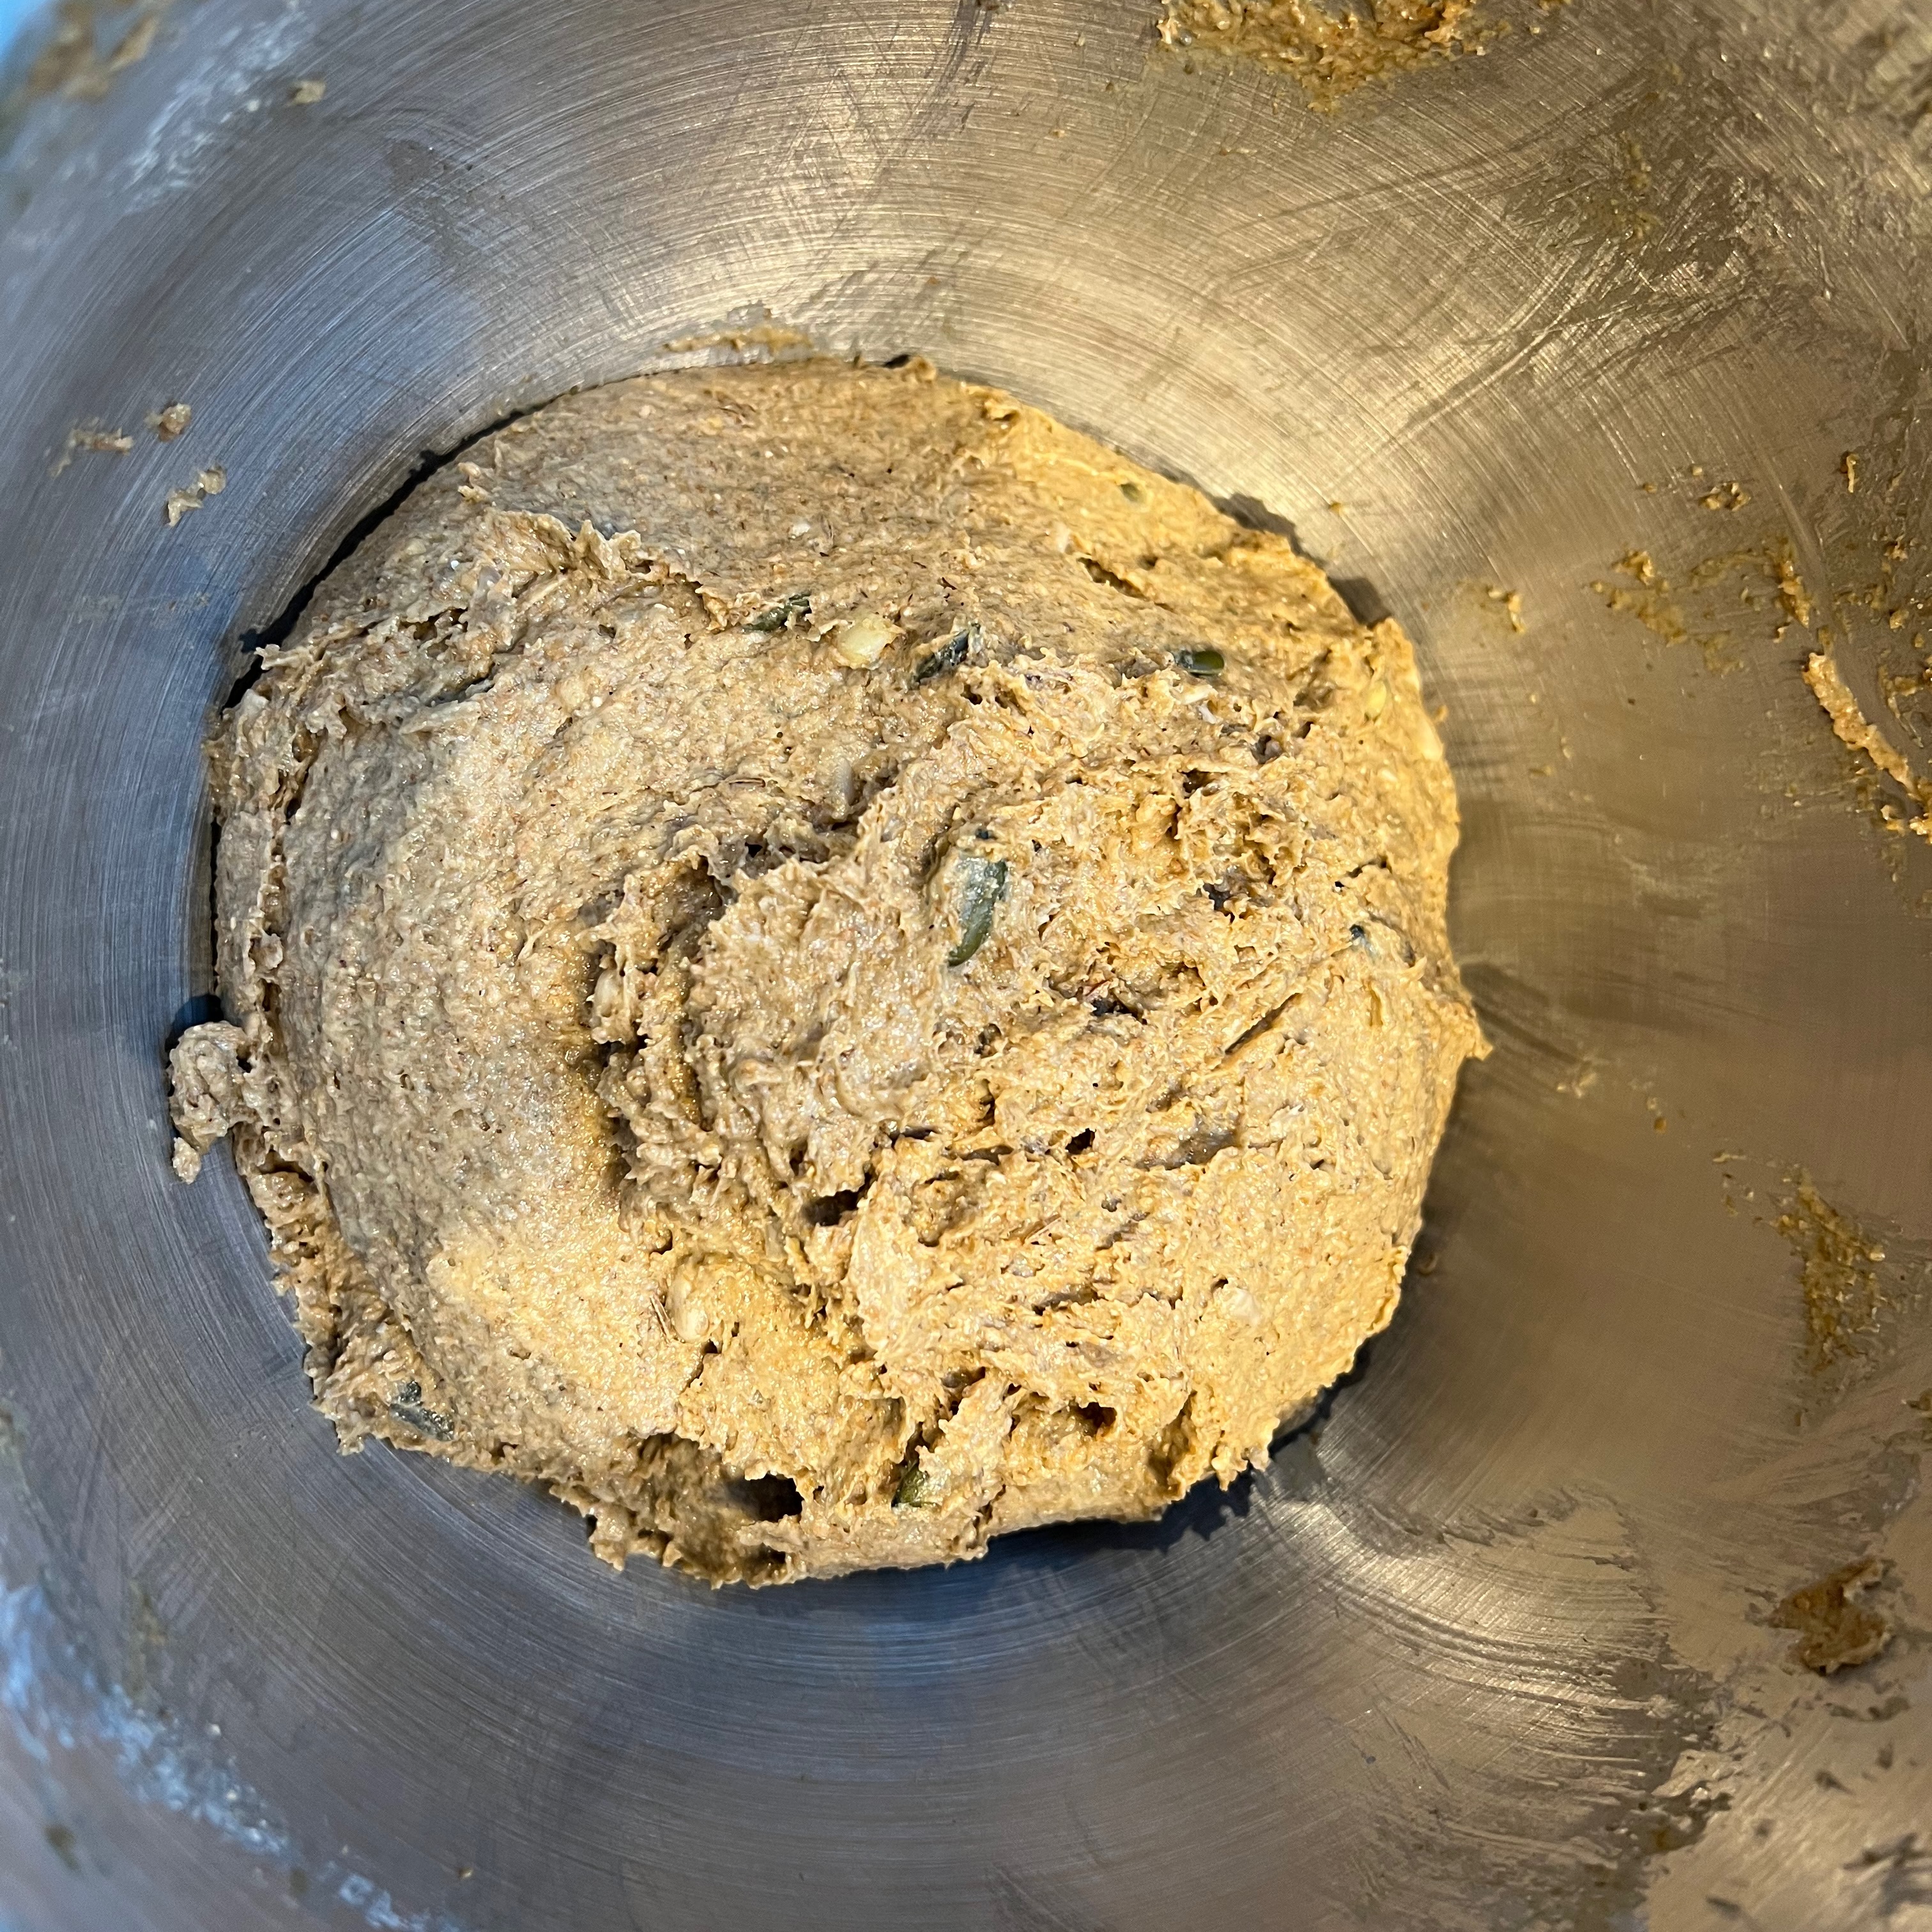
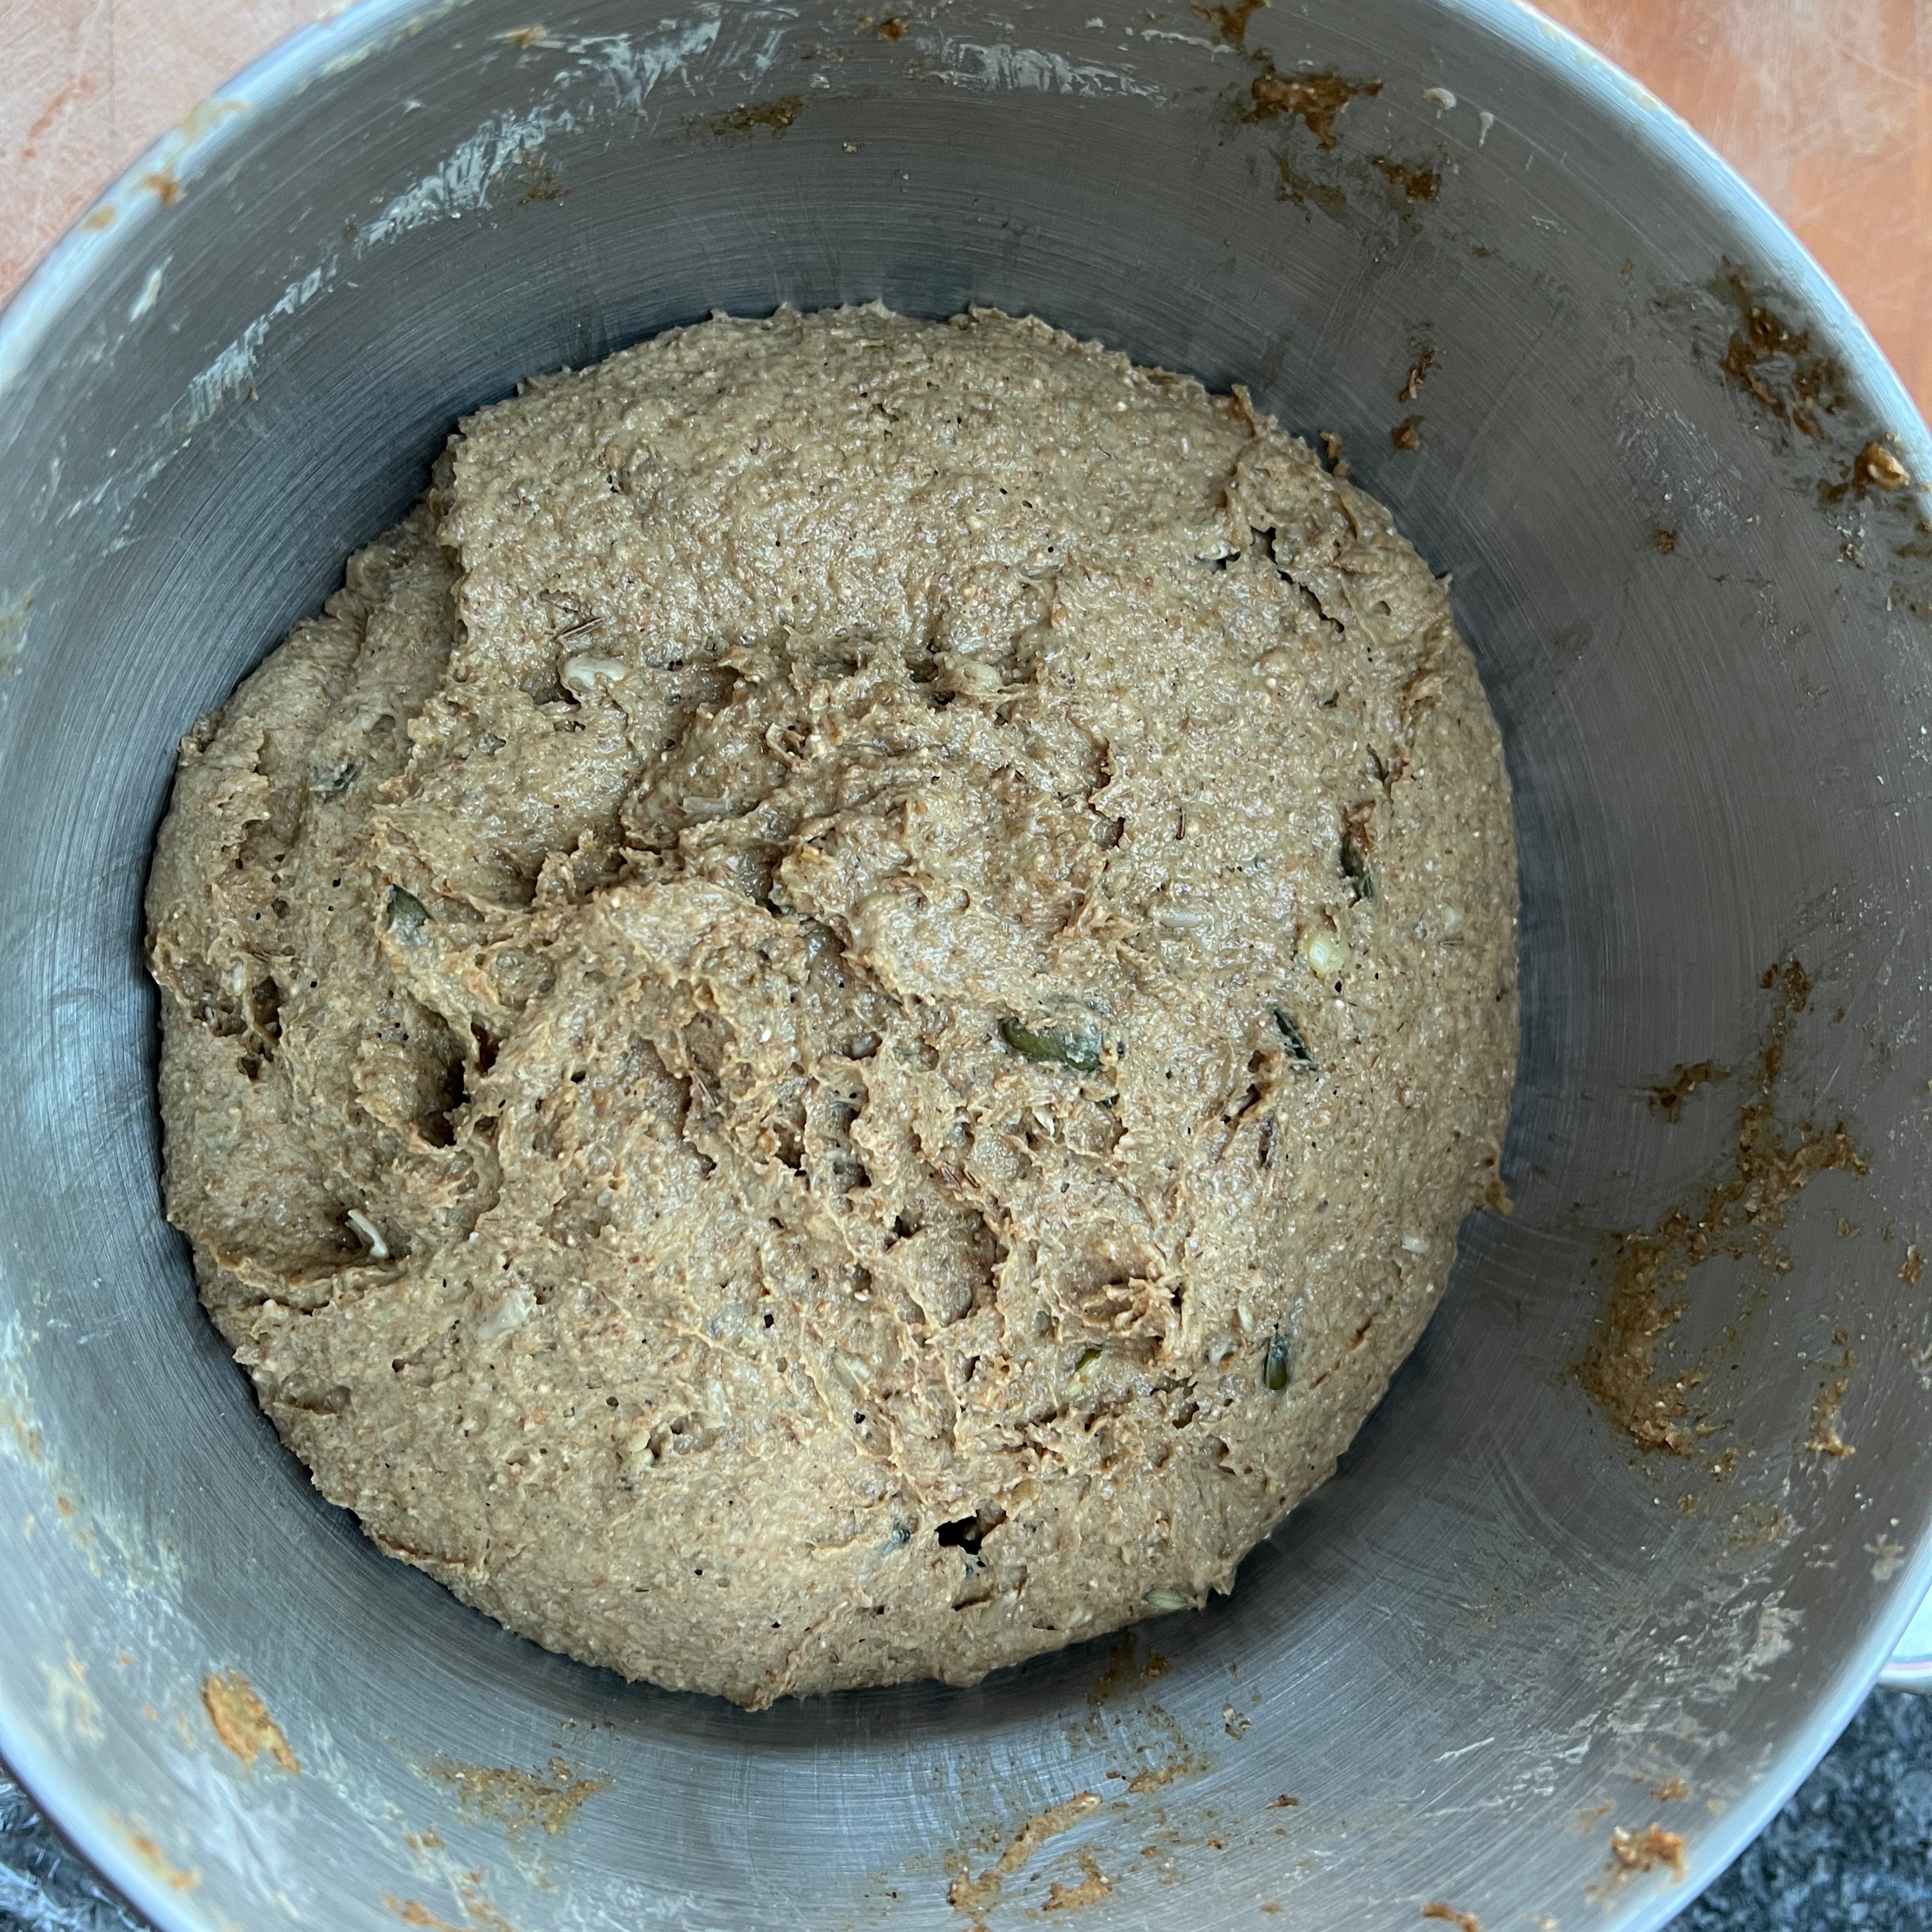
Put all ingredients into the bowl of your stand mixer.
Add all three doughs from the previous day.
Mix thoroughly at medium speed for around 10 minutes using the normal paddle (the dough hook won’t work). You may need to stop and scrape the sides a few times to make sure that you incorporate any flour at the bottom that hasn’t blended in, as well as ensuring that the sticky malt extract and molasses are evenly distributed.
Cover the bowl with cling film and leave to rise until doubled in size (in my relatively cold kitchen, this took close to two hours).
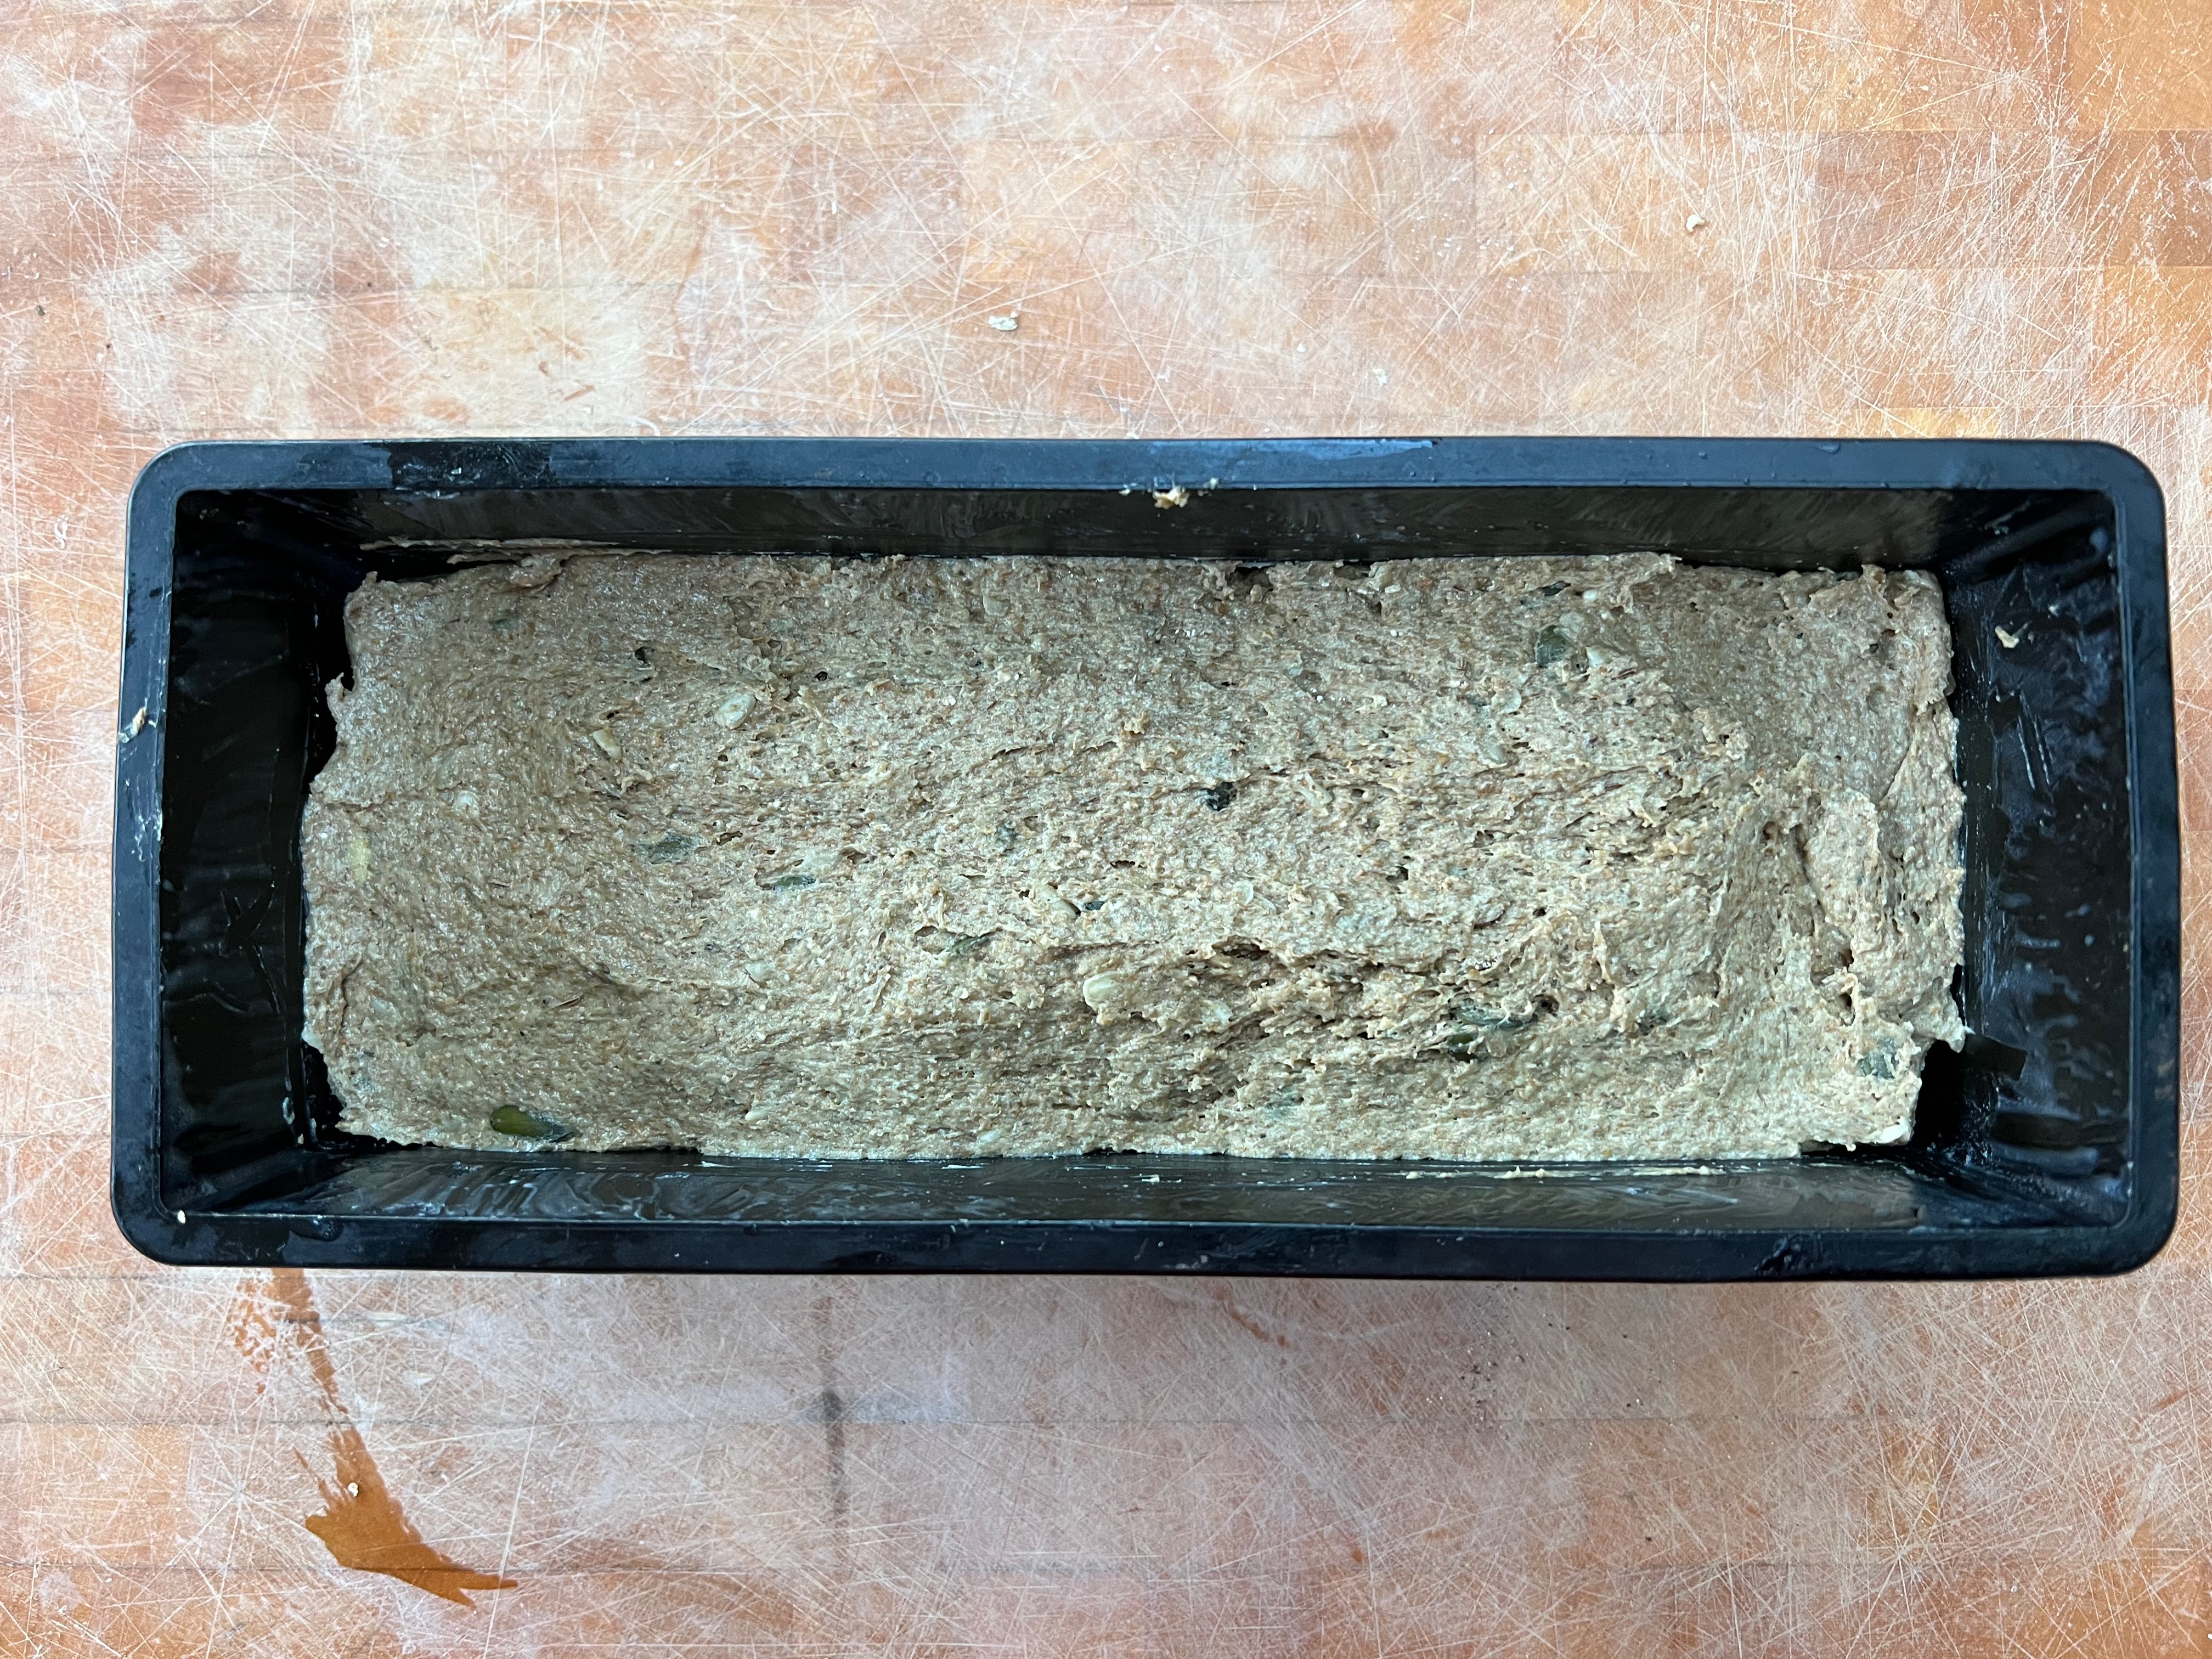
Day 2 – around 11am – shape and second rise
15g butter
Melt the butter and brush your baking tin with it.
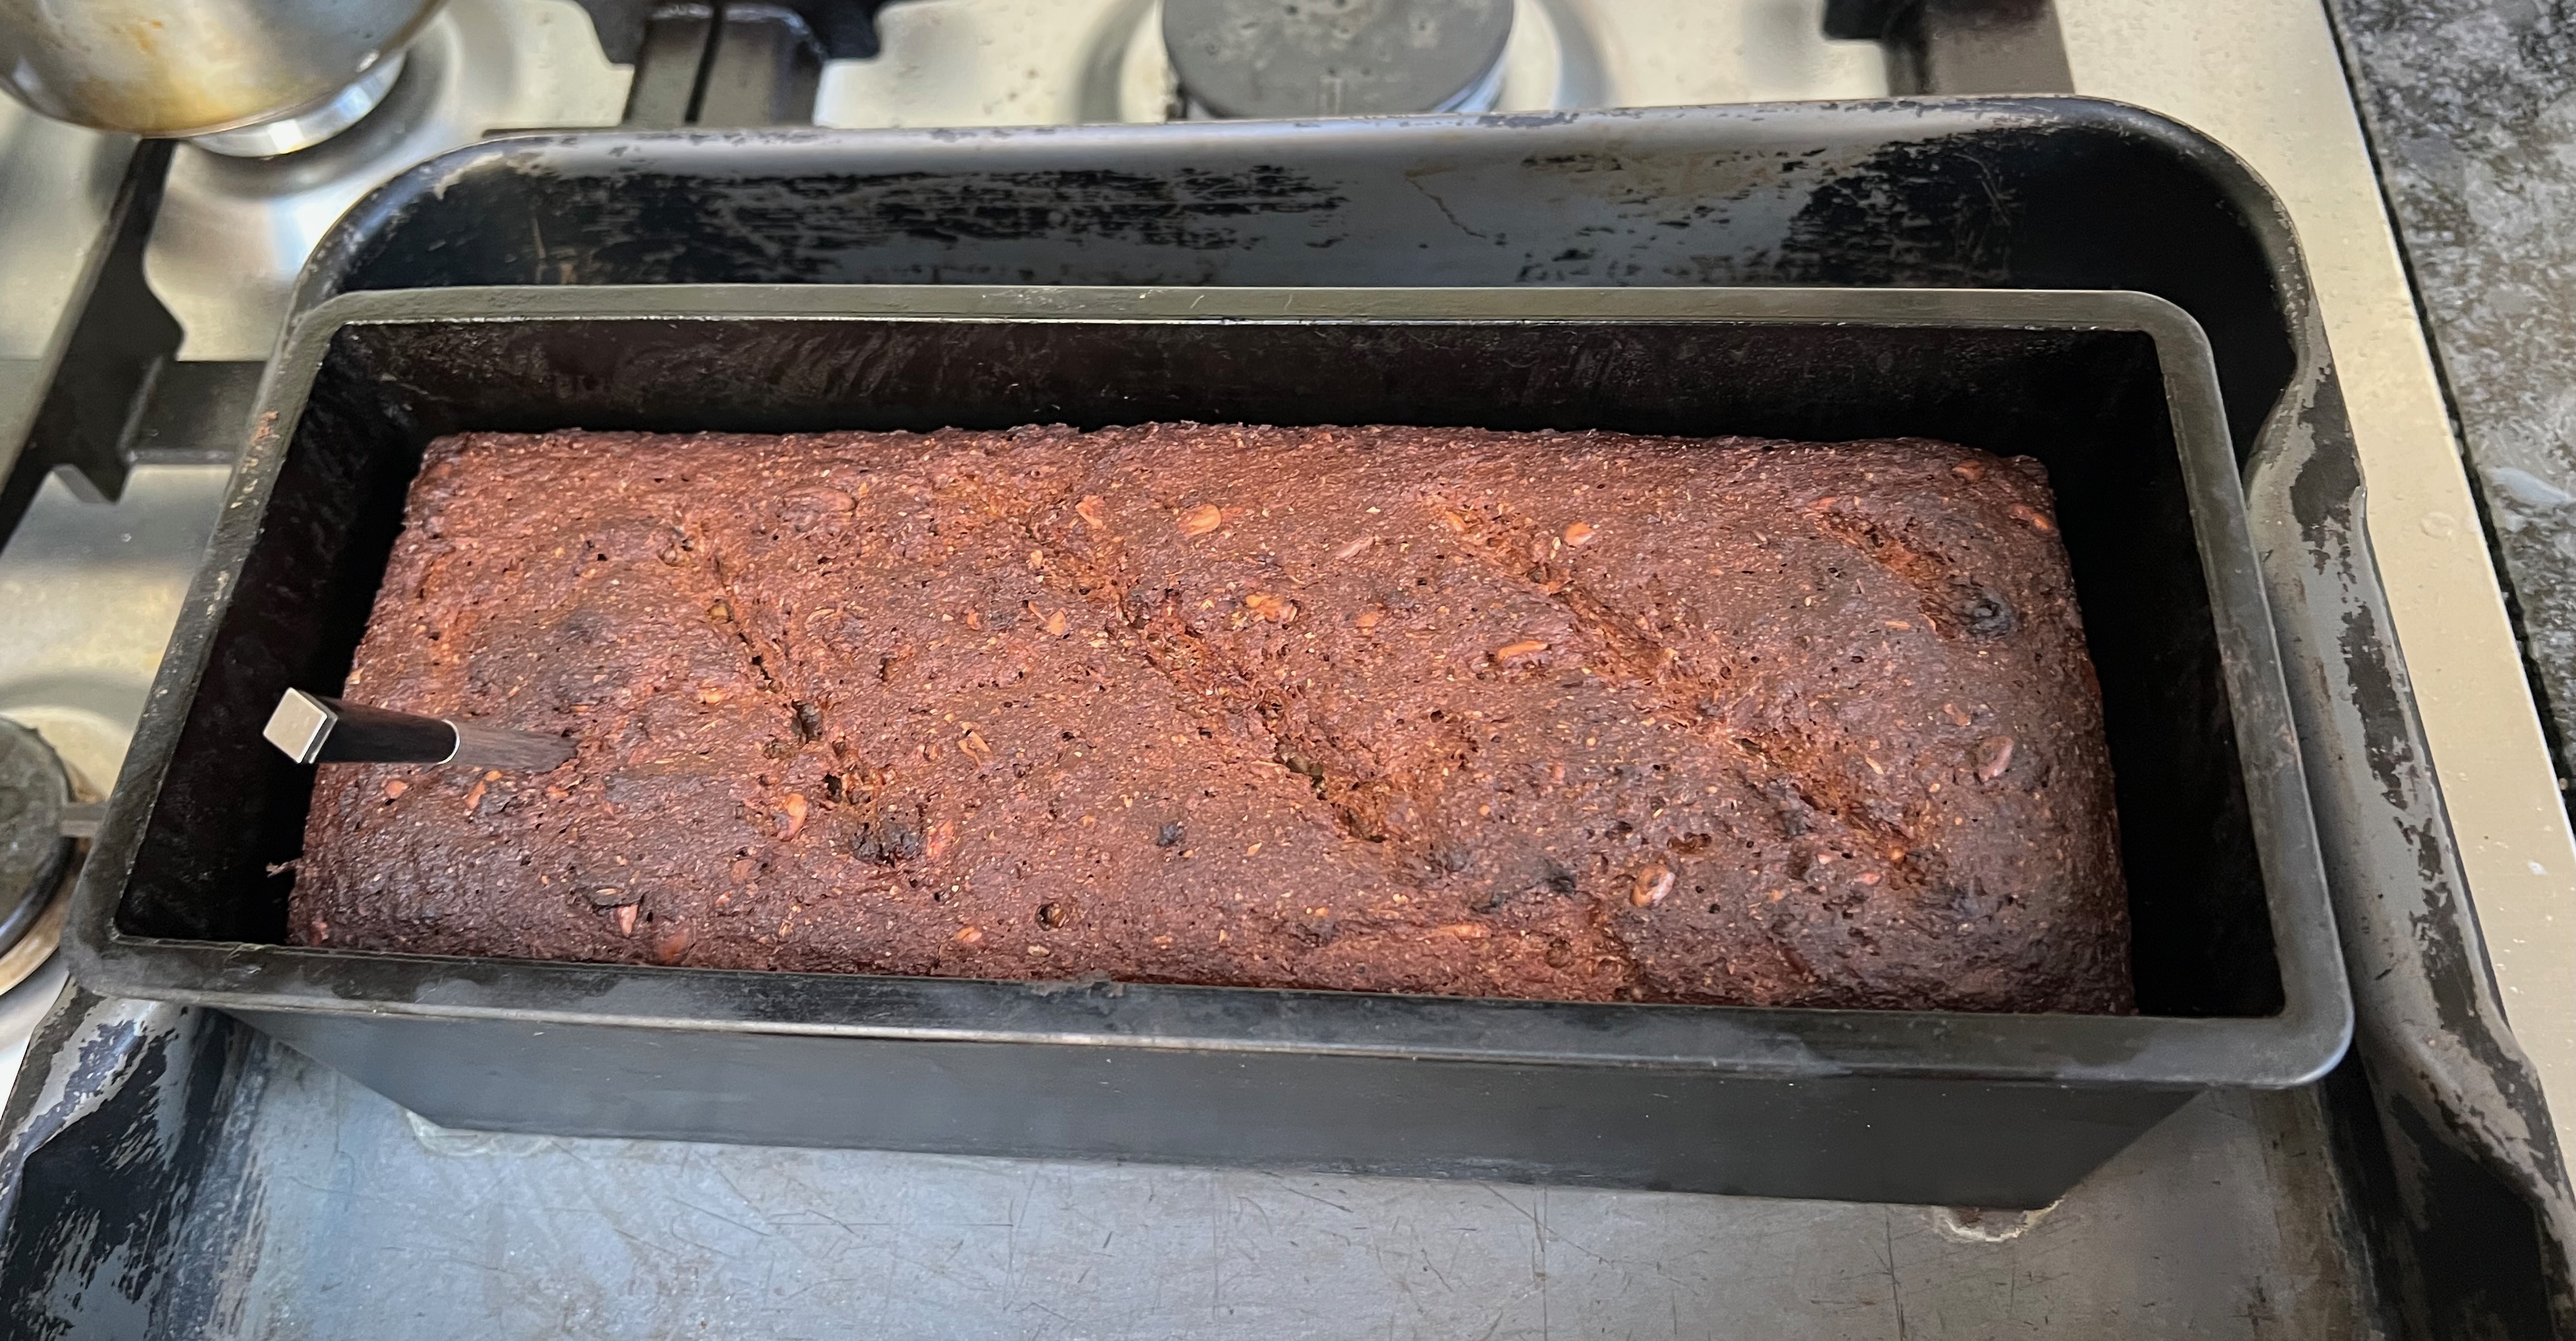
Press the dough into the pan, getting it fully into the corners and making as even a shape as you can. Don’t worry about maintaining gluten structure: the preponderance of dark rye flour means there won’t be much.
Leave to rise until the bread is nearly level with the top of the tin. This took another two hours, but in all honesty, the time is completely variable (disclaimer: I should have left mine about half an hour longer than I did for the loaf photographed here). You just have to be patient and keep watching the bread at regular intervals.
Day 2 – around 2pm – bake and glaze
8g potato starch
30ml water (this is a guess – Georg doesn’t specify)
Around half an hour before you think your loaf will be fully risen, preheat your oven to 250℃ fan.
Spread the potato starch thinly over a Silpat sheet or sheet of baking paper over a baking tray. When the oven is up to temperature, put it in the oven and roast until golden (this took me around 15 minutes). Remove from the oven and leave to cool.
When your loaf is risen to your satisfaction, score the top and brush it with a little water. If you have a thermometer probe that you can use in the oven, stick it into the loaf.
Put the tin into a larger roasting pan with some water and put the whole assembly into the oven.
After 10 minutes, turn the oven temperature down to 180℃ fan and open the oven briefly to let off the steam.
Bake until the internal temperature reaches 98℃ (this took me around 50 minutes).
Around 10 minutes before the end of the baking time, put the roasted potato starch and the water into a saucepan, bring to the boil and simmer for five minutes or so. Take off the heat.
Remove from the oven and place on a wire rack. Brush it all over with the potato starch and water mixture.
And here’s the hard part: leave the bread to rest for 24 hours before eating!
After 10 minutes – with thermometer probeOut of ovenAfter glazingAfter first slice!
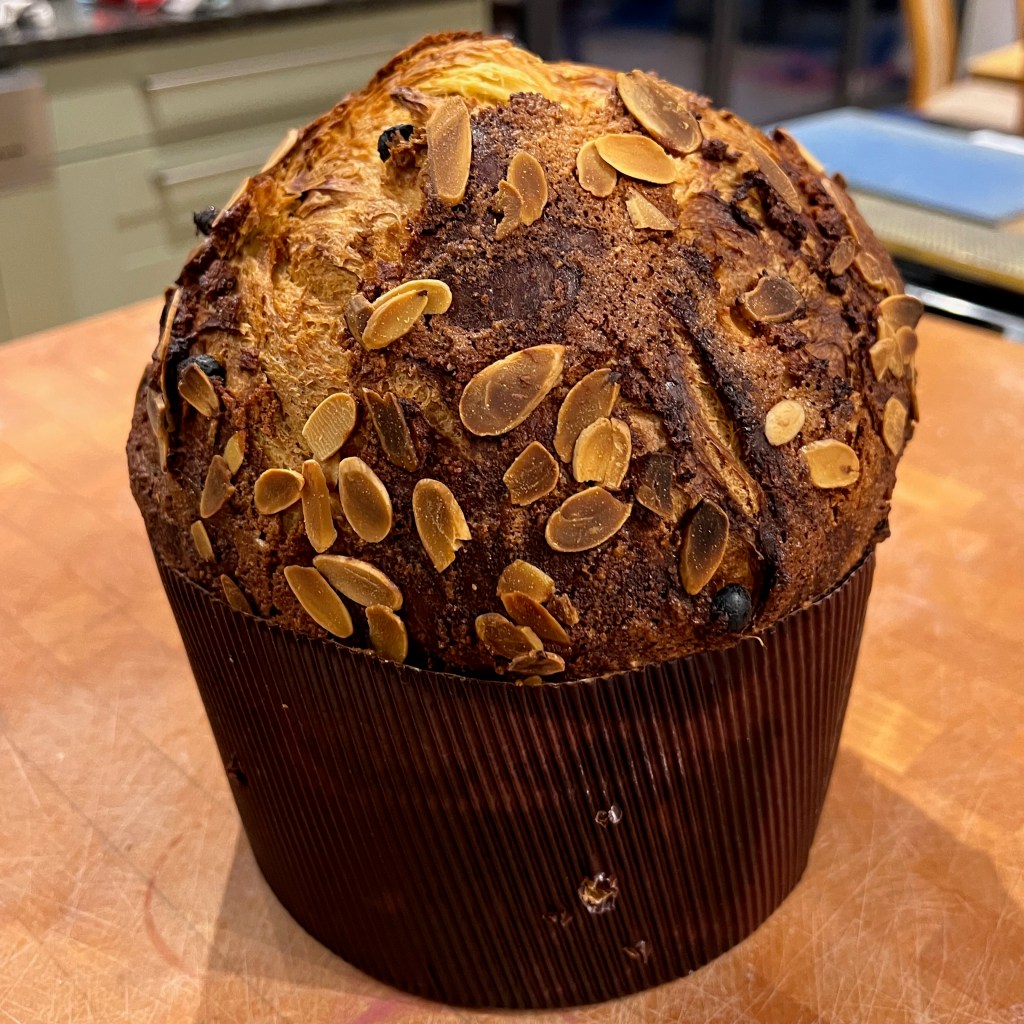
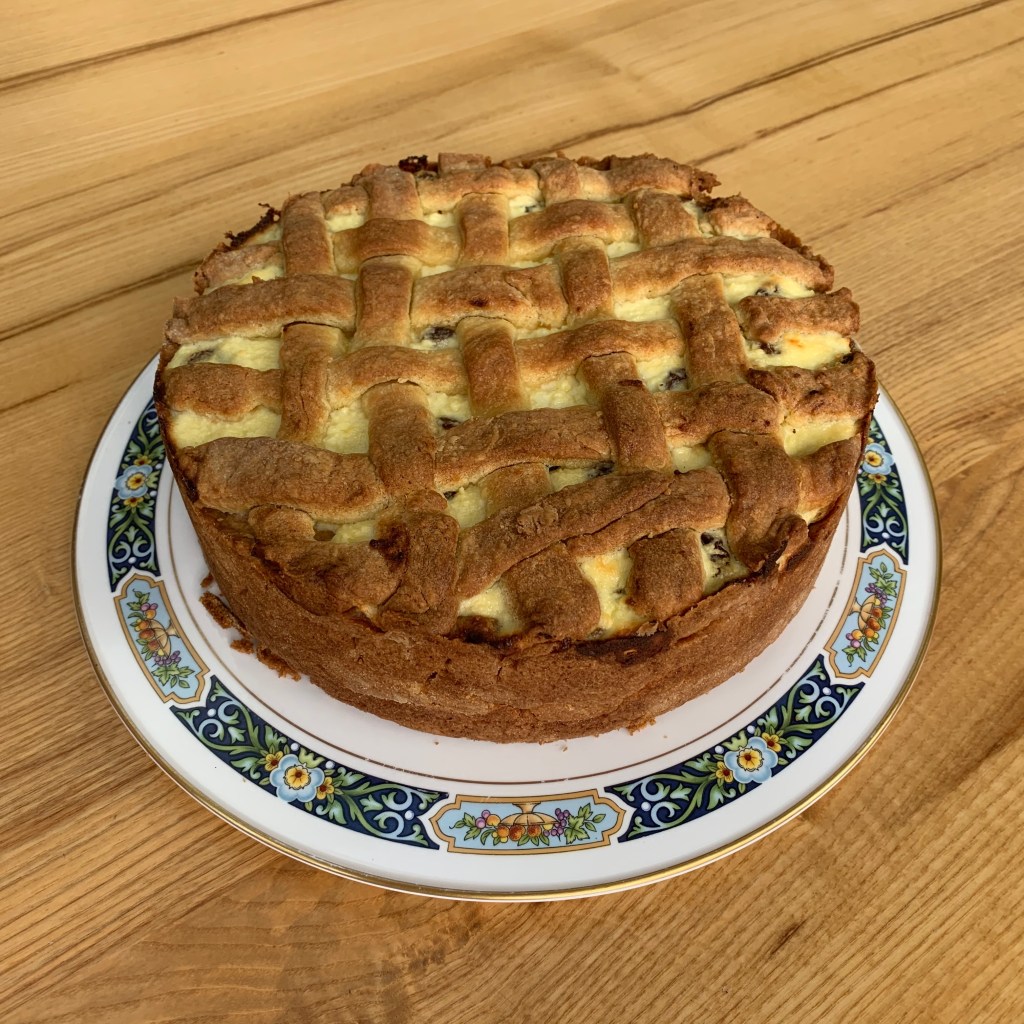
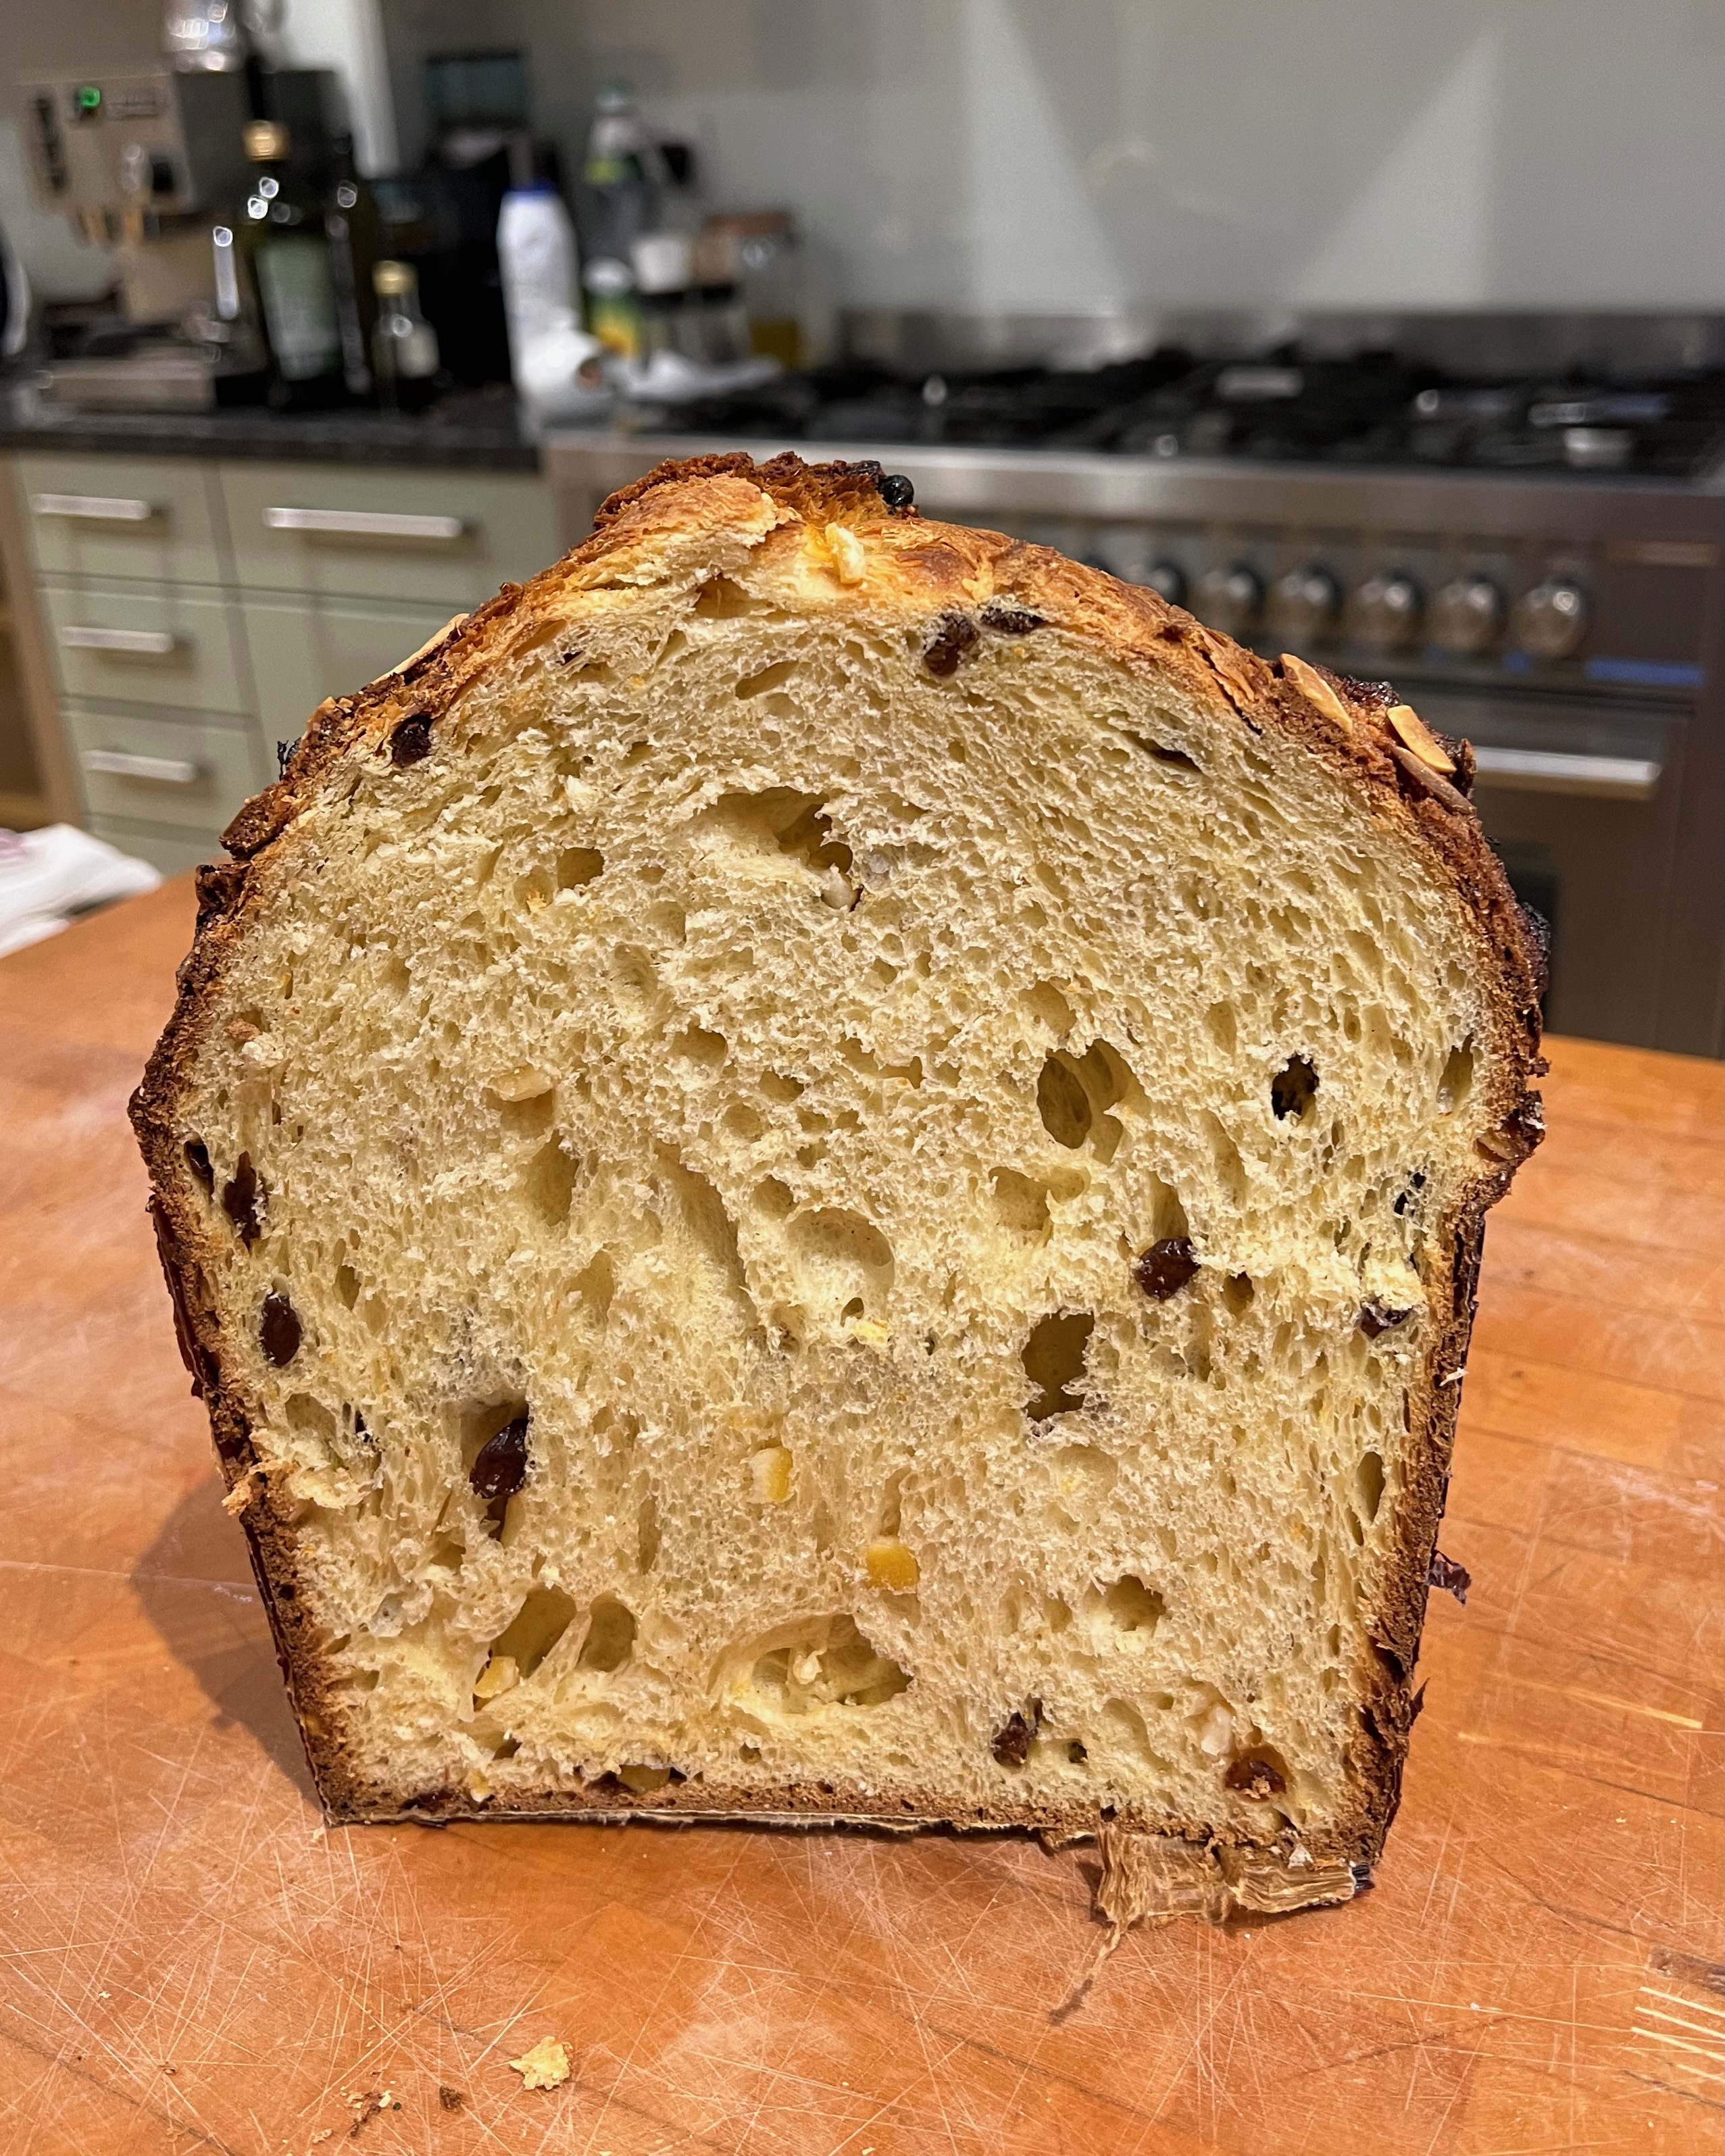
Christmas food in Italy is a whole lot more varied than in England, with all manner of different meats, fish, pasta dishes, cakes and biscuits (mercifully, the Italians don’t share our obsession with roast turkey). But there’s one thing that you’ll see at Christmas all over Italy: the cylindrical, sweetened, enriched bread called “Panettone” – the “big loaf”. Whenever I’ve been to a café in Italy at Christmas time, usually in or near Milan, the base of modern, industrial scale panettone manufacture and said to be its city of origin, piles of panettone pieces have been arrayed on the bar for everyone to nibble with their coffee. The aroma of citrus and vanilla in a bread of extreme fluffiness is unbeatable.
There are zillions of recipes, from the traditional candied fruit to those with more outlandish fillings: chocolate, hazelnut puree, tangerine paste, marrons glacés and so on. But there are a few things that distinguish a panettone from other breads/cakes of its type:
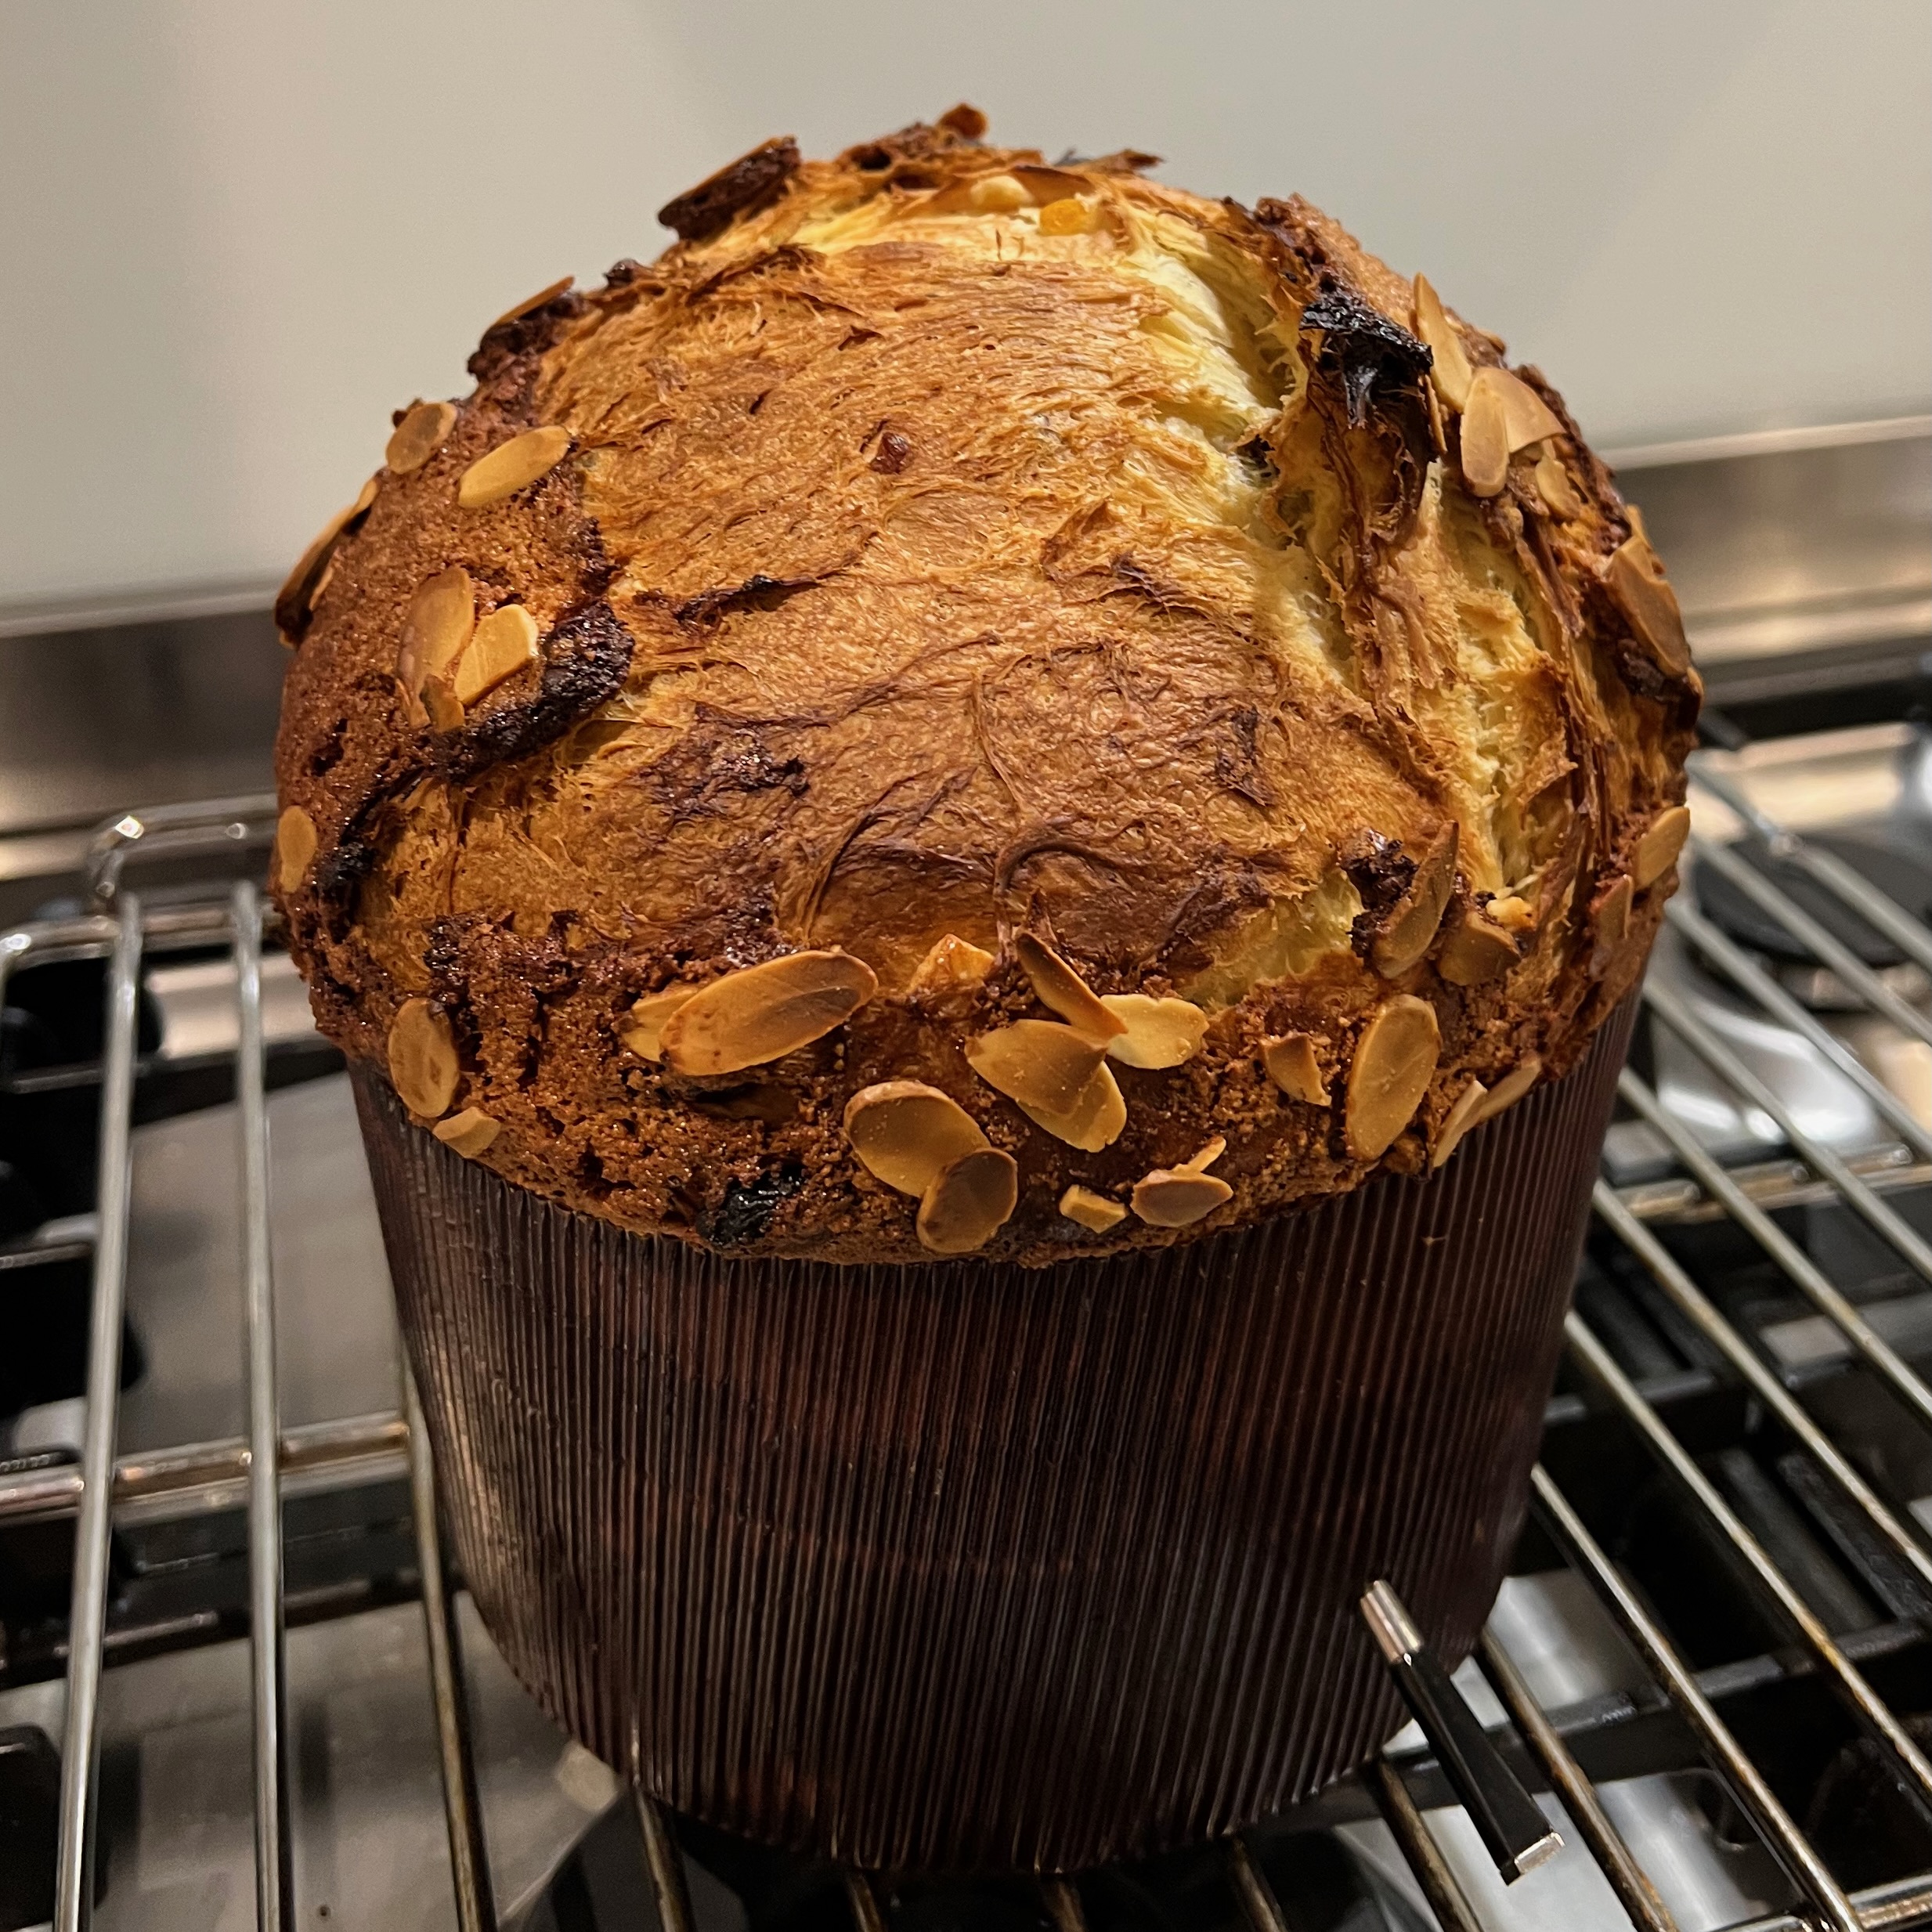
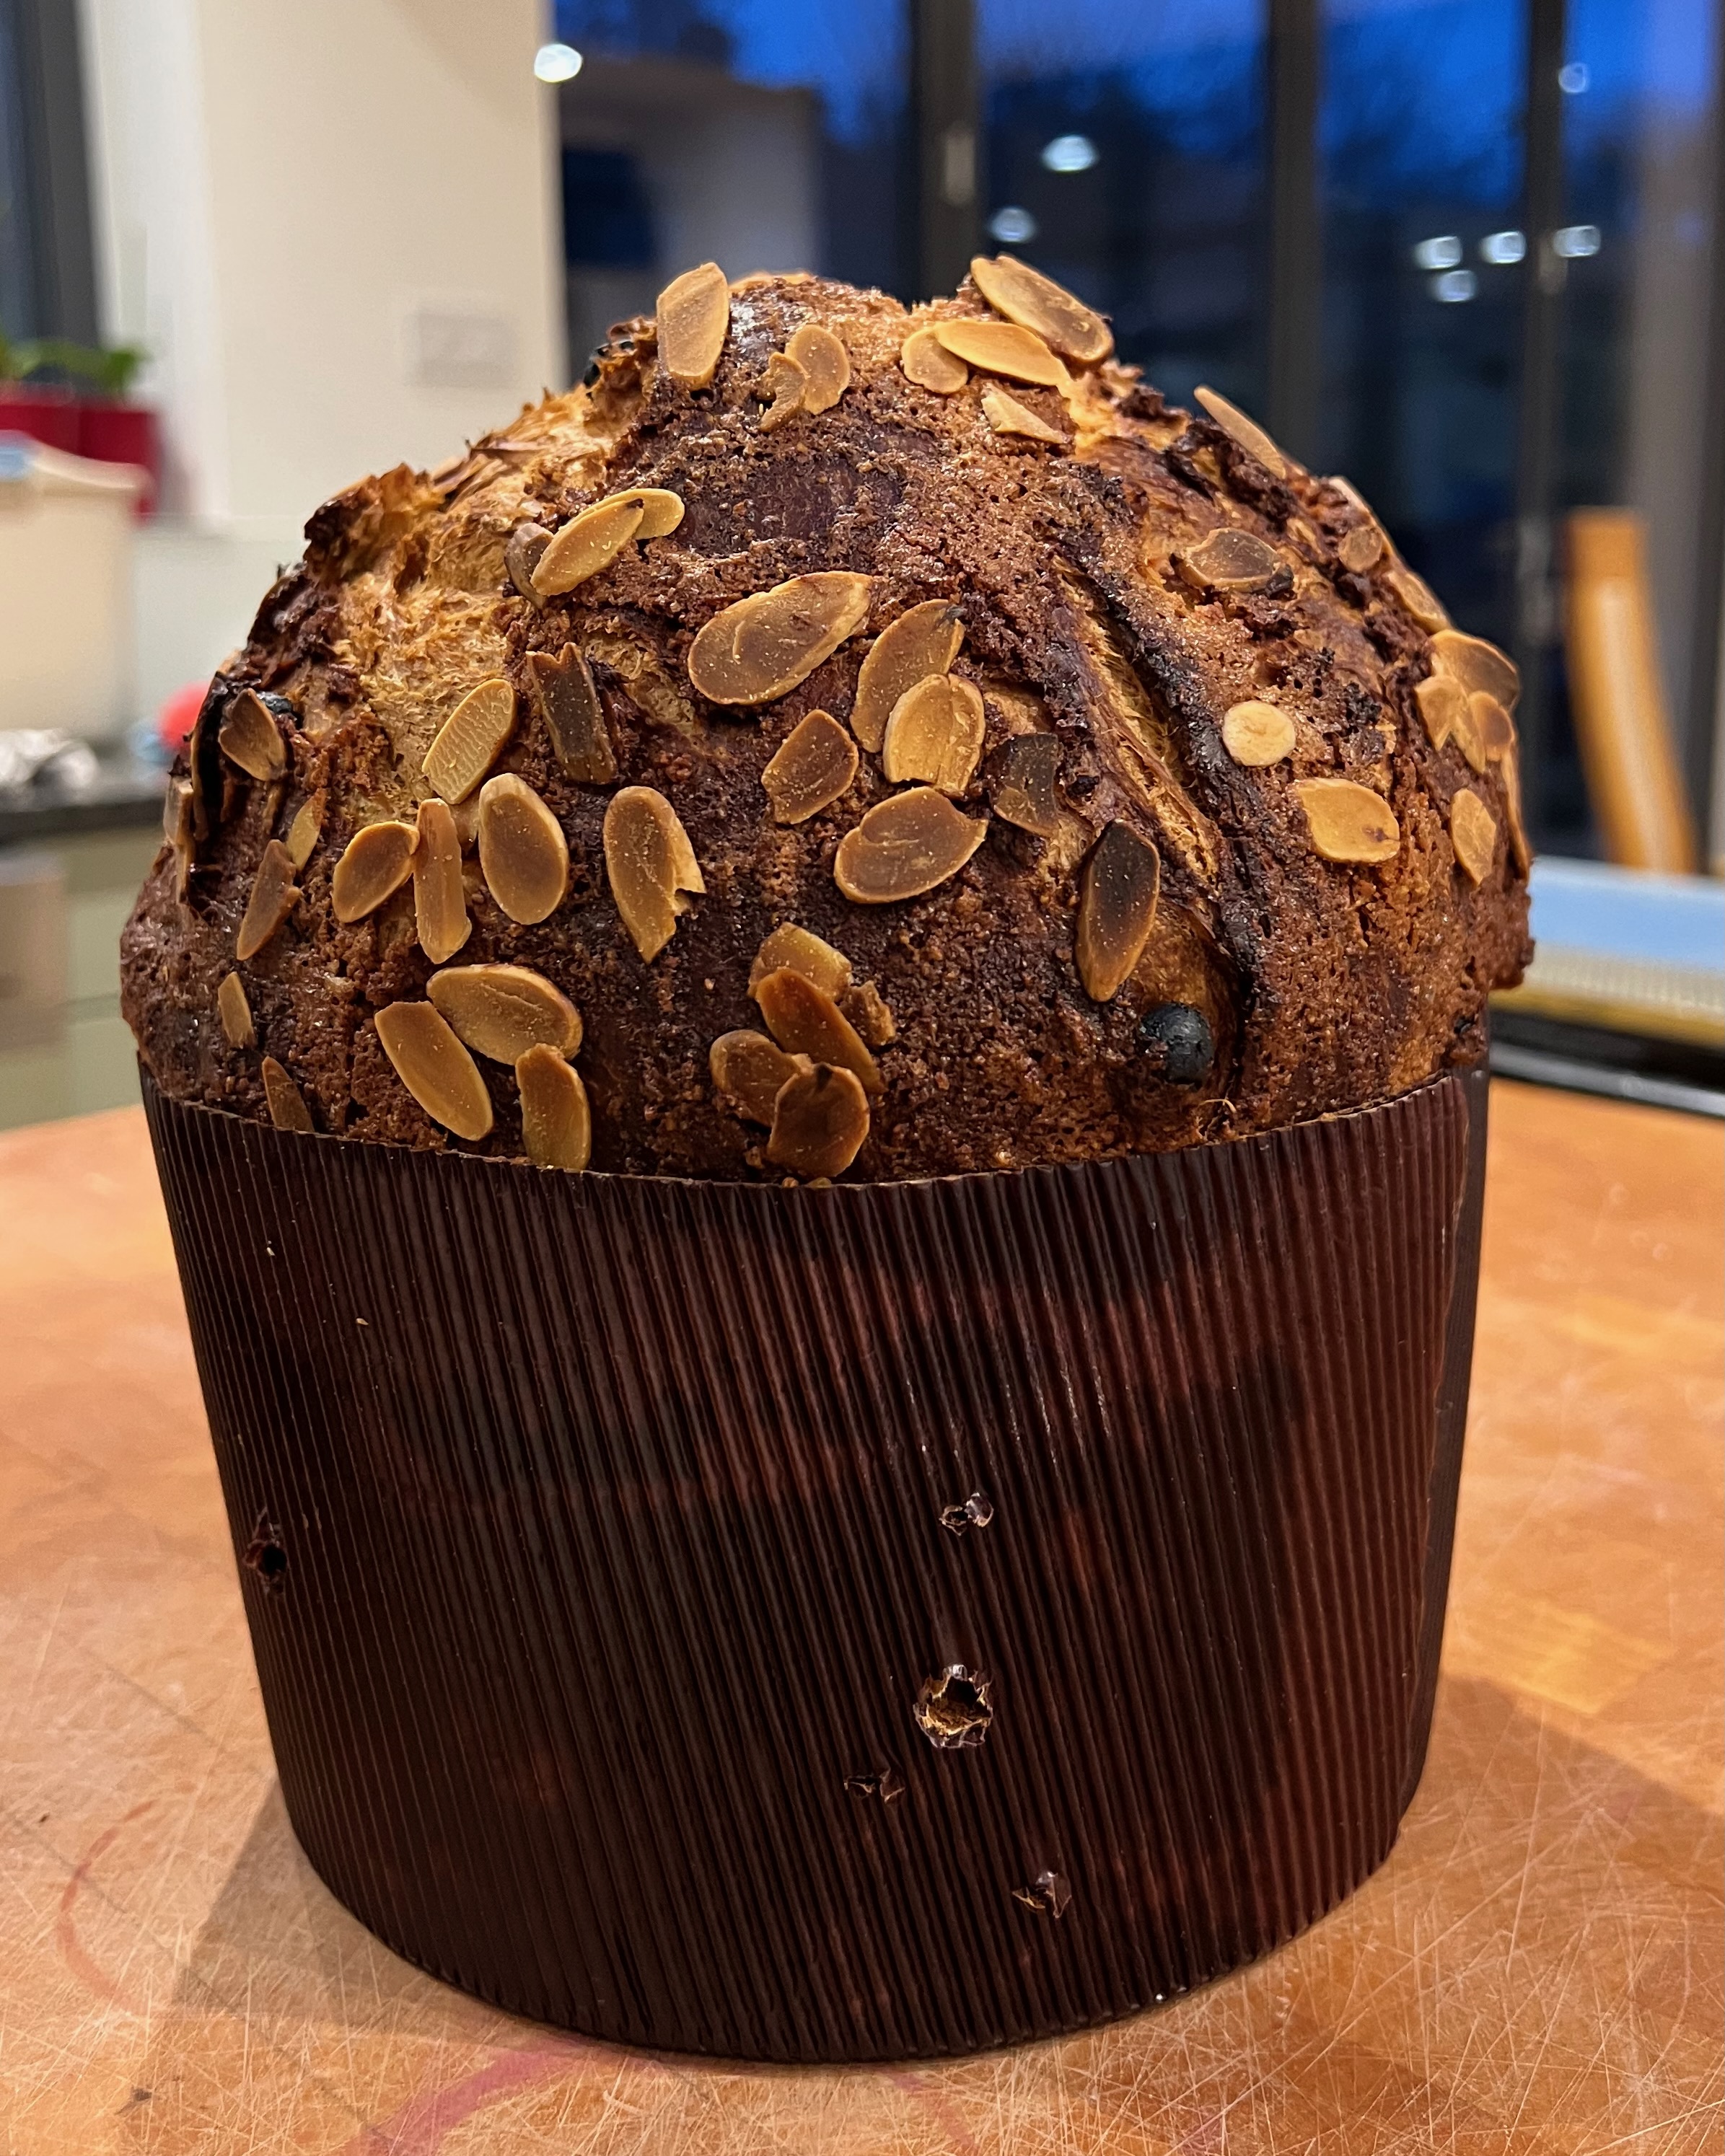
The dough is sweetened and enriched with egg yolks and butter, giving an overall flavour profile something like a brioche. But where you would try to get a brioche smooth and even in crumb, a panettone should be as aerated as you can make it: fluffiness is mandatory and large air pockets are completely acceptable.
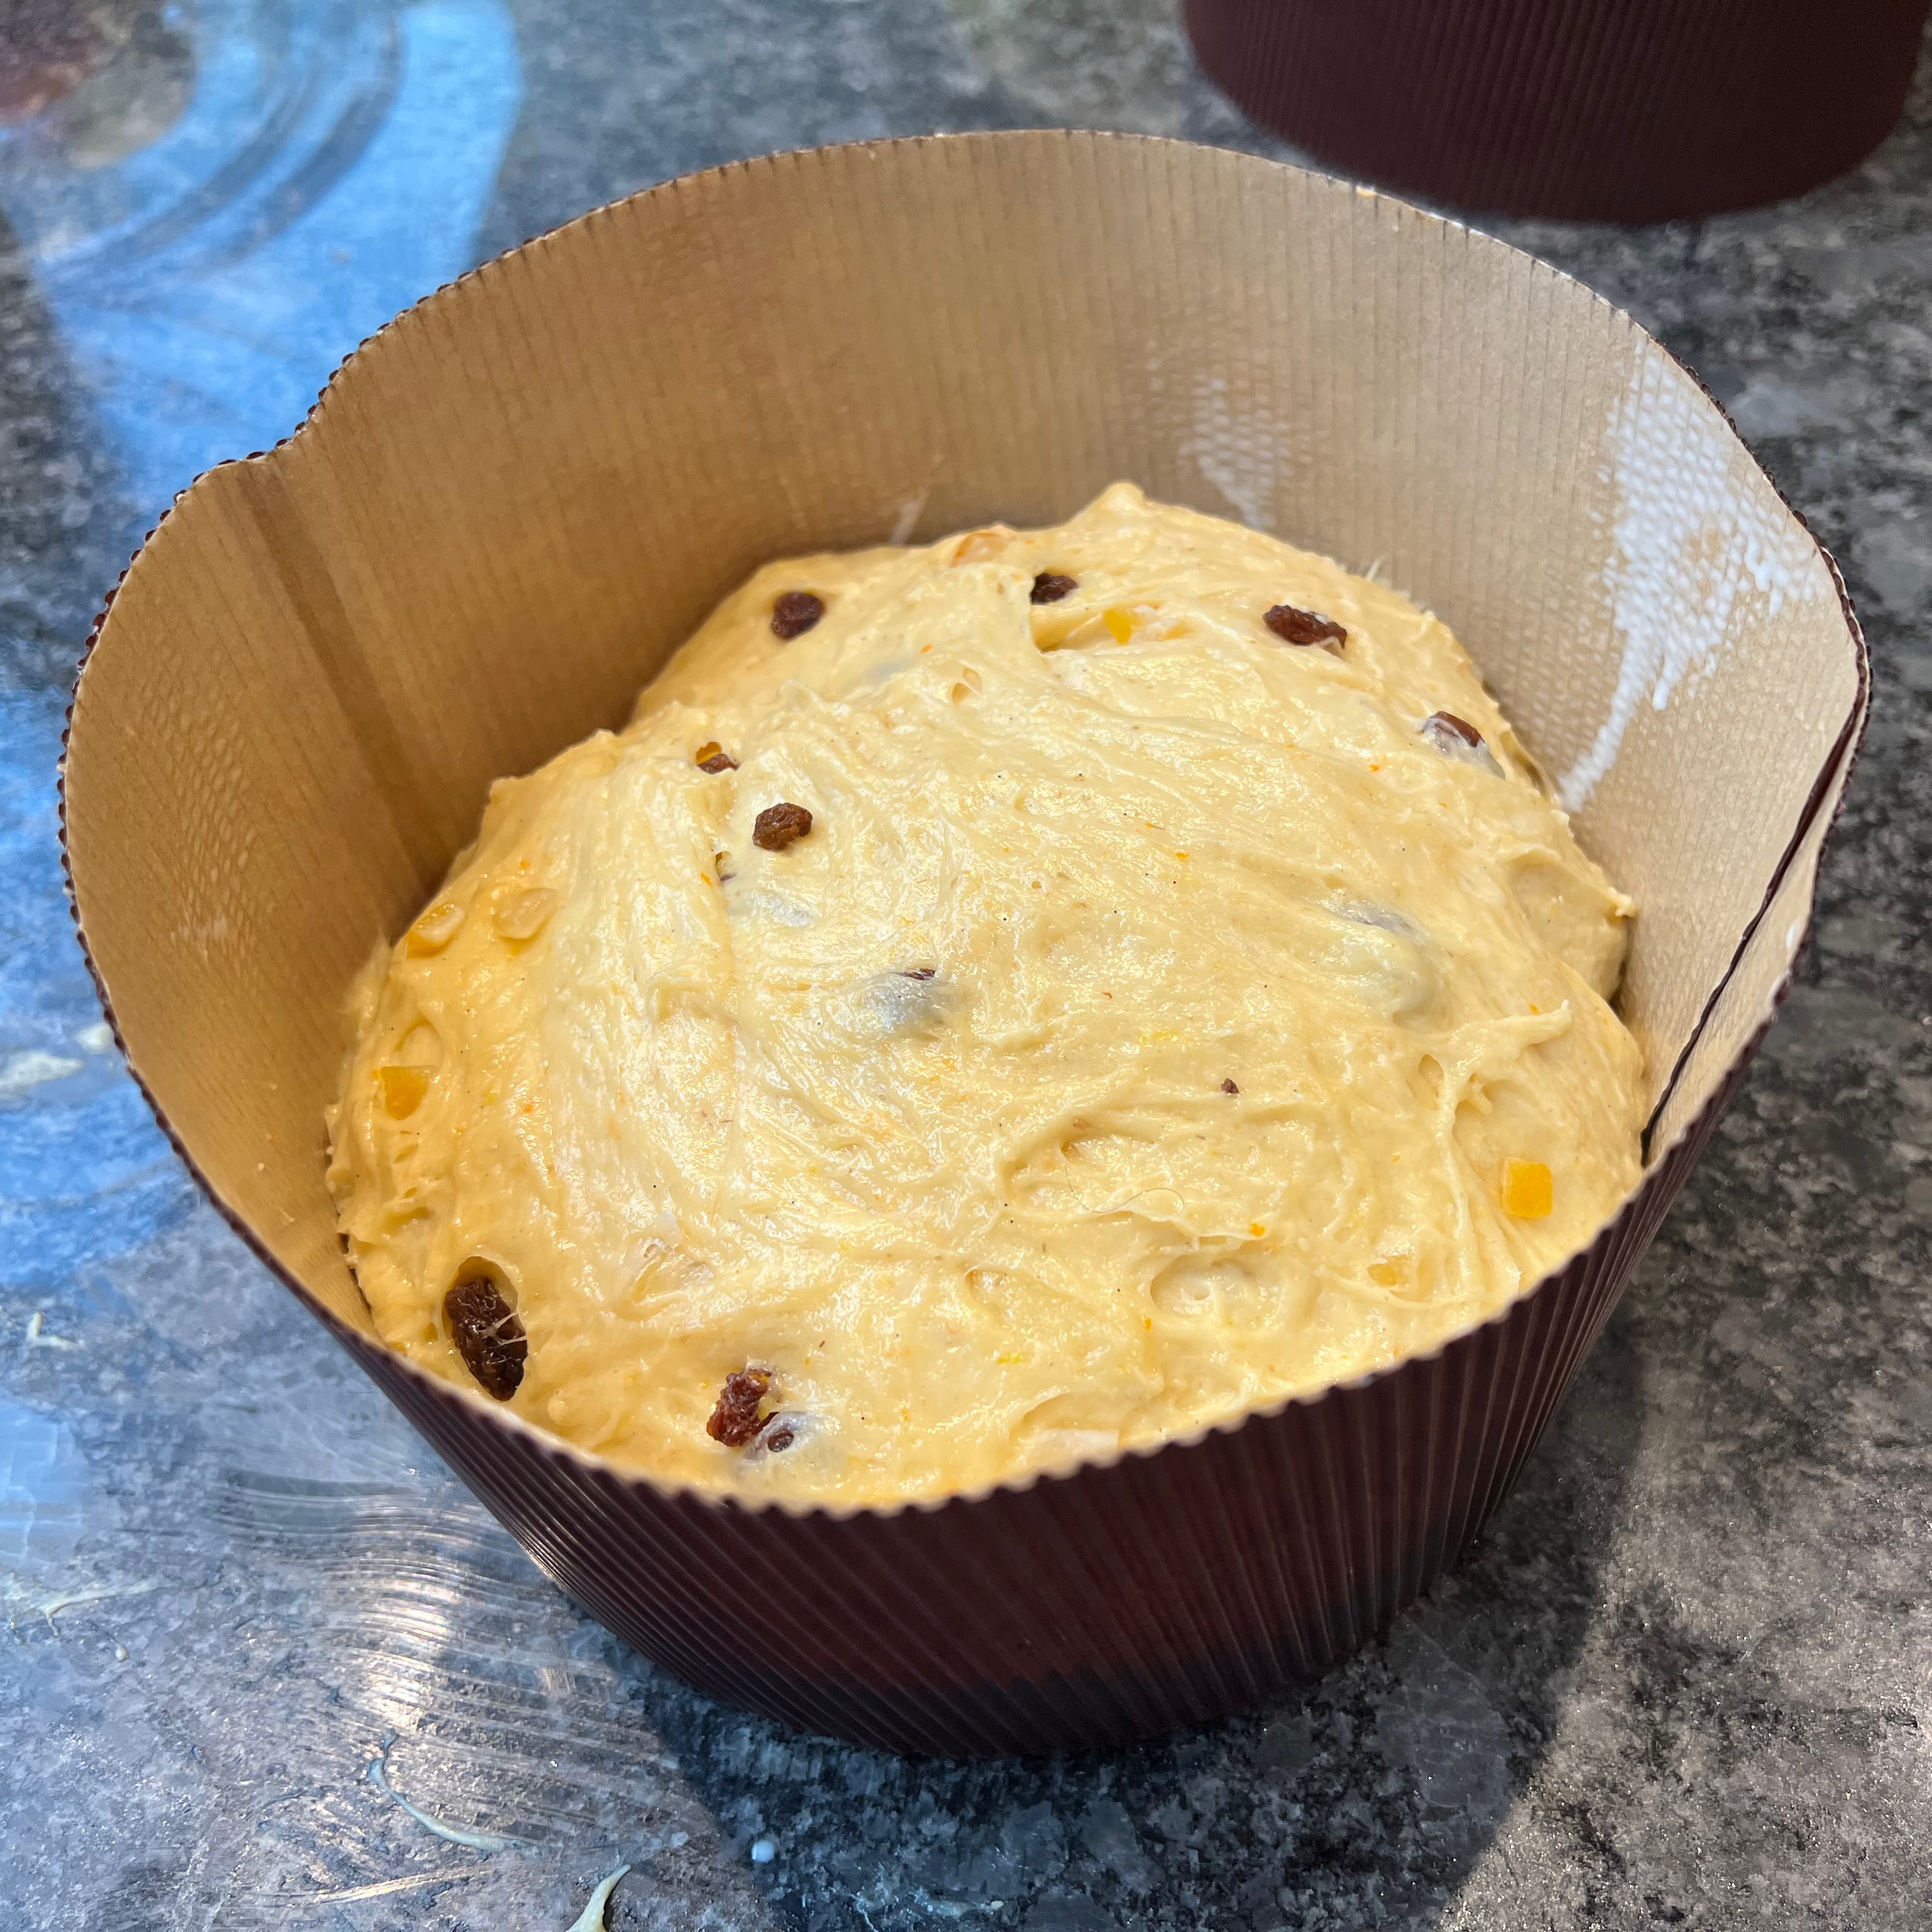
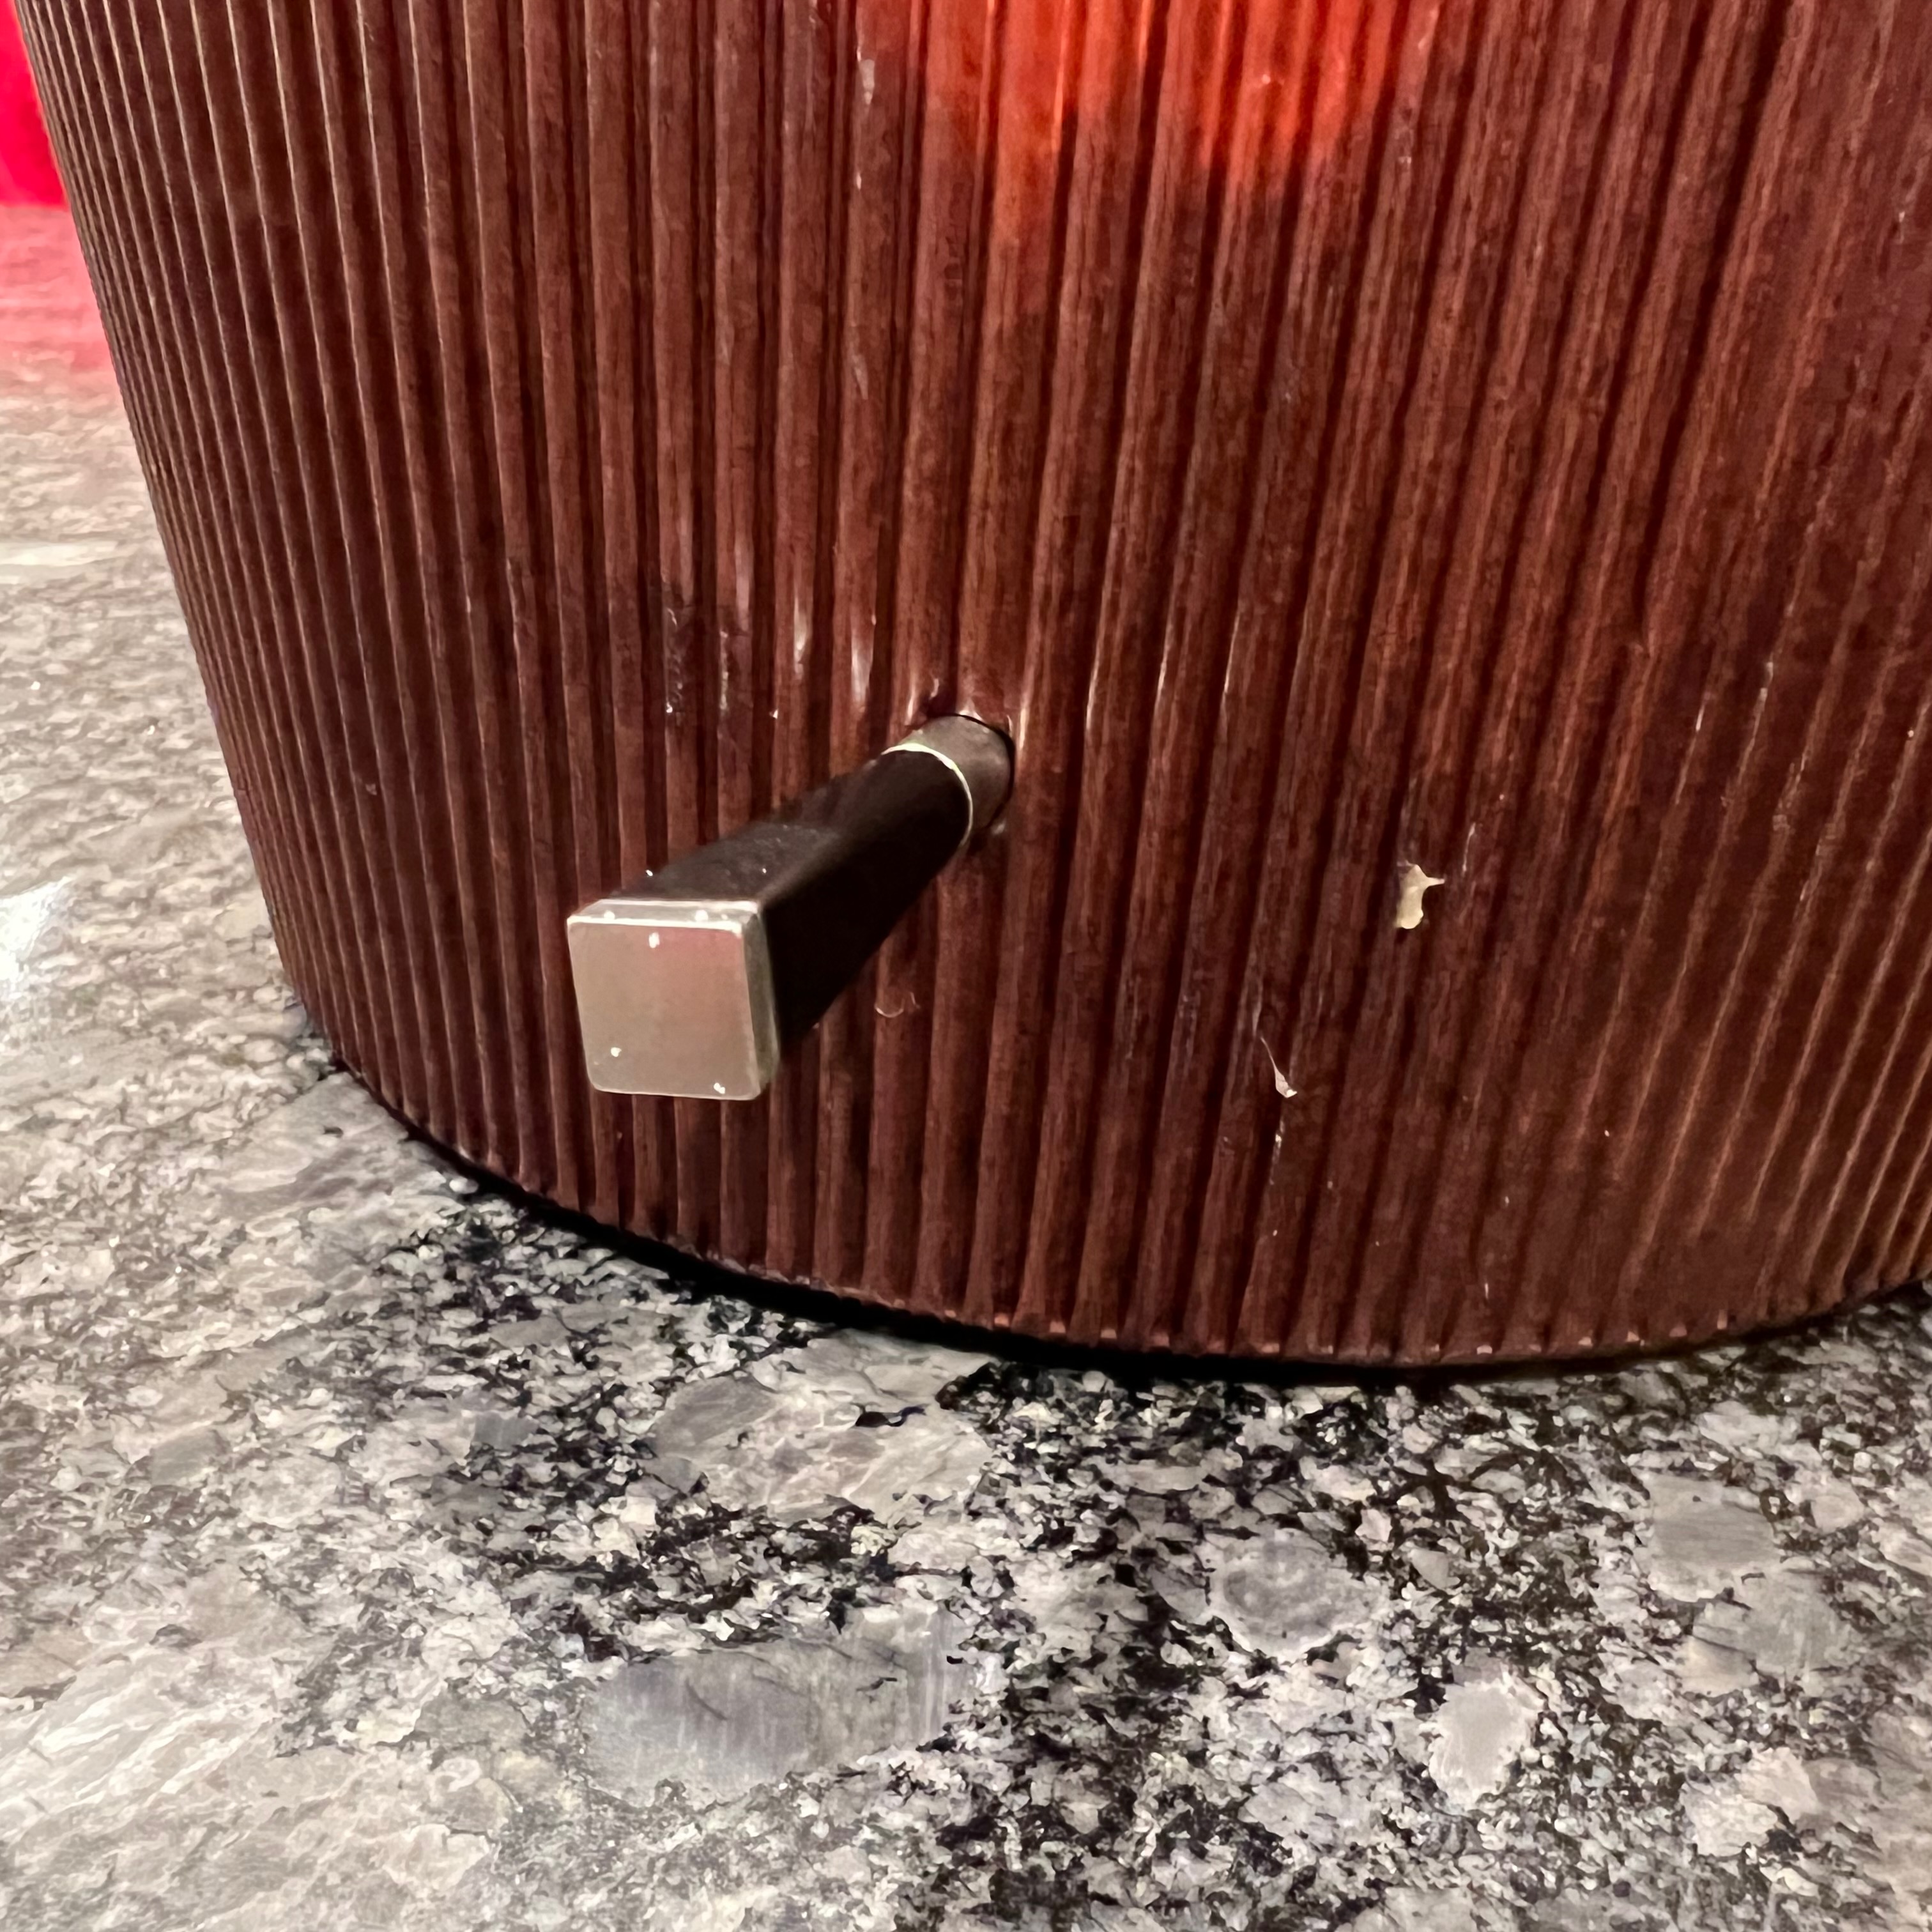
The loaf is baked in a cylindrical case or tin. Originally, the chances are that you’d have reused one of the large tins in which canned goods were sold, but today, you are more likely to go for a single-use paper case made specially for the purpose: these are inexpensive and readily available both in the UK and the US.
To prevent your loaf collapsing down the moment you take it out of the oven – the fate of most heavily aerated breads and cakes – a panettone is cooled upside down: instead of collapsing, it gains extra height and fluffiness.
Making panettone turns out to be something of a project: it’s going to take you most of a day as an absolute minimum, with some recipes calling for multiple resting and proving stages taking several days, in order to develop the flavour to its maximum. I went for an intermediate, starting with a sourdough “sponge” at 6pm on day 1 and getting the panettone out of the oven around 24 hours later, to be cooled and ready for breakfast the next morning.
I ended up taking bits and pieces from several different recipes: Giallo Zaferrano, Great Italian Chefs, BBC Good Food. But rather than slavishly following a set of quantities and times, I relied more on getting the dough to look right at each stage, with my main reference being this video from chefsteps.com. You’ll see from the photos that my texture came out perfectly – I couldn’t have asked for better. However, my flavours beed adjusting for next time: I used a bit too much salt and not enough sugar and I was definitely too conservative about how much candied fruit to add. I’ve adjusted the quantities below to what I think I should have used (and will try for next Christmas).
Confession time: I was going by look and feel and not measuring all the quantities as accurately as usual. So if you’re going to try this, use your judgment.
Day 1, around 6pm: the sourdough sponge, part 1
30g sourdough starter
170g strong white flour
130ml water
Mix thoroughly the sourdough starter with 30g of the flour and 60ml of the water. Leave to ferment for around three hours.
Add the rest of the flour and water, mix thoroughly then leave to ferment overnight.
Day 2, around 8am: the sourdough sponge, part 2
100g strong white flour
4g dried yeast
100g yoghurt (any active yoghourt should do, buttermilk or kefir might be better)
Add all the ingredients to your sponge from the previous day, mix thoroughly and leave to rest until everything is bubbling nicely. This will depend on the ambient temperature: I left mine for around two hours in a place near my boiler which is around 30℃.
Day 2 mid-morning: make the dough
400g flour (very approximate, do by feel of the dough)
8 egg yolks, at room temperature (when you separate the eggs, keep a small amount of the white – you’ll use it for the glaze.
200g caster sugar
140g butter, at room temperature
zest of one orange
zest of one lemon
seeds scraped from one vanilla pod
5g salt
120g lemon peel
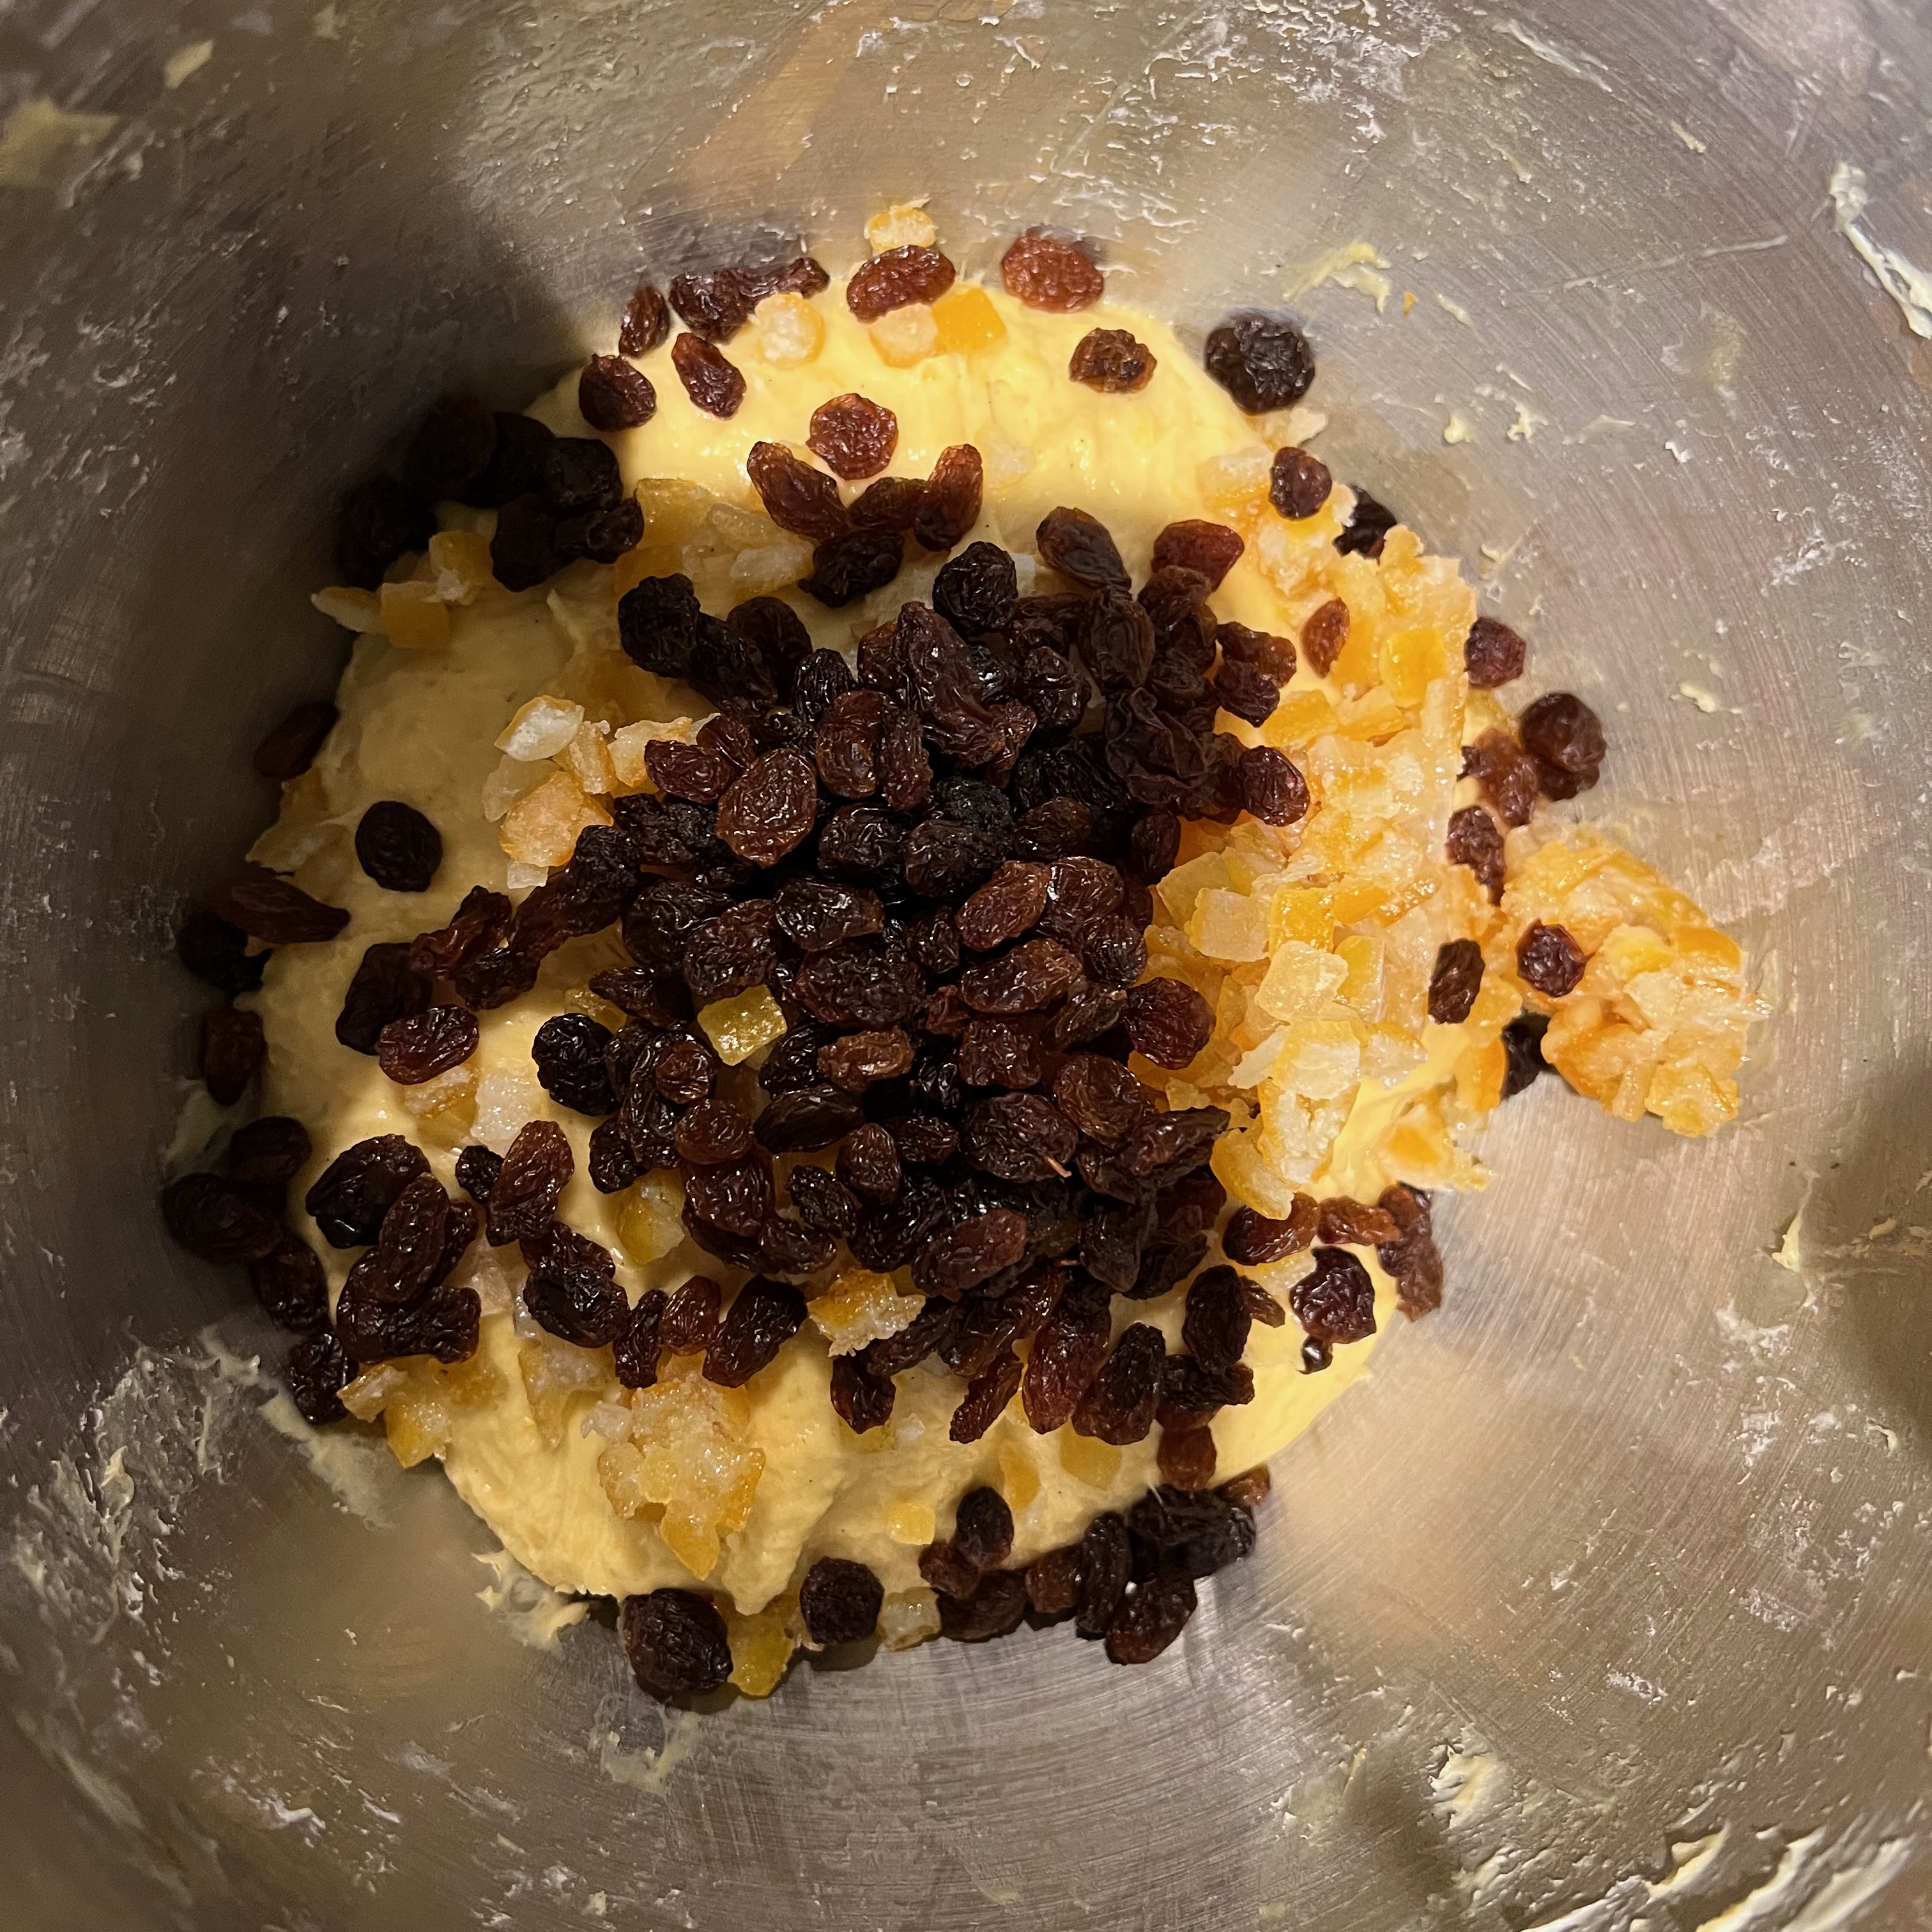
120g sultanas
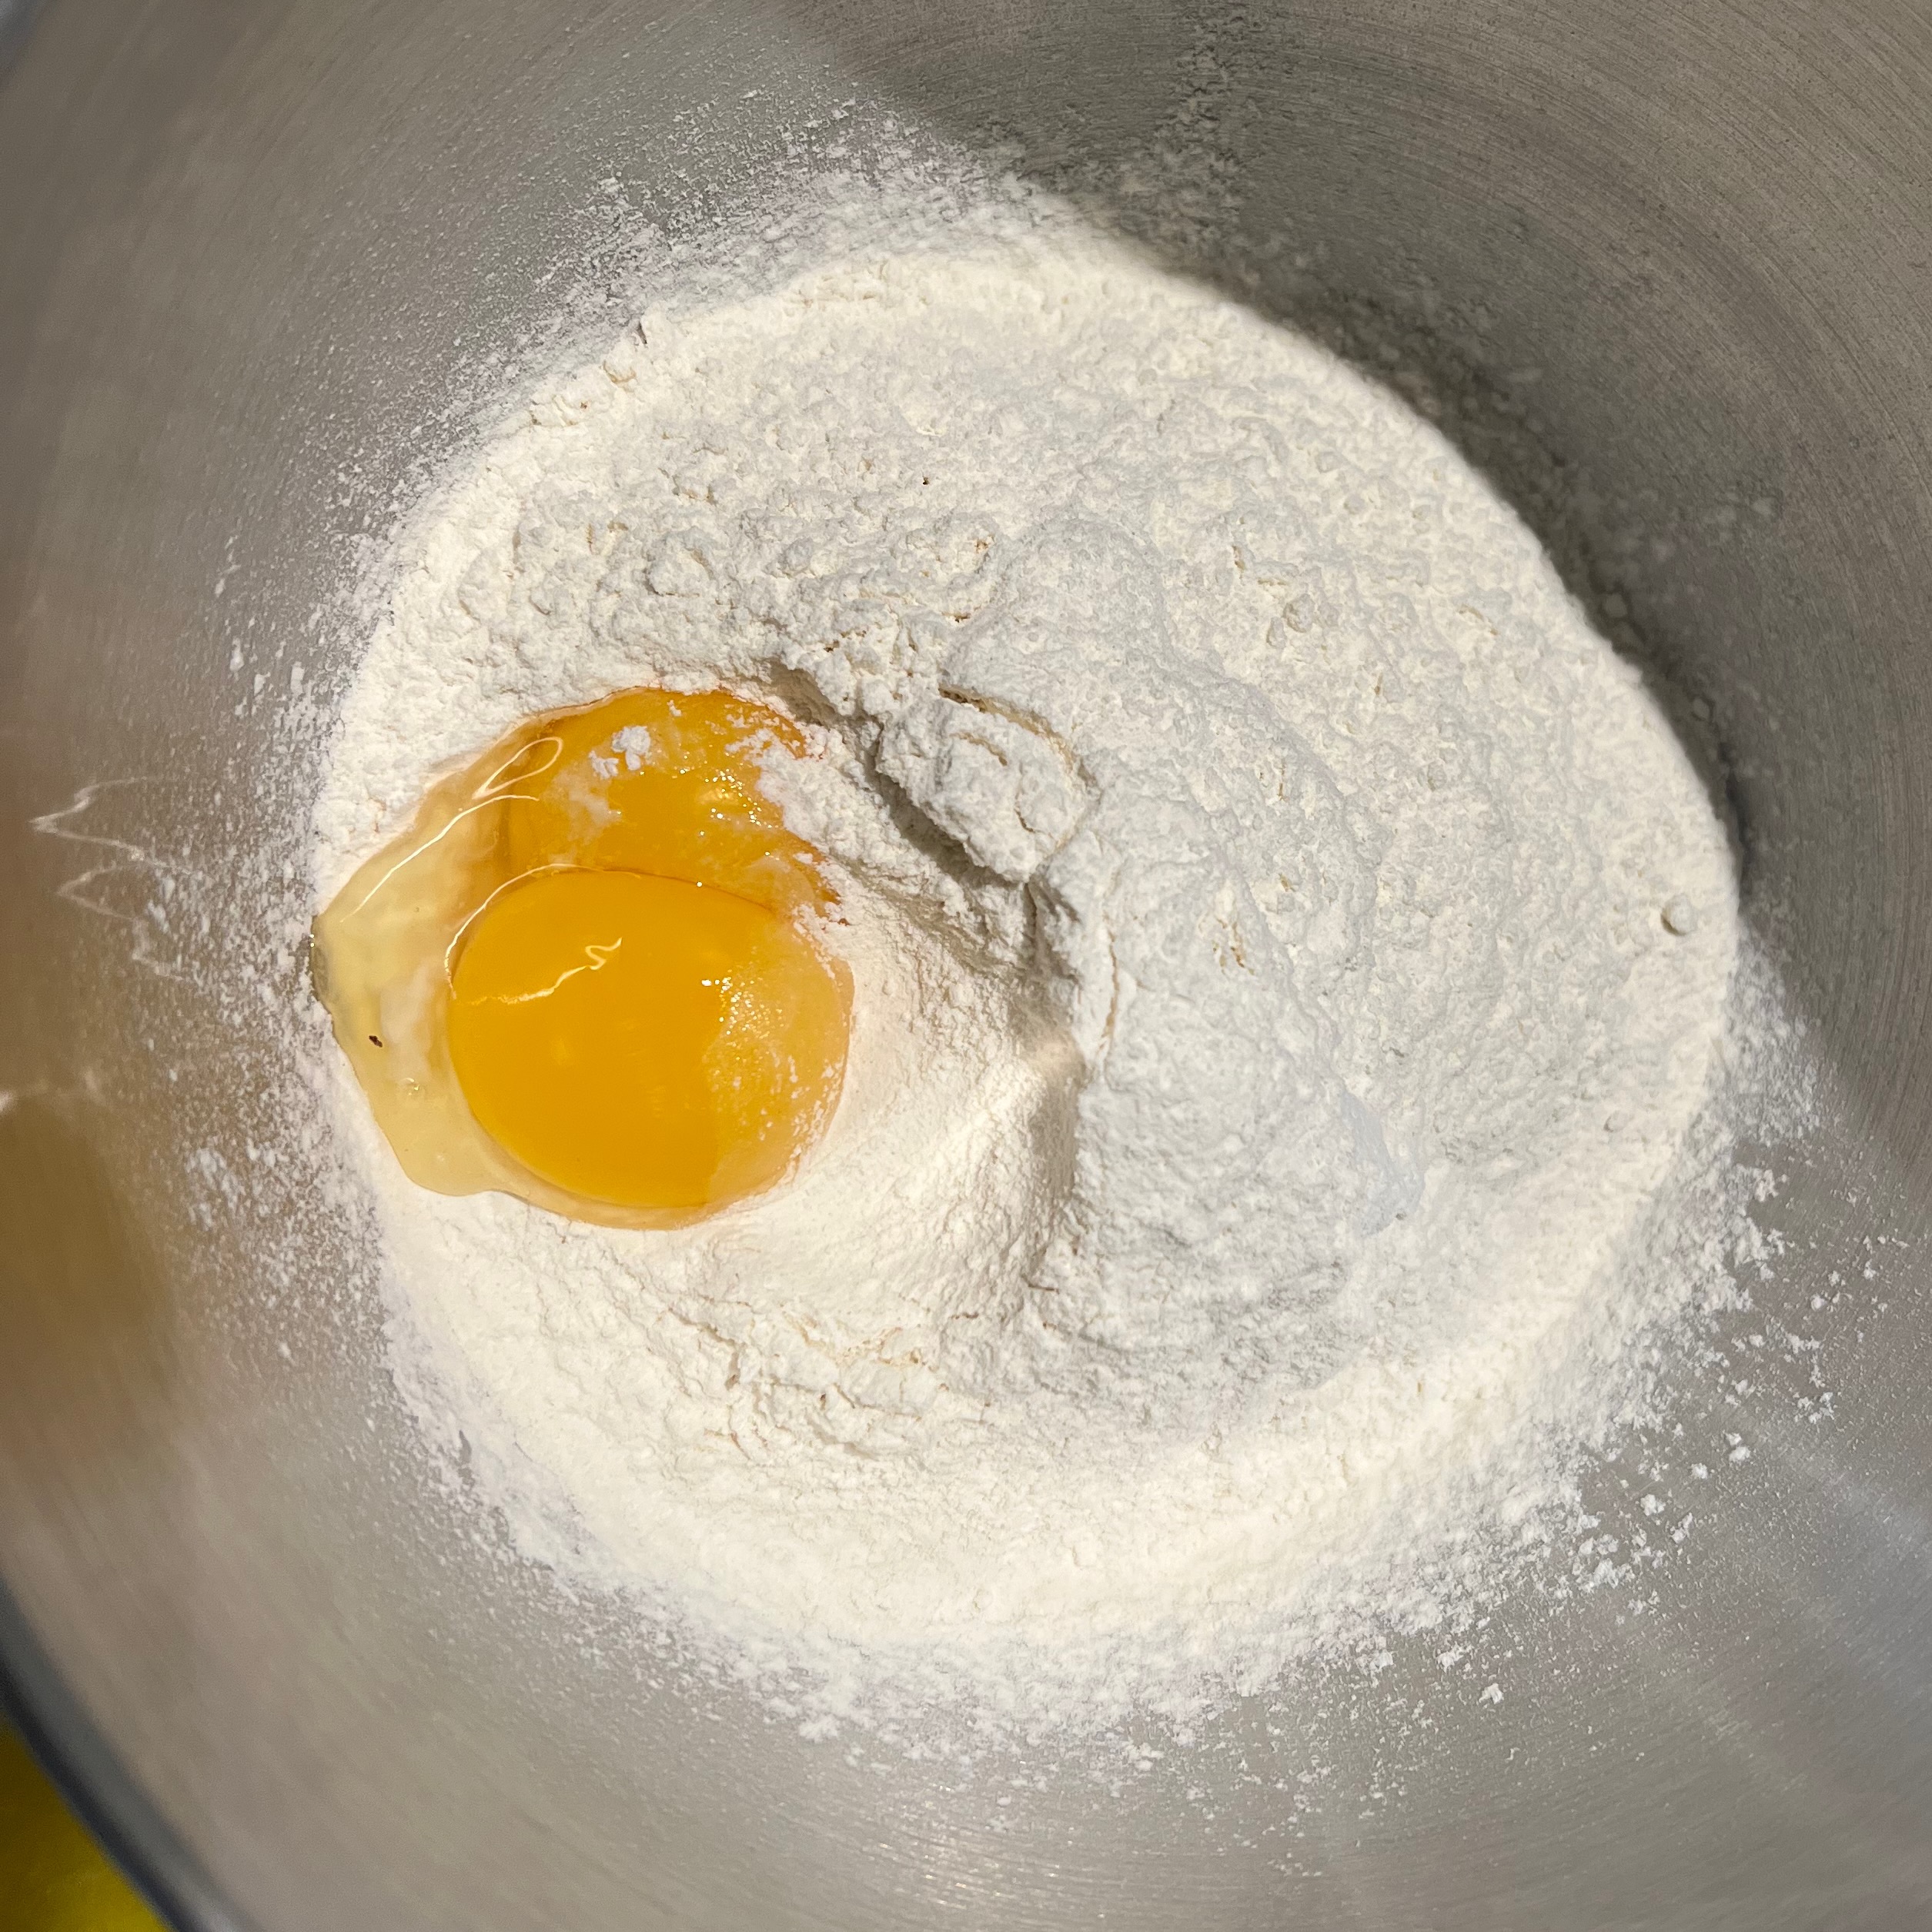
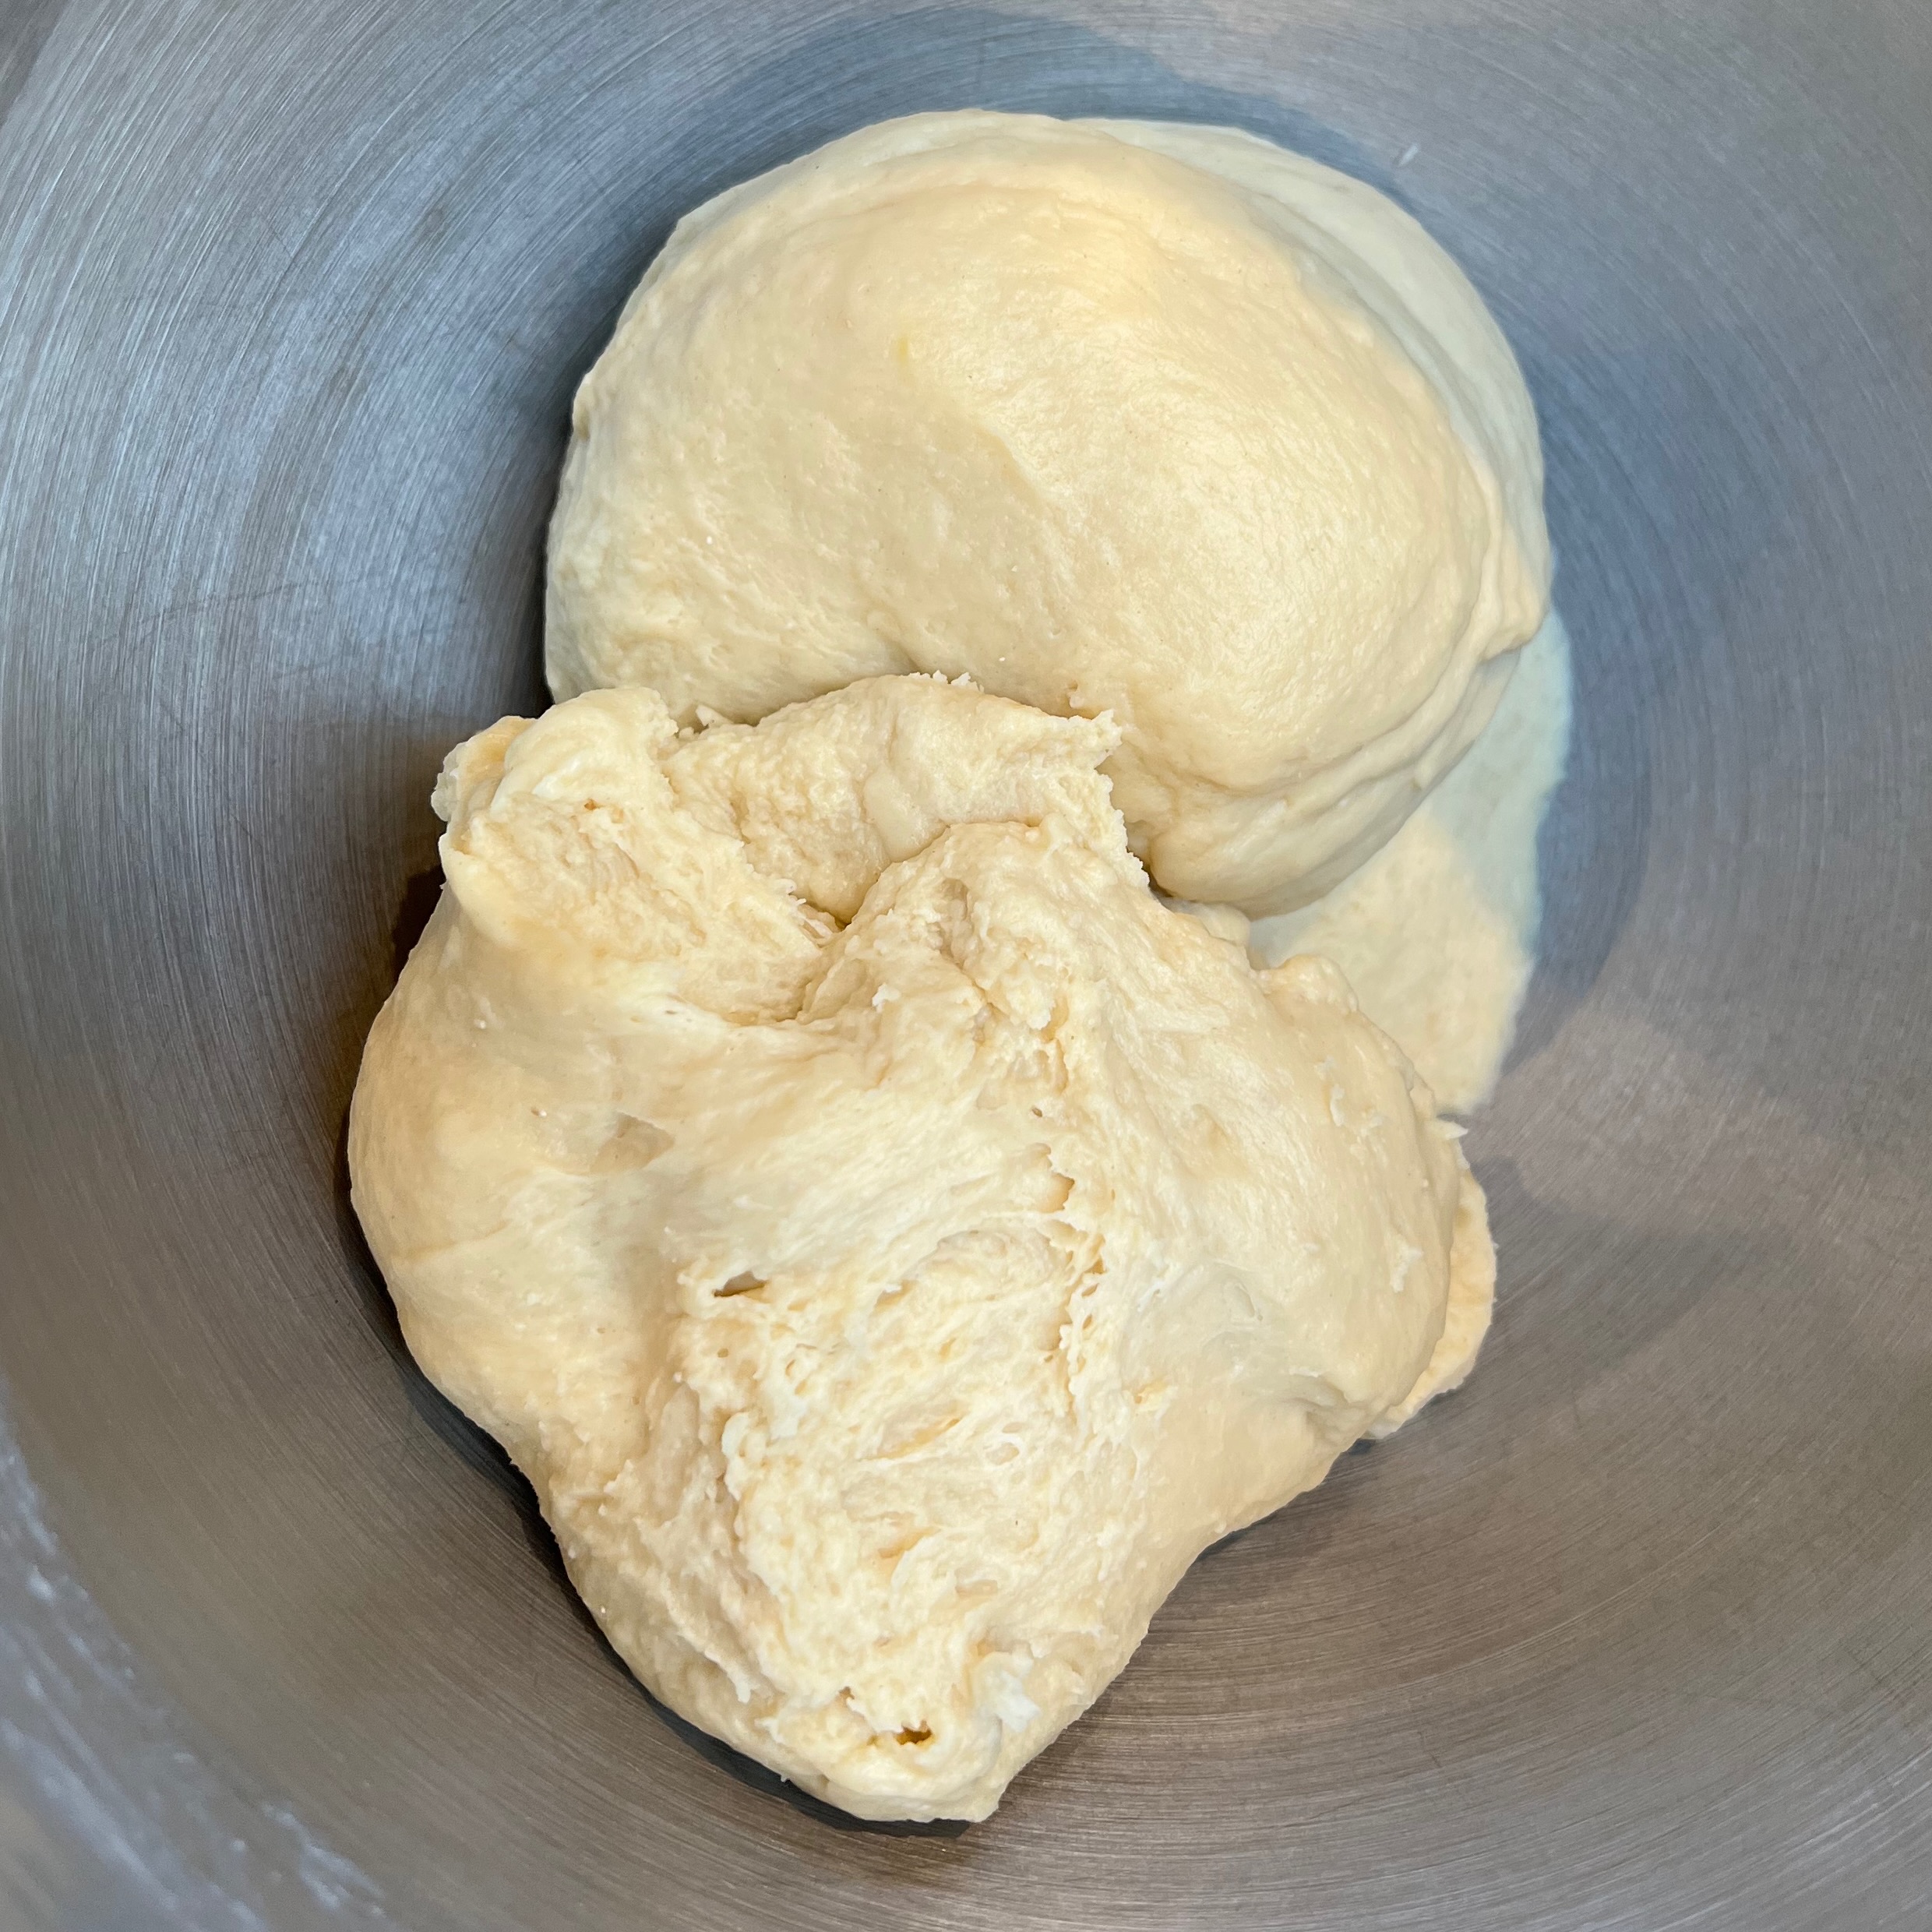
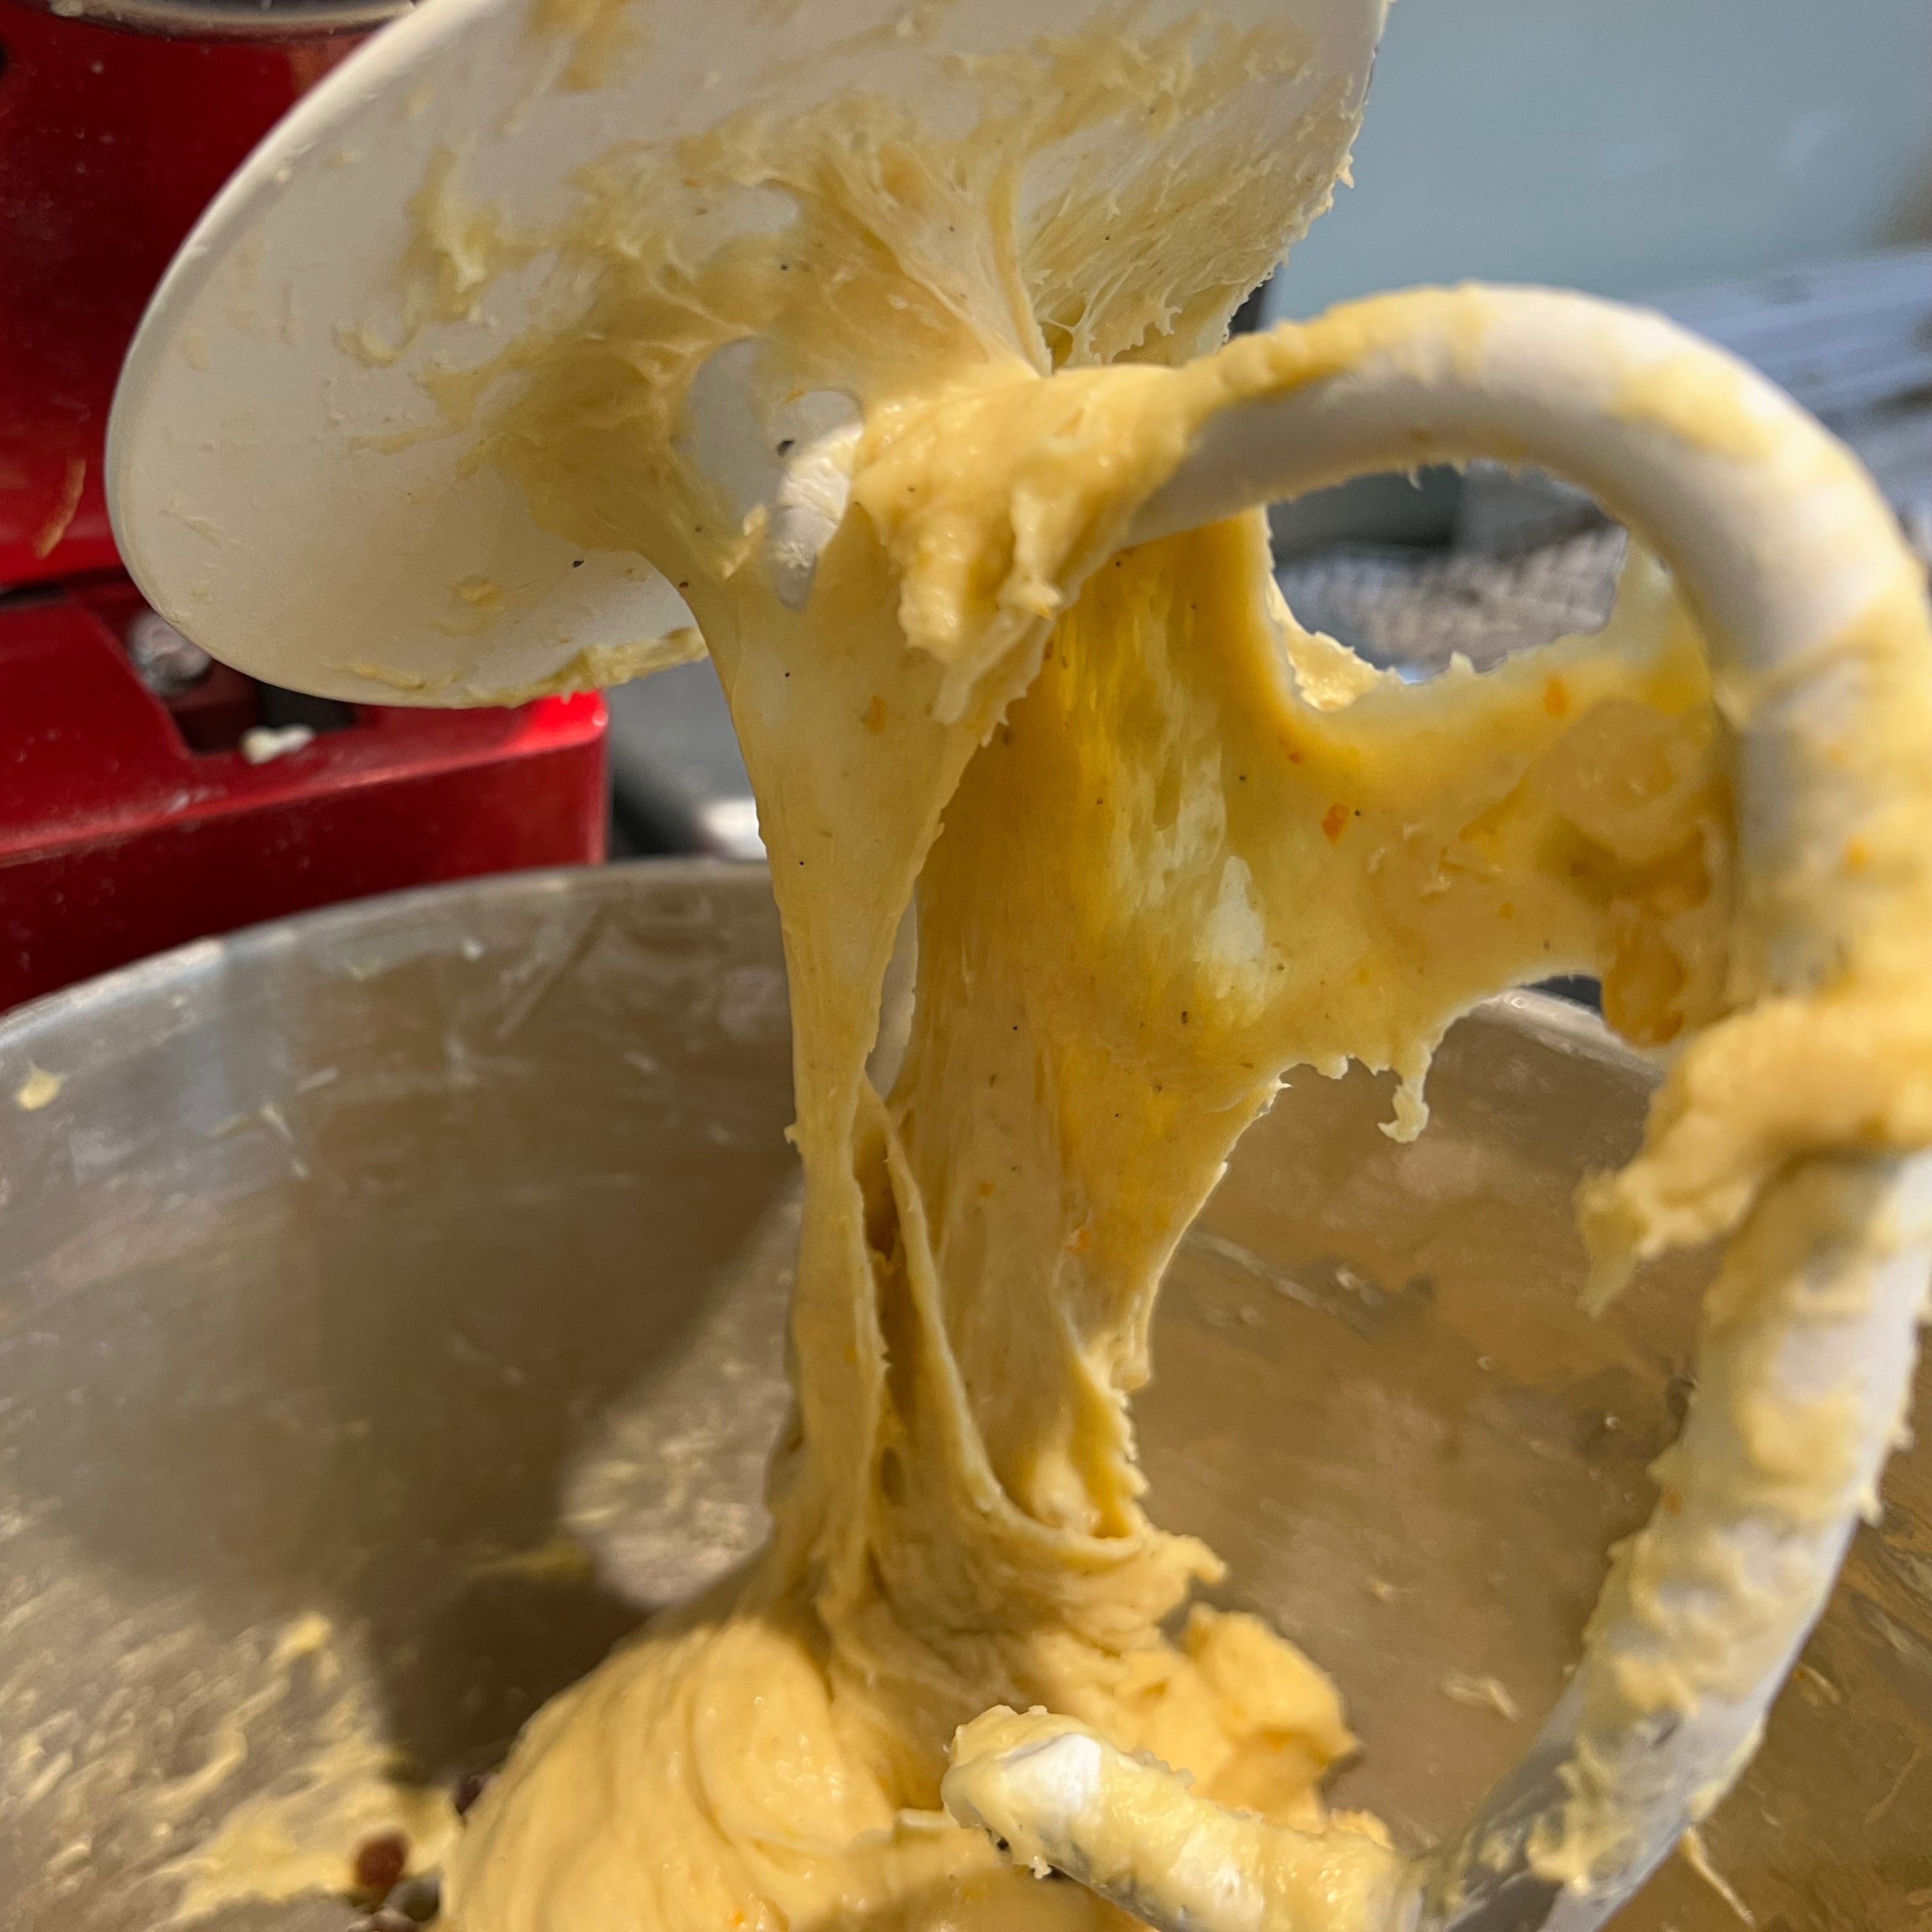
If it didn’t start there, put your sponge into the bowl of your stand mixer. Add flour and egg yolks and knead using the dough hook for five minutes. Leave half an hour, then start kneading again, for perhaps another five minutes, until the dough is extremely elastic with the gluten very stretchy.
Slowly add the sugar and continue mixing with the dough hook until throughly mixed in. The dough should loosen out as the sugar dissolves.
Cut the butter into small cubes, perhaps 1cm on a side. Add the butter a little at a time, continuing to mix until it’s all incorporated. I found that the butter tended to clump around the side of the bowl, requiring me to stop mixing at regular intervals and scrape down the sides.
Eventually, you should have a soft, silky dough whose gluten makes it stretch into thin sheets when pulled. Leave it to relax for ten minutes or so.
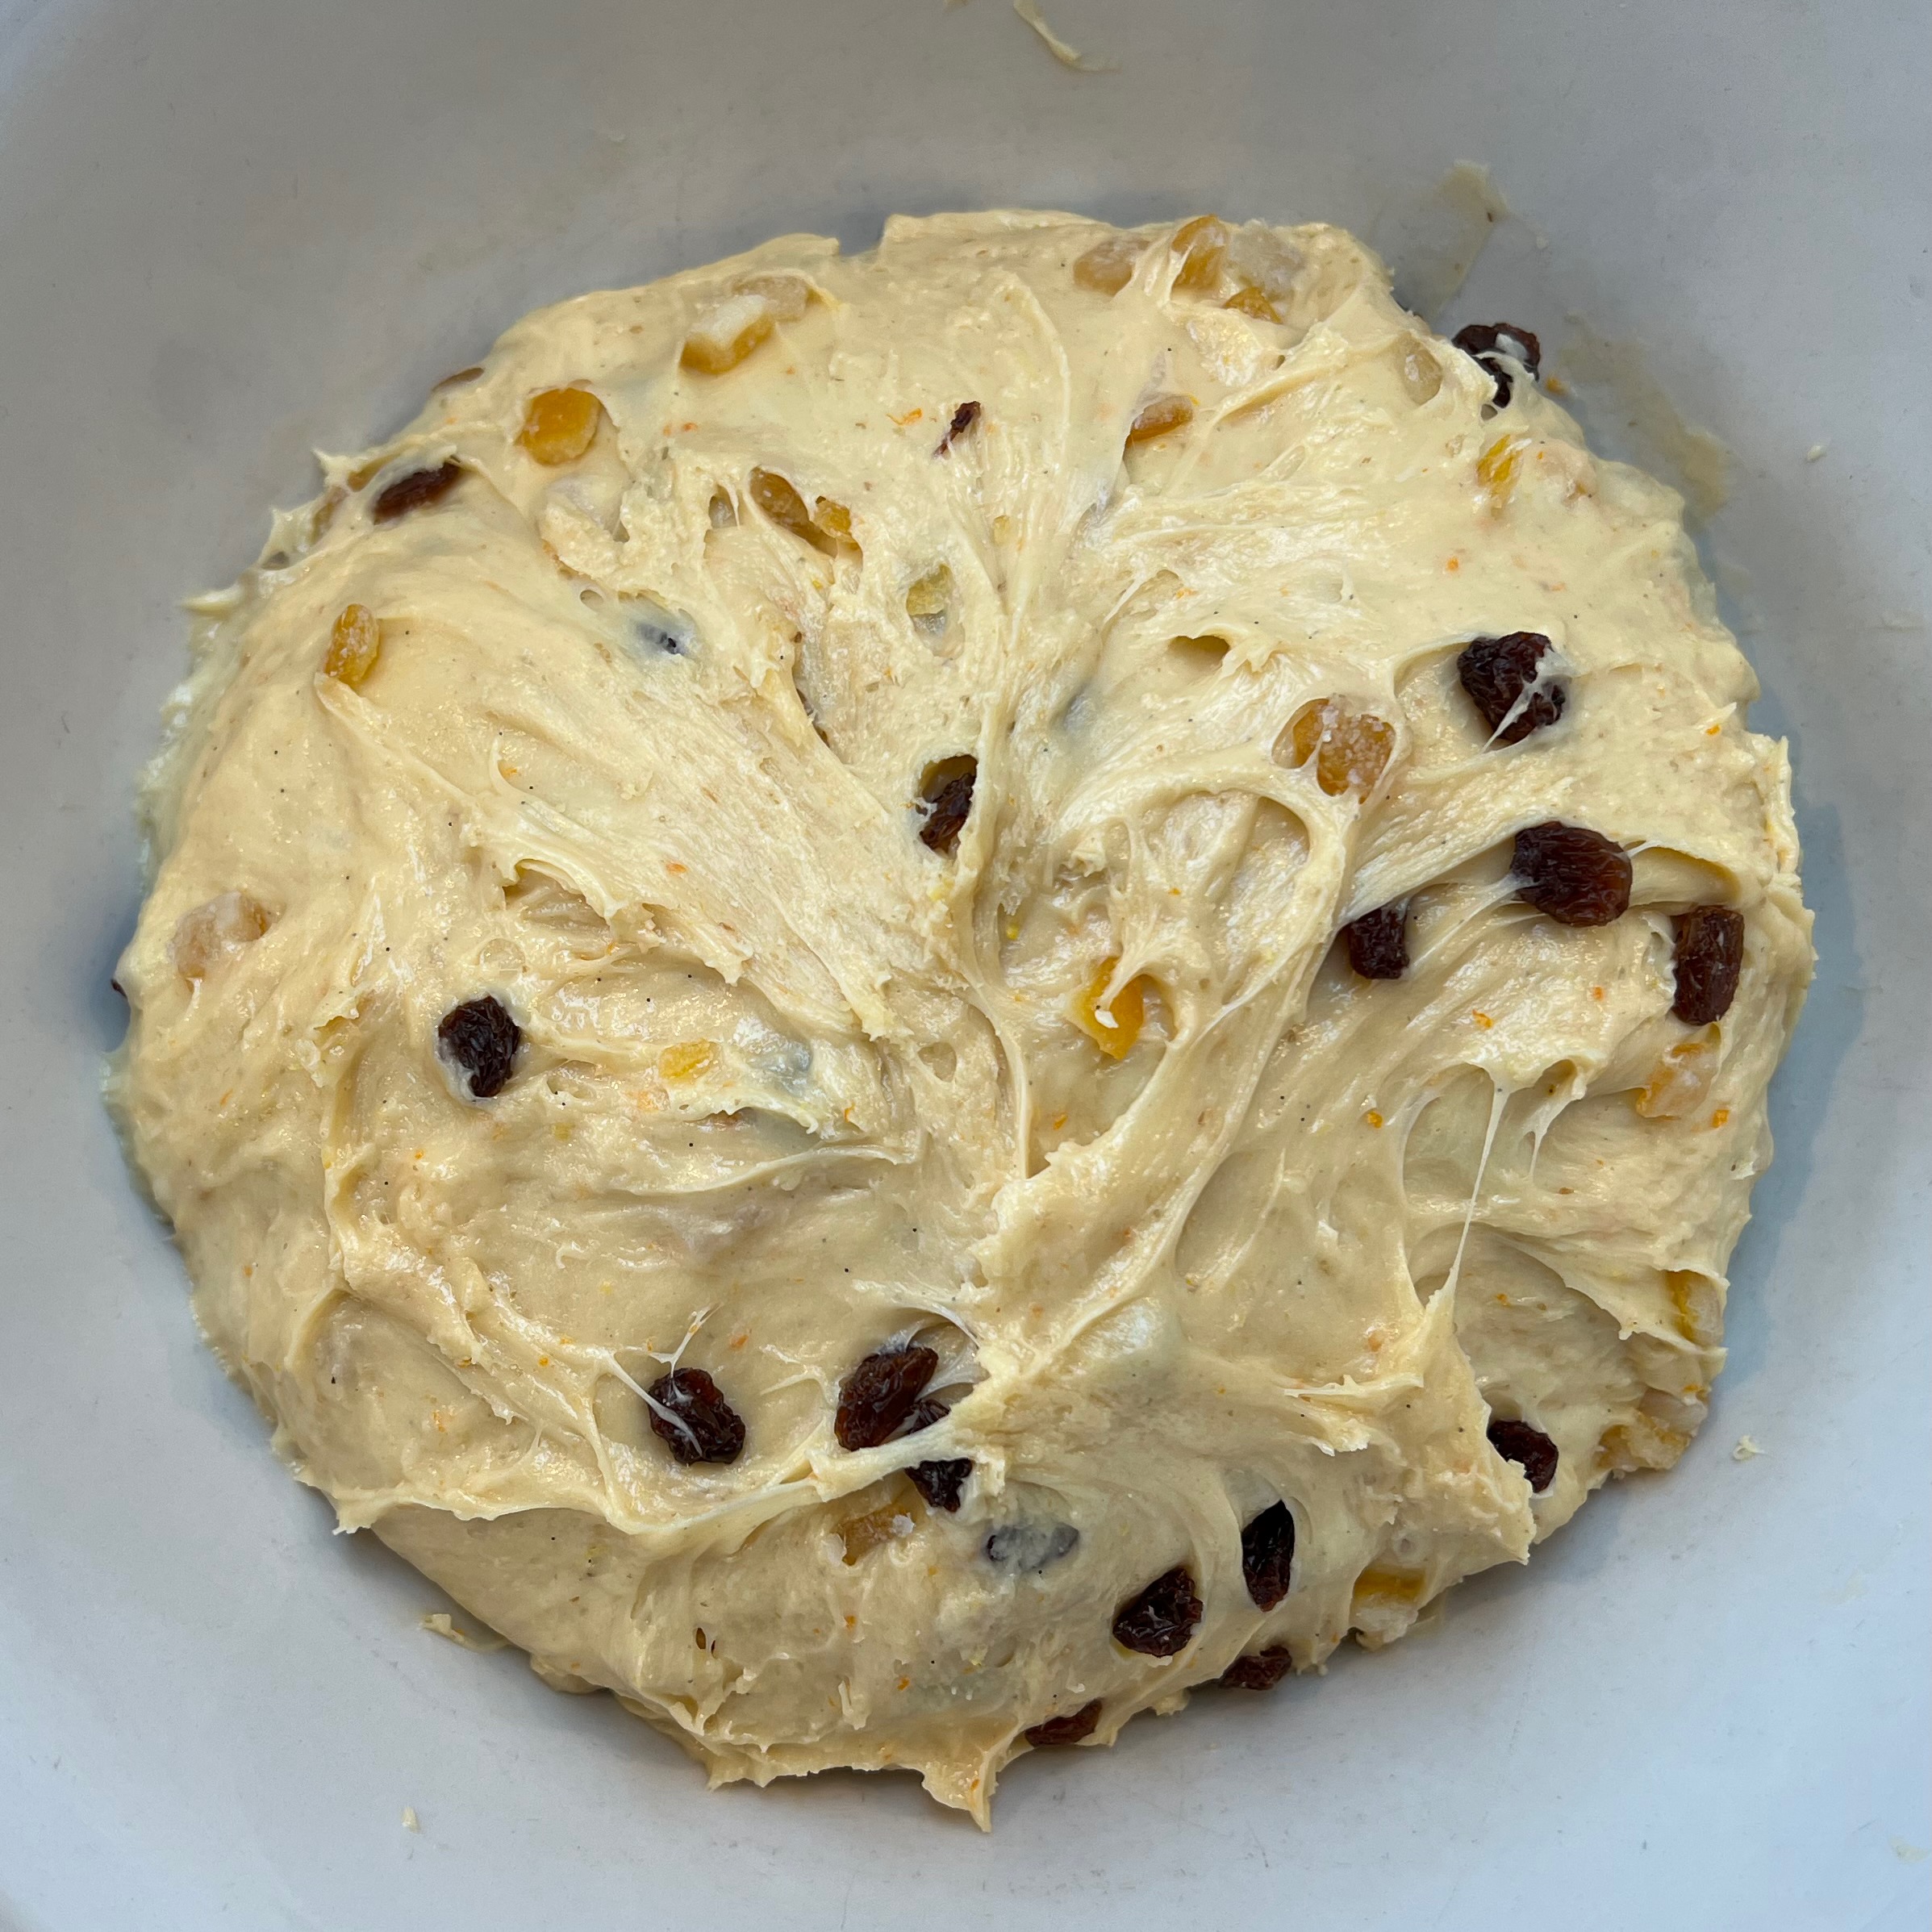
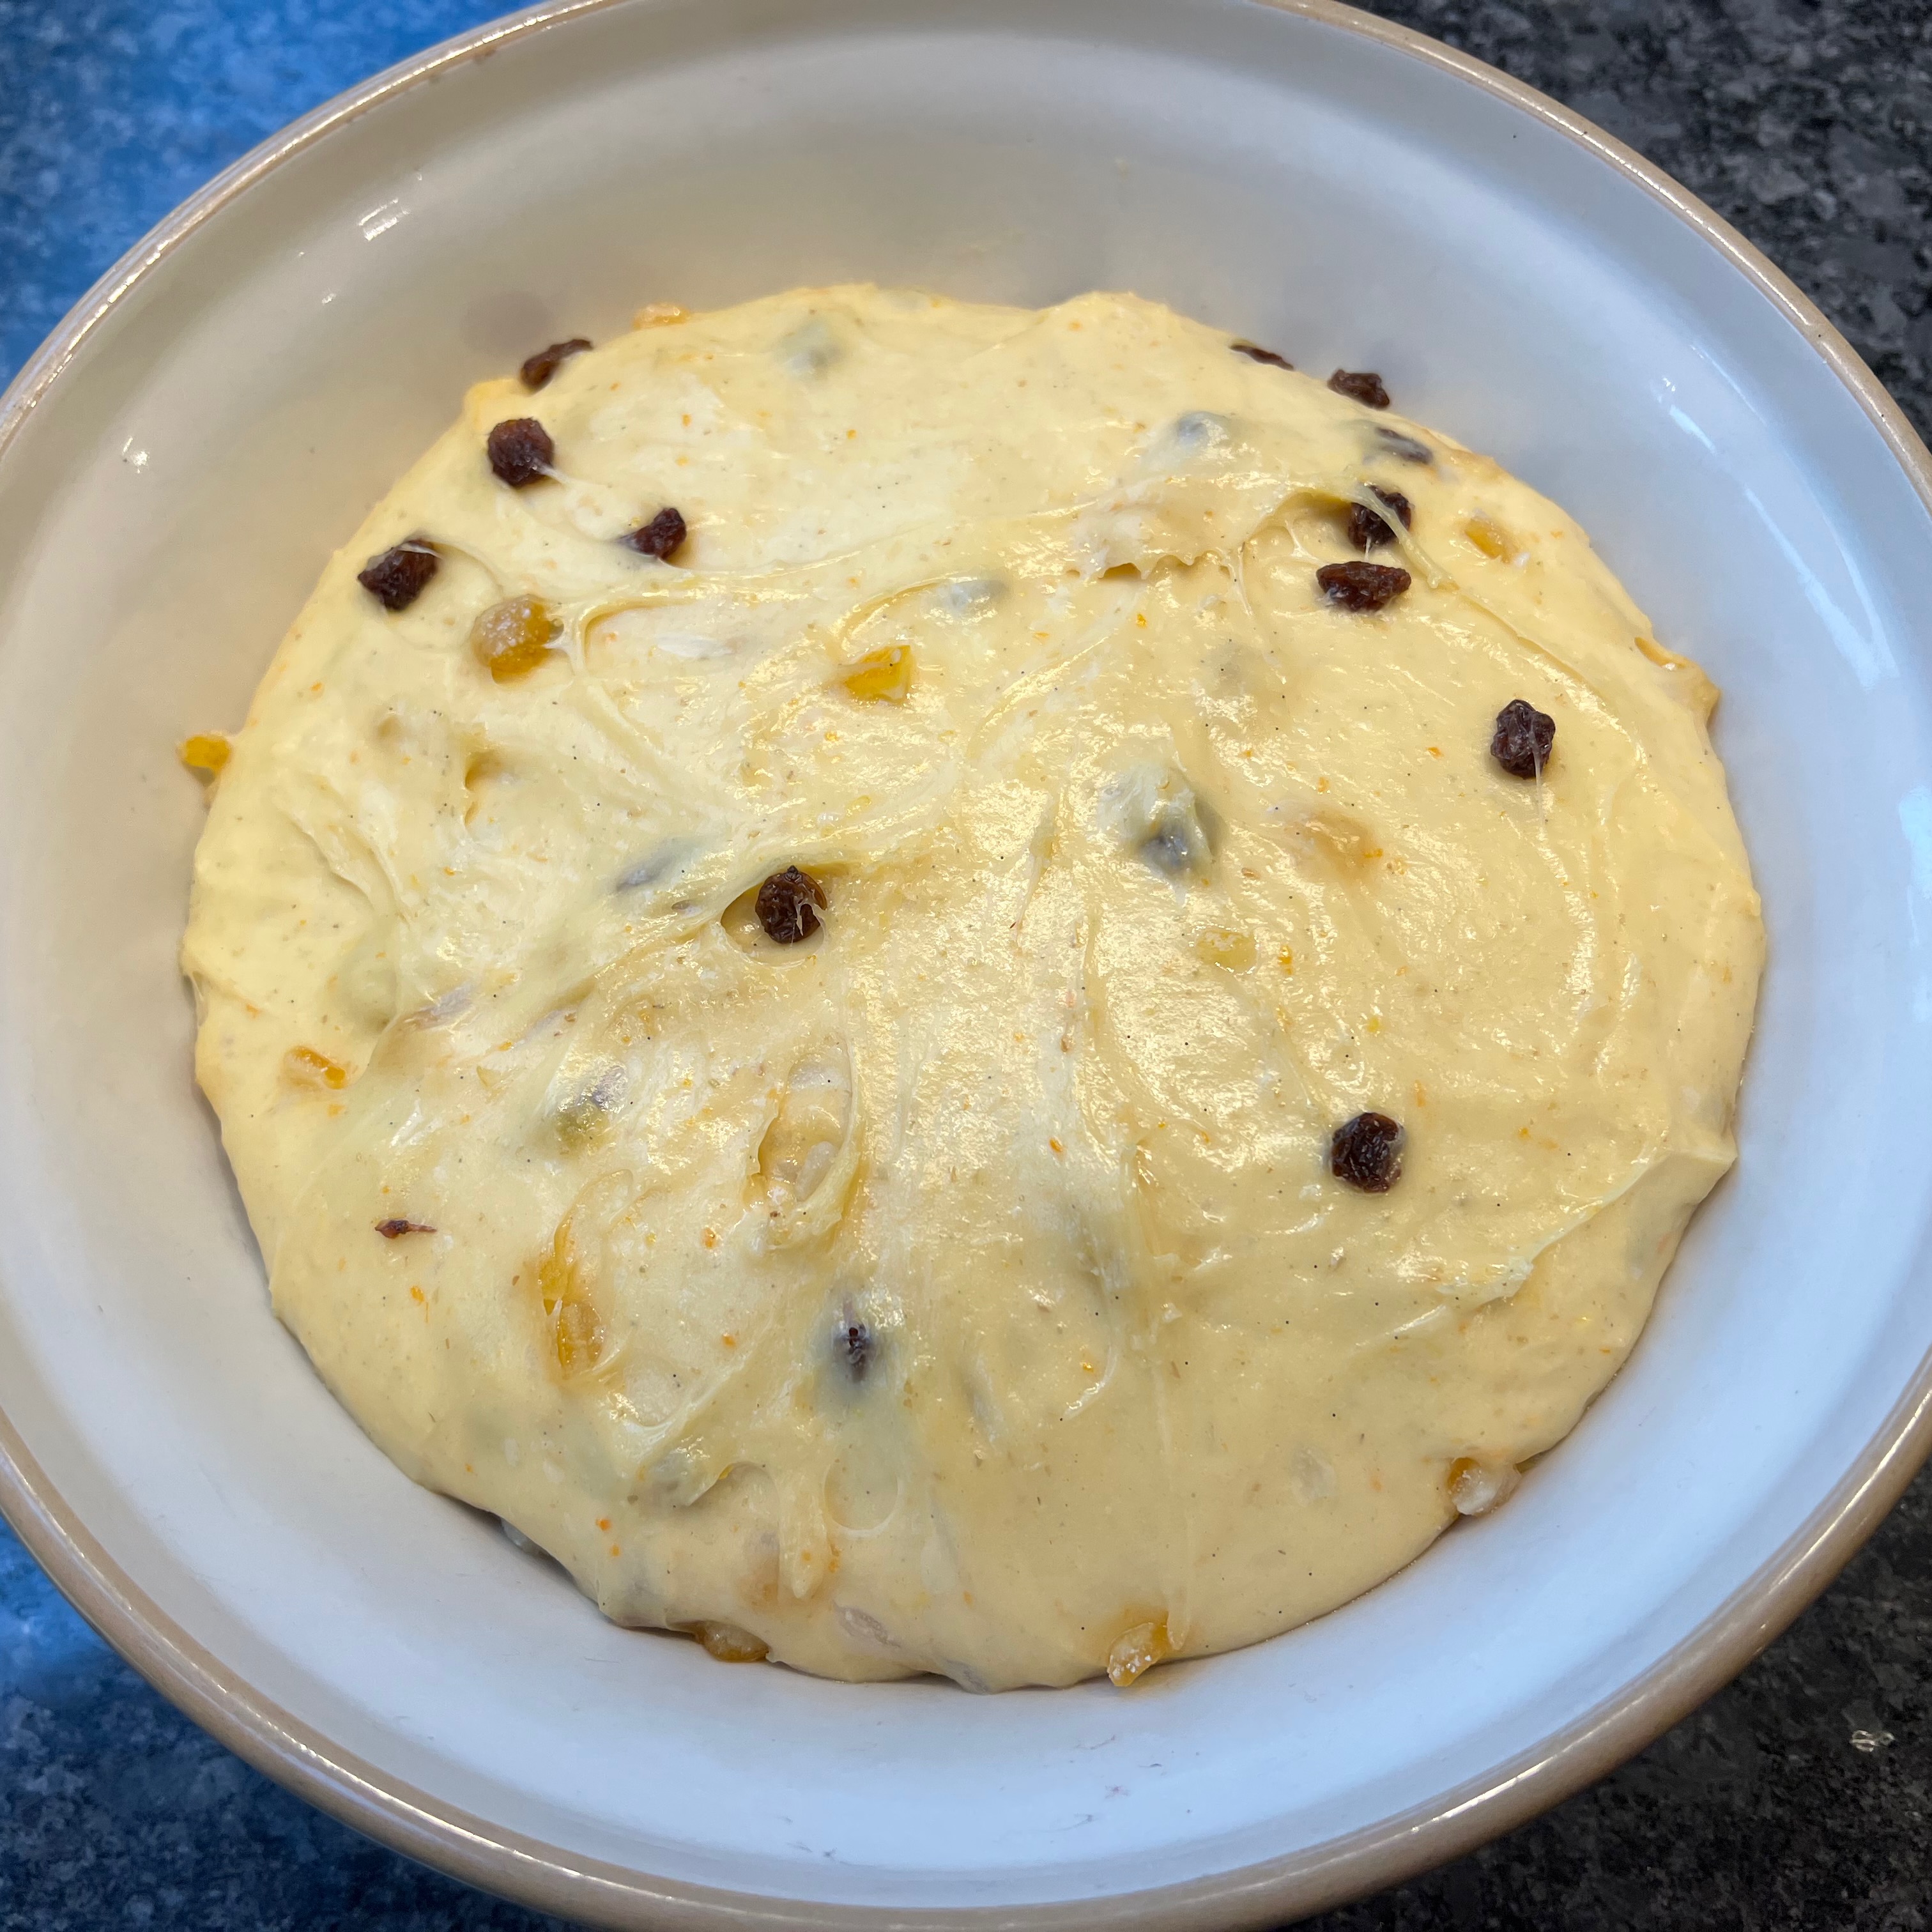
Add the vanilla, the lemon and orange zest, the salt and the dried fruit, and carry on mixing until the fruit is nicely coated in dough – this is what will stop if from sinking to the bottom of your panettone during baking.
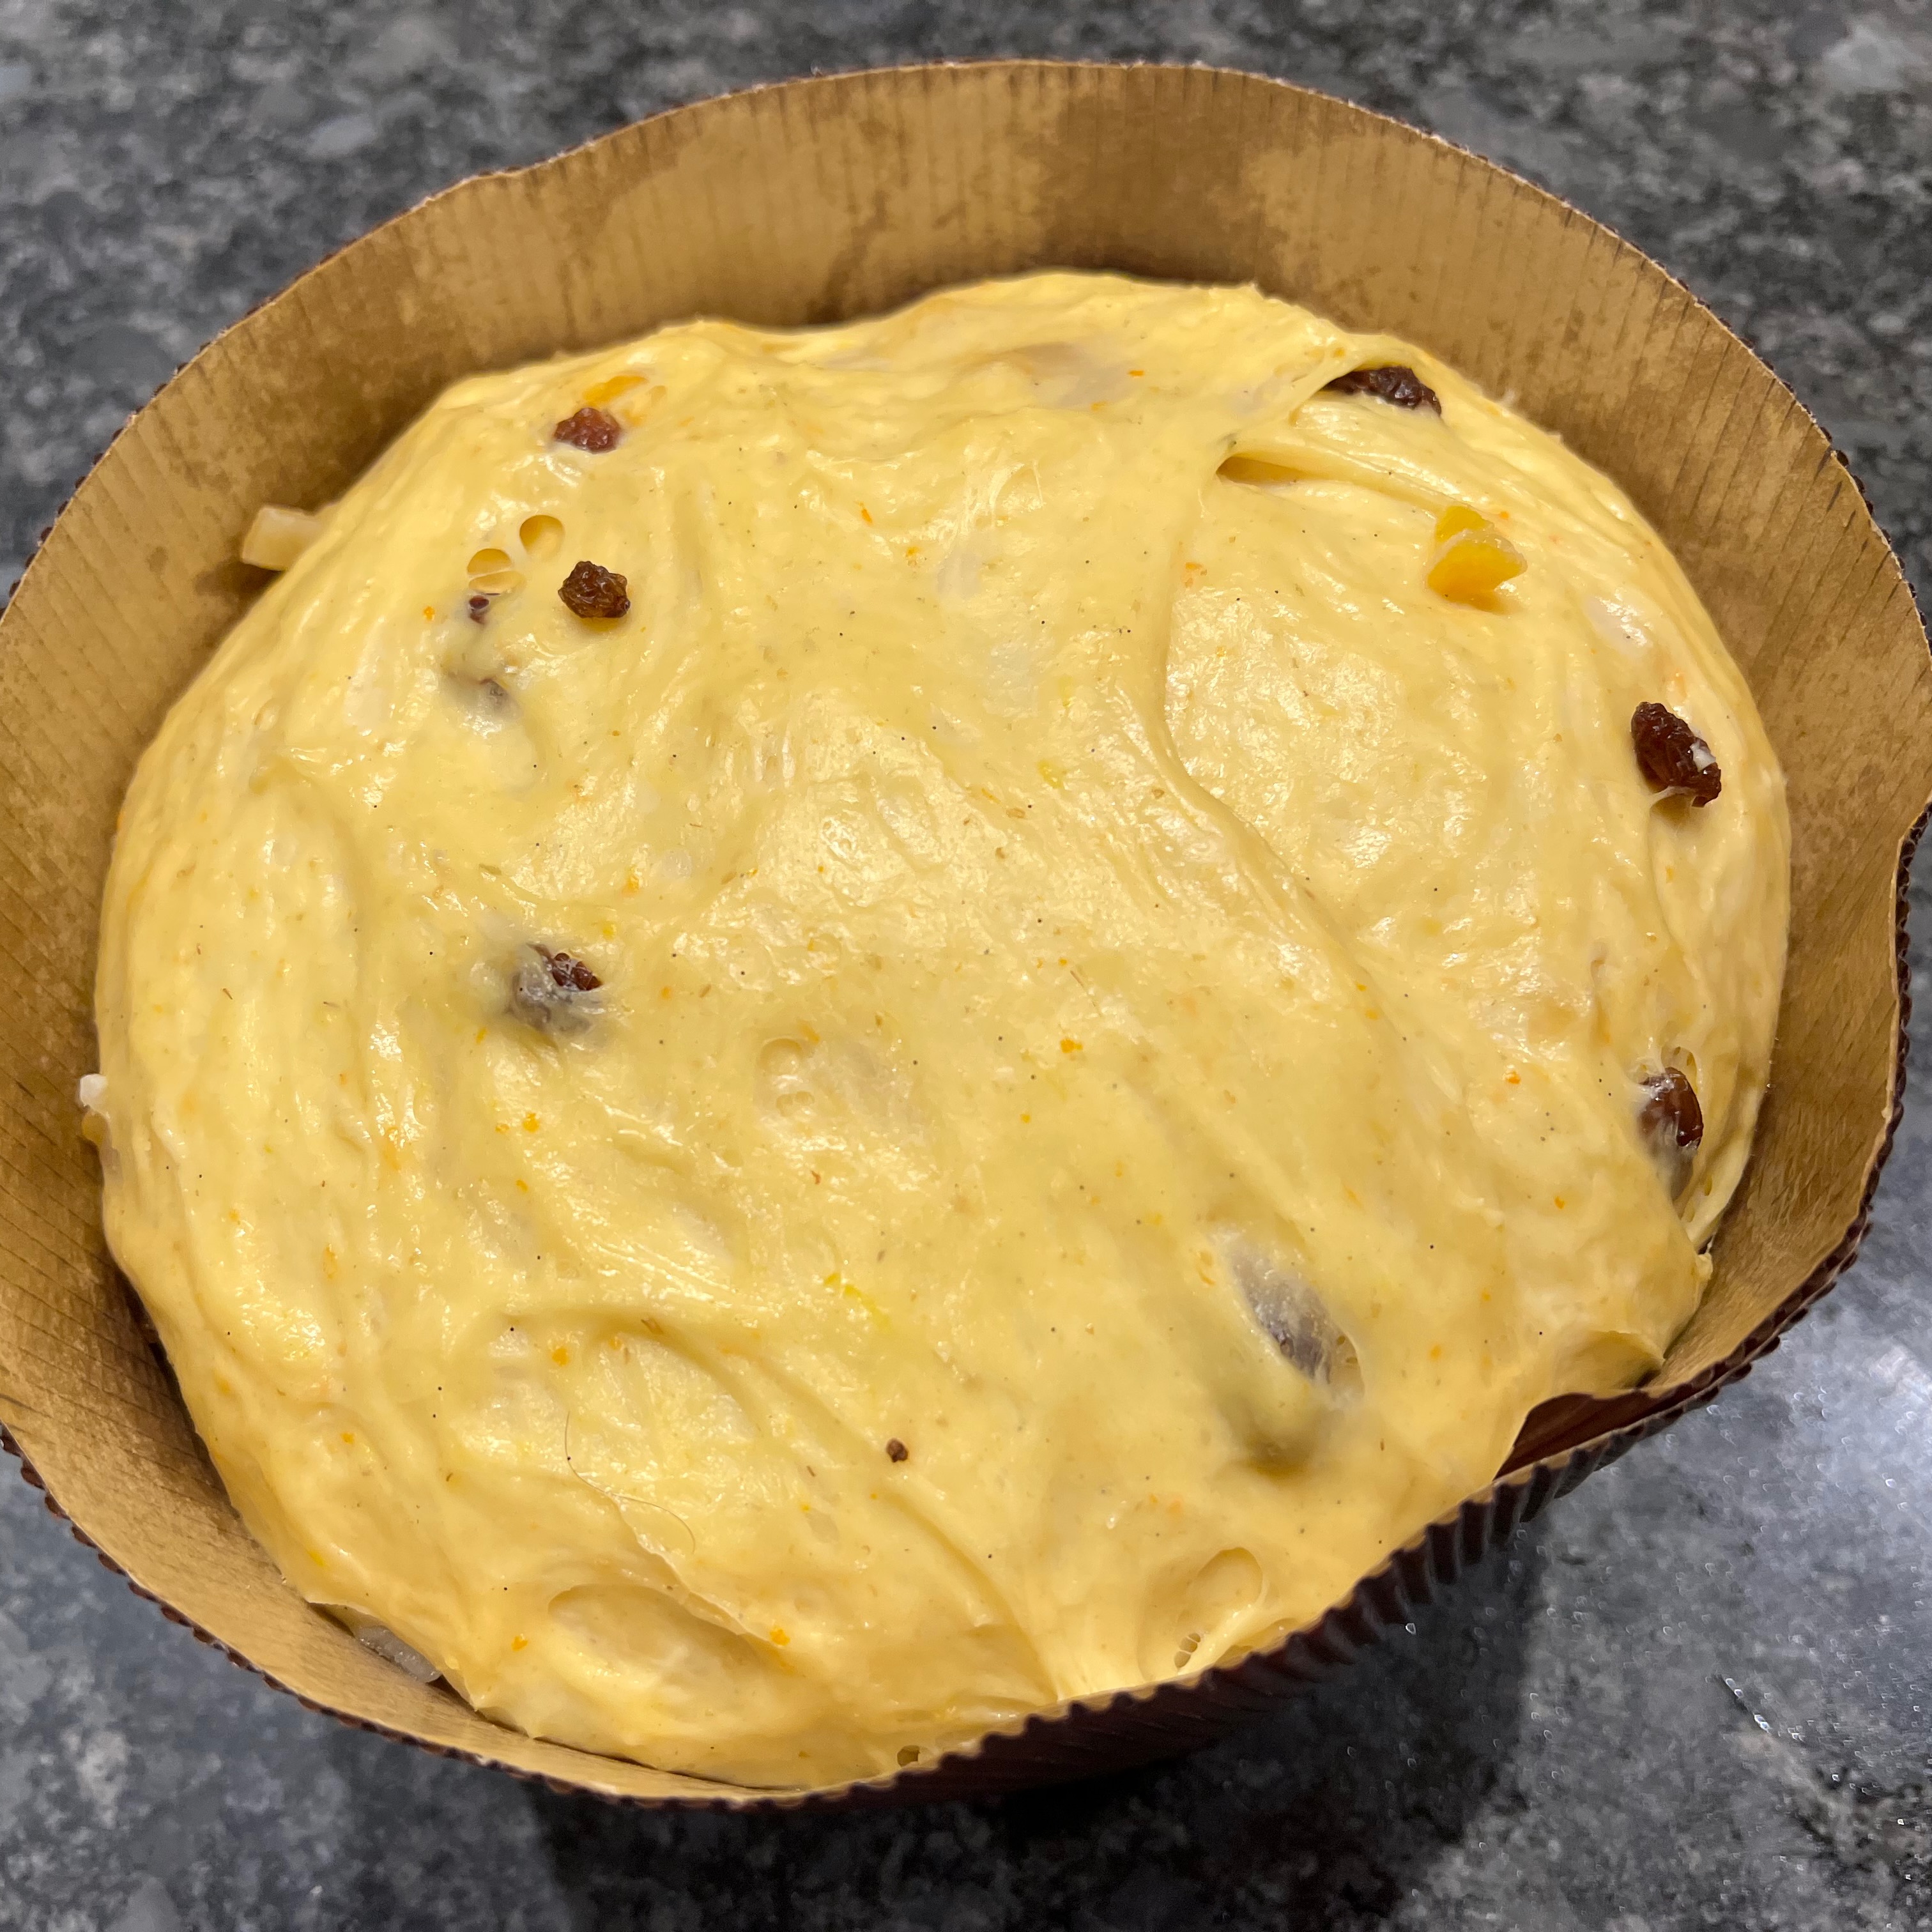
Now leave to ferment until doubled or tripled in size – in my case, this took around three hours.
Day 2 mid-afternoon – stretch and fold
1 panettone mould (or other cylindrical tin)
Oil spray
Spray a non-absorbent work surface with oil; also spray your hands, your scraper and the surface of your dough.
Transfer the dough to the work surface.
Stretch the dough as far as you dare, then fold it over onto itself, trapping some air. Repeat a few times, respraying with oil as needed.
Transfer the dough to your mould. It should reach half to 2/3 of the way up.
Leave to rise. You’re hoping for the dough to reach close to the top of the mould, which will probably take at least an hour, maybe two. At some point during this, start heating your oven to 180℃ fan.
Day 2 early evening: glaze and bake
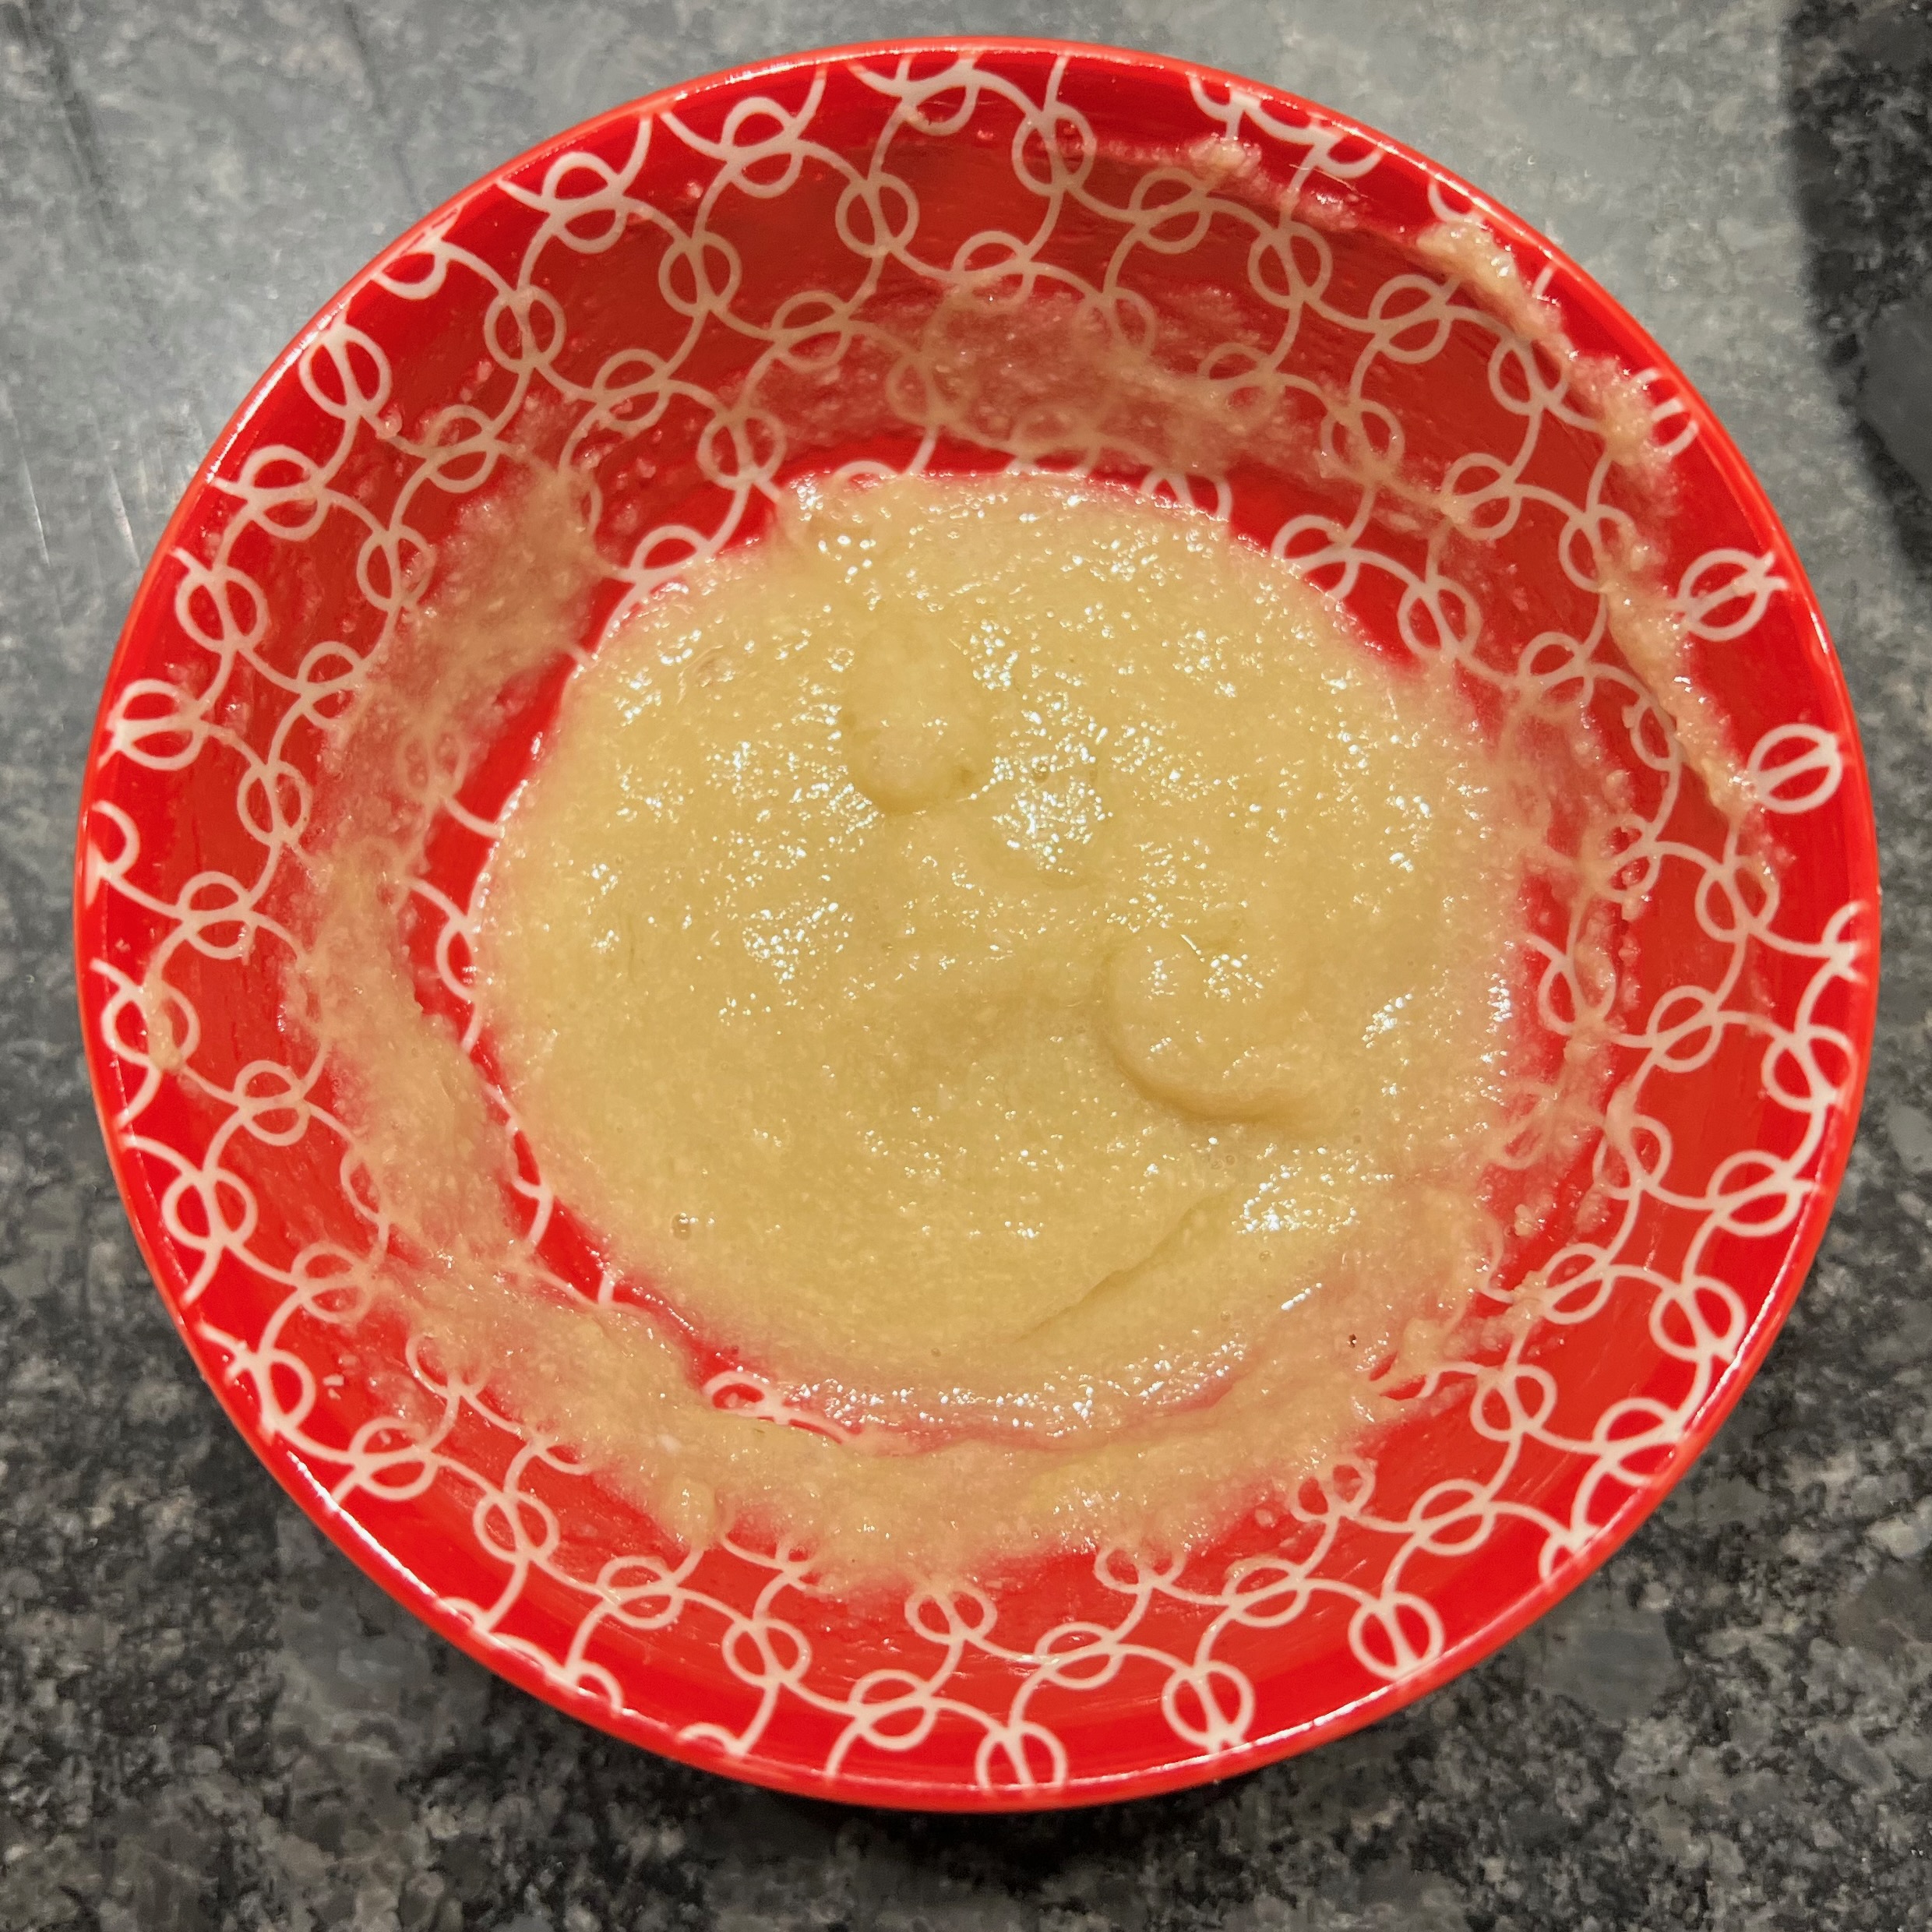
20g egg white
20g icing sugar
20g ground almonds
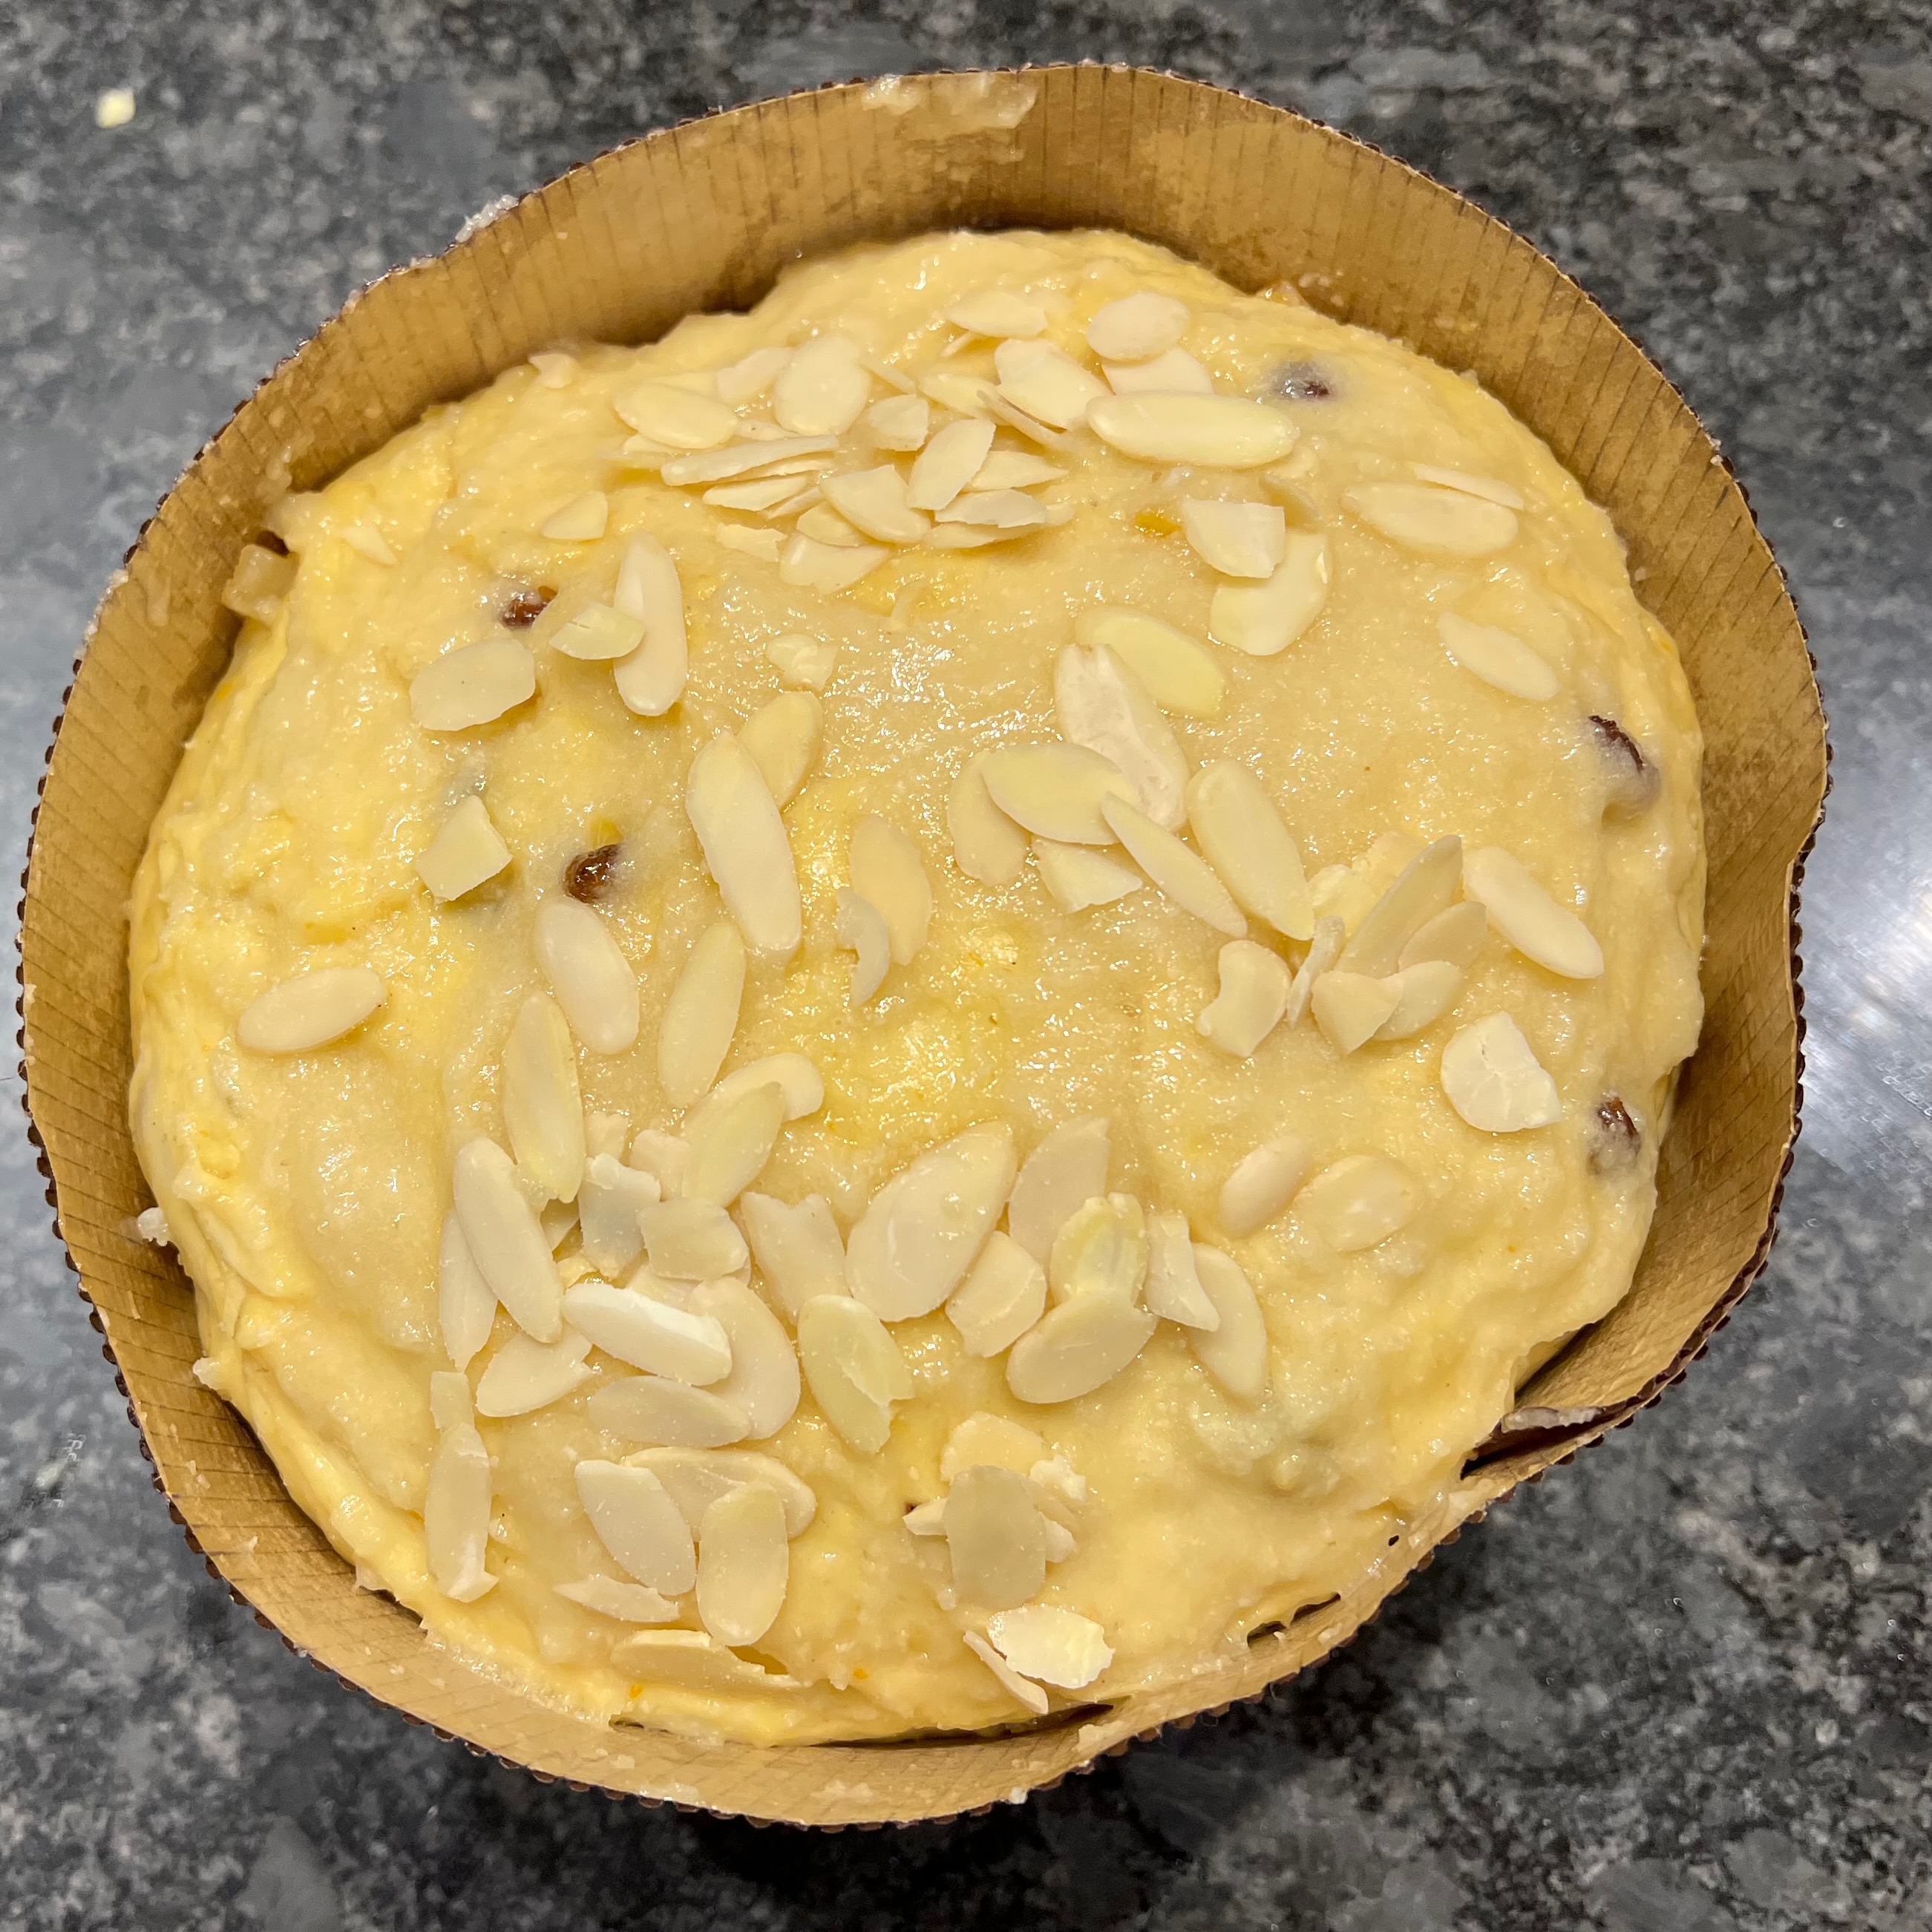
20g flaked almonds for topping – I’ve never liked the traditional topping of “pearl sugar” which is often found on a shop-bought panettone, so I’ve just used the almonds. But you choose.
The glazeReady for the ovenWith temperature probe
In a small bowl, thoroughly mix the egg white, icing sugar and ground almonds to form a fairly thick, sticky glaze (add egg white if it’s too thick).
Preferably with a silicone brush, paint the mixture carefully over the top of the panettone. Since the dough is very light an puffy at this point, you need to treat it gently: you really don’t want to be tearing holes in the surface right now.
Scatter the ground almonds over the glazed panettone. You can press them in a tiny amount, but again, don’t risk tearing the surface.
If you have an oven-proof temperature probe, insert it into the middle of the loaf and bake until the internal temperature reaches 94℃. I use one called a “Meater”, which is intended for meat cookery but works well for this.
If you don’t have a temperature probe, you’ll have to guess: bake for around 40 minutes and then poke a skewer in through the side to look for signs of dough that’s still wet. Mine took just short of 50 minutes total, in an oven that was supposedly set to 175℃ but was actually running at 180.
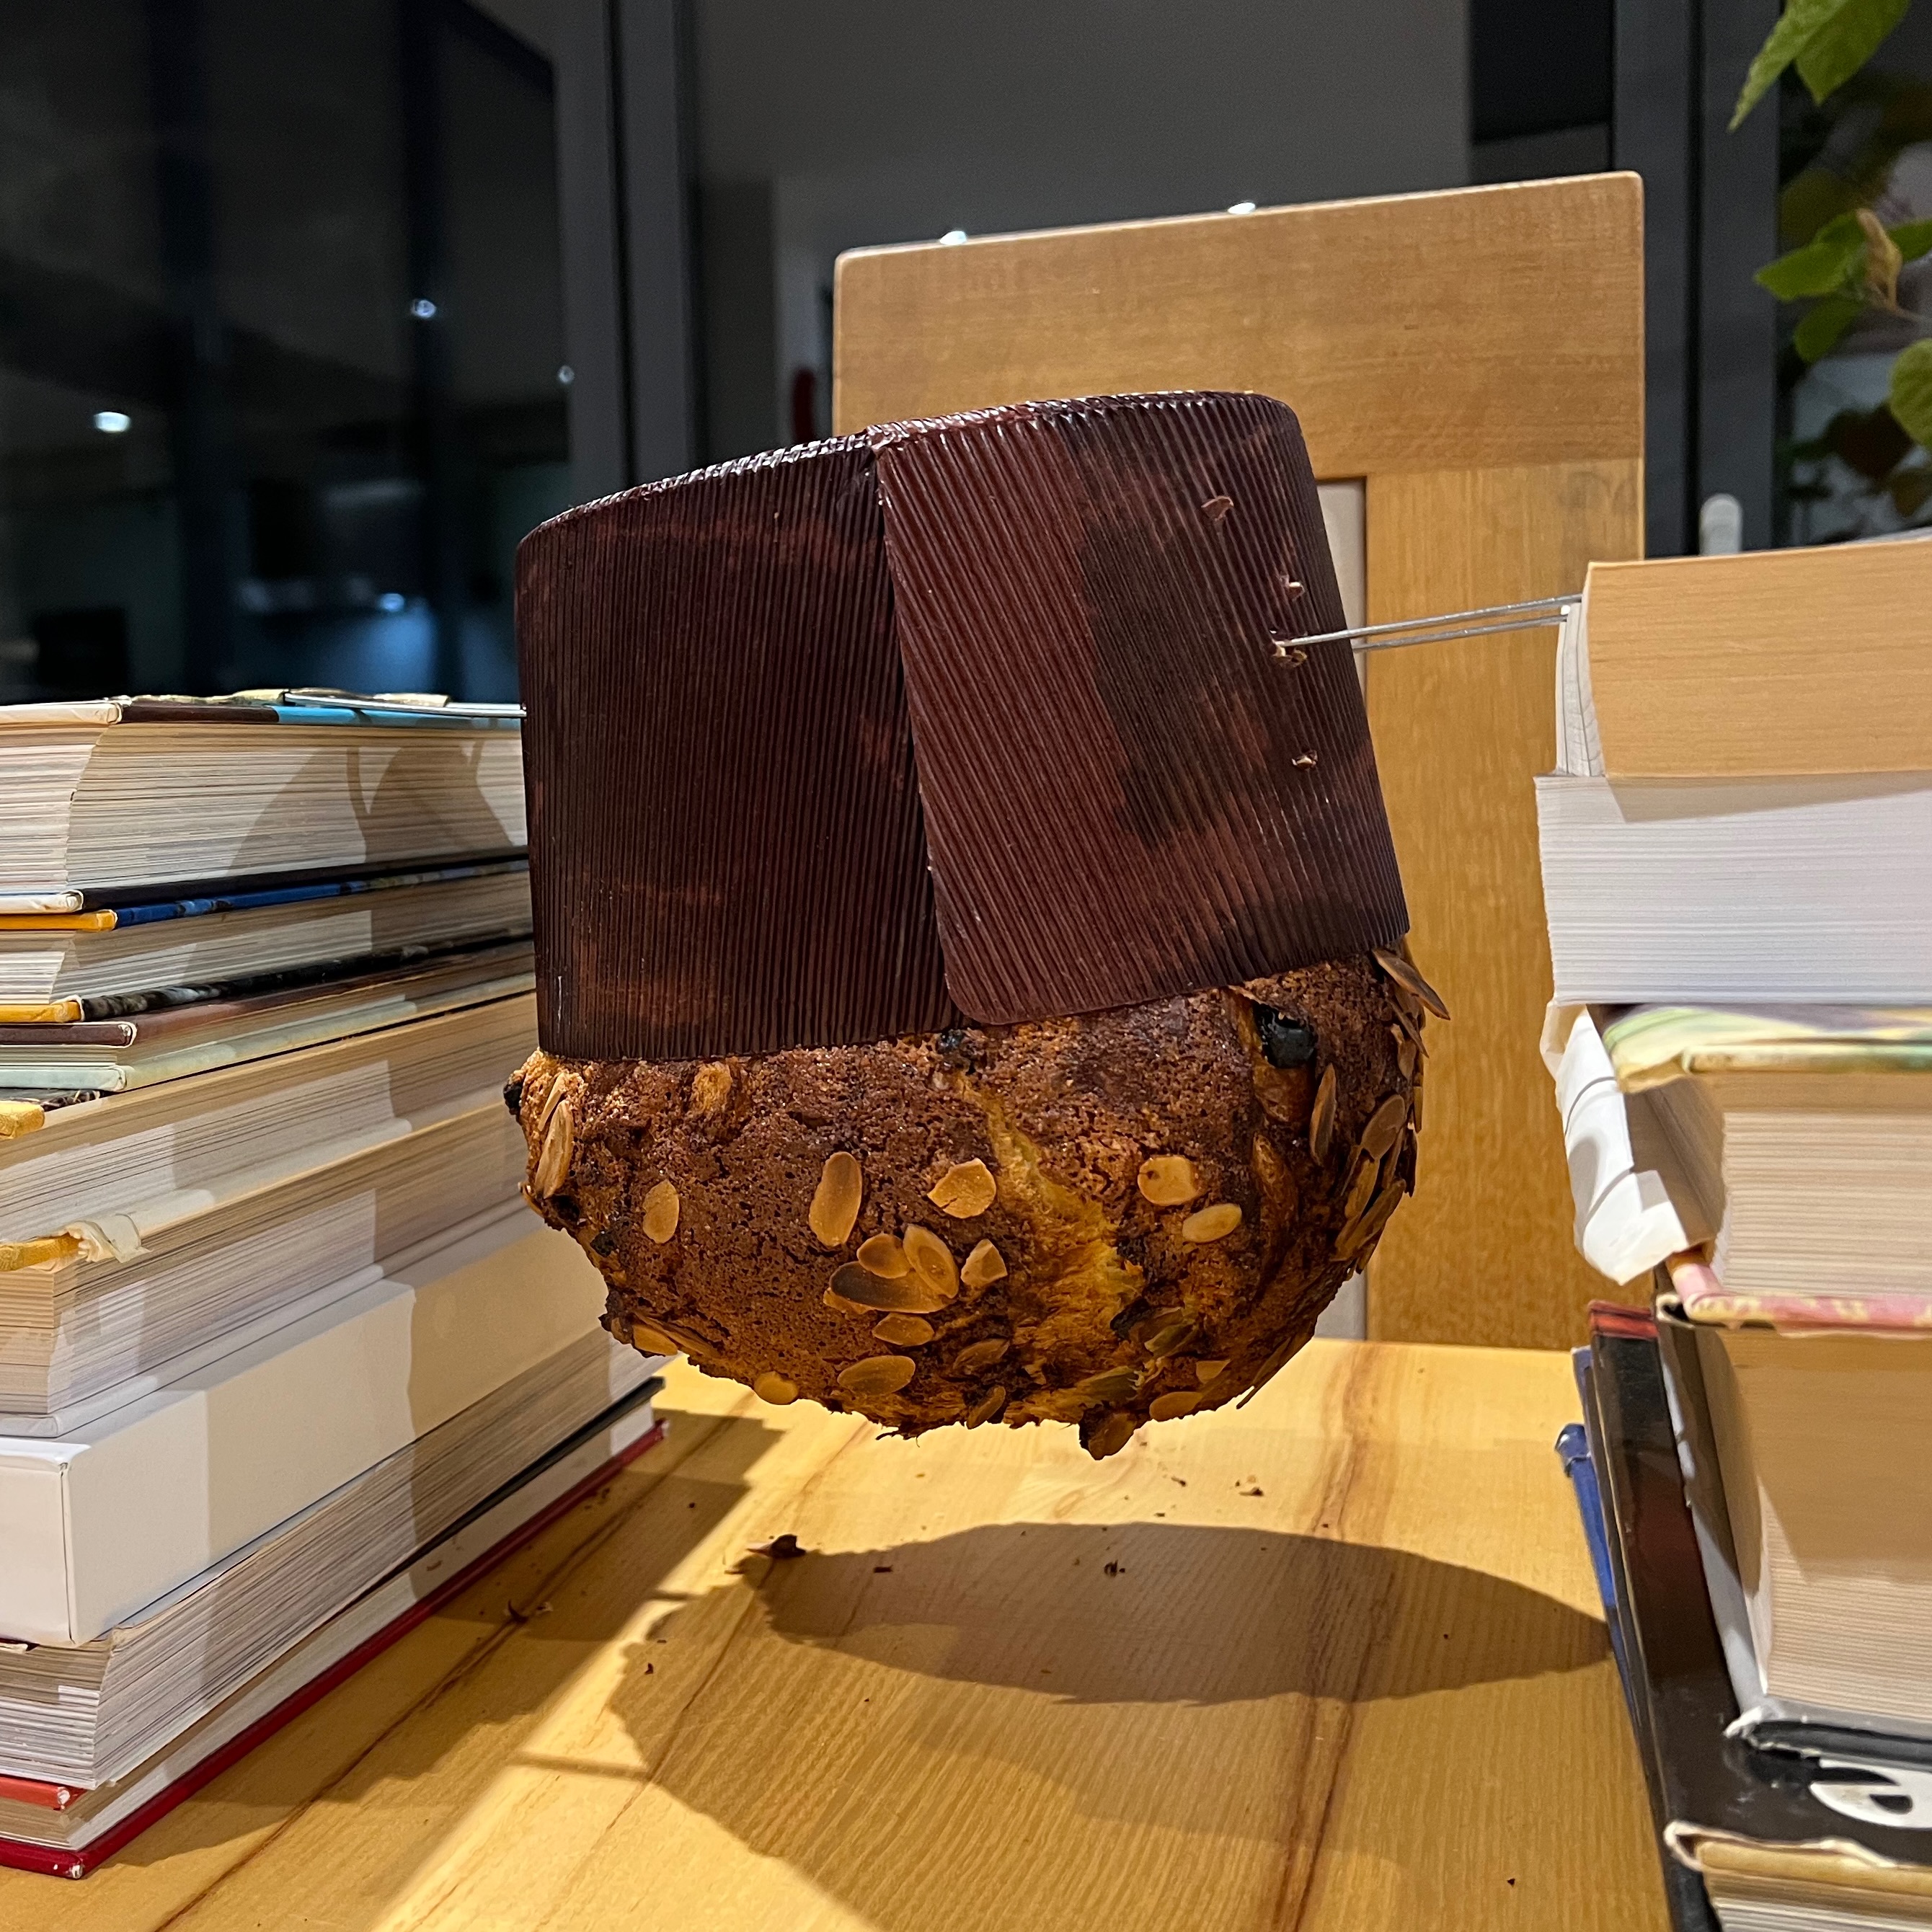
When the panettone comes out the oven, hang it upside down to cool for at least 12 hours before serving. There are various ways of doing this: most involve knitting needles or, in my case, Turkish kebab skewers. As you’ll see from the photos, I poked two skewers through the loaf and balanced the whole lot on a pair of towers of cookbooks. It was rustic, but it worked.
If you get this far and have a lovely dome reminiscent of the cupola of the cathedral in Milan, bravo!
Just out of the ovenHanging outThe finished panettoneCross-section – it’s airy!
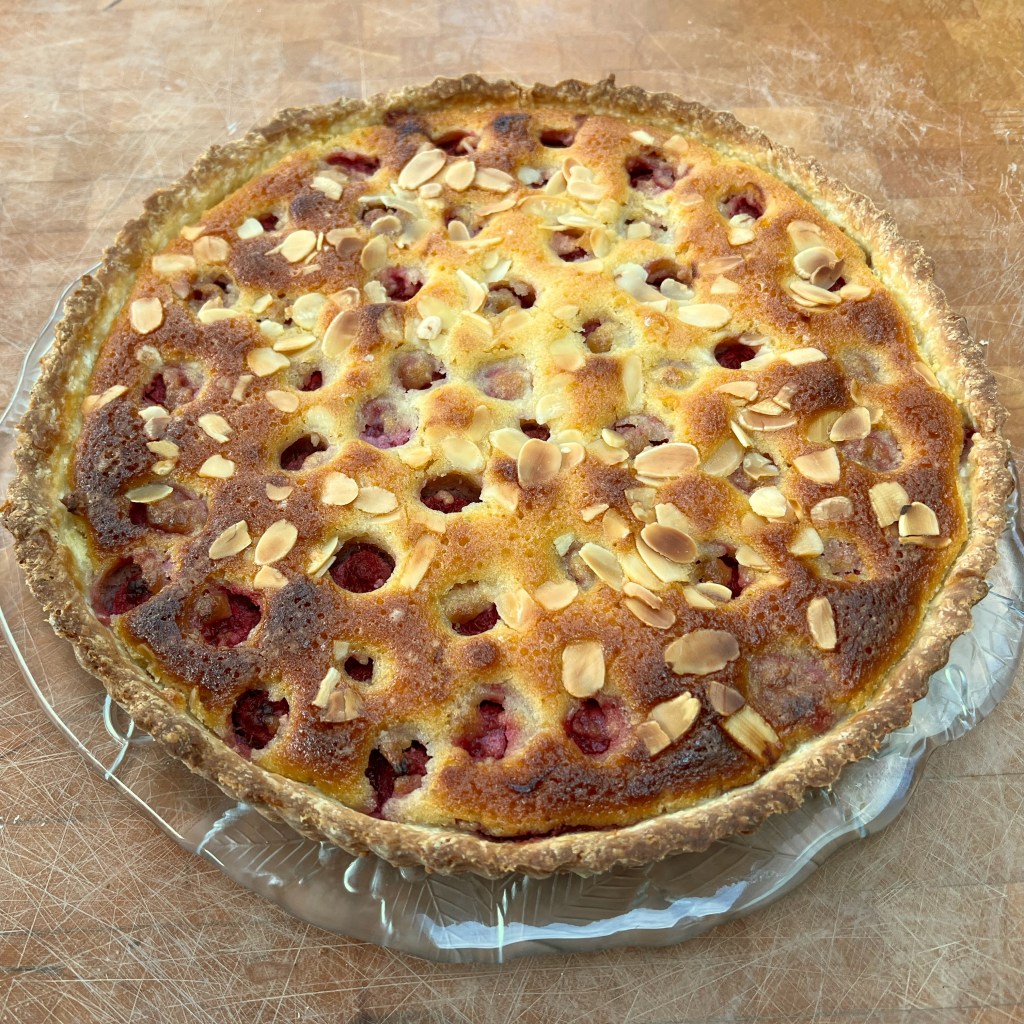
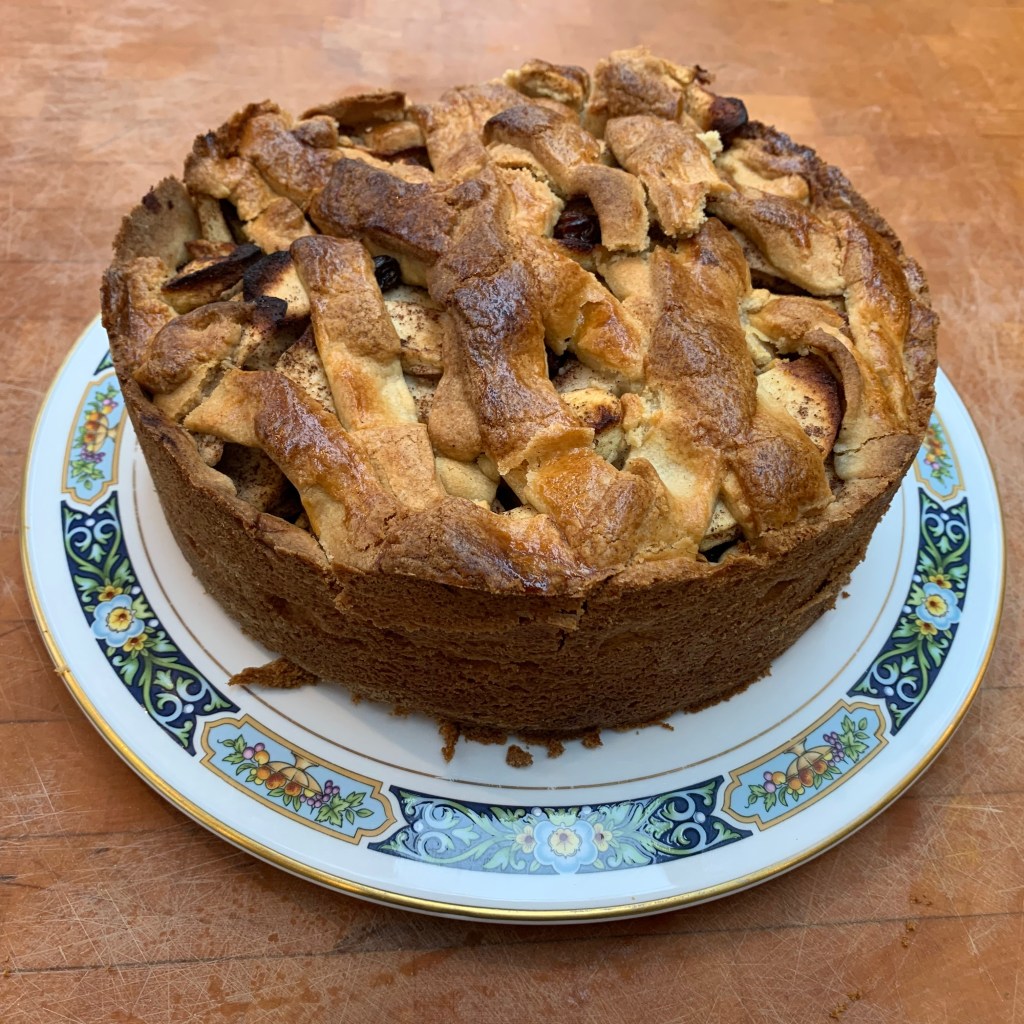
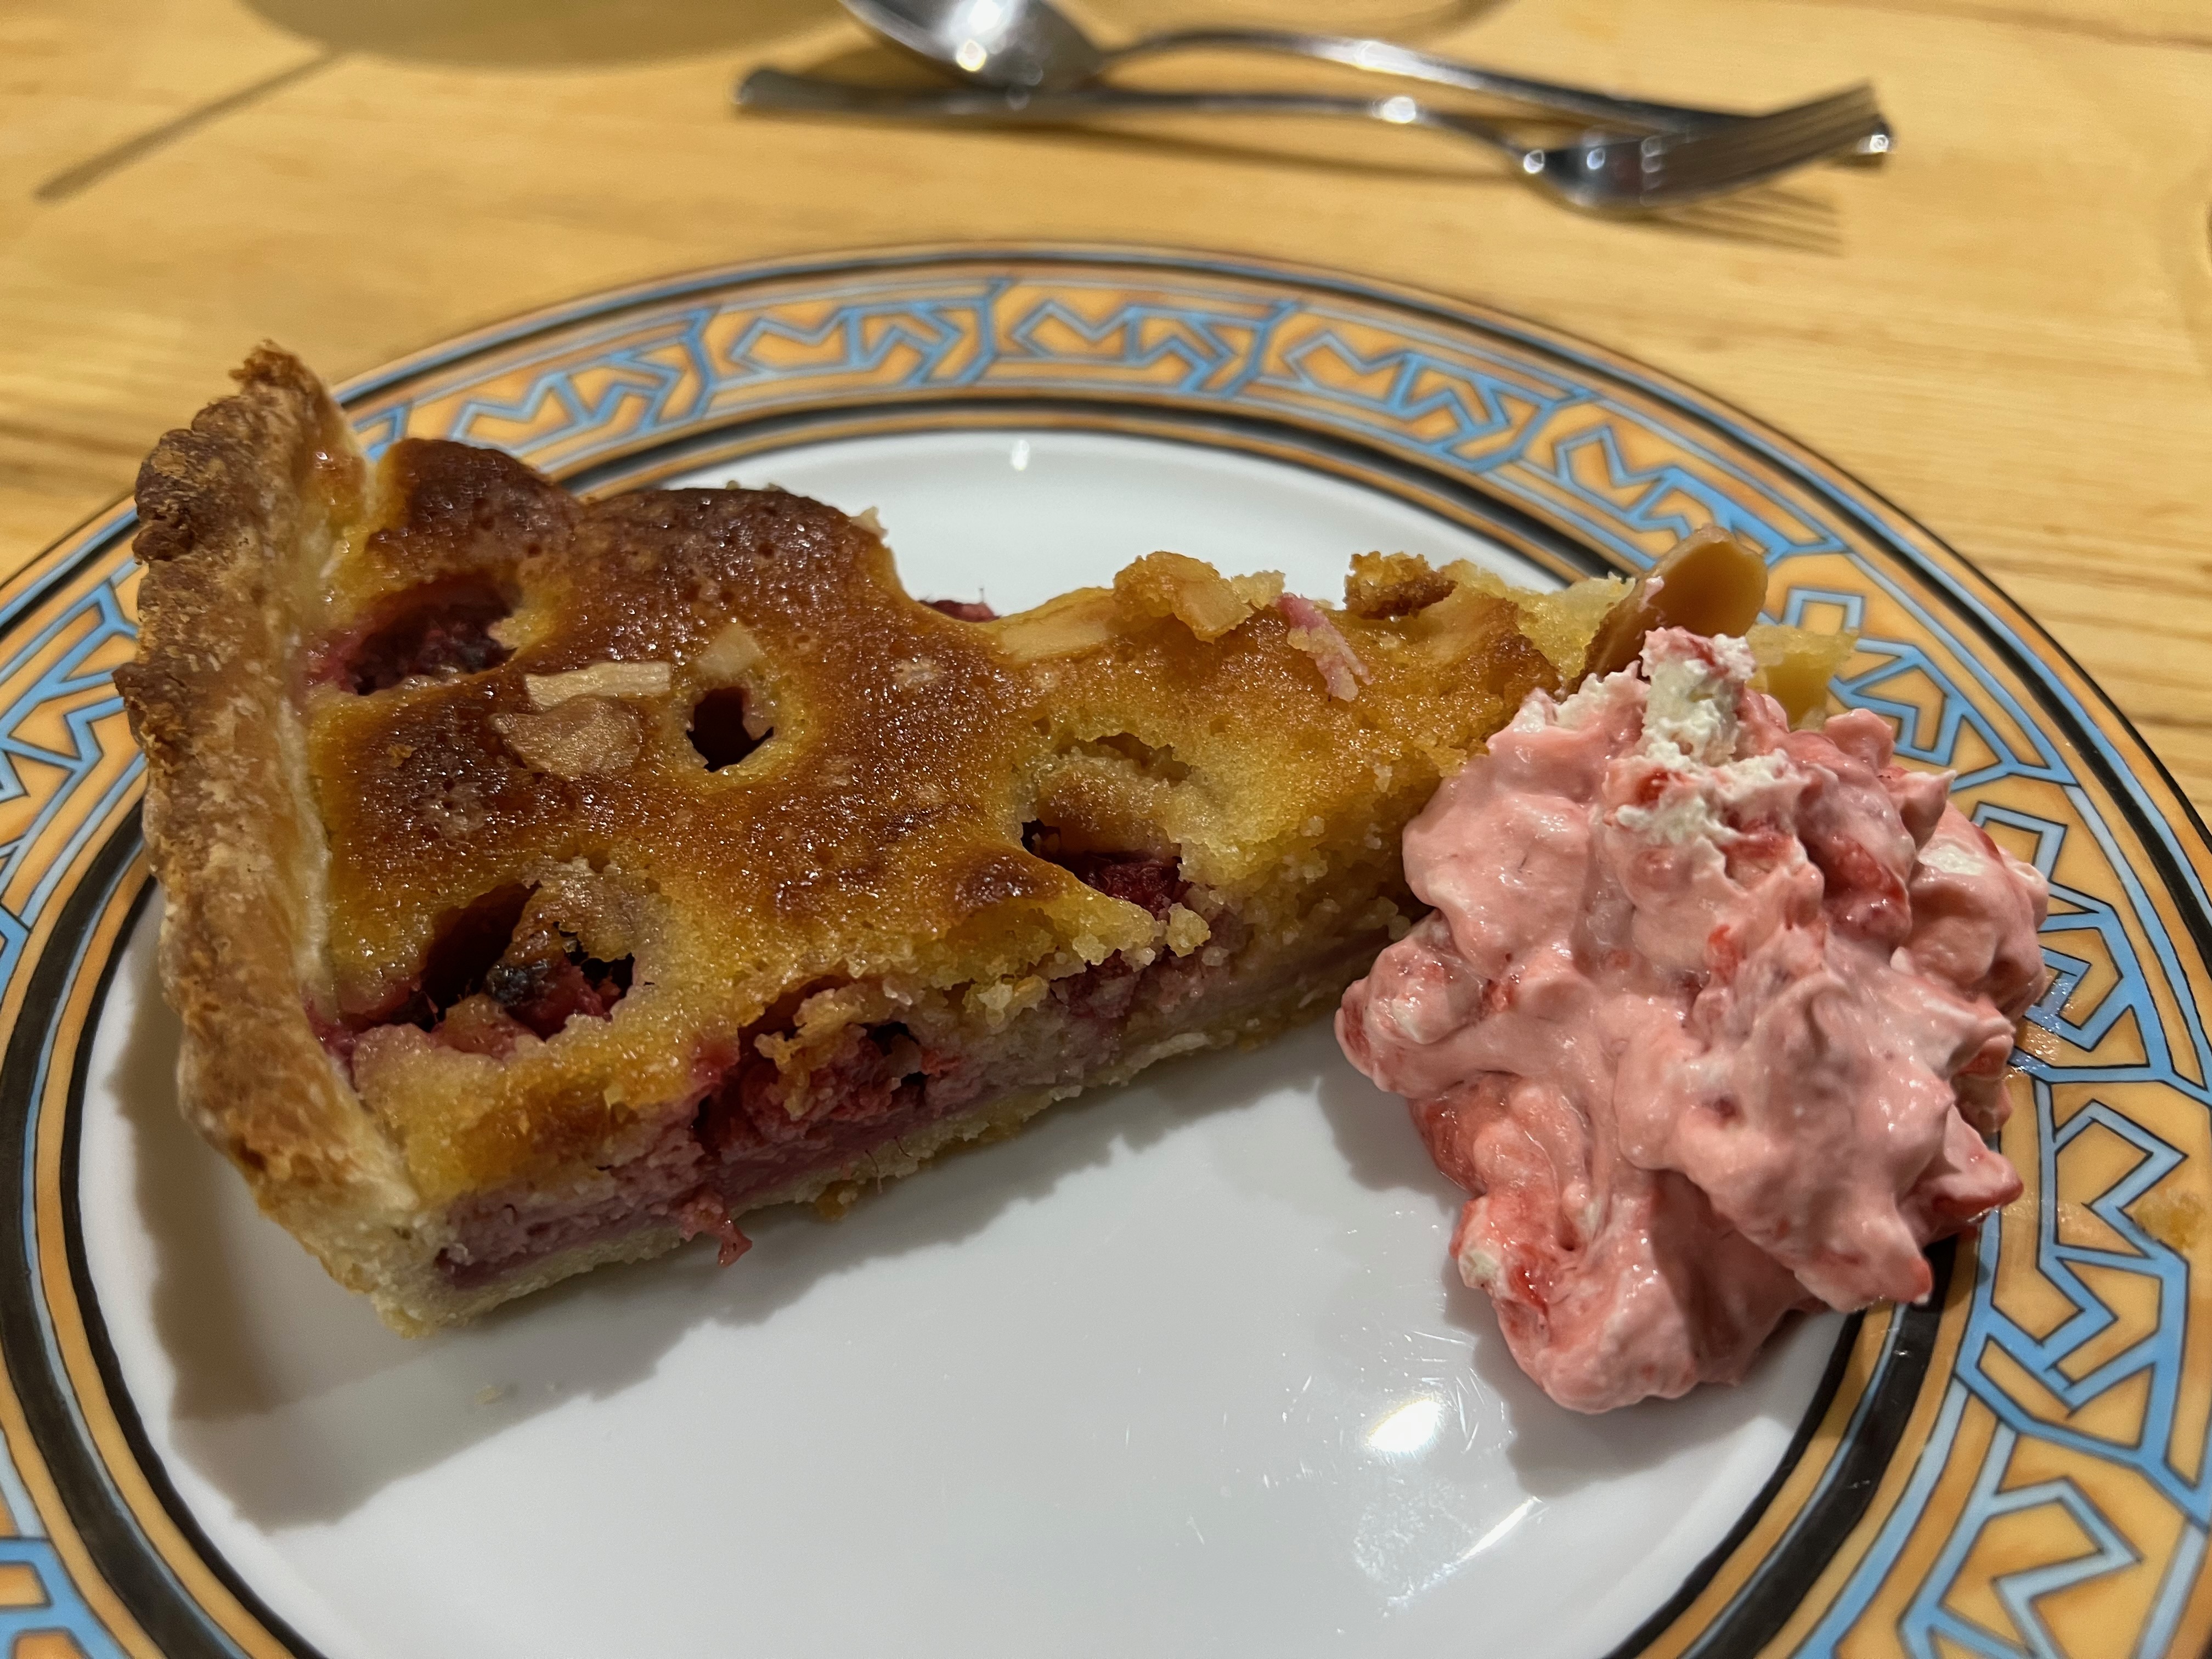
It’s not really obvious why the picturesque Derbyshire market town of Bakewell (population 3,949 at the last census) should have become known as the home of England’s most famous tart. The dessert that bears its name didn’t even start out as a tart – the “Bakewell Pudding” starts to appear in recipes in the early 1800s (there are arguments as to exactly when) and then morphs into its present pastry-fruit-and-frangipane form around the turn of the 20th century. Perhaps it’s just down to the name.
The ubiquitous mass-produced “iced cherry Bakewell” would not make a fit subject for a blog post. But Nigella Lawson’s classic How to Eat has a fabulous recipe for Bakewell Tart. It may owe rather more to French patisserie than to what you’d find in a pastry shop in the village, but it really captures the Bakewell Tart’s almond-and-raspberry loveliness and has been a favourite in my family for years. I’ve changed a few things – mine is a little less sweet and the pastry technique is slightly different (actually based on another recipe in the same book), which I find makes more elastic pastry that’s less prone to tearing. But if you buy the book and make the original, that will work perfectly well too.
If your raspberries aren’t all that sweet (this is December, so mine very much weren’t), you’ll want some extra raspberry jam or, as I’ve done here, use some raspberry coulis made from raspberries cooked down with a bit of sugar and cooled (I happened to have some left over from a previous dessert).
The pastry
200g plain flour (preferably OO grade), plus more for rolling
40g icing sugar
60g ground almonds
60g butter, cold
2 Eggs
Juice of half a lemon
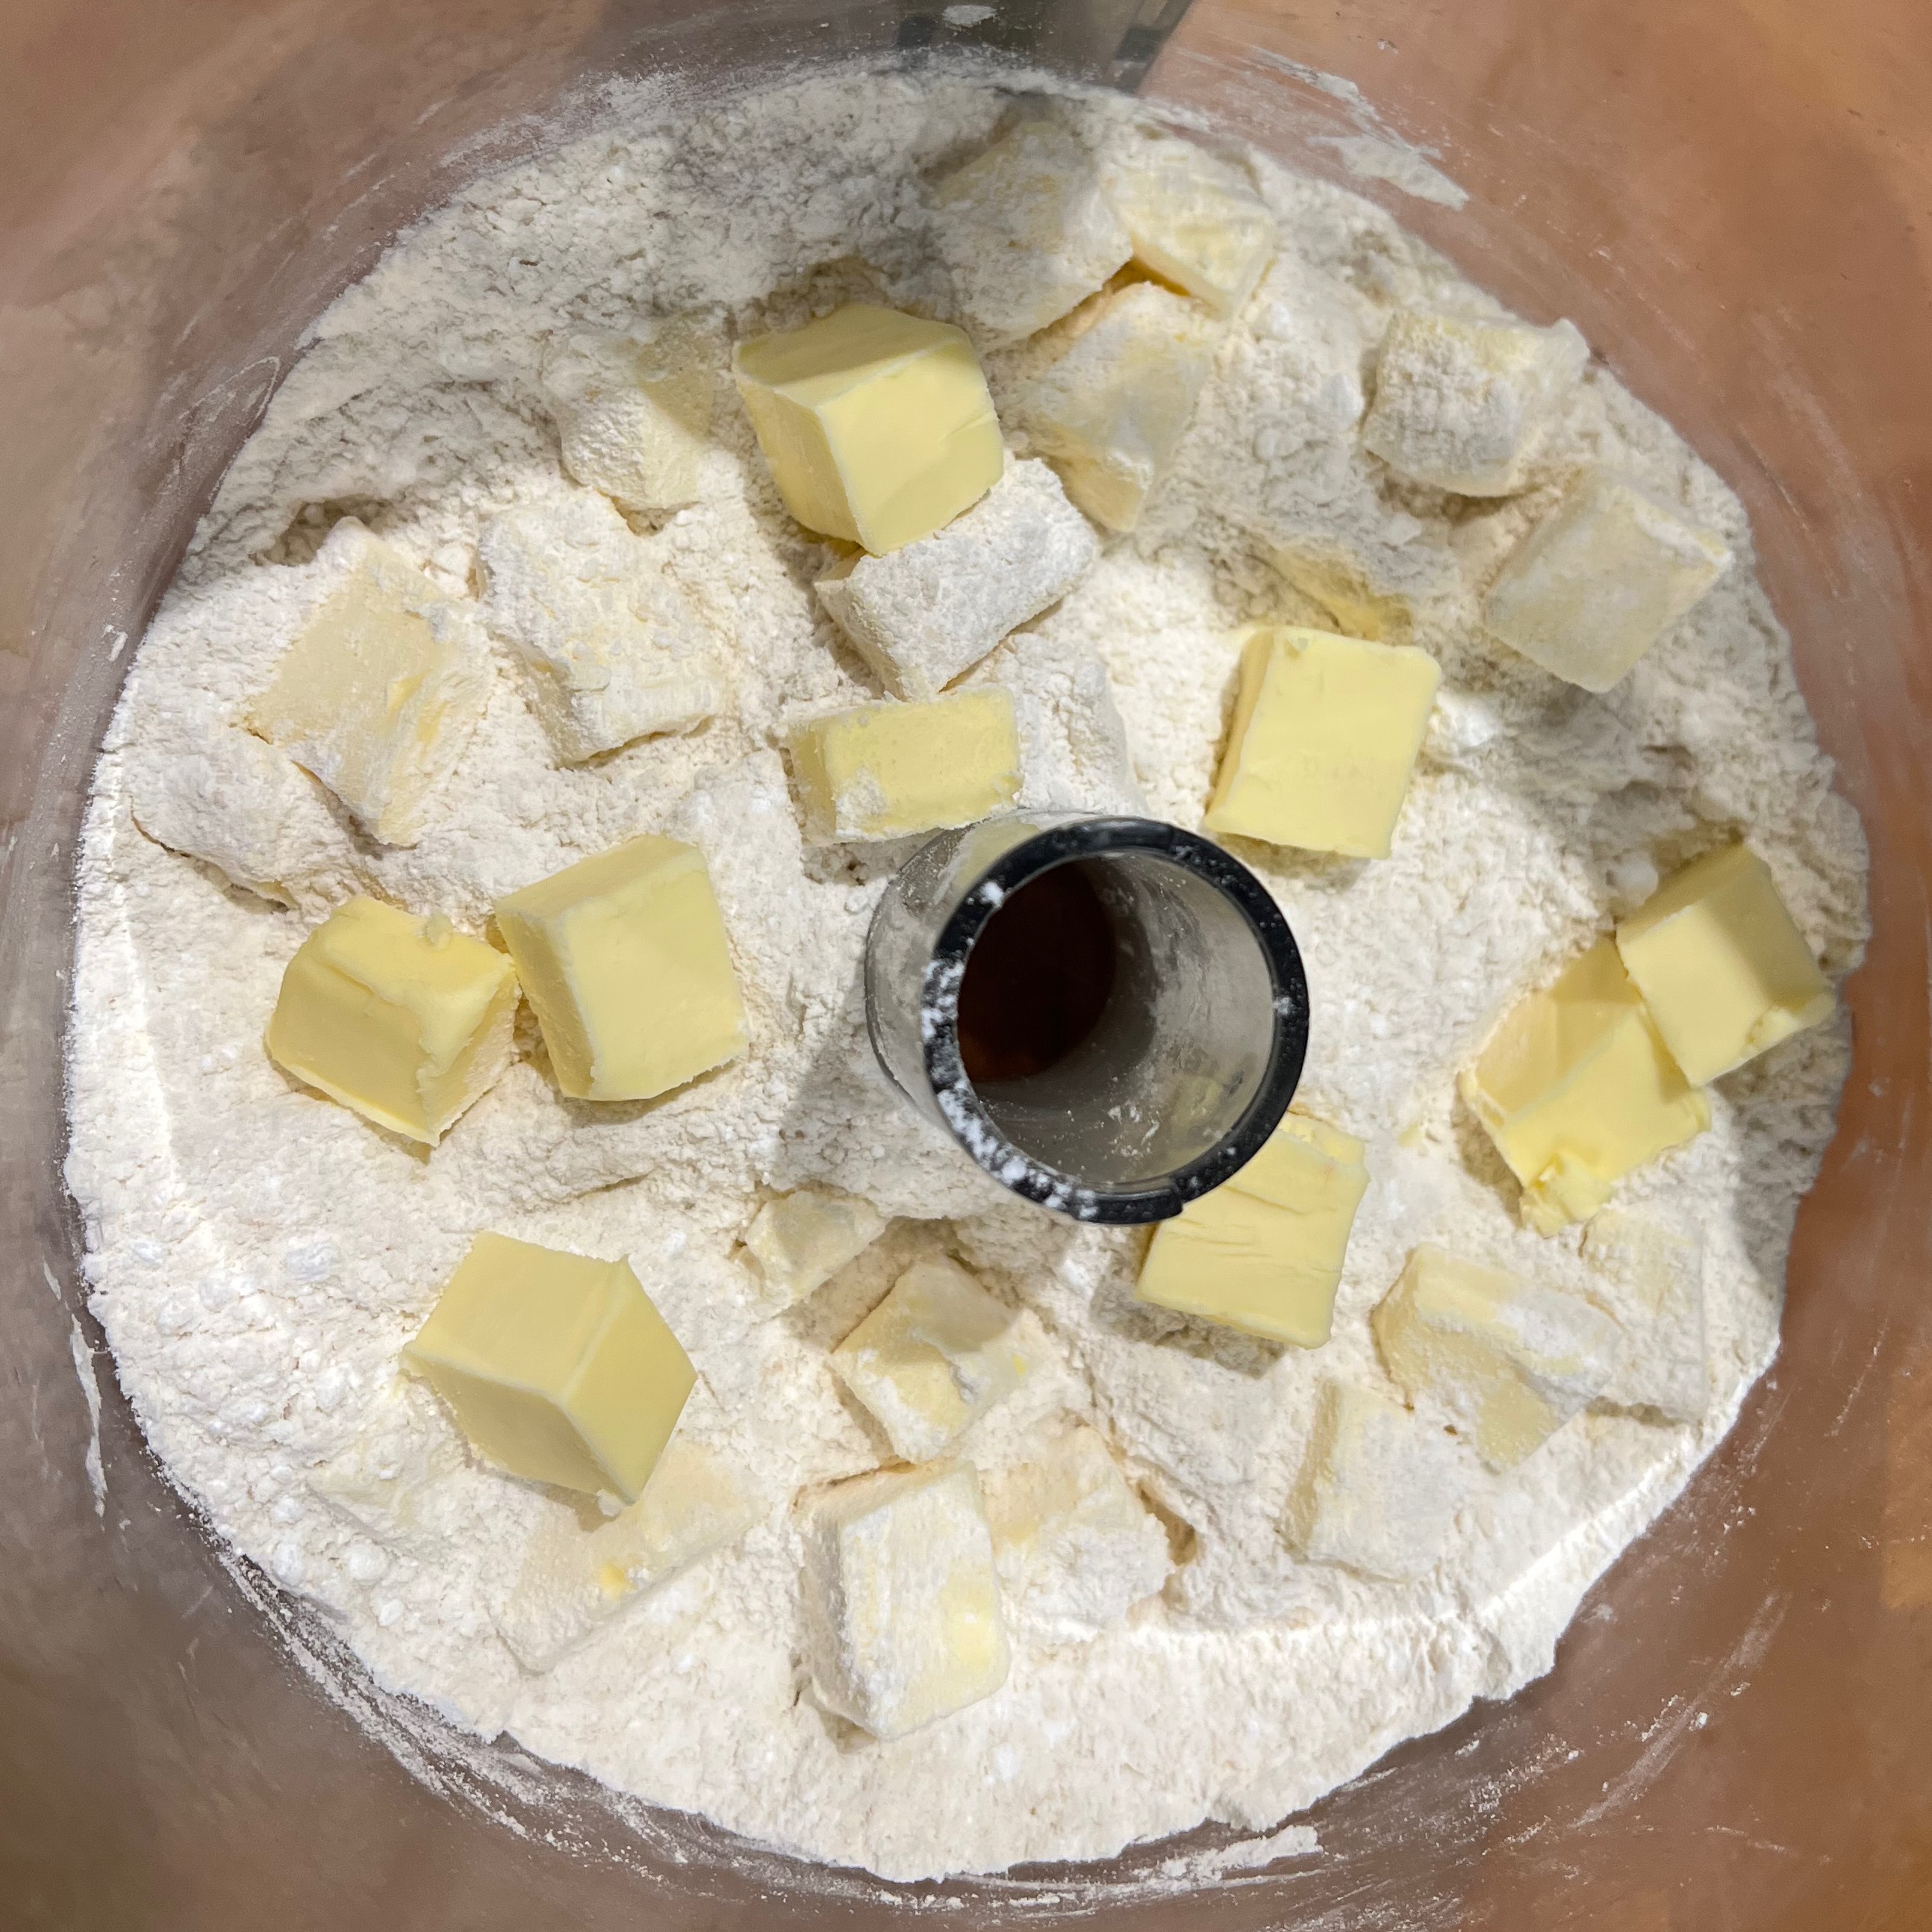
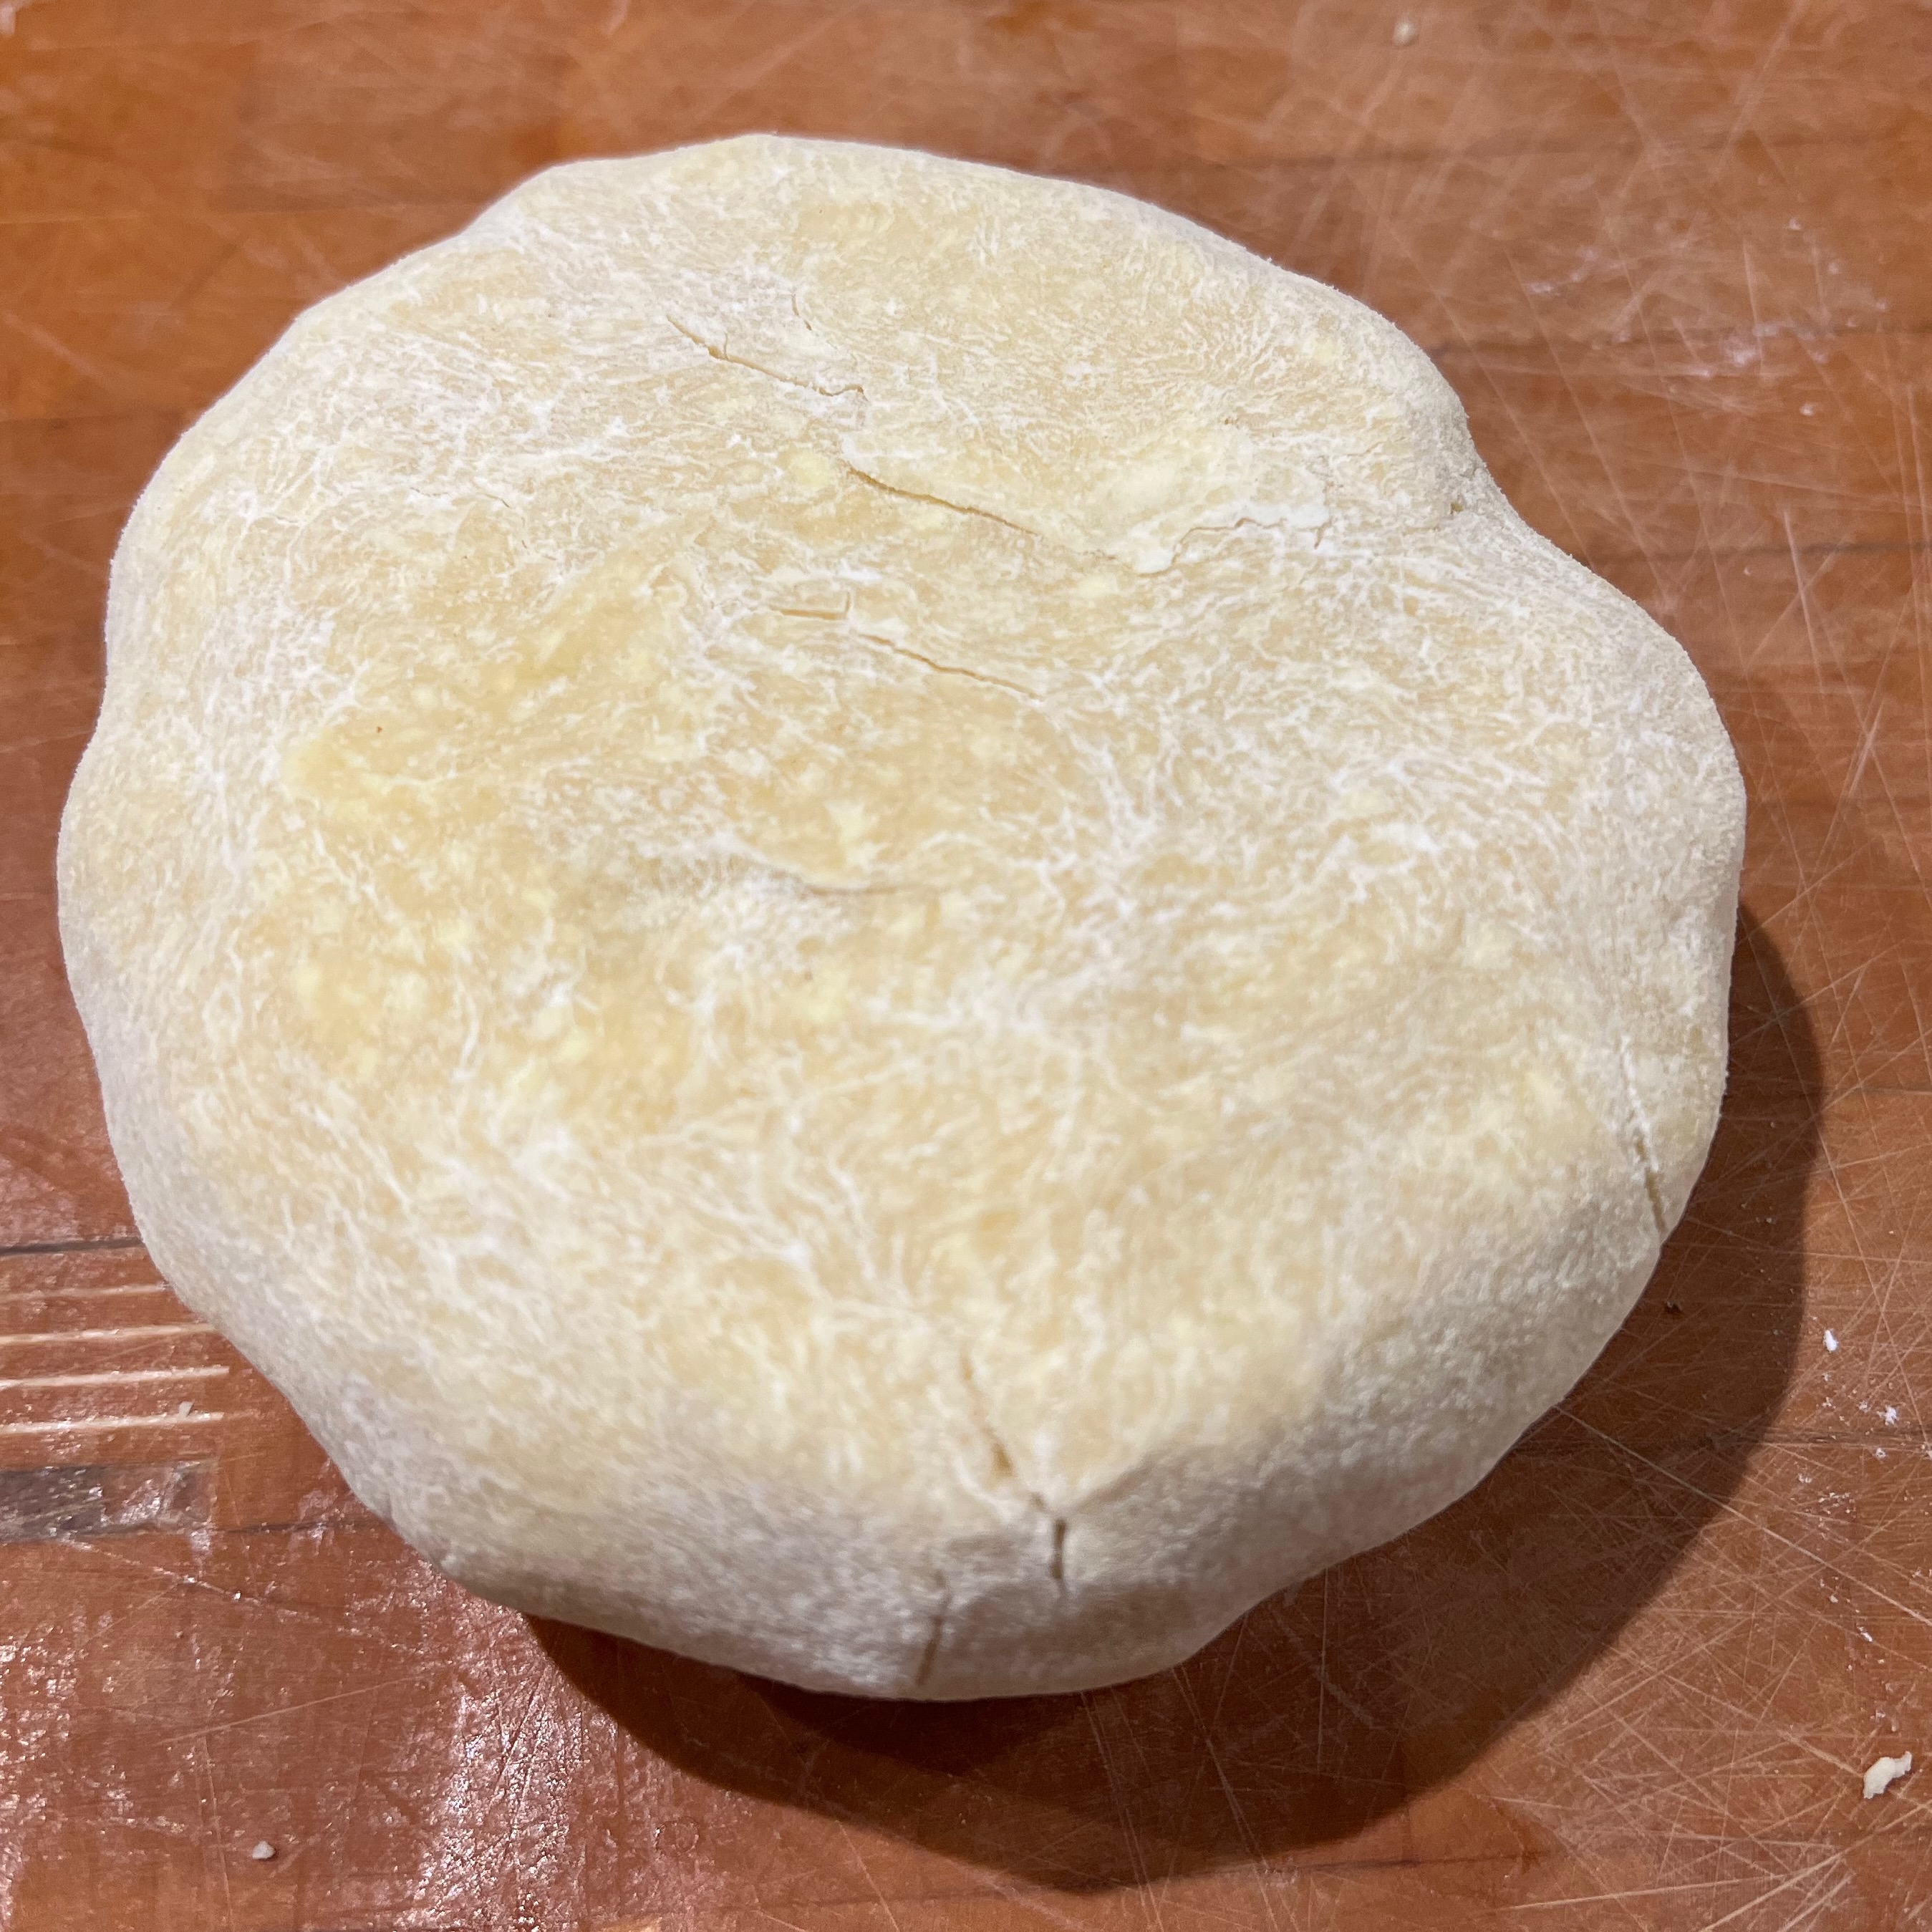
Put the flour, icing sugar and ground almonds into the bowl of your food processor.
Cut the butter into small cubes (perhaps 5-10mm) and add to the bowl.
Put the bowl in the freezer for at least half an hour.
Remove the bowl from the freezer and blitz to a fine, sandy texture.
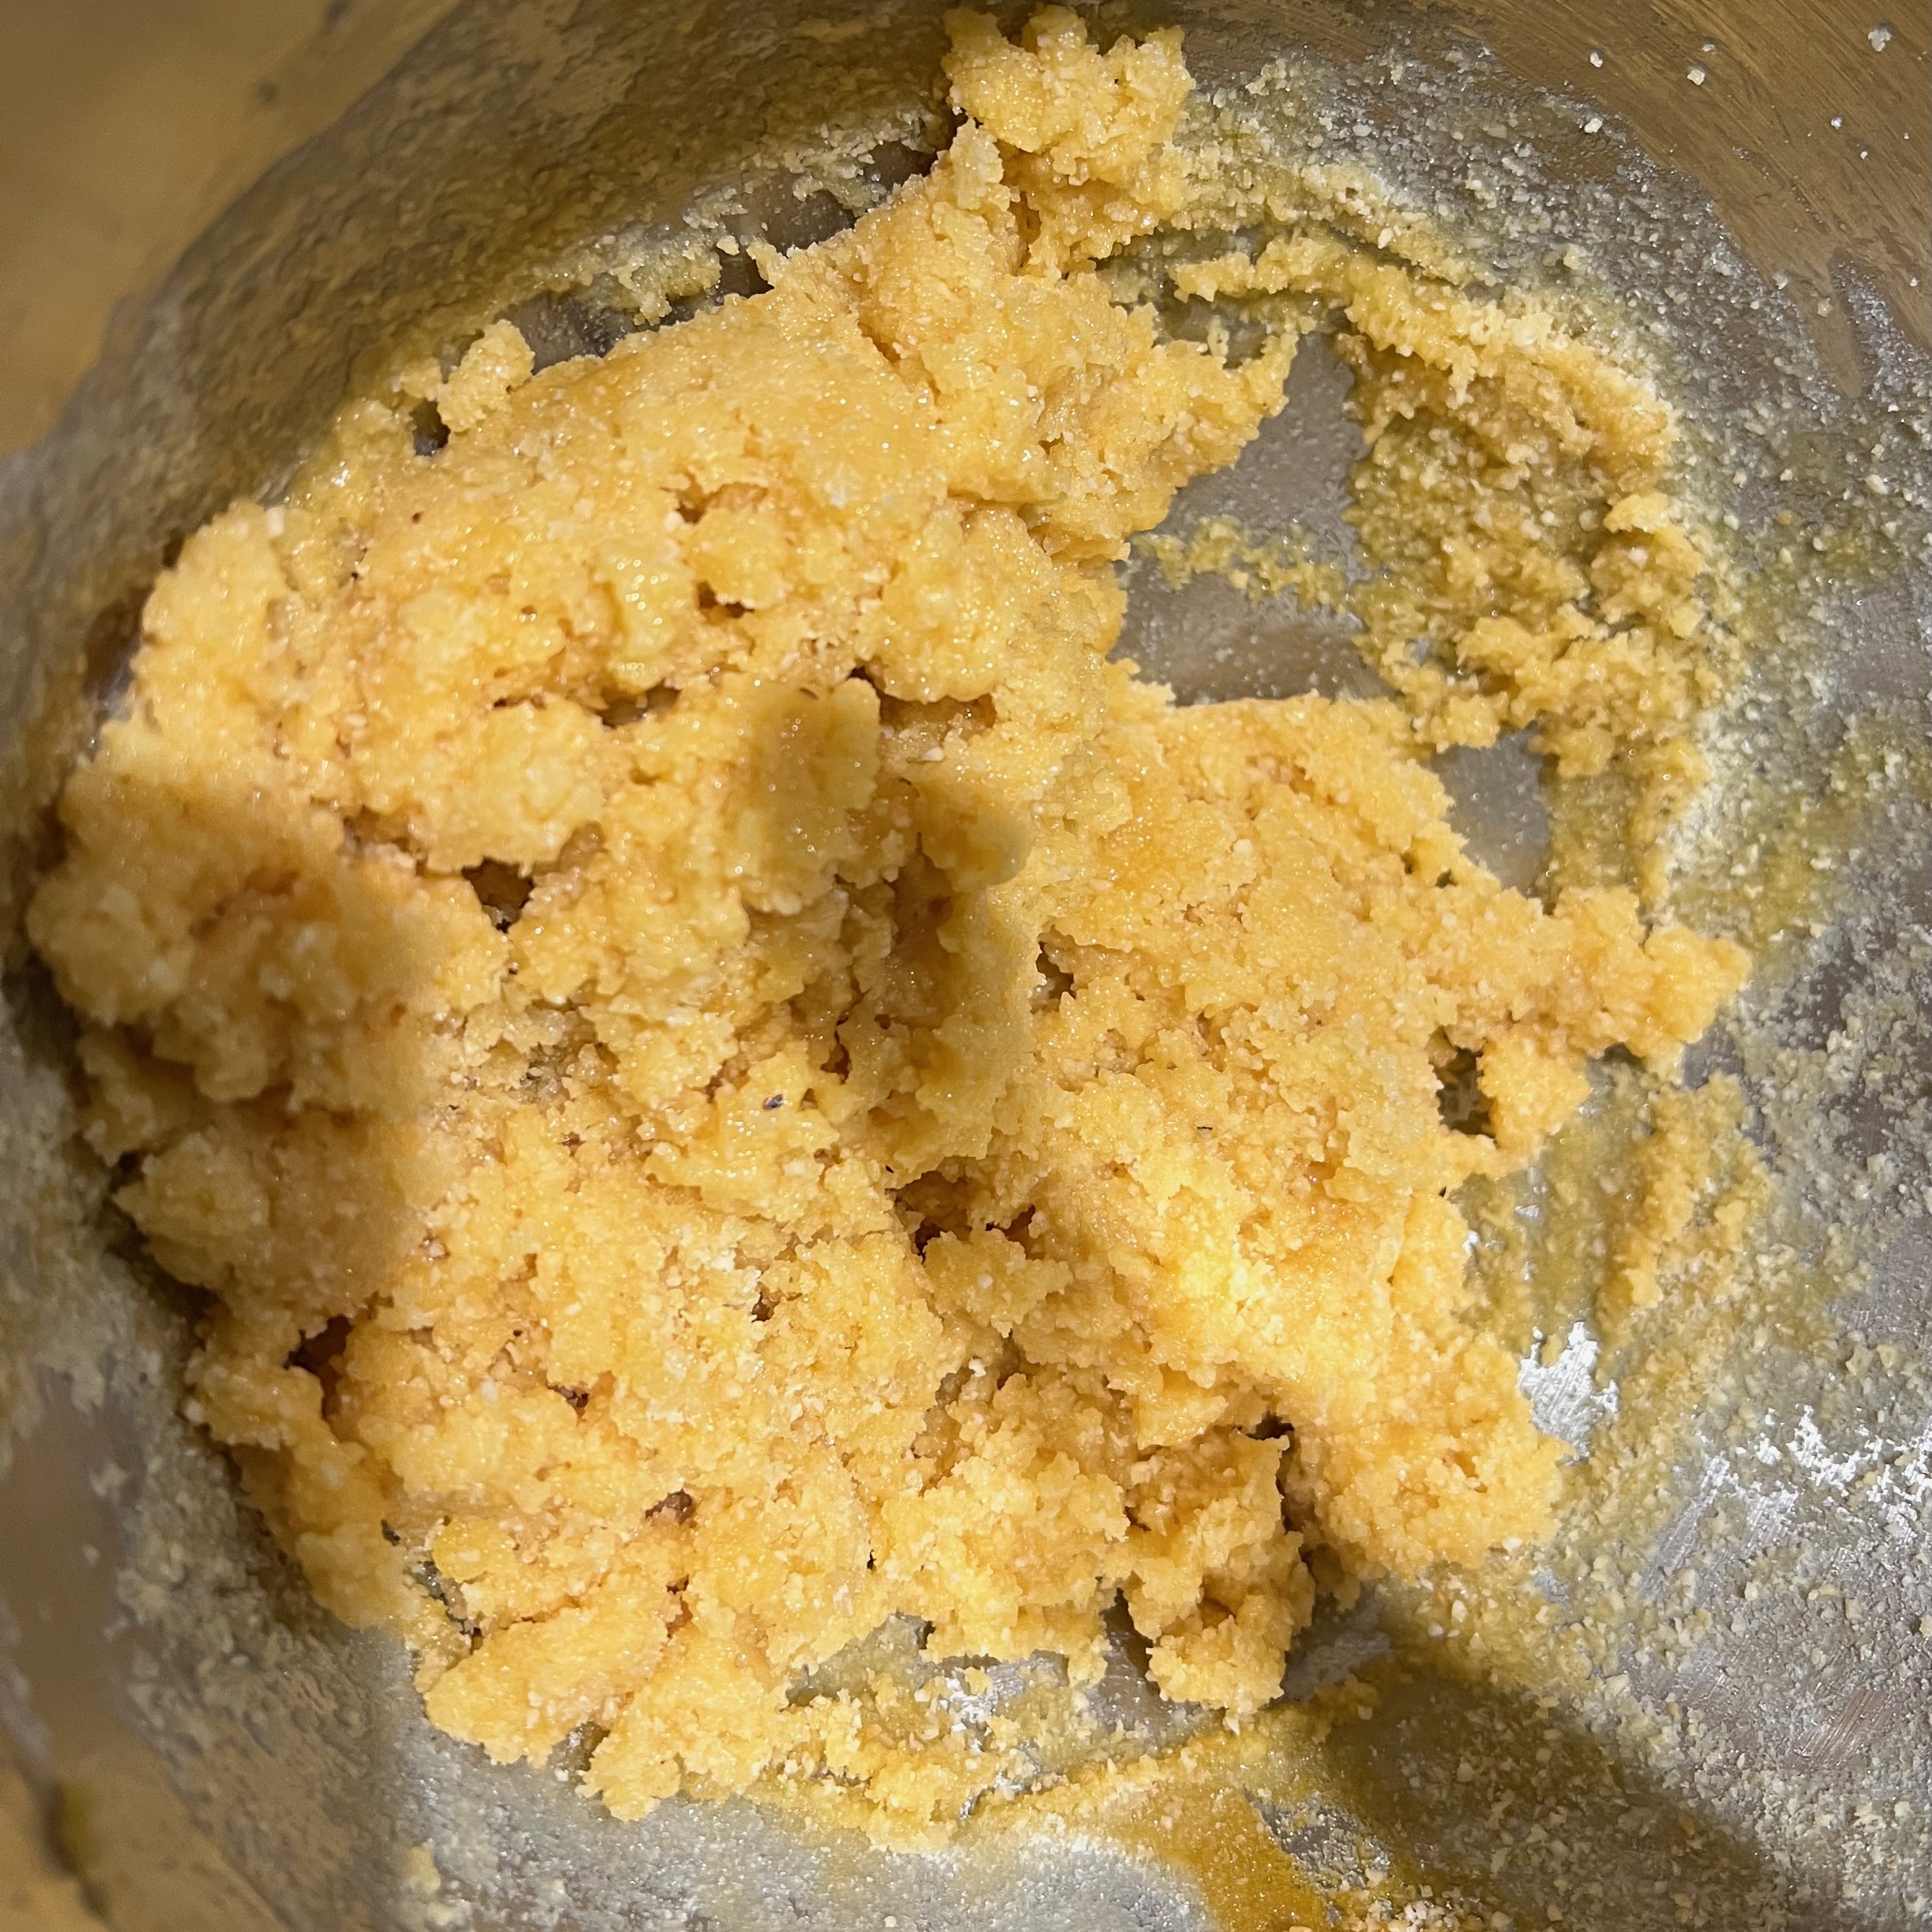
Beat together the eggs and lemon juice, add to the bowl and pulse for a short time to blend in.
Pour the contents onto a surface, bring it together into a ball, knead it a few times, flatten, wrap it in cling film and leave to rest in the refrigerator for at least half an hour.
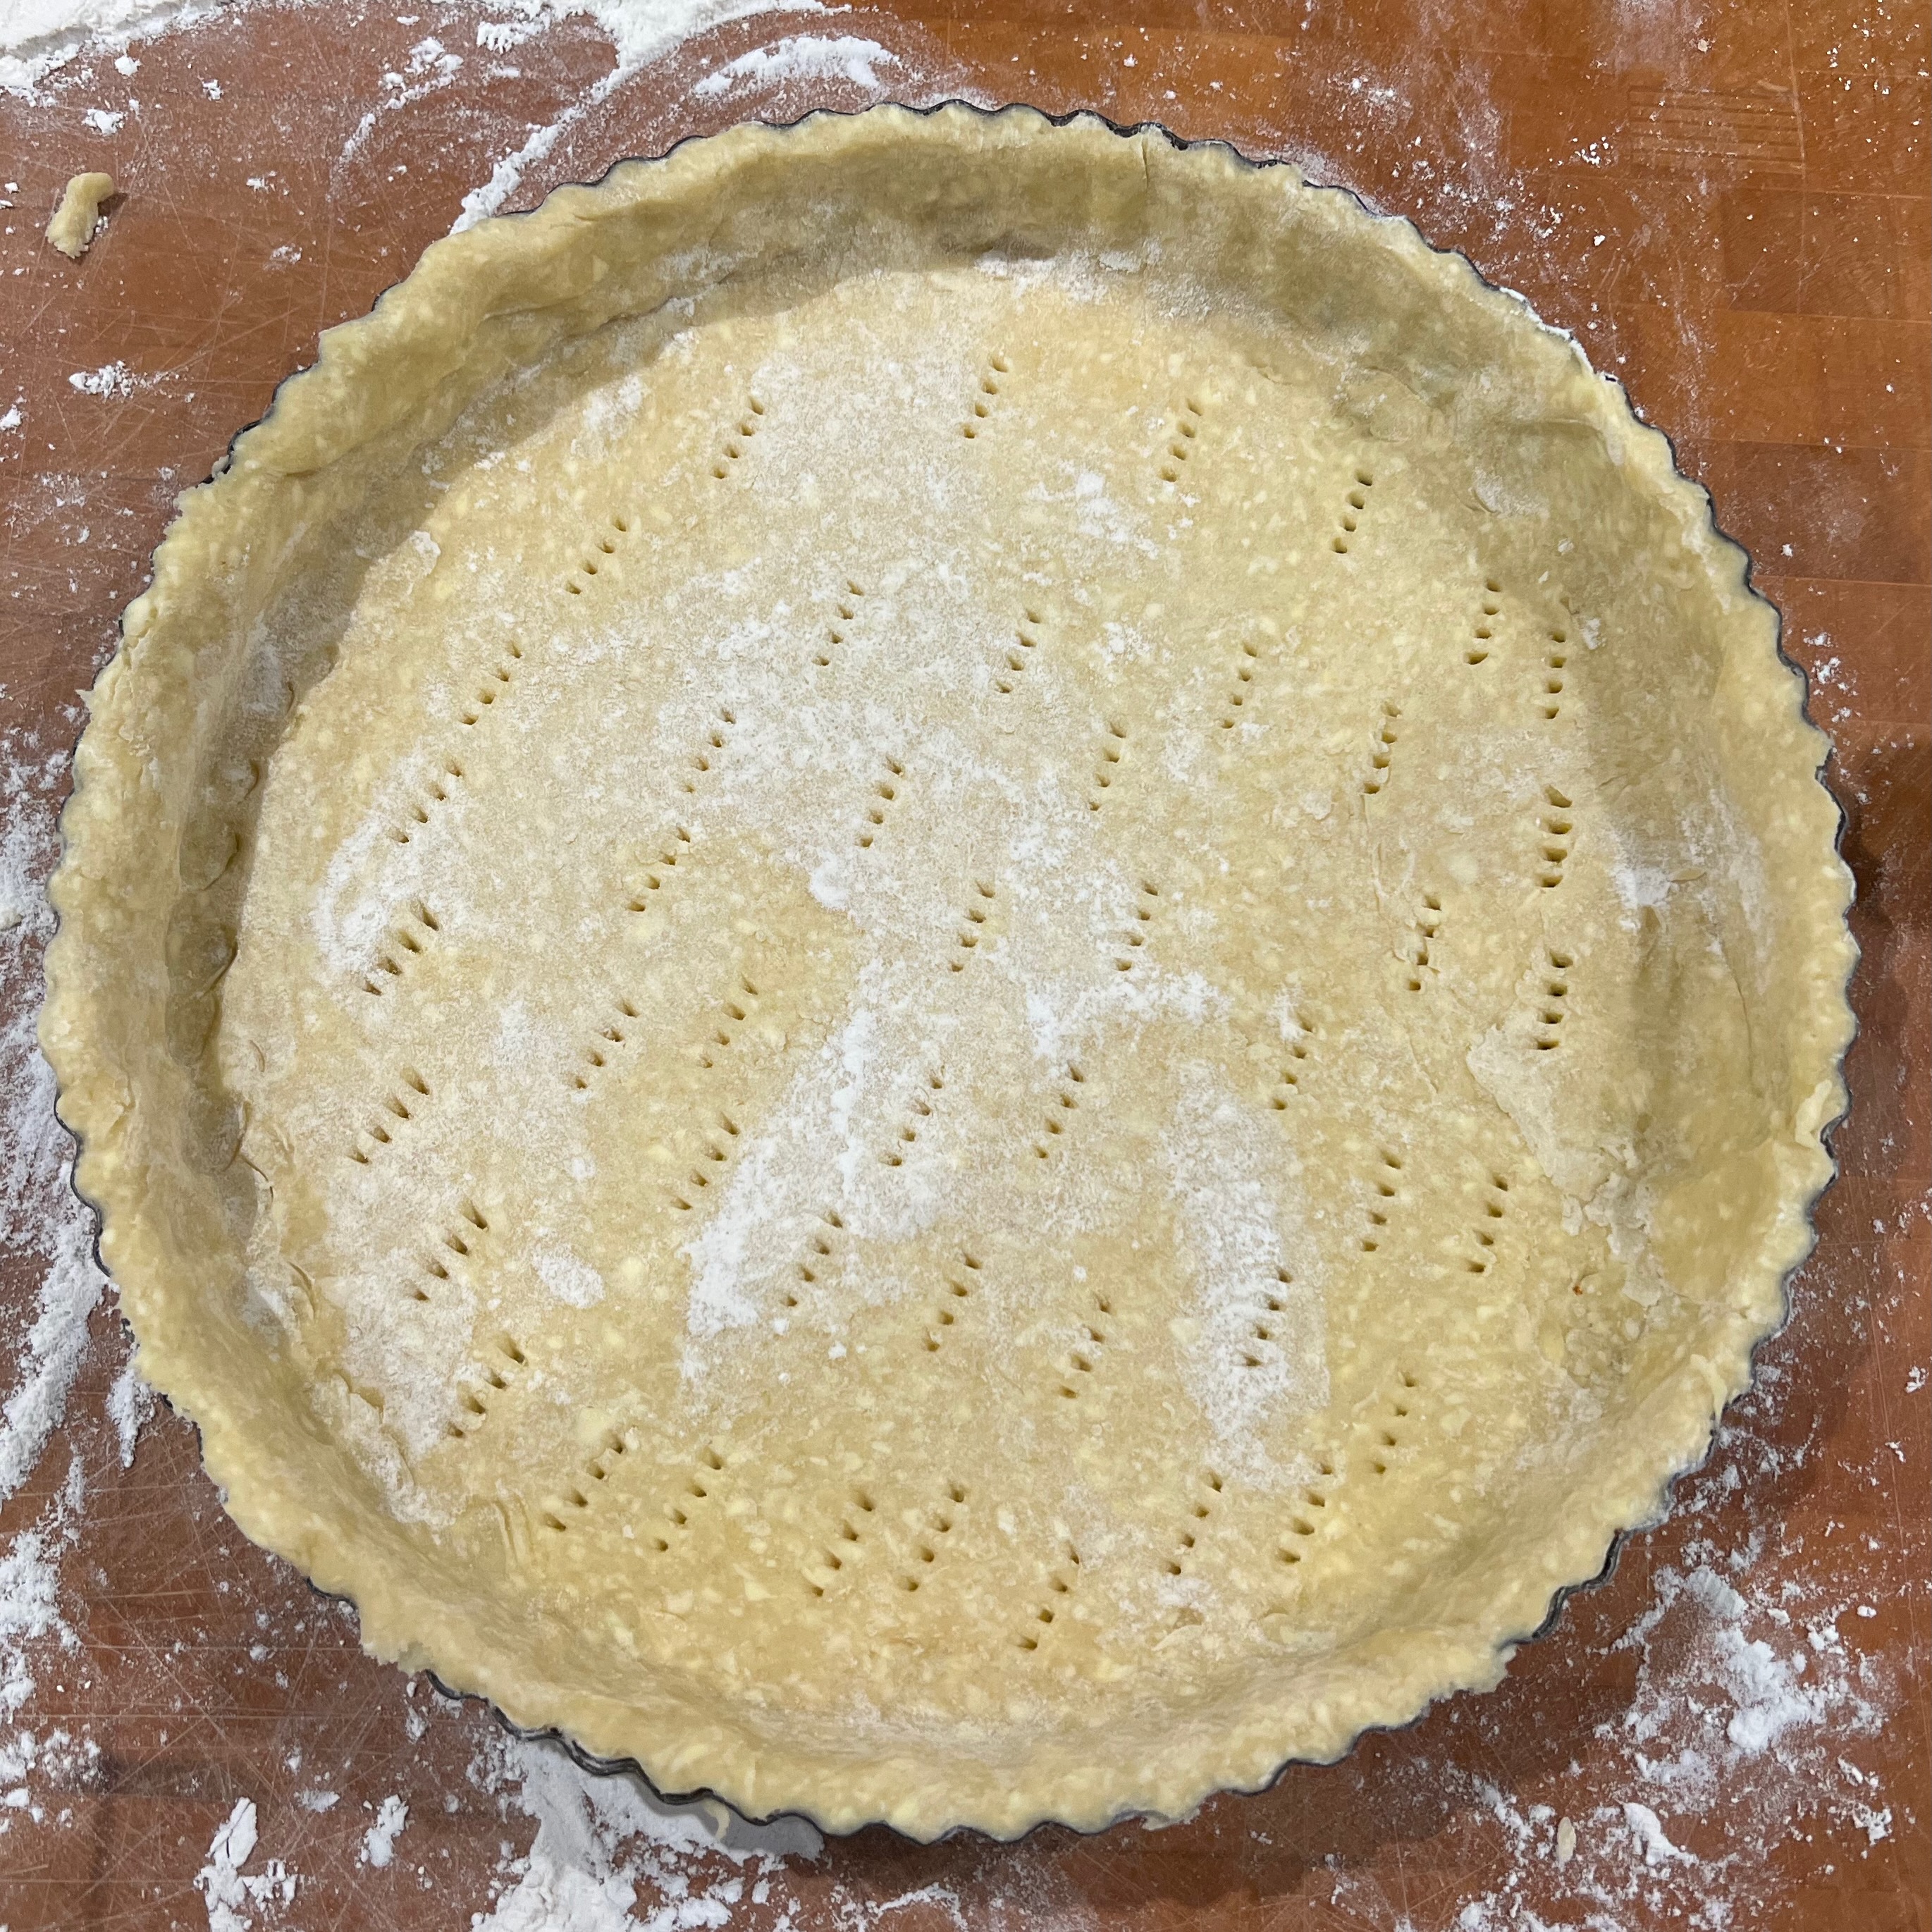
Grease a tart tin (the quantities here do a 27-30cm tin).
Flour your board and rolling pin; roll out the pastry to a diameter several centimetres larger than your tin, then line the tin with the pastry.
Put the tart in its tin back into the refrigerator until you’re ready to assemble it.
The frangipane filling
3 large eggs
180g caster sugar
180g ground almonds
180g butter, melted
Put the eggs into the bowl of your stand mixer, setting aside half an egg white for use brushing the pastry.
Mix the eggs, caster sugar and almonds
When you’re sure the butter is cool enough not to scramble the eggs, mix it in thoroughly
Putting it all together
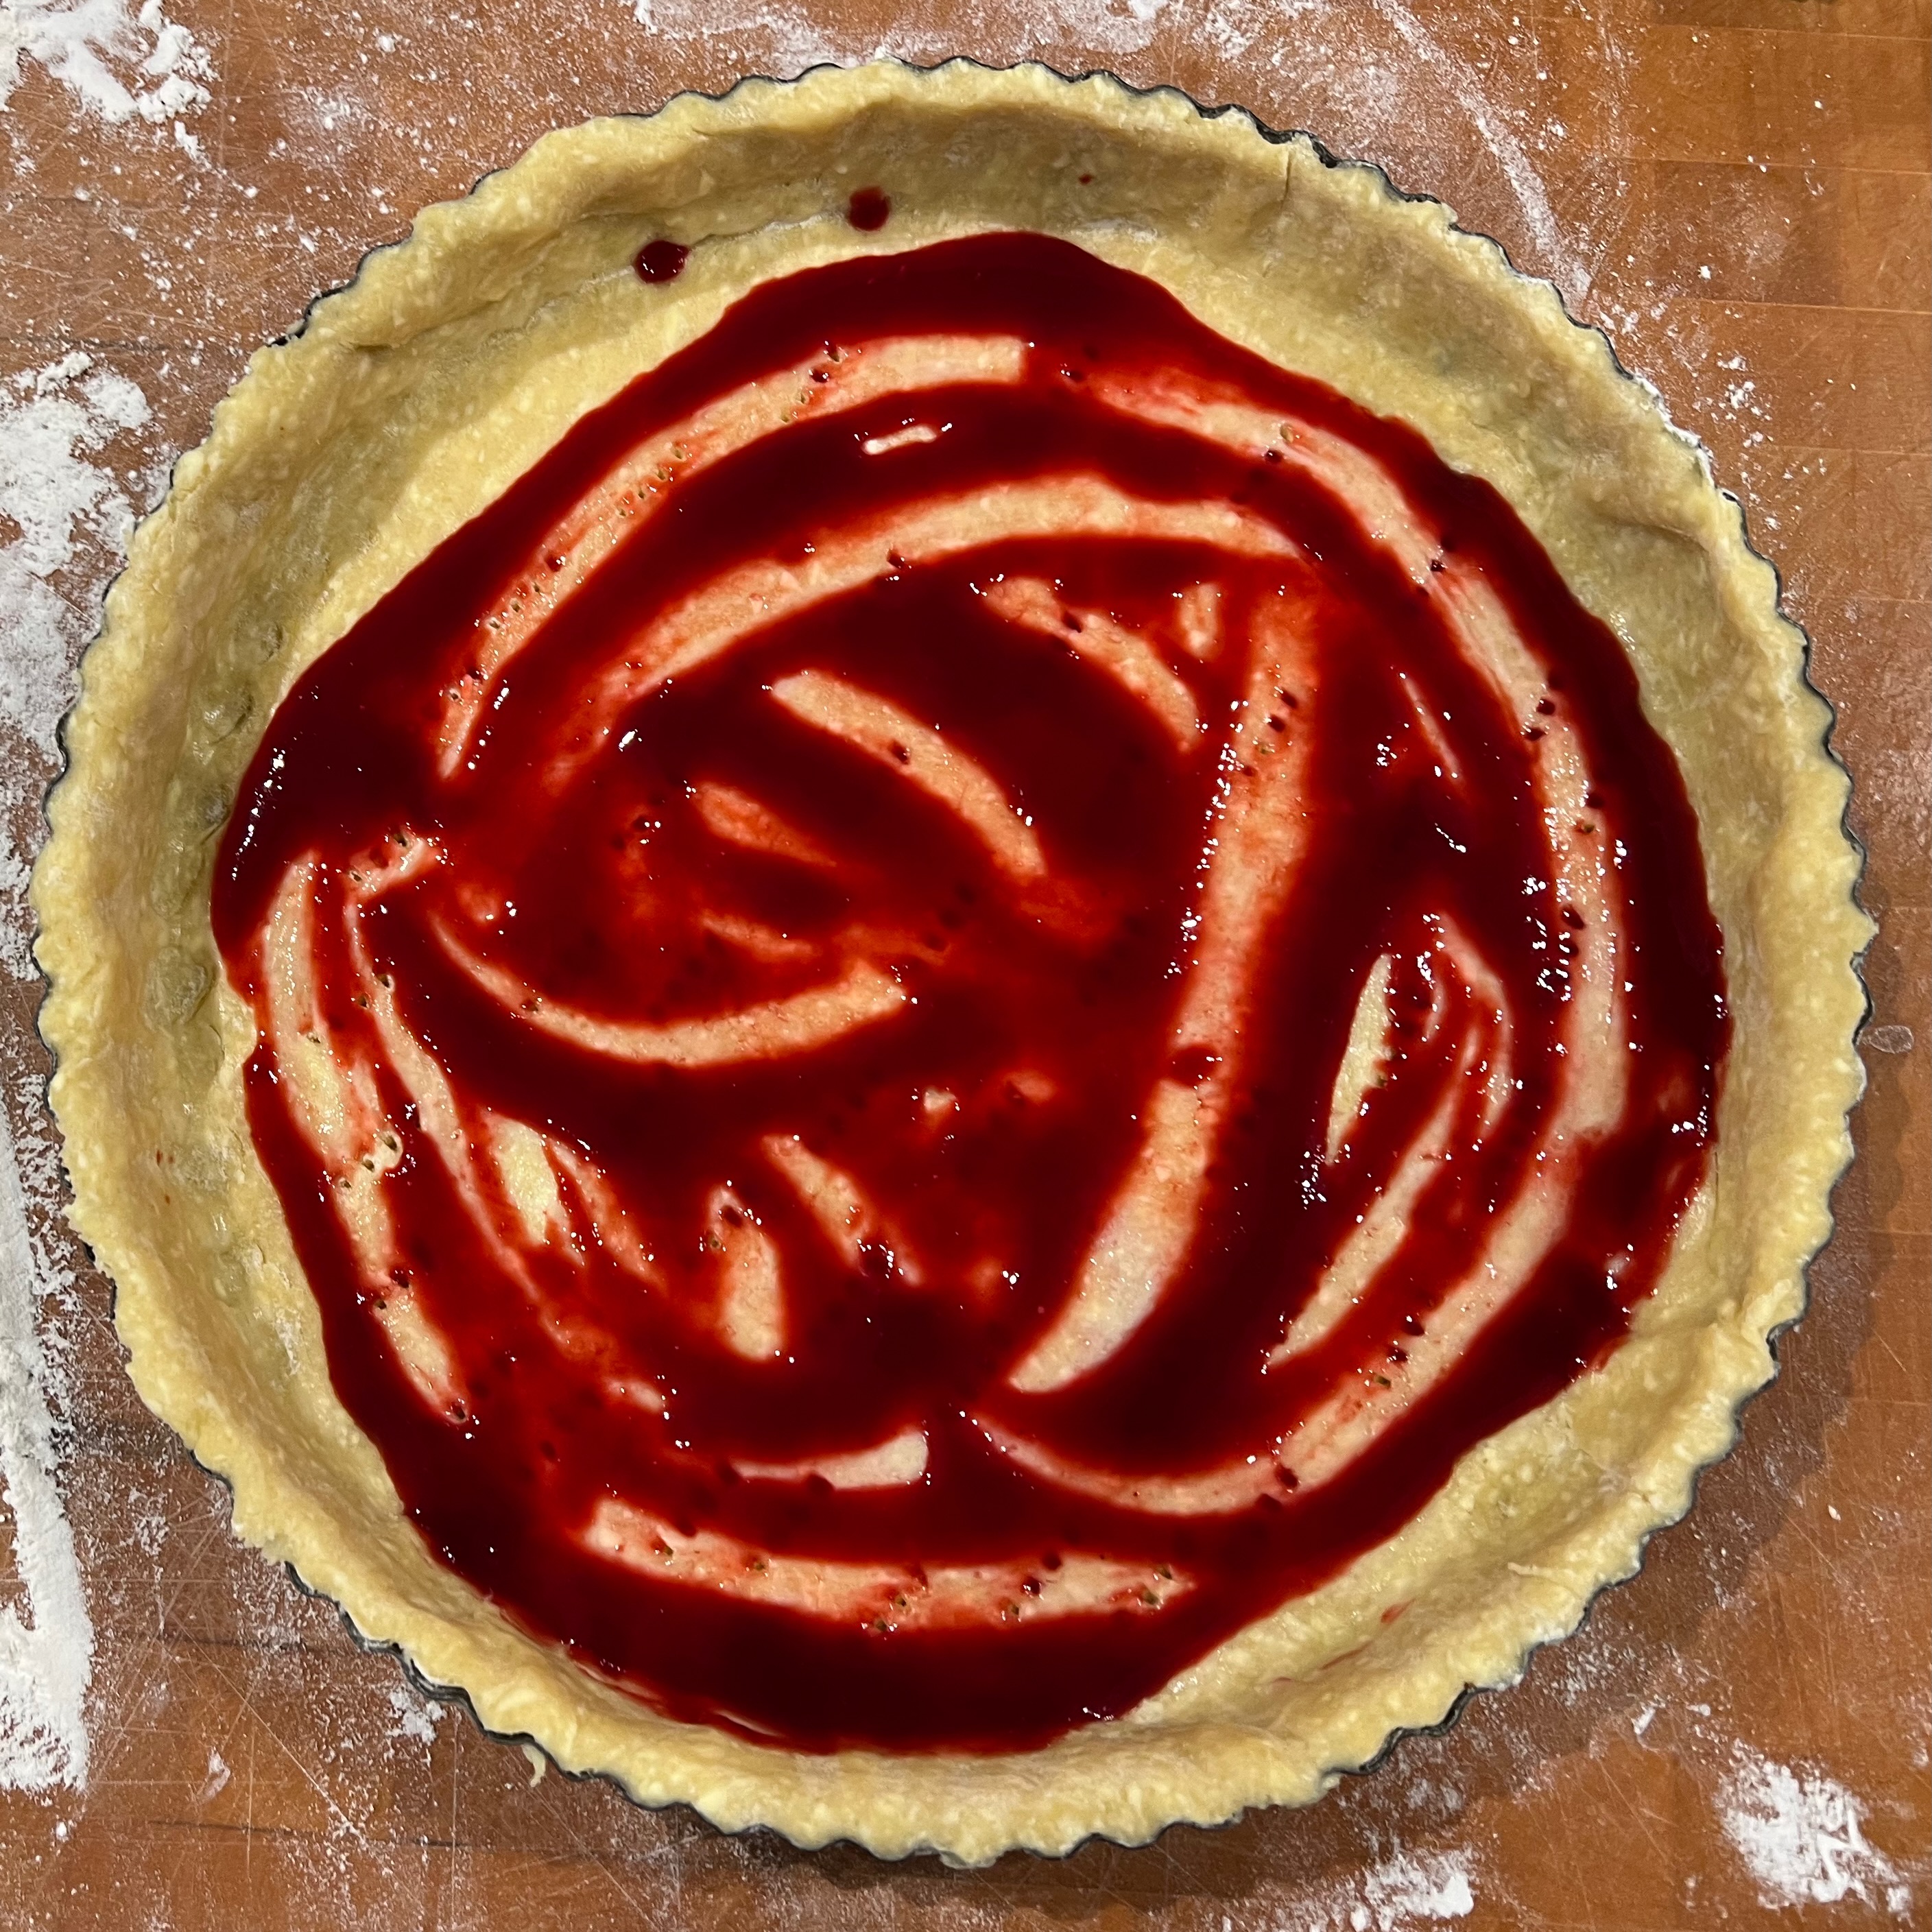
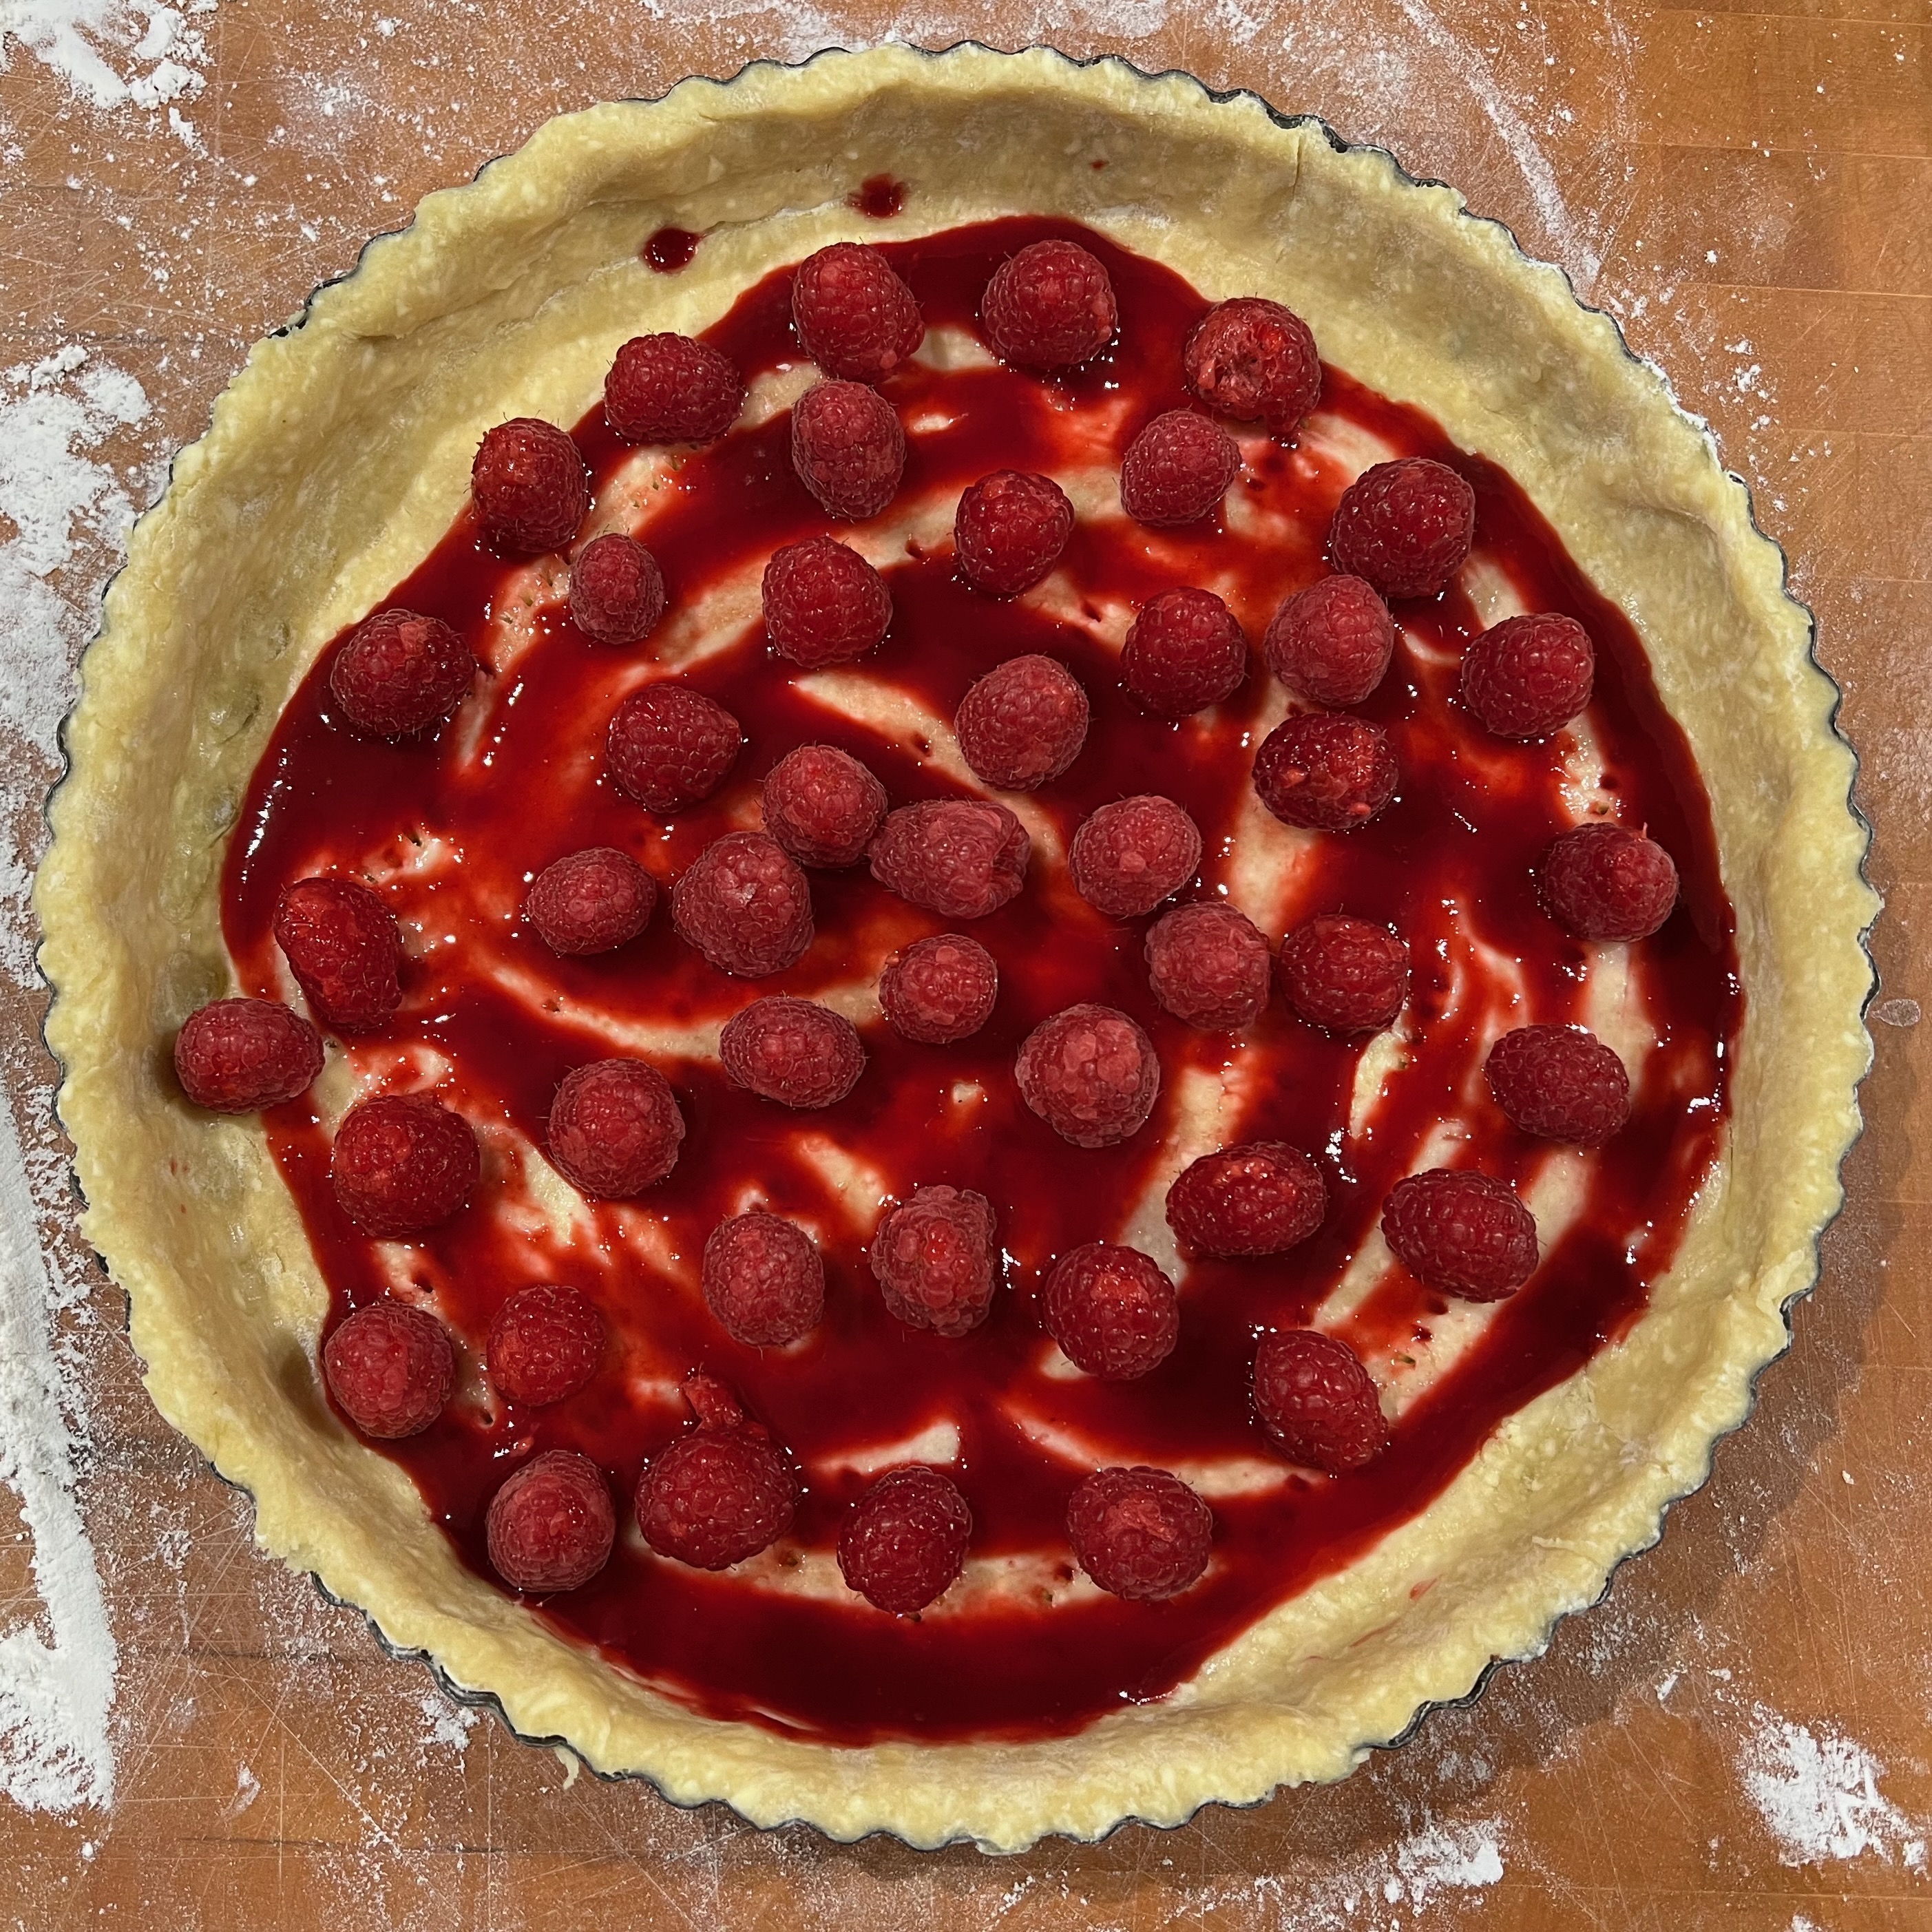
300g raspberries
70g raspberry jam or coulis (omit this if the raspberries are sweet)
Flaked almonds for sprinkling (I used around 25g)
Optional: 100ml or so whipped cream
Preheat oven to 175℃ fan
Prick the pastry base with a fork
Brush the base with your reserved egg white: this helps to stop the jam and/or filling seeping into the pastry with the resulting dreaded “soggy bottom”.
If you’re using the jam or coulis, spread it over as evenly as you can manage.
Dot the raspberries evenly around the whole of the tart base.
Pour the frangipane mixture evenly over the tart base and raspberries. You may need to tilt or shake the tart slightly to get everything reasonably level.
Scatter flaked almonds over the top.
Bake until golden brown, around 35 minutes.
Cool and serve. Whipped cream with a dollop of raspberry jam folded lightly through it makes a nice accompaniment.
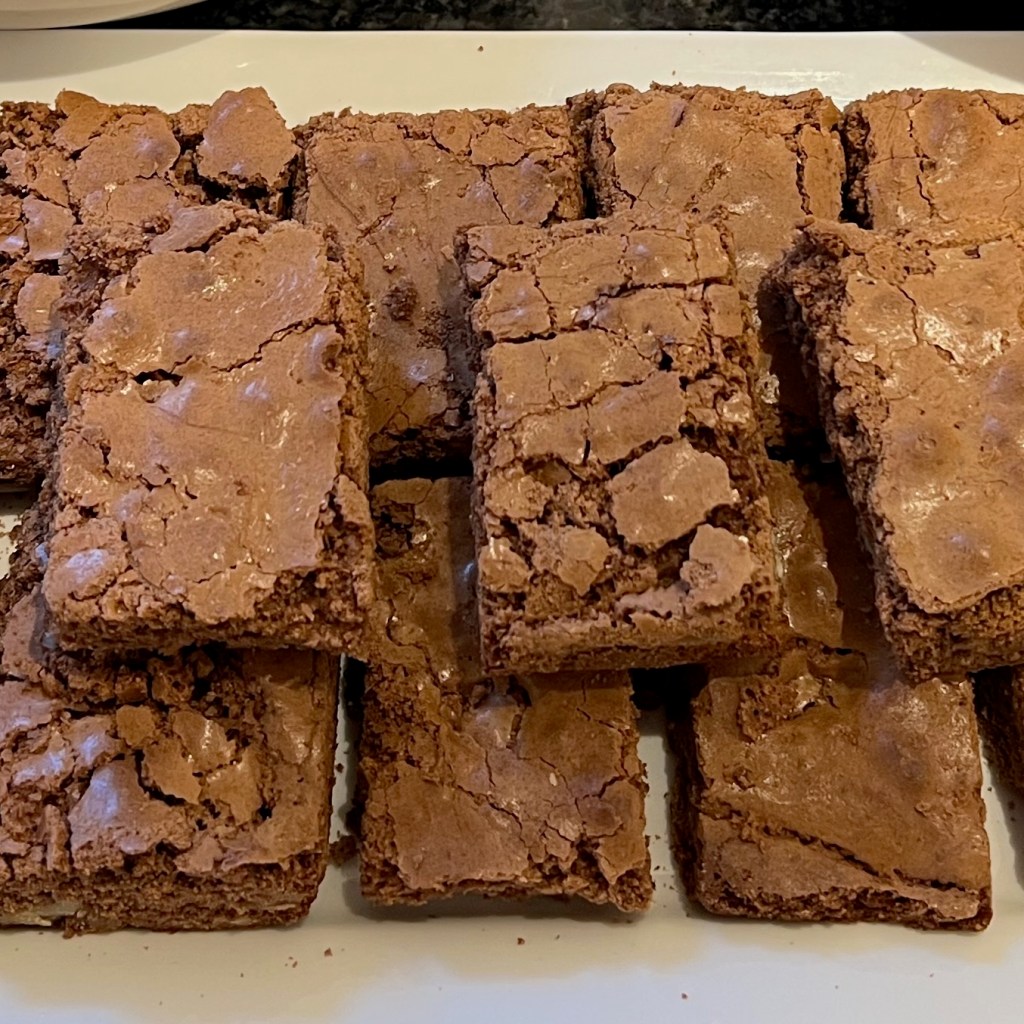
For my first bake from the United States, I chose my personal favourite of Californian carrot cake. But if I’m being honest, the archetypal American bake (leaving aside apple pie, which is really Dutch), is the chocolate brownie – born in the U.S.A and the favourite of millions. Somehow, I’ve managed to live all these years and eat countless brownies without ever having tried to make a batch, so it was about time to try.
There are a million variations on the basic brownie recipe, mainly to do with how gooey you do or don’t like your brownies, but also about choices of nuts and additional flavourings (there are even “blondies” if you prefer white chocolate or you want to omit chocolate altogether). If you are keen to calibrate your recipe carefully to your own taste, Felicity Cloake in The Guardian is probably a good place to start. This being my first time, I went for authentic Americanness rather than perfection and headed for Irma S. Rombauer and Marion Rombauer Becker’s The Joy of Cooking, probably the most famous American cookbook of all time and the book bought by my mother in New York when my family lived there briefly in the early 1960s.
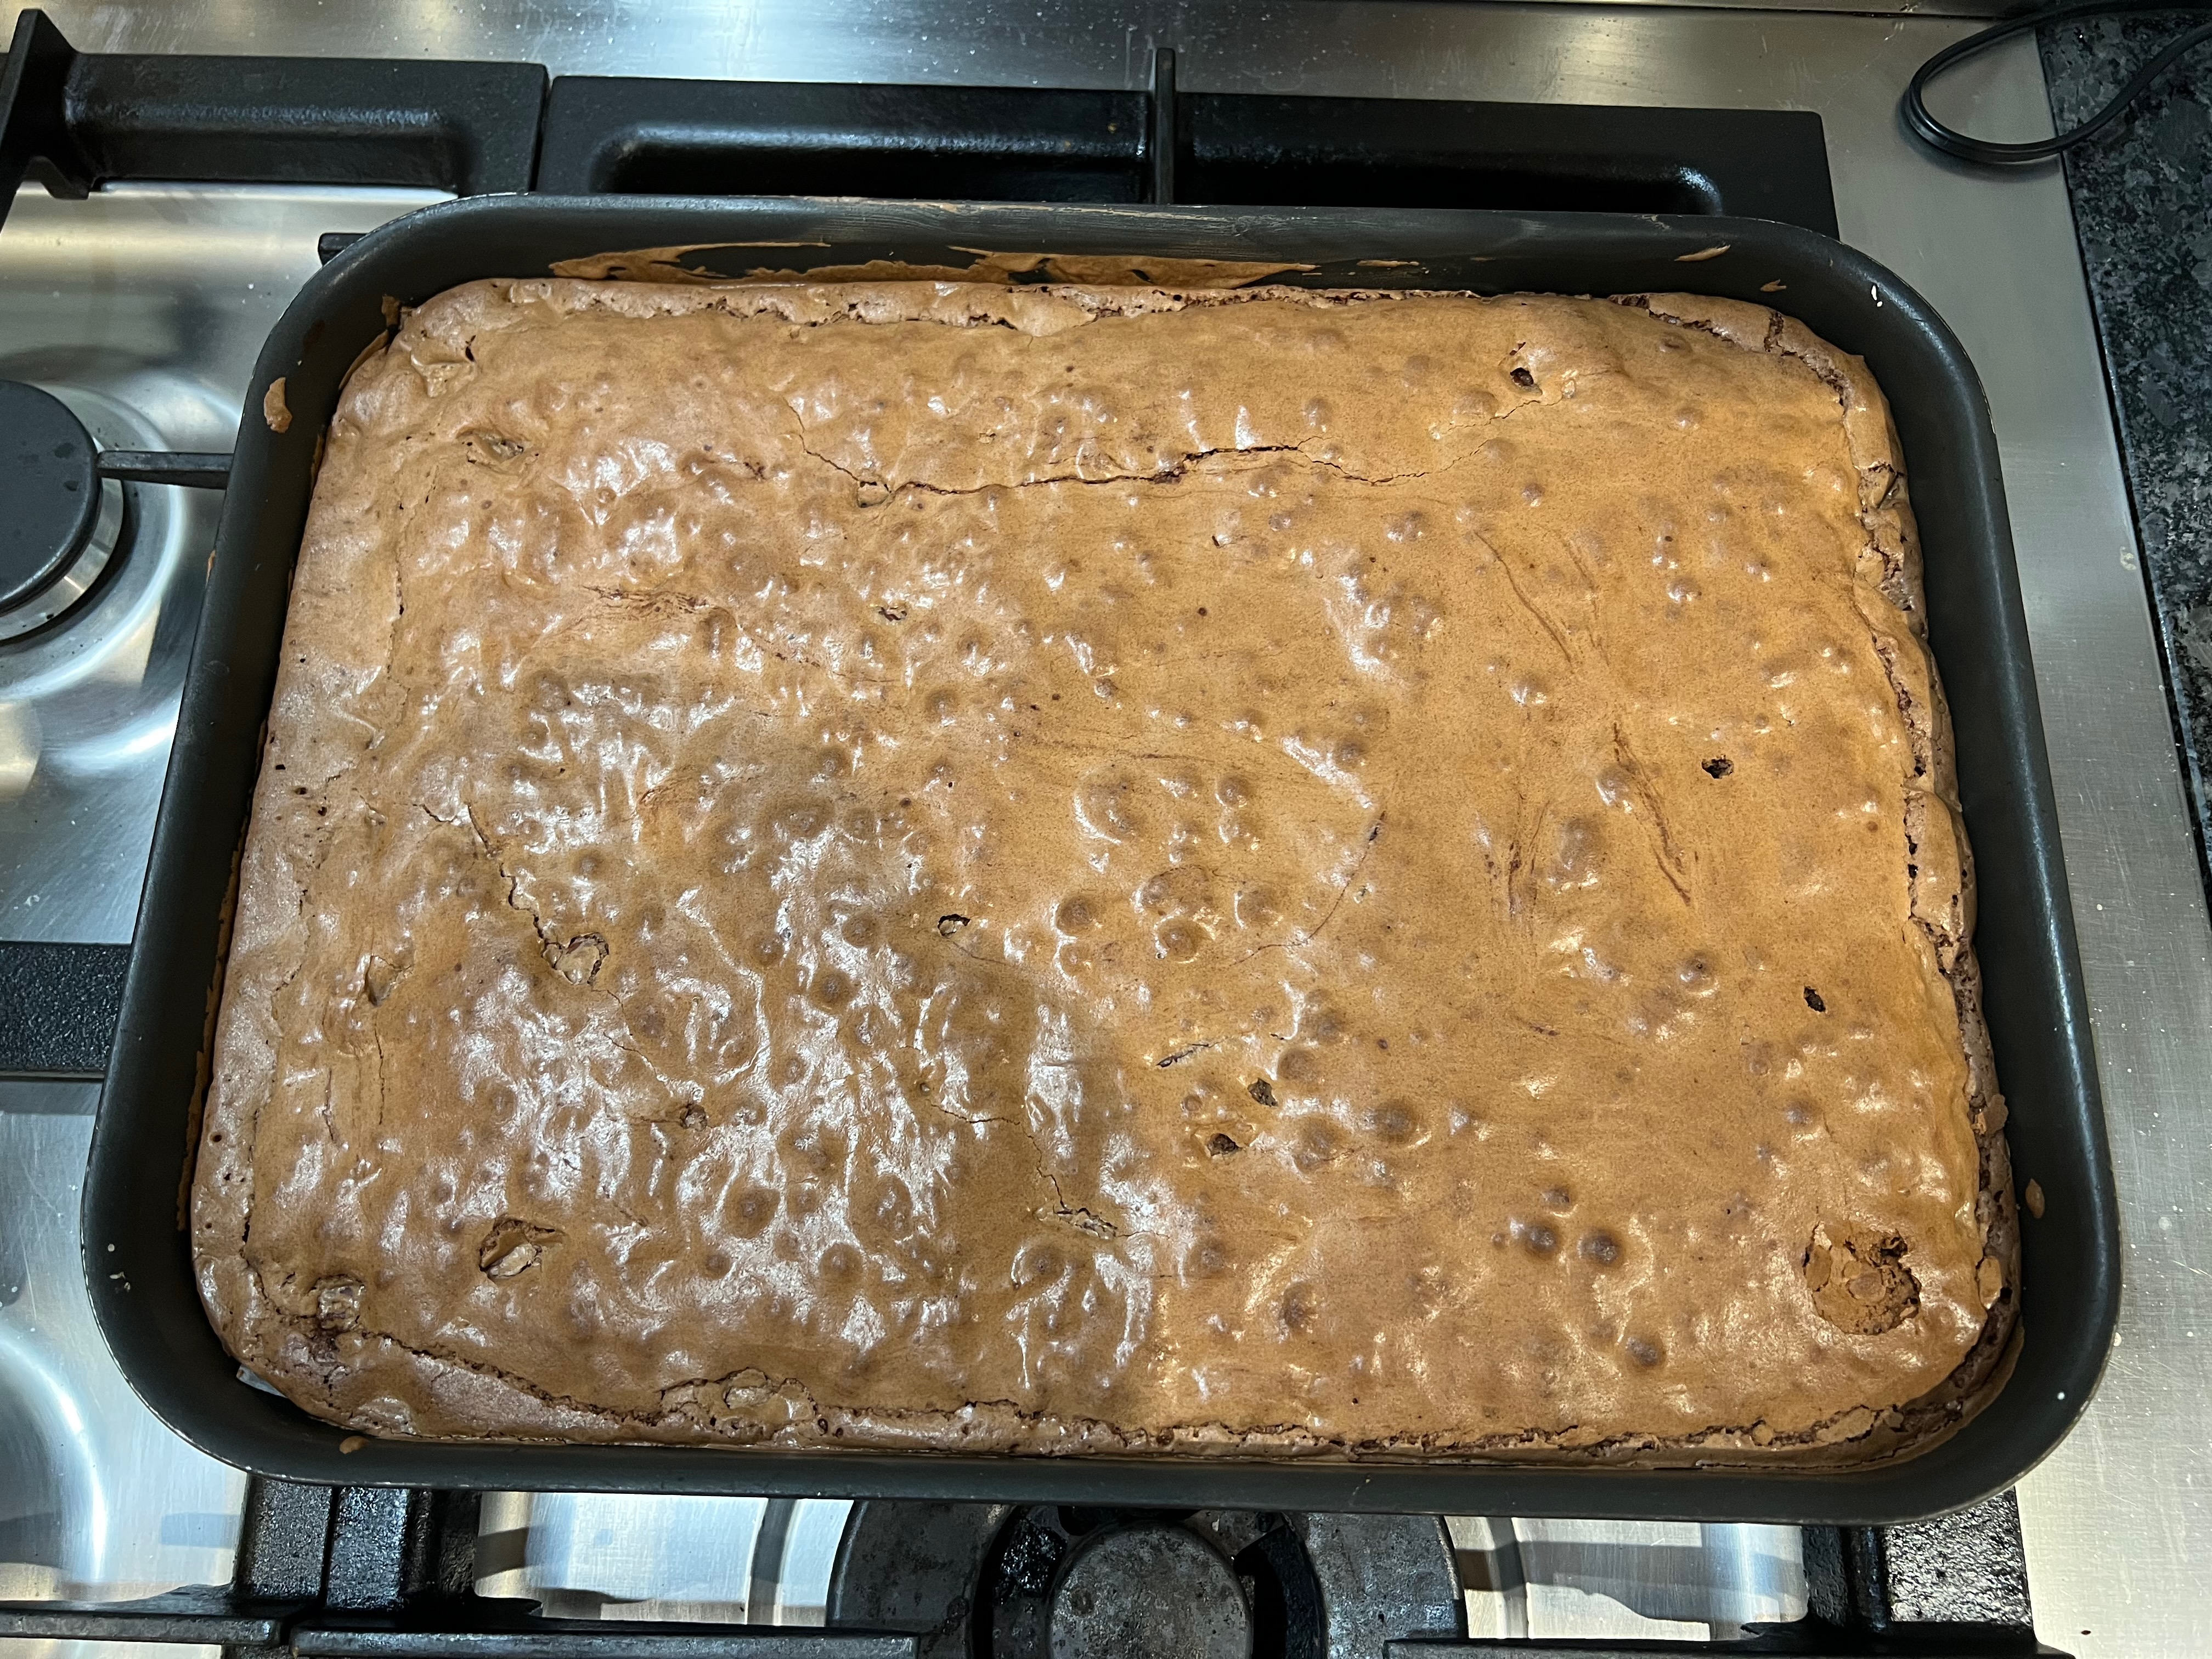
On the grand scale of things, brownies are not a difficult bake: there’s just one tricky bit, namely knowing when they’re done. Again, this is a function of how gooey you want them: I got panicky and left mine in too long, so they were considerably too cake-like for my taste. So don’t use the “skewer has to come out dry” test if you want them remotely sticky.
With my usual aversion to measuring things in cups, I’ve turned everything to metric.
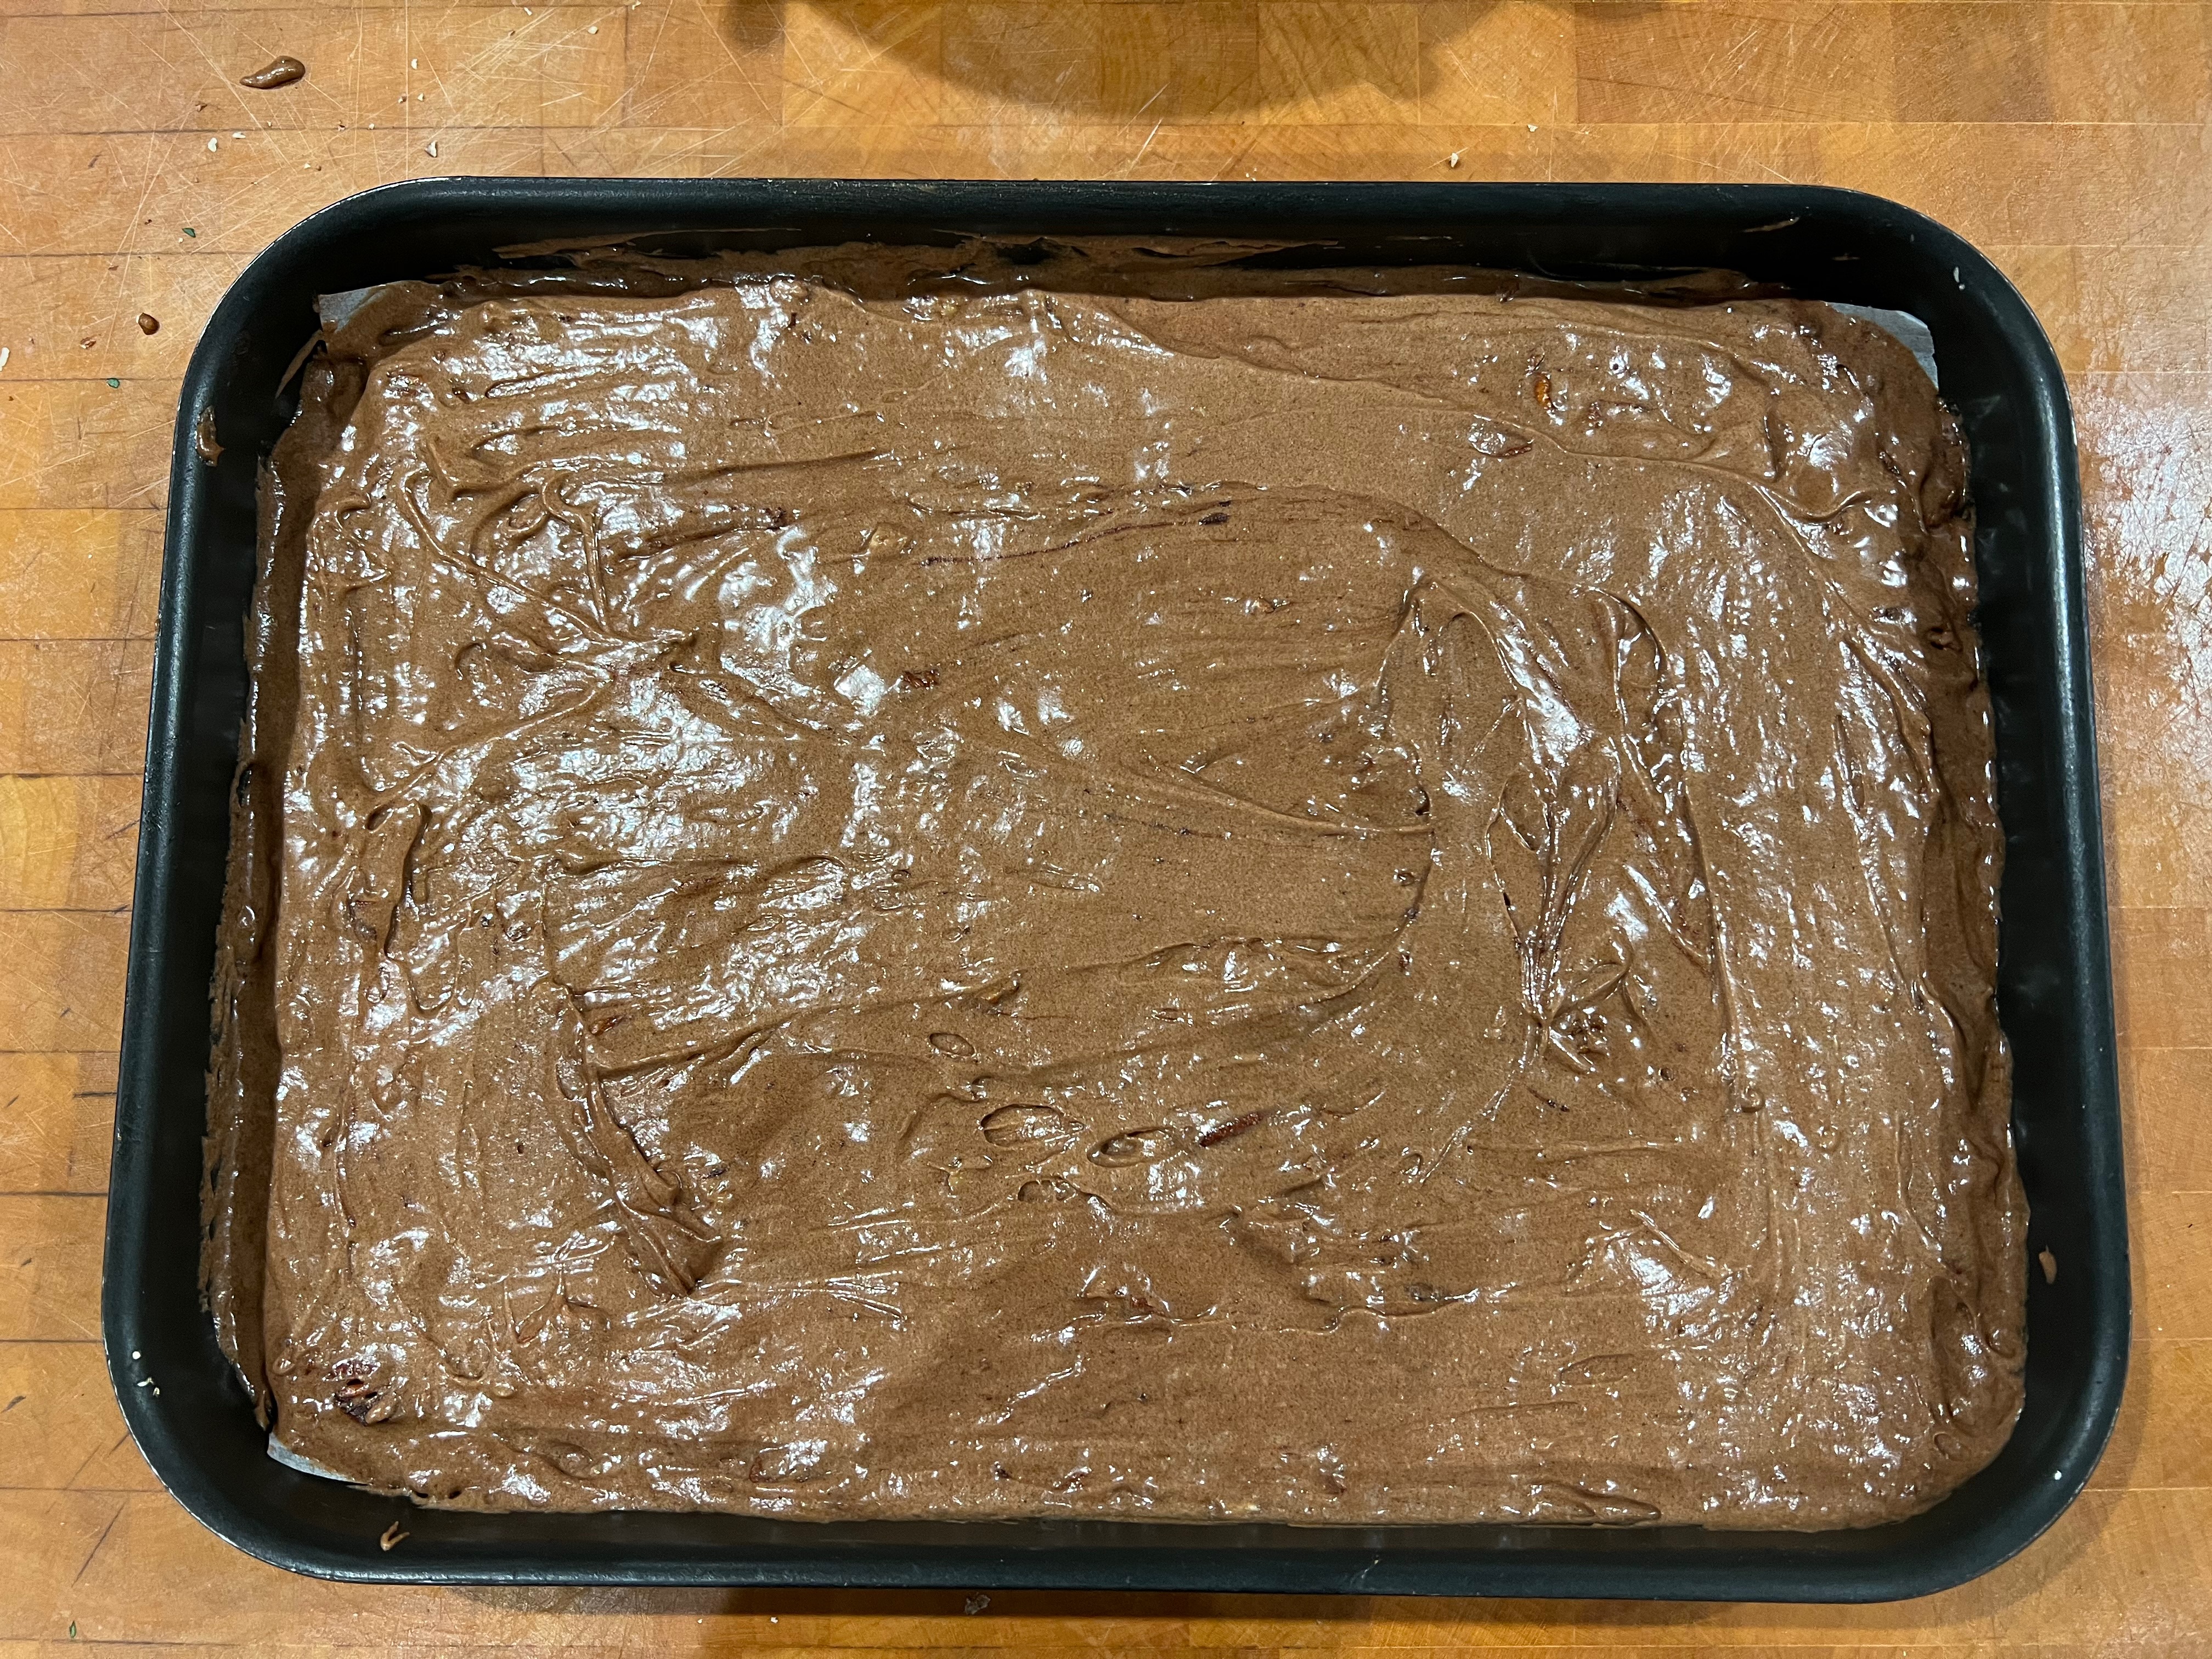
Brownies are, by tradition, square or rectangular. I used a pretty standard 30cm x 40cm baking tin which resulted in fairly thin brownies. If you like them thicker, either go for a smaller tin or multiply up the recipe.
100g chocolate (I used Menier 70%)
60g unsalted butter
4 eggs (mine were of mixed size and weighed about 200g in total)
¼ tsp salt
350g sugar
Vanilla essence to taste
100g pecans
120g flour
Preheat oven to 175℃ fan
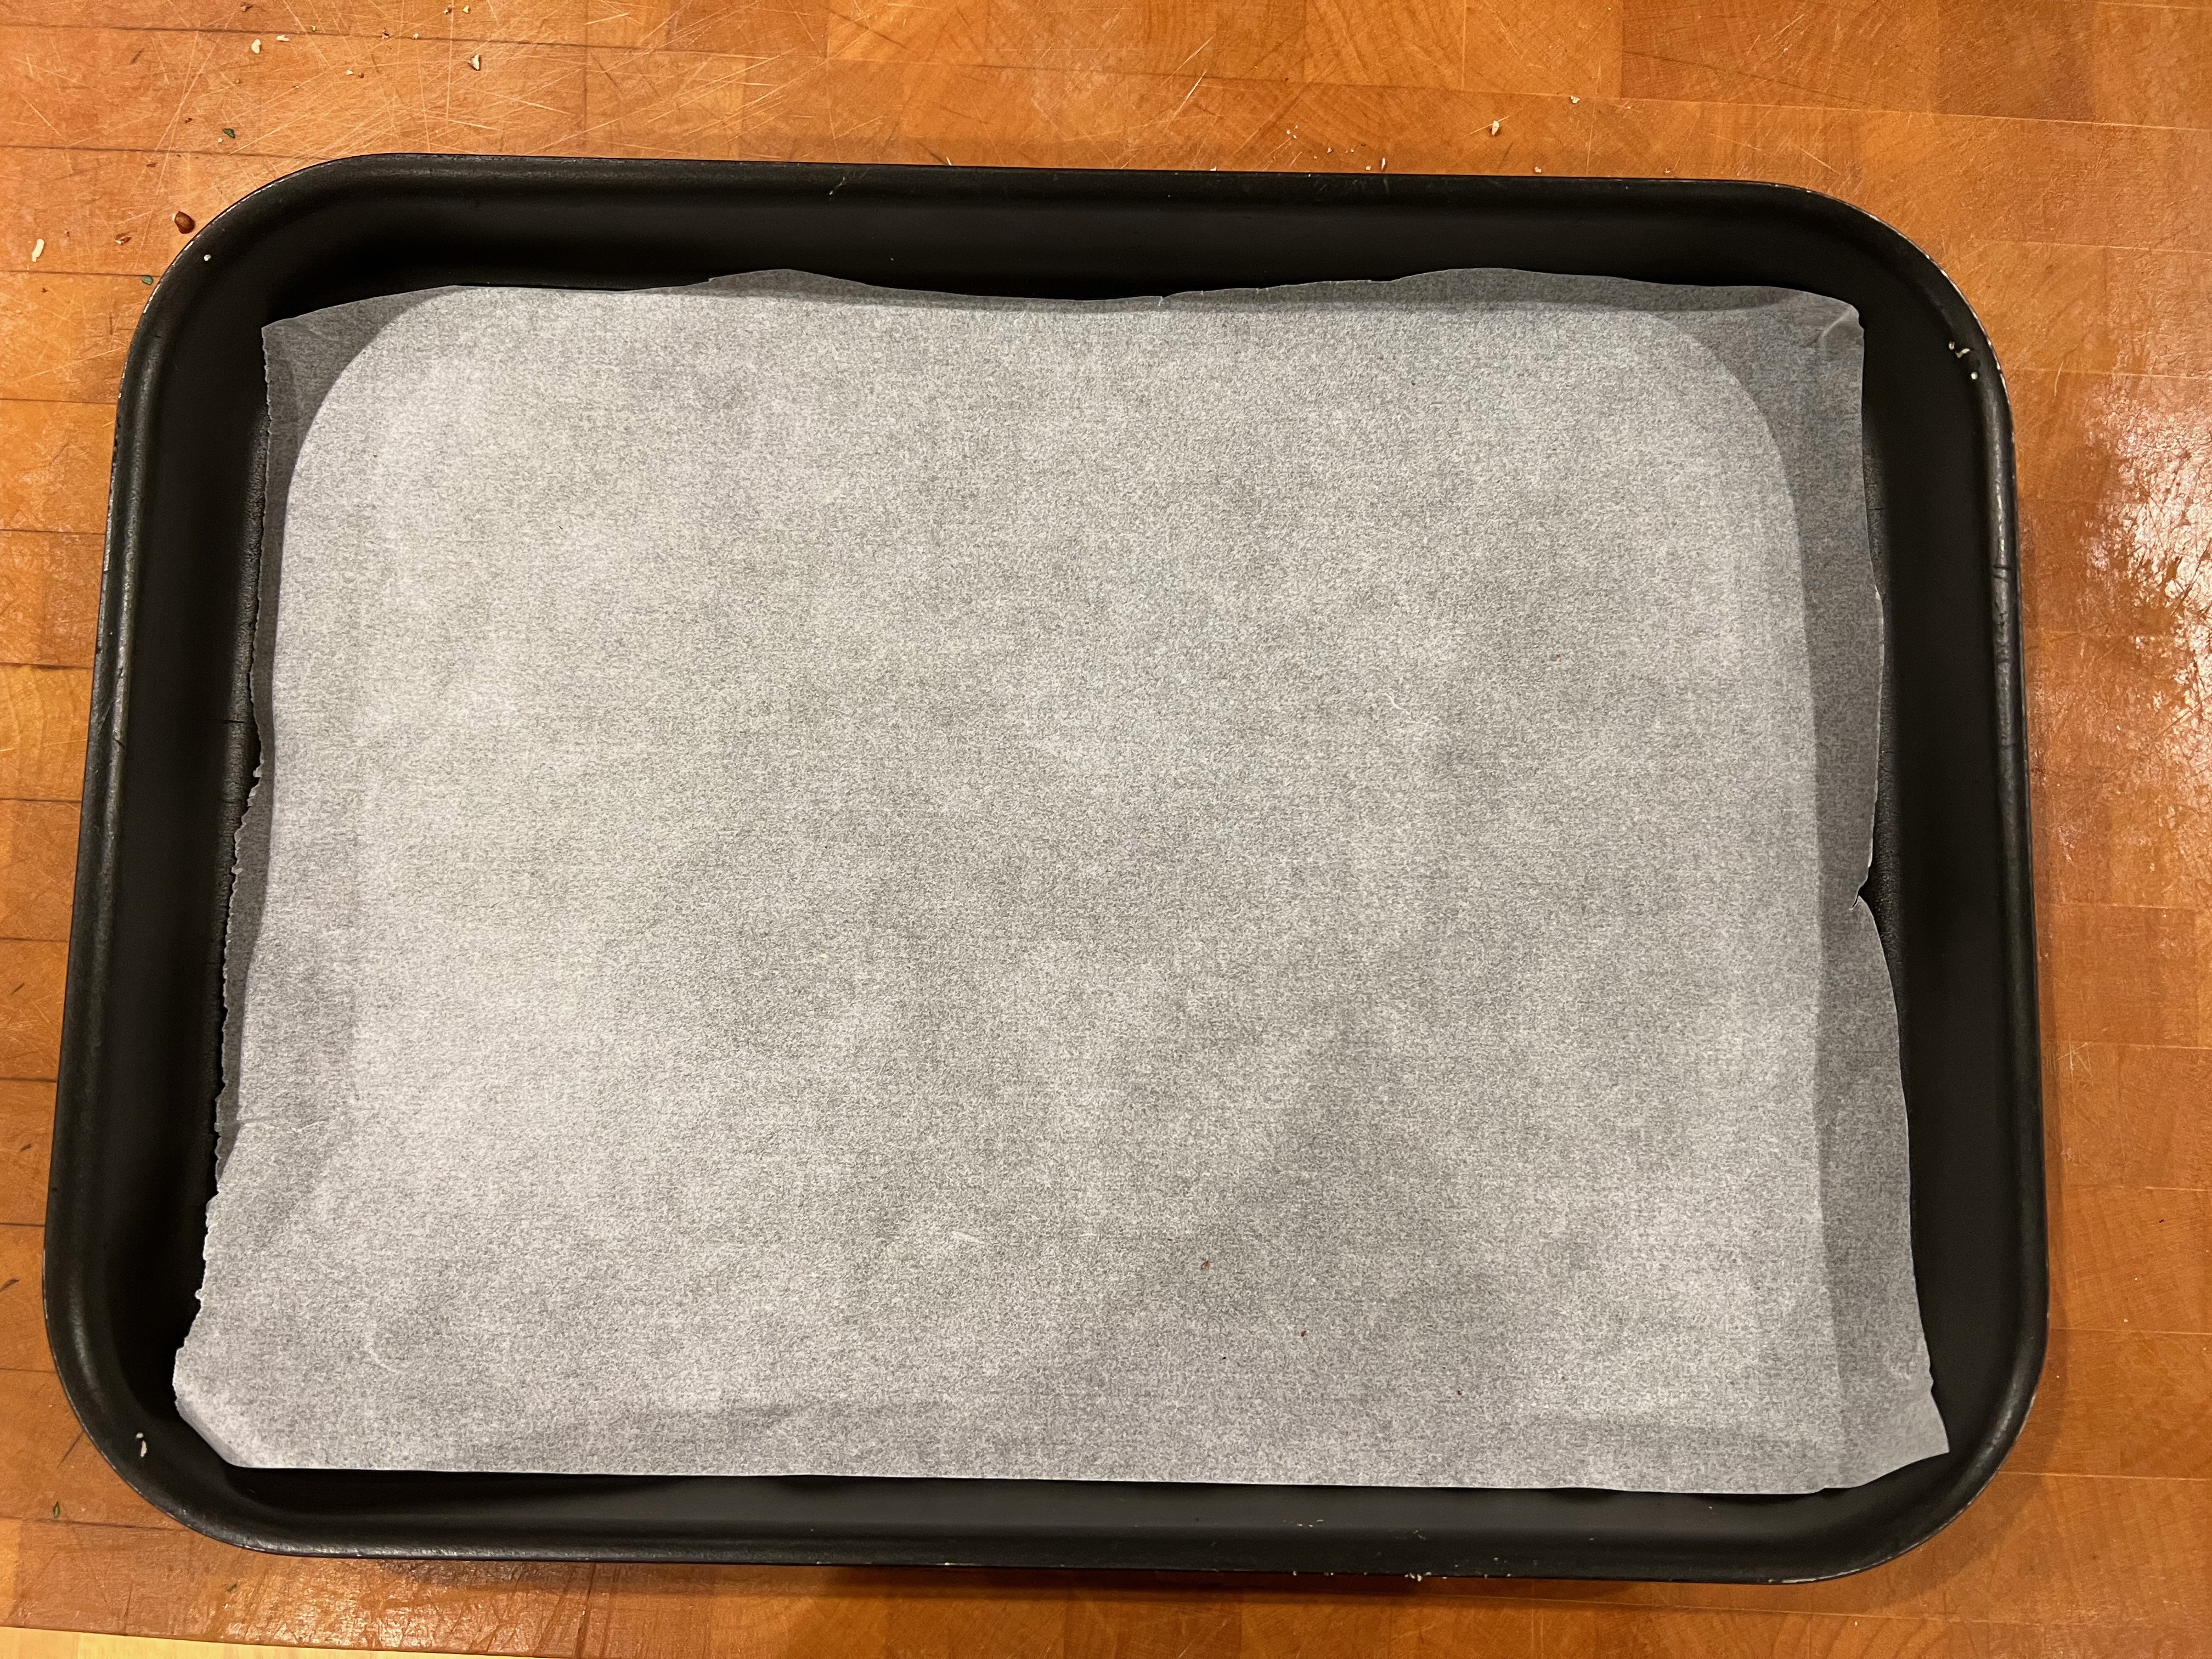
Prepare your baking tin by lining its base with baking paper
Melt the butter and chocolate in a double boiler, blend well and leave to cool.
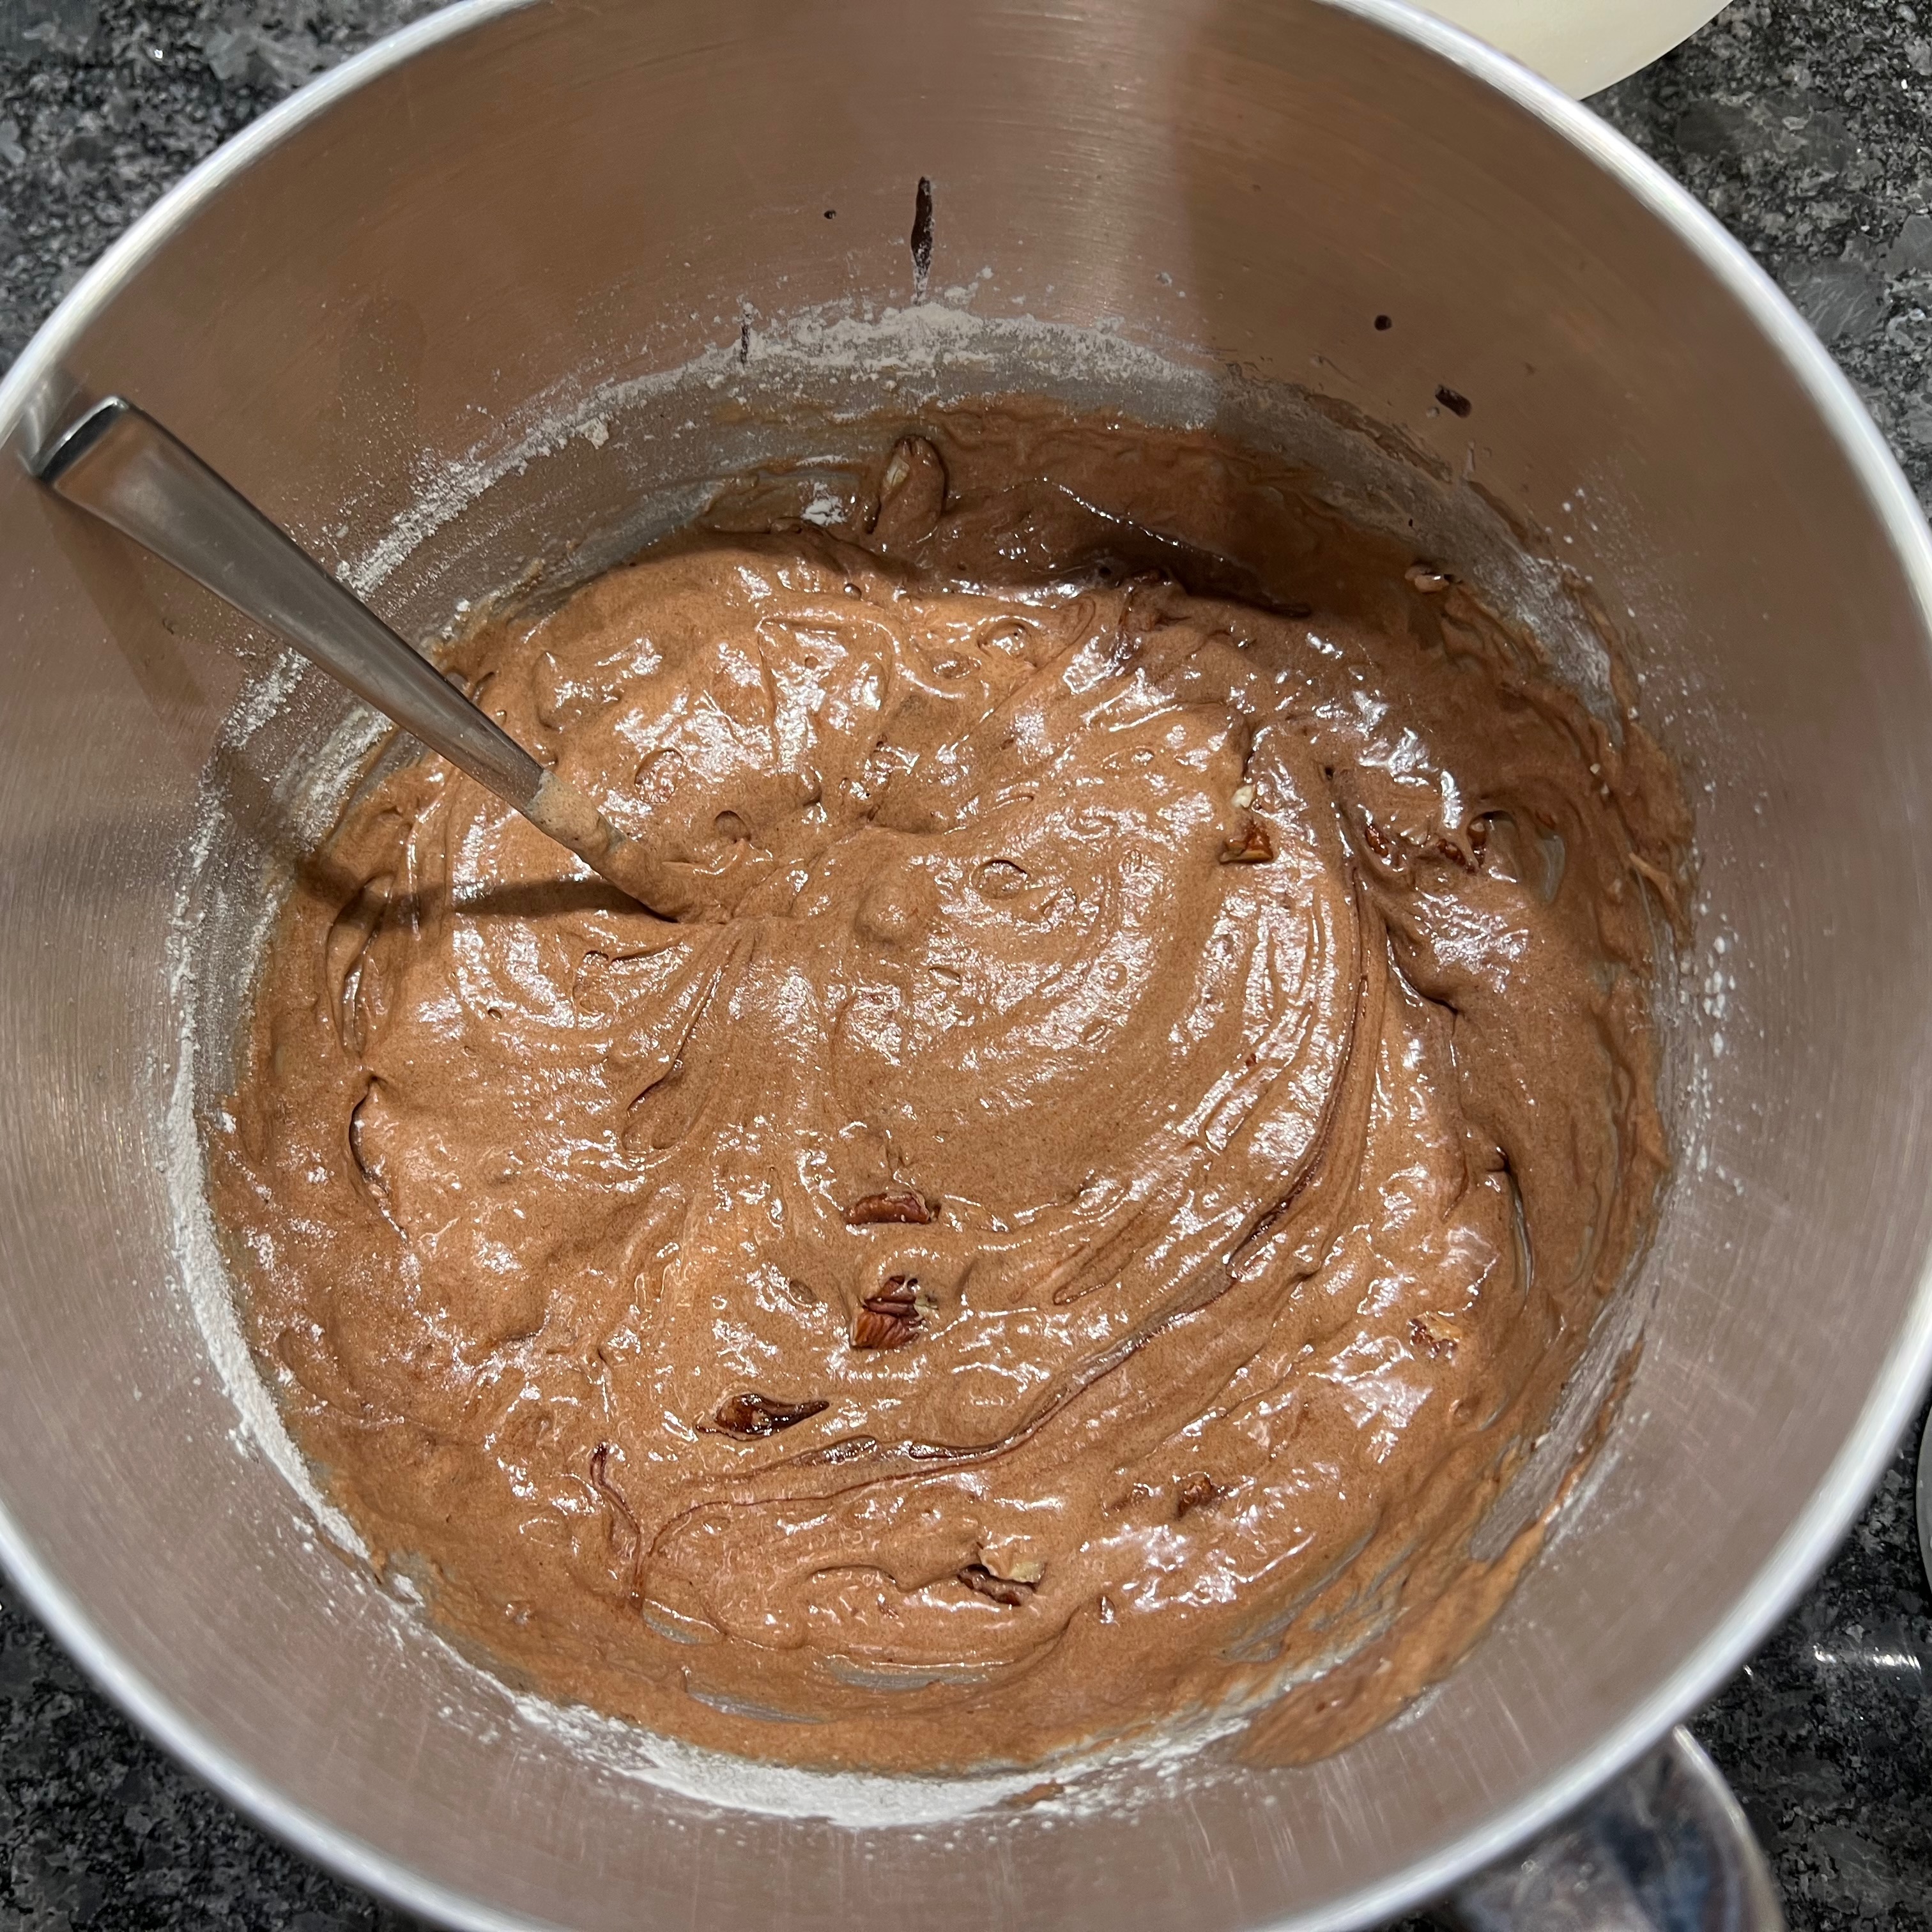
Add salt to the eggs and beat at high speed until frothy and mousse-like.
Still beating, add the sugar gradually and then the vanilla essence.
Gently fold in the chocolate-butter mixture.
Sirt in the flour and stir.
Chop the pecans coarsely, add them and stir.
Pour the mixture into your baking tin, smooth it out so that it’s level.
Bake for around 20 minutes – less for more fudgey, more for more cakey.
Cut into squares or rectangles. For the full Americana (and particularly if, like mine, you’ve overbaked the brownies so they’re too dry, they go well with blueberries and whipped cream.
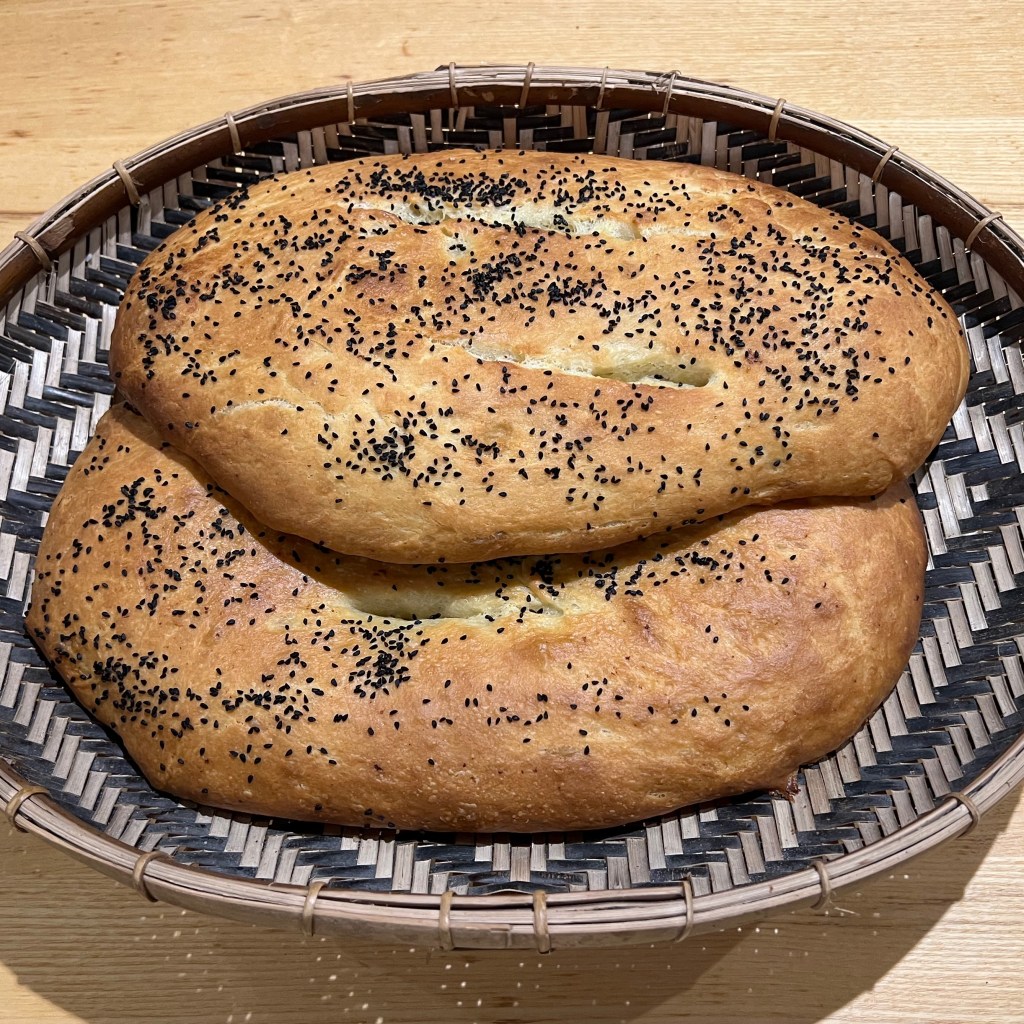
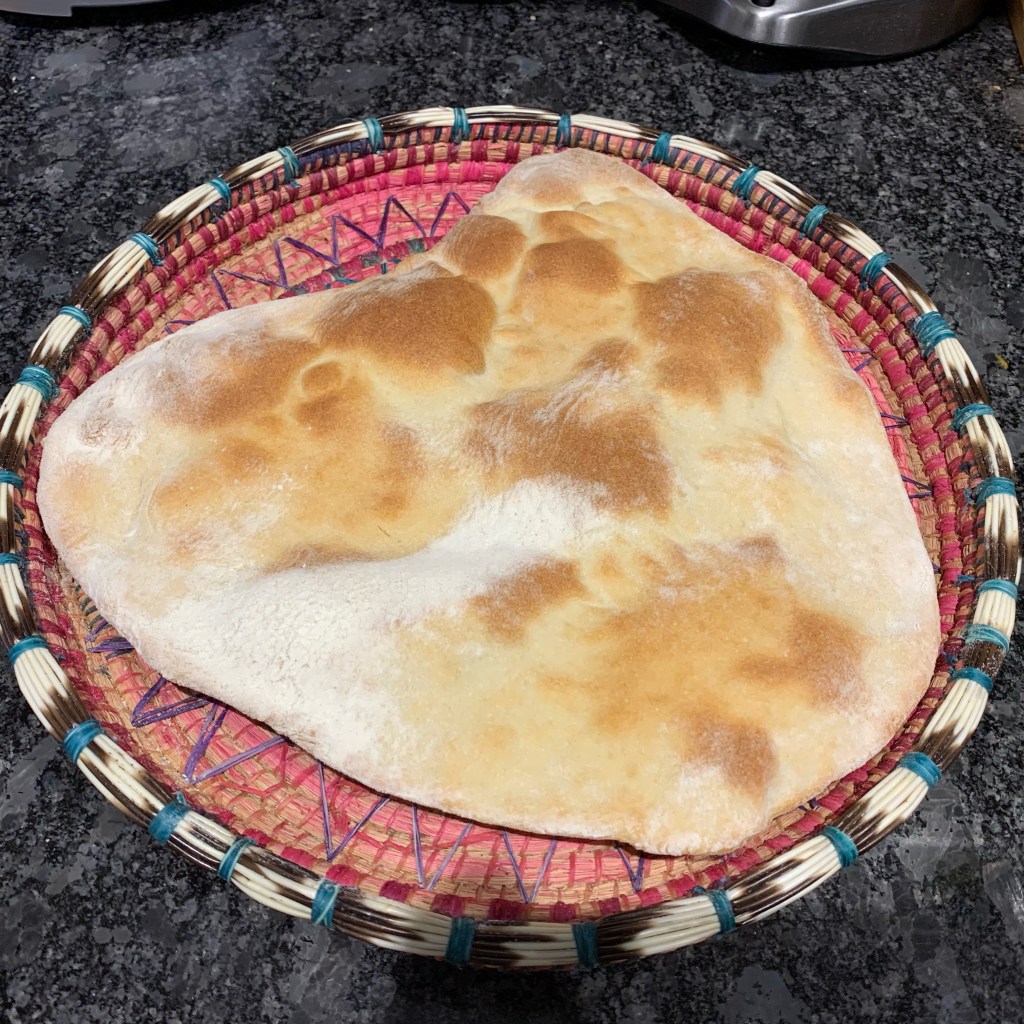
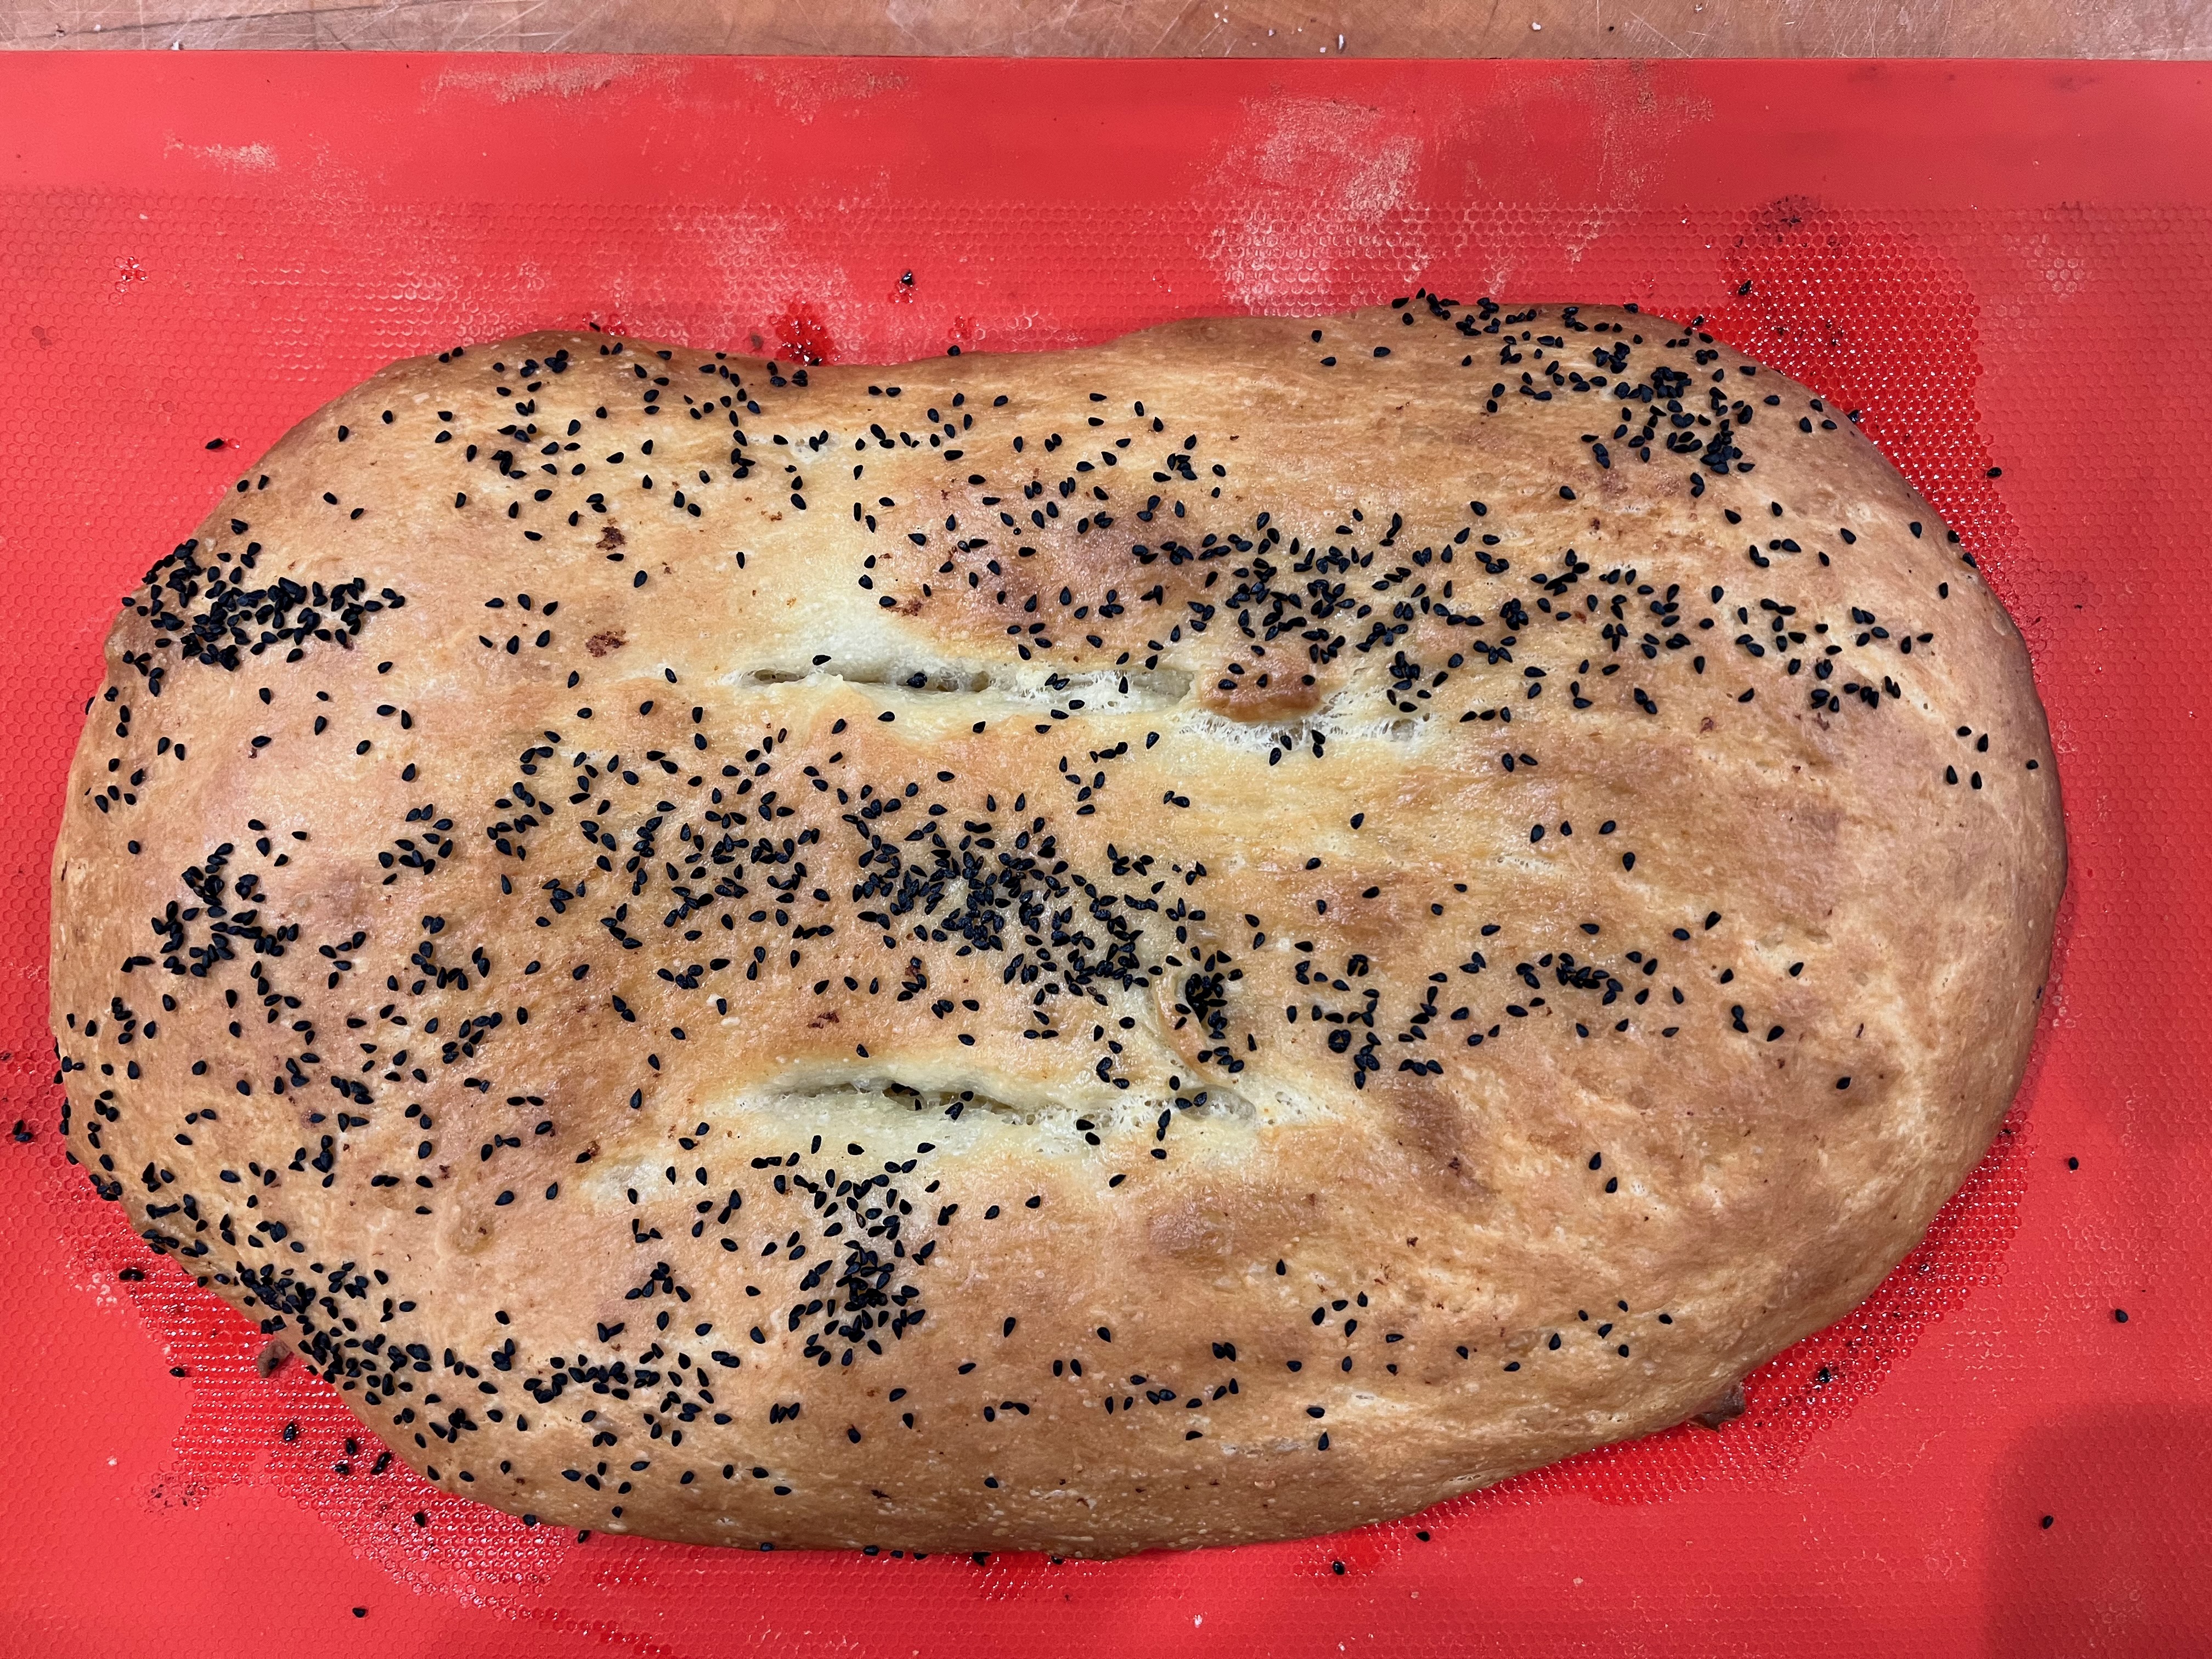
There have been many types of flatbread in this series. Persian flatbread – nân barbari – is my favourite, by a long way: its pillowy texture and crisp top are a winner. The recipe I’ve used is adapted from Sabrina Ghayour’s warmly recommended Persiana; it’s slightly westernised in that I don’t think they use melted butter for the top in Iran and I’ve westernised it further in that suspect that a self-respecting Iranian baker wouldn’t use a stand mixer either. But these are details: this is reliably the best flatbread I know and it works with just about any Middle Eastern dishes, not just Persian ones.
This recipe makes two flatbreads, which feeds around 10-12 people as part of a buffet including one other starch like rice or couscous. The multiple kneading and resting process described here results reliably in a fabulously stretchy dough; you could try taking shortcuts on it but it’s always worked so well for me that I try not to.
7g dried yeast
500 ml warm water (around 40℃)
700g strong white flour
15g salt (Sabrina is a diehard devotee of Maldon salt, I’m not all that convinced)
75ml olive oil
20g butter
A handful of nigella, sesame or caraway seeds
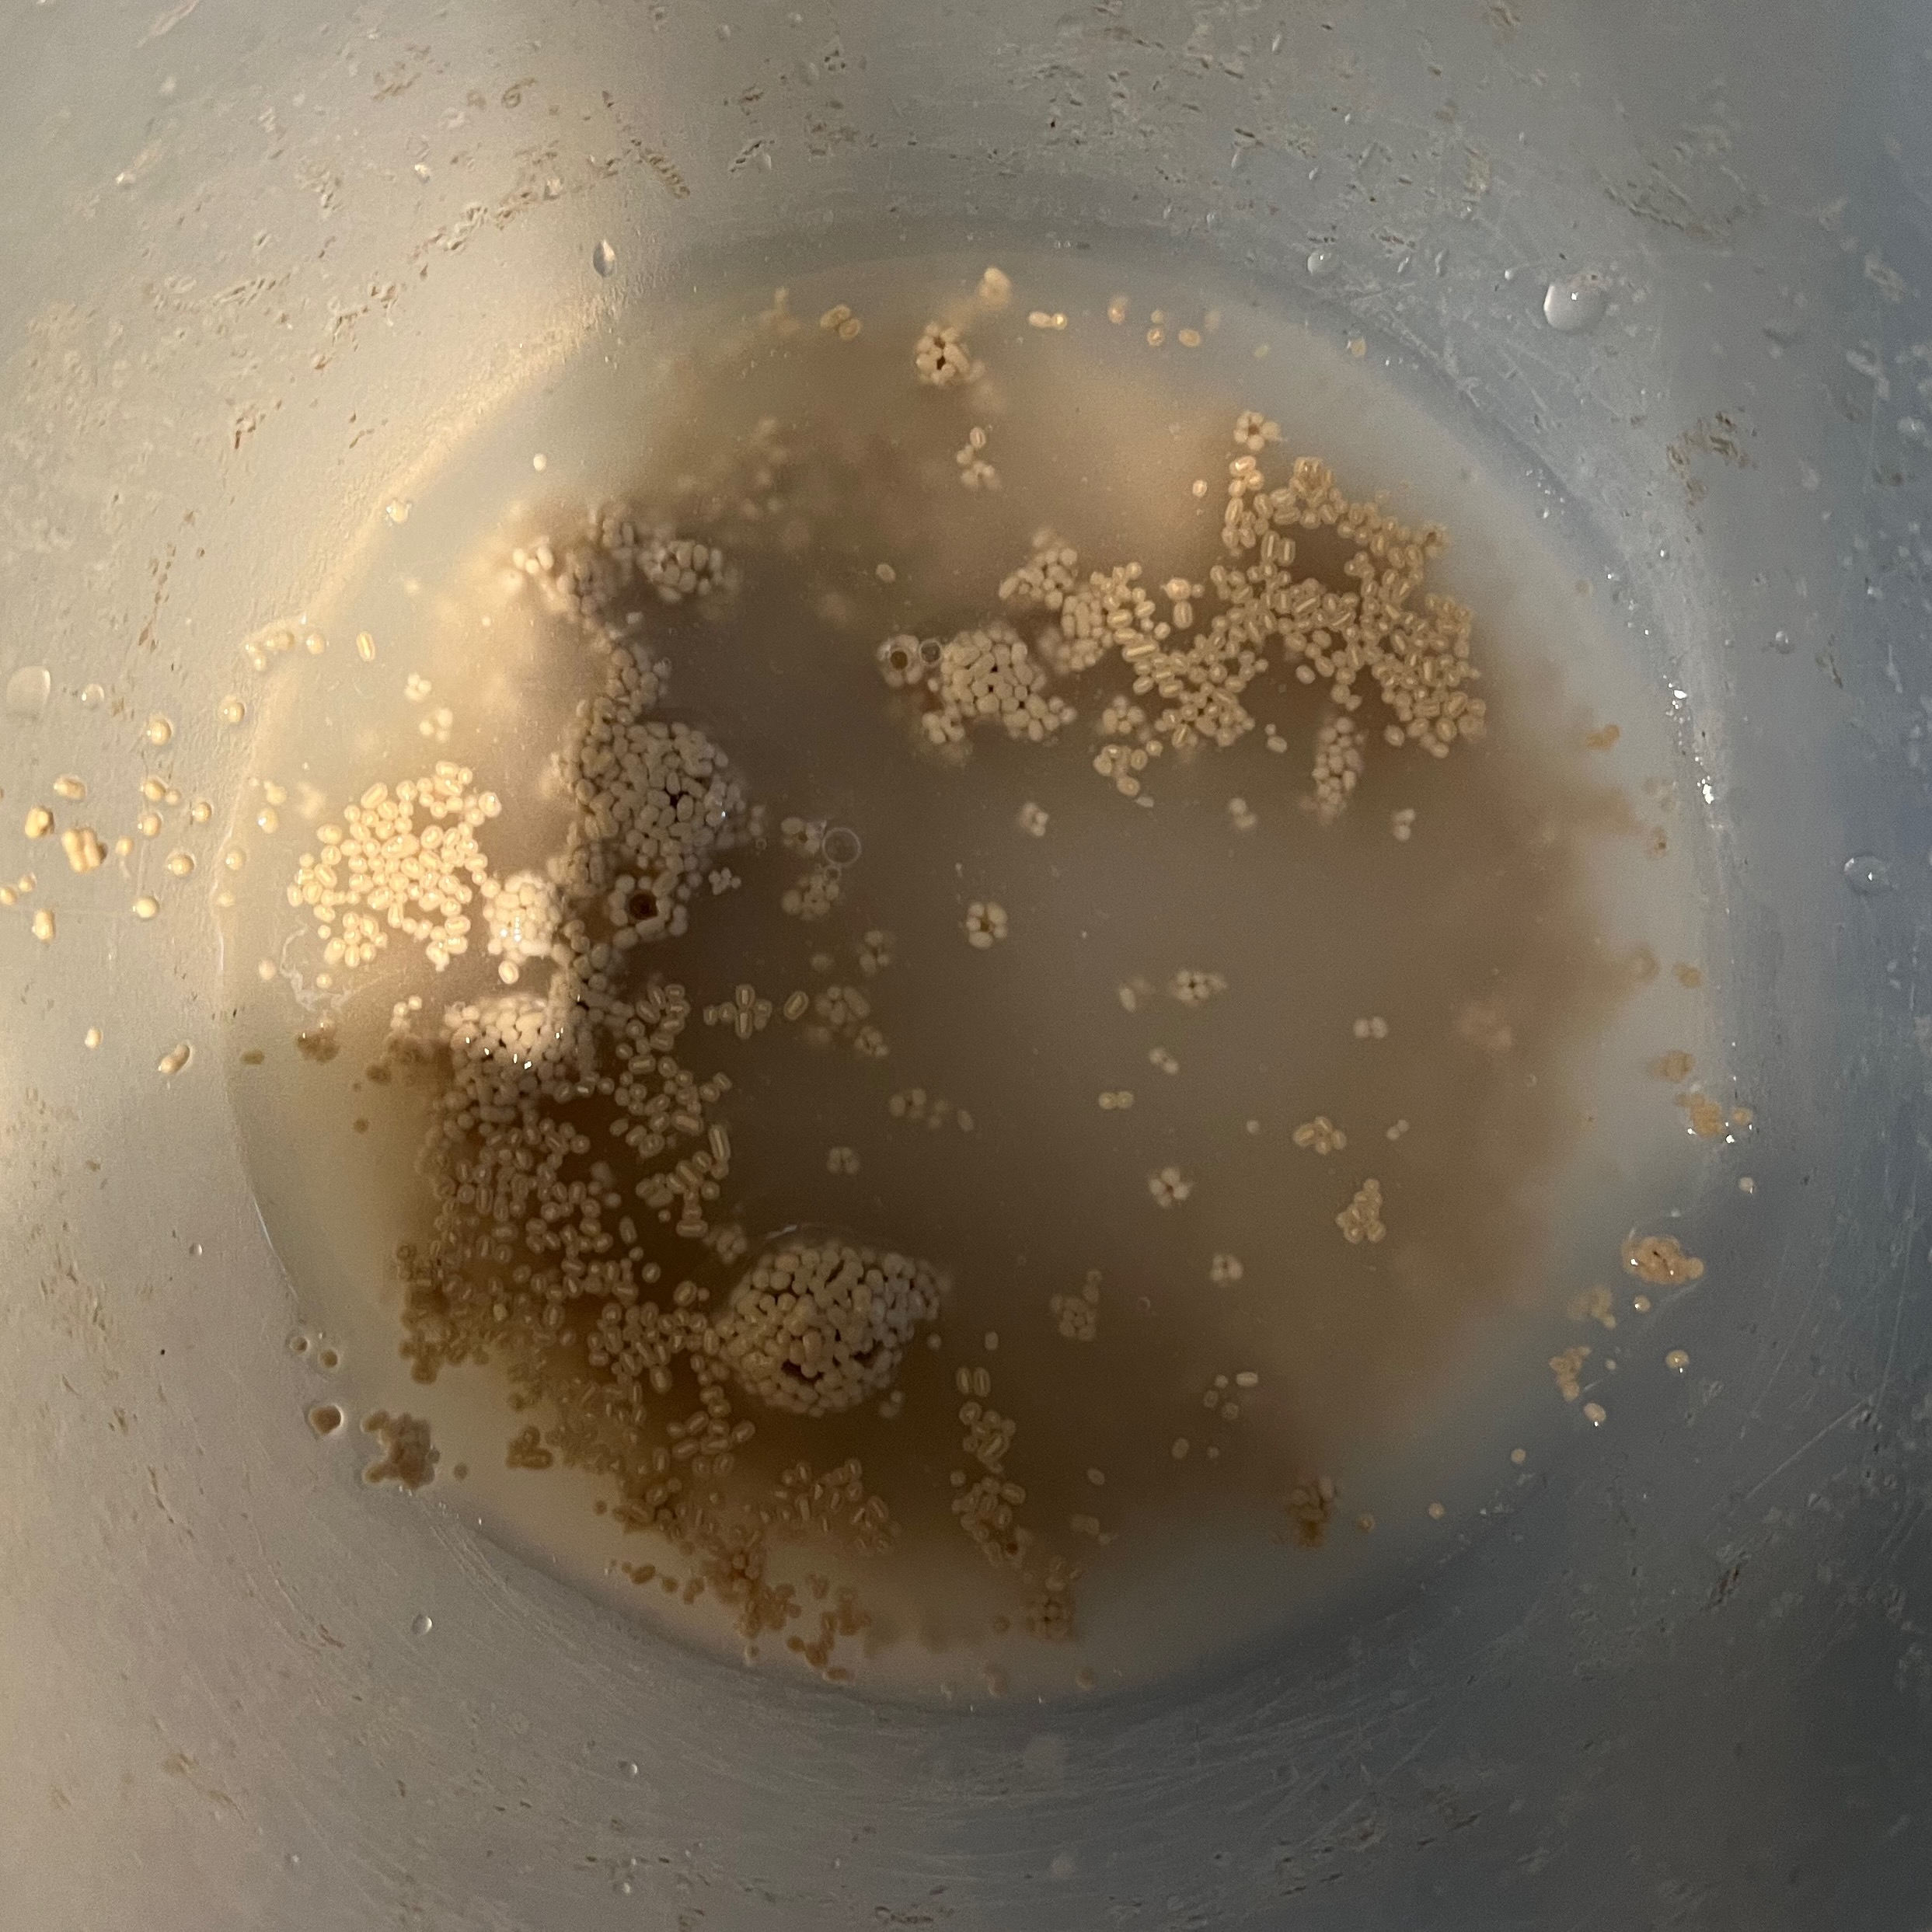
Mix yeast with 50ml of the water, leave to rest for 5 minutes or so until frothy
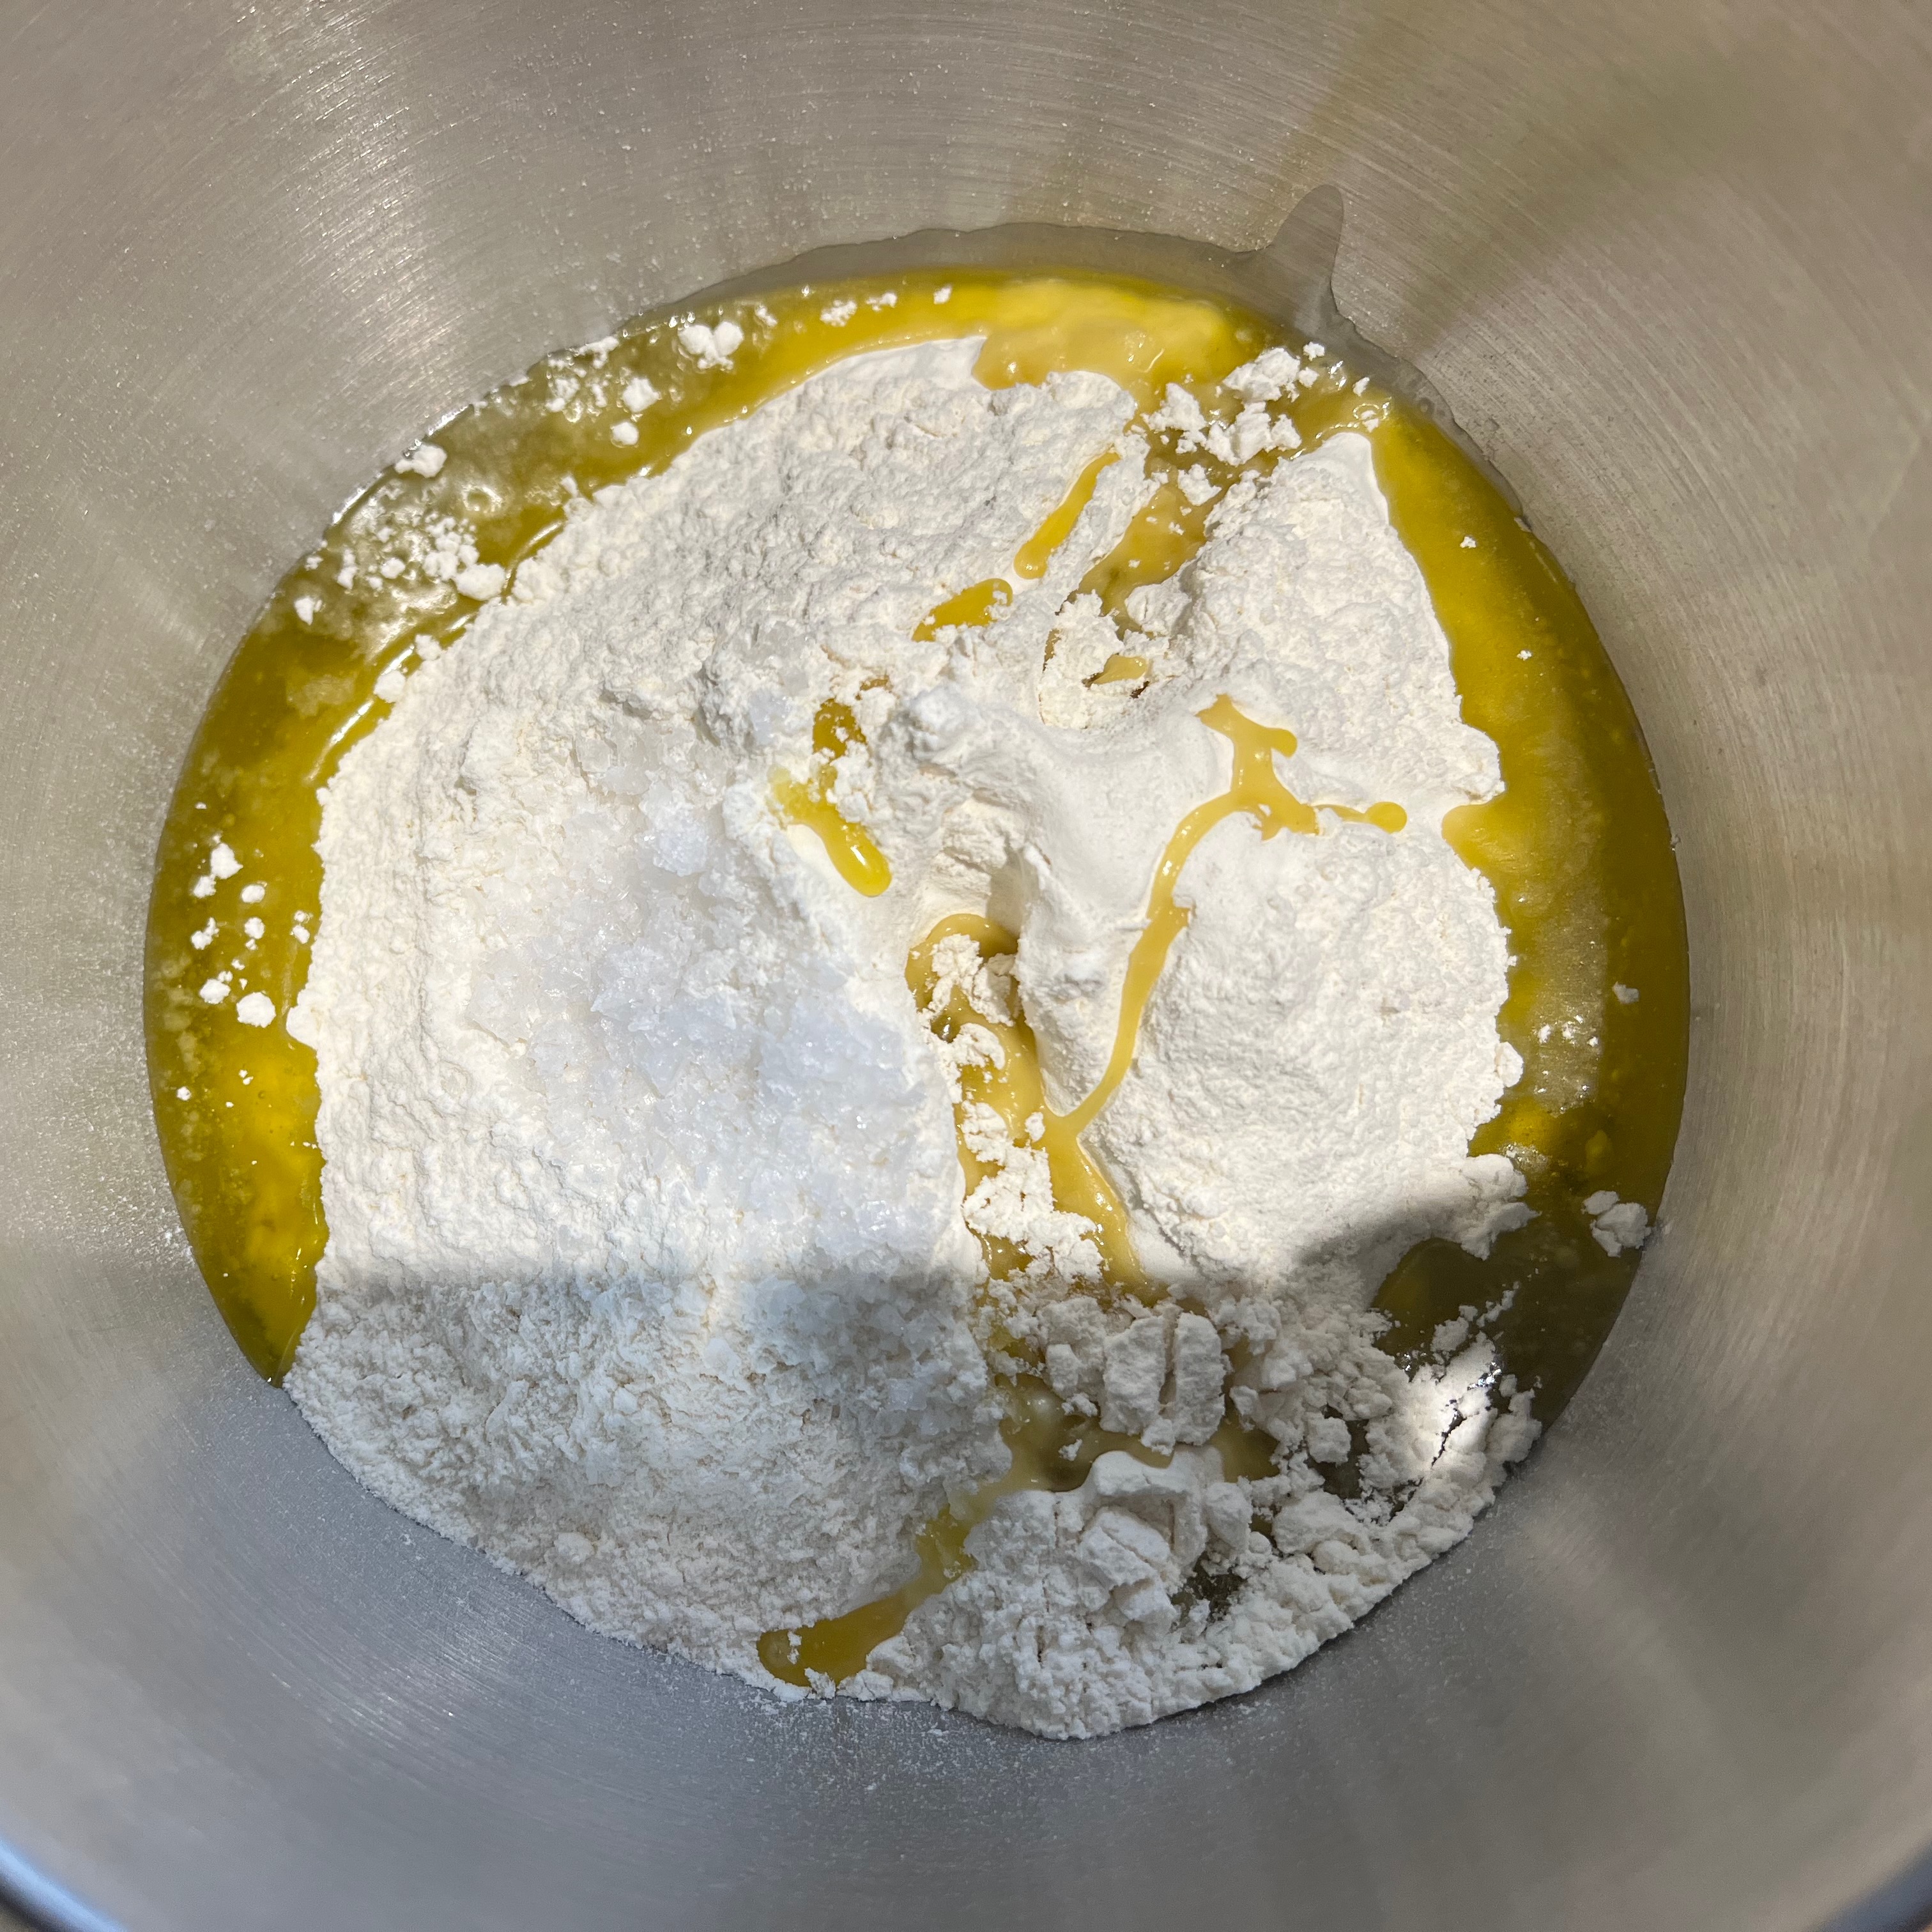
Put the flour and salt into the bowl of your stand mixer, along with 50ml of the olive oil.
Add the yeast mix and the remaining water to the bowl and combine thoroughly.
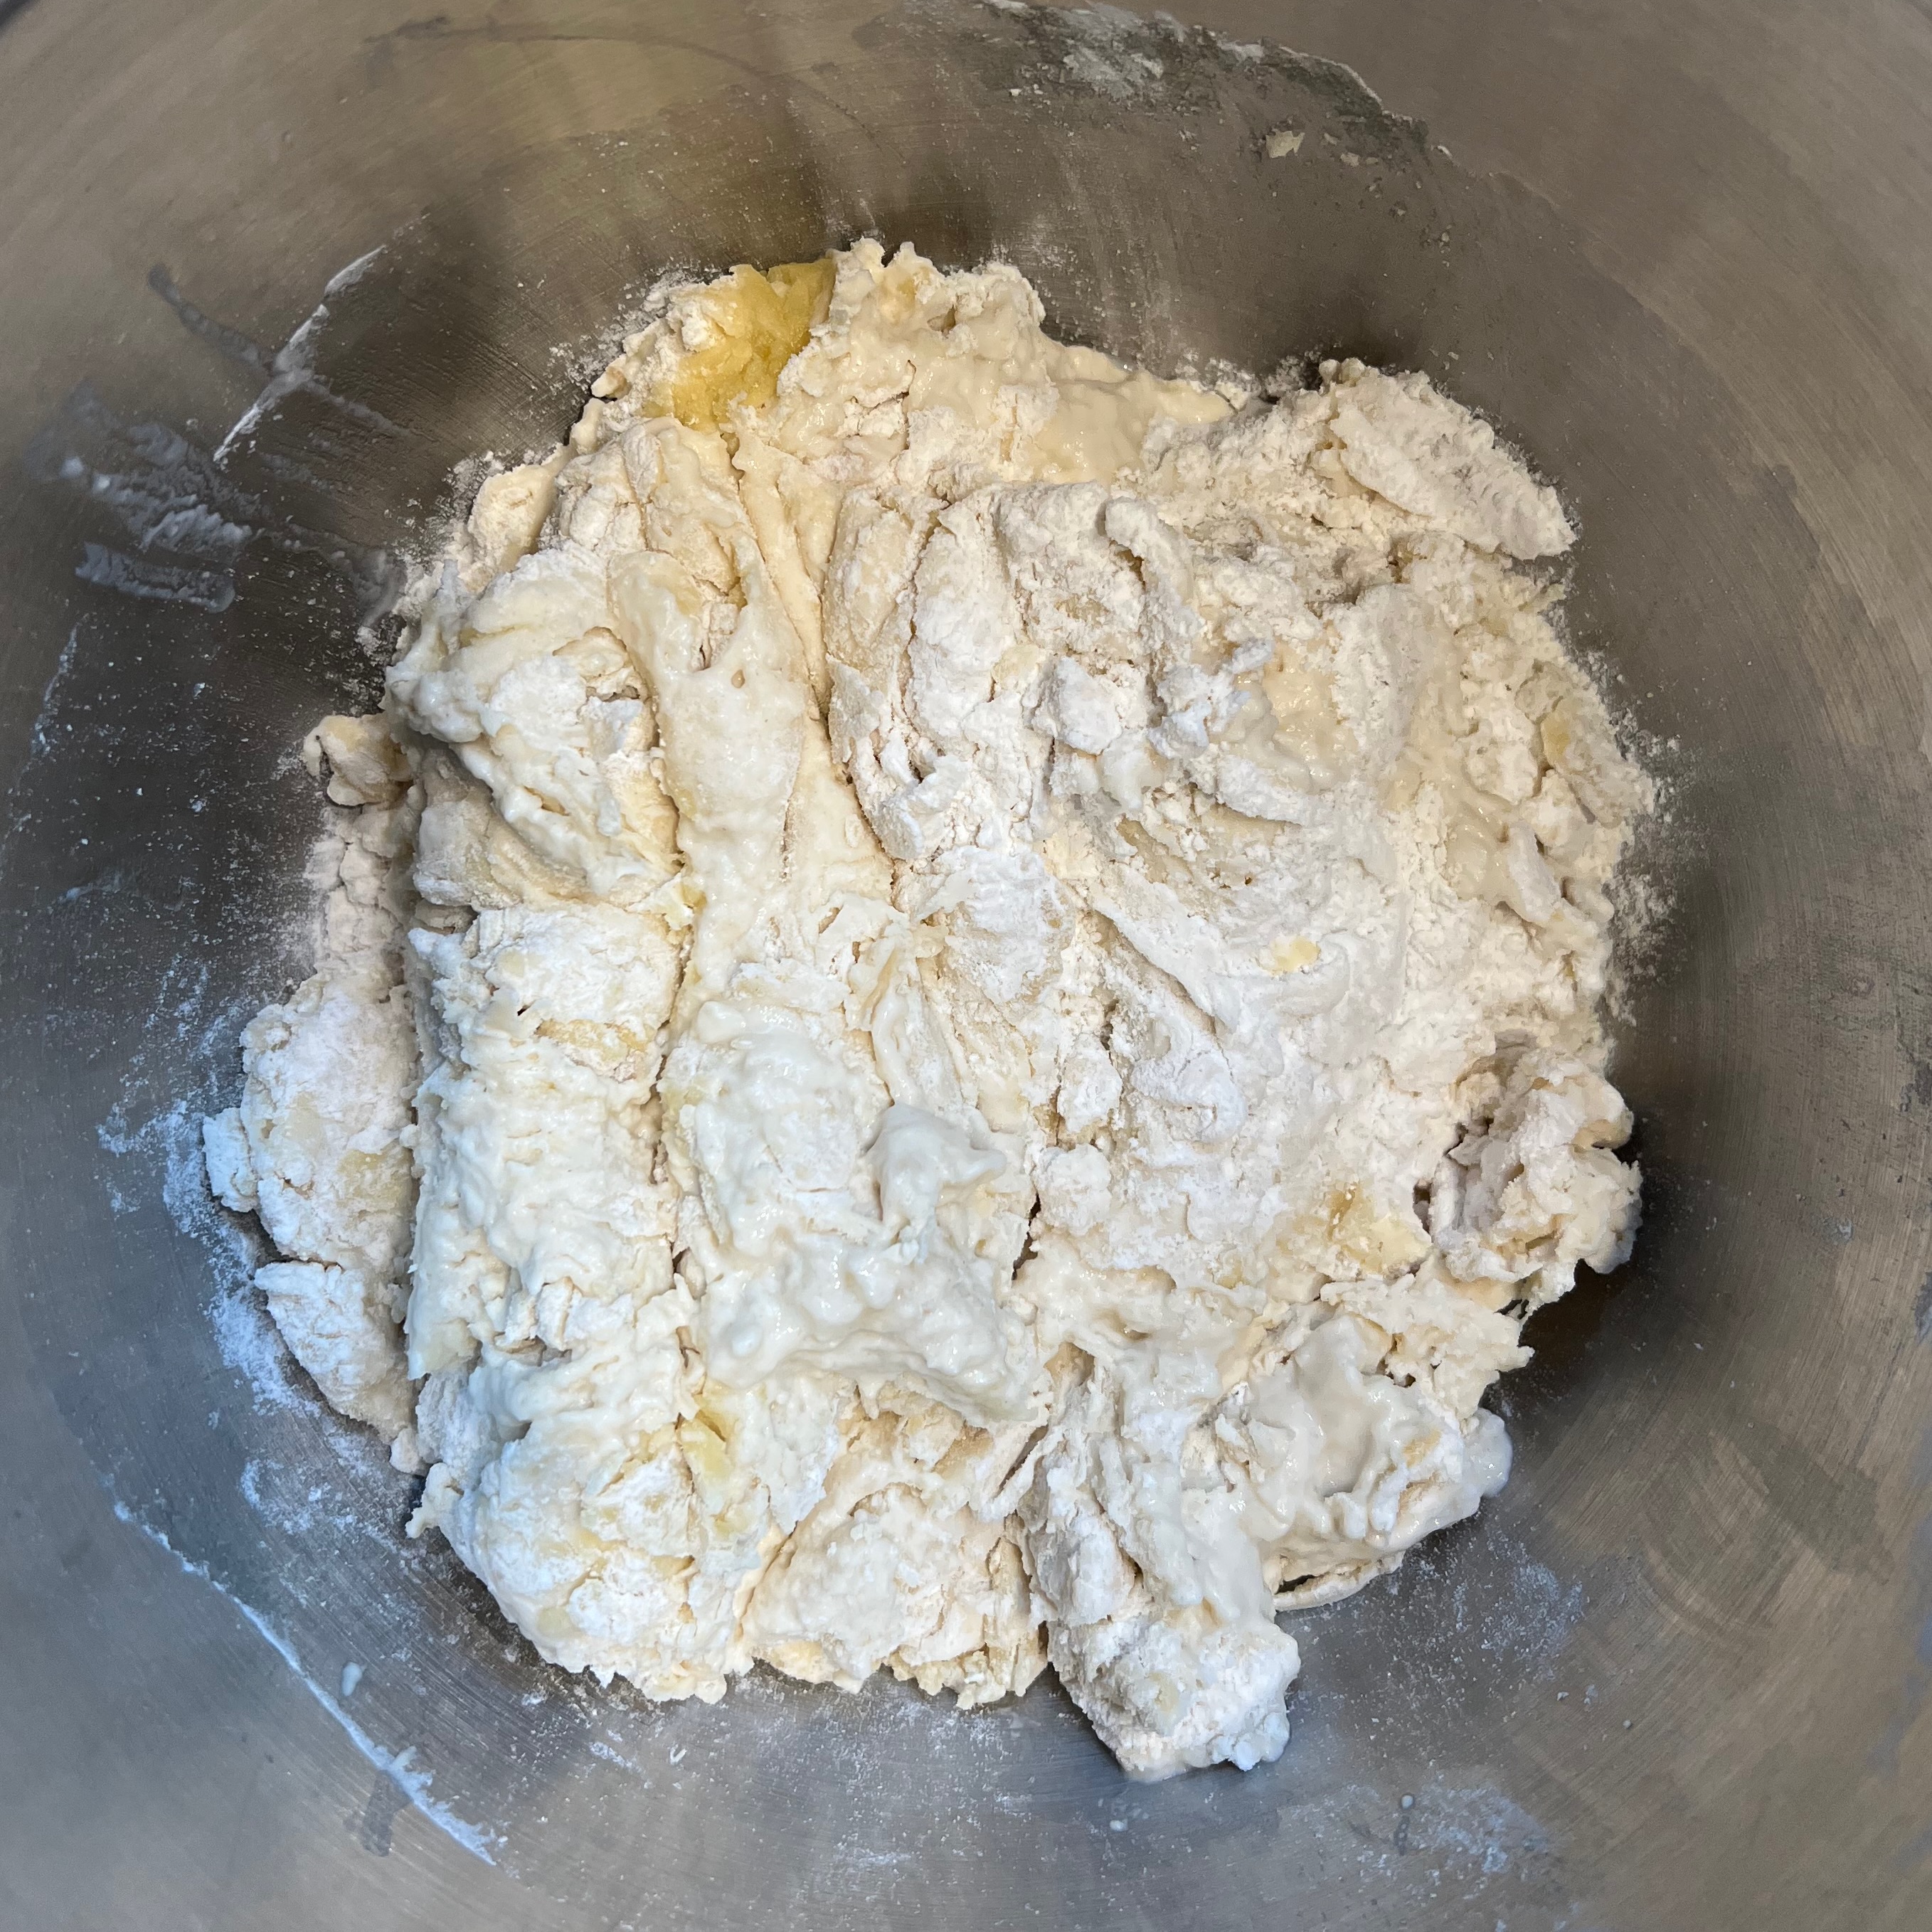
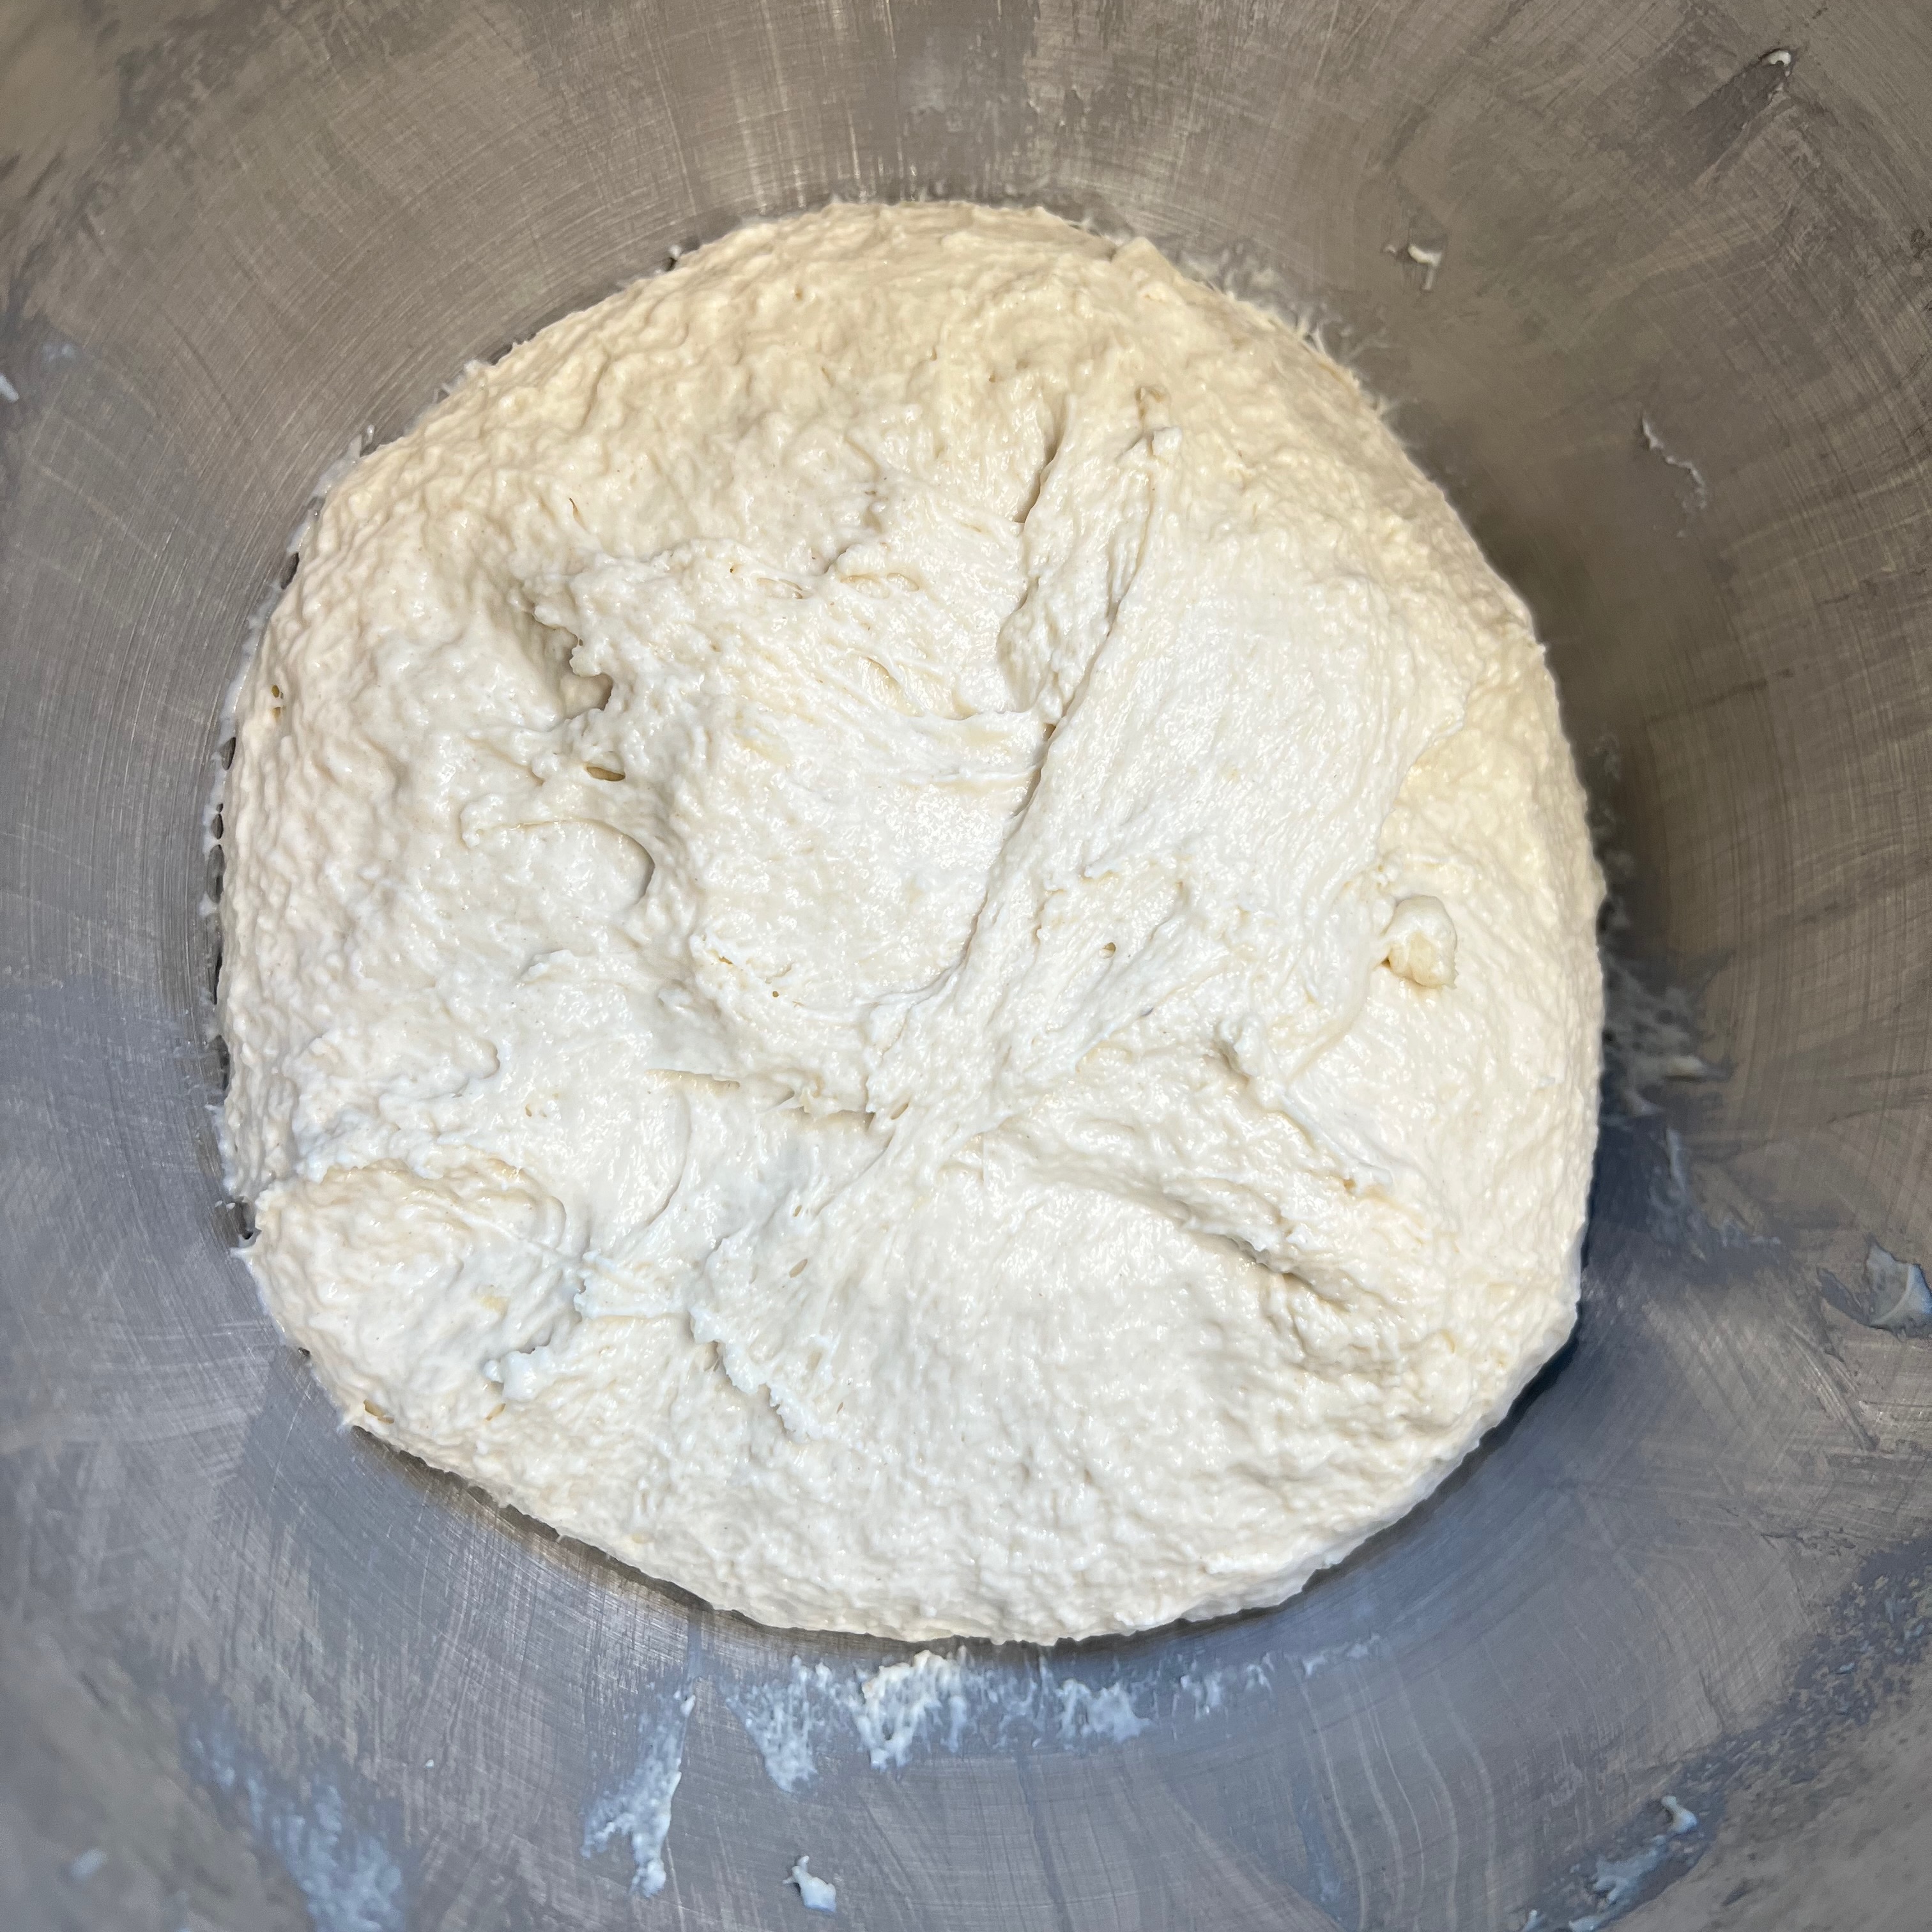
With the dough hook at low speed, knead for 7 minutes. With a scraper, take the dough of your hook, reshape into a single ball.
Leave to stand for 10 minutes, then knead for another 2 minutes, then recombine the dough. Repeat this three times in total; after the second time, add the rest of your oil.
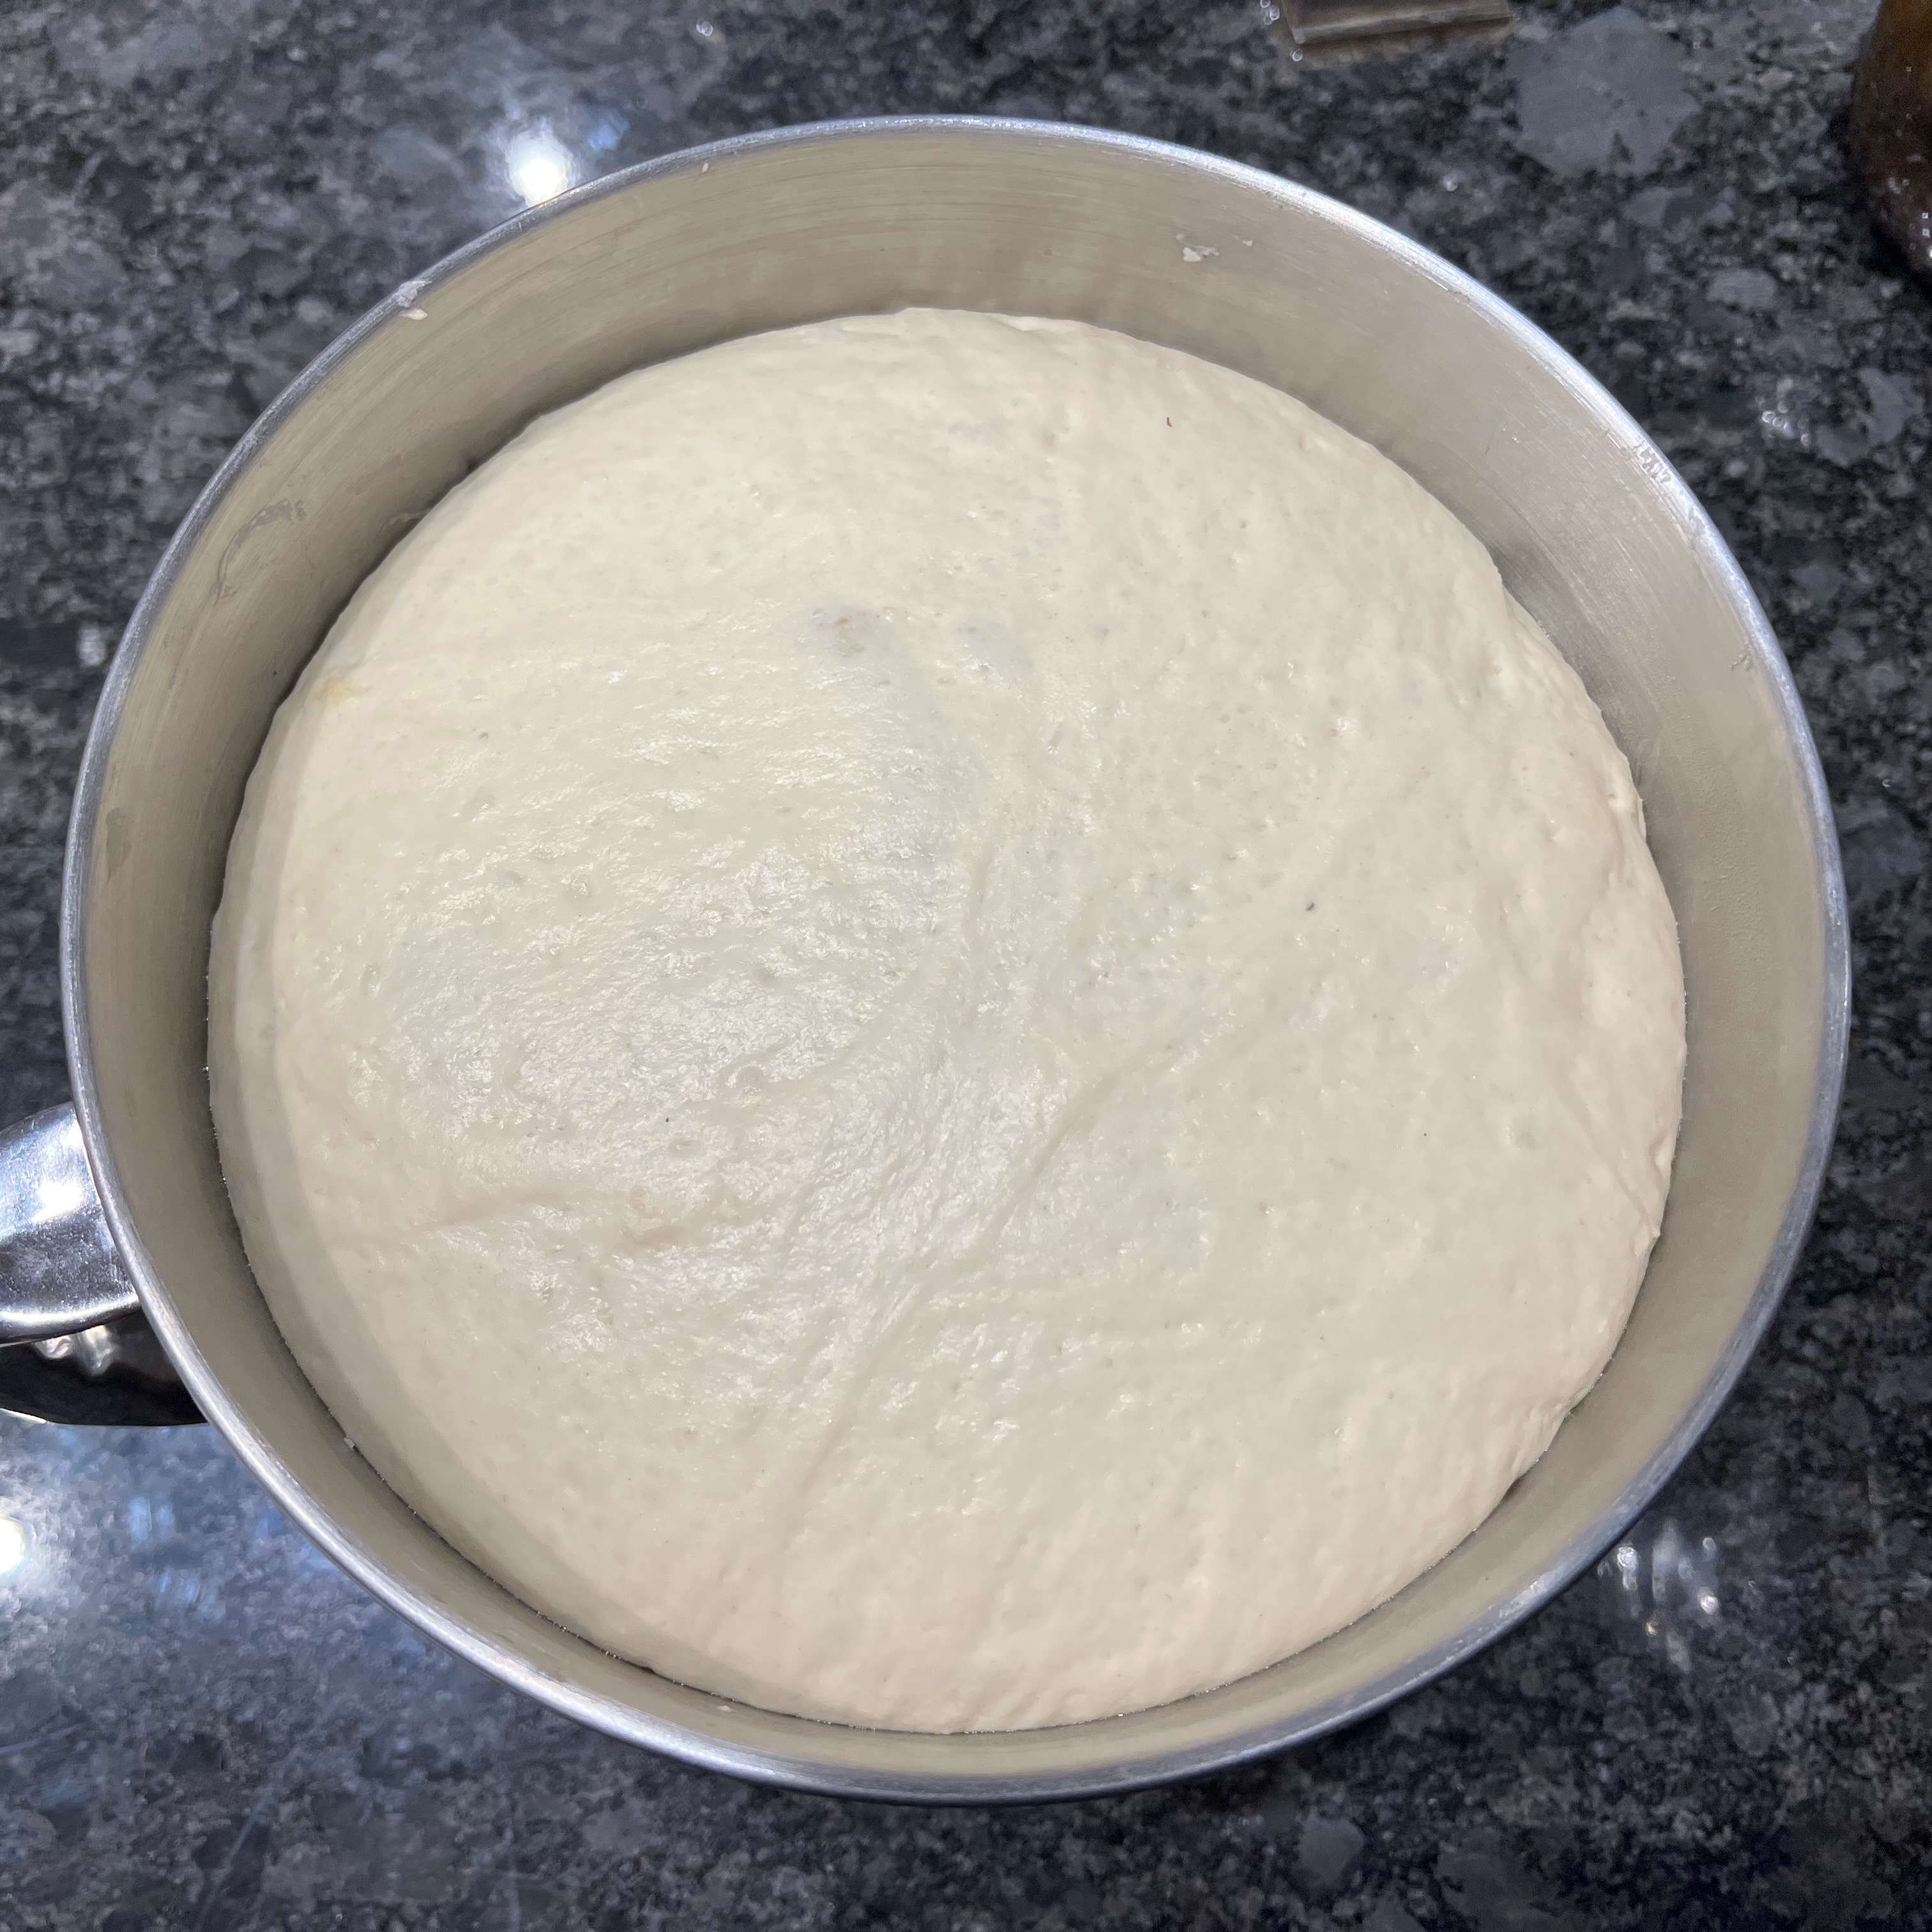
After your third 2 minute knead, reform the dough into a single ball, cover the bowl with a tea towel and leave to rise. Sabrina suggests three hours for the dough to triple in size; I bailed out after 2½ hours, by which time the dough was coming close to the top of the bowl. Your yeast and kitchen temperature will vary.
Line two baking trays with silicone sheets or baking paper. Preheat your oven to 220℃ fan.
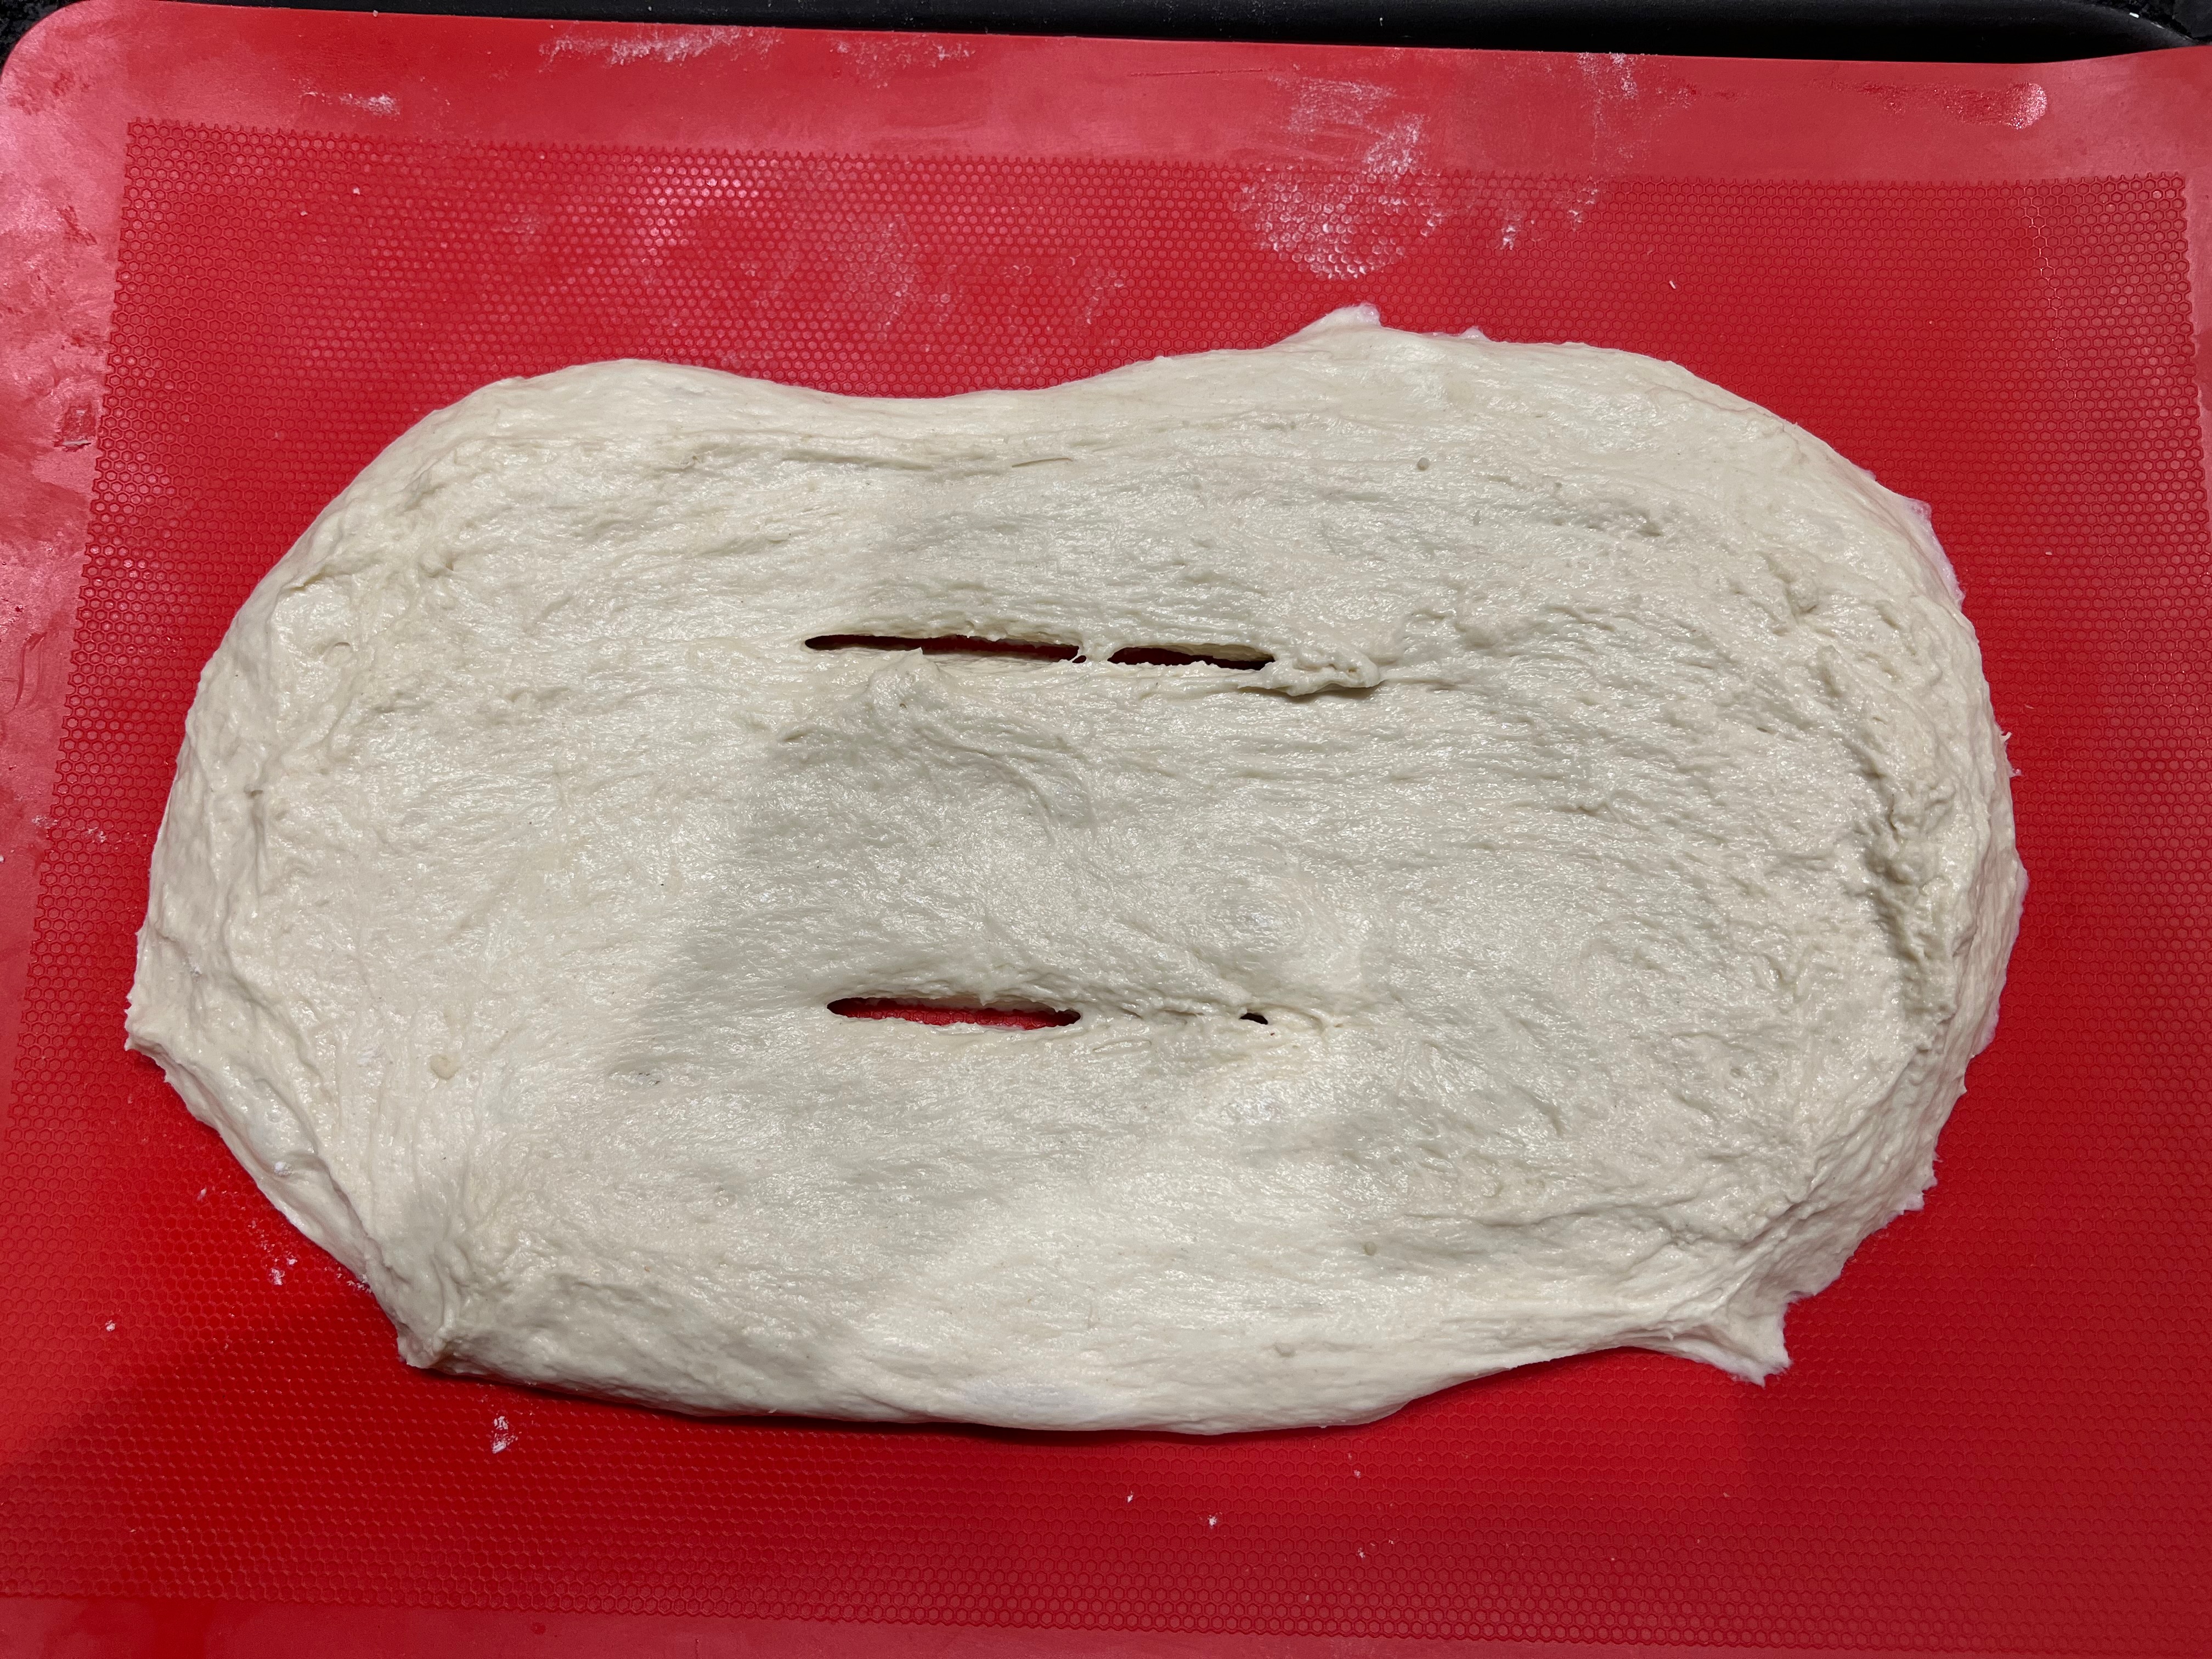
Divide the dough into two equal parts and stretch each part into a large rectangle covering most of the length of your baking trays and around half as wide as they are long. Actually, you can pretty much use any shape you like, but try to make them of fairly even thickness.
If you like, cut a pair of slashes into each flatbread, which will make your bread easier to “tear and share” at the table.
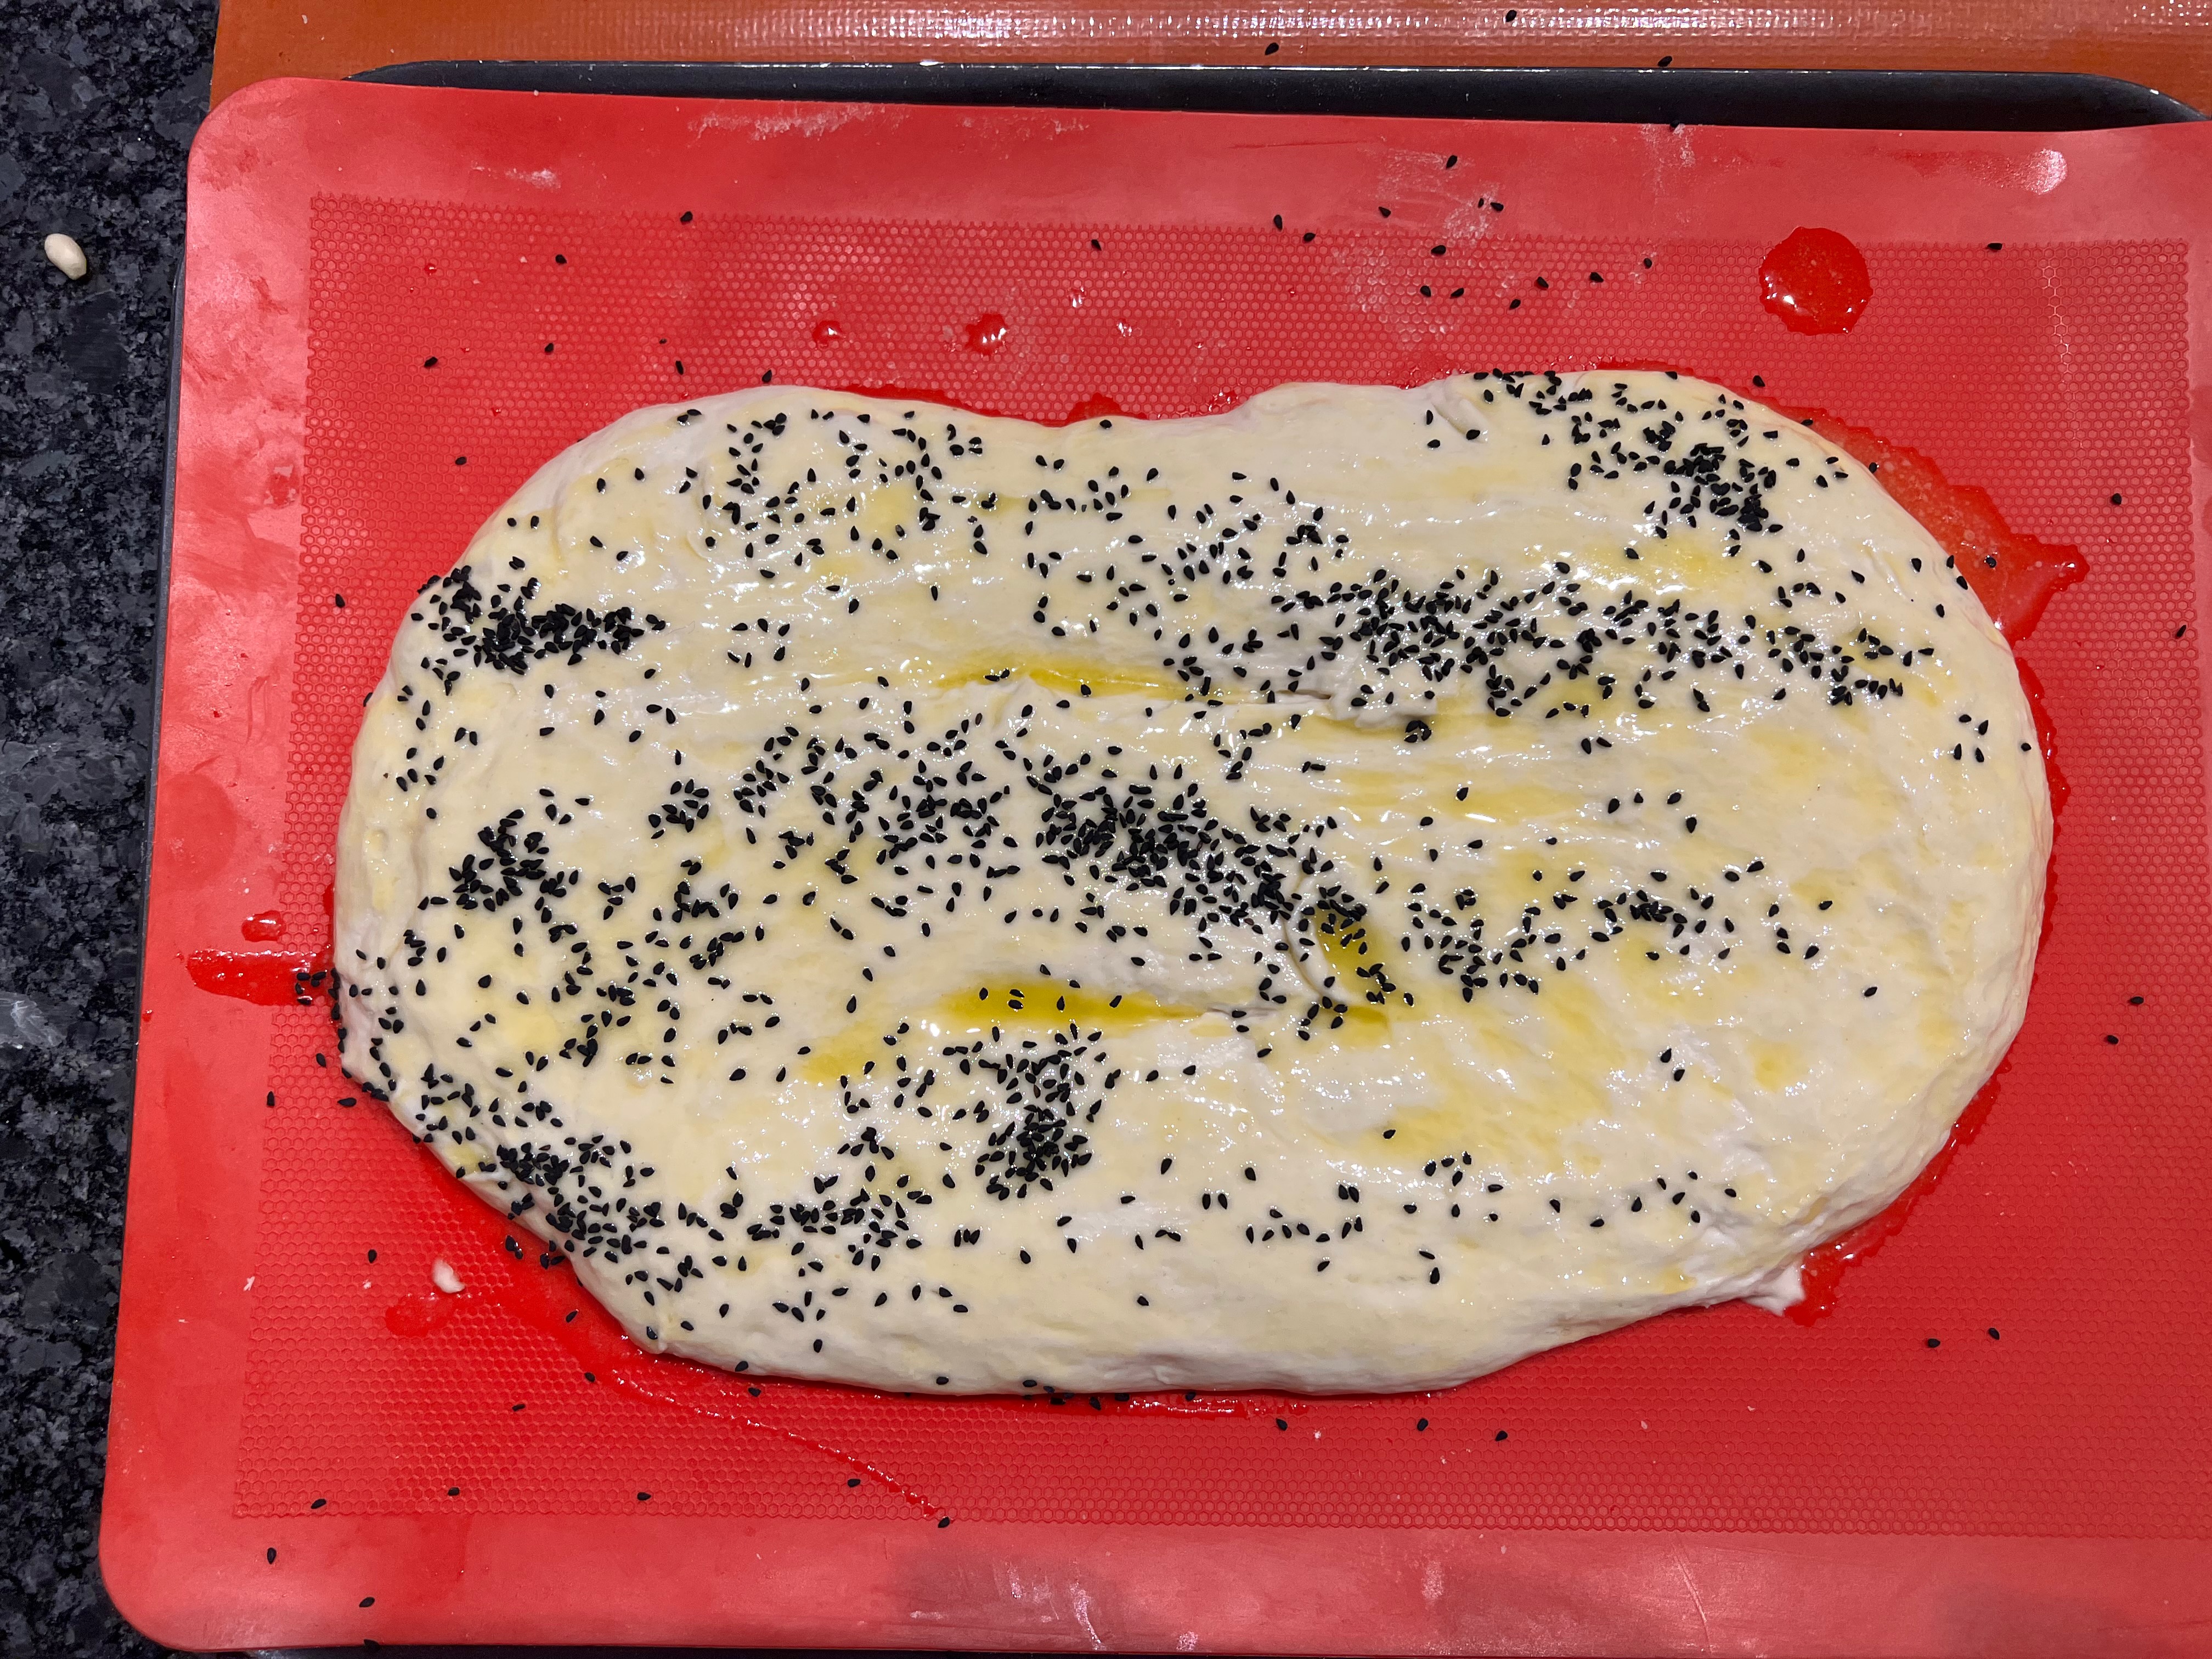
Cover with a tea towel and leave to rise for another 40 minutes.
Brush the top with melted butter, and sprinkle your chosen seeds over the top.
Bake for around 15-20 minutes until golden. The loaves should feel springy if you press them gently.
The ideal timing is for the bread to come out of the oven so that you can cool it to around 10 minutes before taking it to the table. Most of us don’t actually manage this and it doesn’t really matter.