
The core of every Jewish family is the Friday night dinner which greets the Sabbath. Even an unbeliever like me is deeply moved by ritual of the blessings over candles, bread and wine that bring my family together with each other and with our culture. And there’s only one bread for this: the plaited, egg-enriched, slightly sweetened white loaf called challah (or cholla, depending on your favourite transliteration of the Hebrew חַלָּה). Jewish children are addicted to the stuff from an early age and not just for its ritual significance: good challah combines tastiness and pillowy soft texture in a way that’s hard to beat. Beware, though: a lot of bakeries sell challah that looks the part with its perfect plaiting, but is dry or tasteless or both. Which is a good reason for making your own.
For the purposes of this series, challah counts as the entry for Israel. In truth, however, it’s spread throughout the world and you can’t help noticing that similar breads are baked all over Europe from Germany eastwards by Jews and gentiles alike.
There are many ways of braiding your challah and at some point, you need to decide on how many strands you’re going to use: I recommend that you start with 3, but you can go for anything from 2 to 9. You’ve almost certainly spotted from the photographs that I’m fairly rubbish at this part of the puzzle, so I’m not even going to attempt to do a better of job of showing you how than this Czech YouTube video, which shows you how to do all of them. However, my challah is reliably soft and tastes reliably good, so I’ll stand by the virtues of my recipe, which is based on the one in Emmanuel Hadjiandreou’s excellent book How To Make Bread. Hadjiandreou is decidedly non-Jewish, but who’s asking? His recipe has worked better for me than the ones from many synagogue websites.
This makes a single small loaf. It takes several hours from start to finish, but that’s mostly waiting time: the amount of actual work isn’t too horrific.
- 250g Strong while flour
- 4g tsp salt
- 15g sugar
- 3g dried yeast
- 80ml warm water (around 40℃)
- 2 eggs
- 20g sunflower oil
- Poppy seeds or sesame seeds for dusting the top
Ideally, you want a silicone baking sheet to put over your baking tray (better still if you have the Silpat silicone/fibreglass type, which I don’t). But otherwise, baking parchment will do.
- Preheat your oven to 50℃
- Weigh out and mix the flour, salt and sugar in a bowl
- Weigh out and mix the warm water and yeast in another bowl
- Separate one egg and set aside the white in a bowl; mix the yolk with the whole of the second egg, beat lightly and add to the water/yeast mix
- Pour the dry mix into the wet mix and combine until it’s beginning to feel like dough. It will probably still be a bit gritty
- Add the oil and mix until you have a smooth dough
- You could at this point proceed directly to kneading. But you’ll save yourself time and elbow grease by leaving the dough for 10 minutes (a process called autolysis), giving it a quick fold or two and then repeating this a couple of times
- Knead the dough on a lightly floured surface. You’ll only need a bit of flour on your hands and on the surface – don’t be tempted to flood the dough with raw flour at this stage. Keep kneading until the dough is elastic and springs back when tugged or prodded.
- Turn your oven off. Put your ball of dough back into the bowl, cover it and leave it to rise in your turned off oven. You’ll probably want it to rise for a couple of hours: you have to judge this by eye and experience.
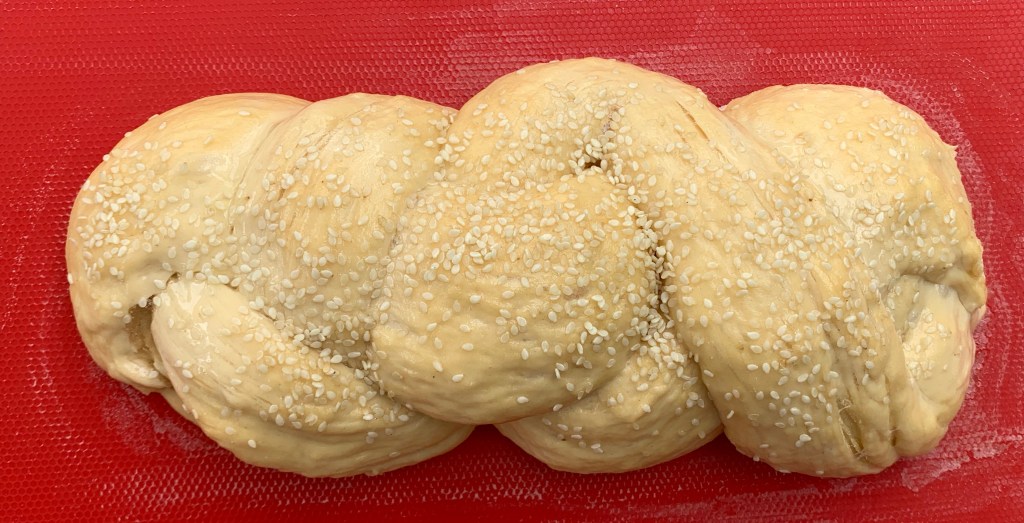
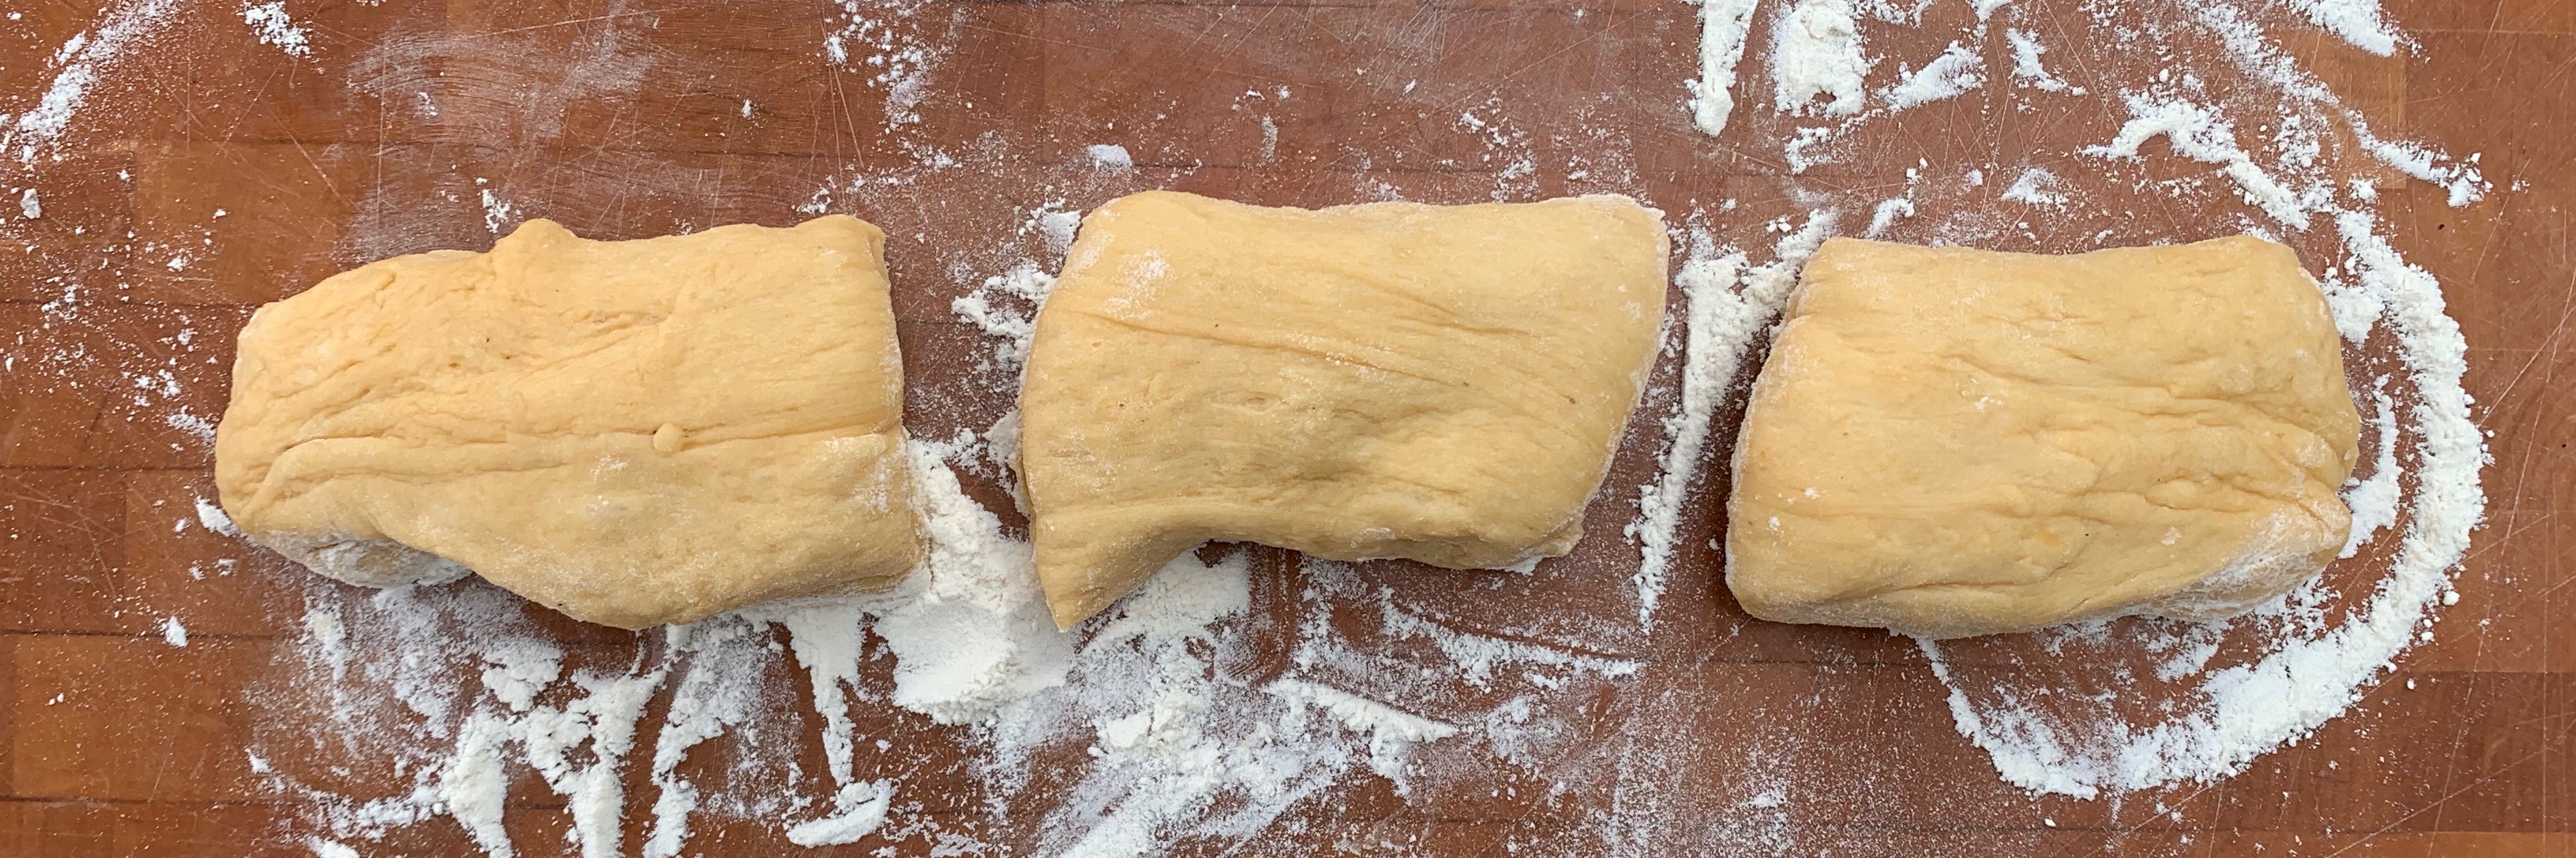
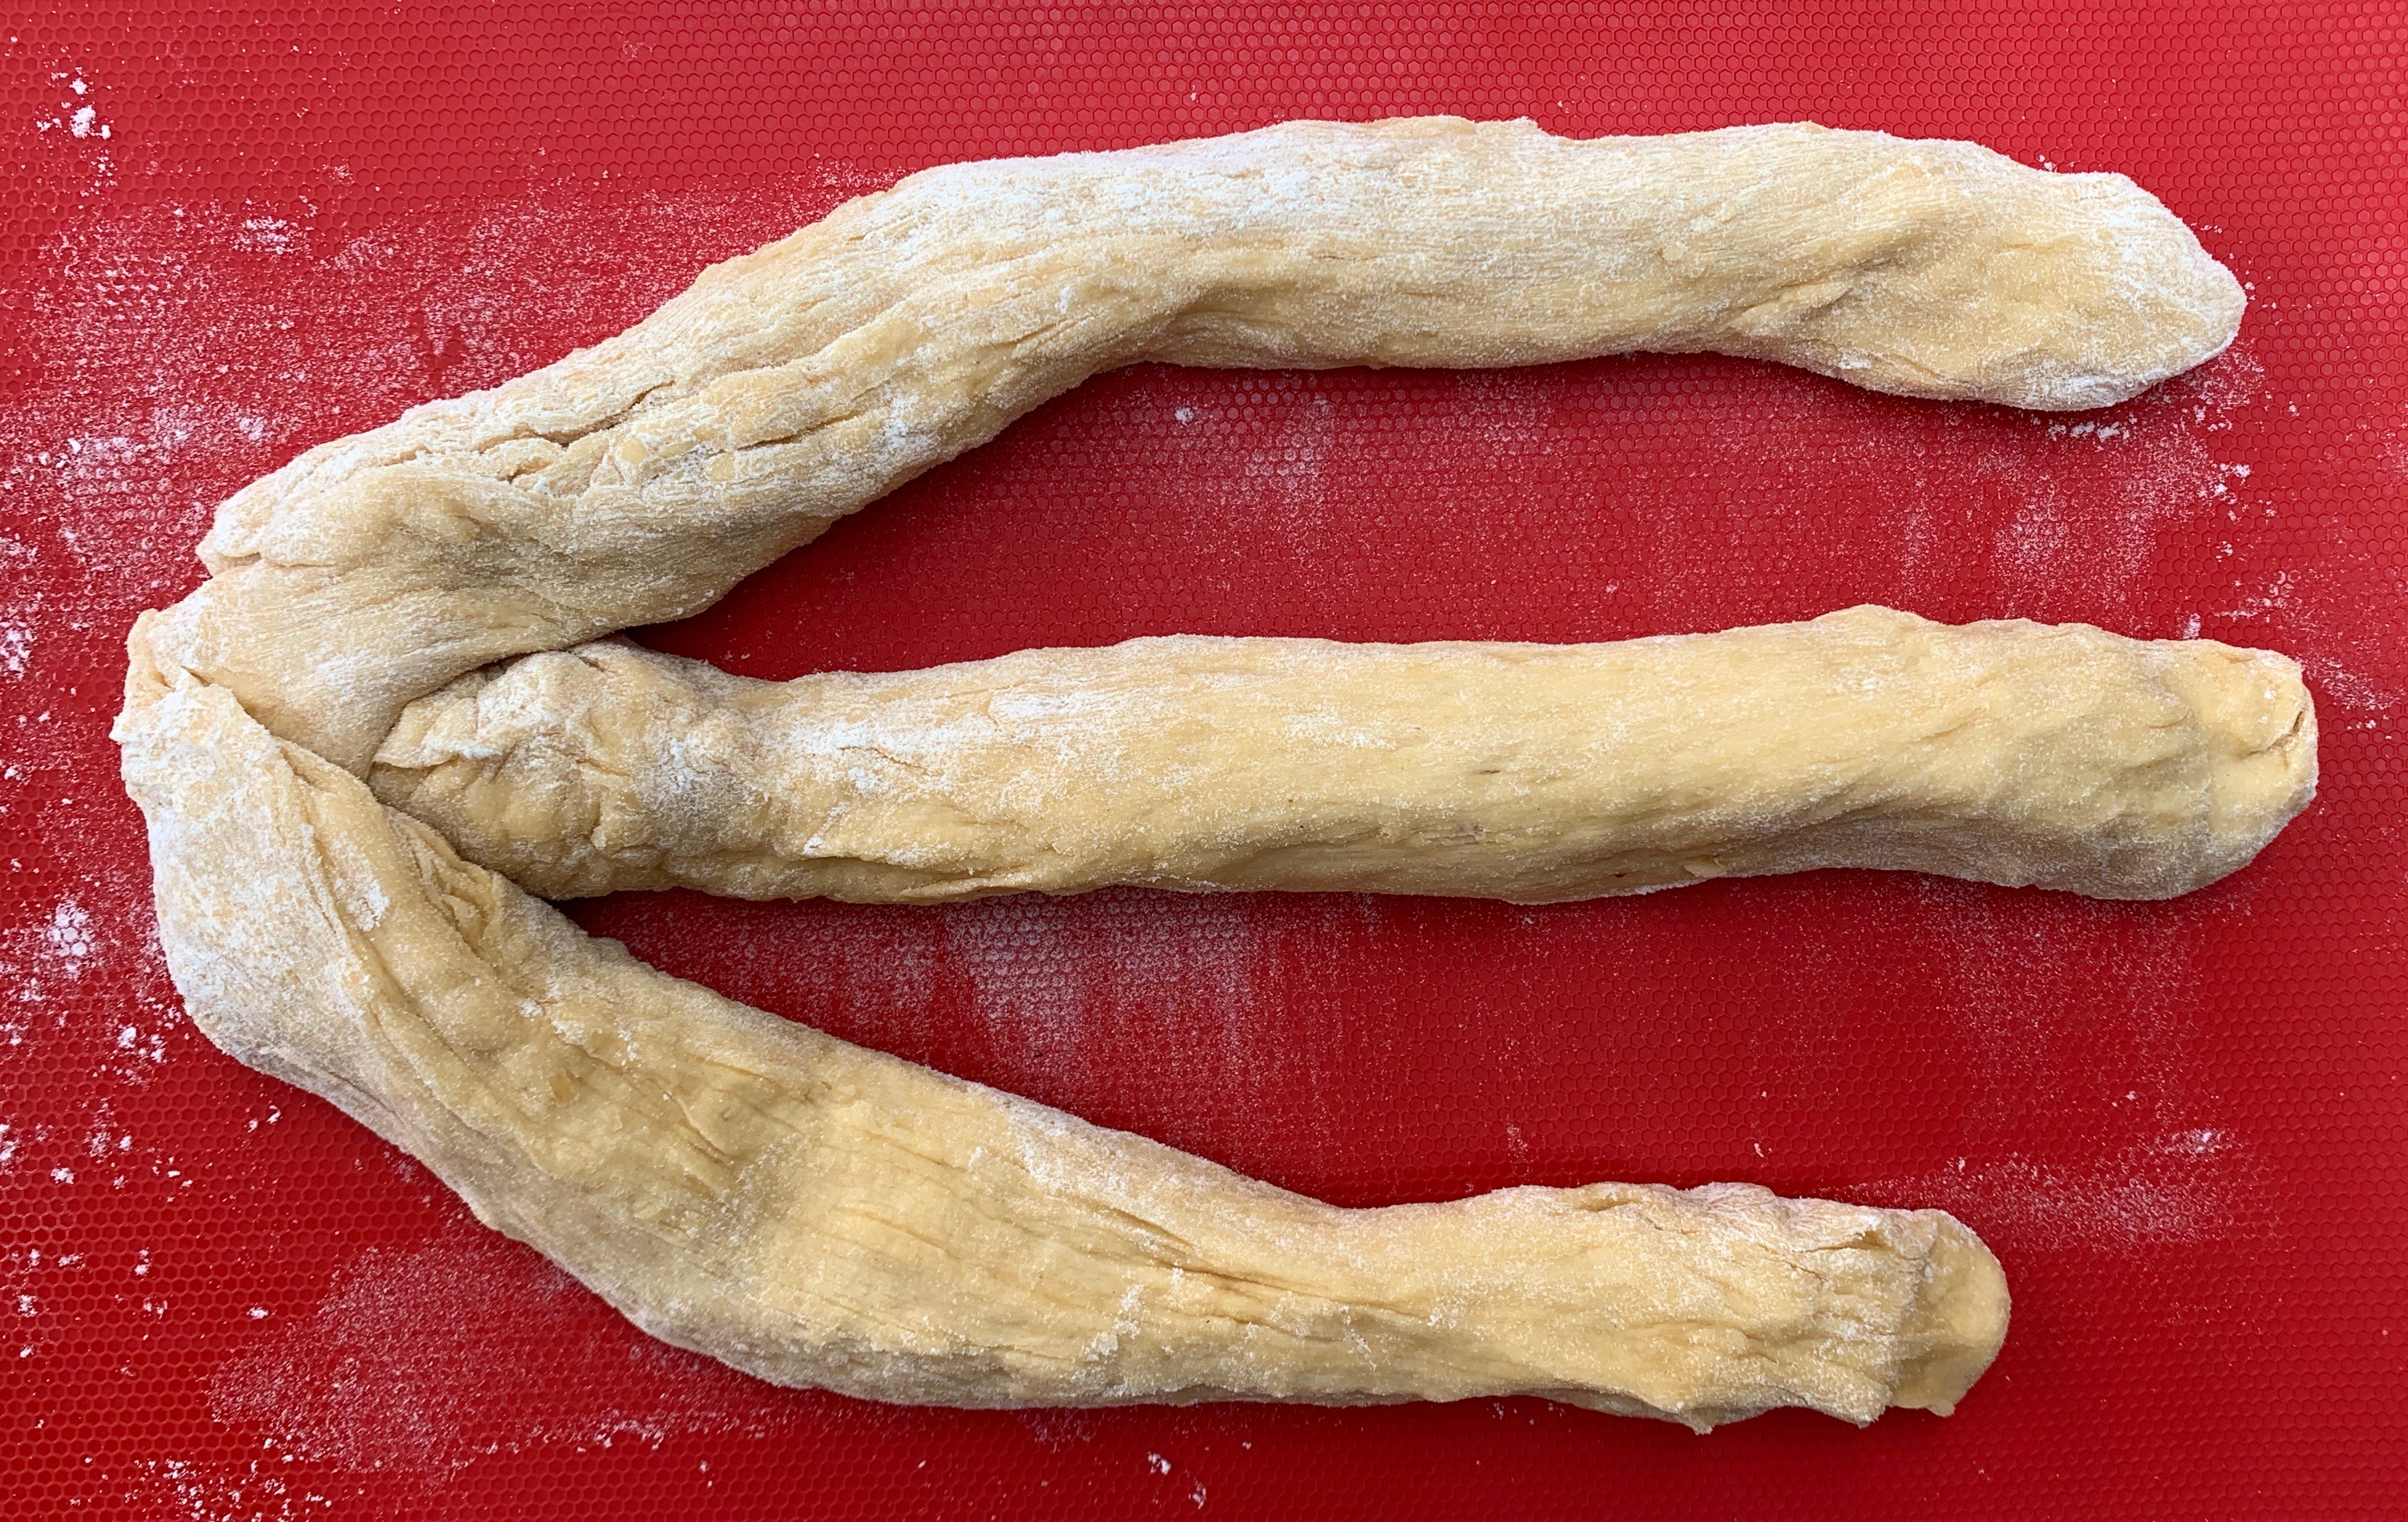
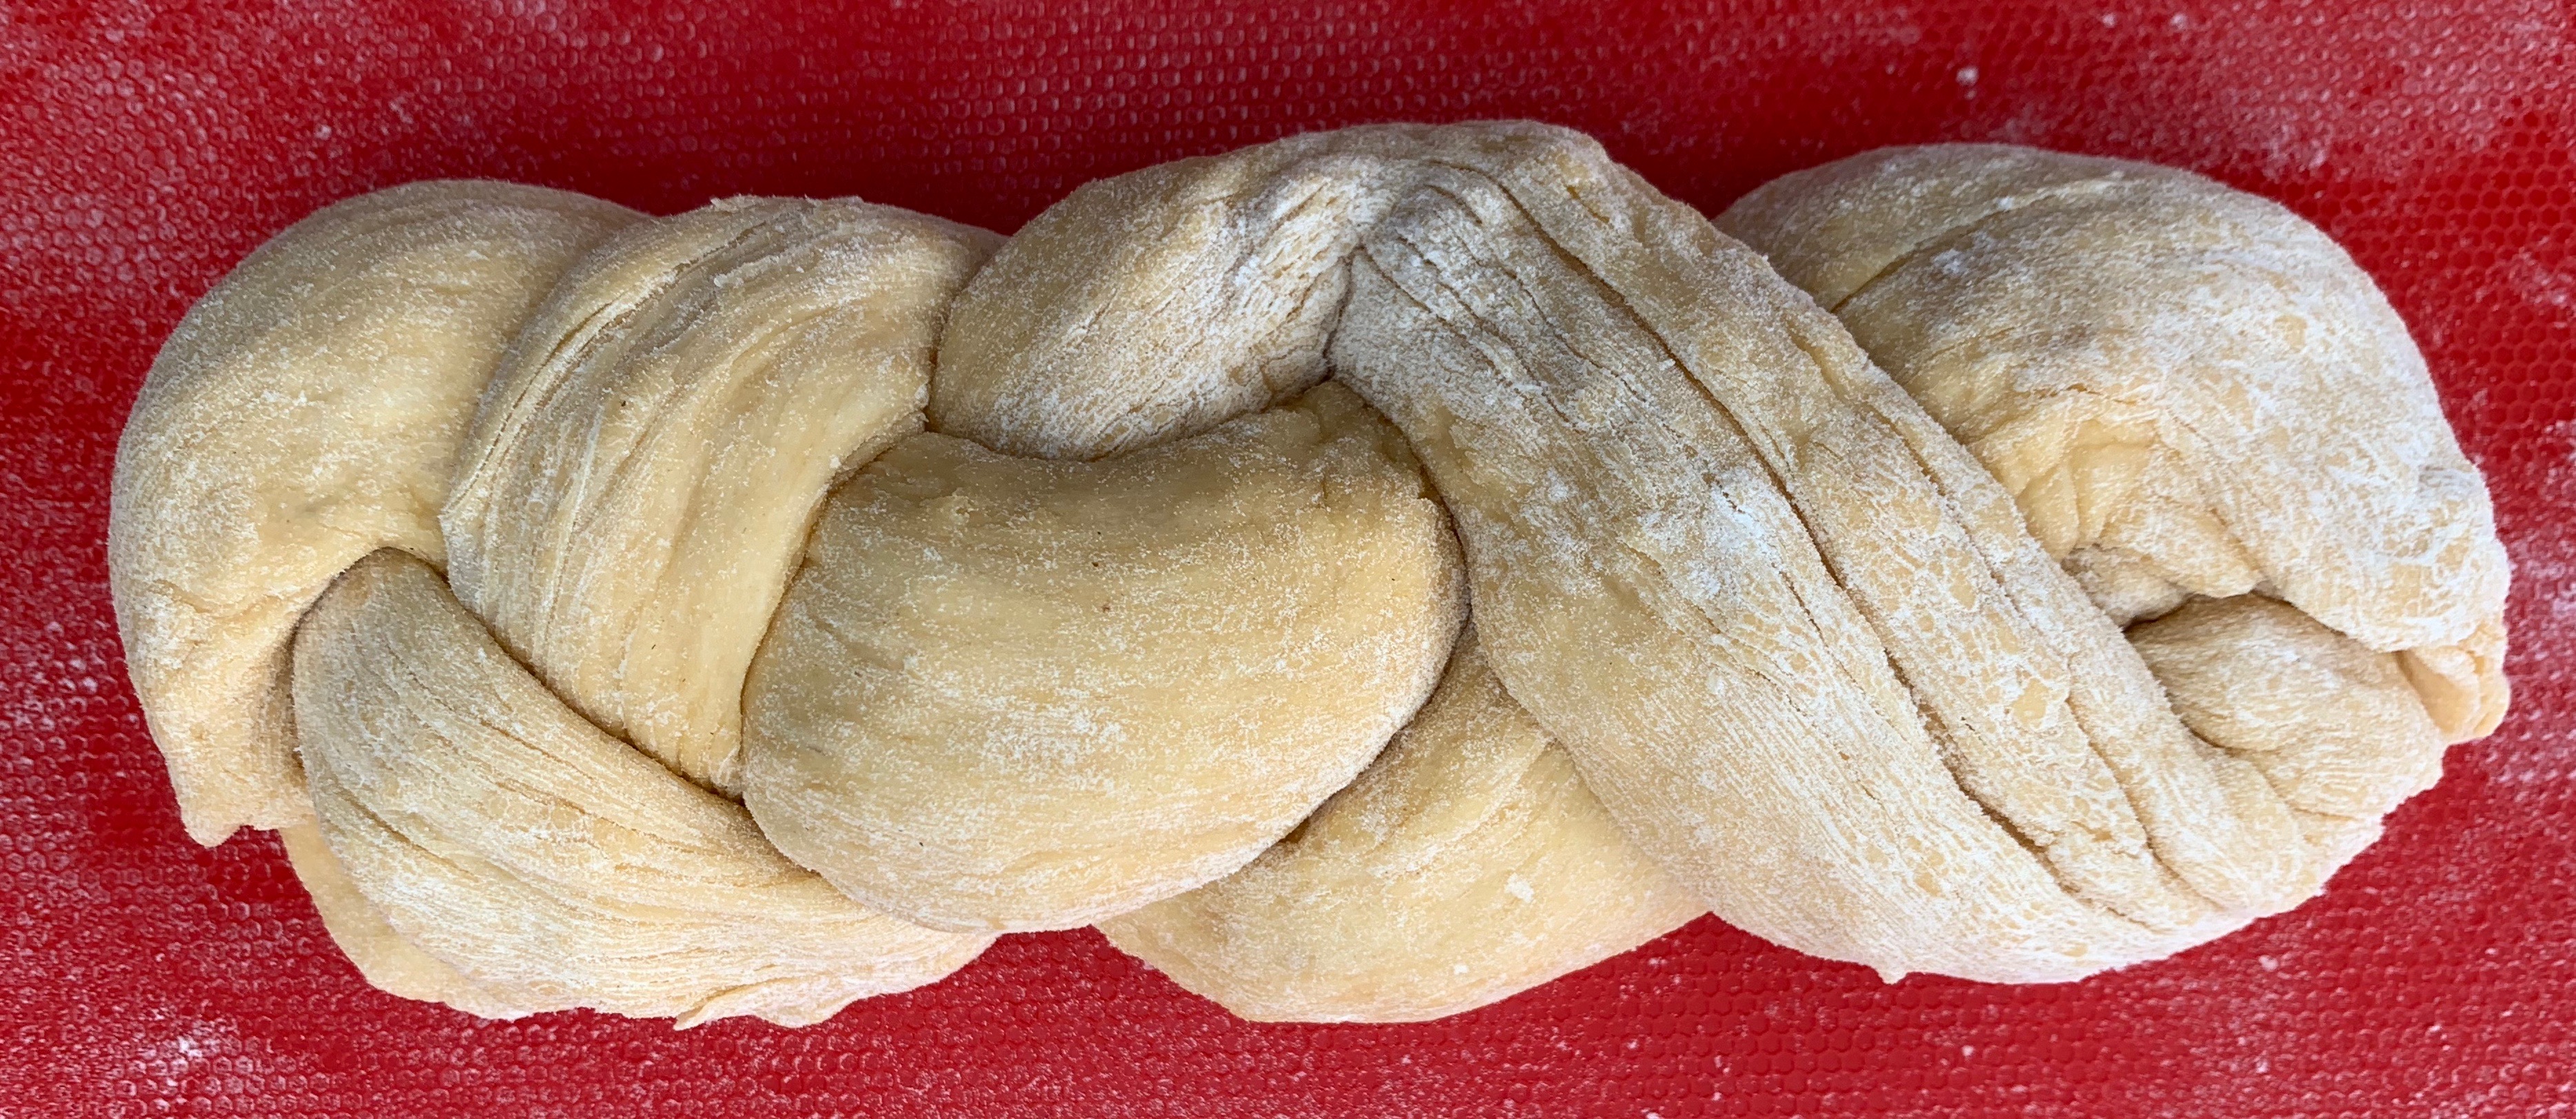
- Punch the dough down, transfer it to a lightly floured surface, divide it into equal parts: as many as you have chosen for your braid. Roll each part into a sausage, stretched out as long as you can reasonably make it while keeping all your strands the same length.
- Braid the dough as per the instructions in the video – either on your board or, preferably, directly onto the baking sheet.
- Transfer the baking sheet onto your tray (or, if you didn’t have a baking sheet, transfer the braided loaf to your lined tray). Brush the loaf with some of the egg white that you reserved in step 4, and sprinkle a generous helping of sesame or poppy seeds over the top.
- Cover the challah with an inverted bowl or domed lid that’s large enough so that the challah won’t touch it when it expands. Now leave it in a warm place until it is well risen: this can be anything from 30 minutes to a couple of hours depending on the ambient temperature and on how strong your yeast was in the first place.
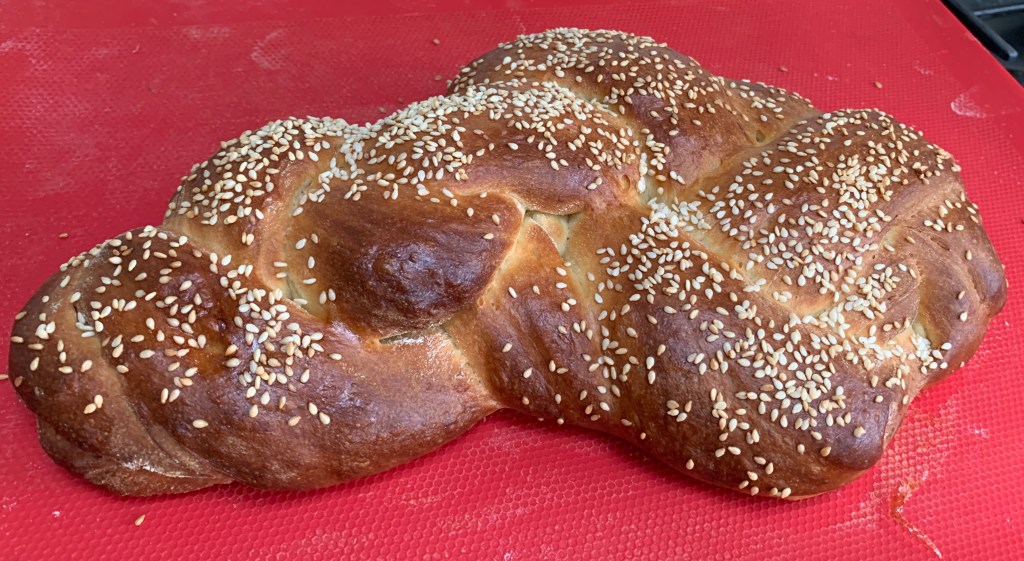
- Make sure you turn your oven to 200℃ fan in plenty of time: the oven could easily take 15-20 minutes to come to temperature and you don’t want your challah sagging horribly while you’re waiting for it.
- Bake the challah for around 20 minutes. The crust should be a medium to dark golden brown and if you stick a skewer into the bottom, there should be no sign of stickiness upon removal.
- Leave the challah to cool on a rack.
Notes:
For step 9, various authorities on bread-making say that you will get a better flavour by using a much slower rise at much lower temperature: perhaps 8 hours at a room temperature of 20℃ or so, or even longer in the fridge. I’ve never tried.
For step 13, if you have two ovens, you can use the same trick as step 9: preheat one oven to 50℃, then turn it off and use it as a proving drawer. Then use the other oven for the actual bake. If you only have one oven, you can’t really do this: if you have a boiler cupboard or airing cupboard that’s warmer than your kitchen, you can use it. Otherwise, you’ll just have to do the second rise at room temperature and be patient.
Some recipes recommend that you preheat the oven to 250℃ and then turn it down as soon as you’ve put the bread in. This gets a slightly better crust, but runs the risk of you forgetting to turn the oven down, something that’s now happened to me sufficiently often that I don’t go for this any more.
The usual in-process shots:
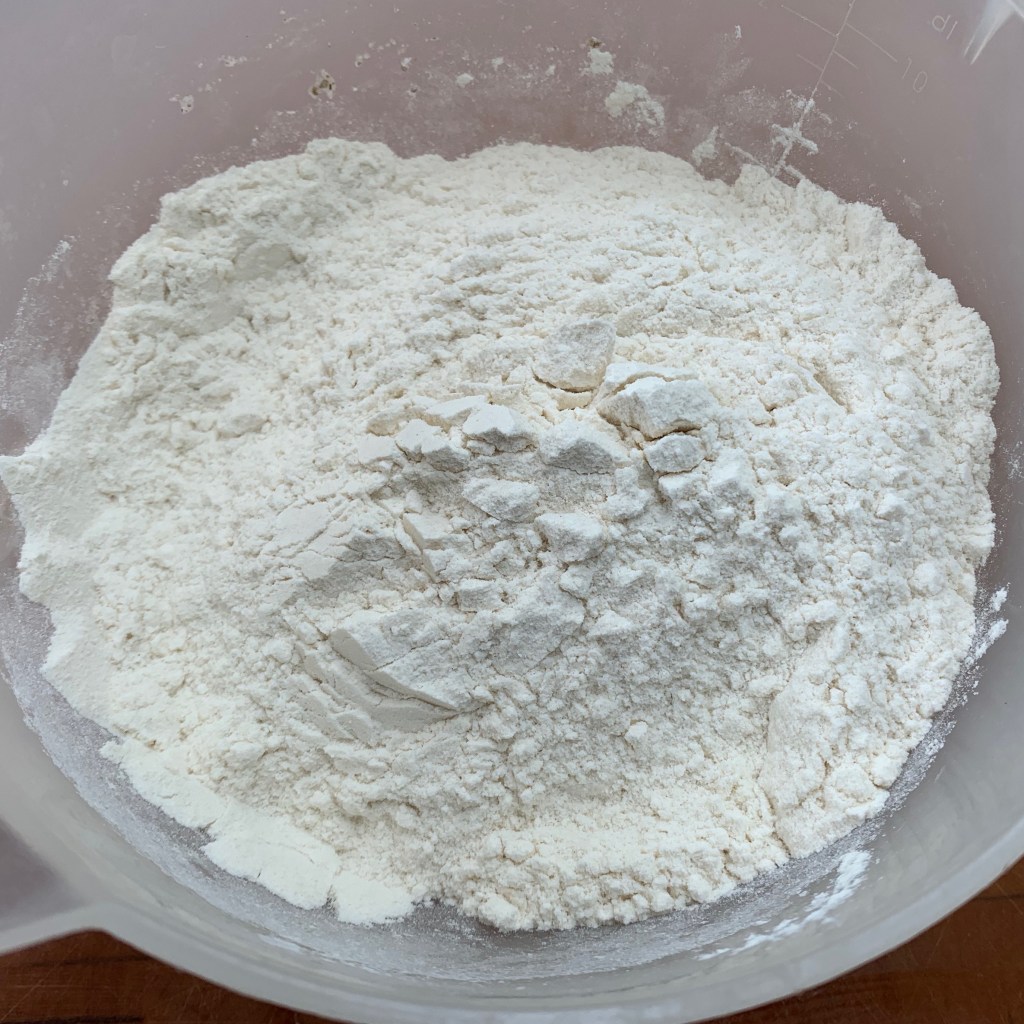
Dry mix 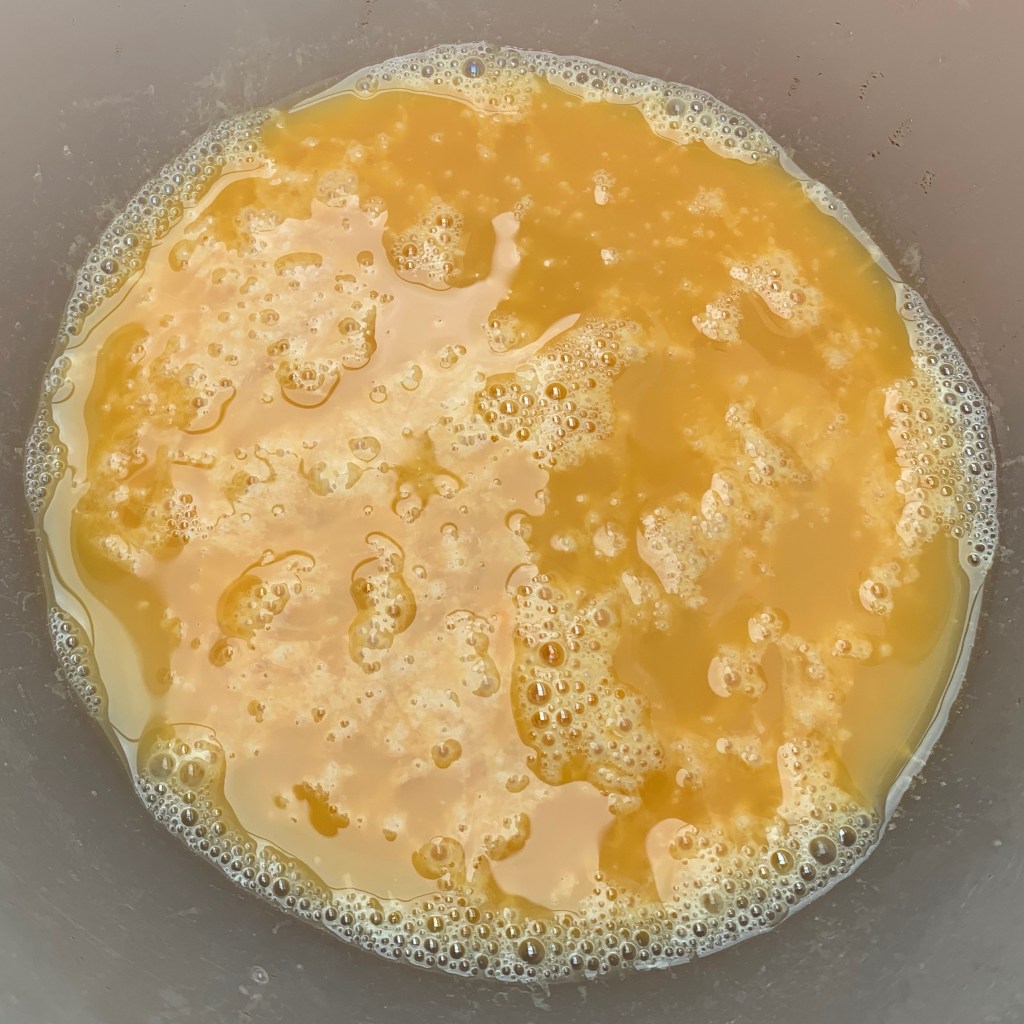
Wet mix 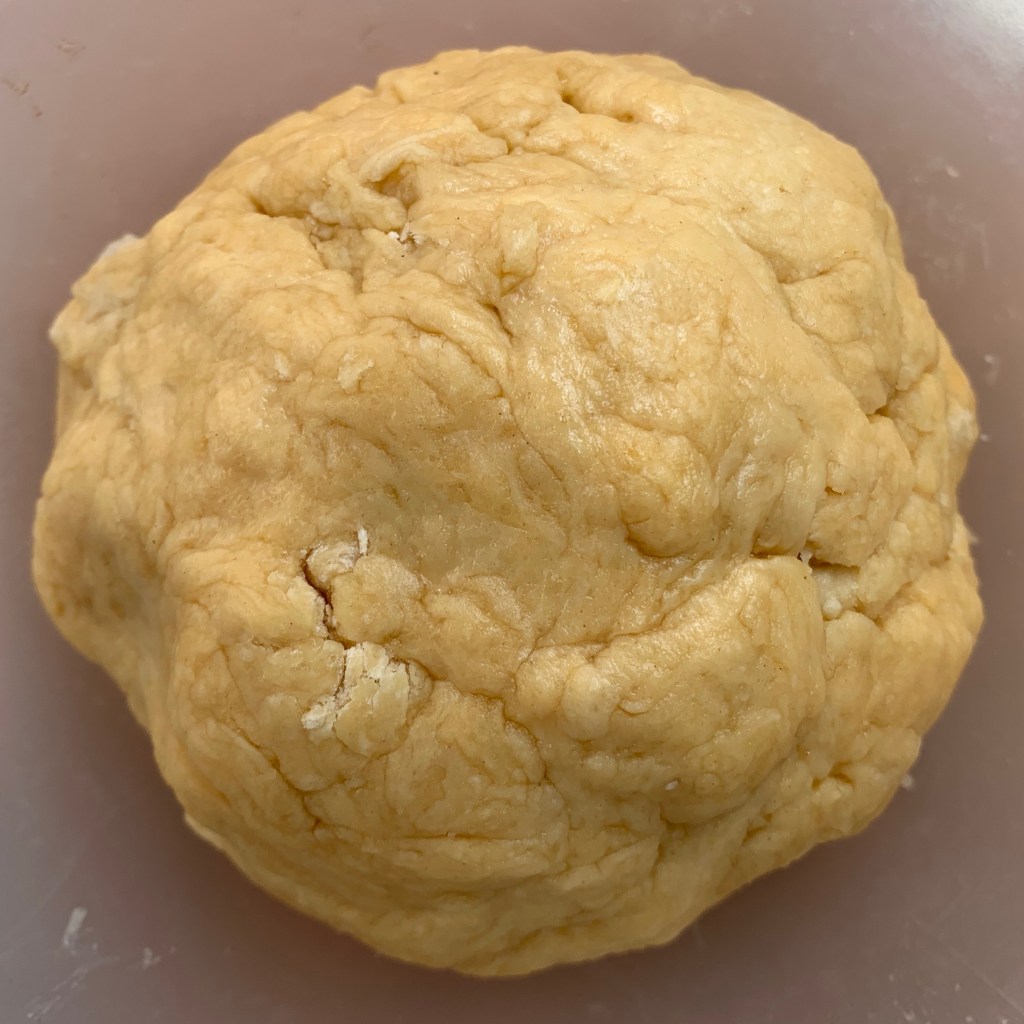
The mixed dough 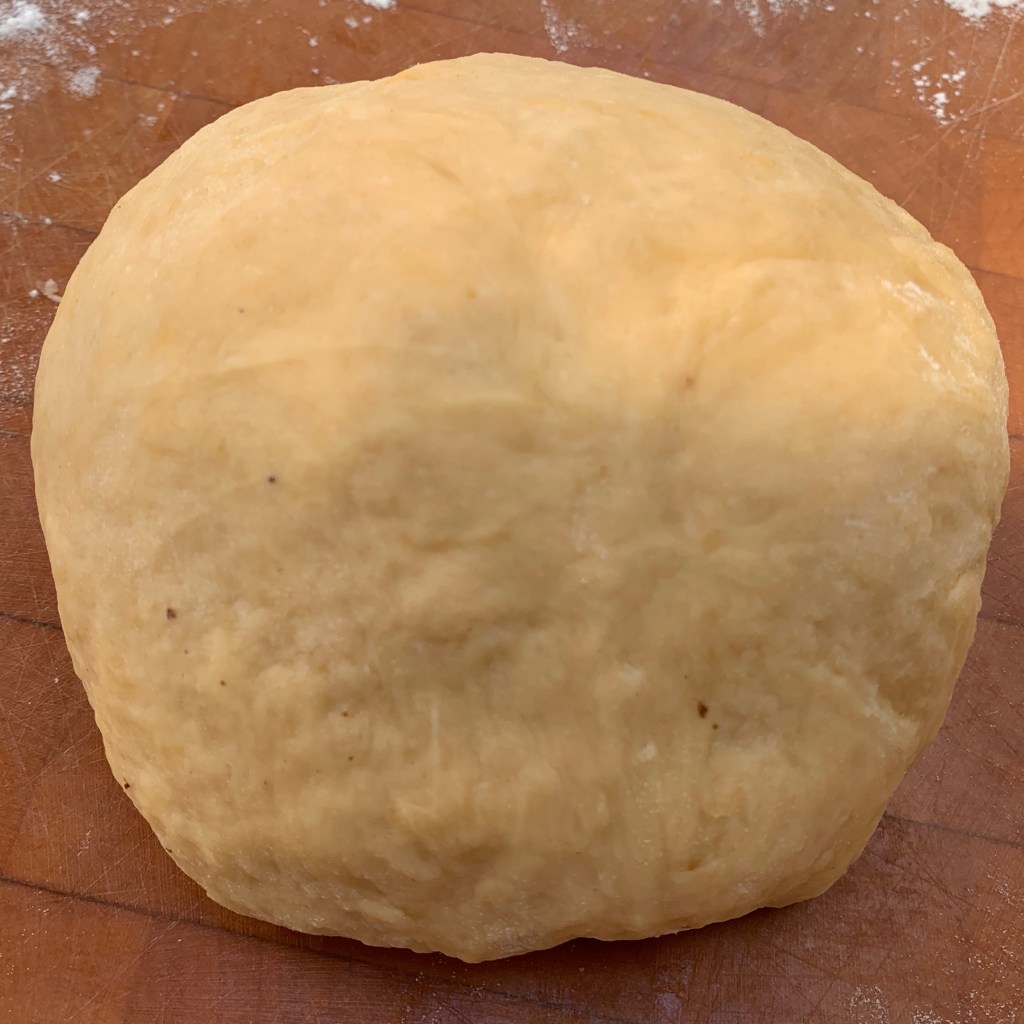
After kneading 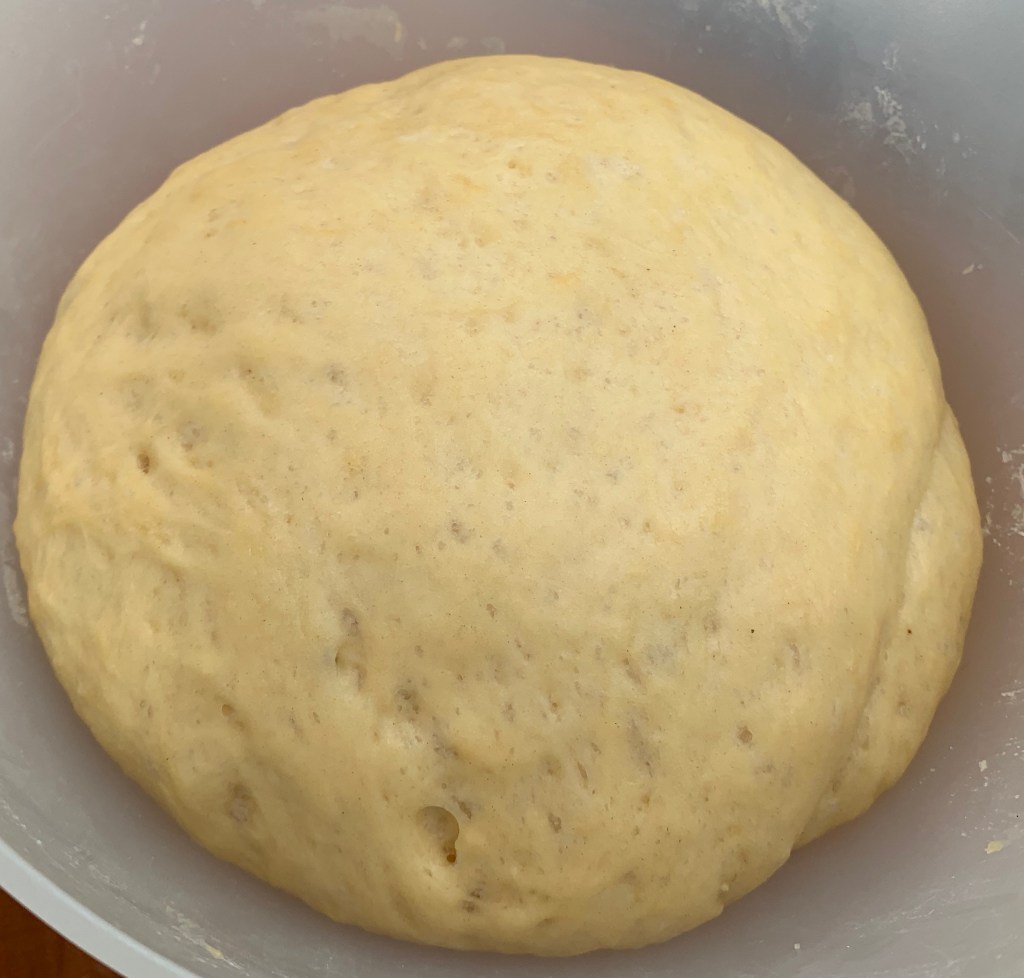
After first rise
And here’s a quick look at the braiding process. But truly, use someone else’s!

One thought on “Around the world in 80 bakes, no.15: Challah”