
The “I” in this post is my wife Alison, who has spent much time making brightly coloured masks for family and friends from an assortment of materials hoarded in our home. She doesn’t have her own blog but very much wanted to share this with anyone who might find it useful.
There are other blog posts for making masks online, but for one reason or another I didn’t get on with them as they failed to give exact measurements where I most needed them and provided a video when I prefer images that I can study. Here is a complete version of masks that family and friends have found fit our faces well, and look stylish.
The cotton I have recommended is very crisp and has a very tight weave. This means if you hold it up to the light you should find it doesn’t let much light through. It is not stretchy if you pull it. The idea of this is that tightly woven material lets through fewer germs. A double thickness of the material is recommended. I tried adding a non woven fabric within the mask and found it too thick to allow me to breathe comfortably.
What you need
- High thread count cotton fabric: 2 pieces 23 cm wide by 20 cm high.
- Cord elastic or 3mm flat elastic 50 cm
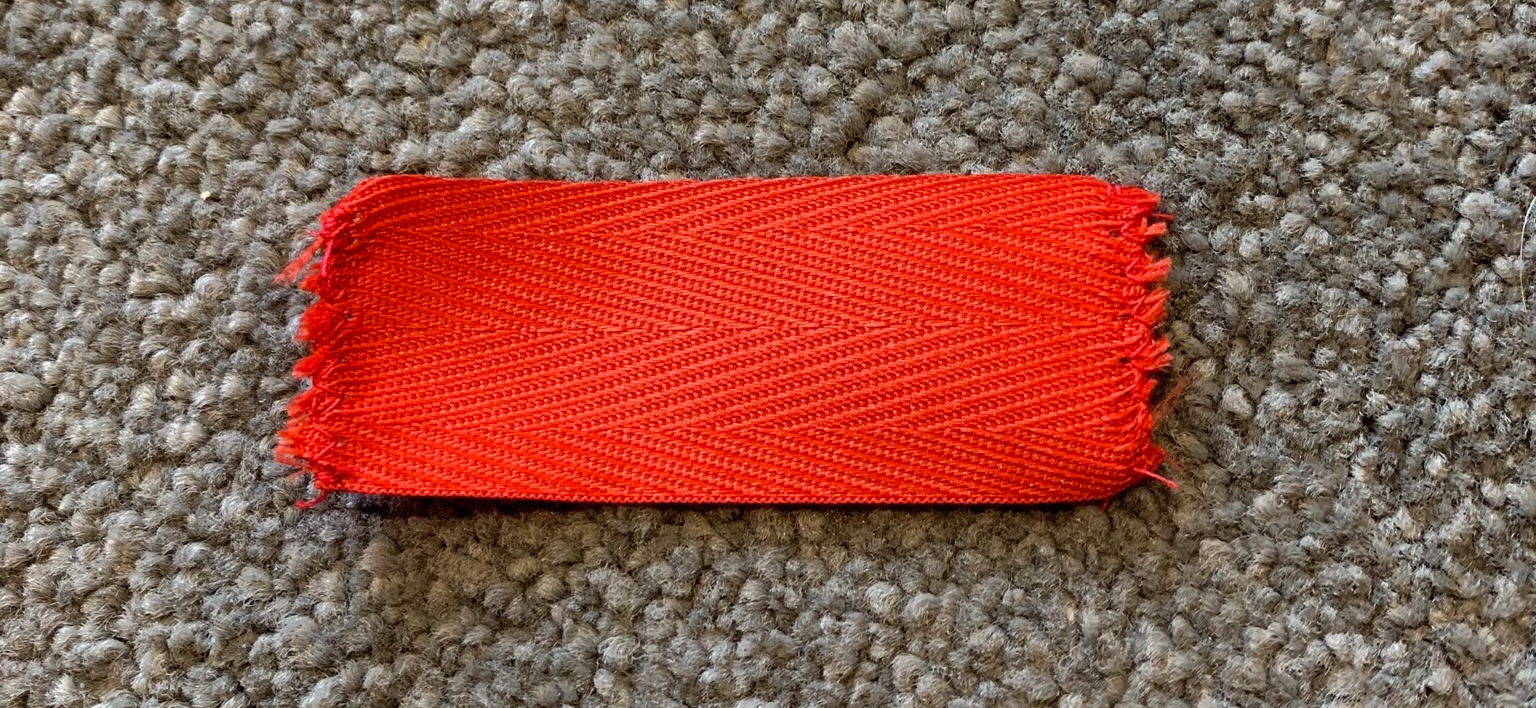
- Tape 14 cm long x 2 cm wide – ideally cotton so it does not fray easily, but if you can’t find that bias binding or ribbon 2 cm wide (Note it’s very fiddly if the tape is 1 cm wide)
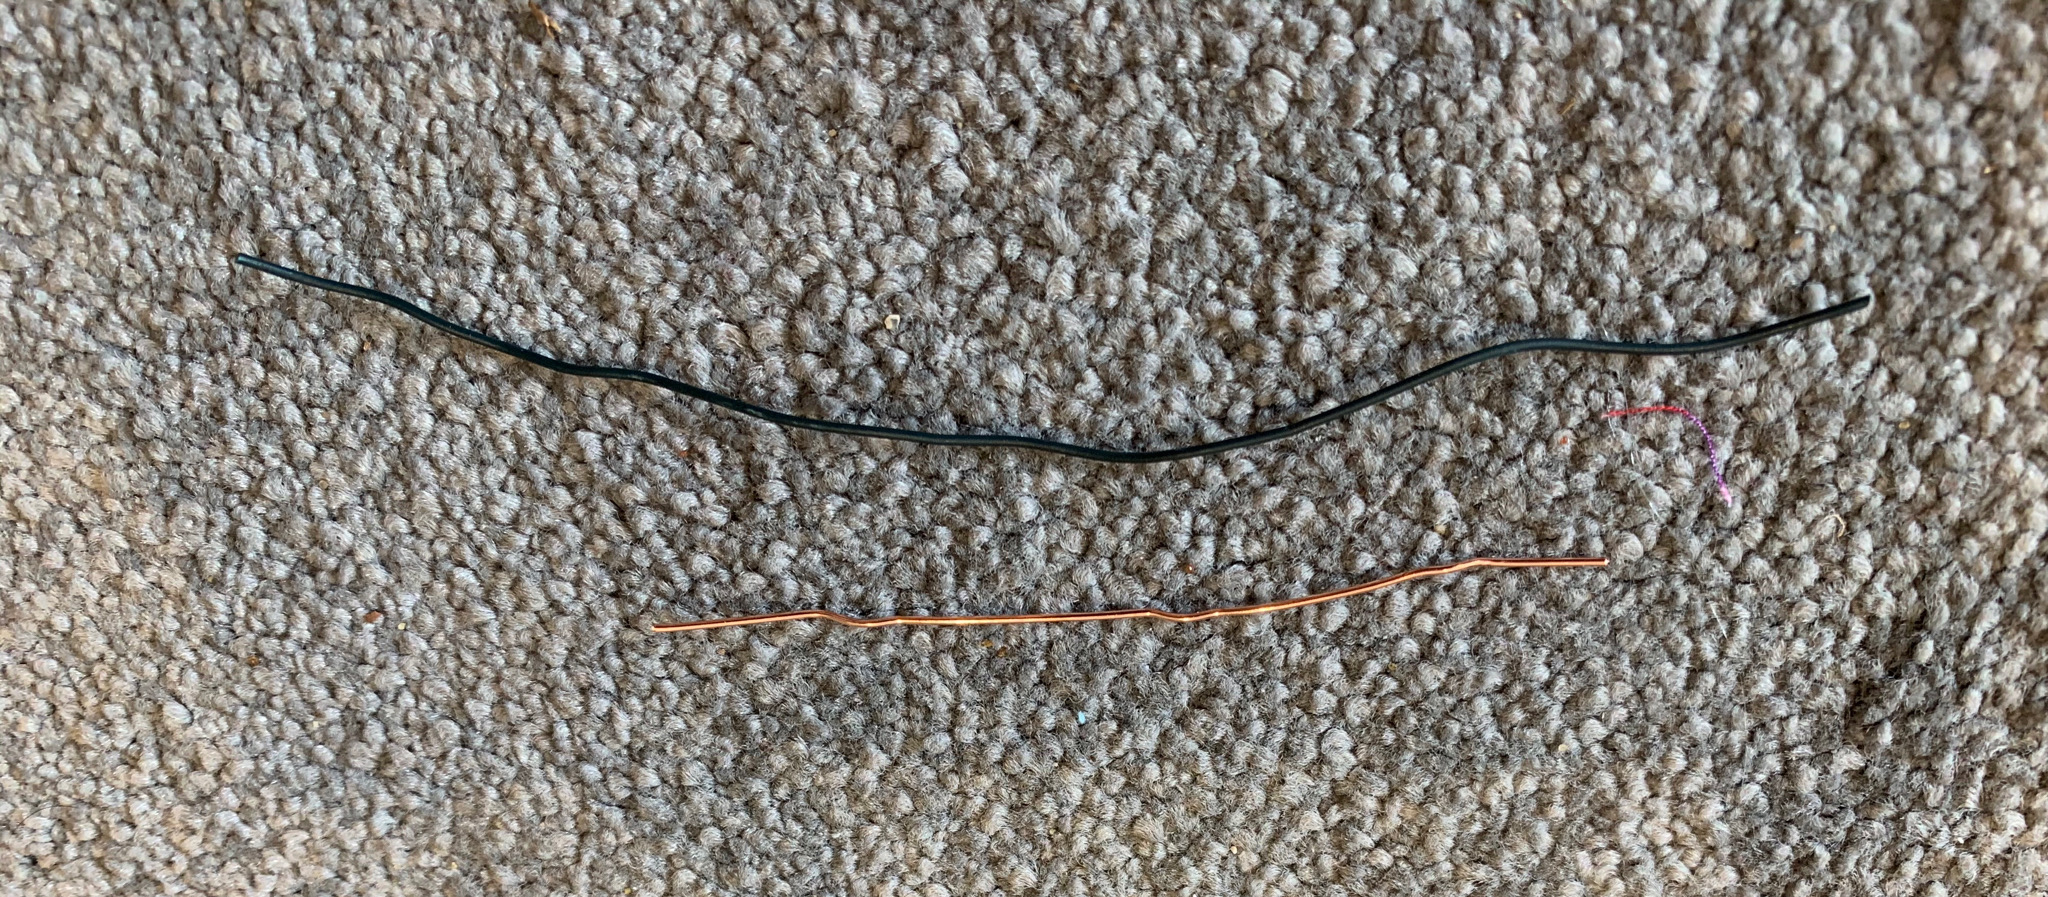
- Wire for nose Garden wire, or a paper clip unwound, or a pipe cleaner, select anything from length 9 cm (paper-clip) to 15 cm (garden wire).
- Thread
Method
- Cut out your fabric into 2 pieces of material 23 cm wide by 20 cm high. Put the right sides together.
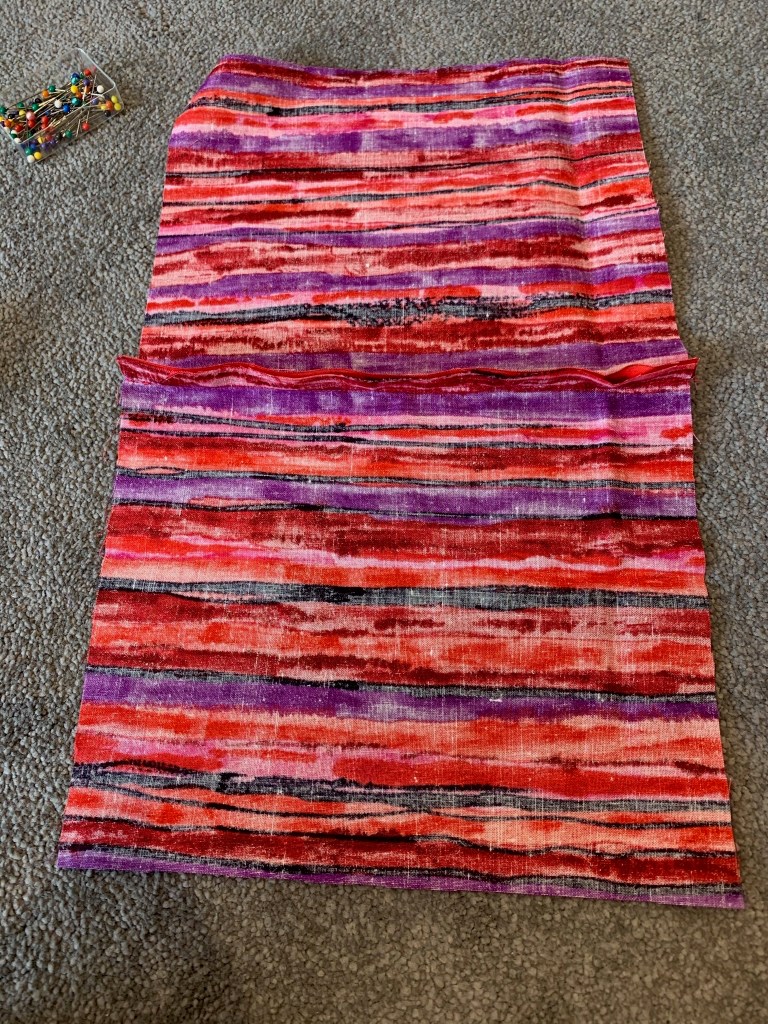
- Machine sew the two pieces together along one long side 1 cm from the edge of the material.
- Open out the fabric with the right side facing down. The hemmed edge faces up. Place your piece of wire in the middle, between the two edges of material
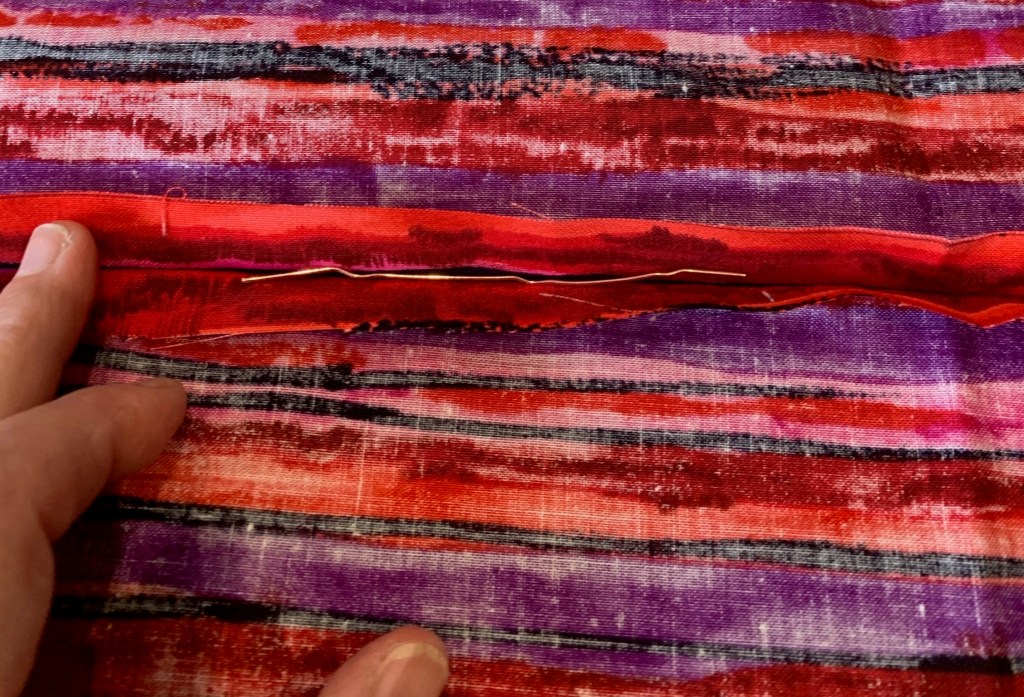
- Bring the top piece of the material down so you trap the wire in place. Hold it there by pinning it into position leaving equal amounts of room to the left and right.
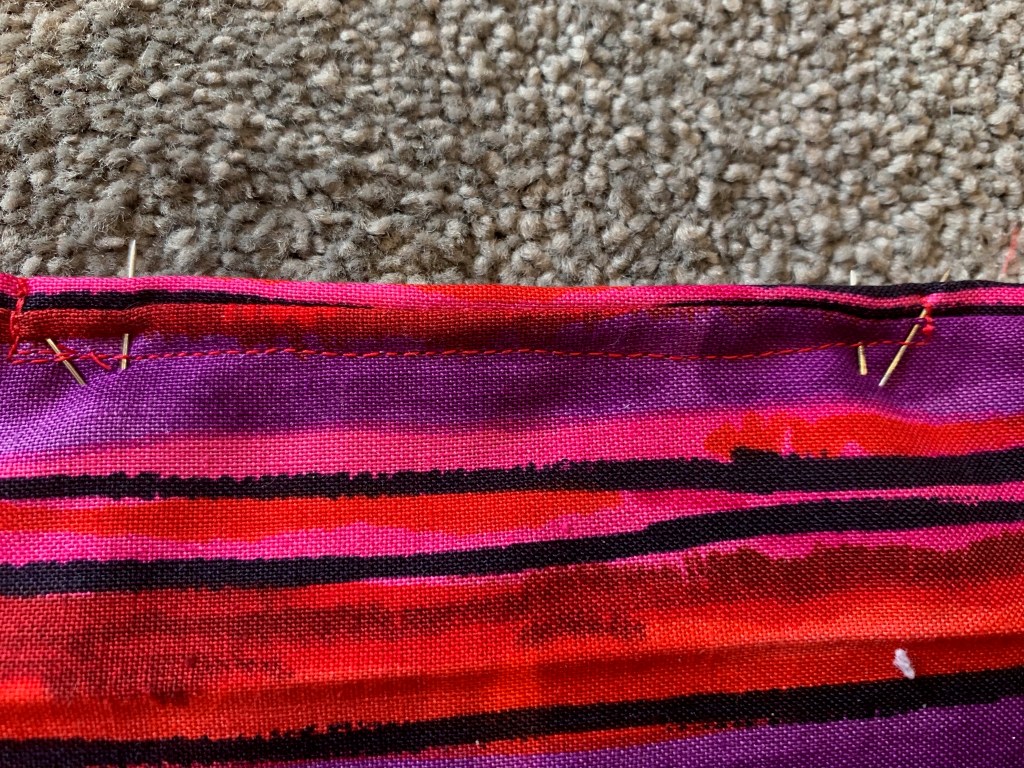
- Now flip the material so you have the right sides together again and sew the second long seam, parallel to the first seam, again 1 cm from the edge and when down, turn inside out so you now have a cylinder of material, right side facing out. You’re now ready for the pleating!
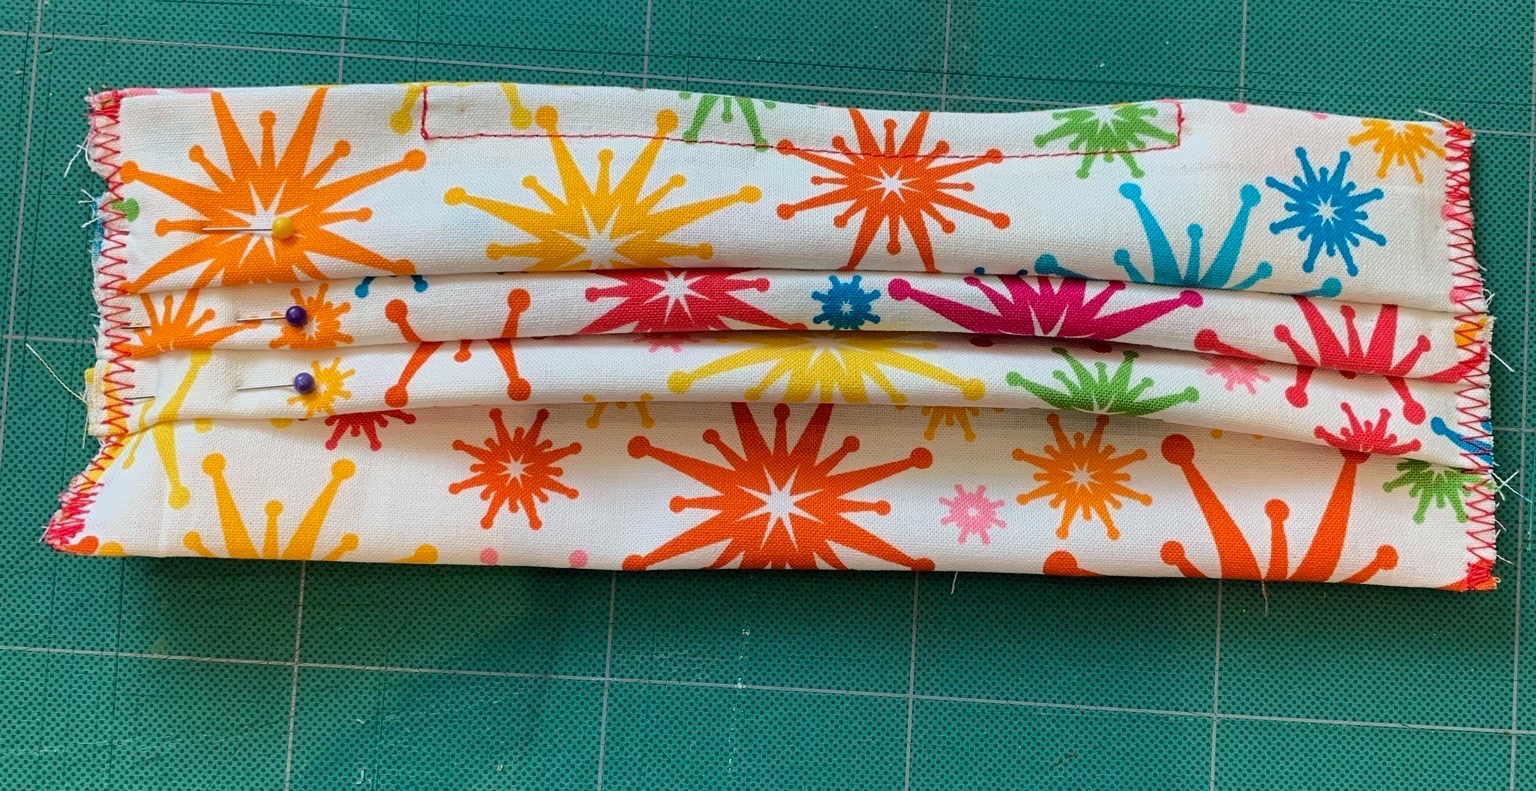
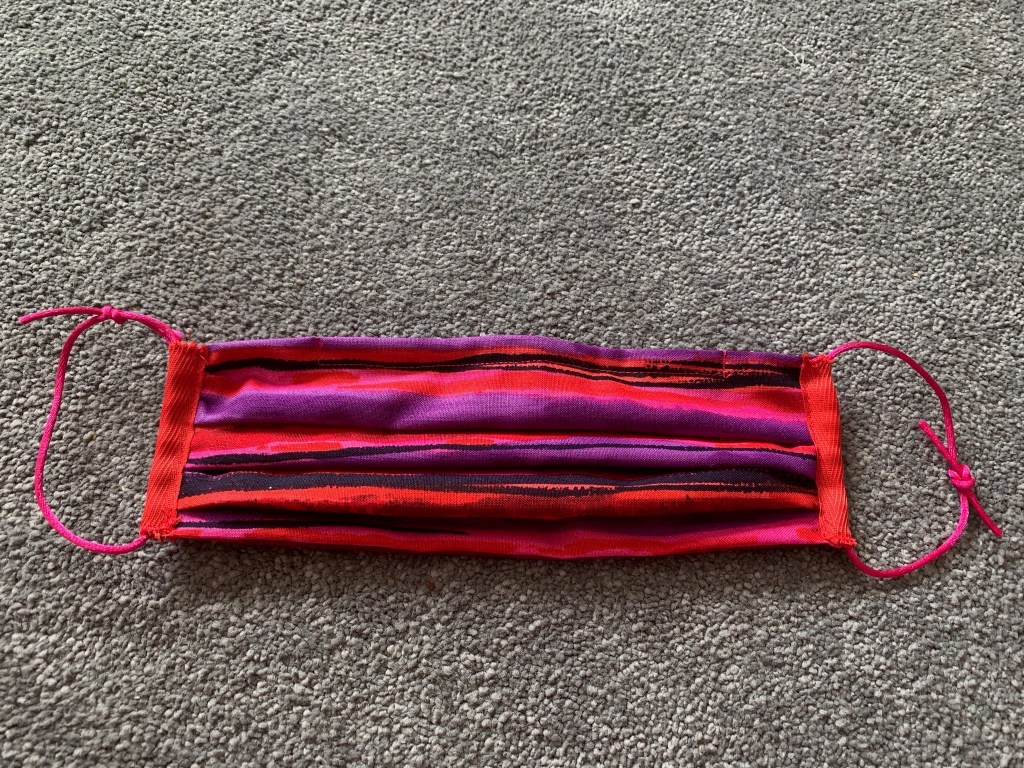
- The pleating is easy once you get used to it but the first time seems really fiddly. Remember your pleats must face down your mask, away from the nose wire. You need a total of 3 pleats. The top of one pleat should approximately meet the bottom of the next one. You want to end up with a mask which is 7cm wide at the sides. You fold the material starting just under the stitching of your box for the wire, about 2cm from the top.
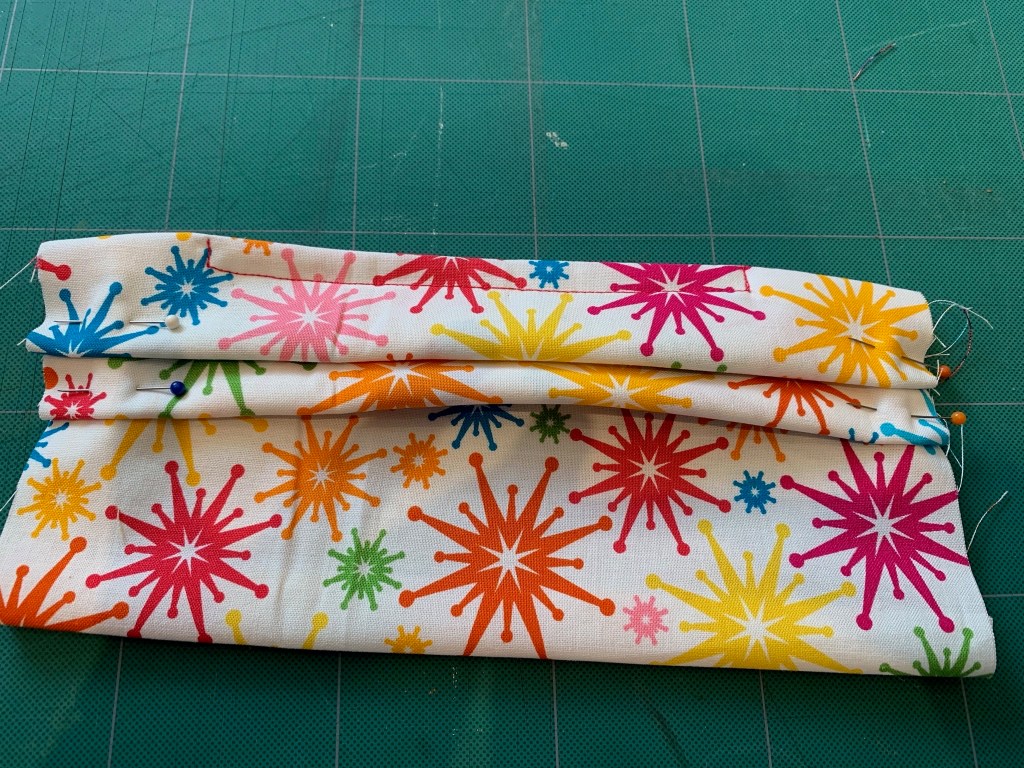
- You pin the pleats into place and once you’ve made your 3, check the width of your mask is no more than 7 cm wide, perhaps slightly less. When you’re happy with it, zig-zag stitch the edges of the mask to hold the pleats in place.
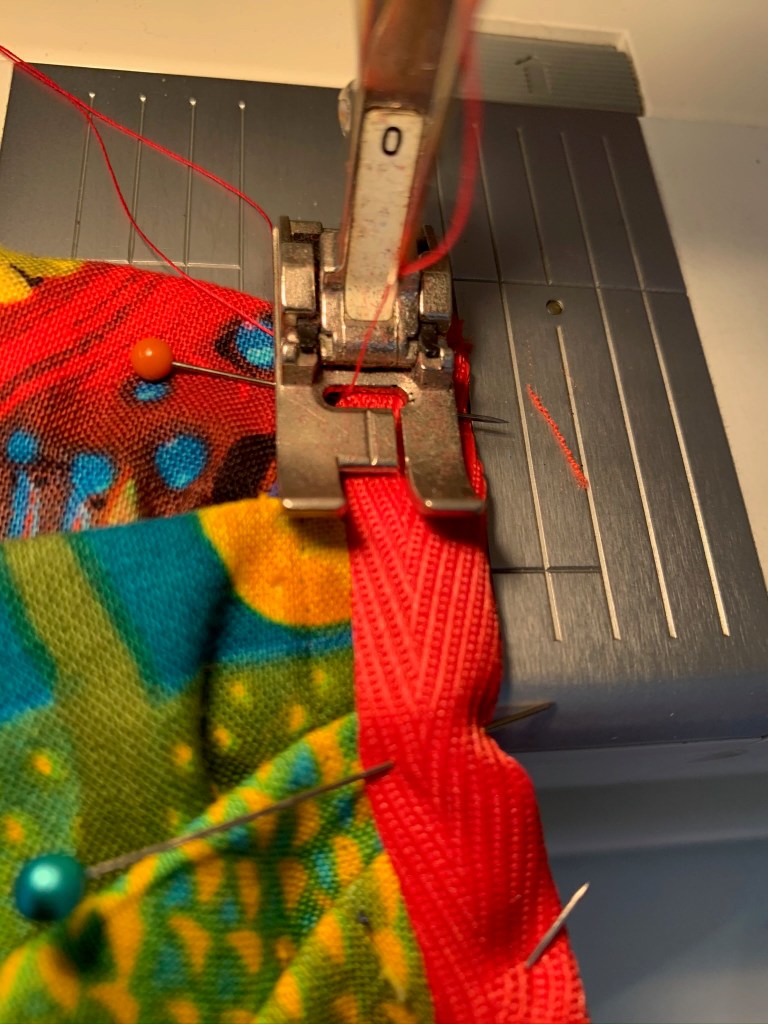
- Cut your tape exactly into two so you have 2 pieces 7 cm long. Zig-zag the short edges so they don’t fray. These must not be sewn onto the mask to enable you to get the elastic in and out (in case the knots in the elastic come undone.)
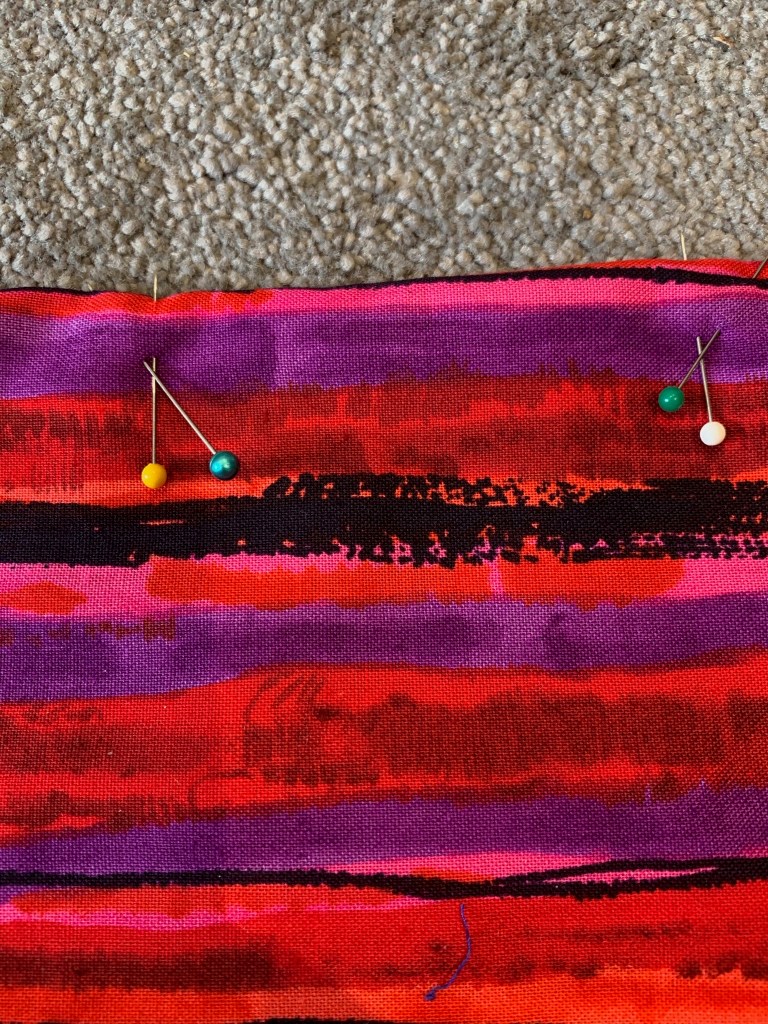
- Pin the tape to the edges of your mask as shown below. Try to get the same amount of tape on the back and the front of the mask.
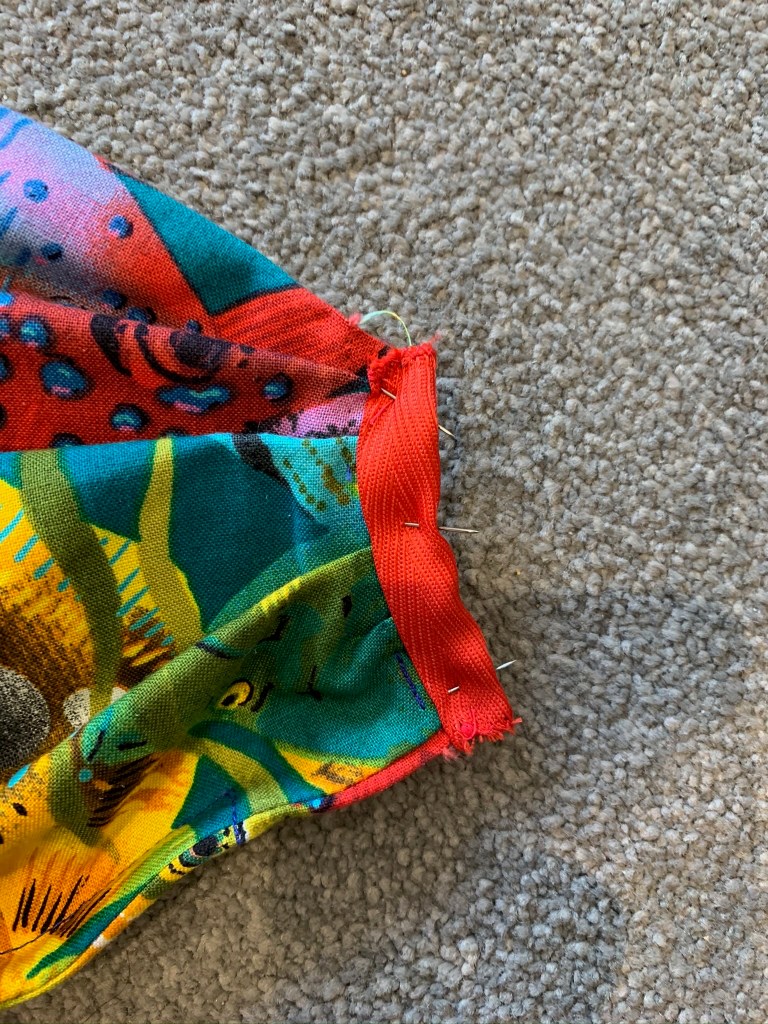
- Stitch the tape to the mask as close to the edge as you dare.
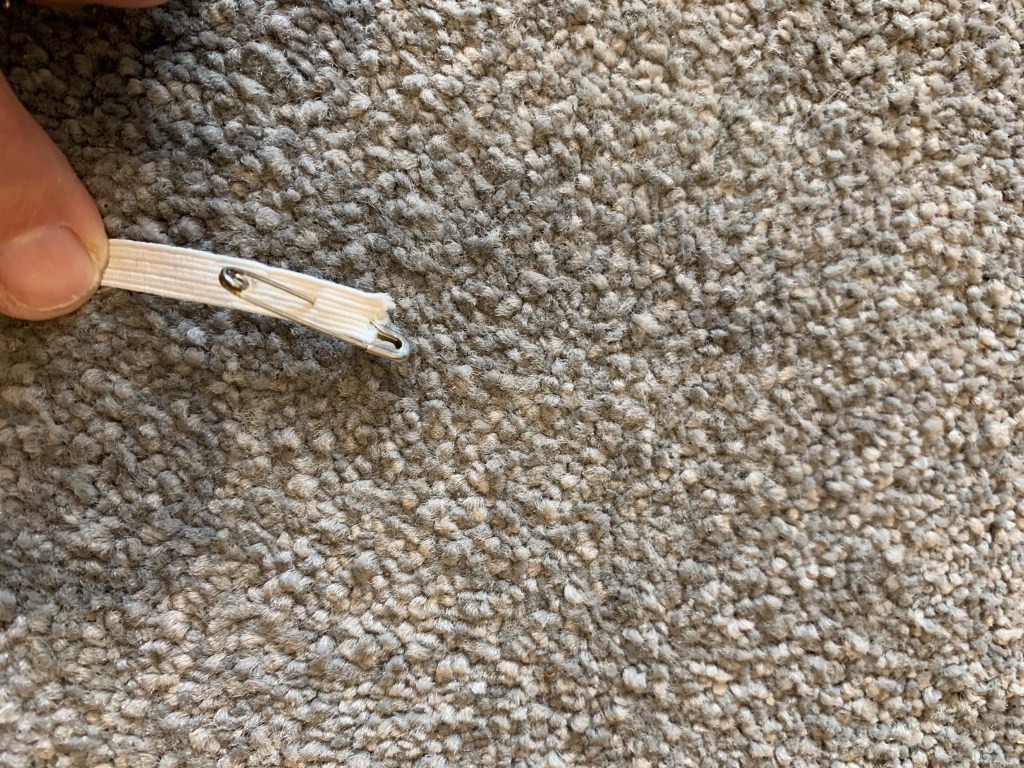
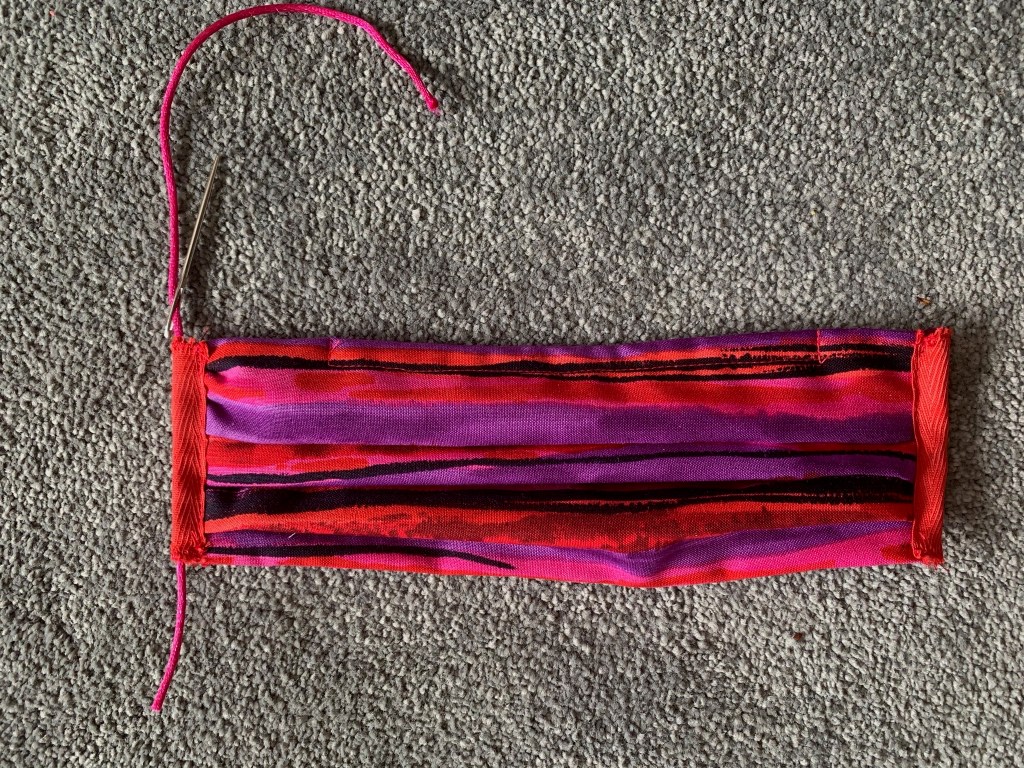
- Now cut the elastic exactly into two 25 cm lengths. Using either a tapestry needle to thread the elastic or a tiny safety pin, wiggle the needle or safety pin through the tape to bring the elastic from the bottom to the top.

- Now tie the ends of the elastic together to make a secure knot – maybe a reef knot, 1 cm from the end of each piece of elastic and you have your mask
I hope you enjoy making these and that they keep you cheerful and safe.
