Most Christian countries have some form of enriched bread that they bake for Easter: there’s the Greek Tsoureki, Italian Pane di Pasqua, German Osterbrot, Russian Kulich, English Hot Cross Buns, Paraguayan Chipa – there are dozens more. Since it’s coming up to Easter and I needed a country that I haven’t yet visited on this round the world trip, I’ve gone for Kozunak, the version that’s popular in Bulgaria (and, indeed, in Romania, Serbia and other Balkan countries.
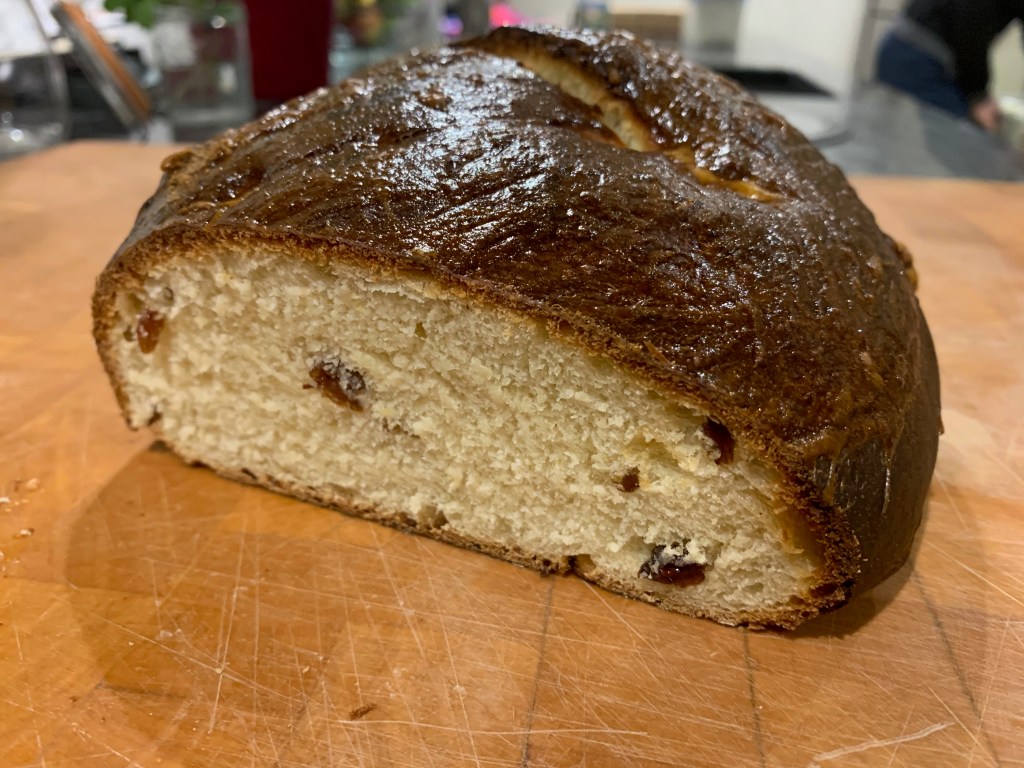
This is a braided loaf, not so far off a Jewish Challah, but sweeter and with the addition of lemon and rum-soaked raisins. It’s not massively difficult in essence, but set aside a good amount of time for the three rises that will be needed. I’ve started with a recipe from The Spruce Eats (another of Barbara Rolek’s), halved the quantities as best I could, and broken the recipe up into several stages so that it’s easier to see which ingredients you need for which stage.
My one moan about this recipe is that it uses heroic numbers of small bowls. If you hate washing up, this probably isn’t one for you, or you might want to reshuffle the exact order of the processes a bit.
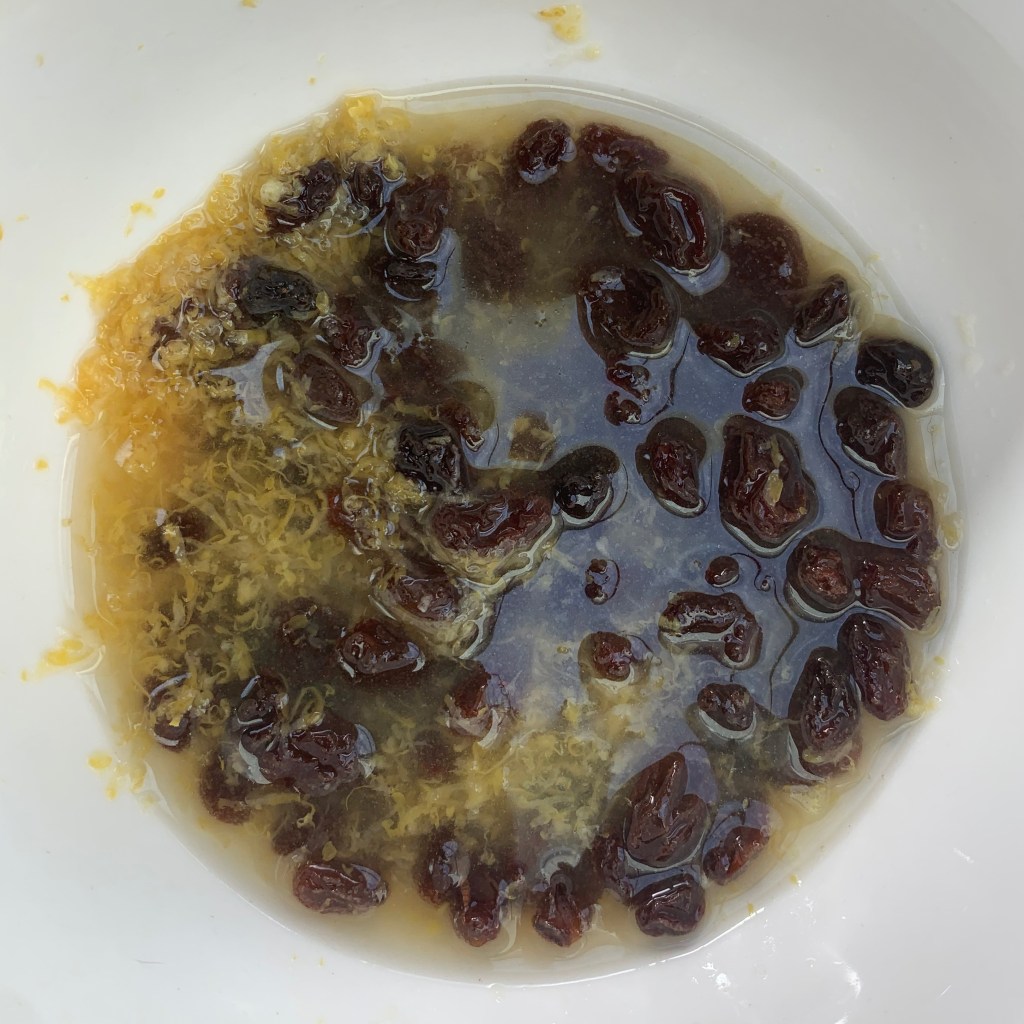
The raisins
1 lemon
30 ml rum
50g raisins
Grate the lemon zest into a small bowl
Juice around half the lemon and add it to the bowl (I ended up with about 30ml)
Add the rum and raisins to the bowl and mix
Leave to stand until needed
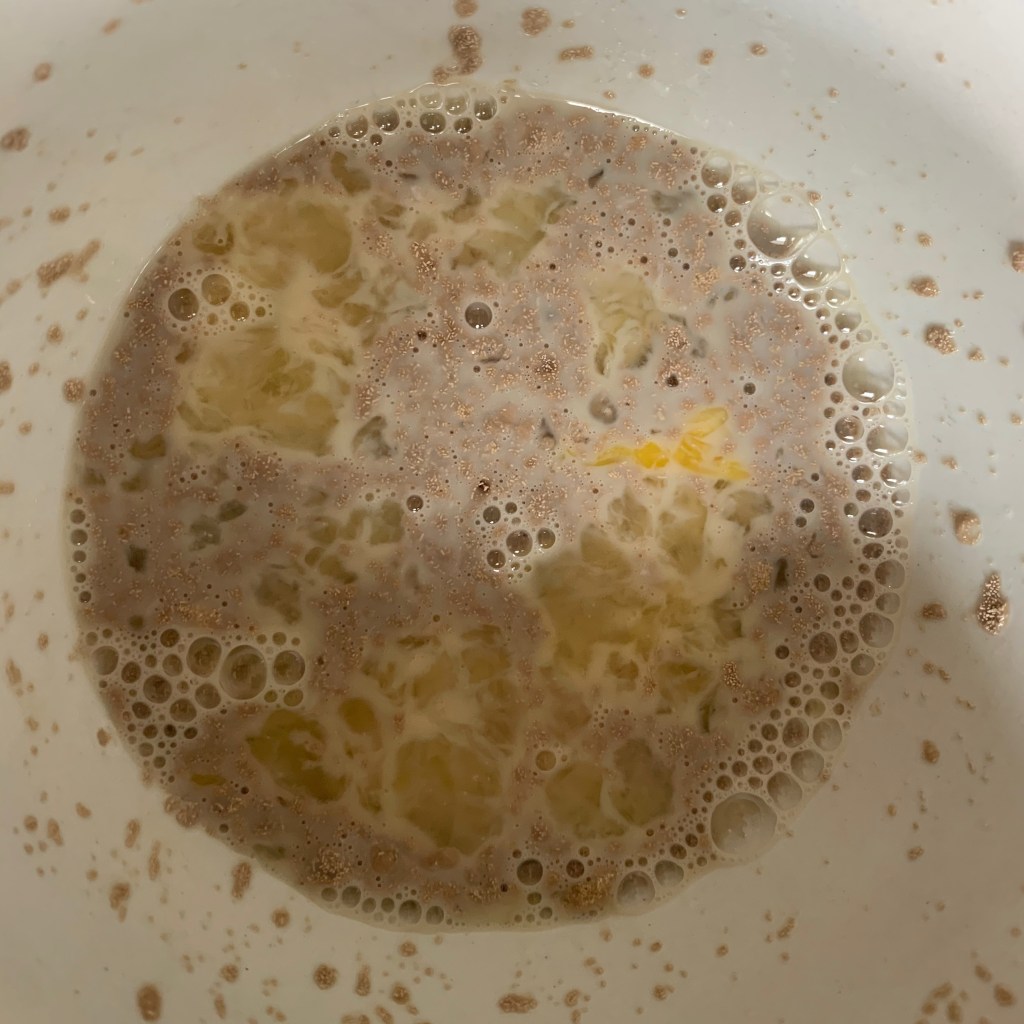
Yeast mix
90ml milk
1 egg (you’ll use half at this stage, half later)
7g yeast
10g sugar
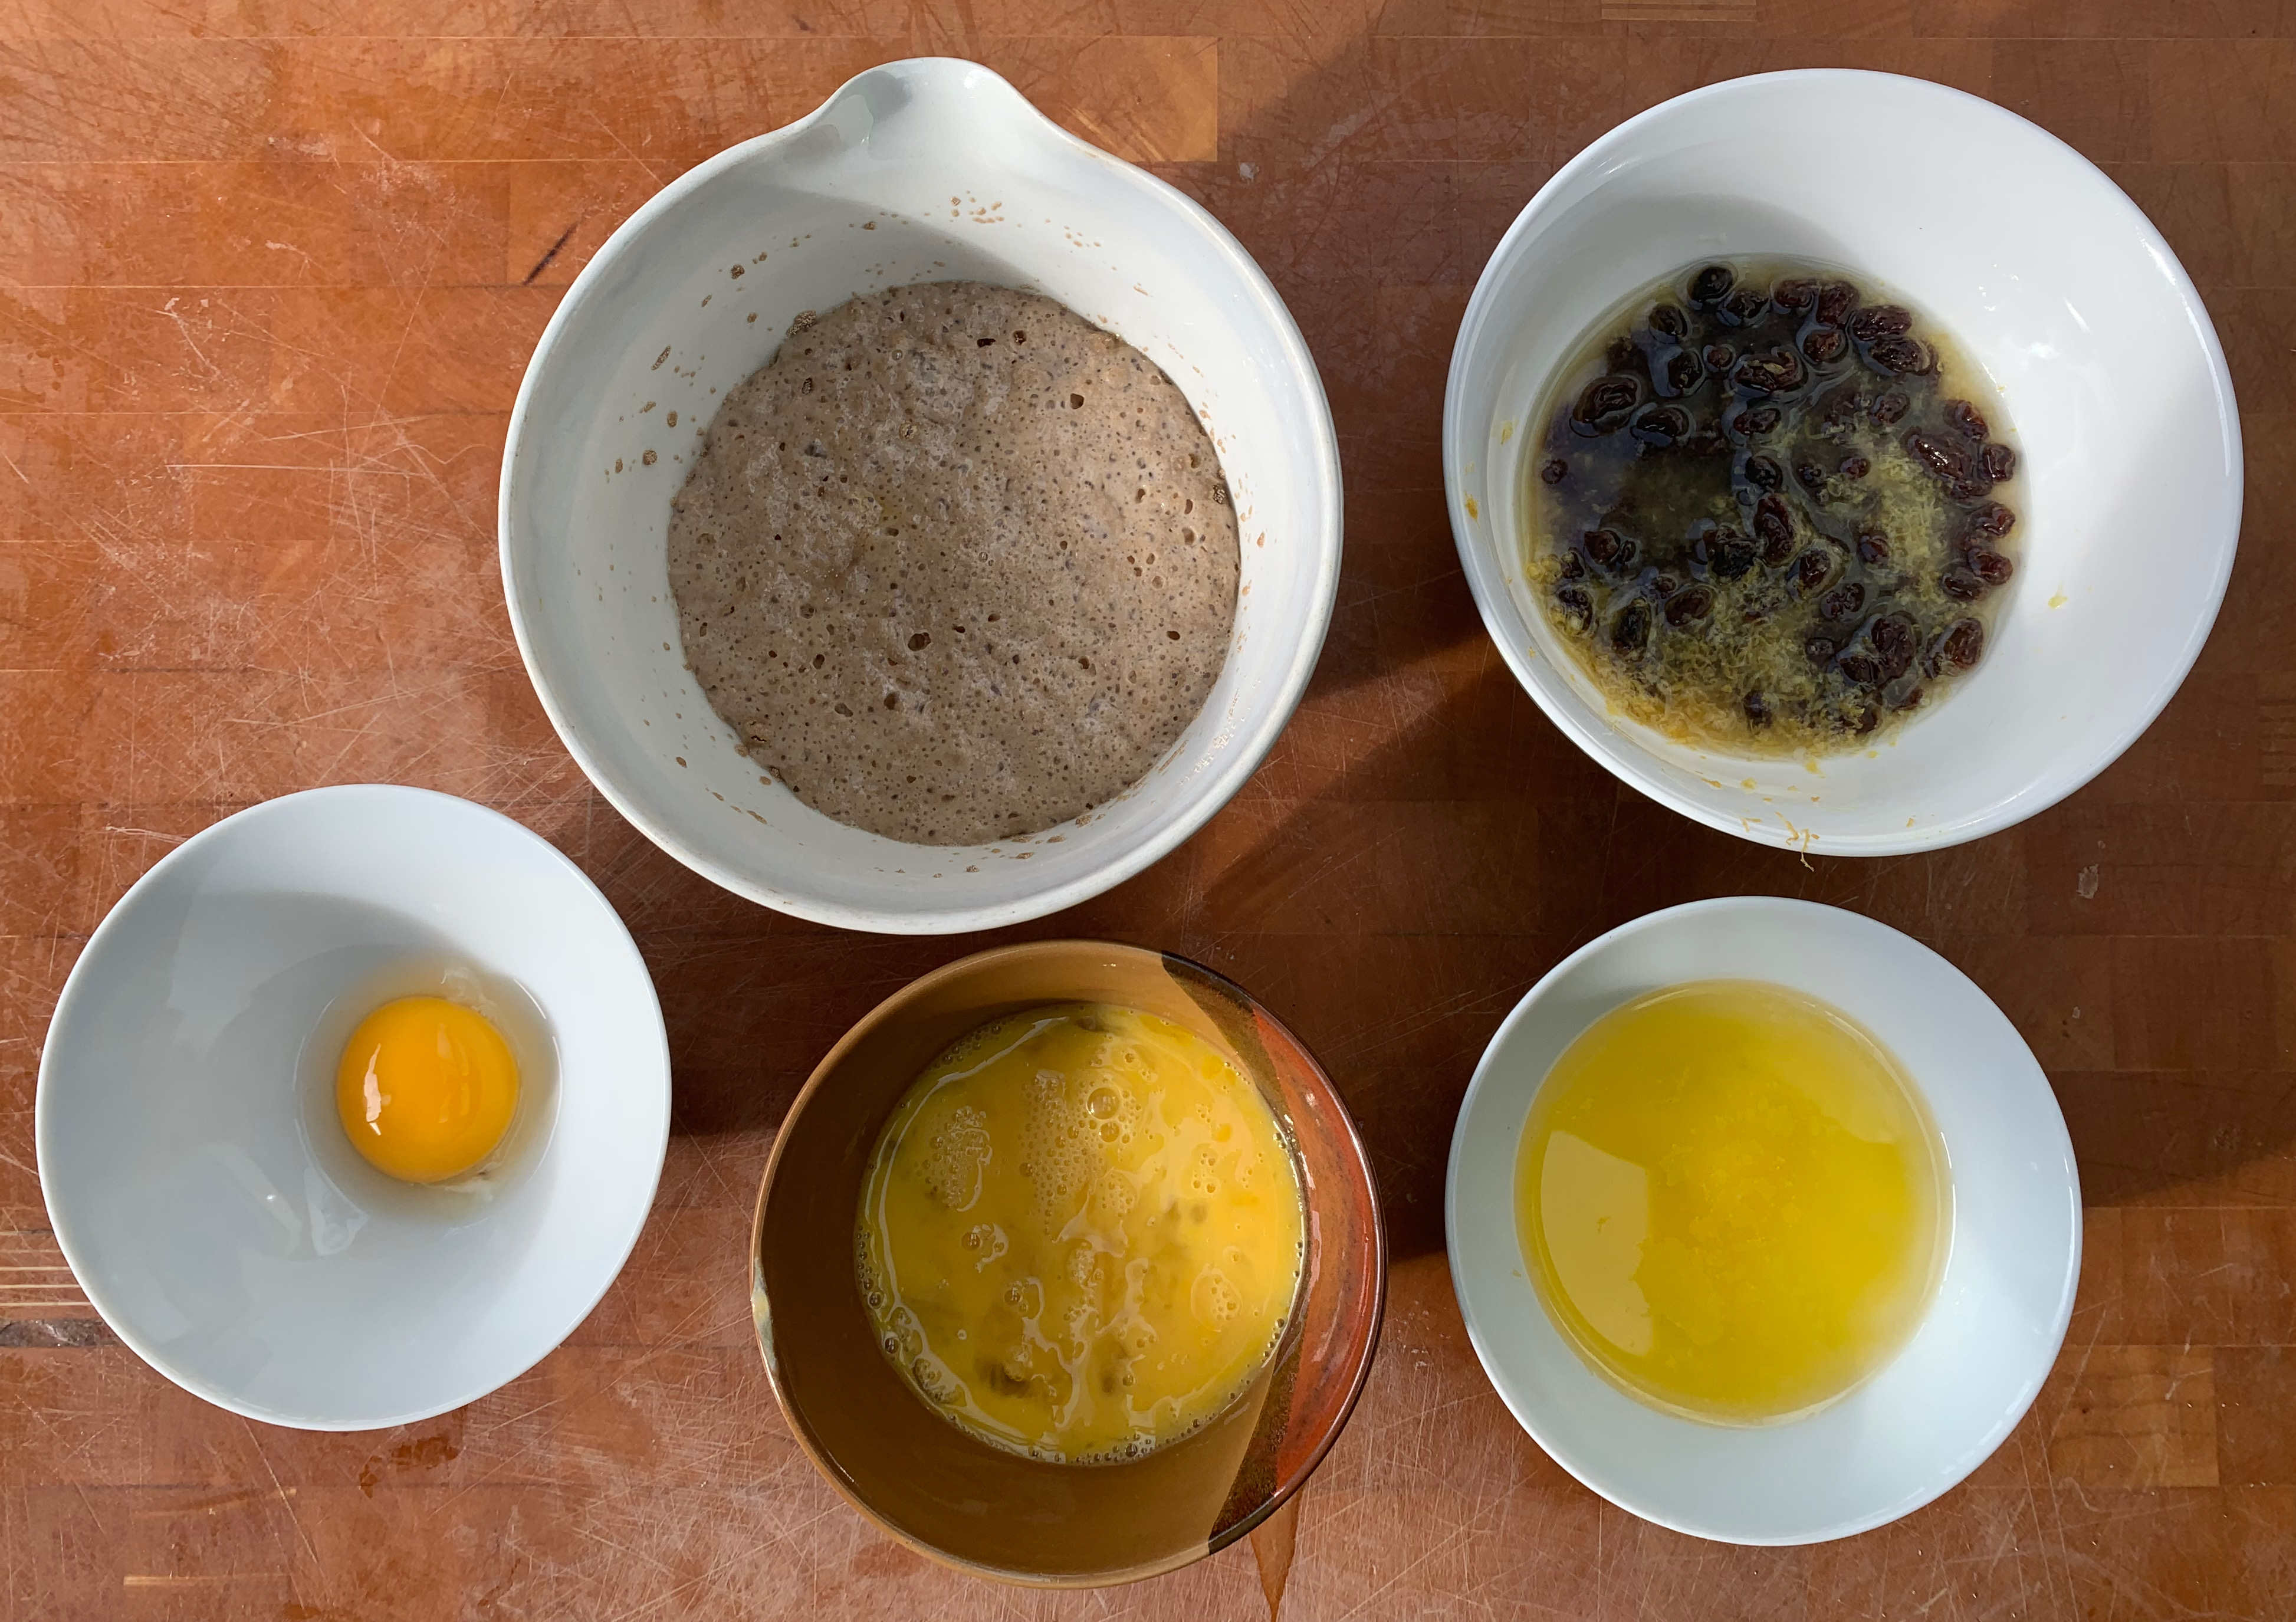
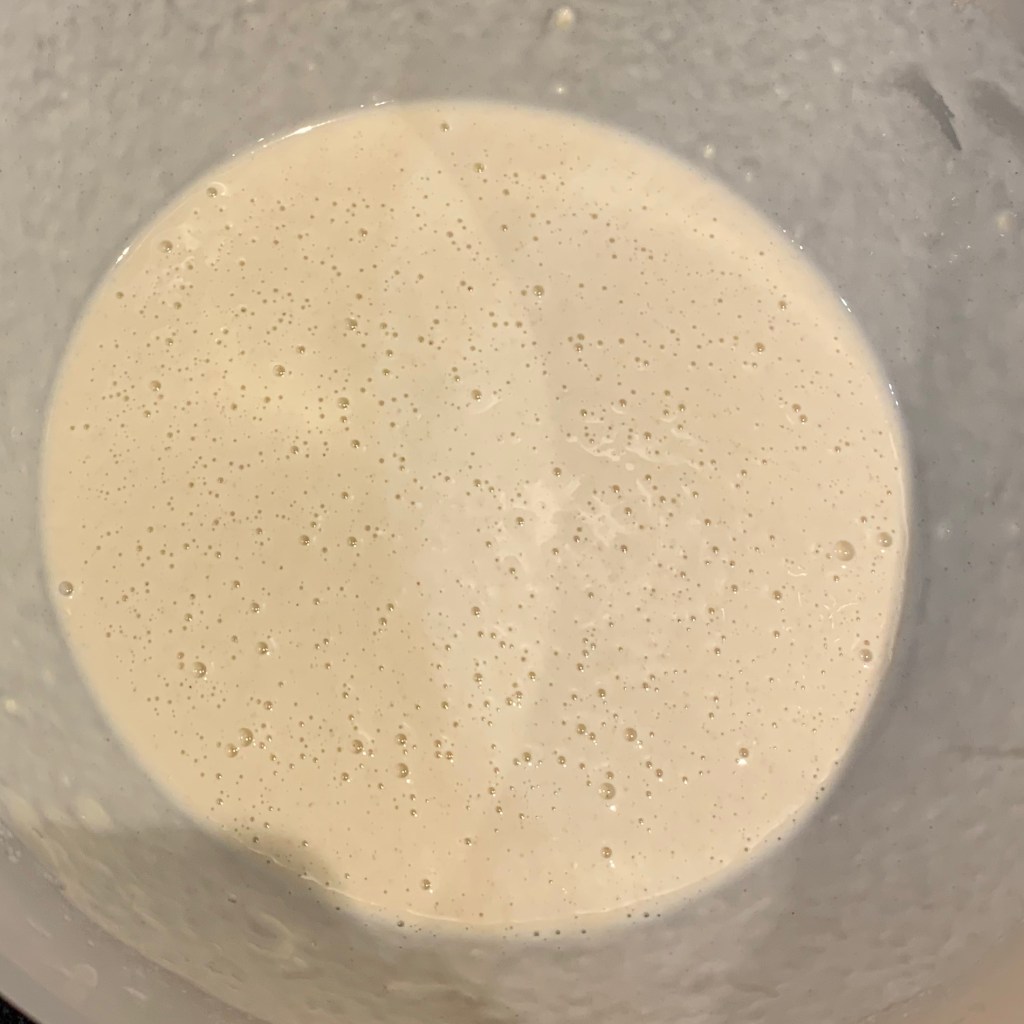
Warm the milk to just below boiling – say 80℃. Pour it into a small bowl. (Note: it’s sensible to put this straight into the bowl of your stand mixer, which I didn’t do)
Beat the egg in a small bowl
Once the milk has cooled to around 40℃, add the yeast, sugar and around half the beaten egg. Keep the rest of the egg: you’ll be using it shortly.
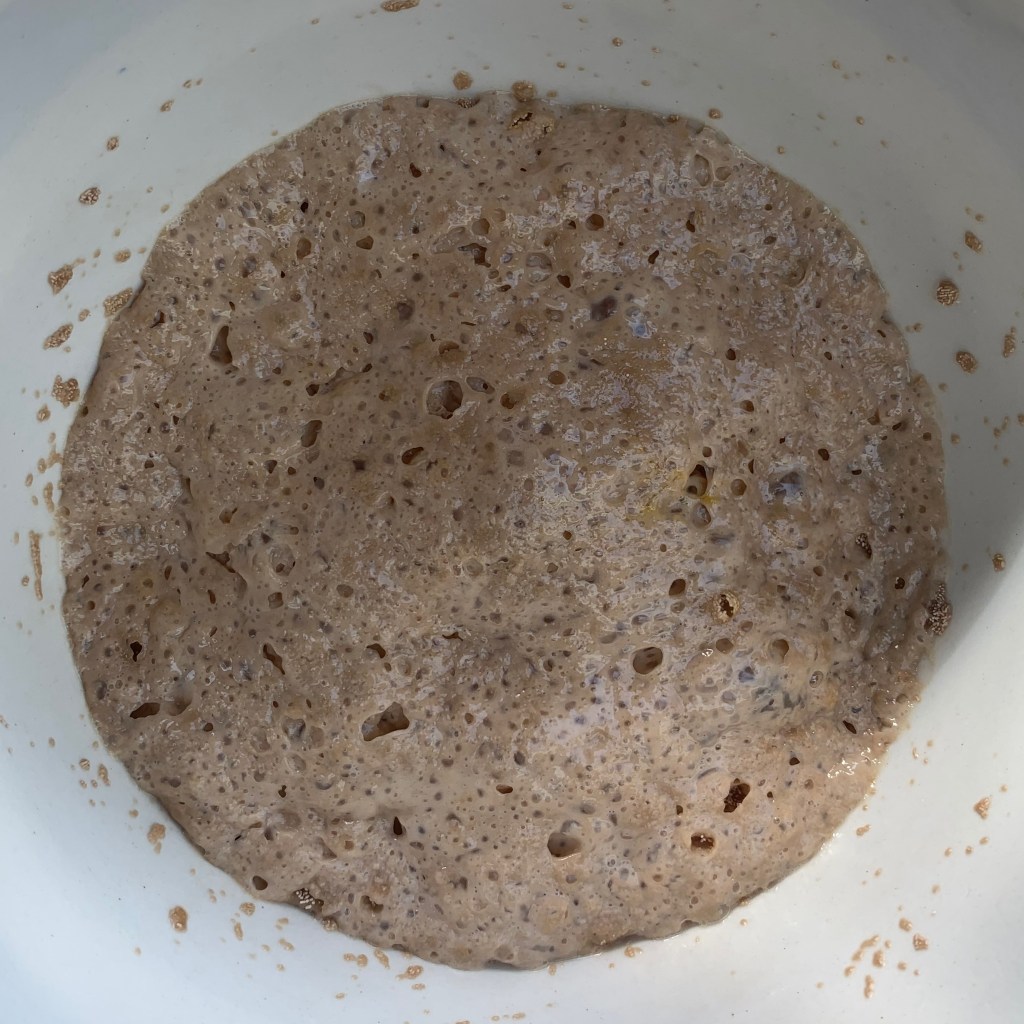
Leave to stand for 20-30 minutes until the mixture is frothy.
The dough and final baking
120ml milk
100g sugar
30g sunflower oil, plus some more for greasing
30g butter
2 eggs, plus the half left over from earlier
vanilla essence to taste
600g flour
10g salt
20g flaked almonds
Put the milk and sugar into a saucepan; warm until the sugar is dissolved. Remove from the heat.
Melt the butter and mix with the oil (I use 20 seconds in the microwave, but if you don’t have one, you’ll want to use a pan).
Separate one of the eggs: reserve the yolk in a small bowl, add the white and the other egg to the half a whole egg that you had left over earlier. Add some vanilla essence and beat them together. Keep the yolk aside, covered: you’ll use it for a wash before baking.
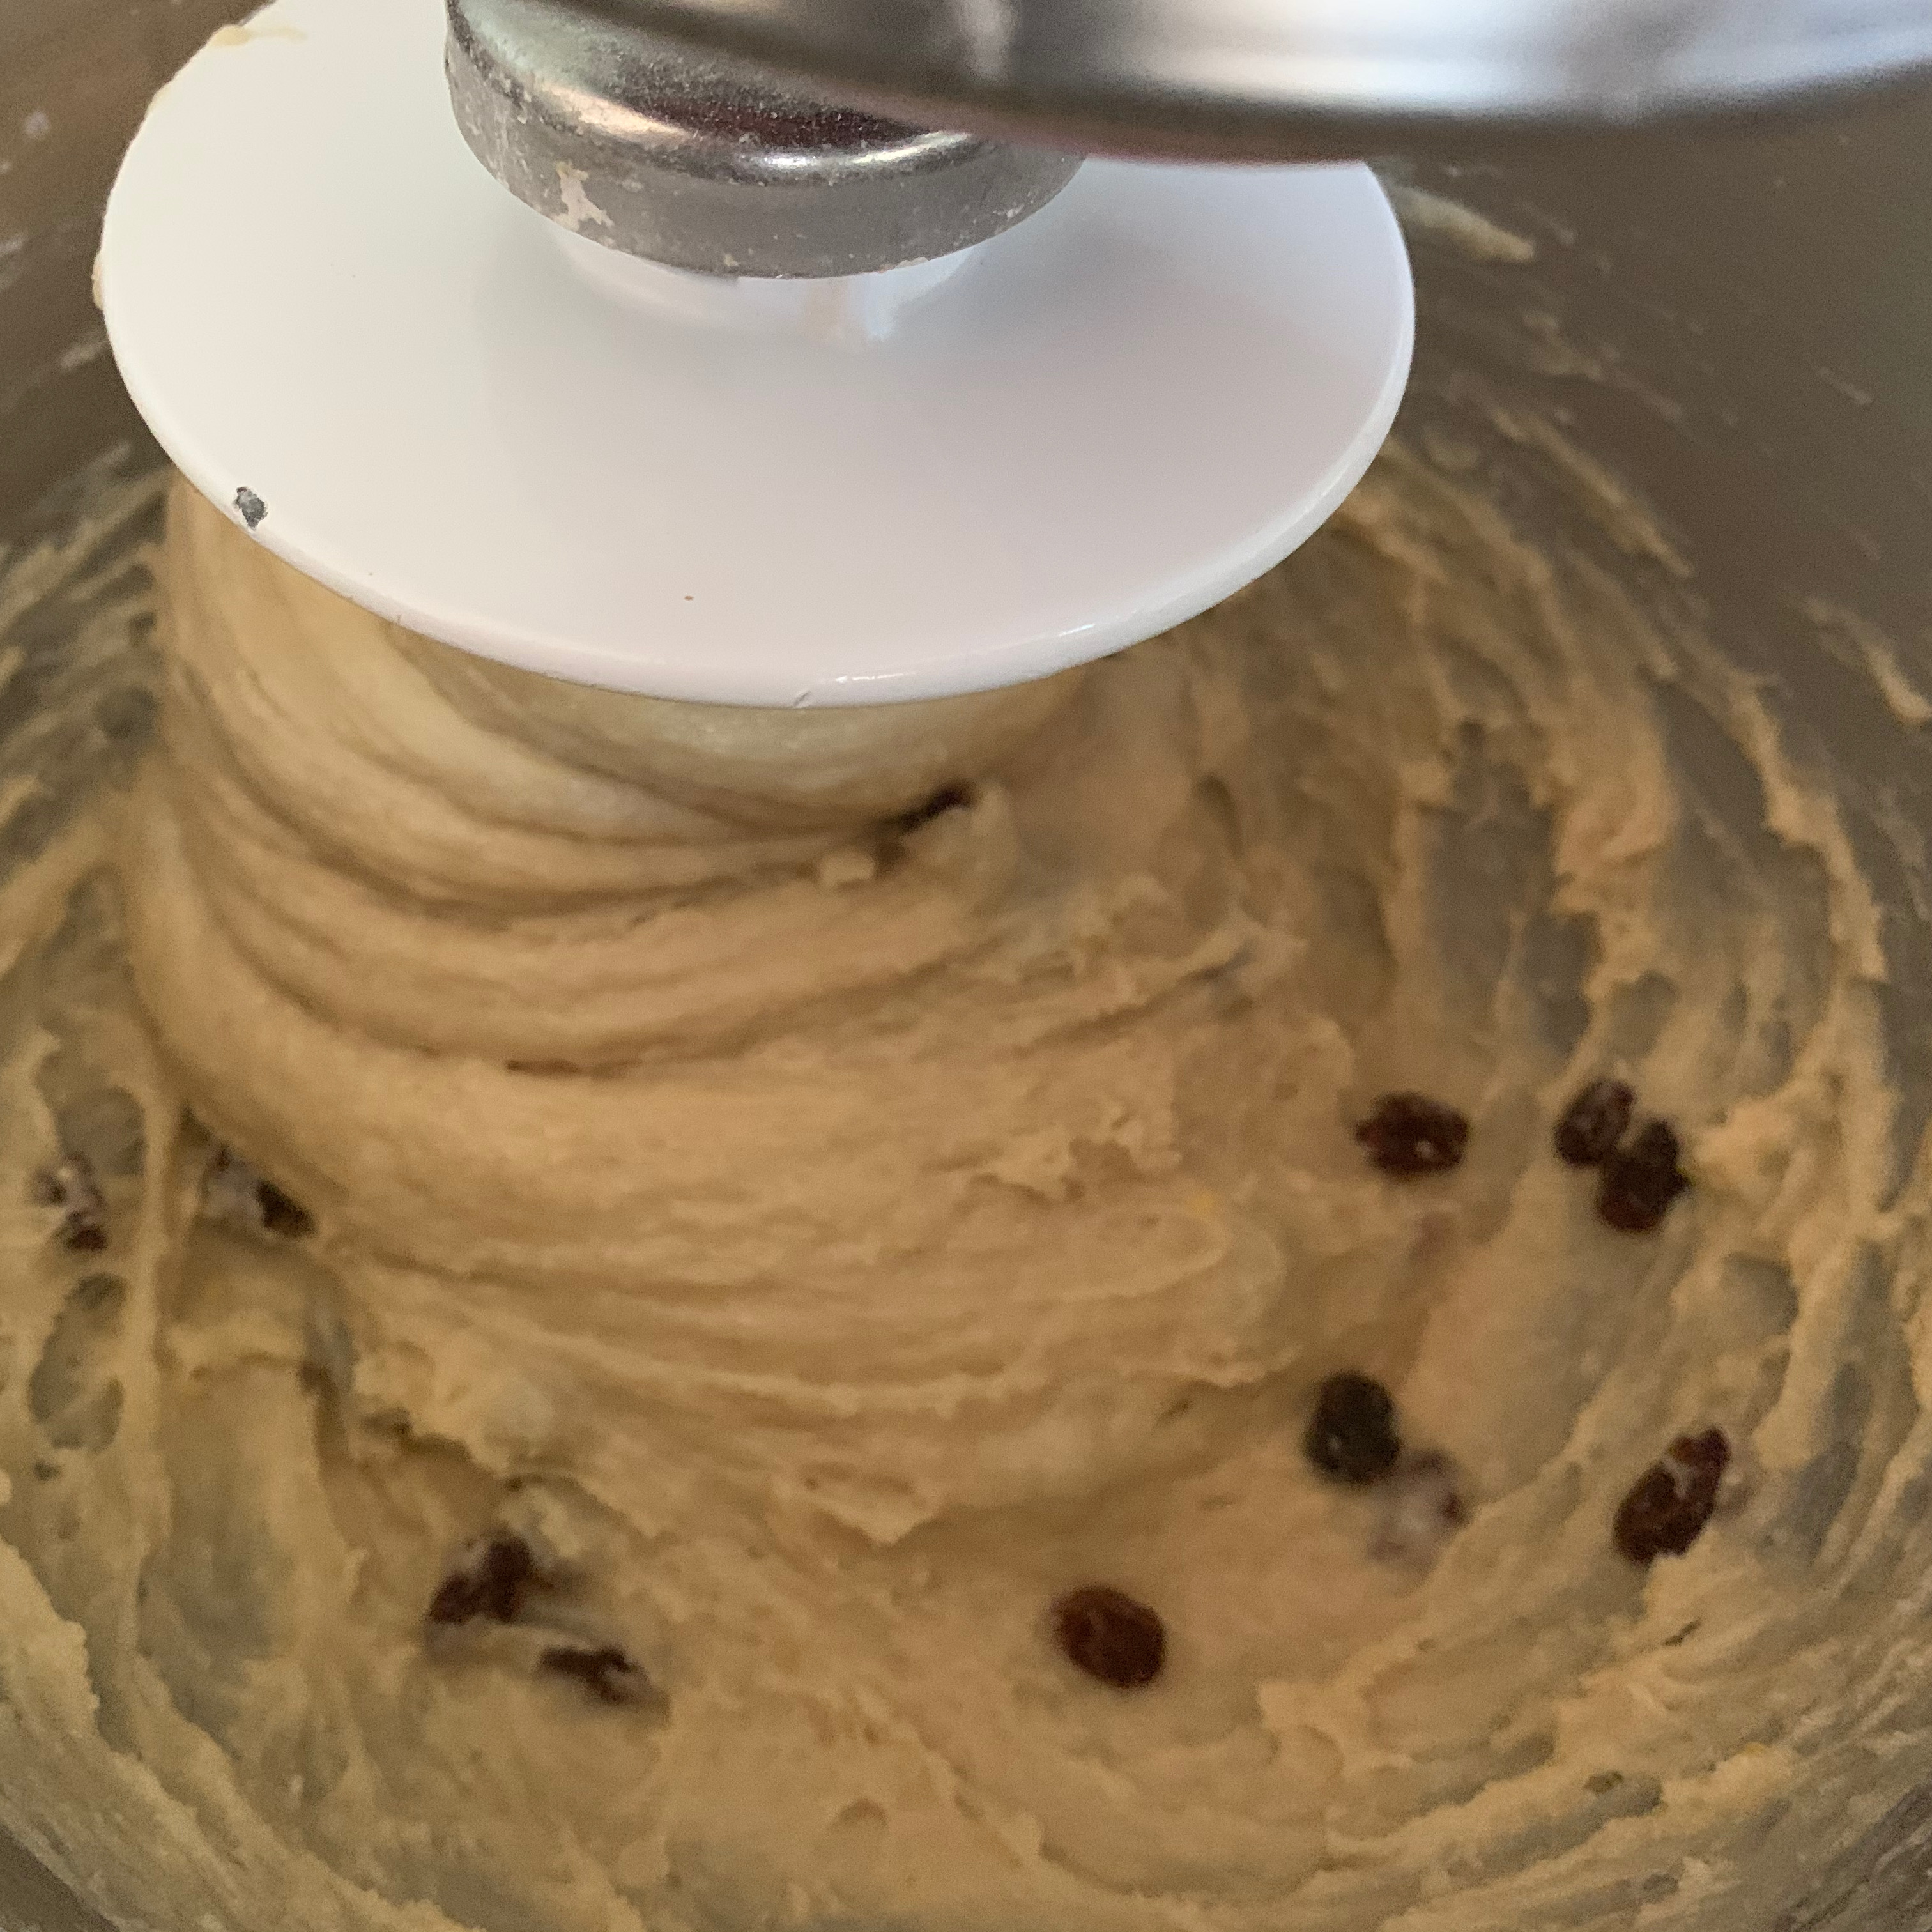
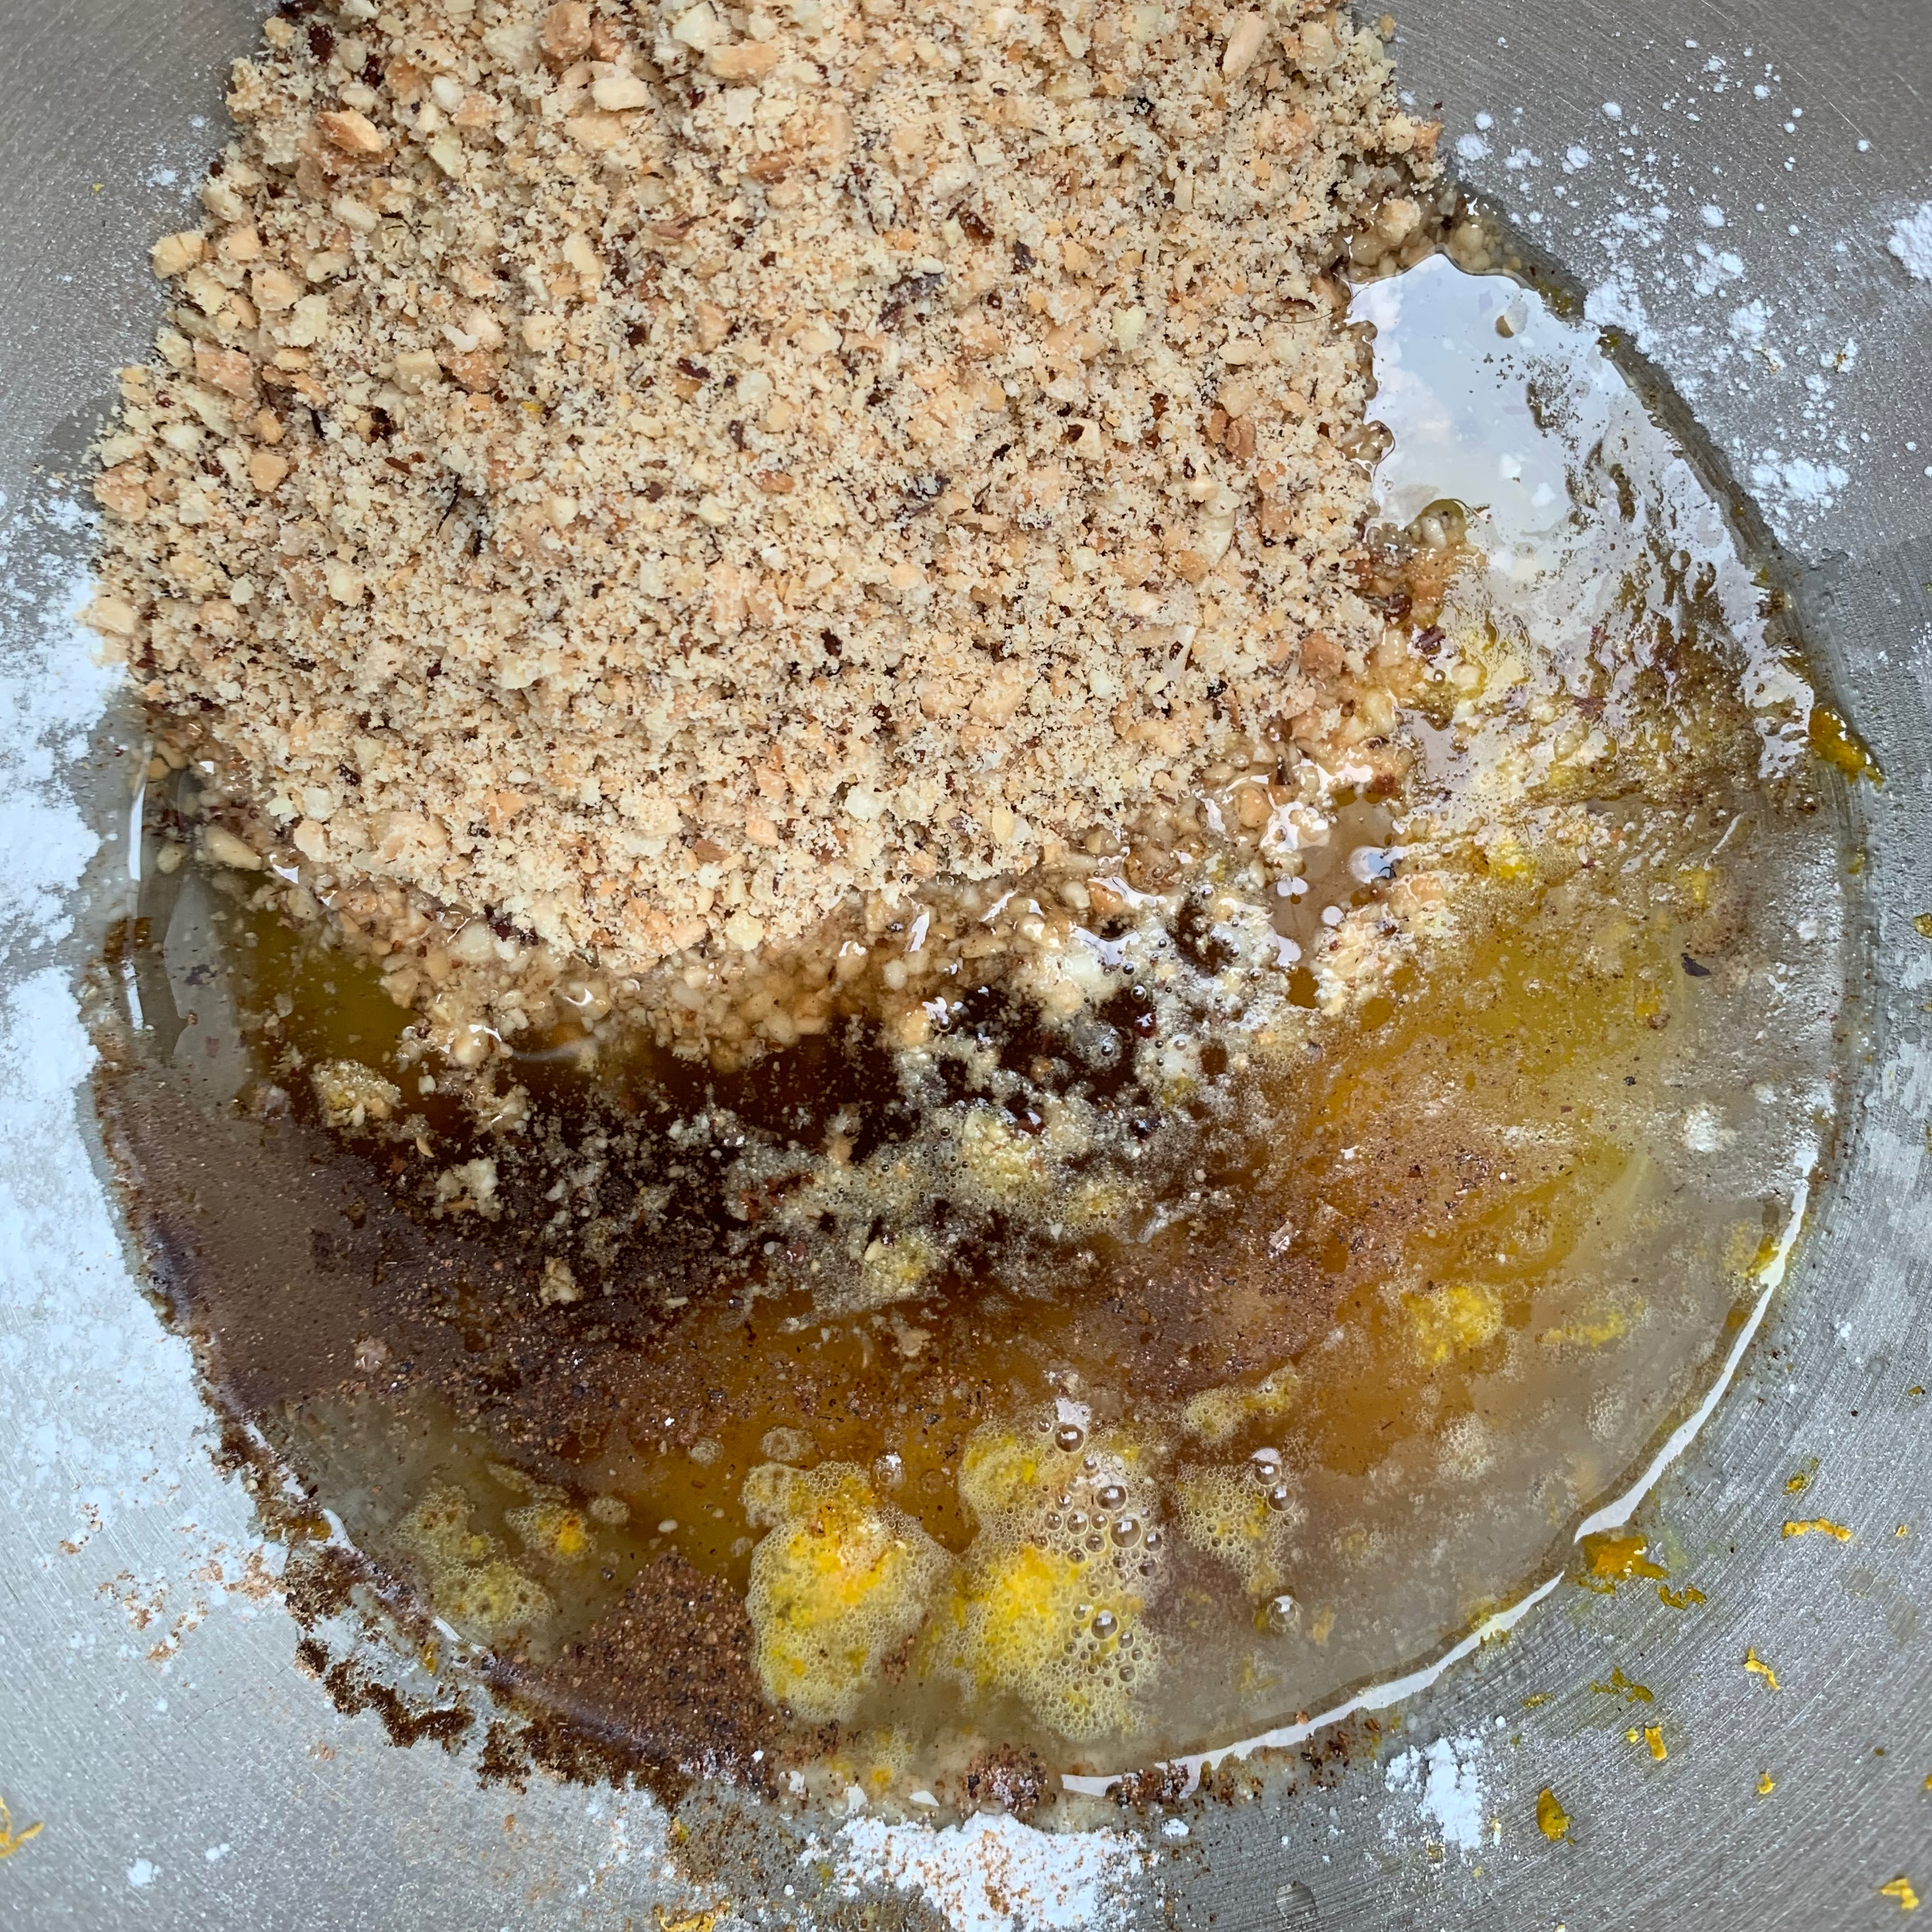
Once your sweetened milk is cool and the yeast mix is frothy, you can get started on the dough. With the yeast mixture in the bowl of my stand mixer, I used the standard beater and set it going at low speed.
Add the milk mixture.
Add the butter/oil mixture.
Drain the raisins and add them.
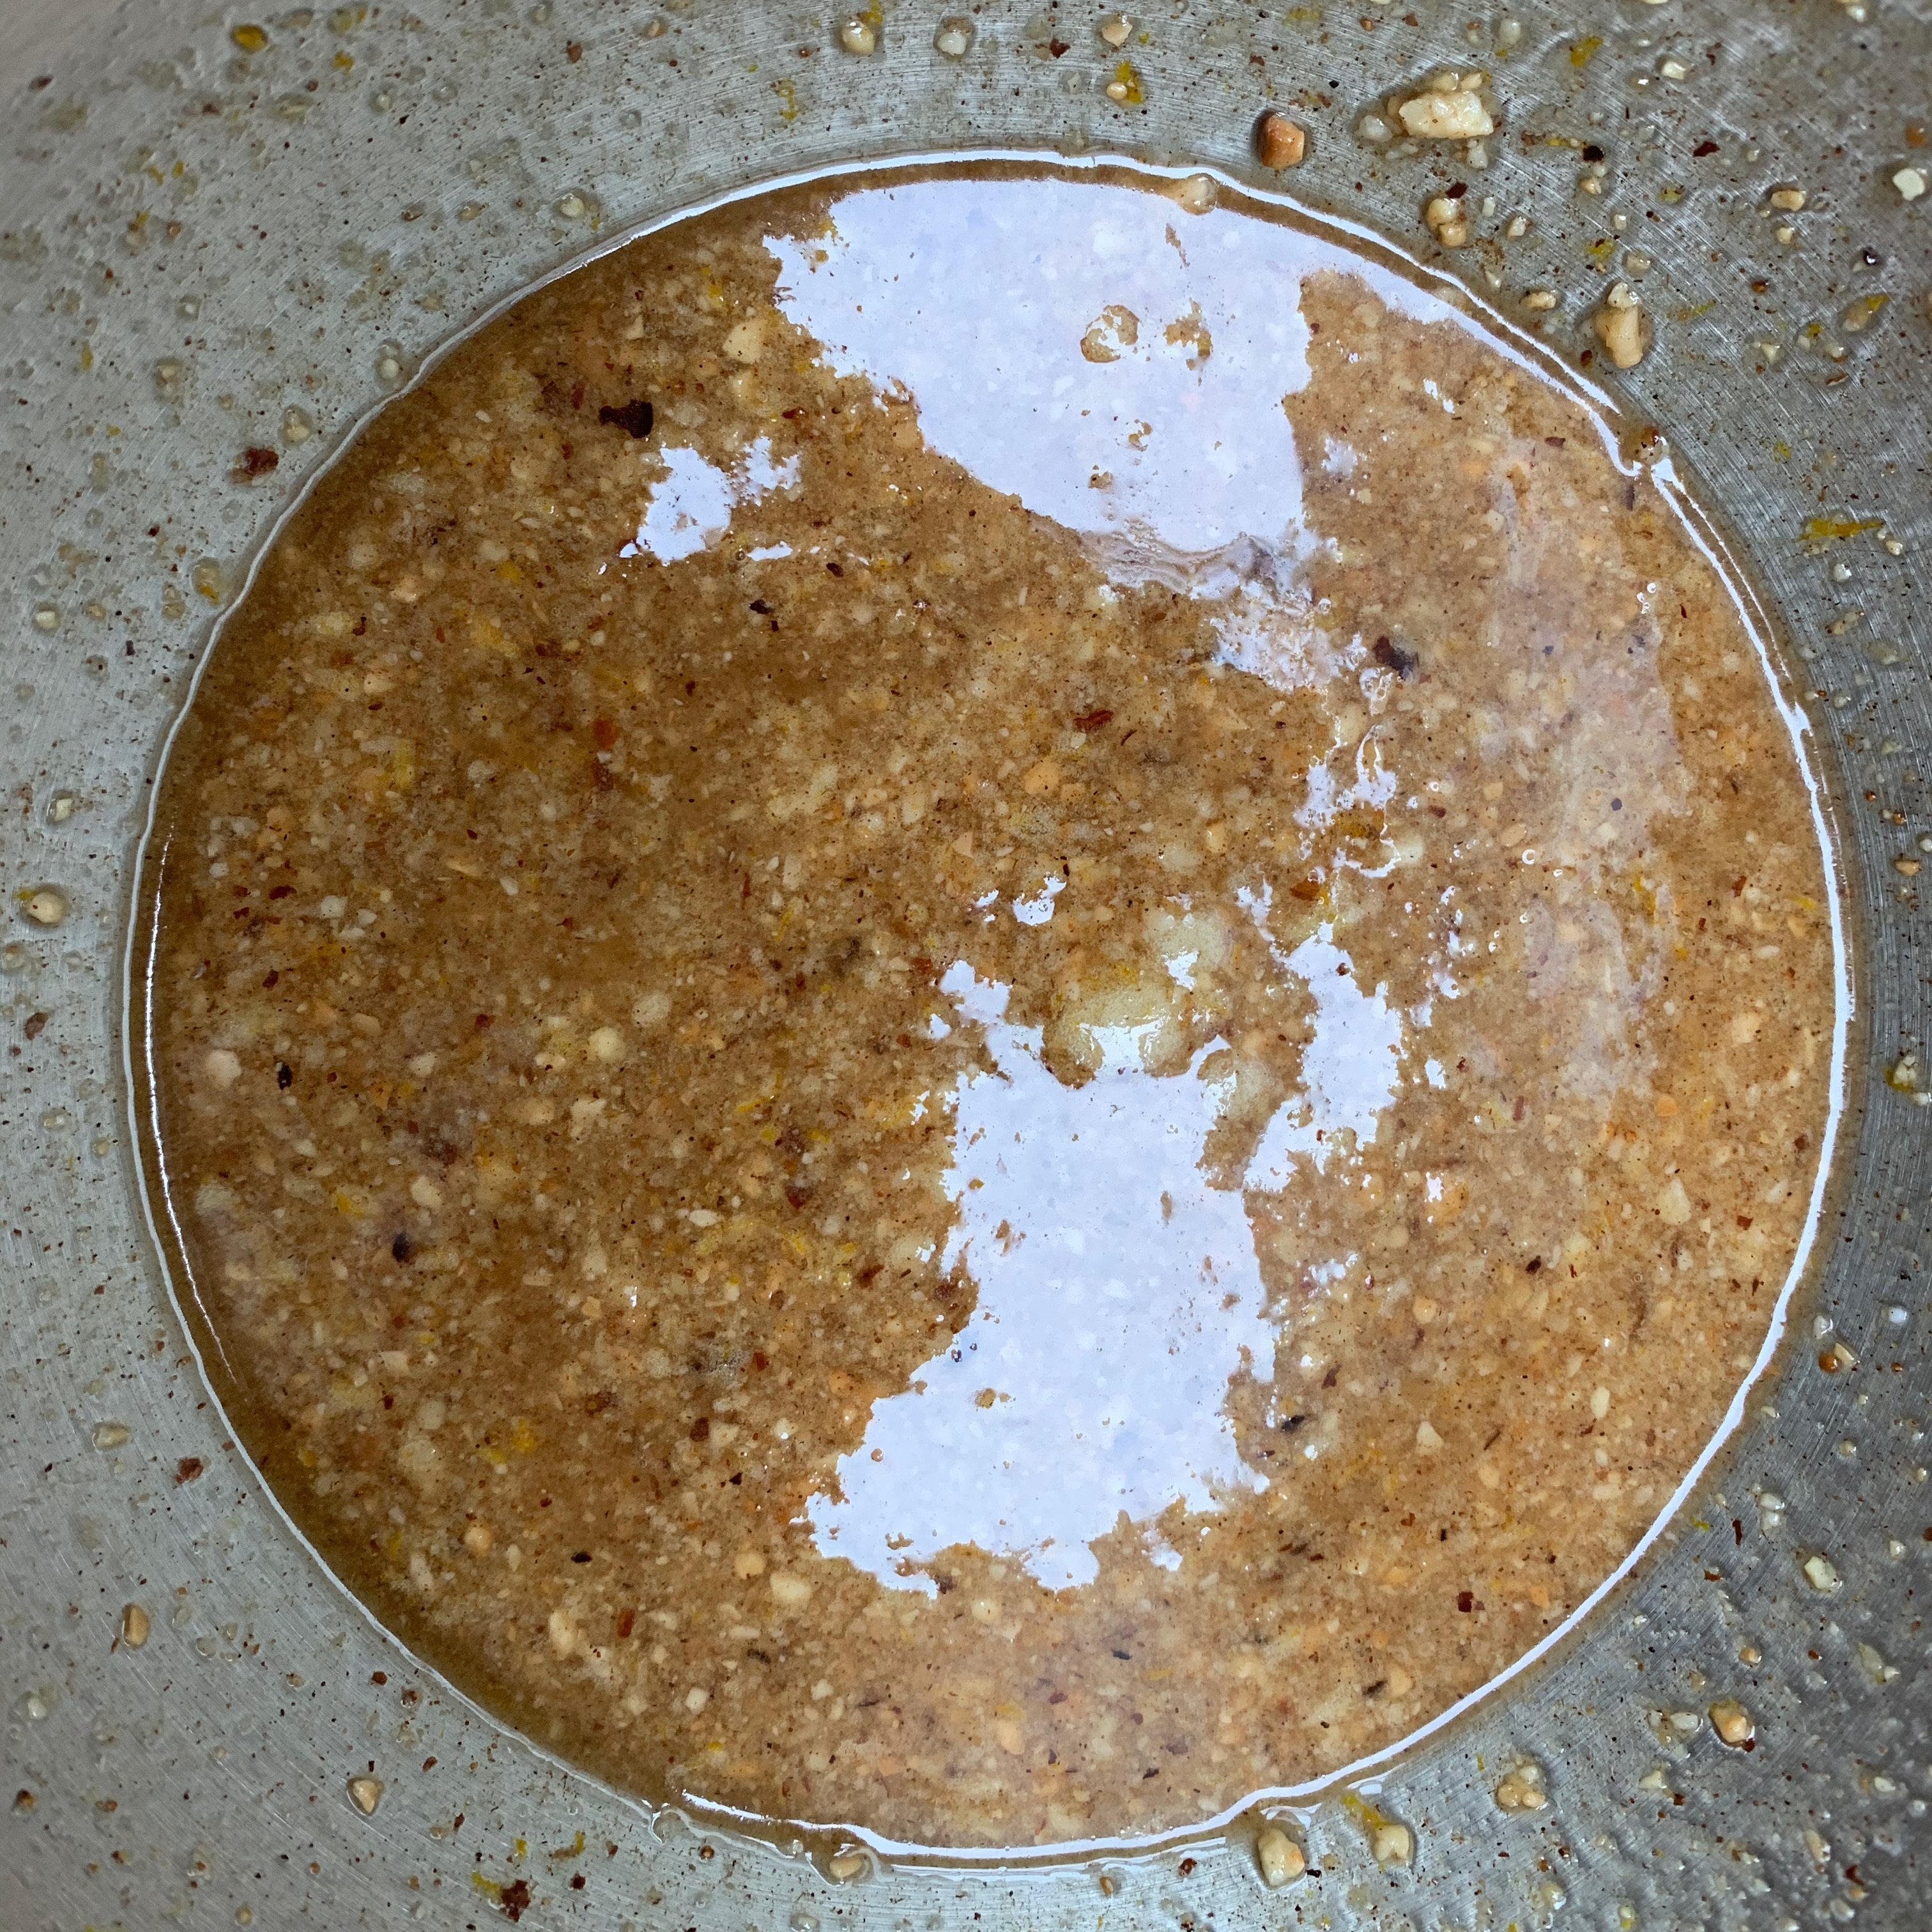
Add the flour and salt. Mix until all the ingredients are combined.
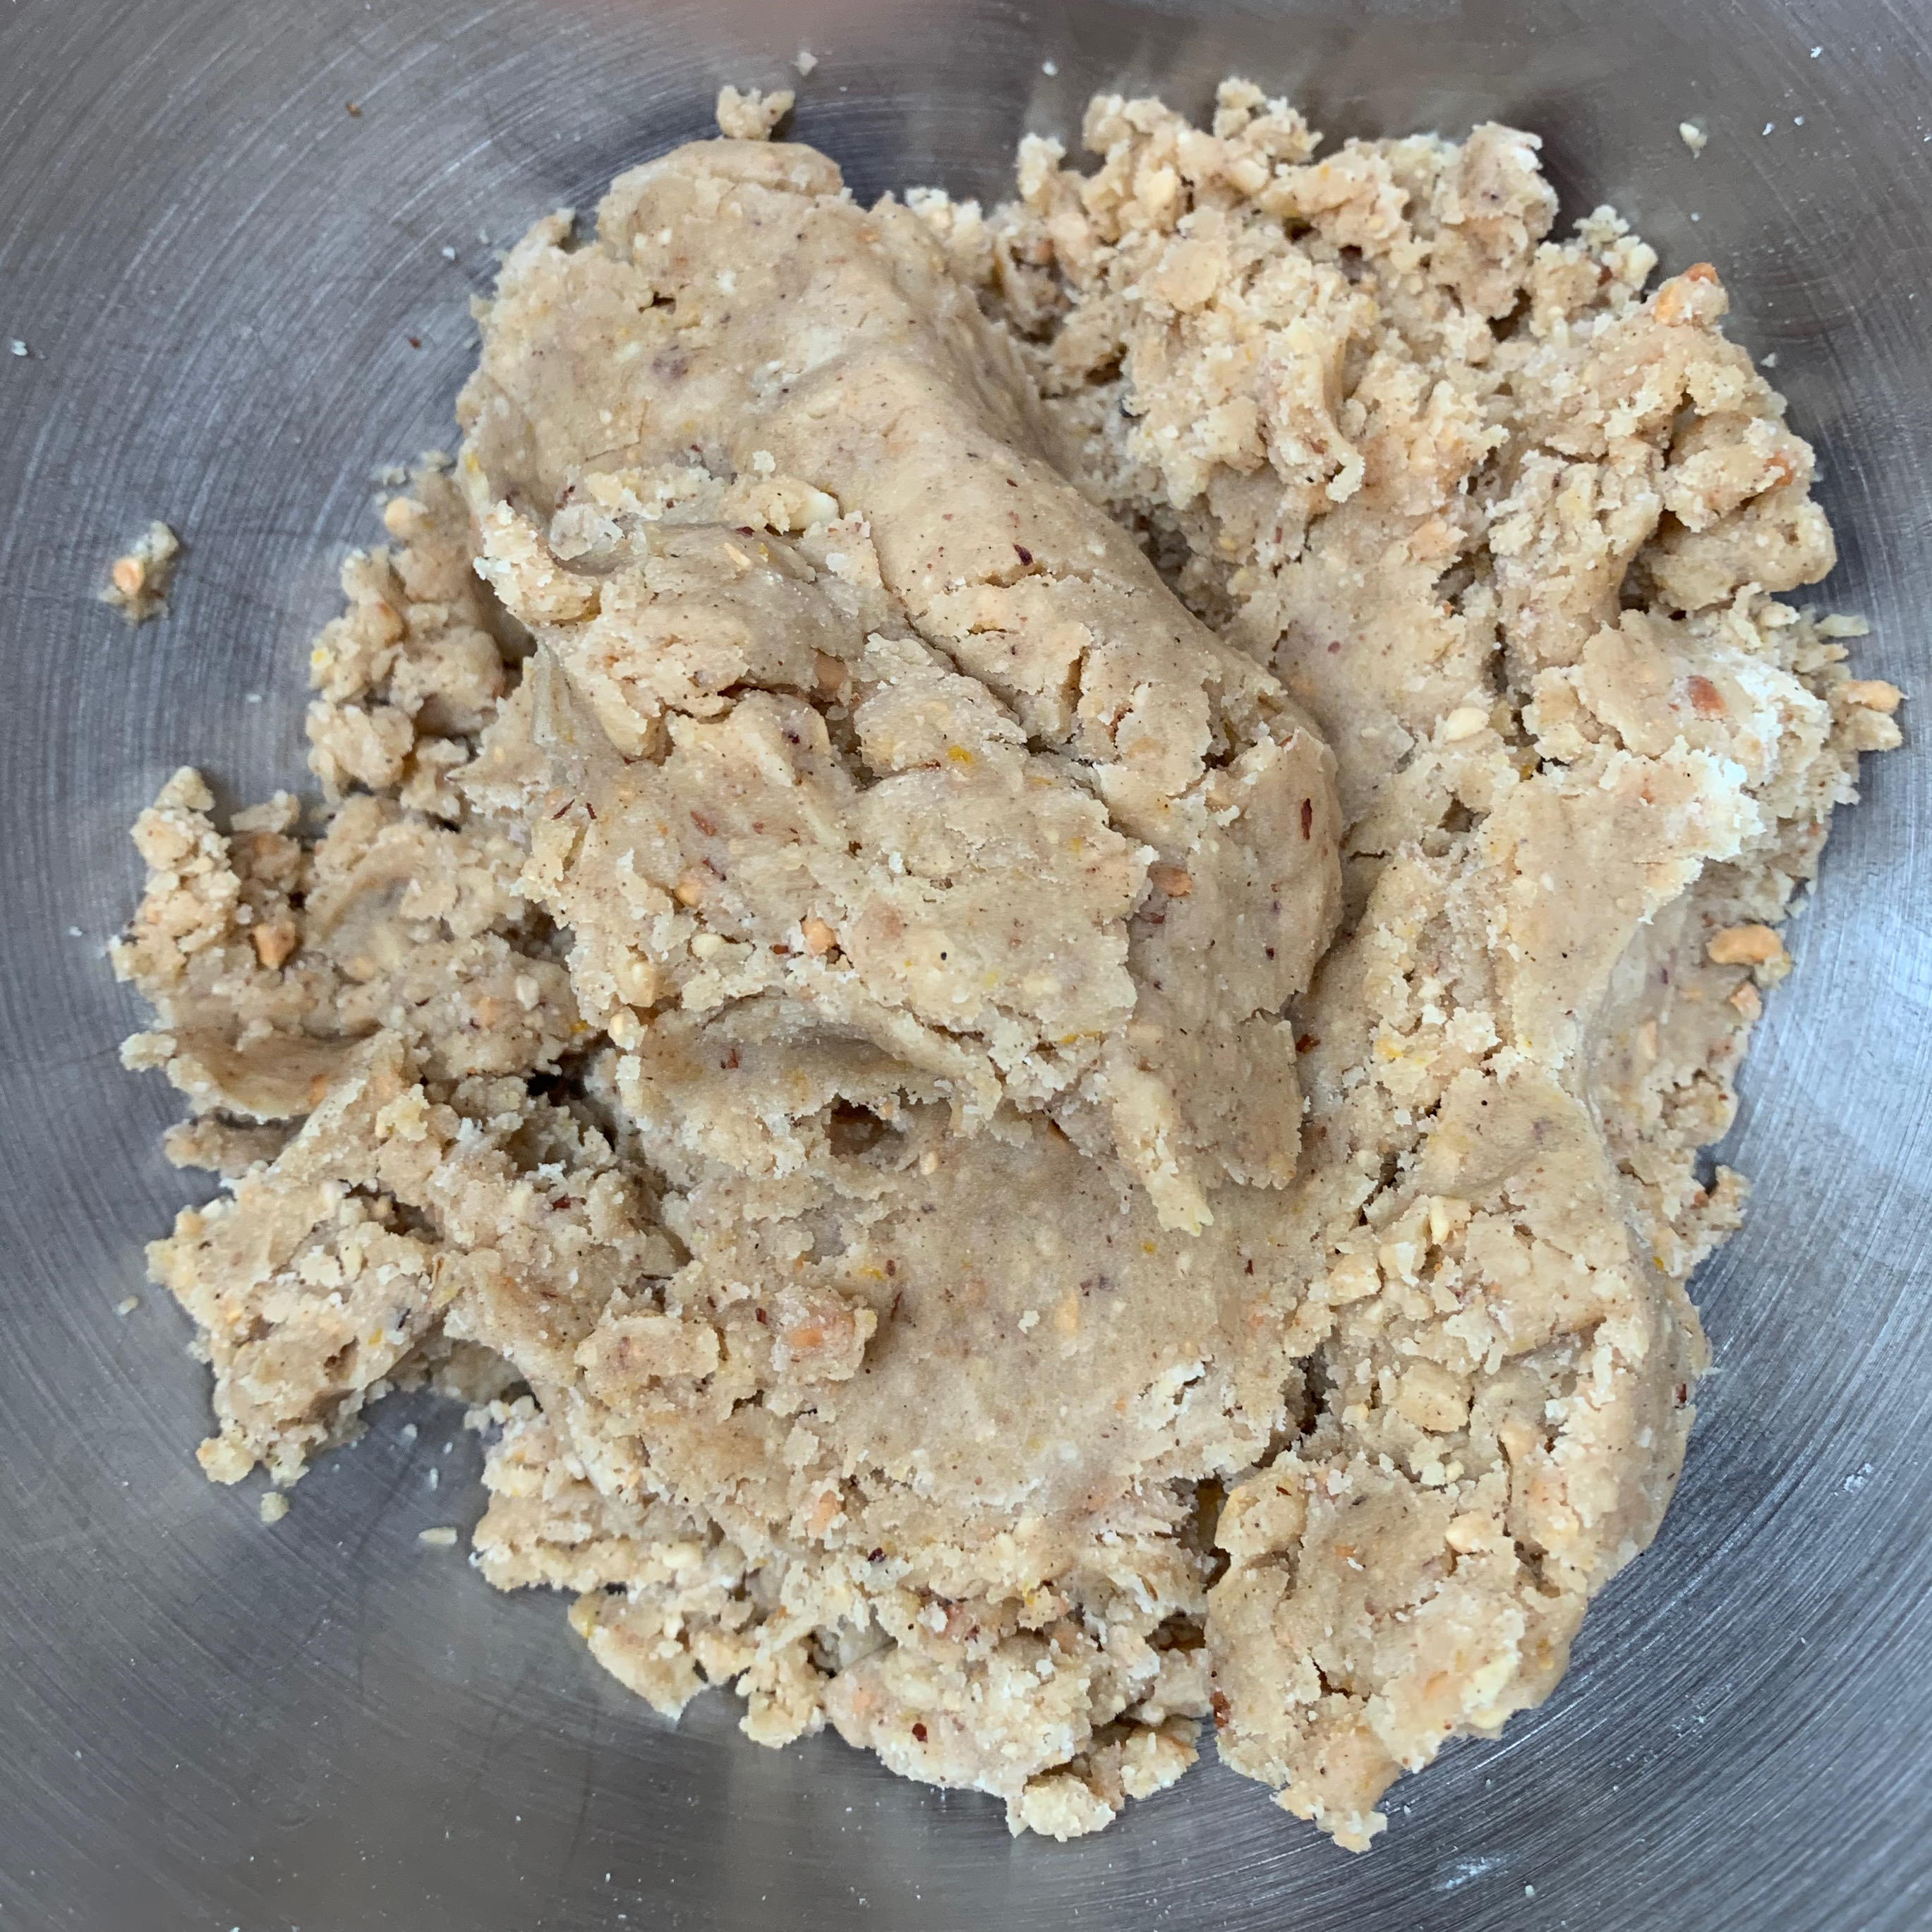
Switch to the dough hook and knead for around 5 minutes until the dough is very elastic
Grease a bowl with oil.
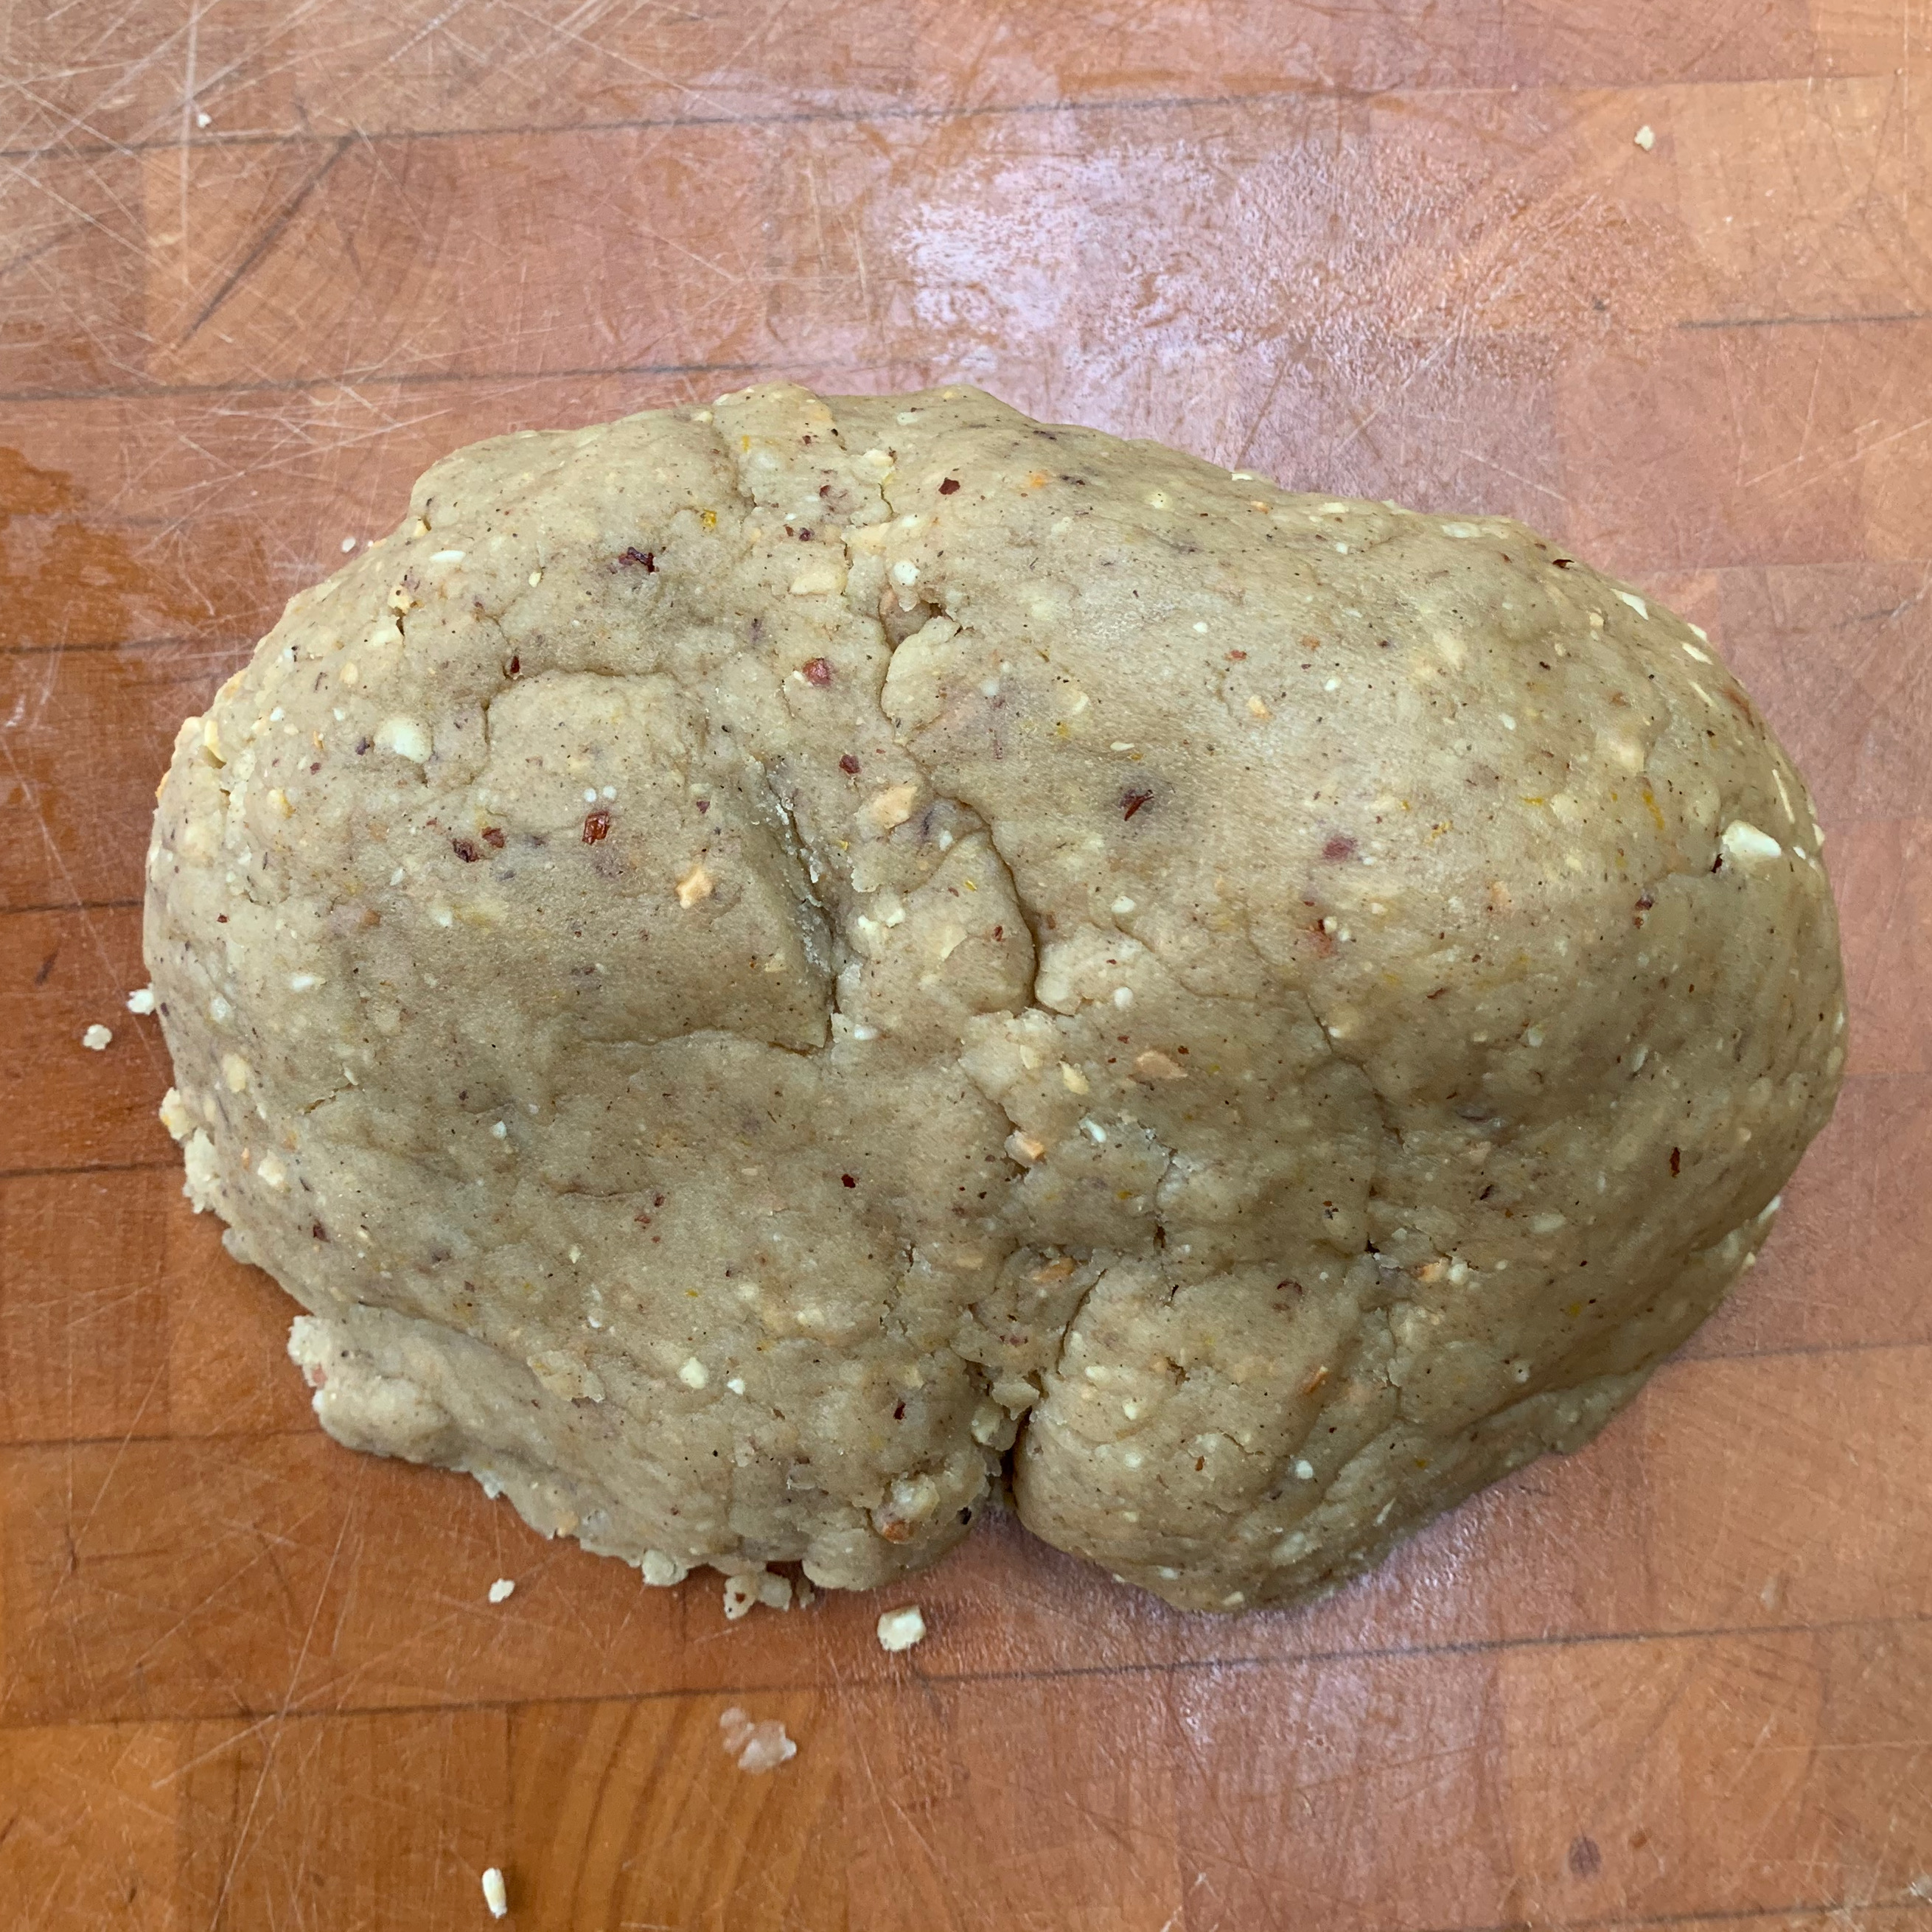
Form your dough into a ball and transfer it to the bowl. Coat the dough in oil, either by turning it or by brushing some more oil over the top.
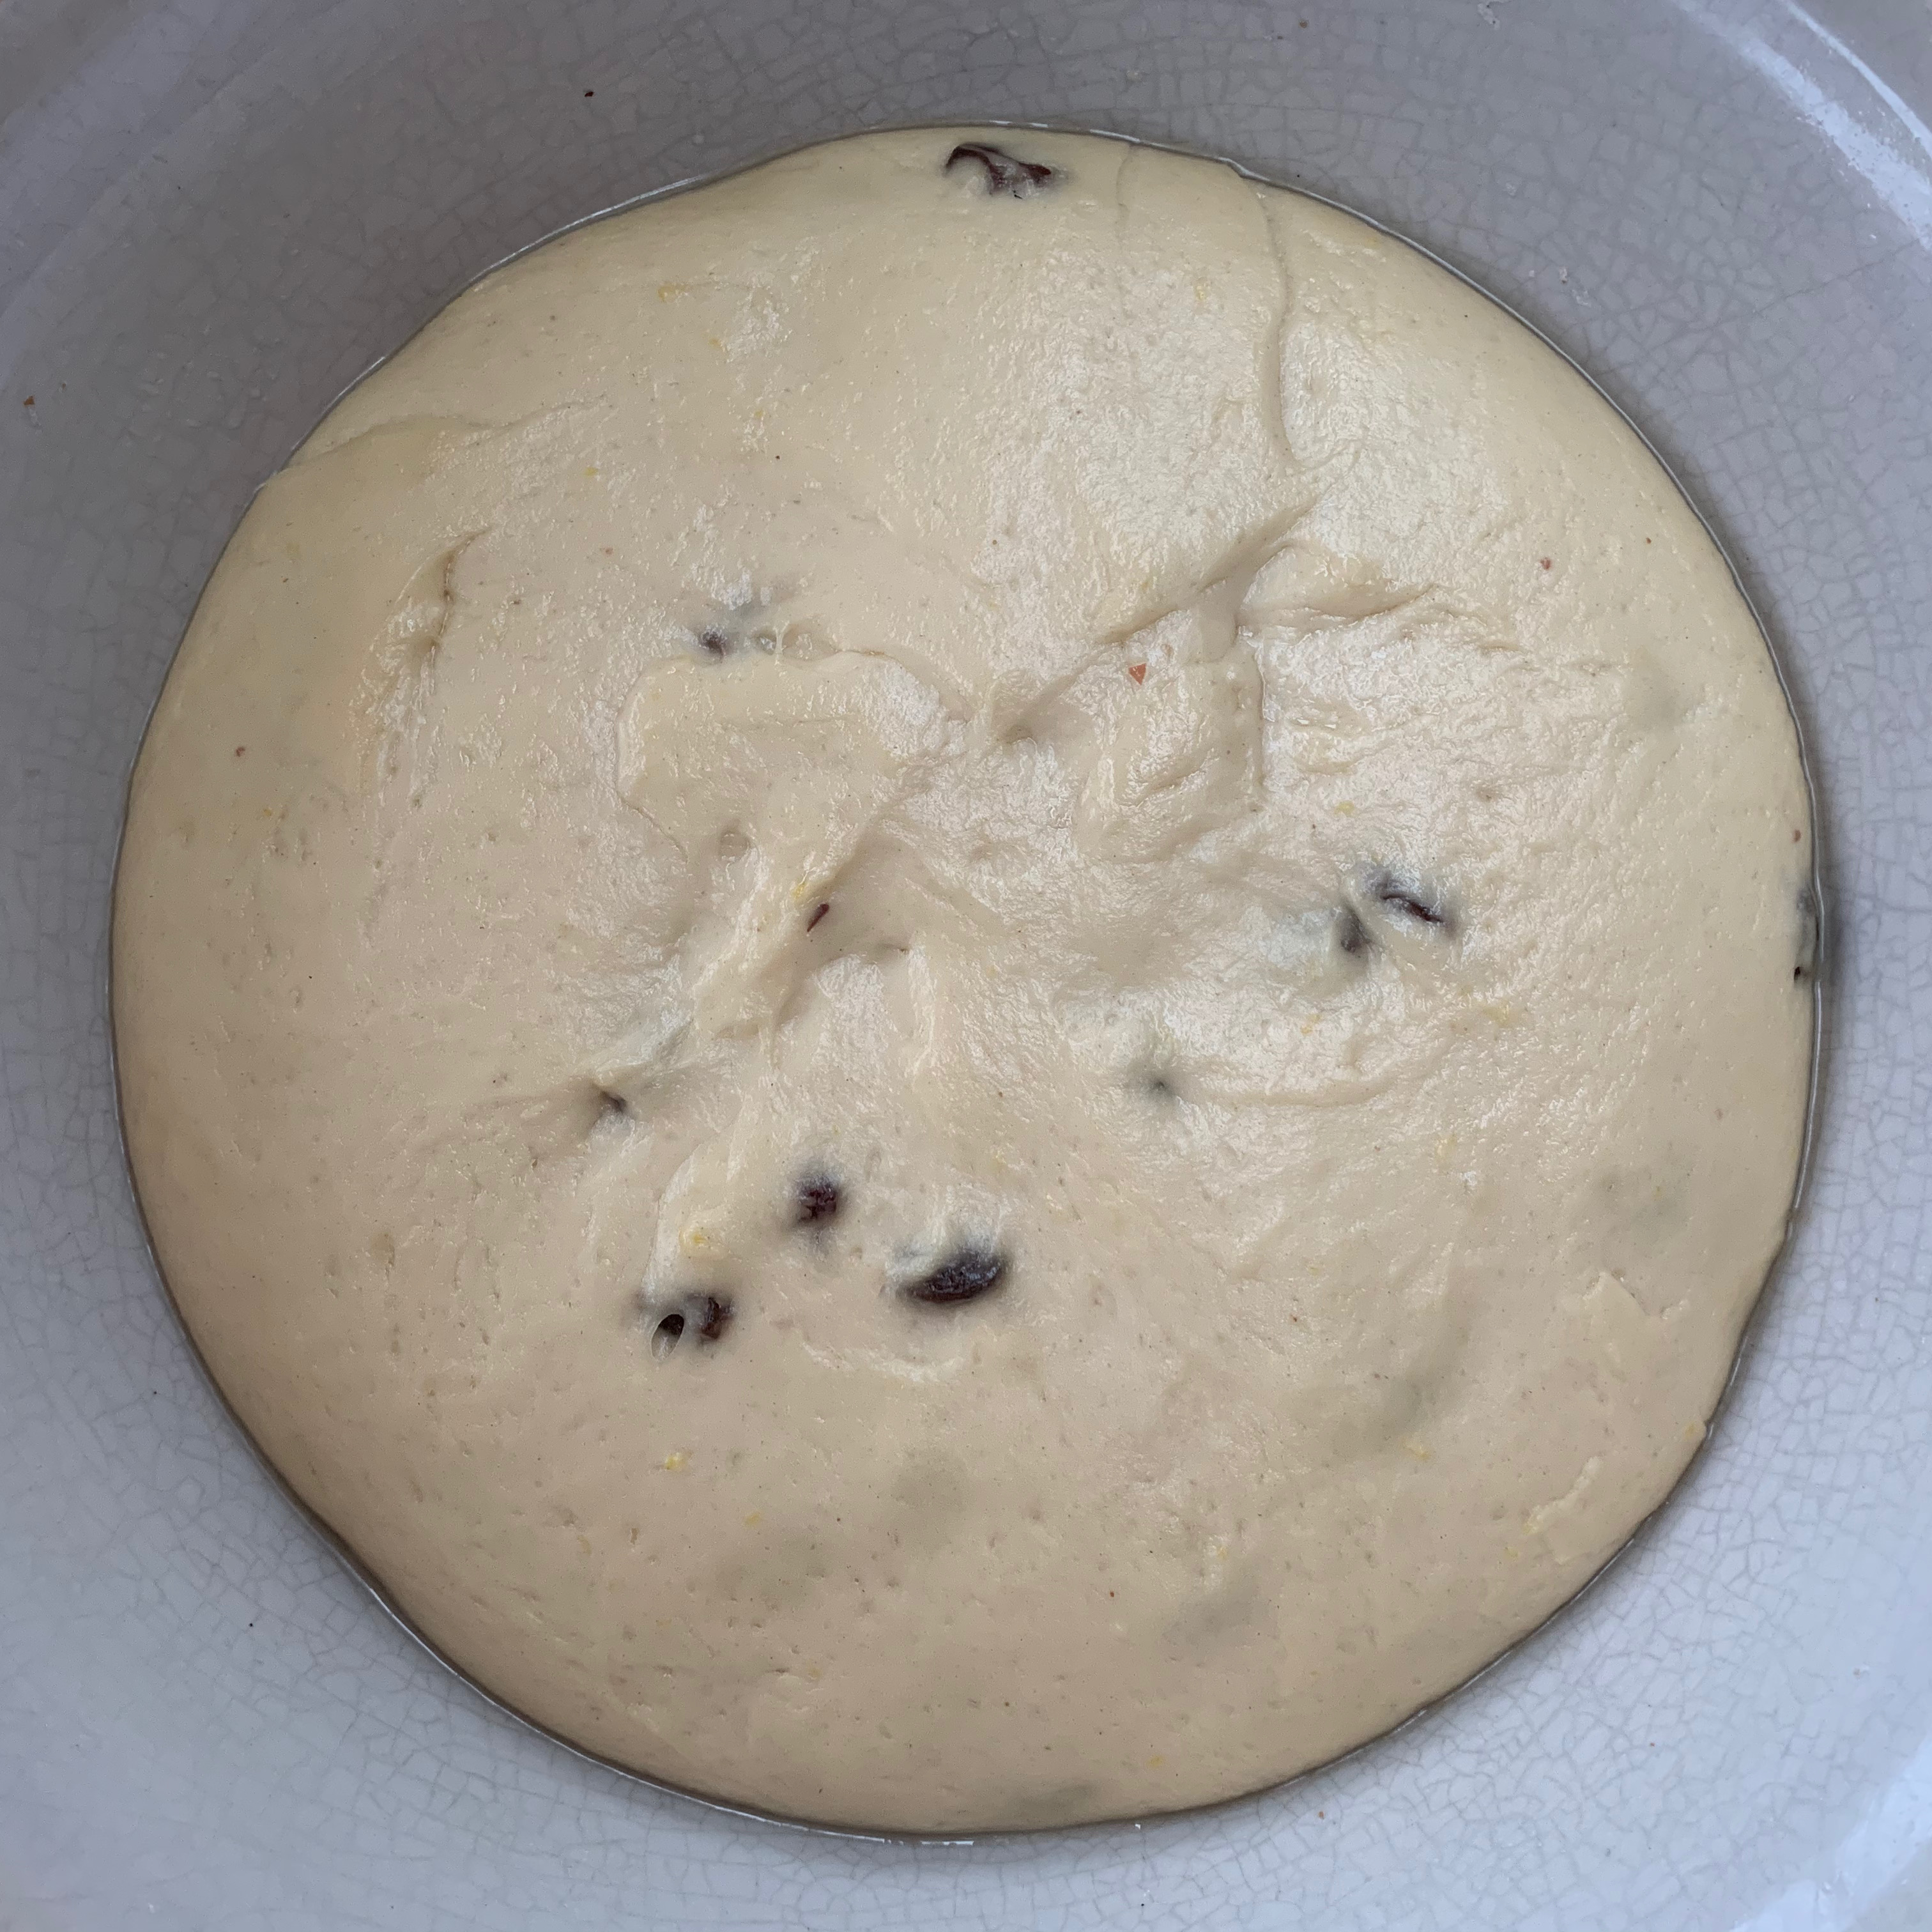
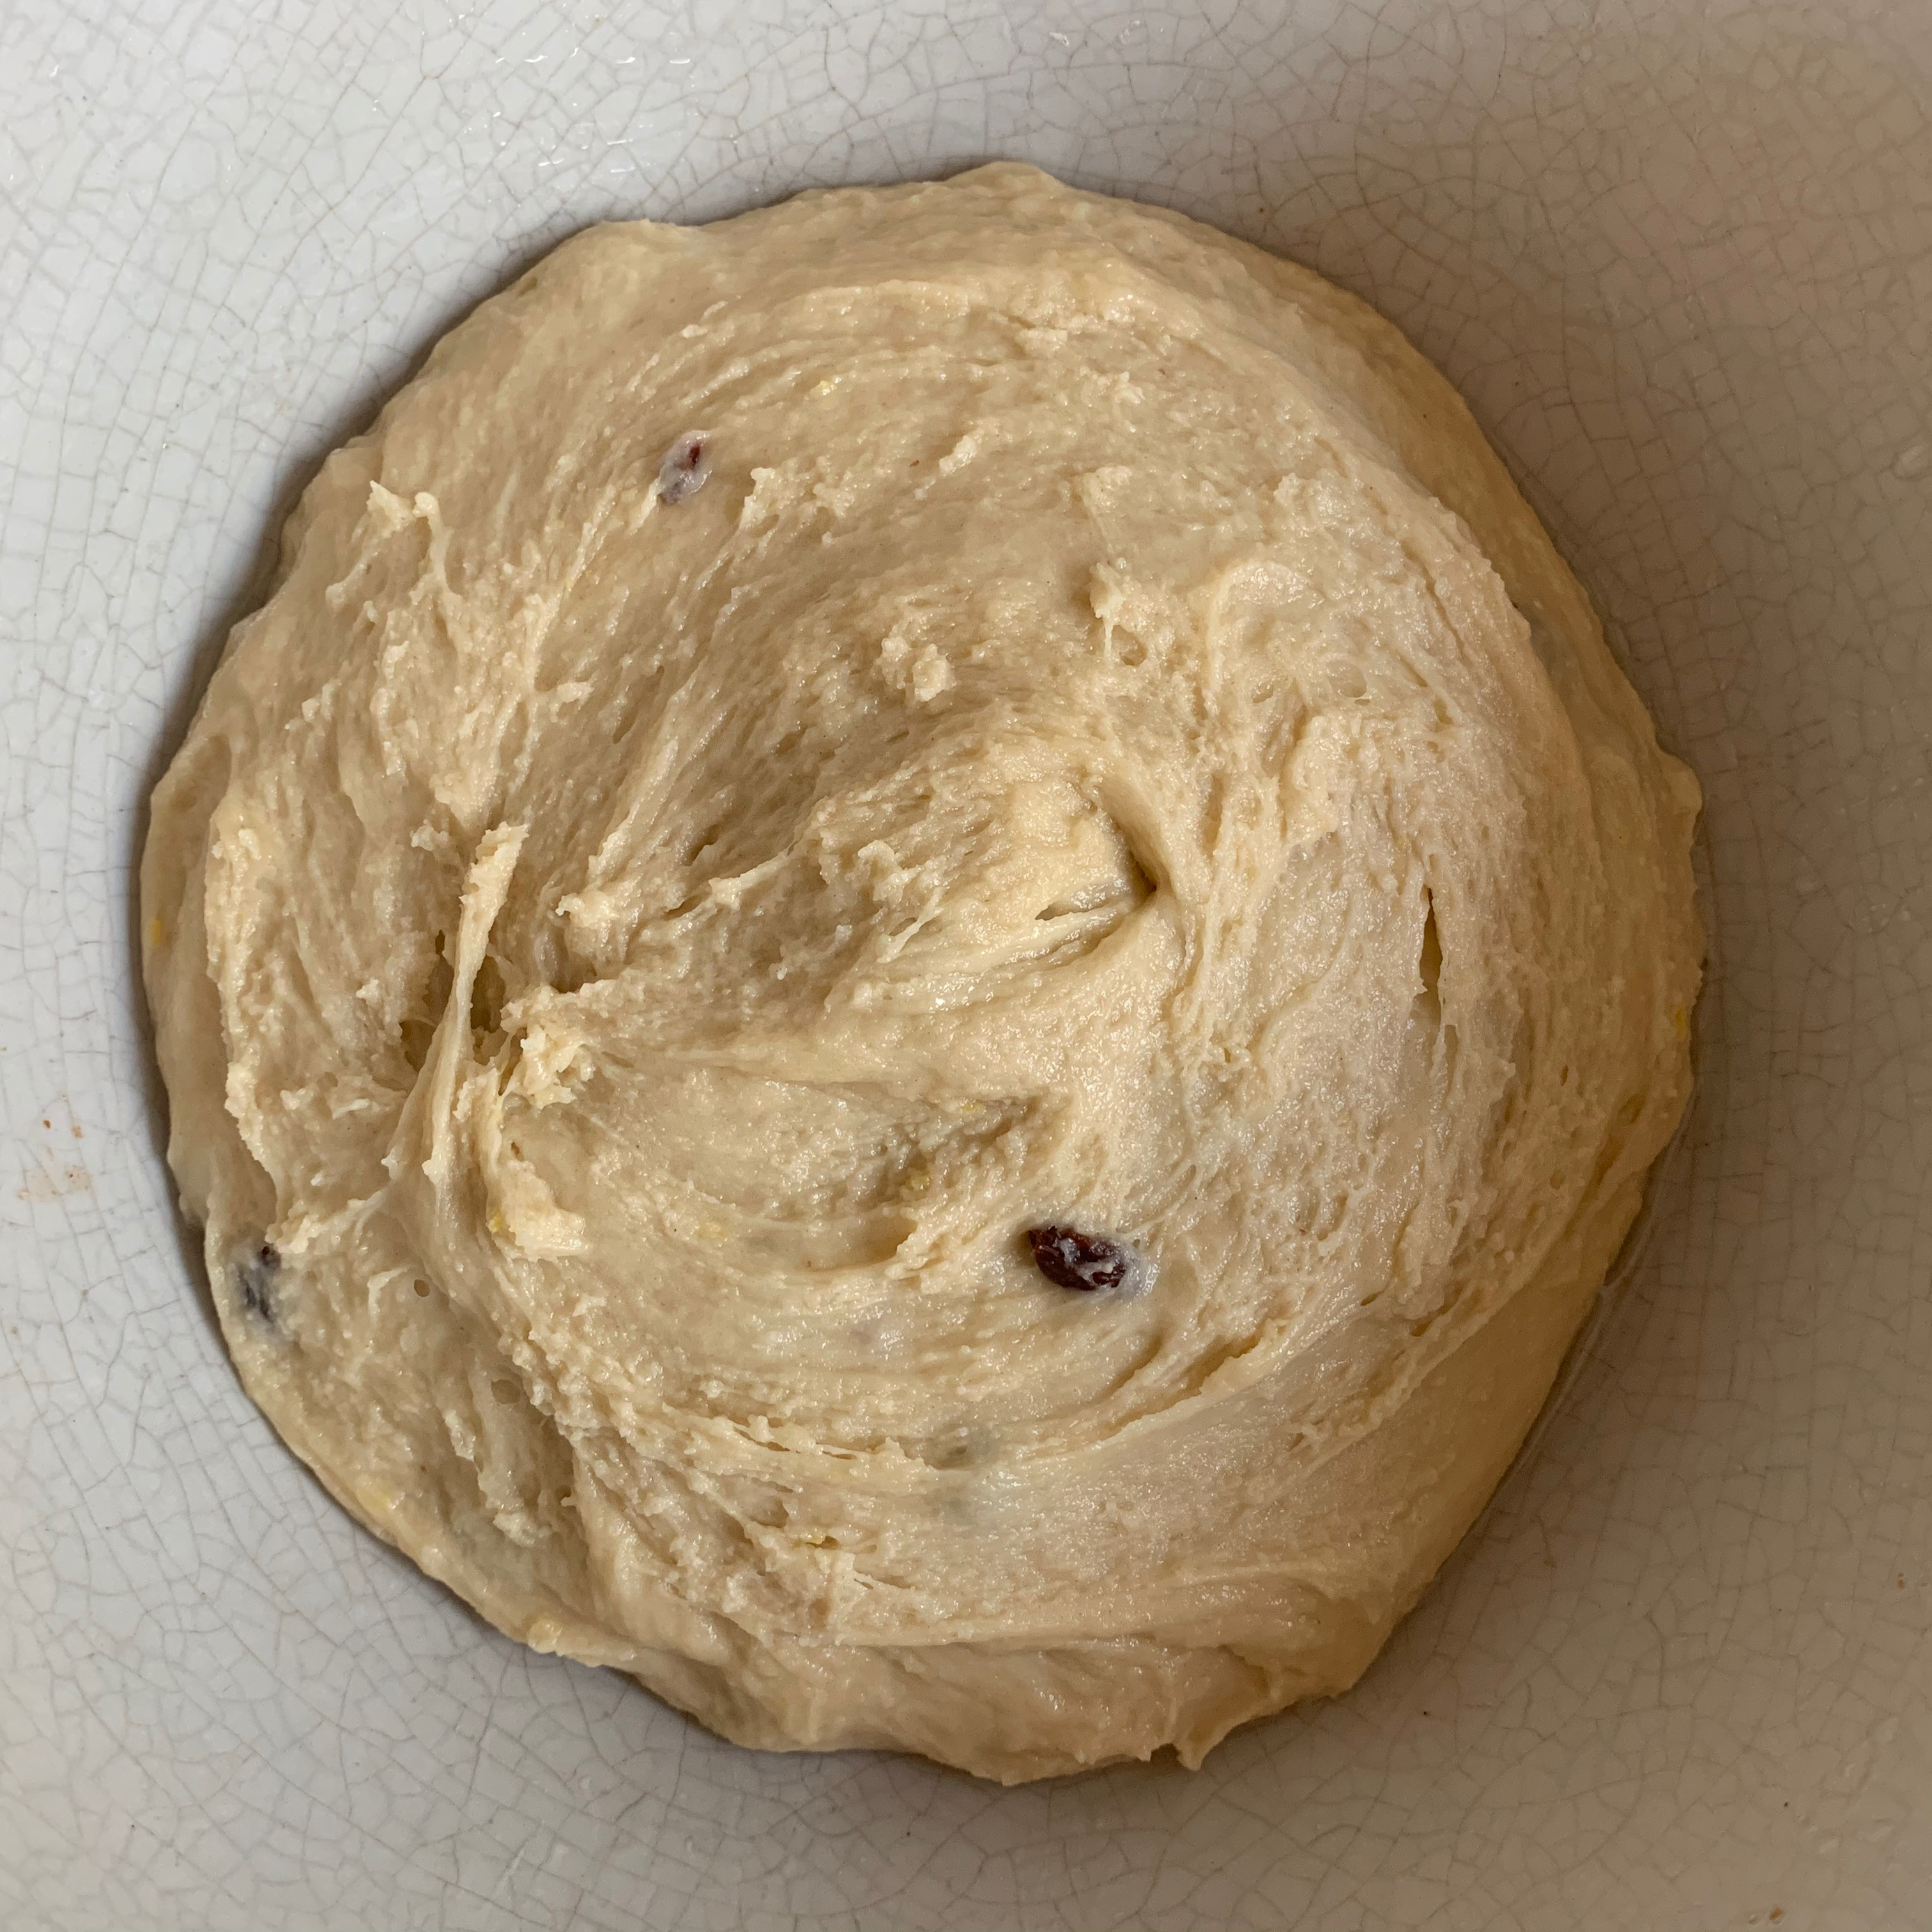
Cover with cling film and leave to rise until doubled in size – probably 1-2 hours.
Punch the dough down and leave to rise again – probably 1-2 hours.
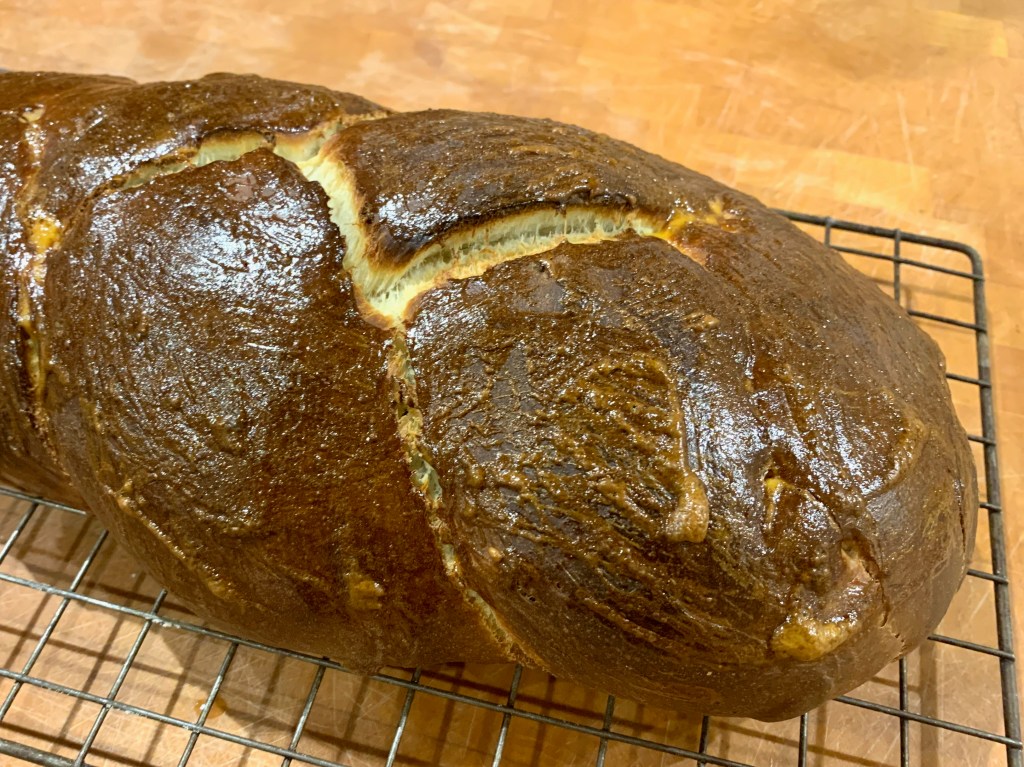
Preheat oven to 190℃ fan (I used 200℃, and my crust is too dark)
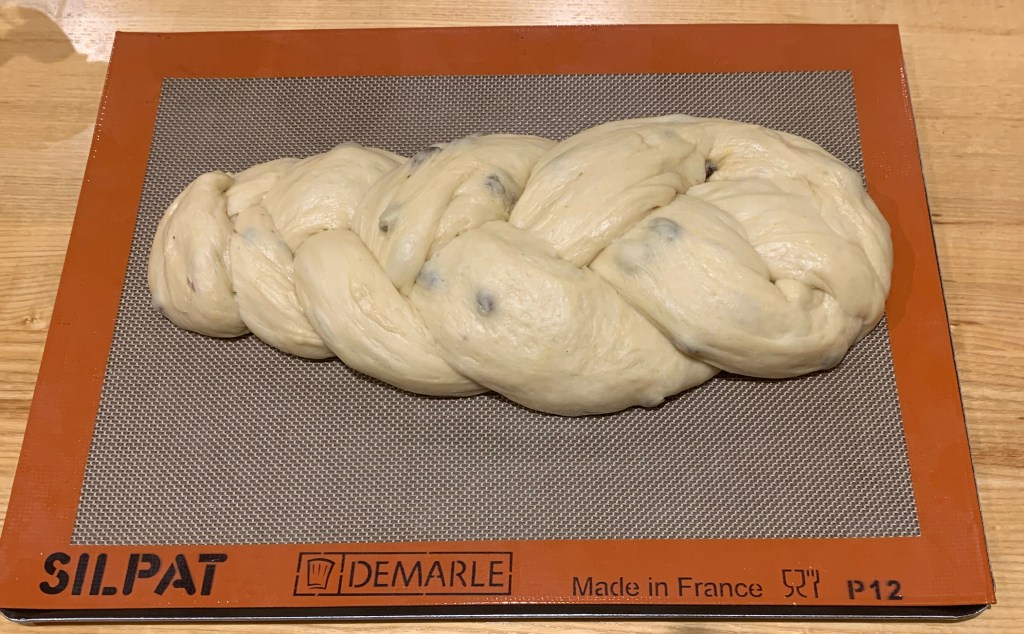
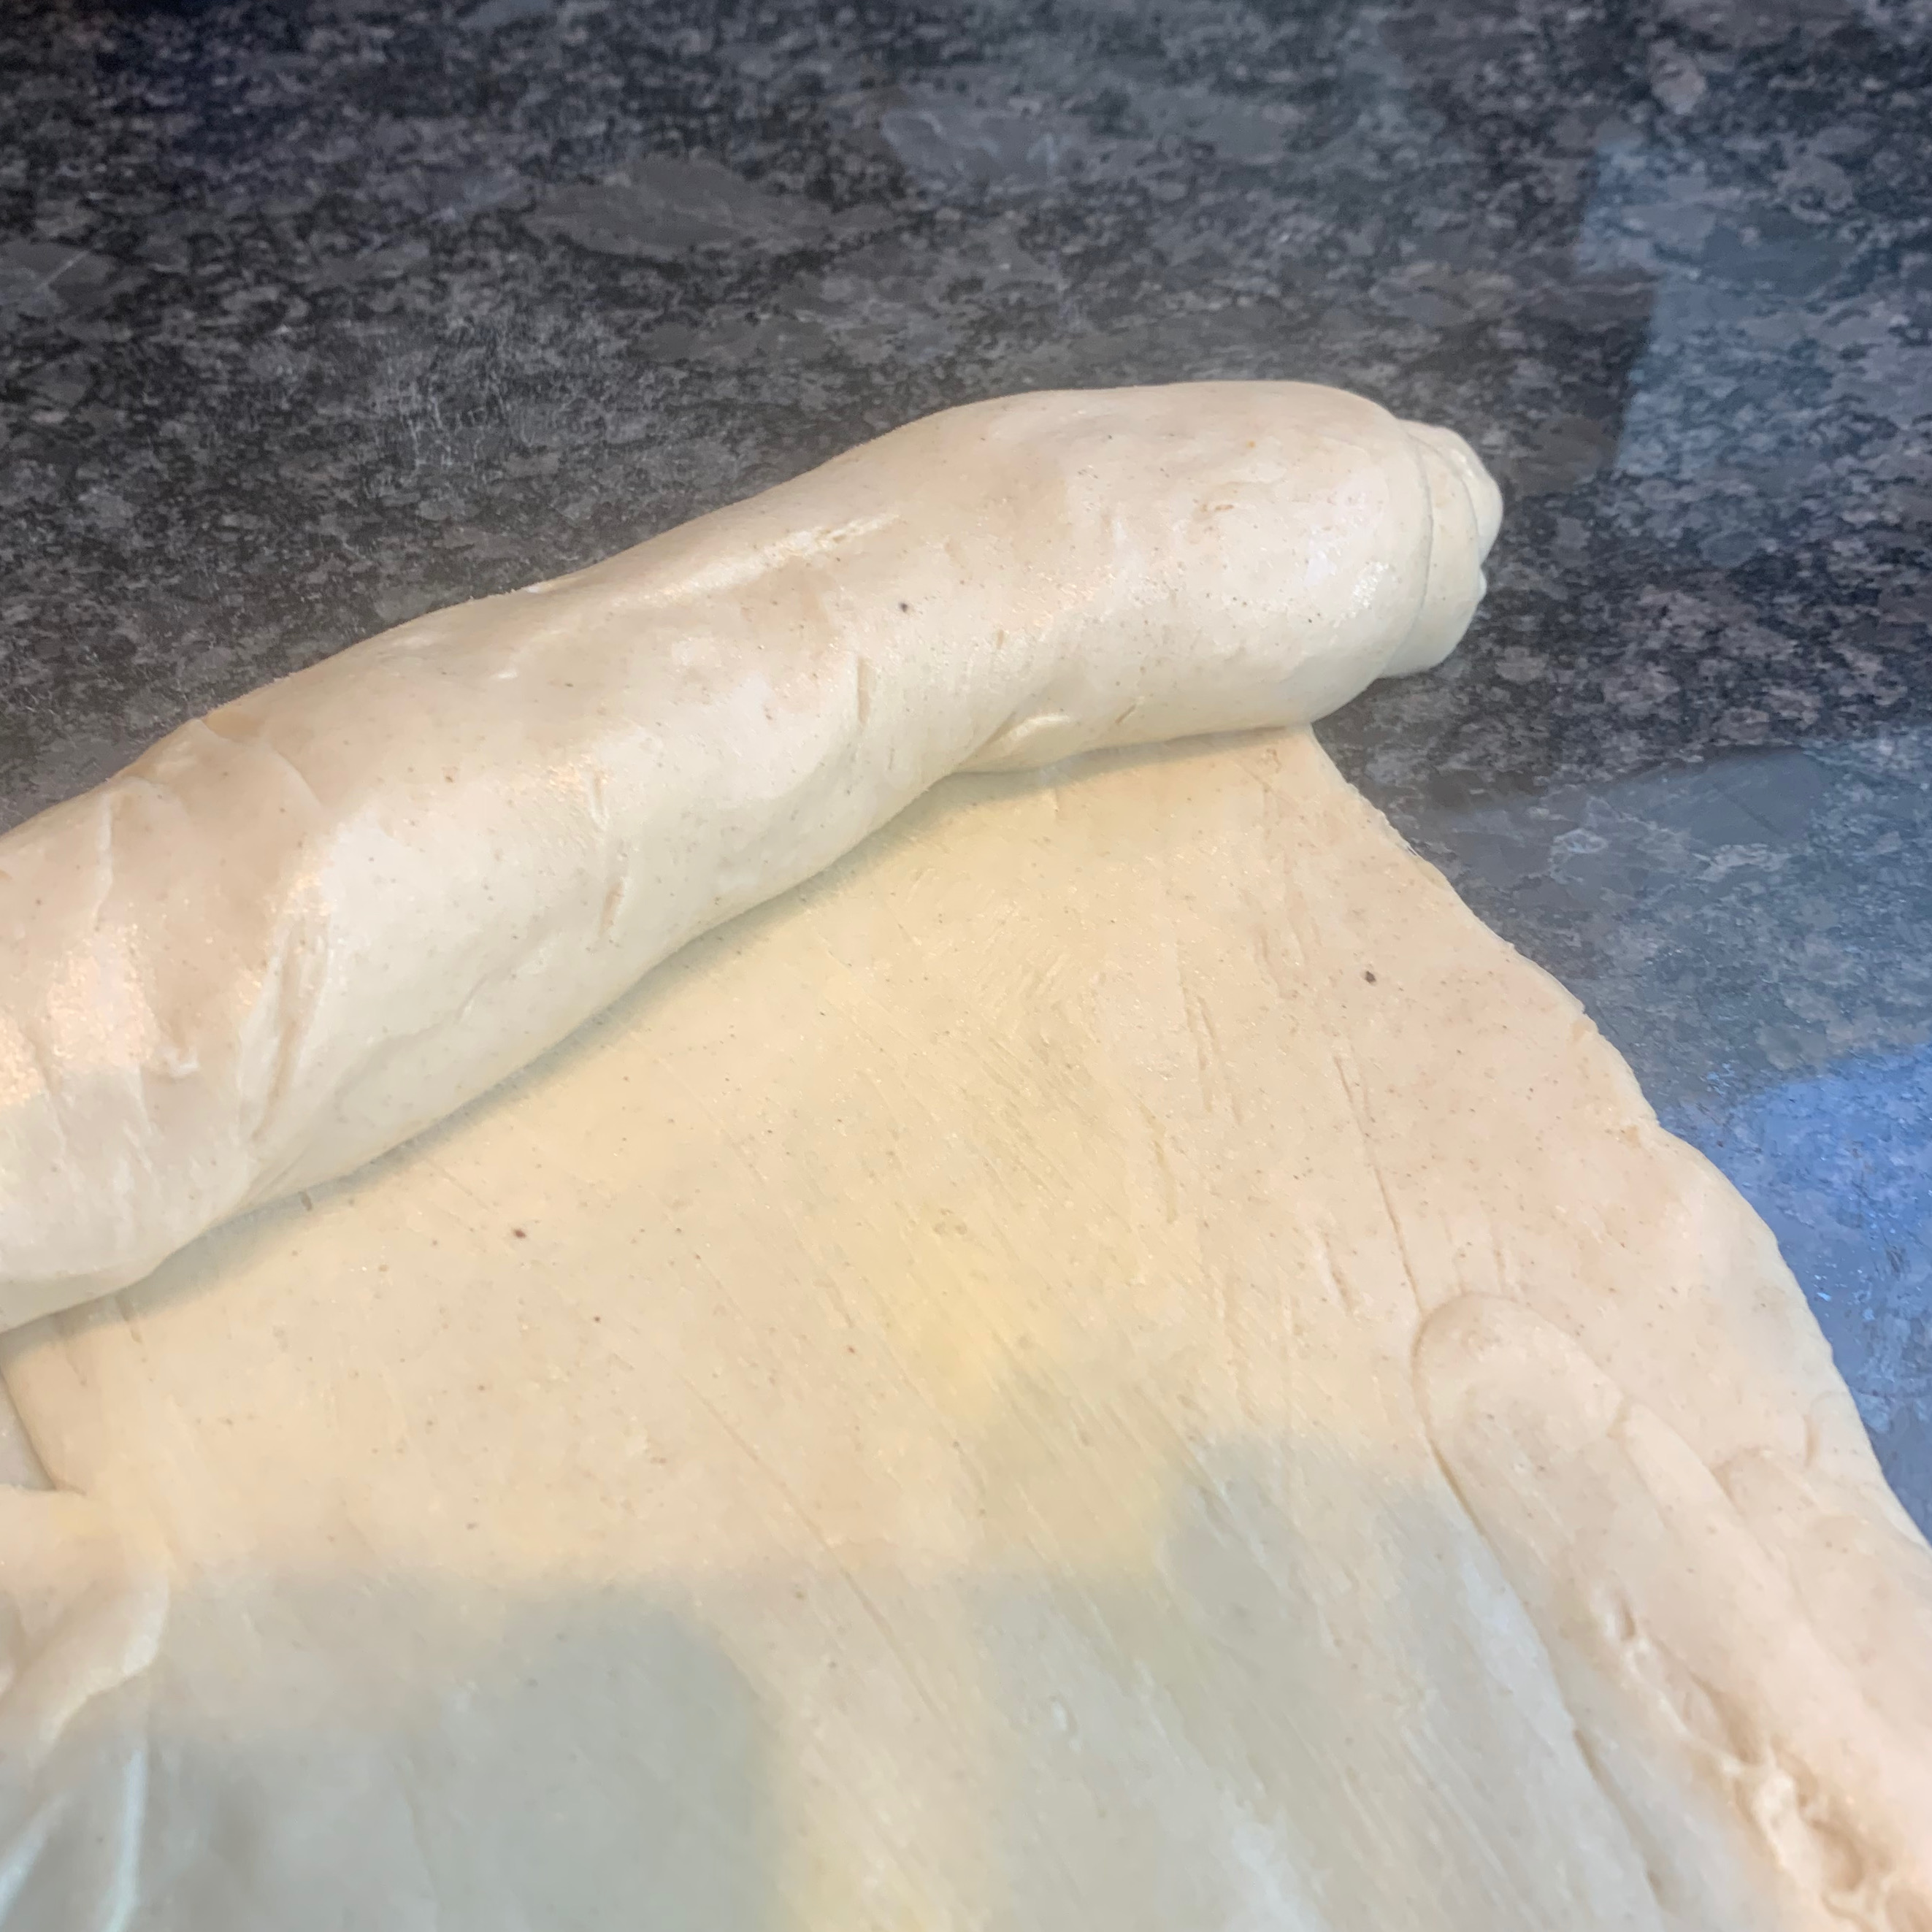
Separate your dough into three parts (actually, as many parts as you fancy for your favourite braid: now create your braid as shown in this video.
Cover and leave for another 30 minutes.
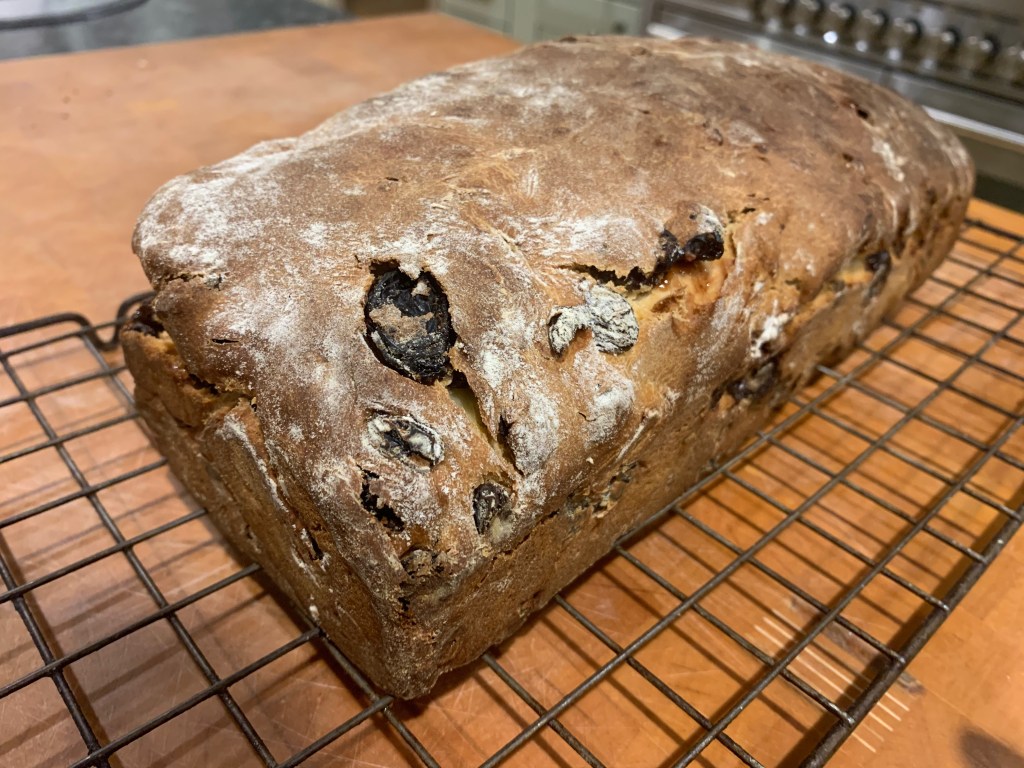
Spread the loaf with your beaten egg, scatter the almonds over the loaf and put in oven (photo disclaimer: I forgot the almonds!)
Many countries have taditional Christmas cookies. Melomakarona (μελομακάρονα) are the version from Cyprus (the Greek bit, as well as being from Greece). They’re laden with the flavours of orange and spices, dipped in syrup and dusted with nuts. They’re really delicious, so when the cookie jar is empty, why wait for Christmas?
I started with a recipe from food blog Afrodite’s Kitchen, but there are plenty of others which vary in terms of choice of nuts, choice of spices and various other details. So everyone agrees that you dip the cookies in syrup, but some people cool the syrup first and others specify hot syrup. And I made my melomakarona round and dimpled, but other recipes are clear in preferring more of an egg shape.
I’ve halved the quantities in the original recipe and simplified things a bit. My dough came out a bit too floury, so I have reduced the amount of flour slightly here. Add a bit more flour (or, in the opposite direction, orange juice or water) if you think you need it.
The cookies
1 orange
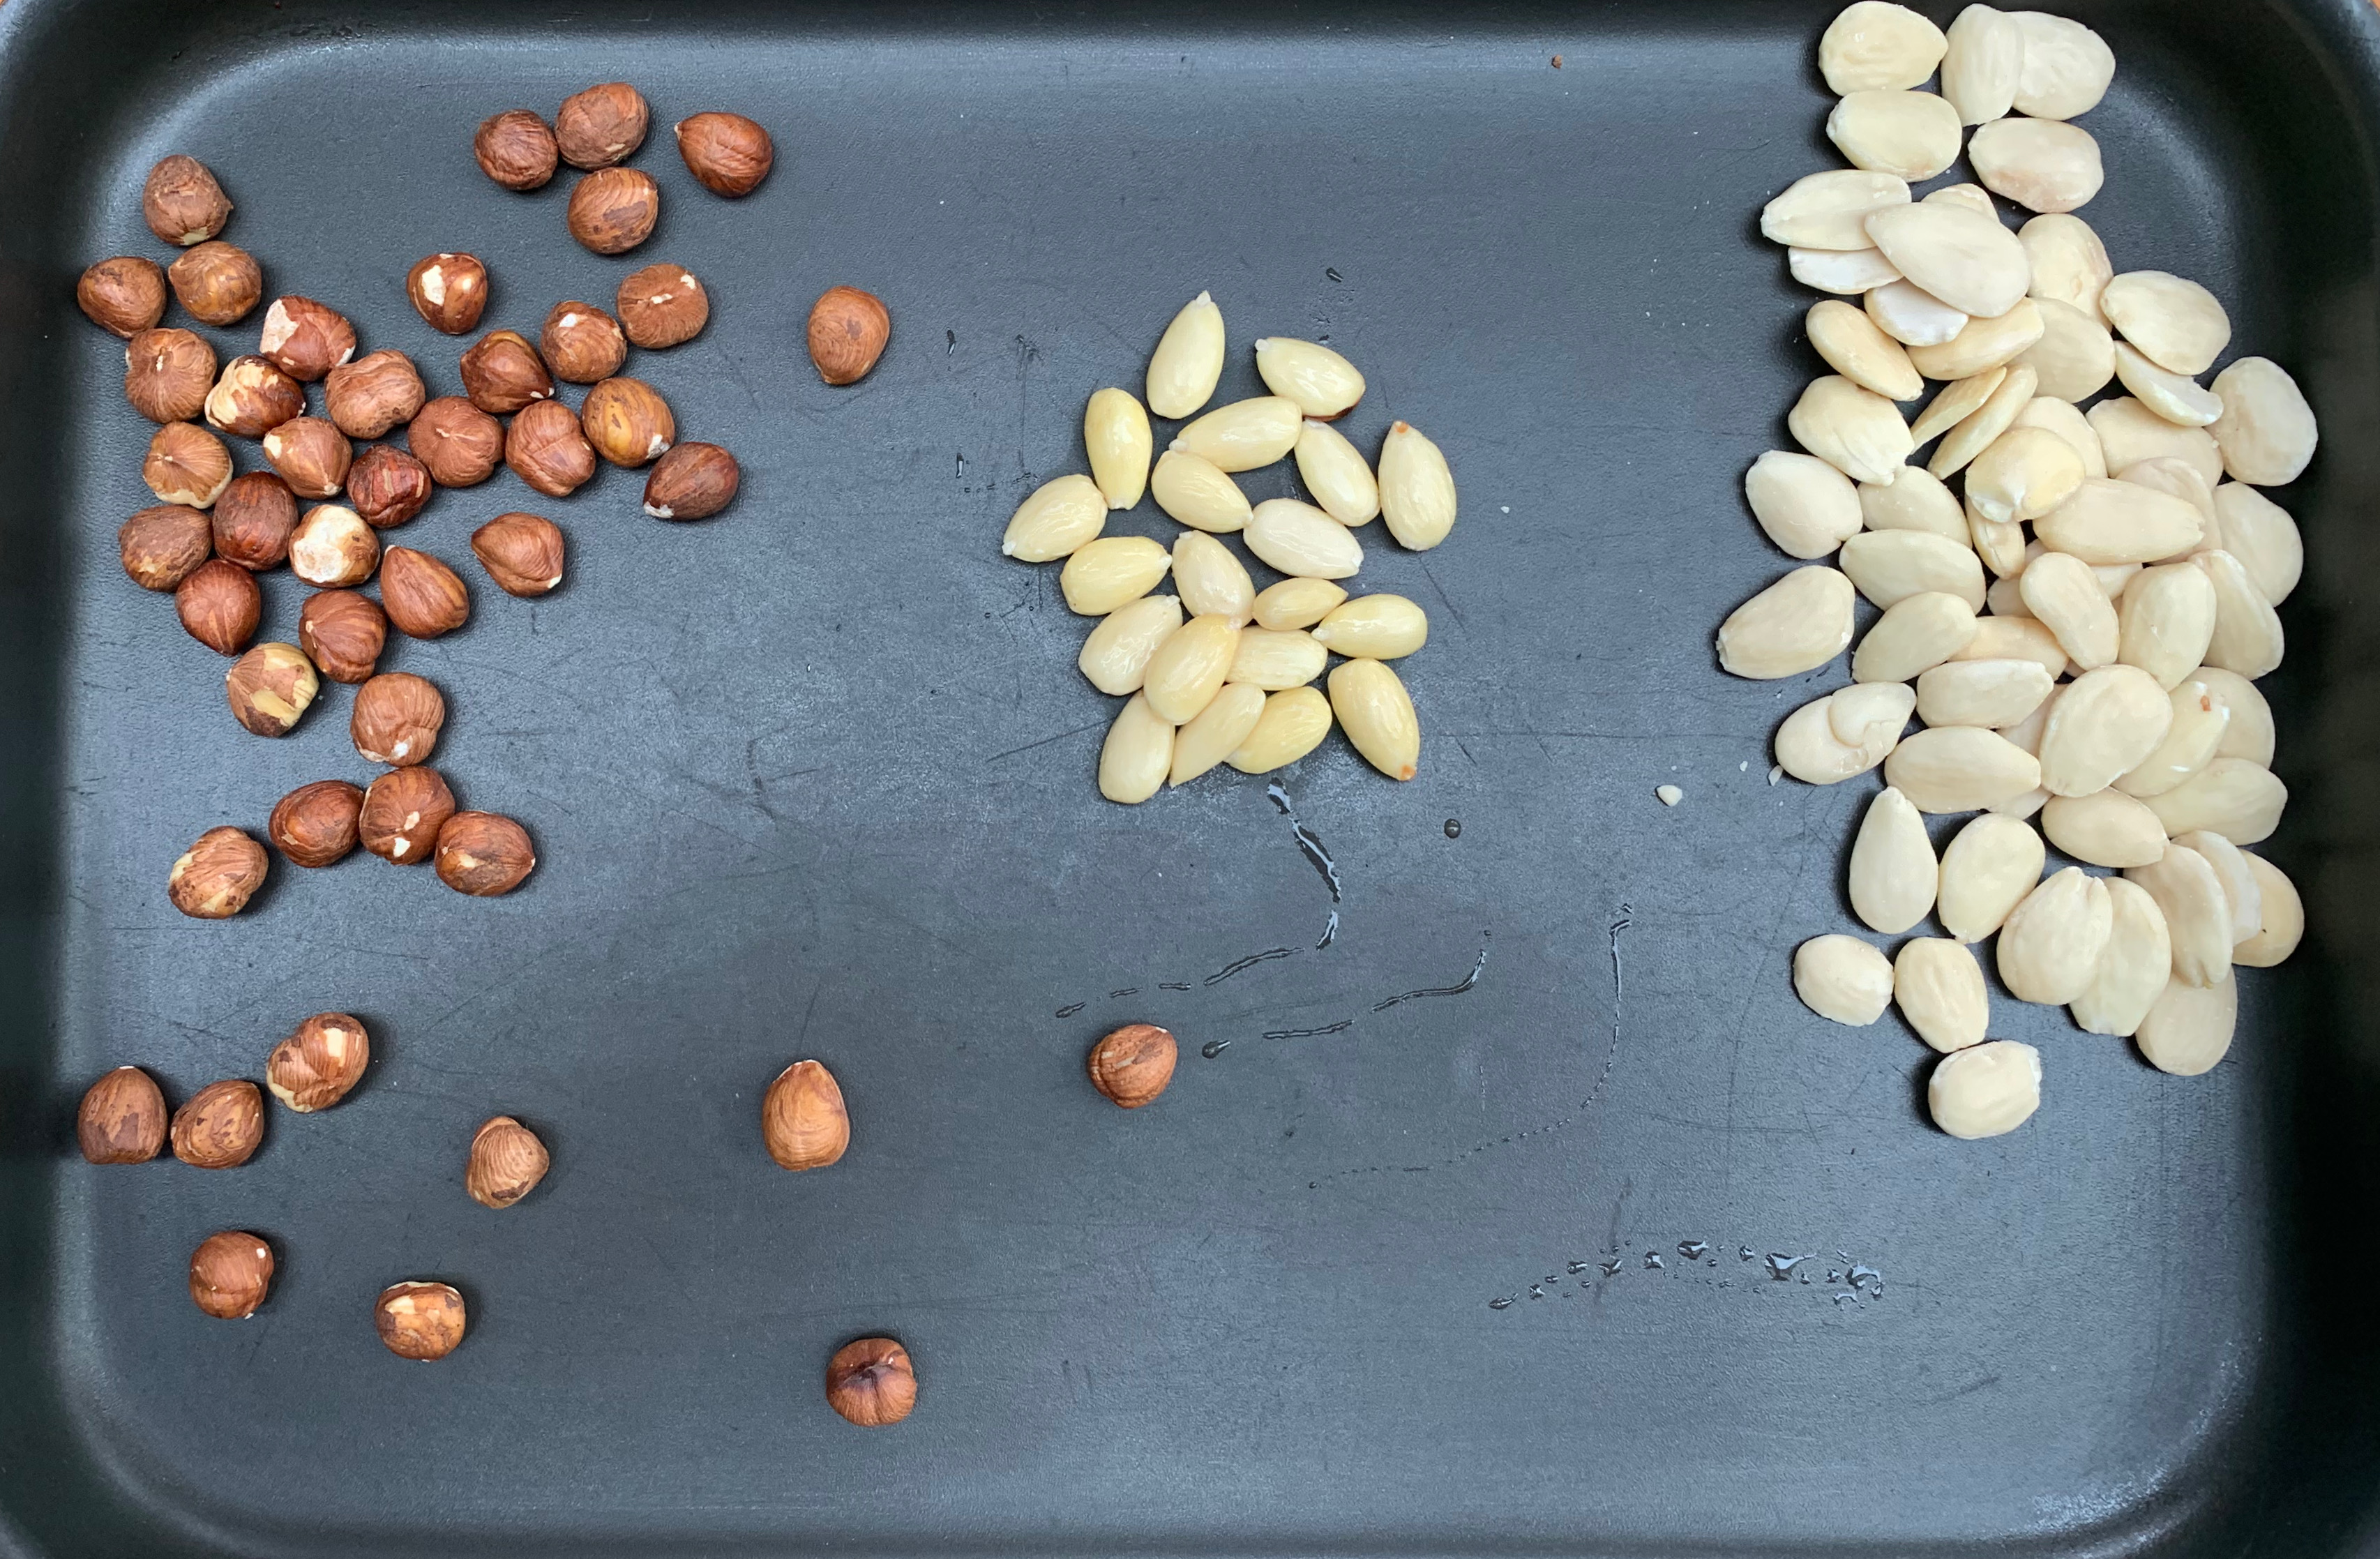
80g almonds
50g hazelnuts
150ml sunflower oil
50g icing sugar
4g (1 tsp) cinnamon
1g (¼ tsp) nutmeg
1g (¼ tsp) ground cloves
1 tsp ground ginger
6g (¾ tsp) baking powder
6g (¾ tsp) baking soda
3g (½ tsp) salt
400g OO flour
Preheat oven to 175℃ fan.
With a potato peeler, take a couple of thick pieces of rind from the orange and reserve. Grate the rest of the zest of the orange and juice it (expect around 80ml of juice).
Put the almonds and hazelnuts on a baking tray. When the oven is up to temperature, roast them for around 10 minutes until they’re a medium brown colour. Remove and leave to cool until you can handle them. Meanwhile, you can get on with making the cookie dough.
Put the sunflower oil, orange juice and zest, icing sugar and spices into a bowl.
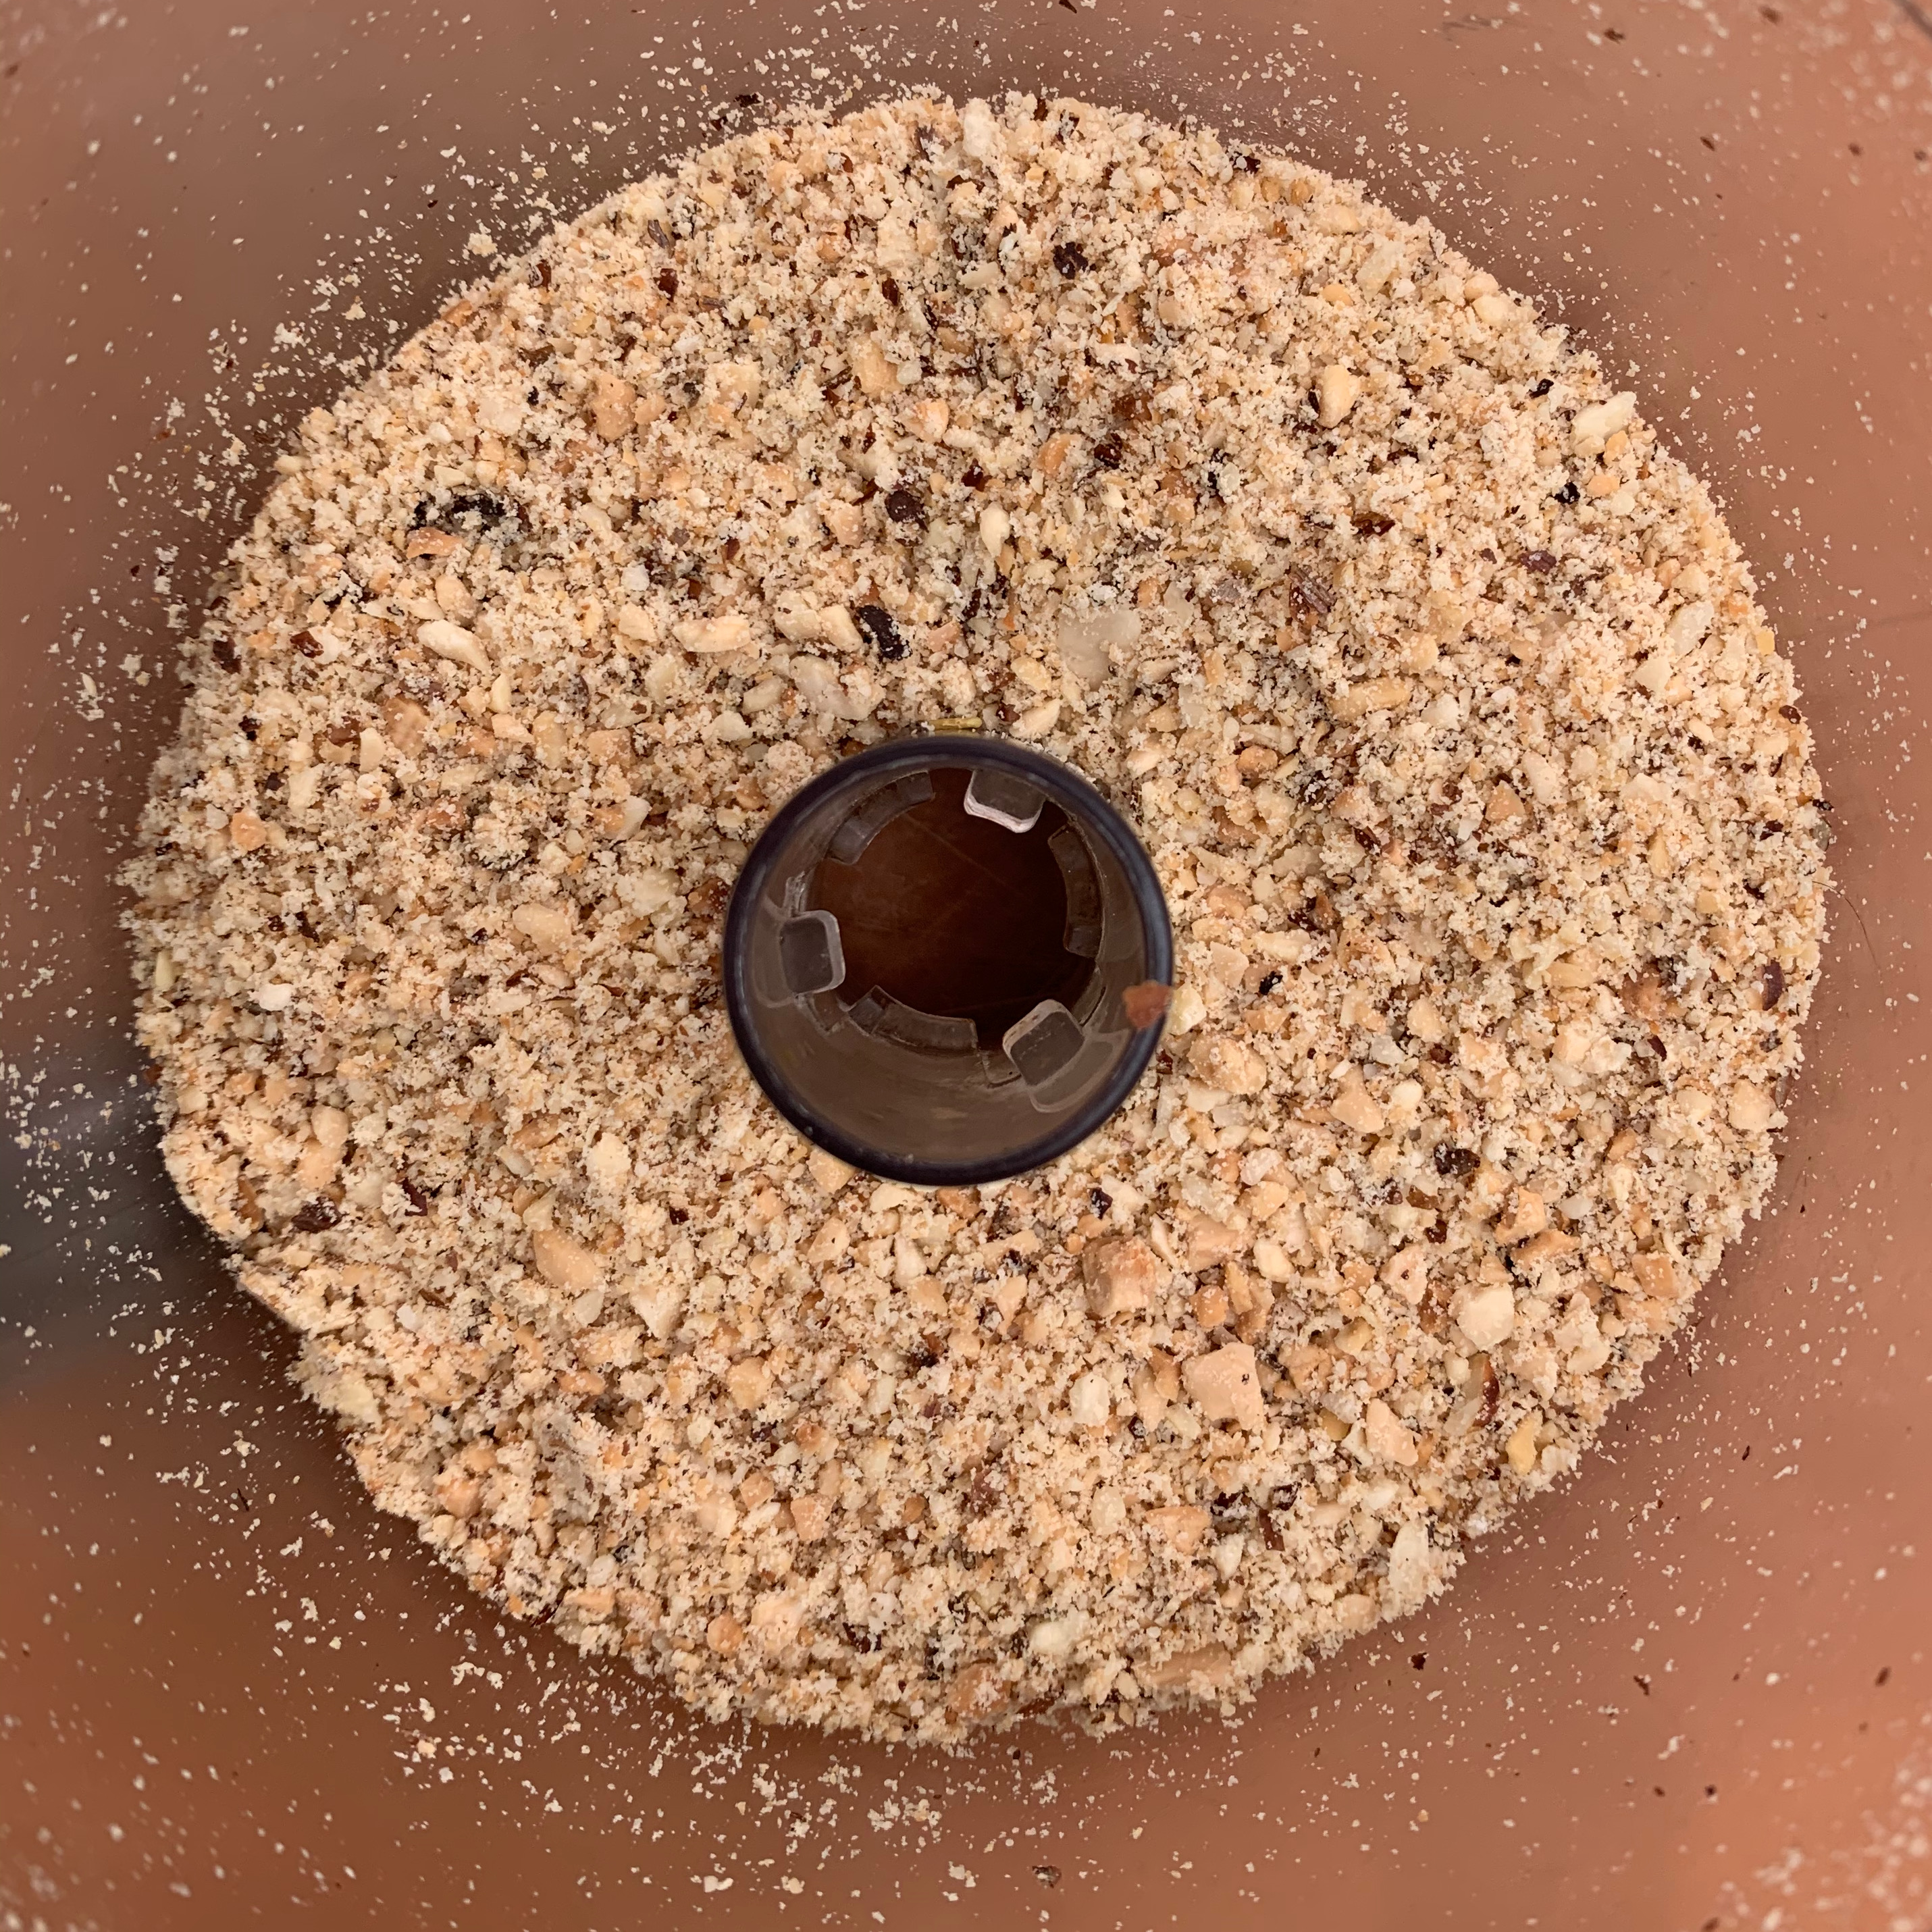
Once the nuts are cool, reserve around 20g of each (you’ll be using them later for dusting). Blitz the rest to a powder (but don’t overdo it: you don’t want the oil coming out of the nuts).
Add the nuts to the oil and spice mixture and whisk until smooth.
Put the flour, salt, baking powder, baking soda and salt into a bowl, stir until even; add these to the wet mix.
Mix thoroughly and knead until you have a smooth dough which is the consistency of a thick paste.
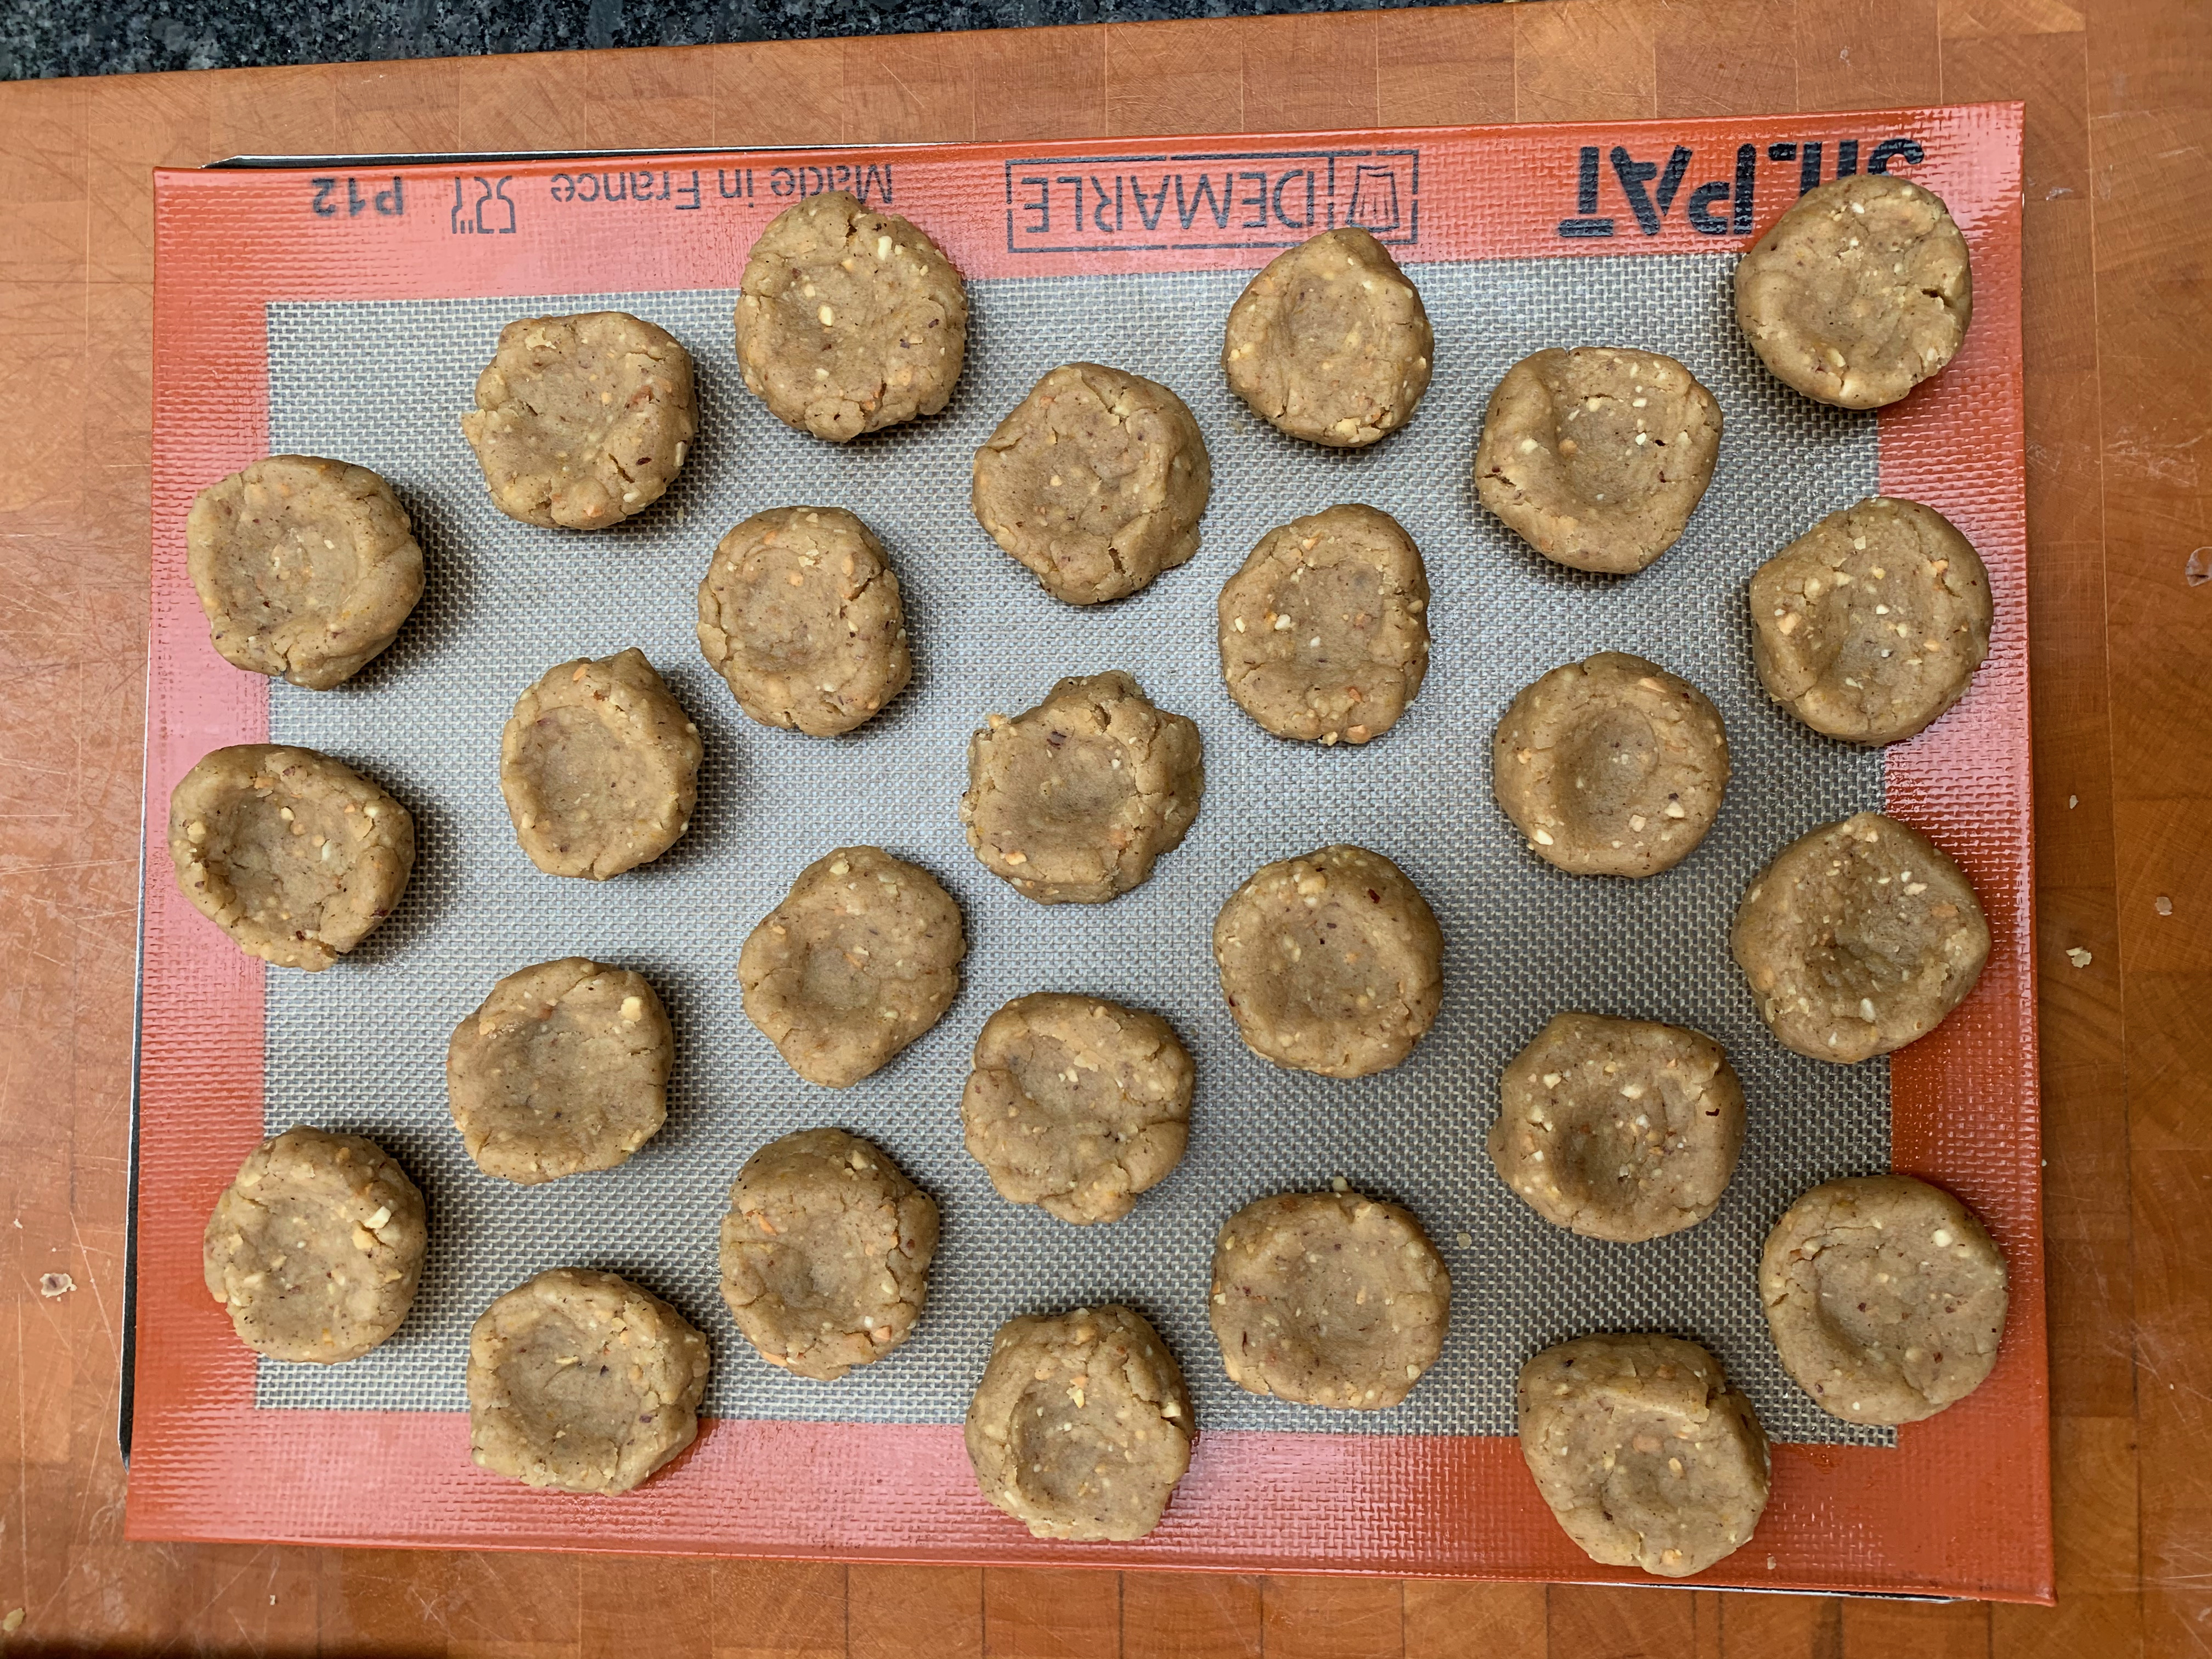
Divide the dough into balls of around 30g each (my dough made 27 cookies). Press each ball into your choice of a dimpled circle or an oval.
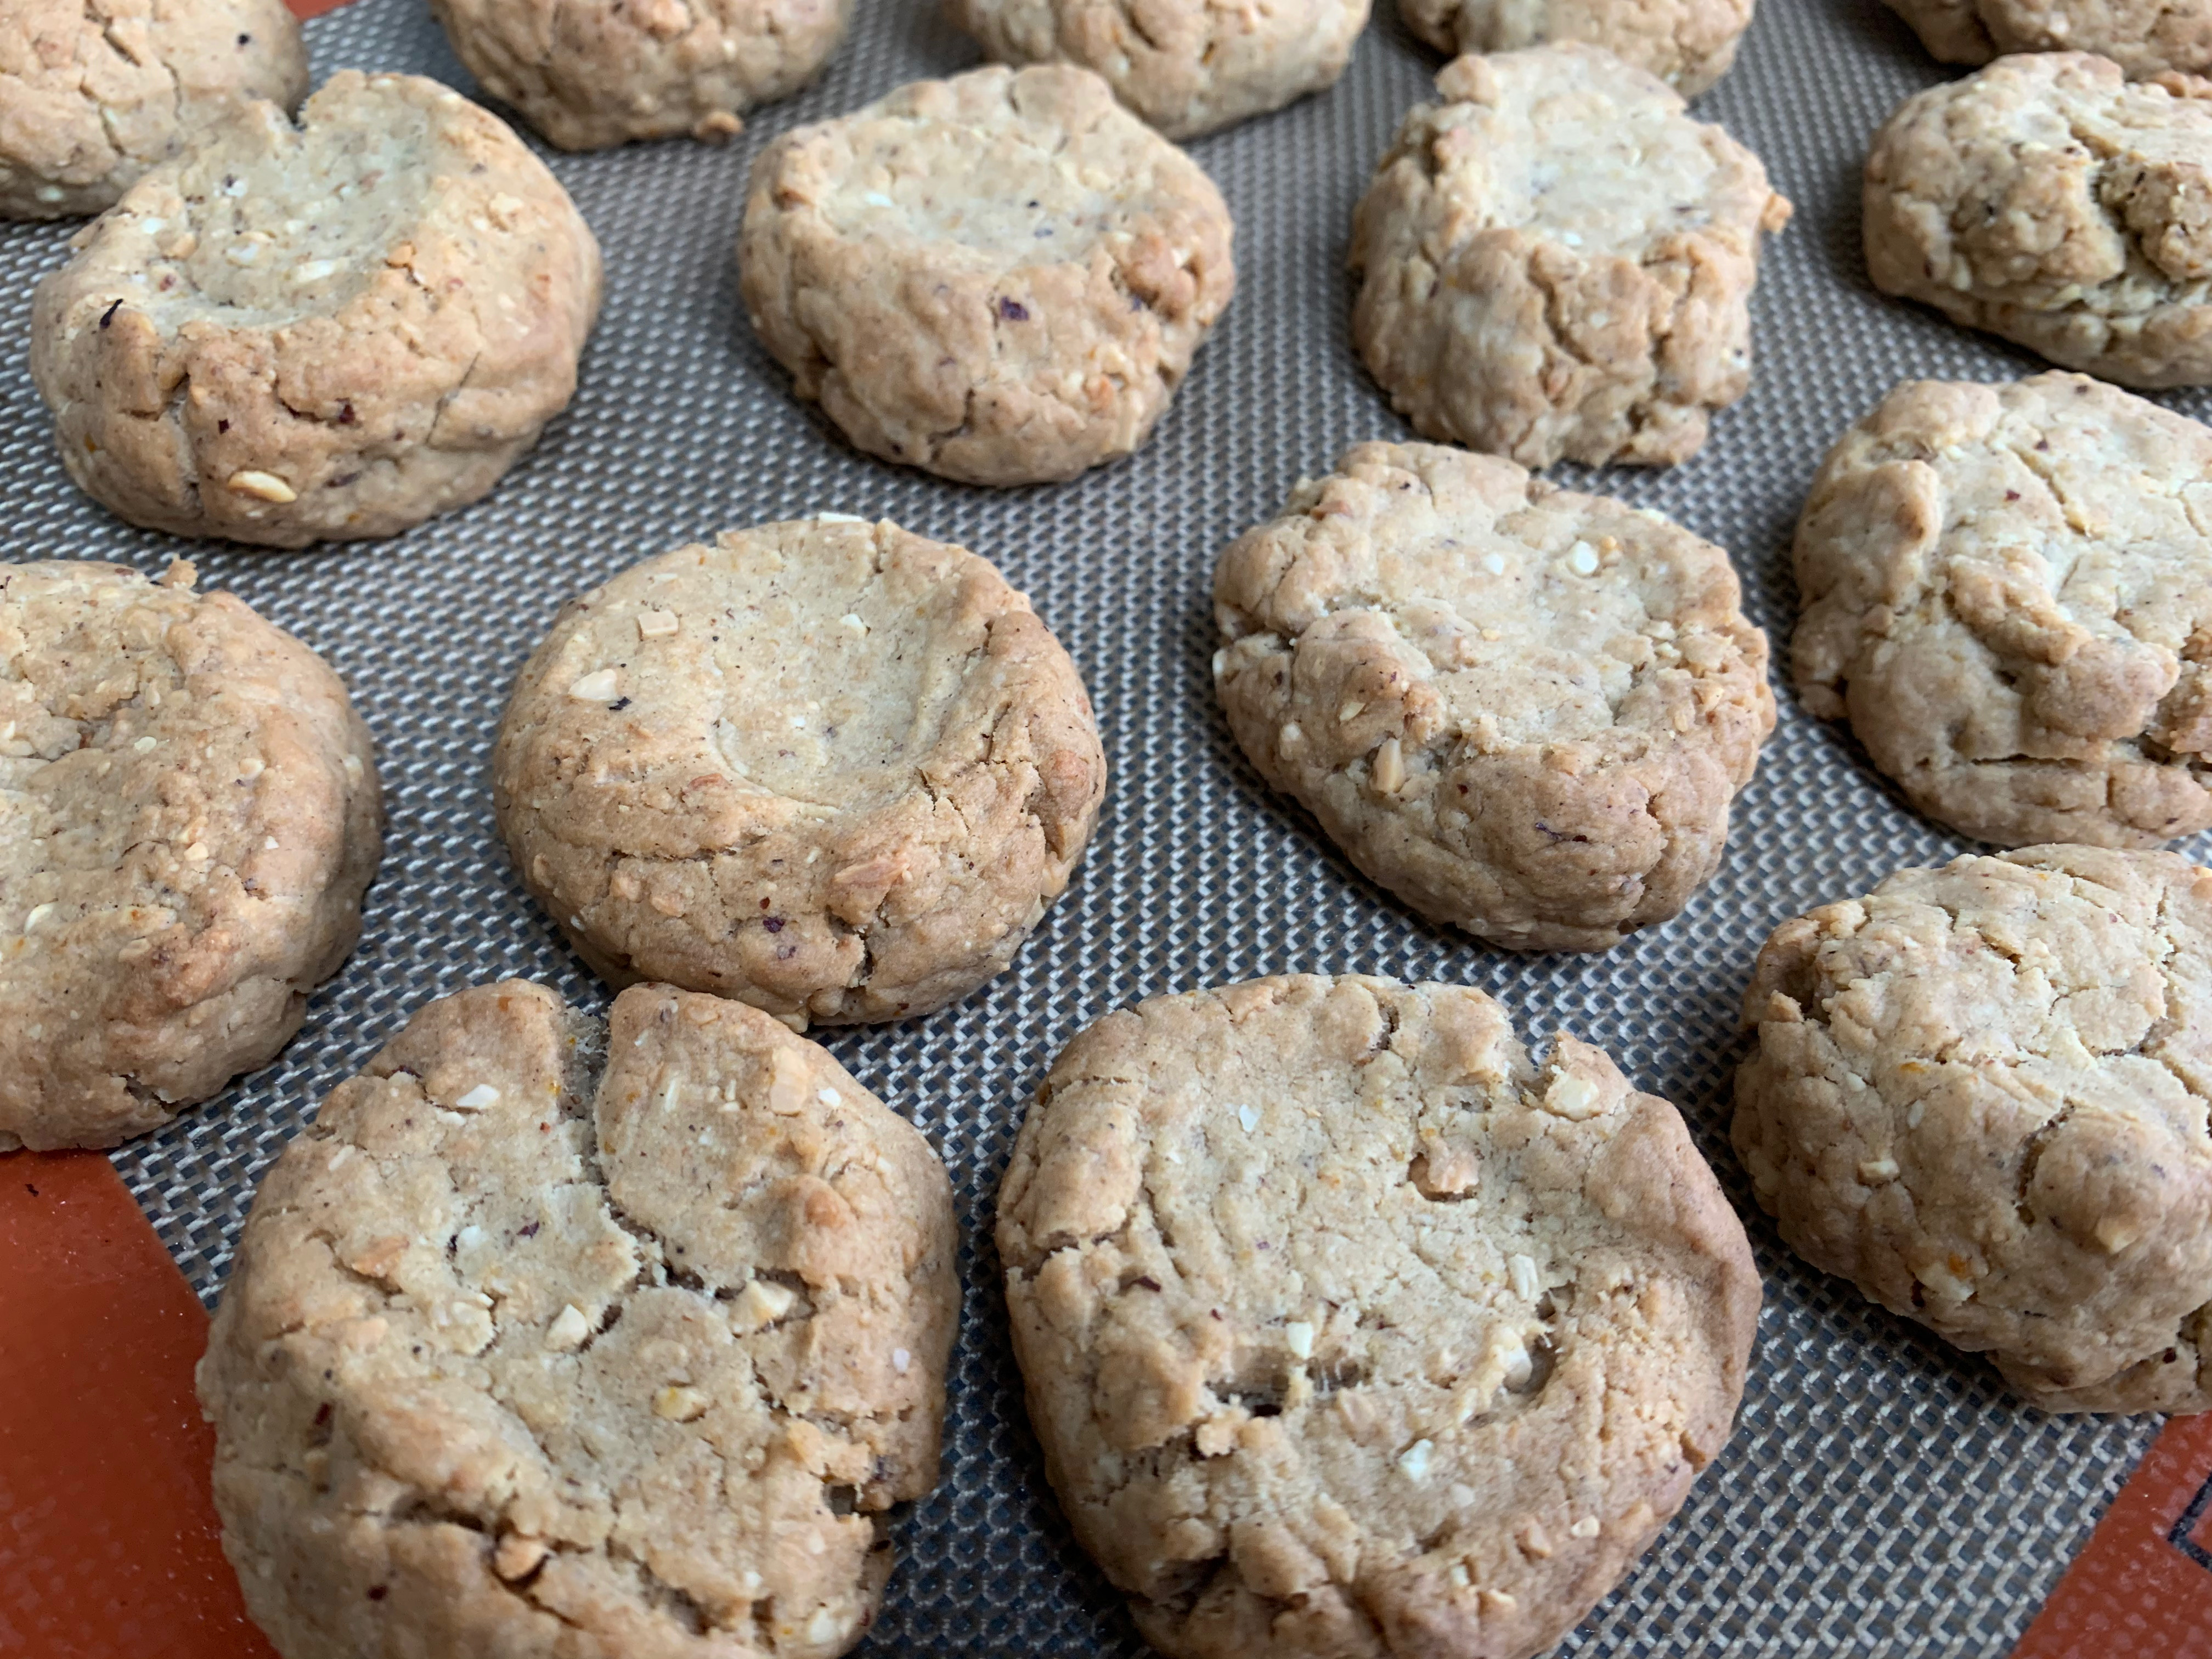
Place on a baking sheet and bake for around 20 minutes
Leave to cool
The syrup, and final assembly
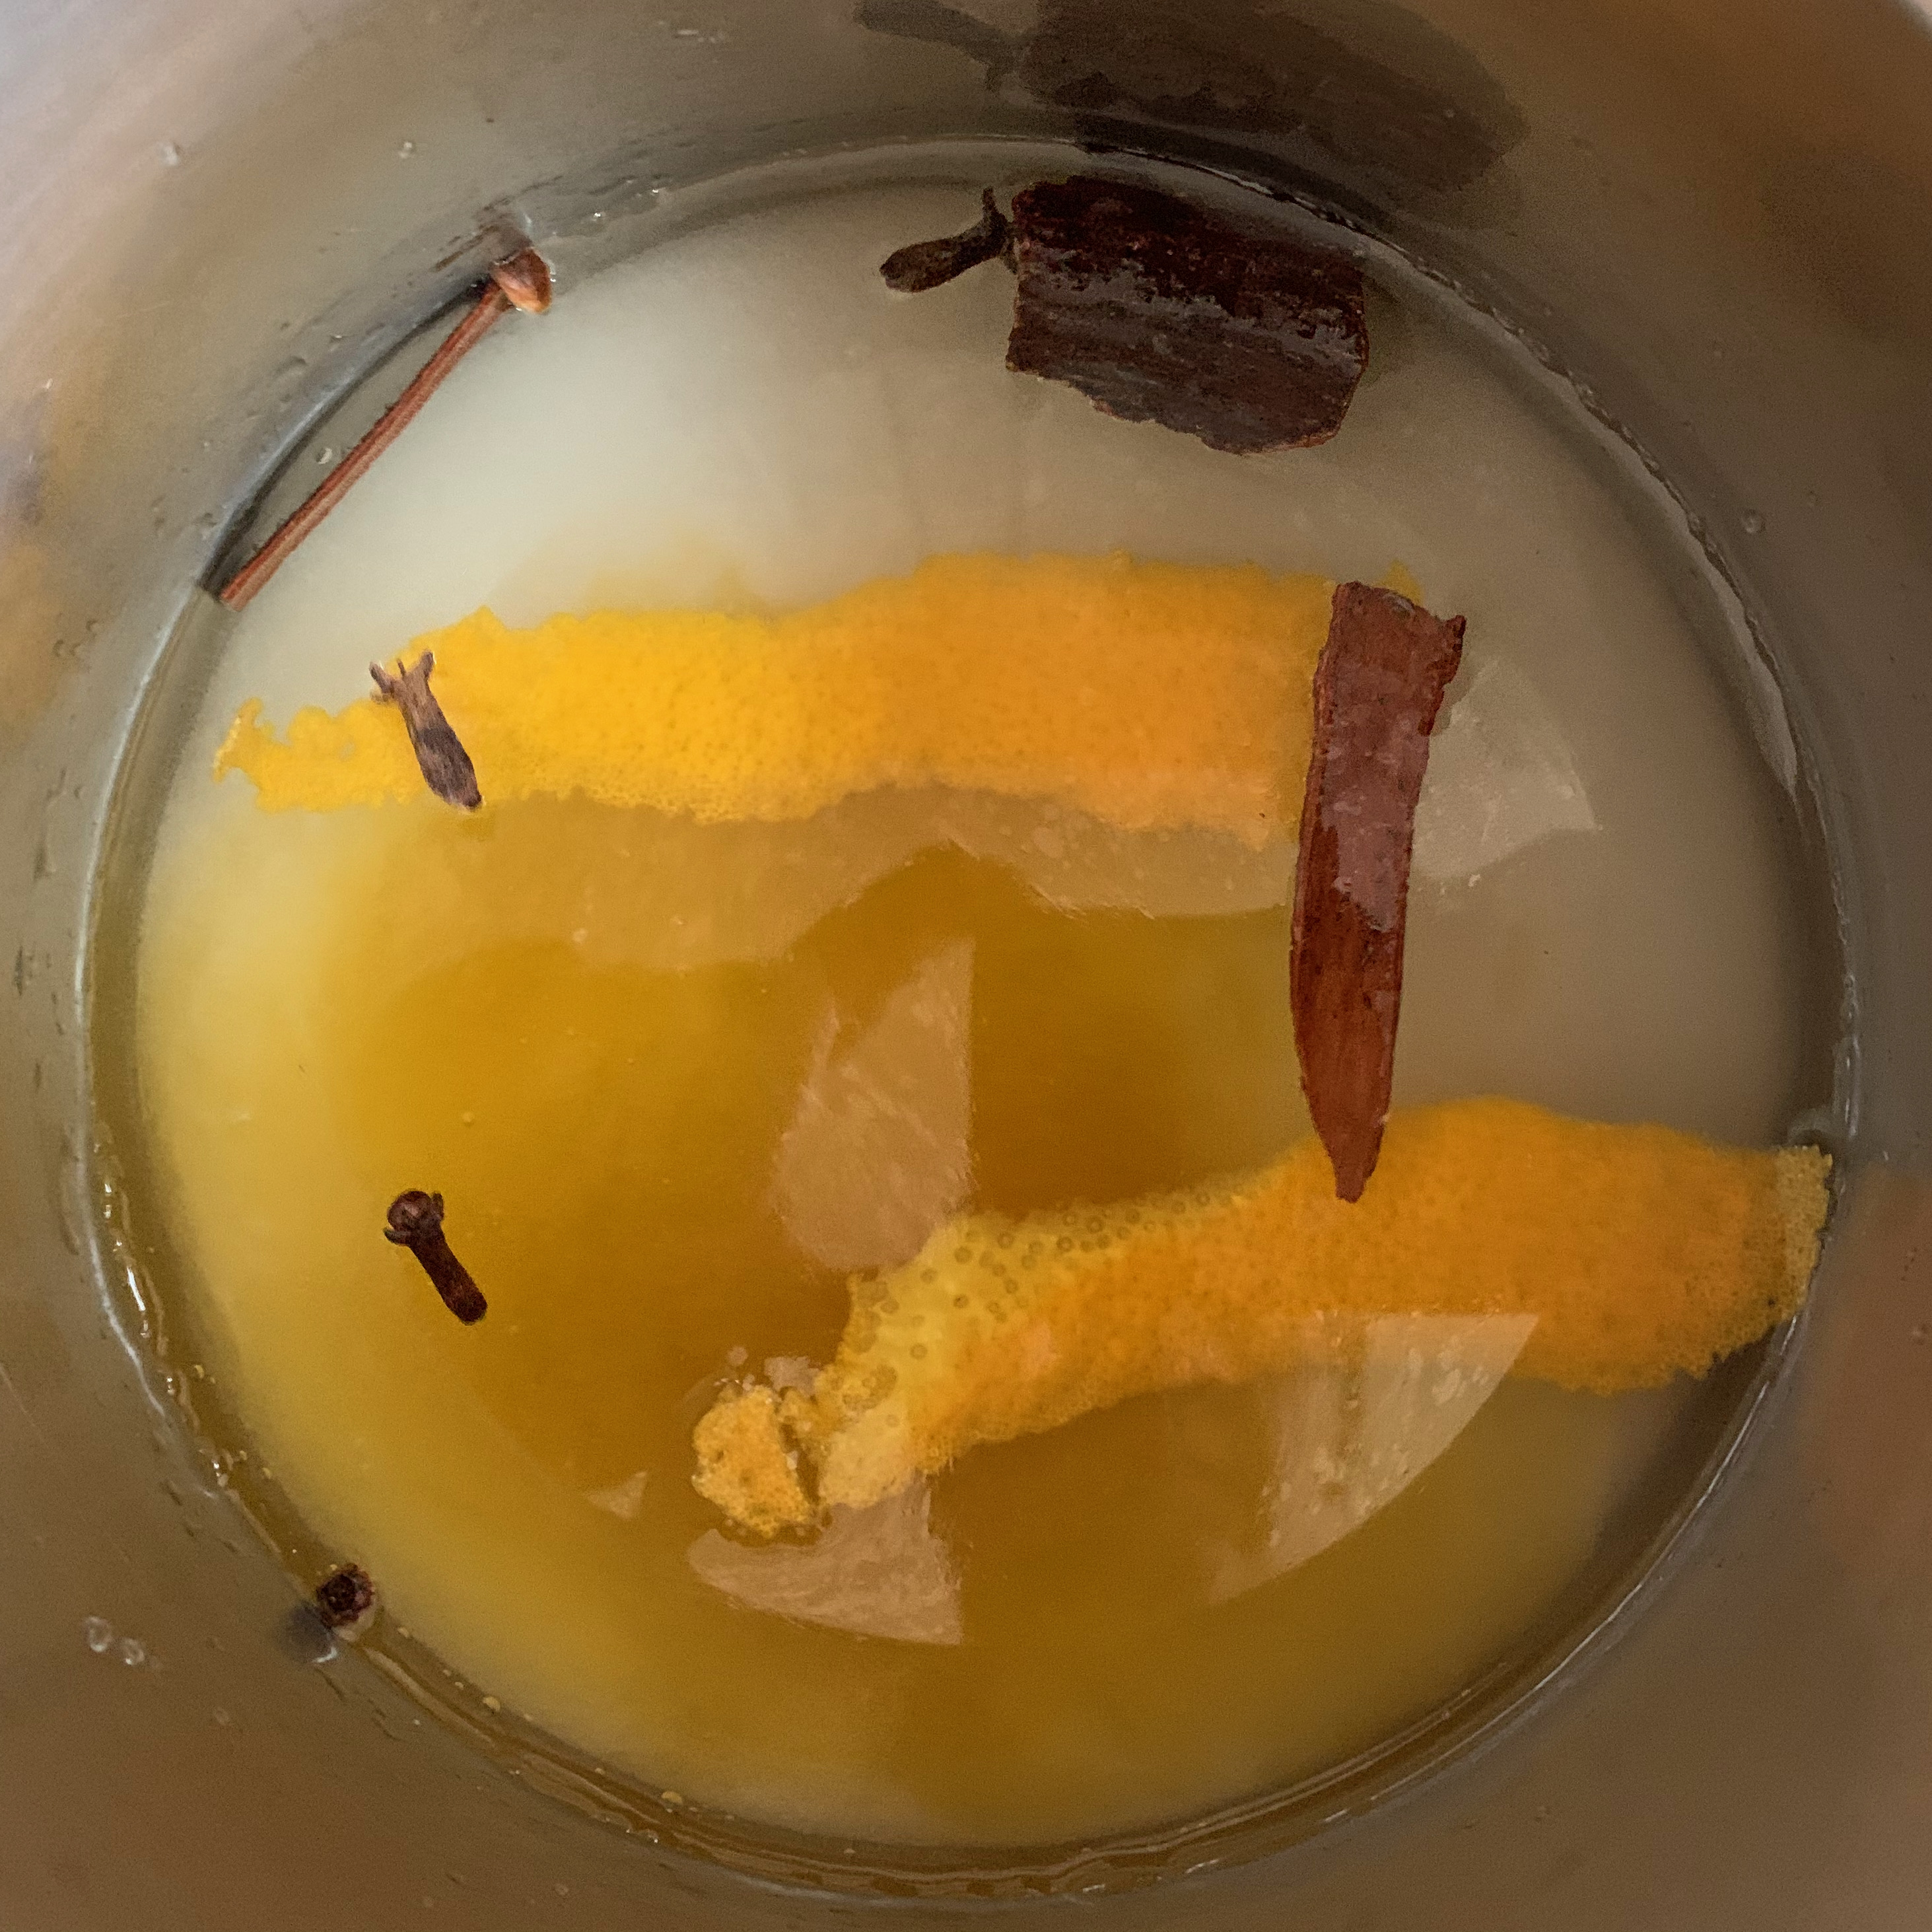
240ml water
200g sugar
120g honey
1 cinnamon stick
3 cloves
2 thick pieces of orange rind (from above)
Almonds and hazelnuts (from above)
Chop the toasted nuts finely. You can use your food processor, but don’t blitz the nuts to a powder as you did with the others.
Combine water, sugar, honey, cinnamon, cloves and orange rind in a small saucepan. Bring to a boil and then turn the heat down to simmer.
Dip each cookie into the simmering syrup. Afrodite’s Kitchen says 10-15 seconds max, but I found it needed 20 to get enough syrup to soak in: this probably depends on the exact texture of your dough.
Sprinkle the cookies with the chopped nuts.
You can leave them to cool at this point, but you don’t have to…
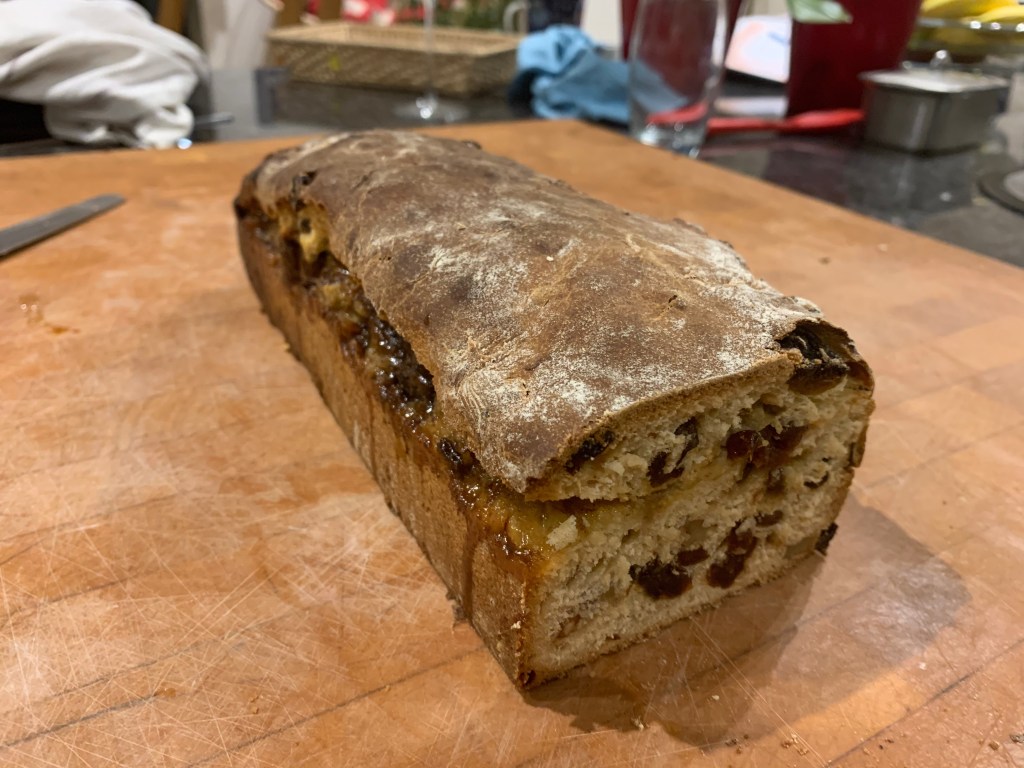
Time for a different kind of bake altogether: a yeasted fruit cake, which is a lovely afternoon snack somewhere between a cake and a bread. This one is from Lithuania and comes to us all via food writer Barbara Rolek: the same recipe seems to surface in lots of different US websites. I first spotted it on The Spruce Eats; I’ve halved and metricised the quantities, as well as tweaking a few things.
The result is a bit like a giant, fruit studded cinnamon bun. It’s great for slicing and storing in the freezer for a ready supply of snacks. The recipe doesn’t need excessive amounts of work, but it needs a lot of elapsed time – there are multiple rises which can each take a couple of hours, depending on the temperature of your kitchen. Start early.
A couple of caveats, especially if you’re looking at the photos:
You can use pretty much any dried fruit you like. I couldn’t get glacé cherries, which looked nice in the original recipe.
The dough on mine came out very stiff indeed, so you may find you want to increase the amount of milk.
I used bread flour, which was probably a mistake. I’d stick with plain flour next time.
Also next time, I’d probably start by activating the yeast in some warm water (or milk) and sugar. The recipe doesn’t suggest this, but not doing it meant that my dough took an eternity to rise.
The dough
8g yeast
120g sugar
180 ml milk
550g plain flour
4g salt
60g butter
1.5 large eggs
180g mixed fruit
120g raisins
40g walnuts
30 ml rum
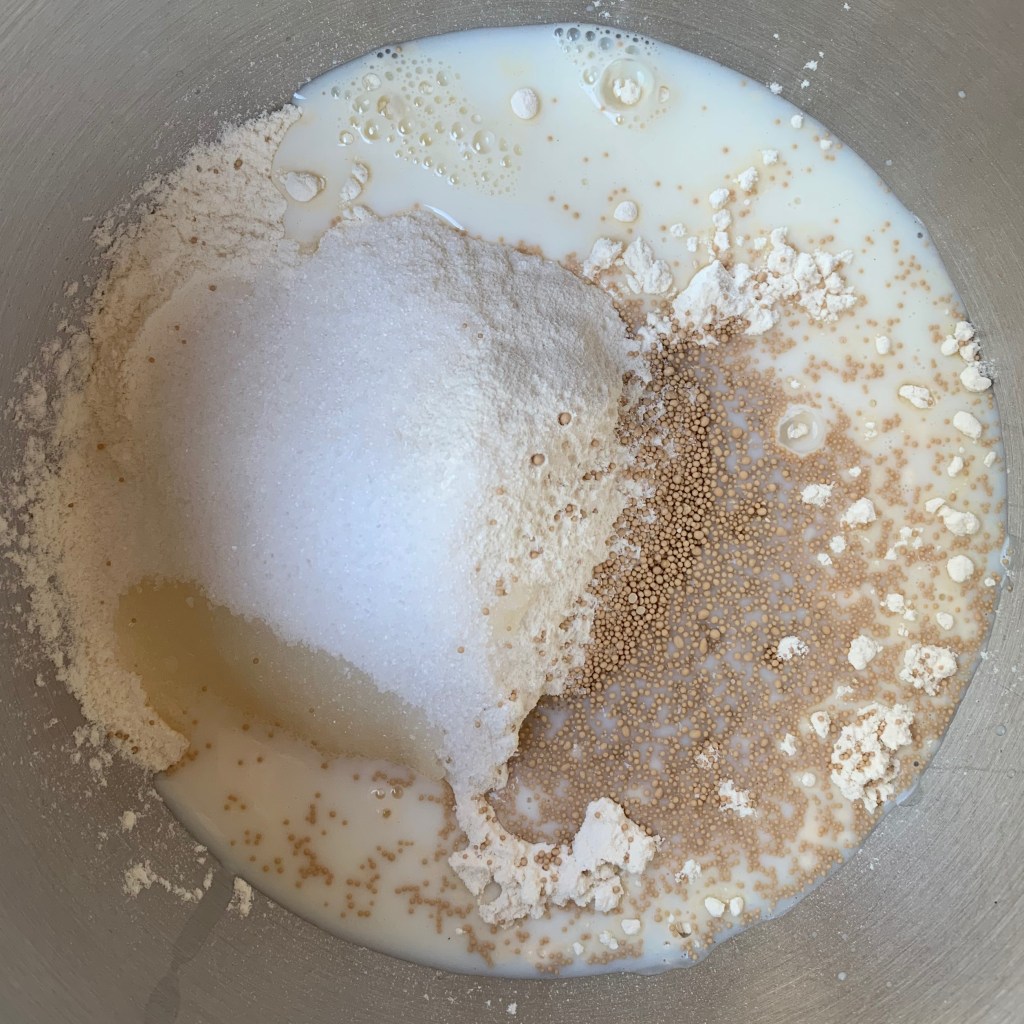
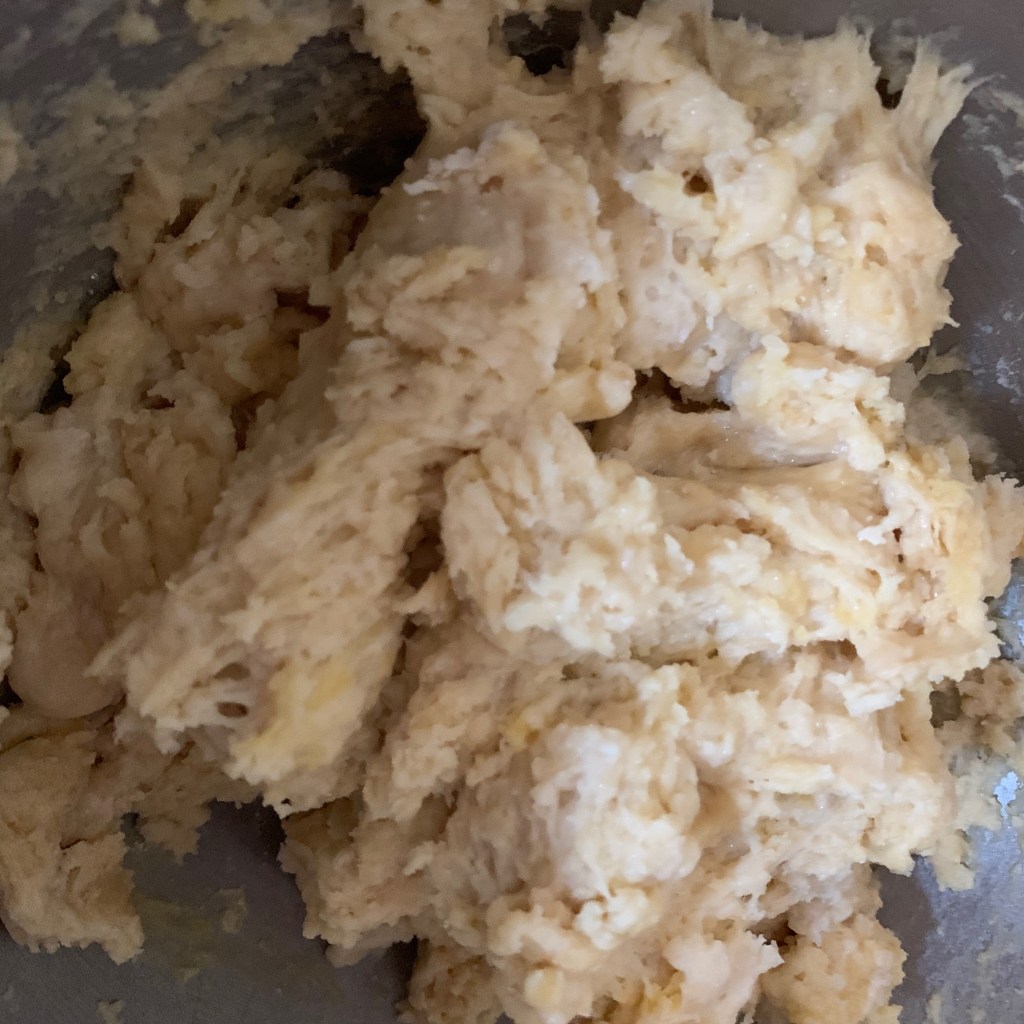
In your stand mixer, combine 300g of the flour, 60g of the sugar, the yeast and milk and mix until reasonably smooth. Cover and leave to rest for an hour.
Melt the butter. Add it to the mix with the eggs, the salt and the rest of the sugar and the flour. With the dough hook, knead for 5-7 minutes.
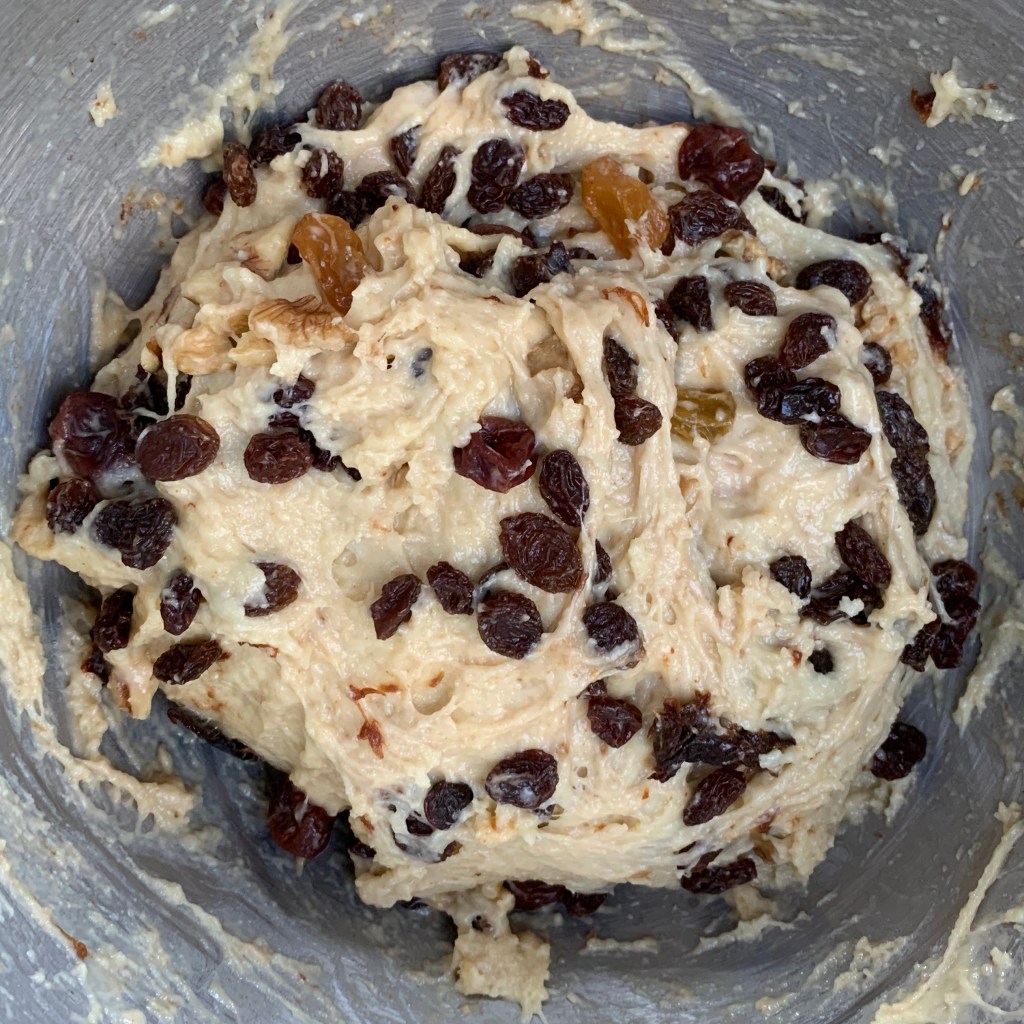
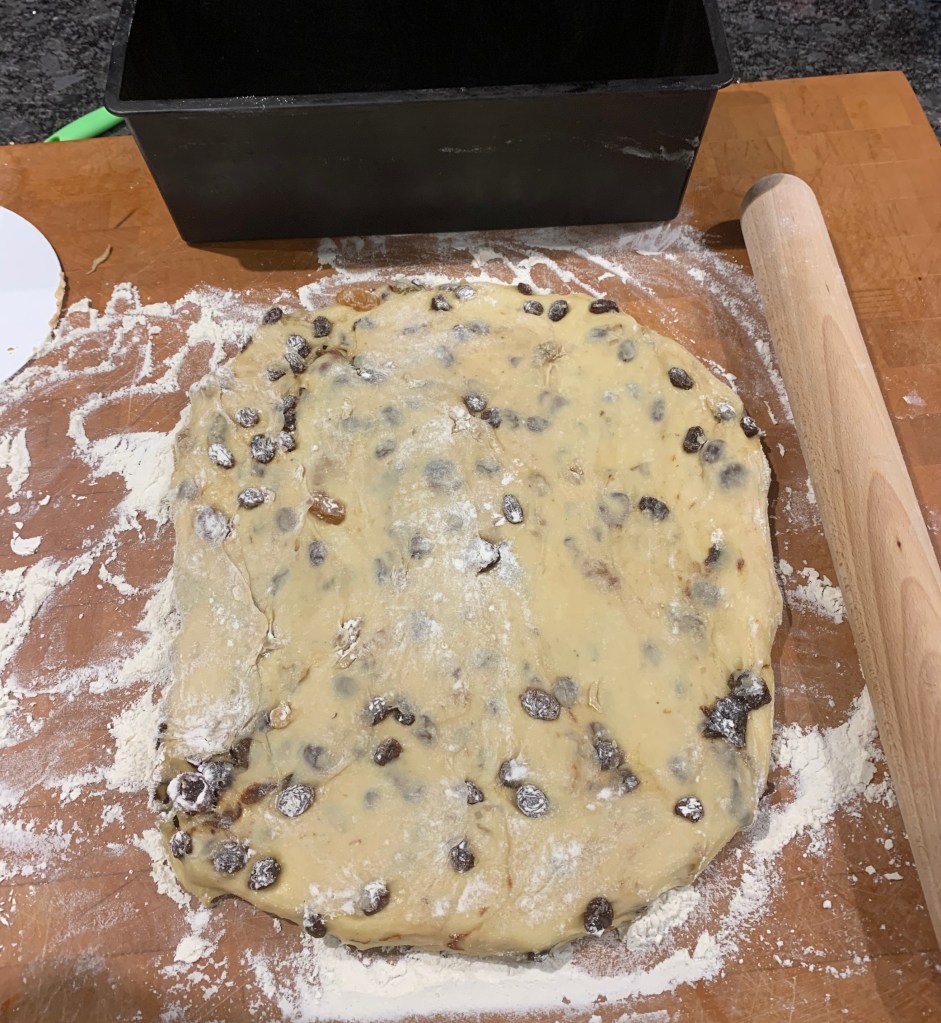
Add the fruit, raisins, walnuts and rum. Mix thoroughly.
Leave to rise until doubled in size. Expect this to take an hour or two.
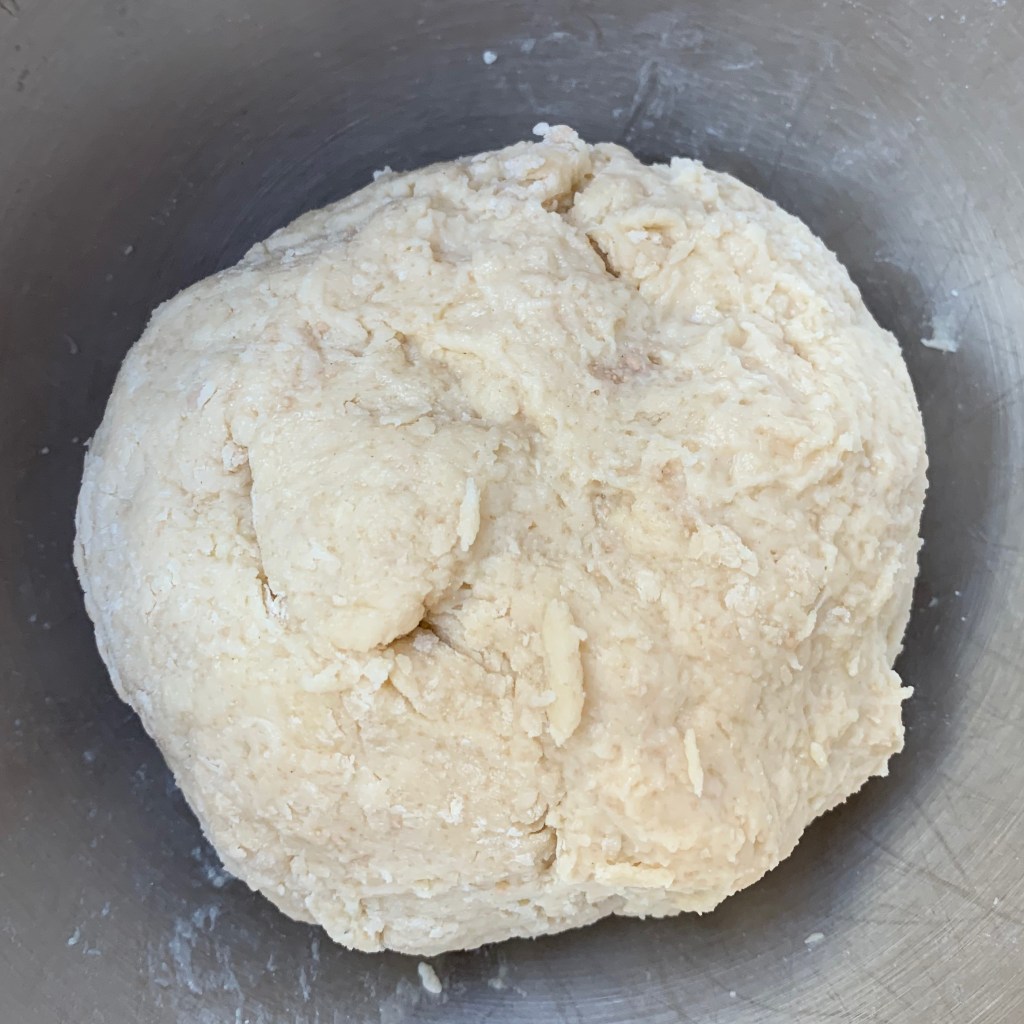
First batch of ingredients
First dough
Additions for next mix
Mixed, ready to knead
With fruit and rum mixed in
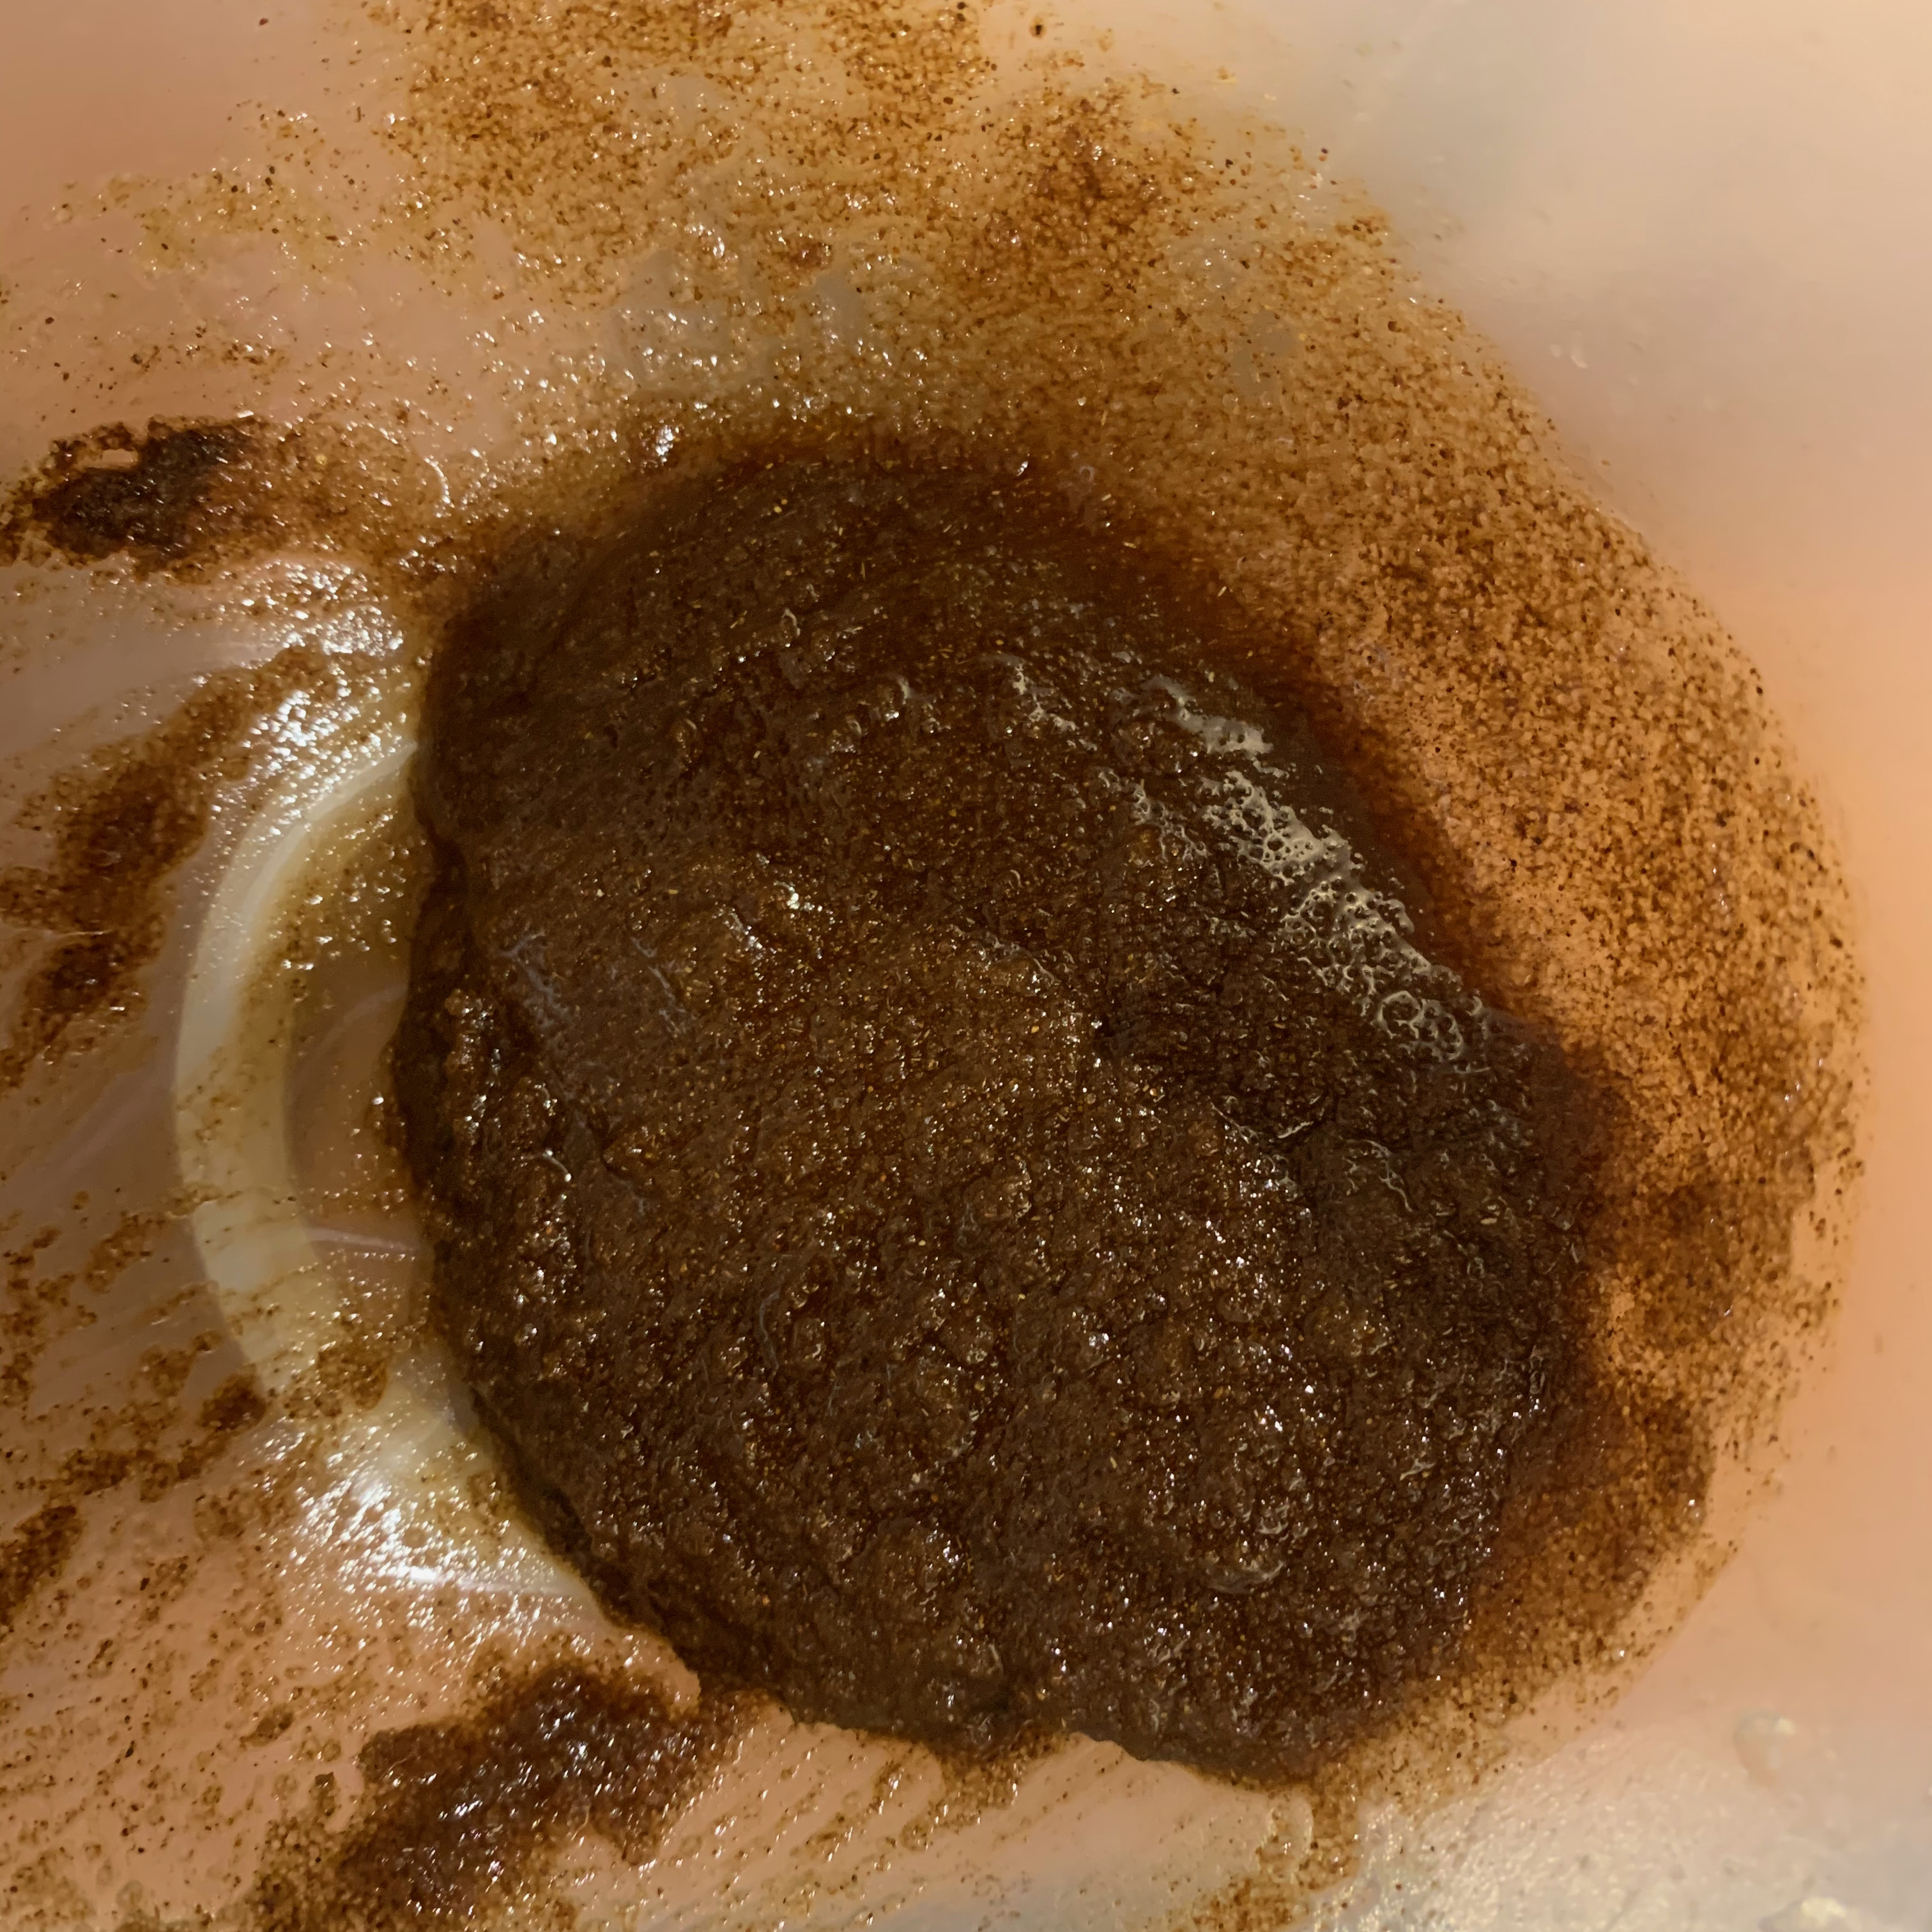
Cinnamon filling
The filling
30g butter
60g sugar
6g cinnamon
Melt the butter.
Mix with the sugar and cinnamon. Leave to cool somewhat.
Putting it together
Grease a loaf tin.
Flour a surface and roll out your dough into a rectangle. The width of your rectangle should be somewhat under the length of your loaf tin; the length around 1½ times the width.
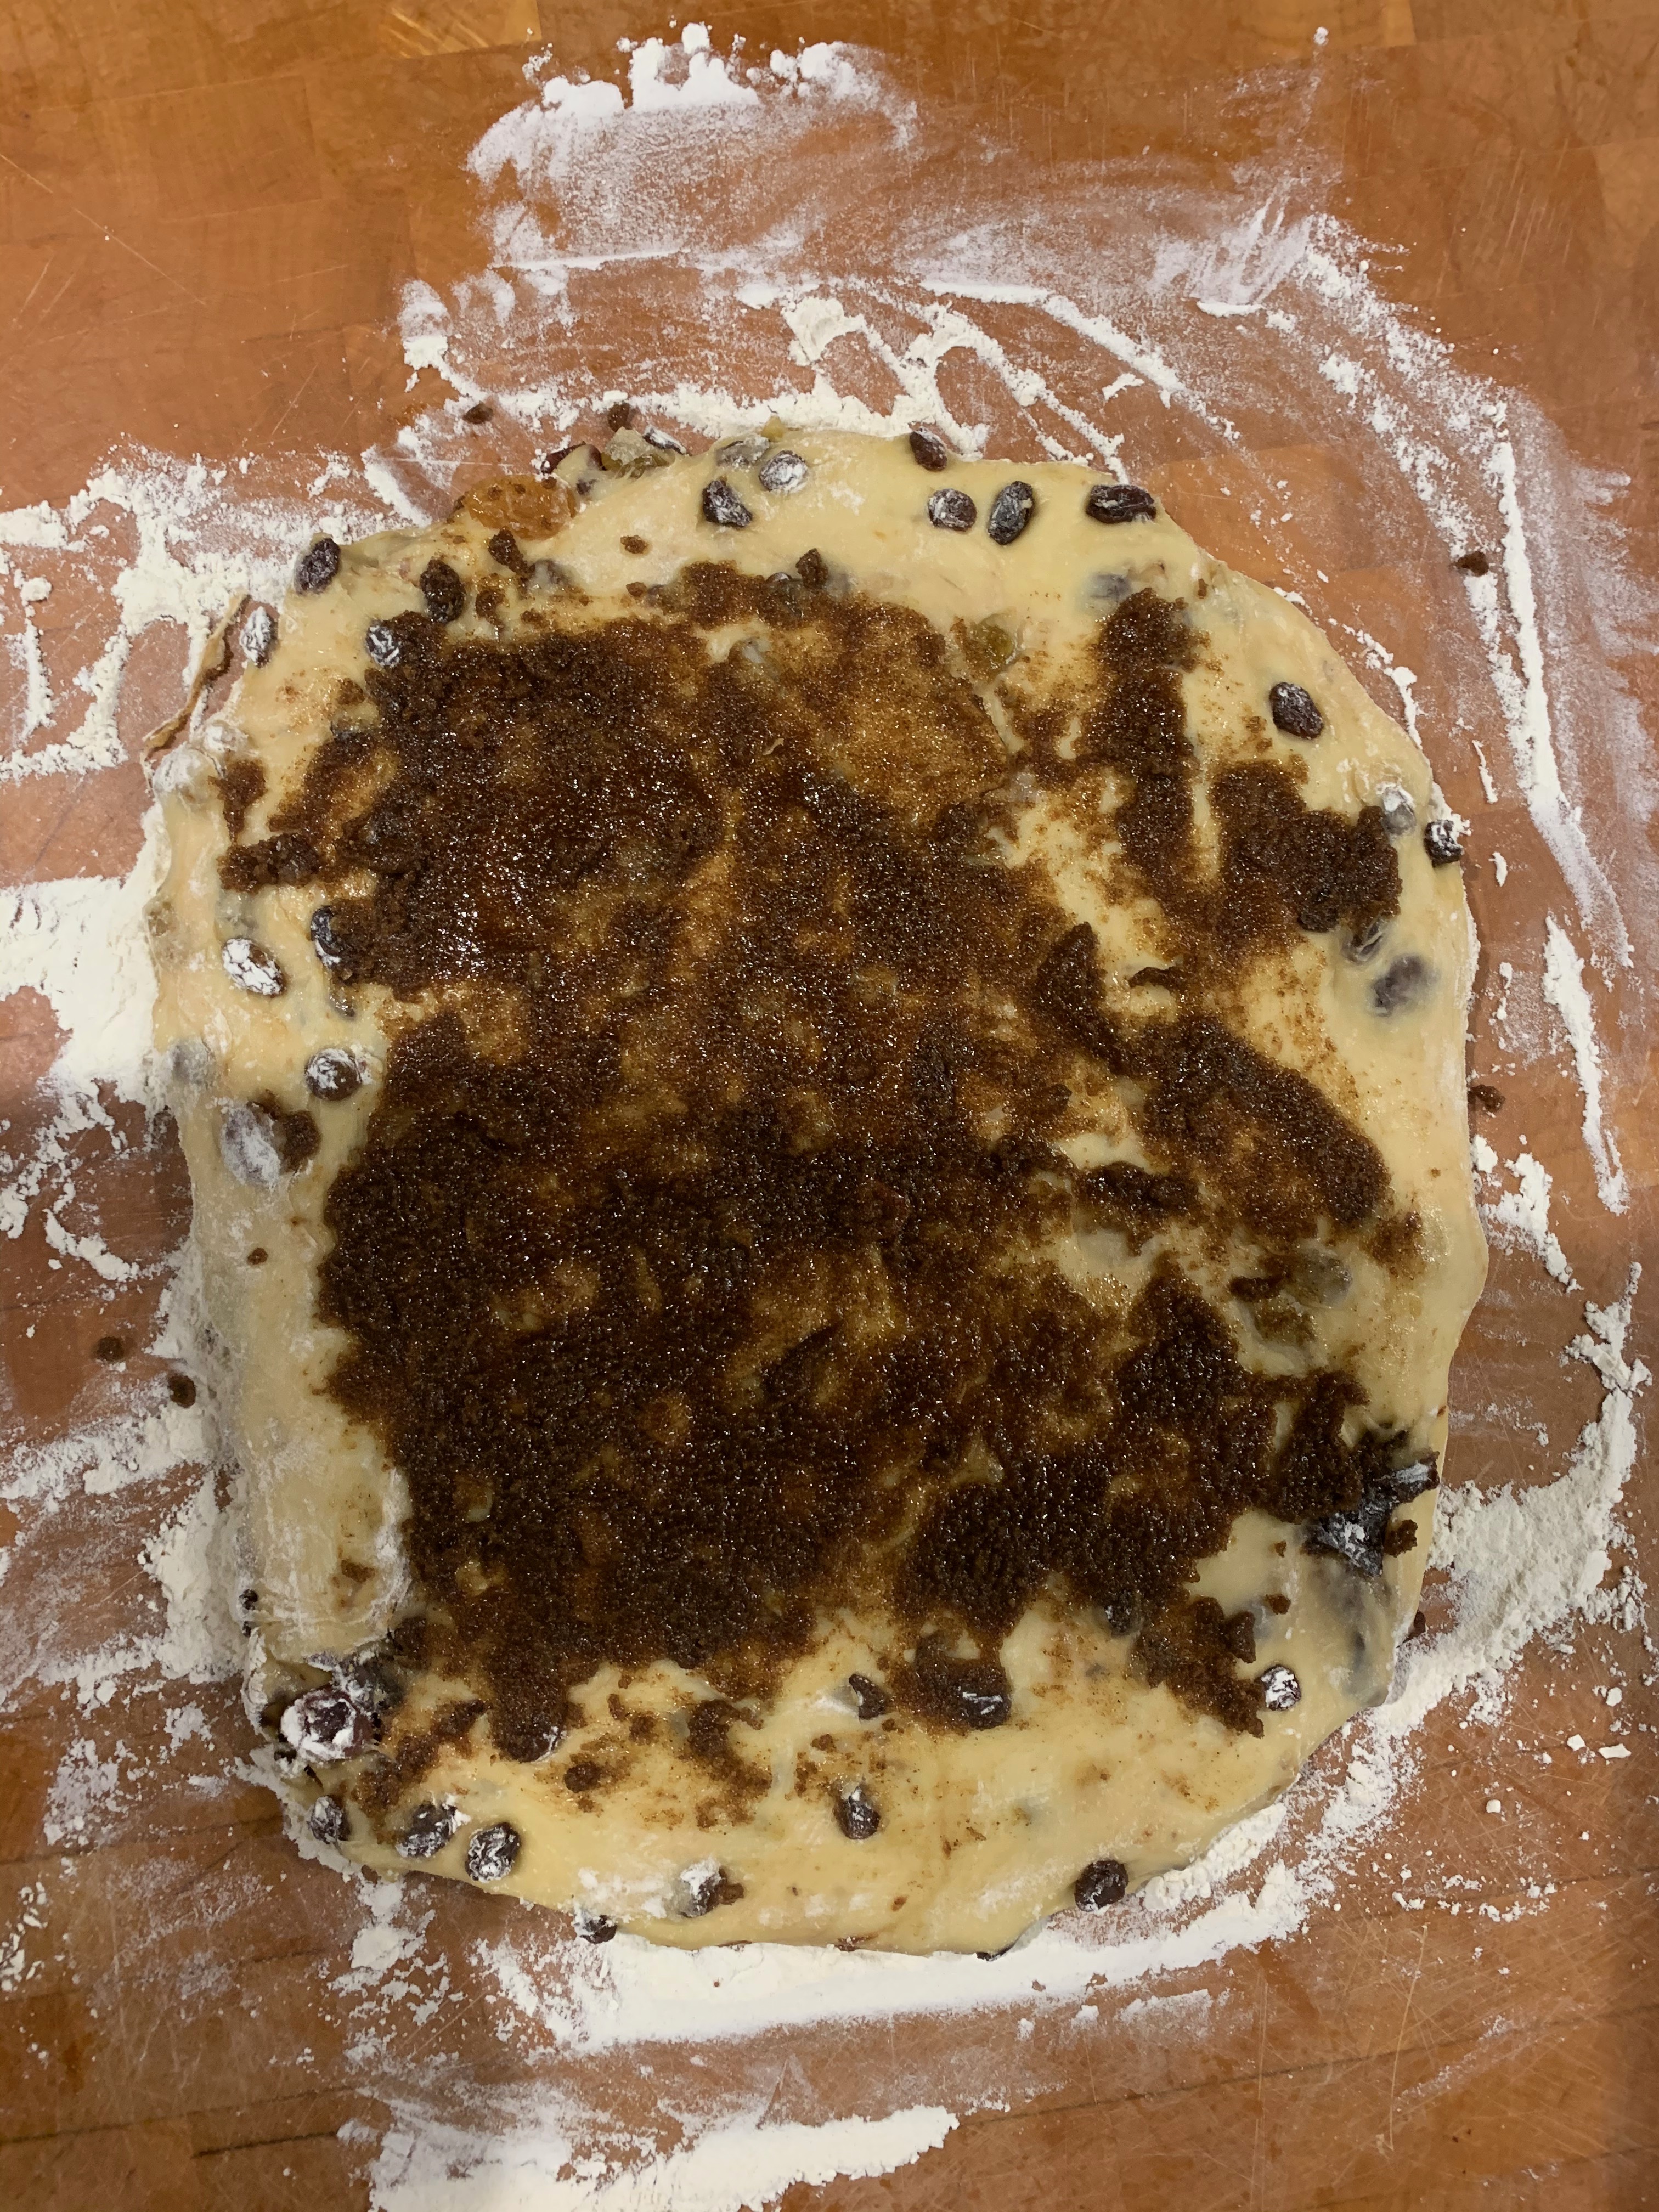
Spread your rectangle of dough with the filling. Don’t go too close to the edges – you won’t want filling leaking out.
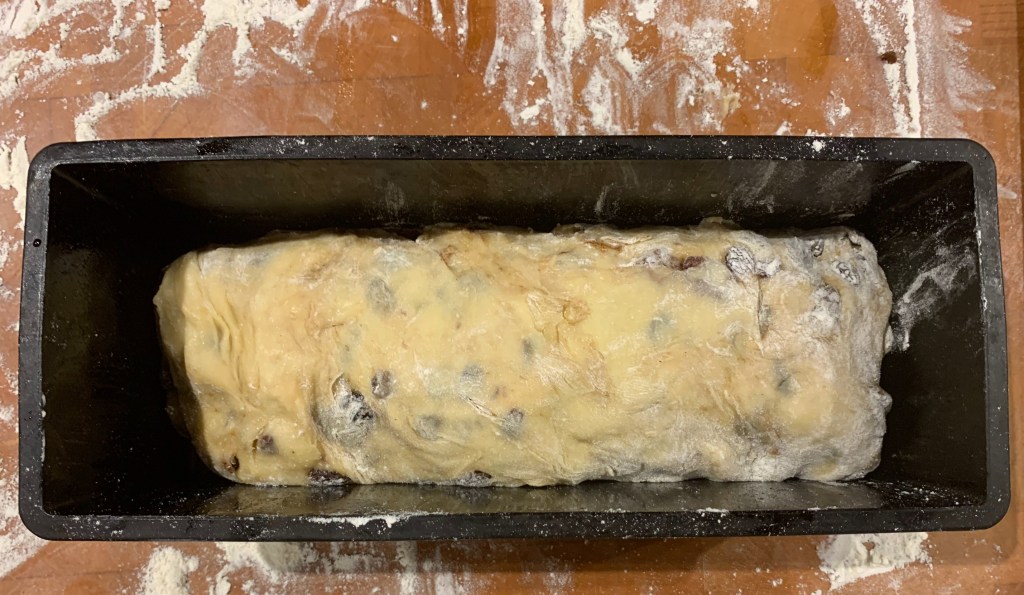
Roll up the dough into a thick sausage, ensuring the filling is sealed inside. Transfer the sausage into your loaf tin.
Leave to rise until doubled in size. Again, this could easily take 1-2 hours. If this hasn’t happened after a couple of hours, give up and bake it anyway.
Preheat oven to 200℃ fan
Bake for 10 minutes, then reduce temperature to 175℃, then bake for around another 40 minutes.
Leave to cool on a rack. If you want, sprinkle with icing sugar (I didn’t).
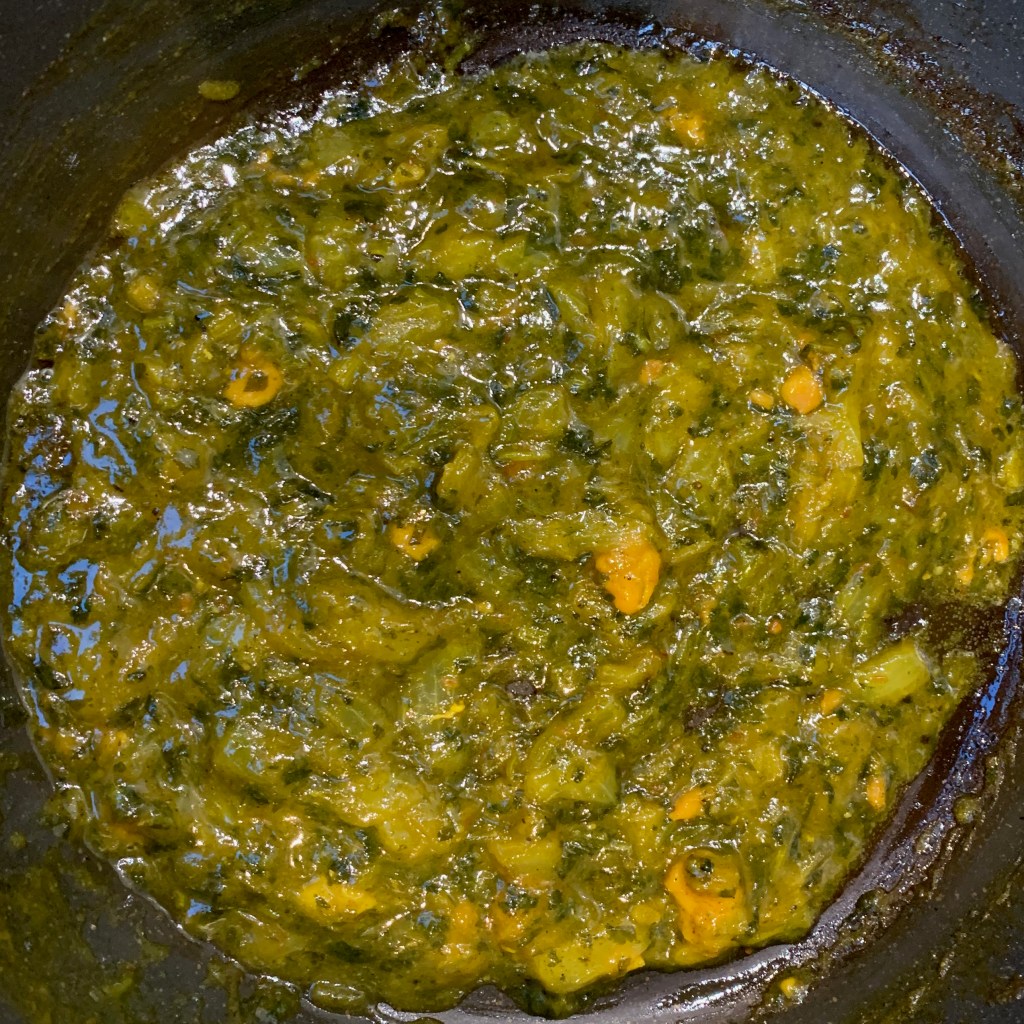
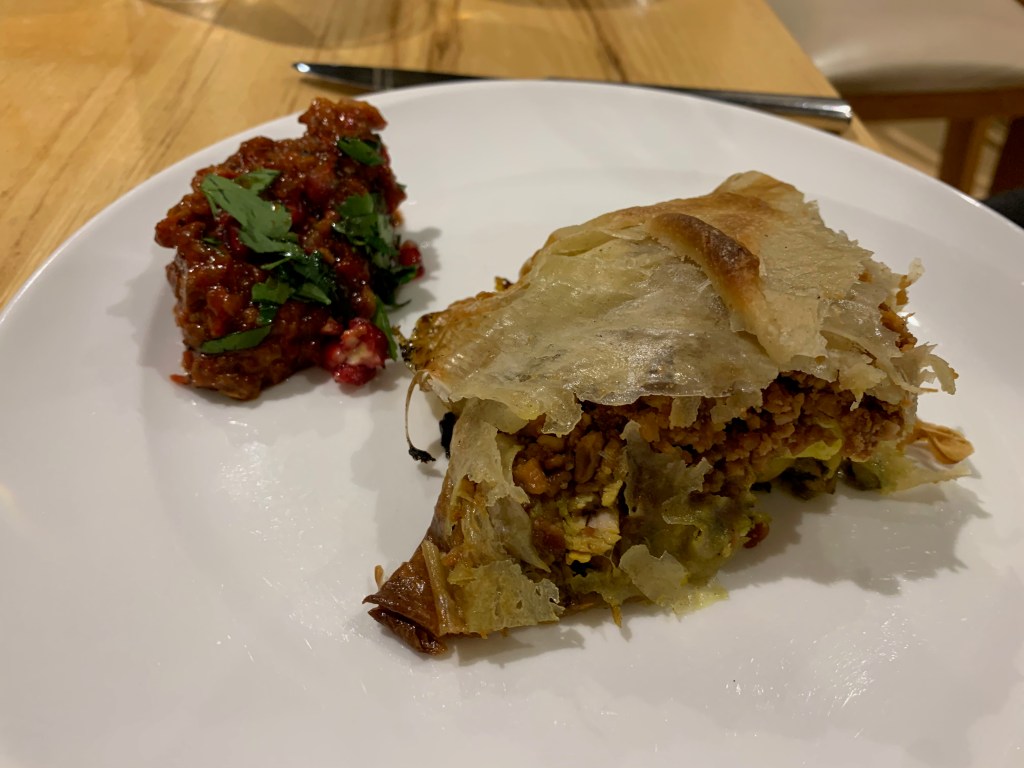
Bastillas (or Pastillas) are Moroccan pies made with ultra-thin pastry. They’re unquestionably one of the country’s most famous dishes: you will find dozens of different types, with different recipes for each type. But be careful: there are some disappointingly bland recipes around. On the other hand, a really good, flavour-packed Bastilla can be dazzling, a huge crowd-pleaser. It’s complex, but it’s worth it.
I’ve chosen one of the most popular types: the chicken, egg and almond bastilla. I based my version on a combination of The Spruce Eats, My Moroccan Food and French-language blog Choumicha.ma and the results were outstanding. But you have lots of choices, which I’ll try to explain.
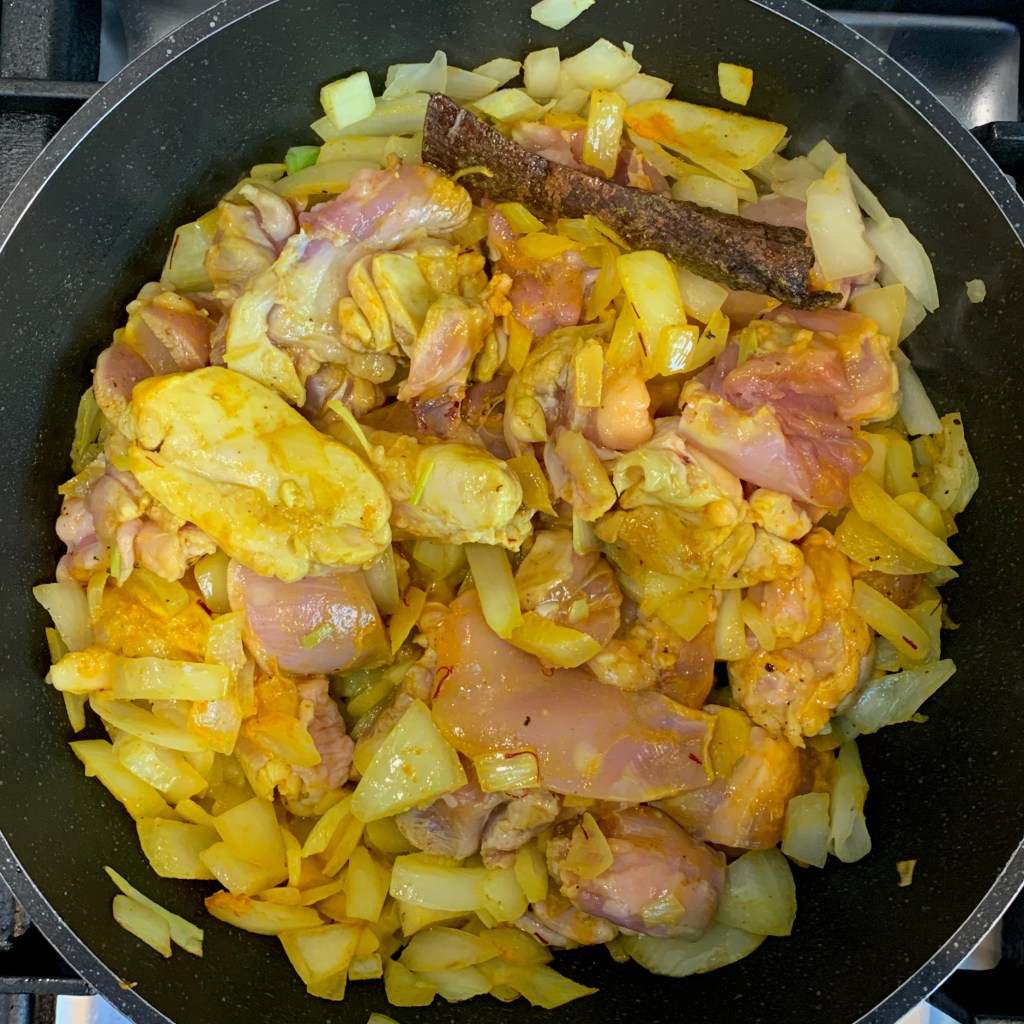
There are some constants: you’re going to make a chicken and onion stew with herbs (most probably parsley and coriander) and spices, which will definitely include ground ginger and turmeric. You’re going to scramble some eggs. You’re going to chop up some almonds. And you’re going to bake all of these in a shell of layered thin pastry. But beyond those basics, you’ve got several options.
The first crucial one is the size: you can make a single large bastilla or multiple individually size ones. I went for something in between: the quantities below make enough for six people (assuming that you’ve got some other side dishes of some sort), and I chose to do two bastillas for the two of us to have on separate days (with leftovers).
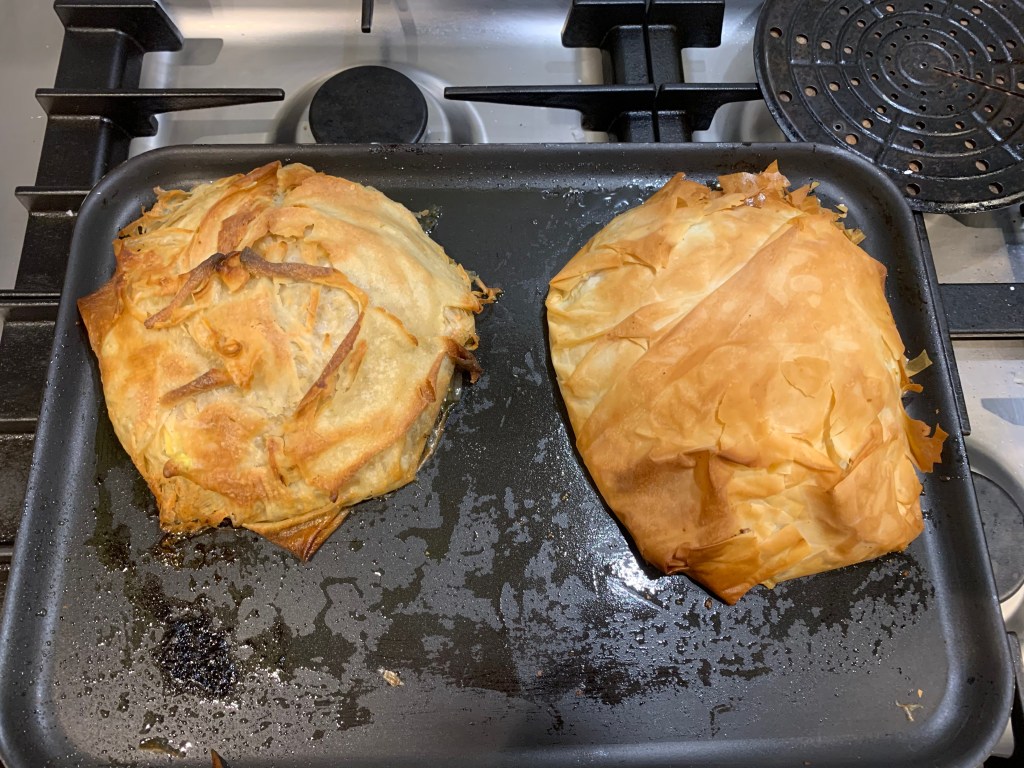
The next question is the type of pastry. If you’re going for the full-on Moroccan experience, you’ll want to freshly make your own pastry sheets: Choumicha has a really nice video showing you how it’s done. The Spruce gives the pastry a name, “warqa”, and shows a similar recipe. The warqa process is seriously weird, but works fine once you’ve got used to it. Since I wasn’t feeling super-confident, I made enough pastry for one of my two bastillas, and used supermarket-bought filo pastry for the other. The warqa version was a clear winner: it’s a time consuming faff, but the result is considerably superior and I won’t be going back to filo any time soon.
You have options on the spicing: saffron, cinnamon, ras el hanout and orange blossom water are just some of them. Some Moroccan recipes use smen, a fermented butter not dissimilar to the Indian ghee, either in place of the oil or in addition to it.
I went for chicken thigh fillets because there are better quality ones available than whole thighs at the supermarket I use. Cooking your chicken on the bone will get you a richer sauce.
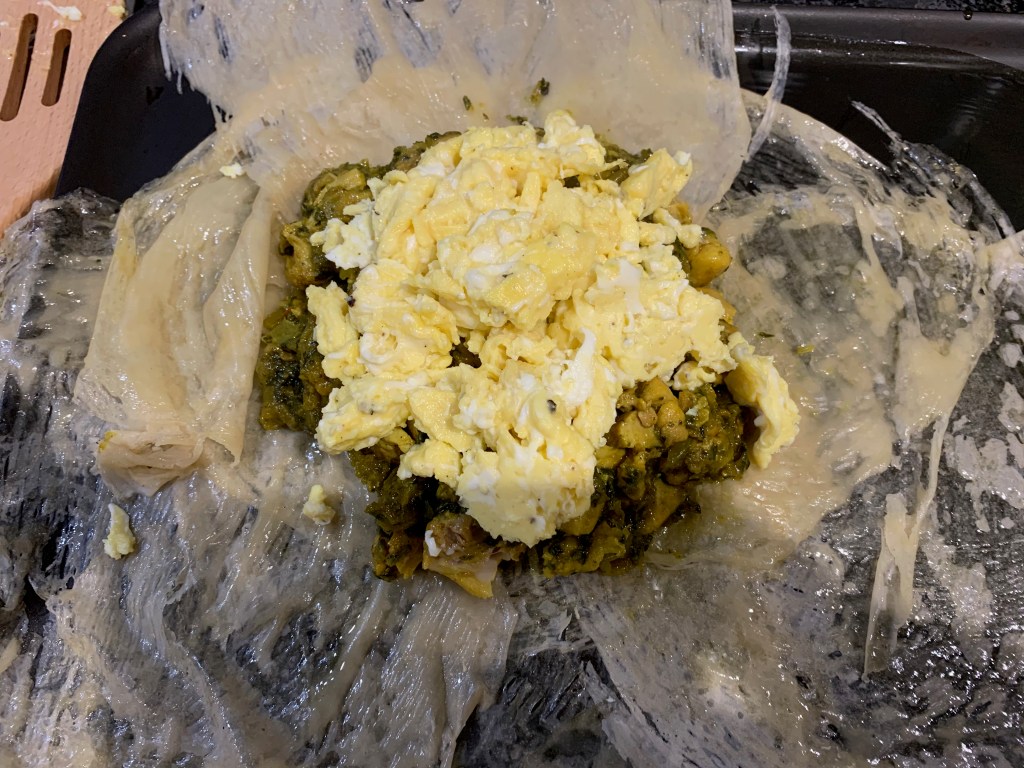
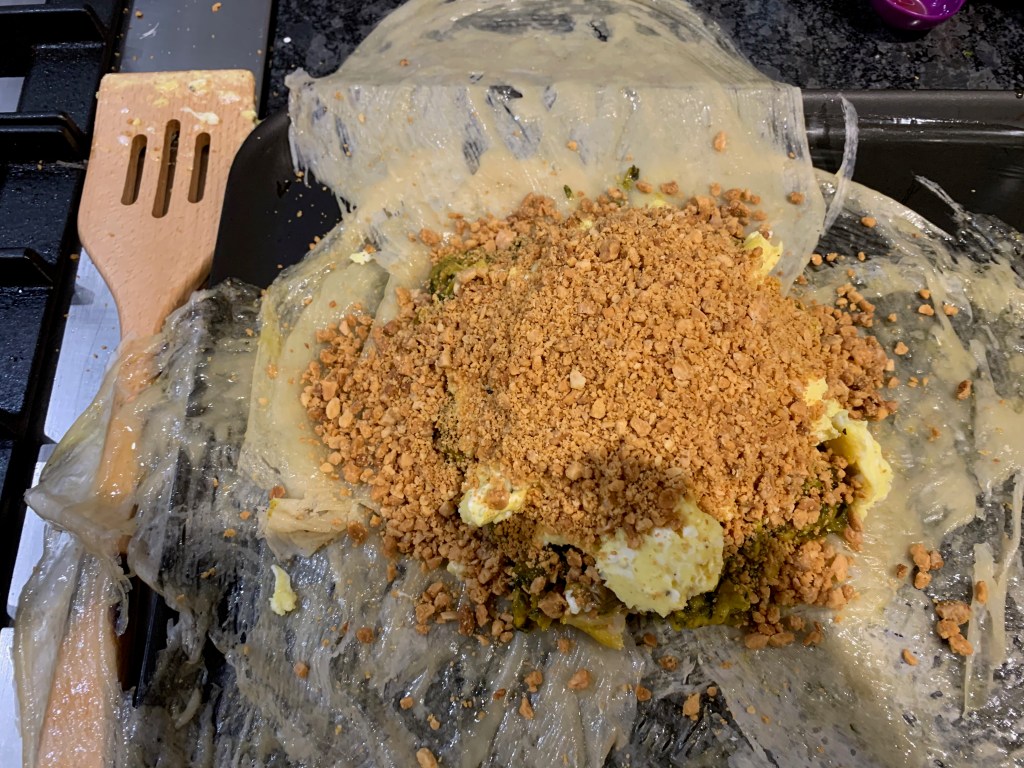
Next, there’s the question of how to layer your fillings. I went for a three layer approach: chicken mixed with onion sauce, scrambled eggs, ground almonds. There are other possibilities (keep the chicken and the sauce separate and/or blend your eggs into the sauce when you scramble them).
Finally, there’s the question of icing sugar. I really don’t like things sweet so I ignored the two instructions to add icing sugar: one when grinding the almonds and one when the whole bastilla is finished.
That’s more than enough about the possible variations: let’s get down to the recipe I made.
The chicken filling
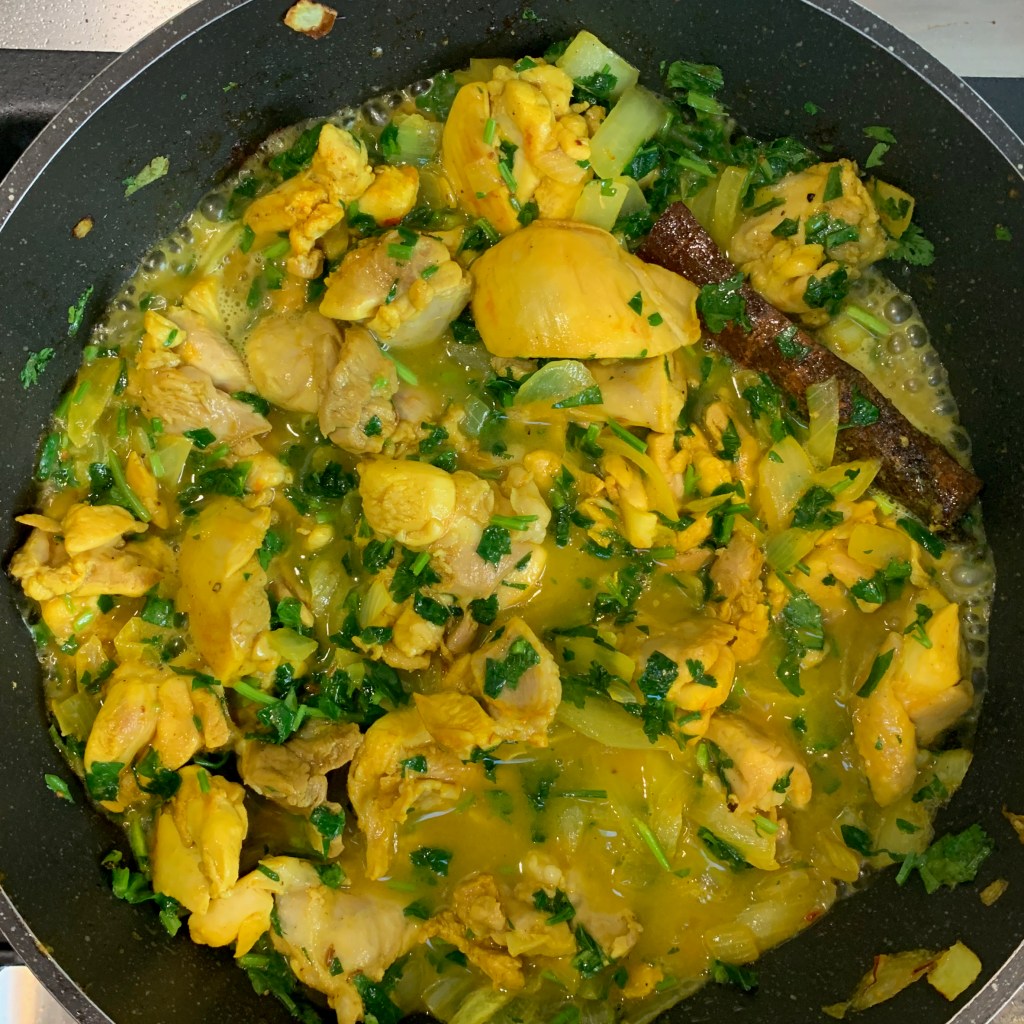
If you can, make your filling the day before. Like many stewed dishes, it tastes more intense when the flavours have had lots of time to infuse. Quantities of herbs are very approximate: I’ve never yet found a dish that gets spoiled by adding too many fresh herbs.
Olive oil for frying
800g chicken thigh fillets (or around 8 large chicken thighs)
500g onions
1 tsp turmeric
1 tsp ground ginger
1 cinnamon stick
2 tsp ras el hanout
A small pinch saffron
Salt to taste
Black pepper to taste
20g flat leaf parsley
20g coriander leaves
½ tablespoon honey
Divide the chicken thigh fillets into two at the point where they’re nearly split anyway.
Chop the onions reasonably finely (you don’t need to go overboard).
Heat oil in a pan, add the chicken, onions, spices, salt and pepper.
Fry on medium heat, uncovered, until the chicken is browned on all sides and the onions are transparent (around 10-15 minutes)
Add the parsley and coriander and a small amount of water (perhaps 50-100ml), cover your pan and simmer until the chicken is cooked through.
Remove the chicken and set aside. Discard the cinnamon stick. Add honey to the mixture, uncover your pan and cook until almost all the water has evaporated and you have a thick paste. You don’t want a watery sauce turning your pastry soggy.
Meanwhile, if your chicken was on the bone, remove the bones and skin. Chop the chicken into small pieces, perhaps 5-10mm across.
Recombine the chicken and the sauce and set aside.
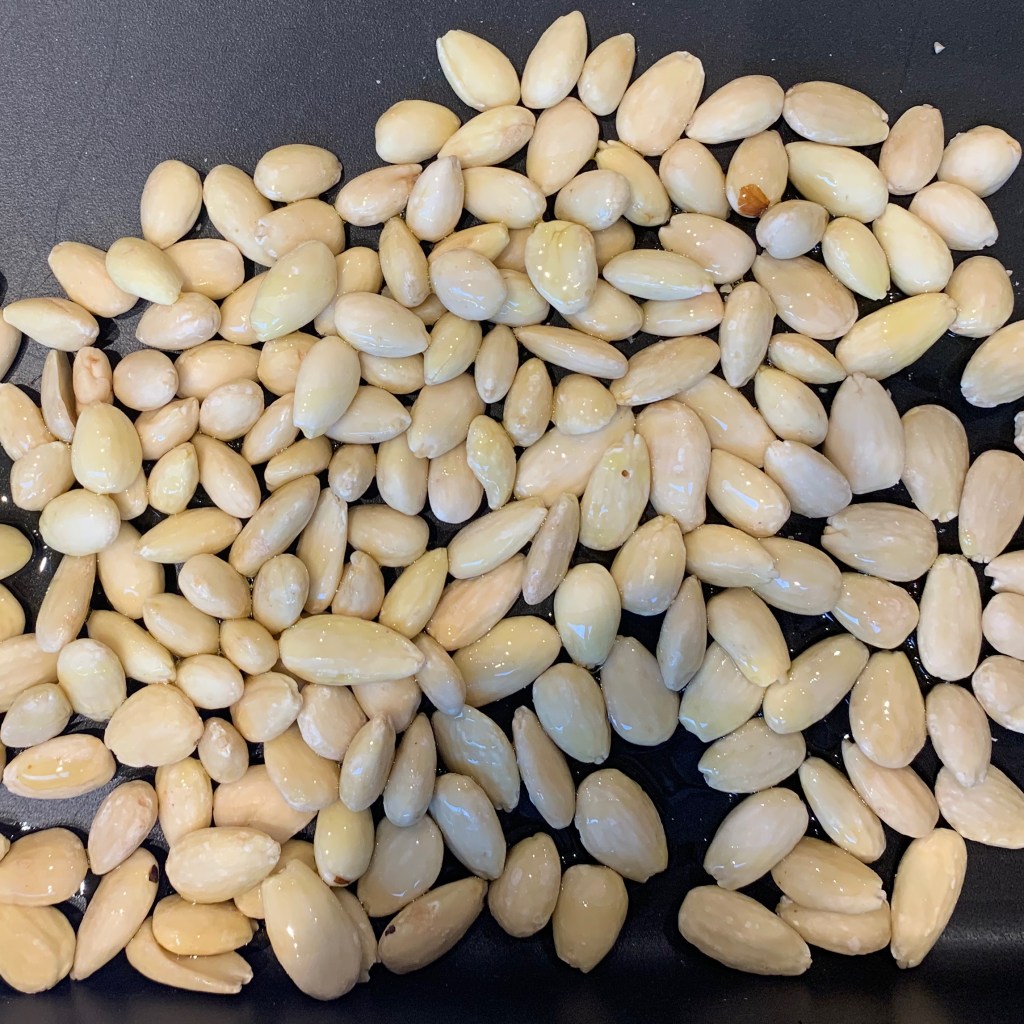
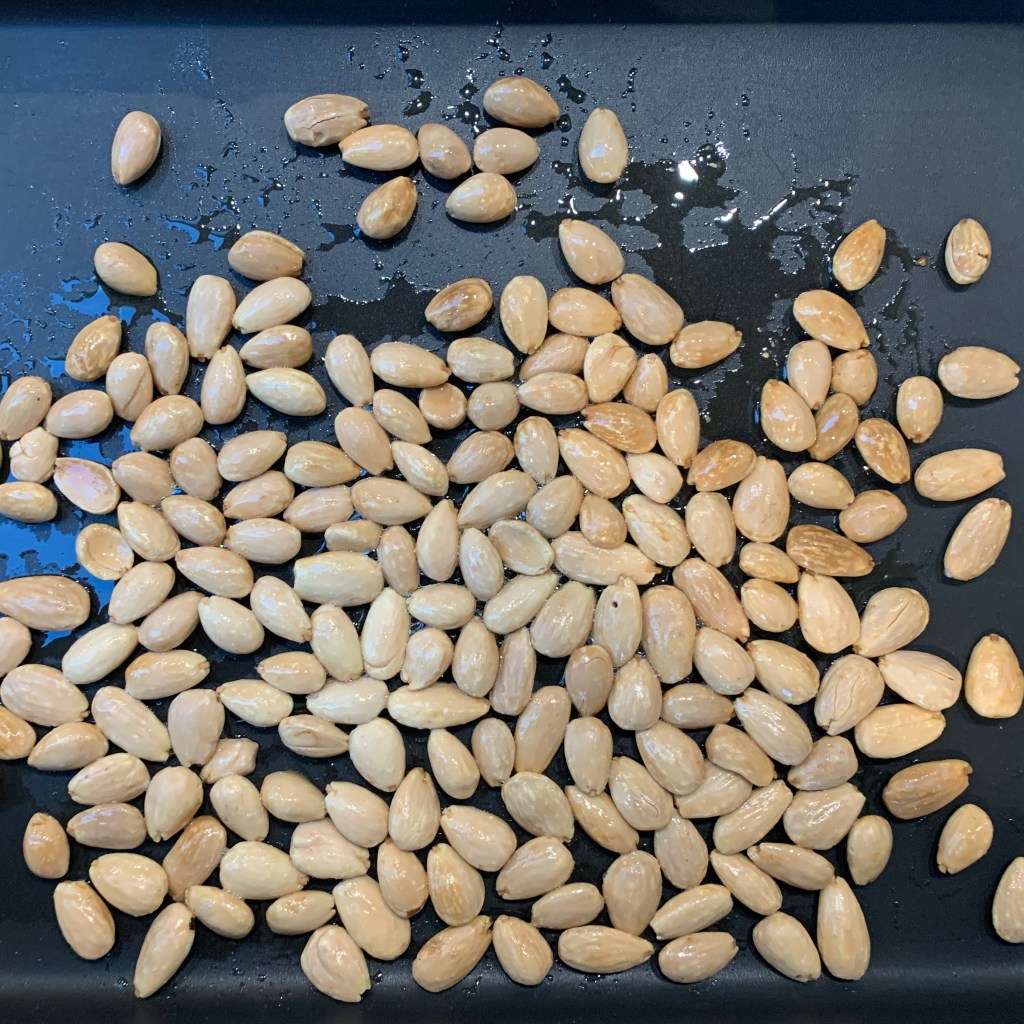
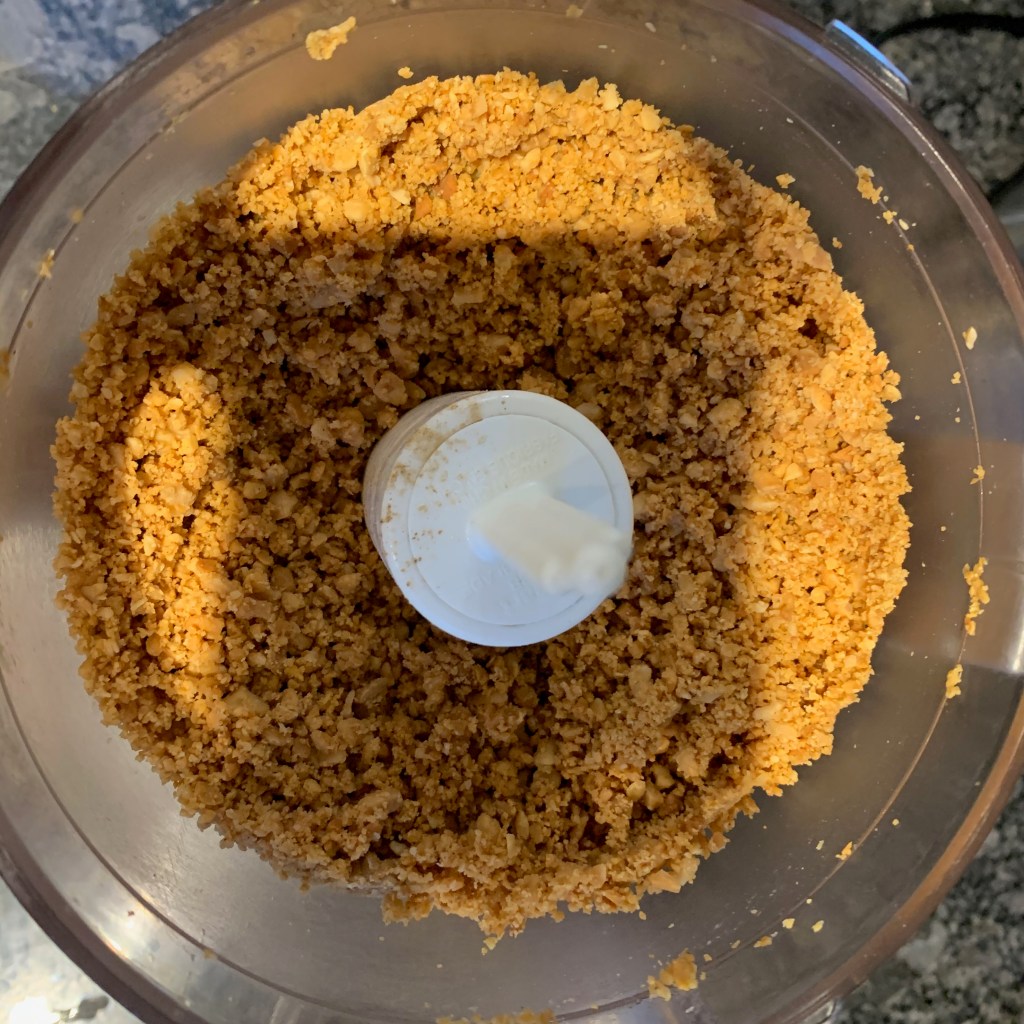
The almond filling
200g blanched almonds
Olive oil for drizzling
Preheat oven to 160℃ fan
Spread almonds out on a baking tray, drizzle with olive oil
Bake in the oven for until golden: around 15-20 minutes
Remove and leave to cool
Blitz the almonds in a food processor until you have a coarse grain – you don’t want a fine powder or the oil will start coming out of the nuts.
Set aside
The warqa pastry sheets
The amount here should be about right for a single large bastilla. If you’re making more smaller bastillas and/or you’re a bit heavy handed with your pancake creation, you might need to increase the recipe, up to double.
160g flour
240 ml water
5g salt
Olive oil for brushing
Whisk together flour, water and salt until you have a smooth, runny batter. In the Choumicha video, this is done in a blender, but a bowl and a balloon whisk work fine.
Have a nylon or silicone pastry brush ready.
Have a small dish of olive oil ready, with a different pastry brush (of any type you like)
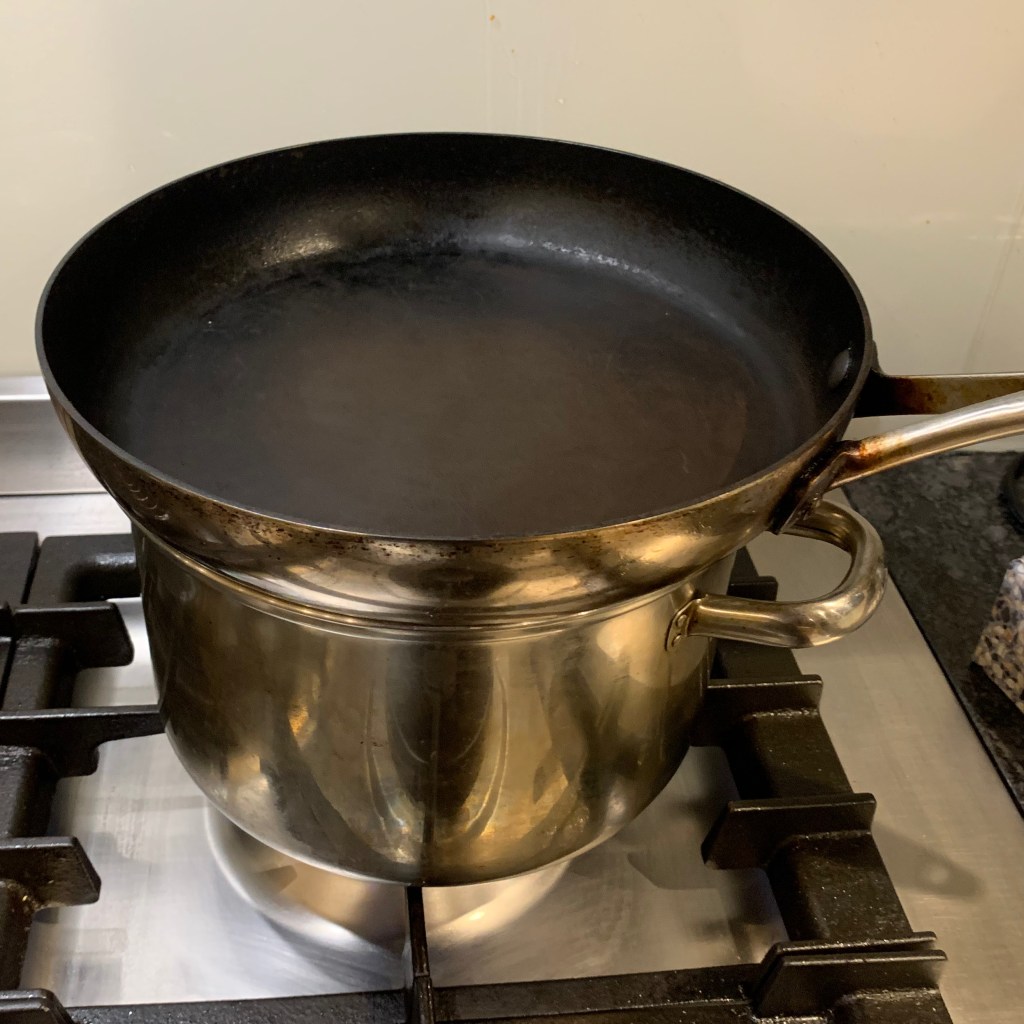
Prepare a double boiler by bringing water to the boil in a saucepan which should be just under the diameter of a non-stick frying pan that you place above it.
On a work surface as near as you can get to the pan, spread a sheet of plastic or cling film somewhat wider than your pan. Have another one of the same size ready.
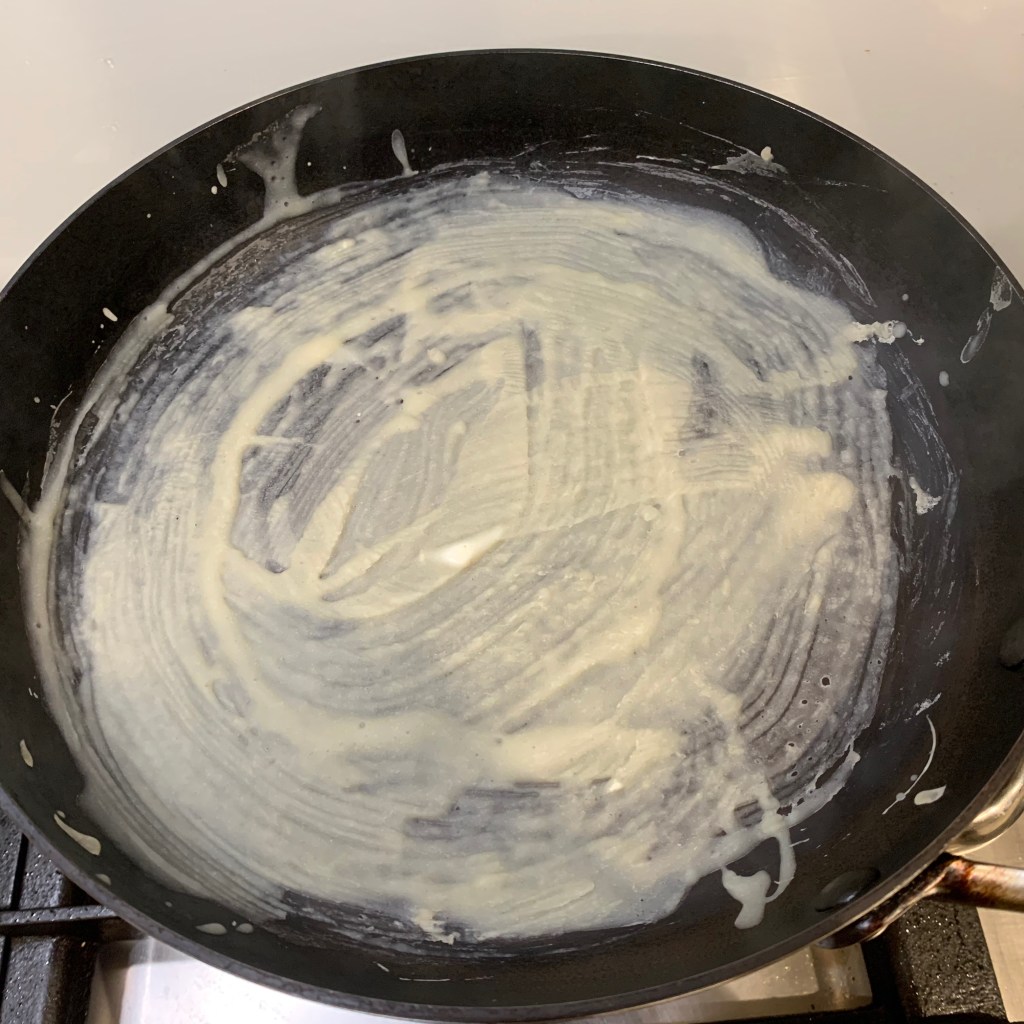
Once the pan is warm, quickly paint an ultra-thin layer of batter across all of the bottom of the pan. The correct thickness is less than you think – you’ll hardly be able to see the batter because it’s just about transparent.
After about 2-3 minutes, the pastry sheet will be cooked: you’ll know because the edges will start to curl away from the rounded sides of the pan. Now comes the scary part: pick the sheet up carefully by one of the edges and peel it off the pan.
Transfer the pancake to your plastic sheet, brush olive oil over it, and put the second plastic sheet over it to stop it drying out. You’ll lift that second sheet off shortly before the next pancake is cooked.
Repeat until you’ve run out of batter. If all goes well, you’ll hardly need to clean your frying pan, but if you’ve had a failure, just wash up the frying pan, put it back in double boiler position and wait until it’s properly warmed up again before continuing.
Batter
Pans as double boiler
First sheet – far too thick!
Second sheet – getting better
Finished pile of warqa sheets
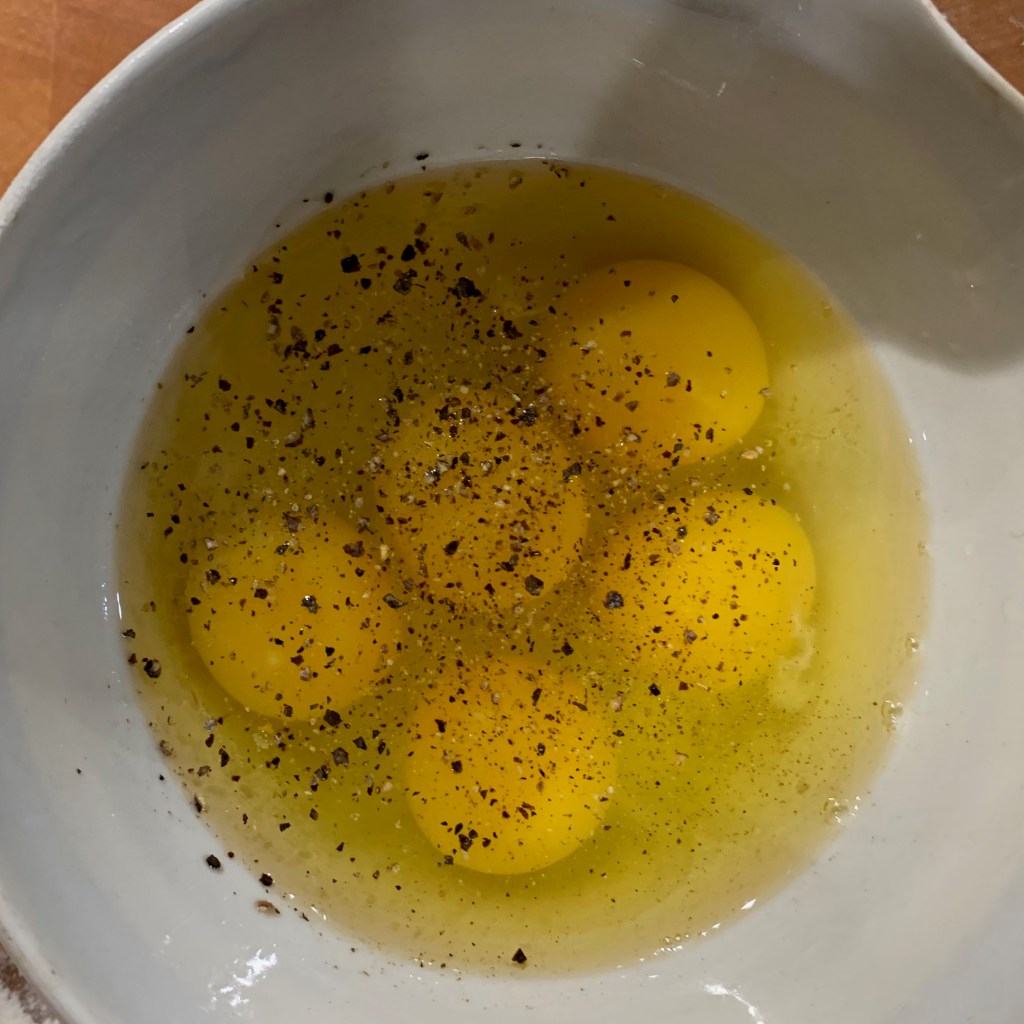
The egg filling
5 large eggs
10g butter (quantity very approximate)
Salt and pepper to taste
Whisk the eggs with the salt and pepper
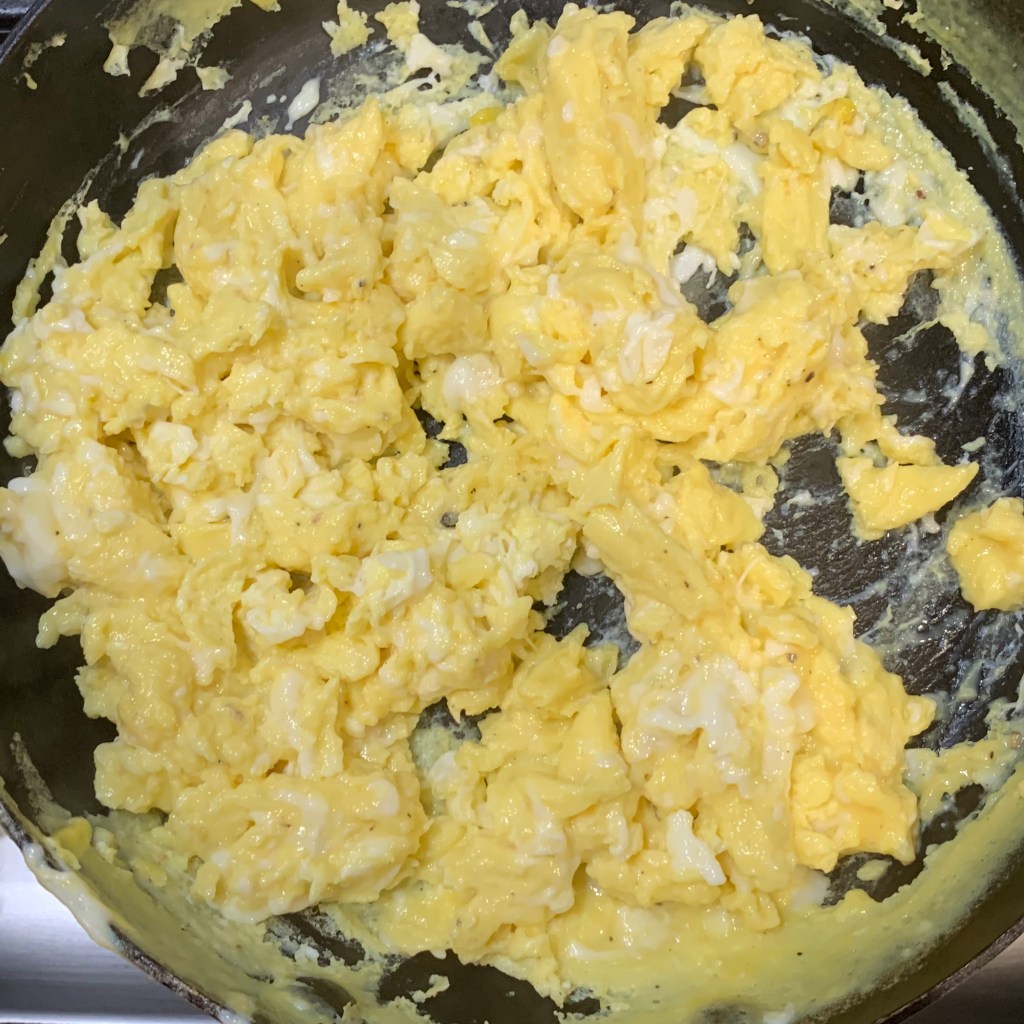
Melt butter in a pan
Add the eggs and stir over medium heat until you have a fairly dry scrambled egg mixture (like the chicken filling, you don’t want it making your pastry soggy).
Putting it all together
Ideally, you will have a round dish with shallow, slightly rounded sides to help form you bastilla into the traditional round shape. If, like me, you don’t, you’ll just have to go freehand on a greased baking tray.
Olive oil, melted ghee or smen for brushing
Preheat oven to 200℃ fan
If you’re going to make more than one bastilla, divide your fillings up into equal portions and repeat the instructions below for each.
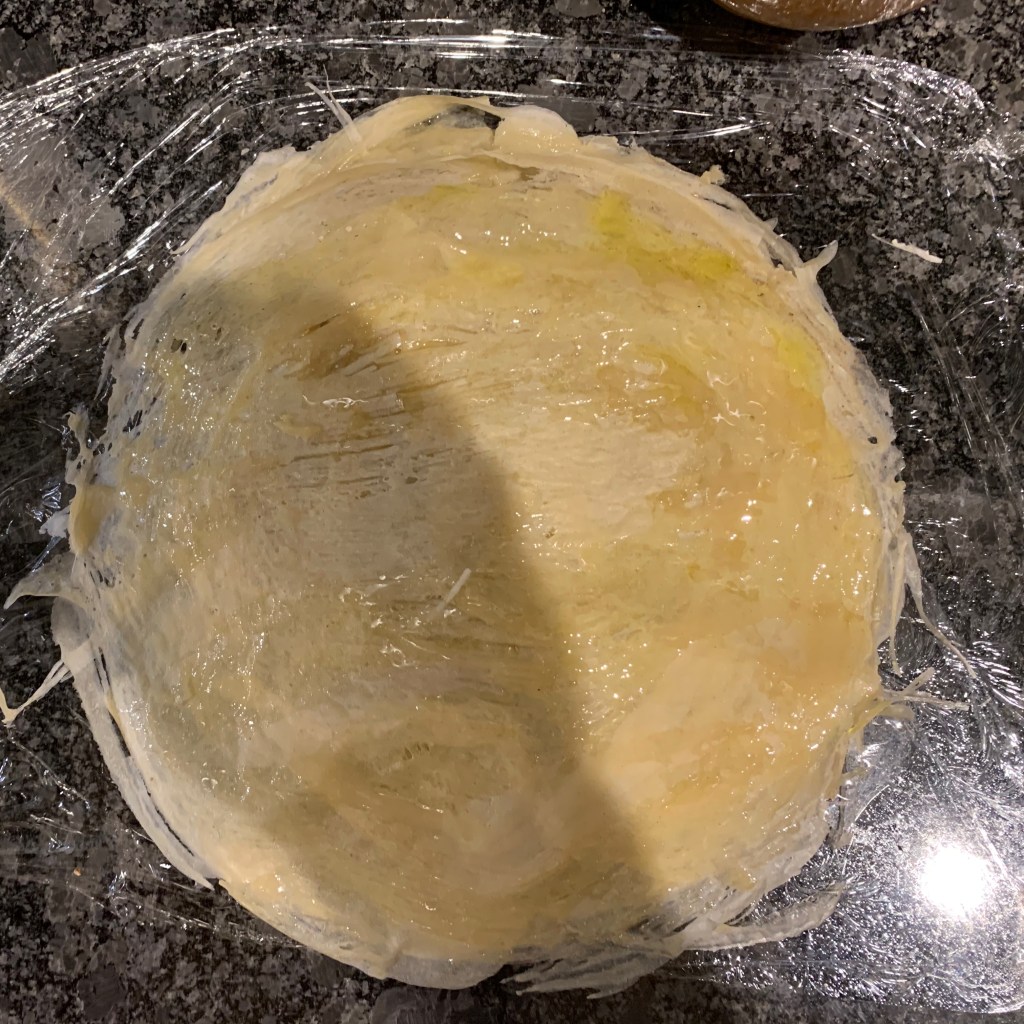
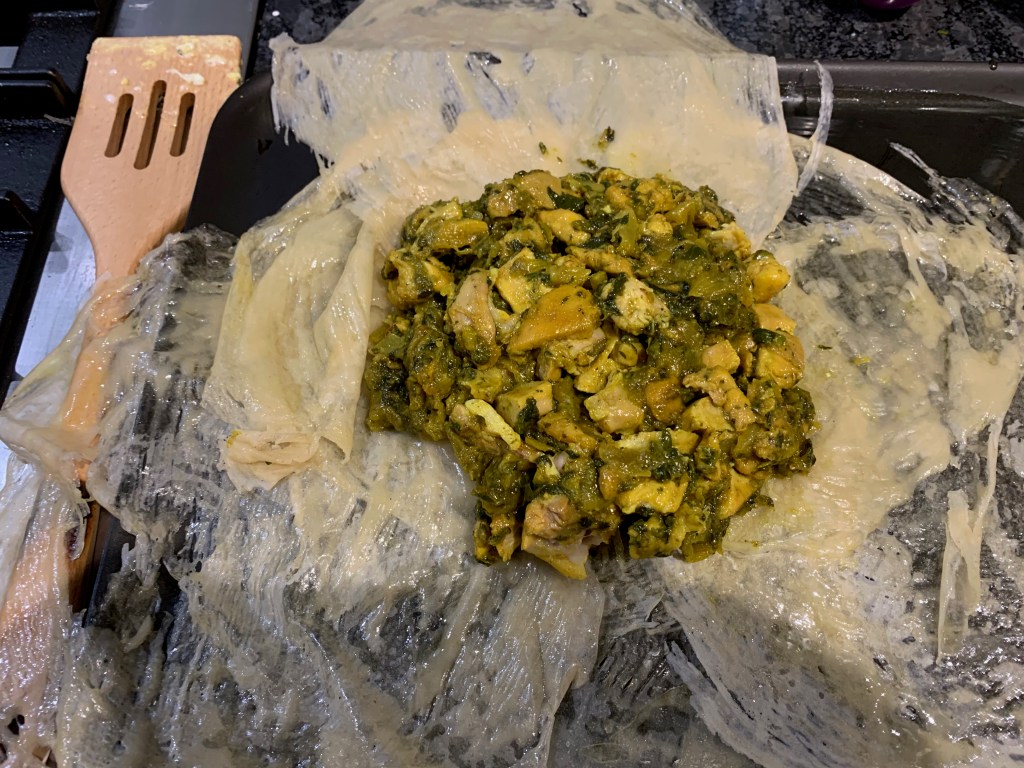
Place a few overlapping layers of pastry in a pattern big enough that once you’ve made your mound of fillings, you will be able to cover them in at least two or three sheets.
Make a flattened mound of chicken filling in the centre.
Spread the top with the scrambled egg.
Spread the top with ground almonds.
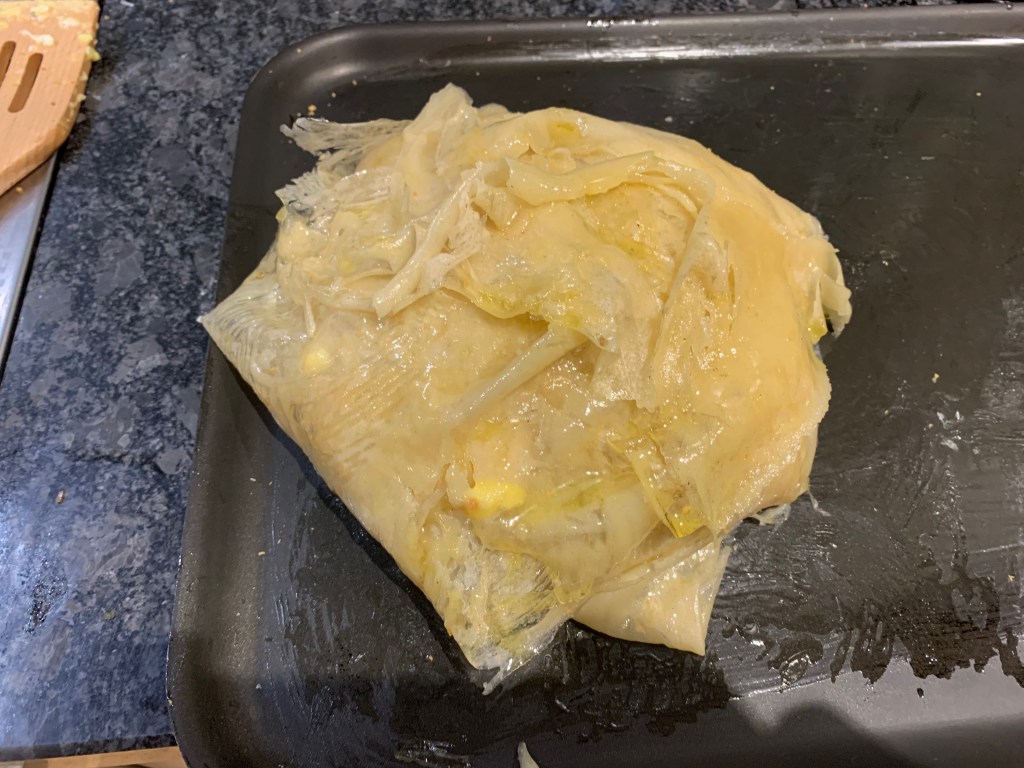
Fold a layer of pastry over the top. Brush it with oil (or ghee or smen).
Repeat until all the layers have been folder over and you have a completed round pie, brushed across its top.
Bake until golden, around 20 minutes. Take out and cool.
Moroccans sprinkle the whole thing with icing sugar and cinnamon before serving. I didn’t.
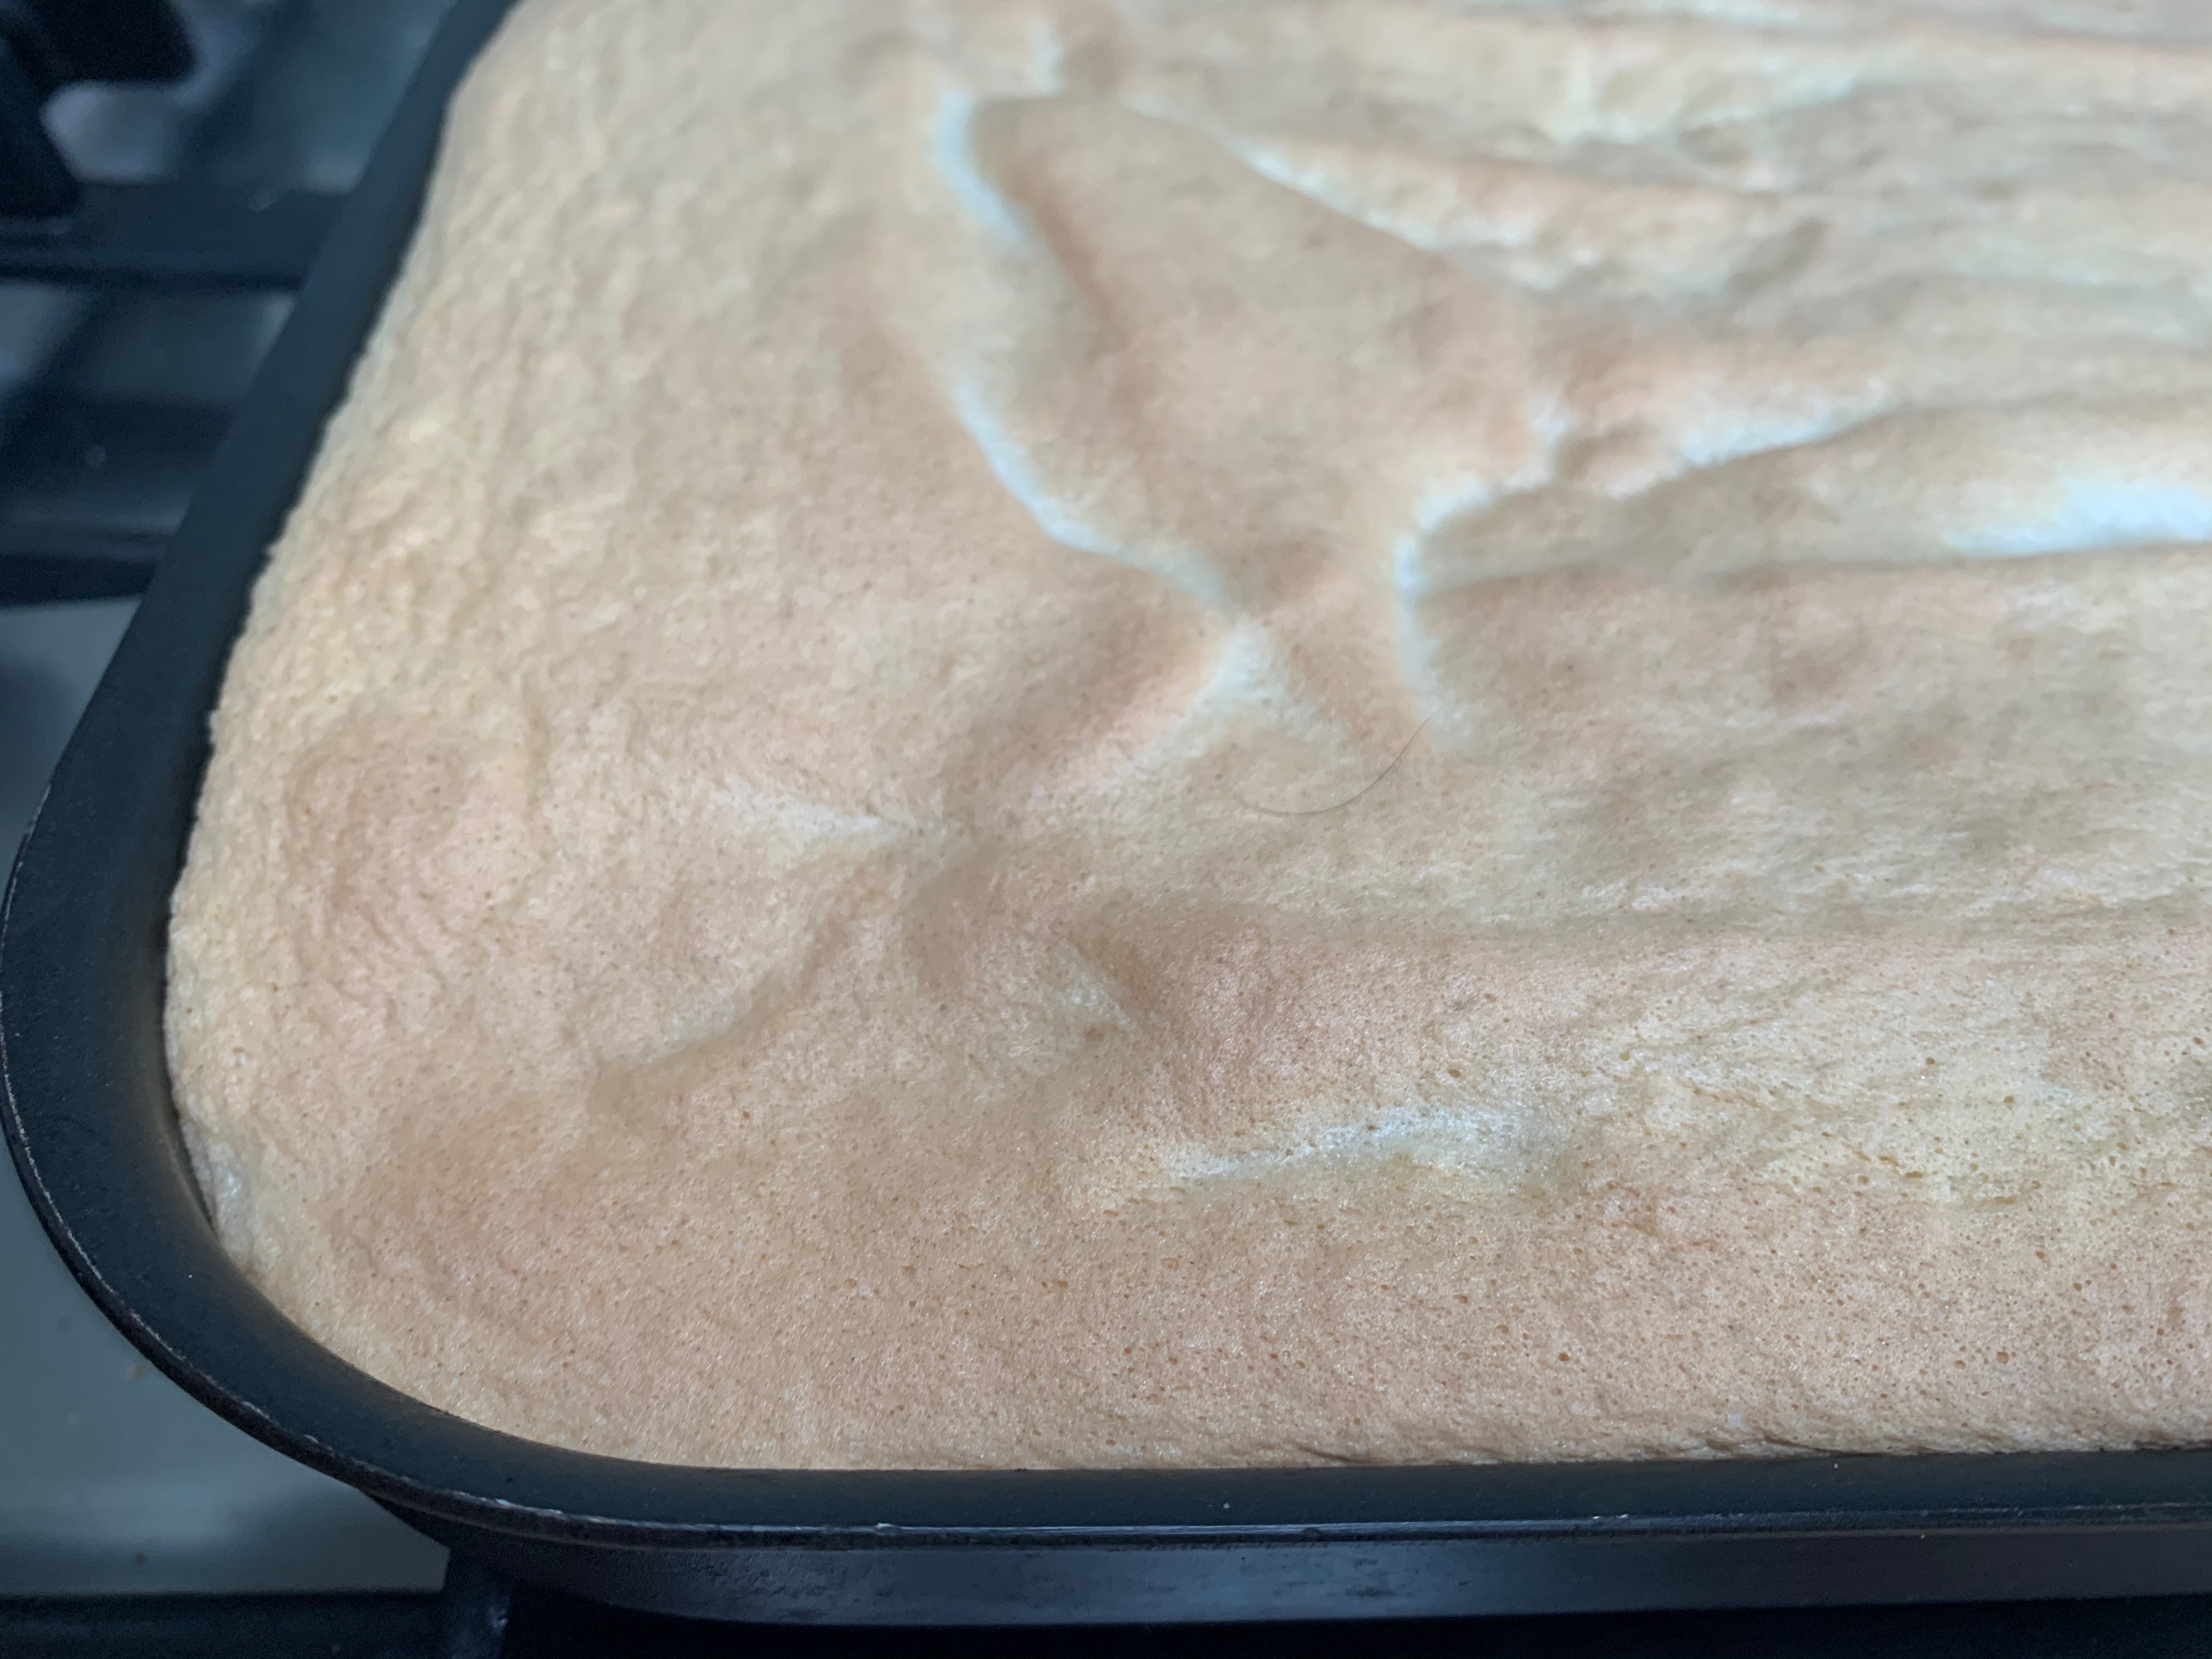
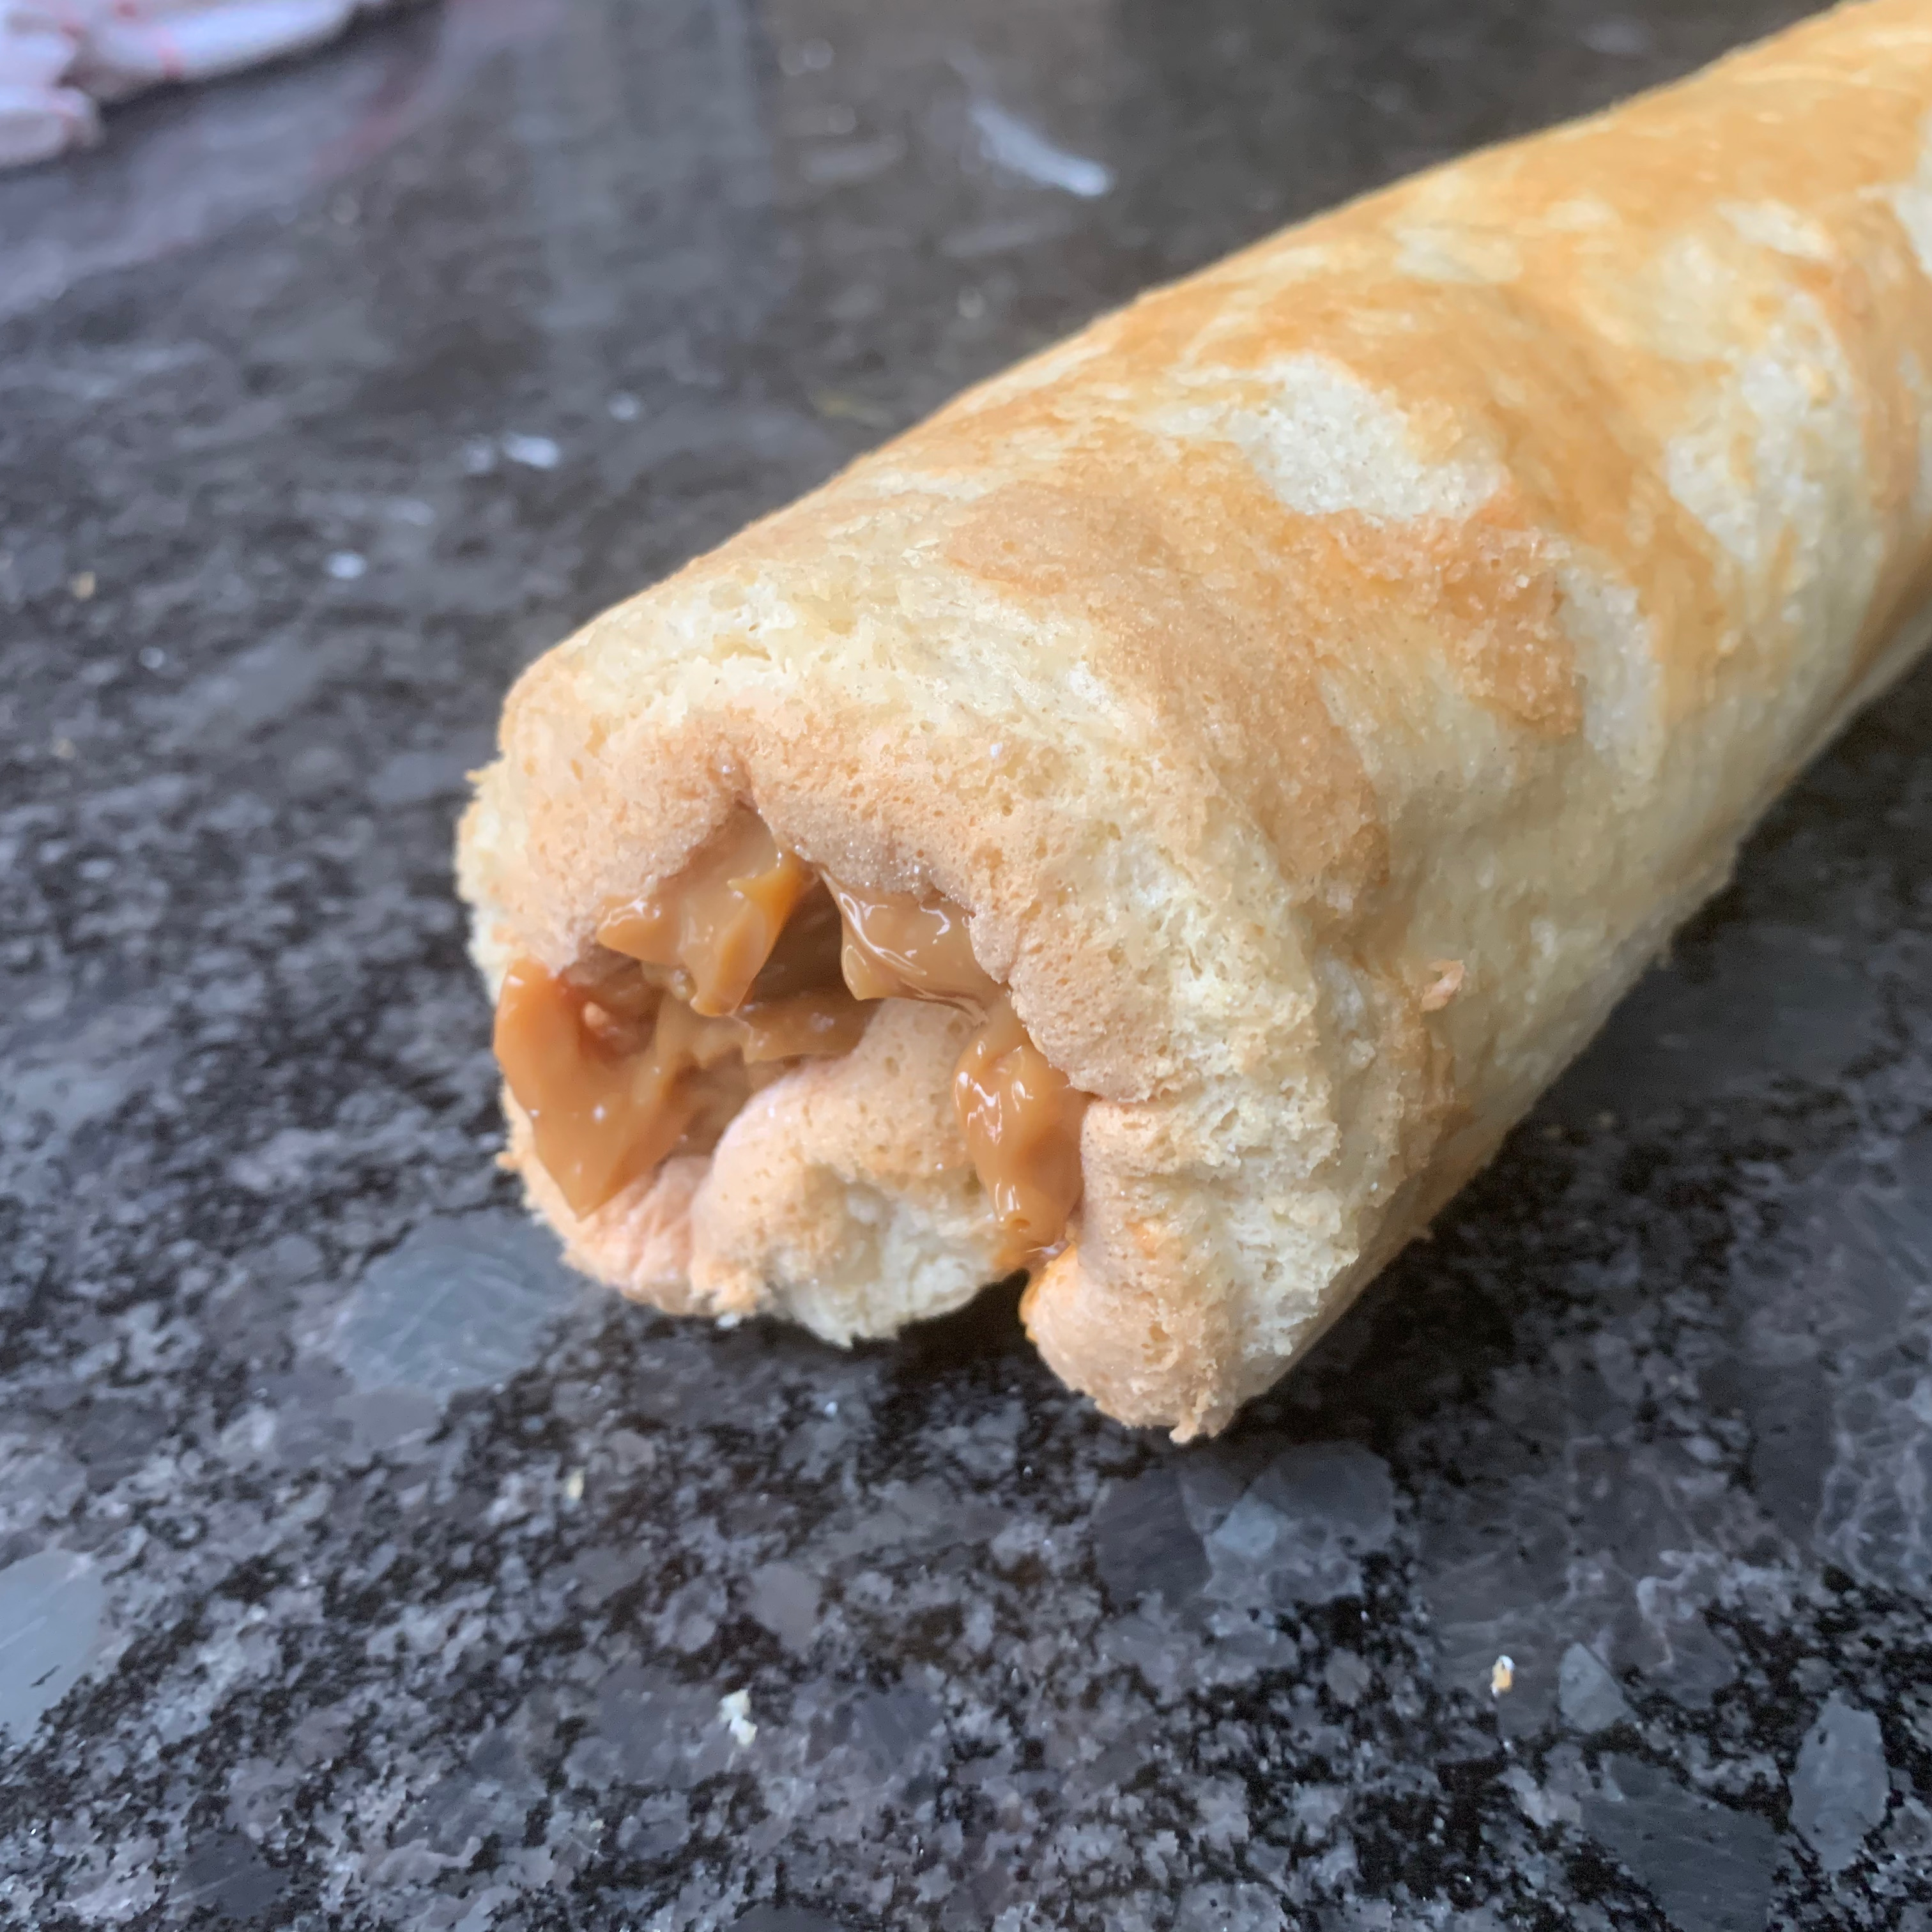
I have no idea why a Swiss Roll is called a Swiss Roll. I’ve travelled to Switzerland a lot and I don’t remember seeing one there. If Wikipedia is to believed, it doesn’t even come from Switzerland in the first place. But apparently, if you happen to be in Chile, at 5pm, it’s time for a coffee and a slice of Brazo da Reina – a rolled sponge cake filled with dulce de leche (caramelised condensed milk). The name in Spanish means “the Queen’s Arm”, which sounds to British ears more like a pub sign, which just goes to show that there’s no accounting for language. It’s not really clear where that name comes from either, and the same cake has other names in different bits of Latin America: Brazo de gitano (gypsy’s arm) or Pionono. Other countries also use different fillings.
The Chilean recipe I started from is notable for having a lot of eggs and no shortening whatsoever, which makes for an incredibly light, airy sponge cake. There are other recipes that use a small amount of oil.
The recipe I used tells you to fold the egg yolks into the beaten whites, then add the flour to the whole lot. That was a little too far outside my comfort zone, so I stuck to a more conventional scheme of mixing egg yolks, sugar and flour before folding, which worked very well.
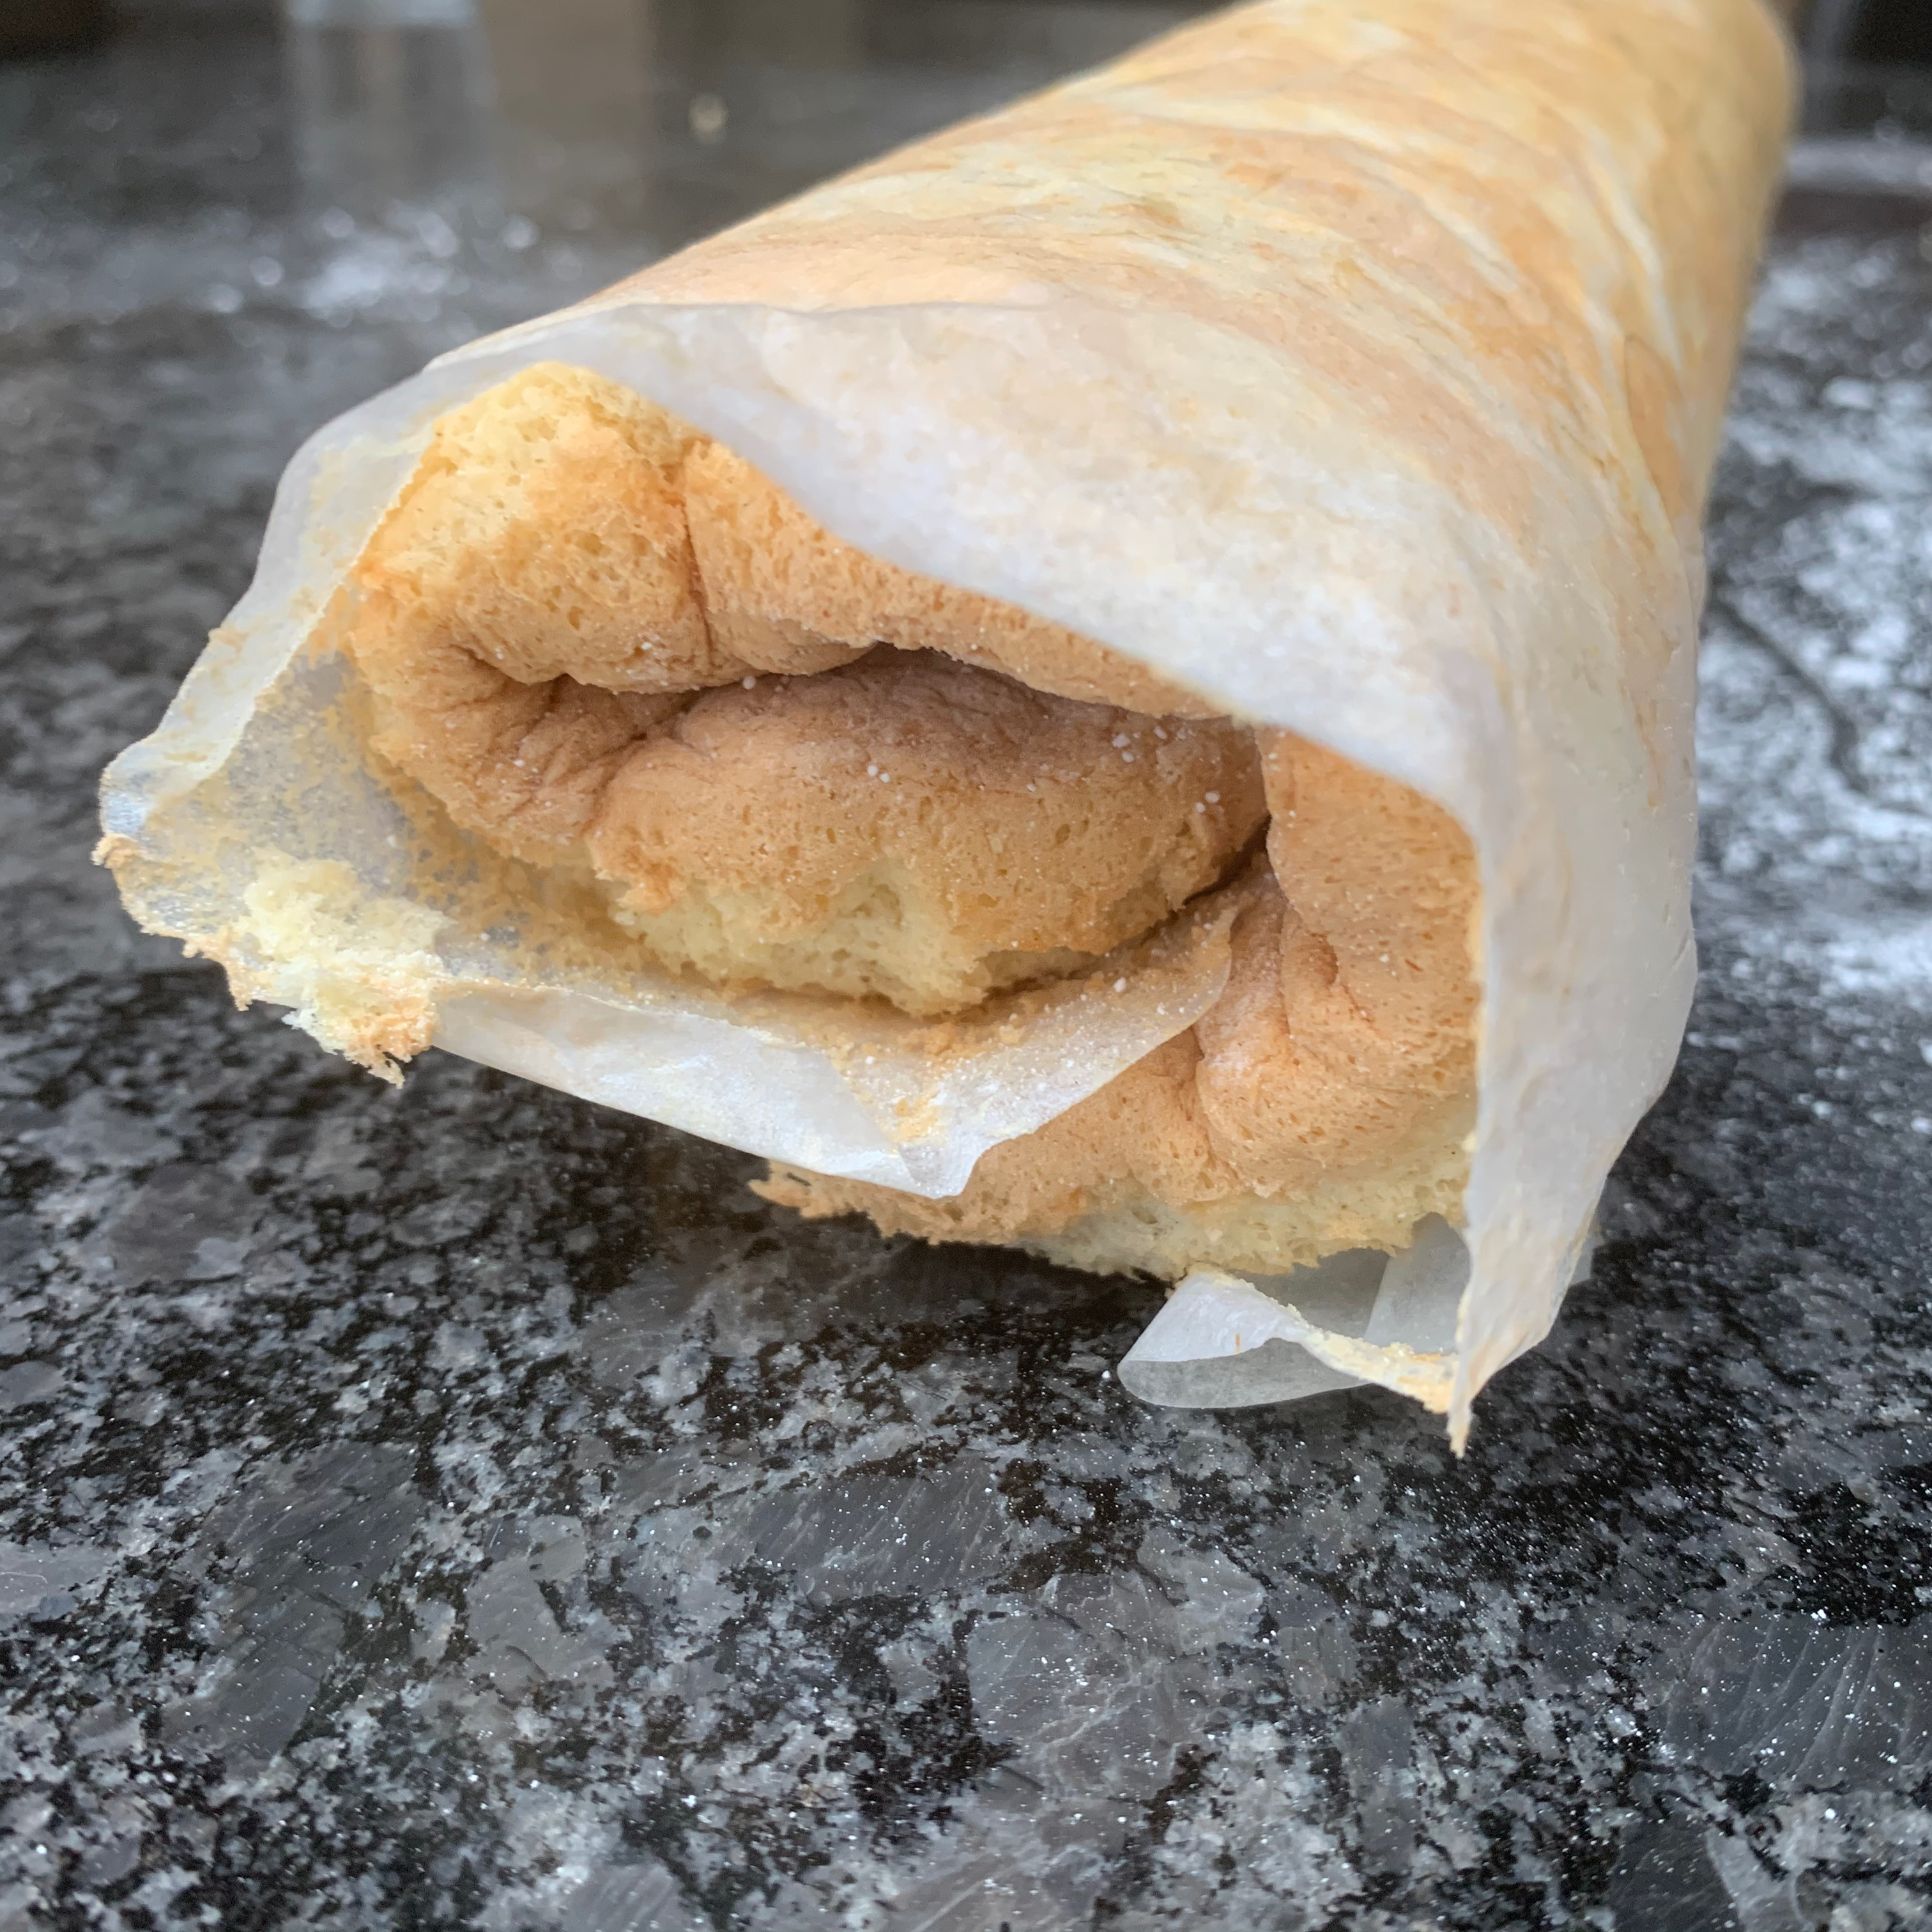
The tricky part of making a roll cake – especially one as light an airy as this – is to roll it up without tearing. I wasn’t 100% successful, but it was good enough.
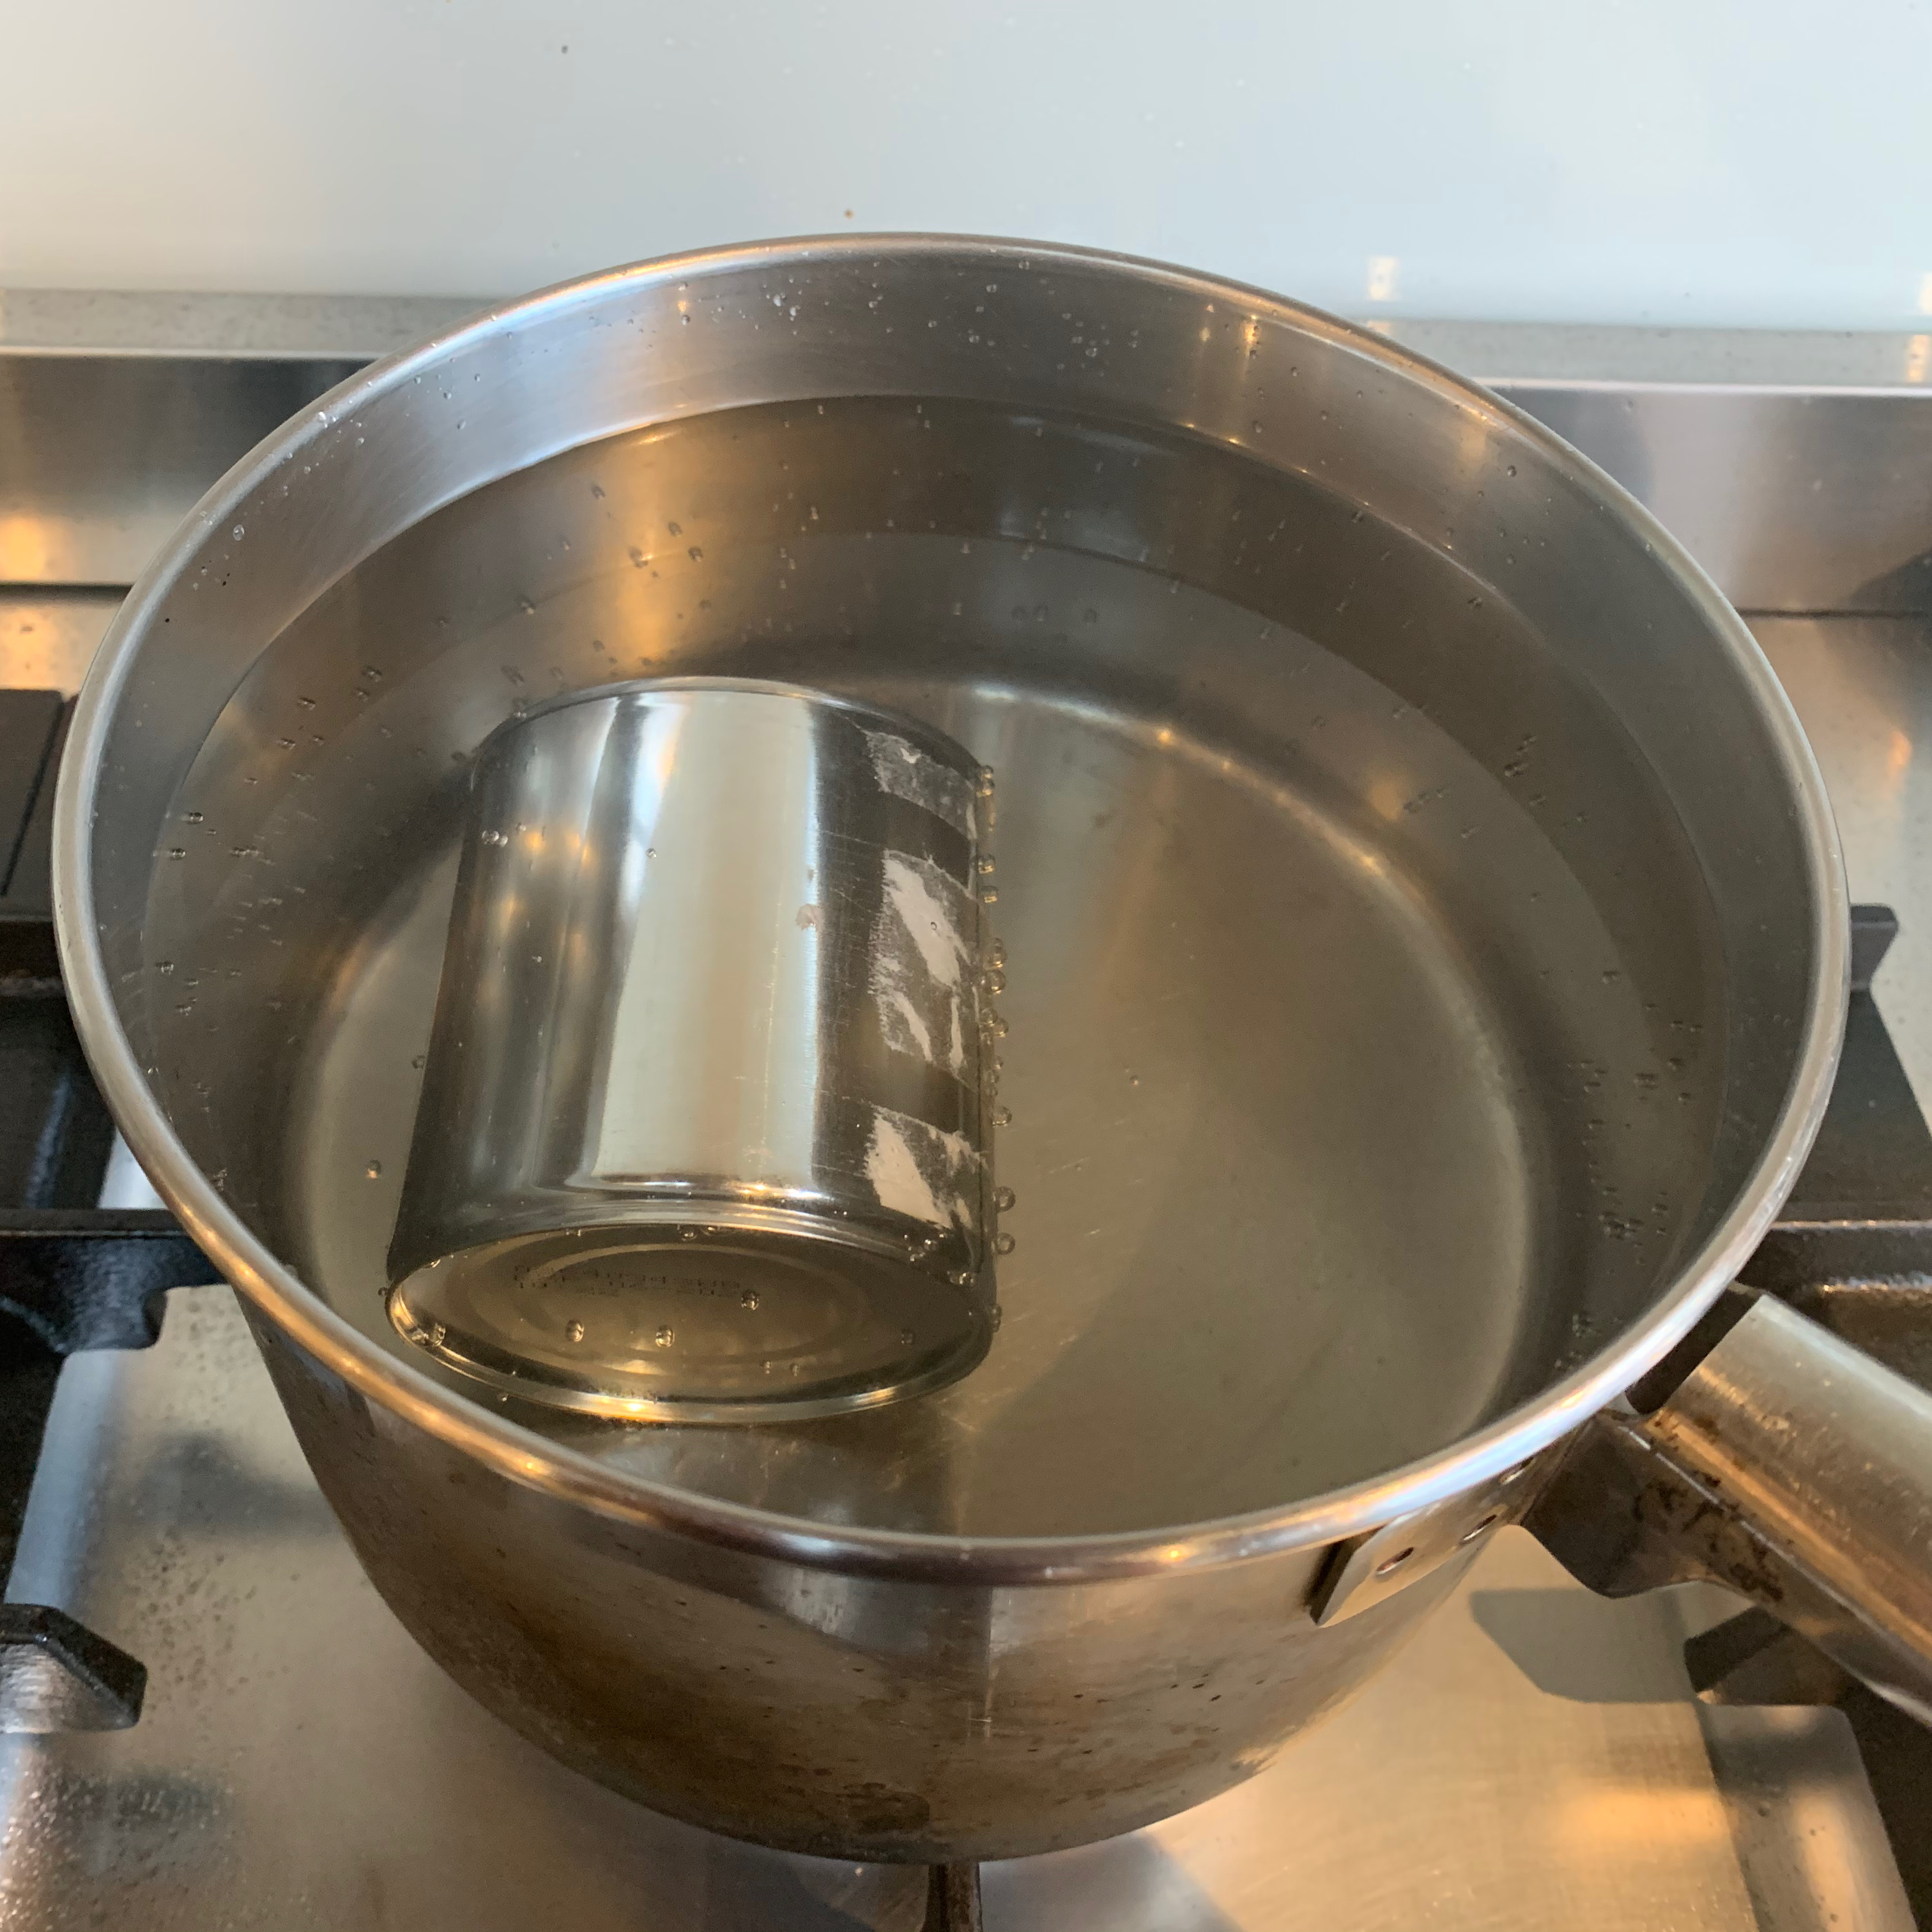
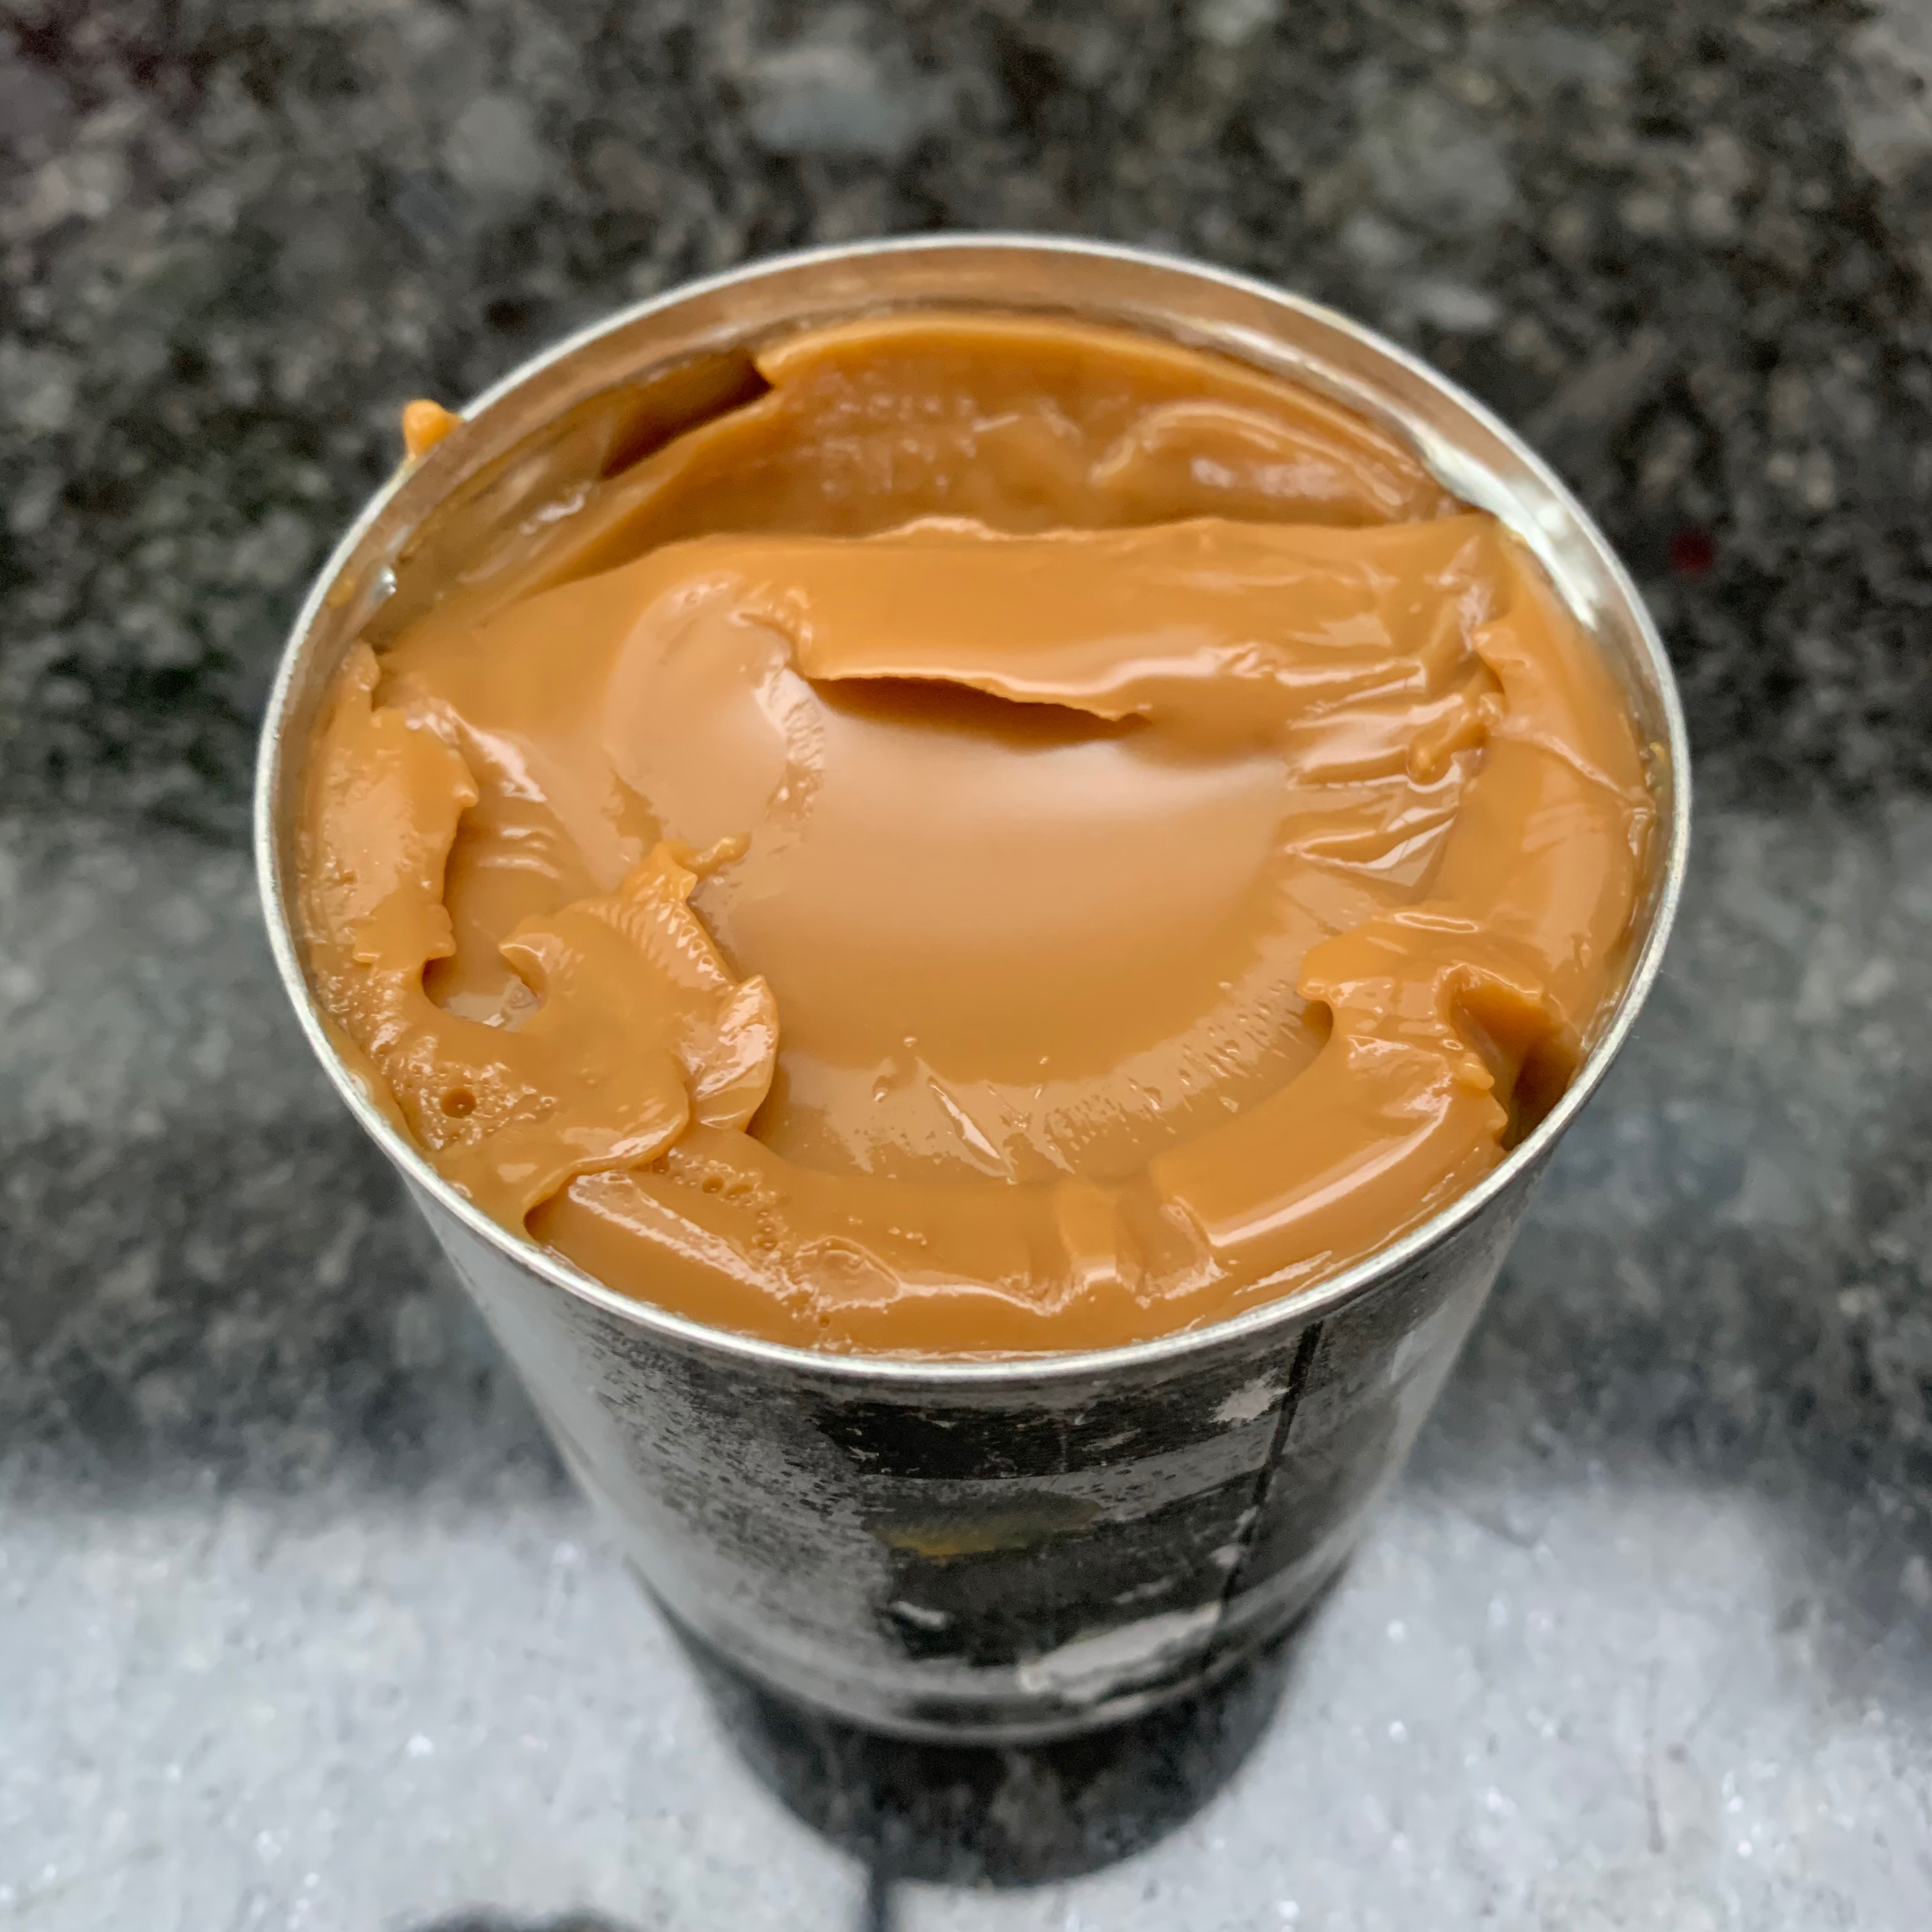
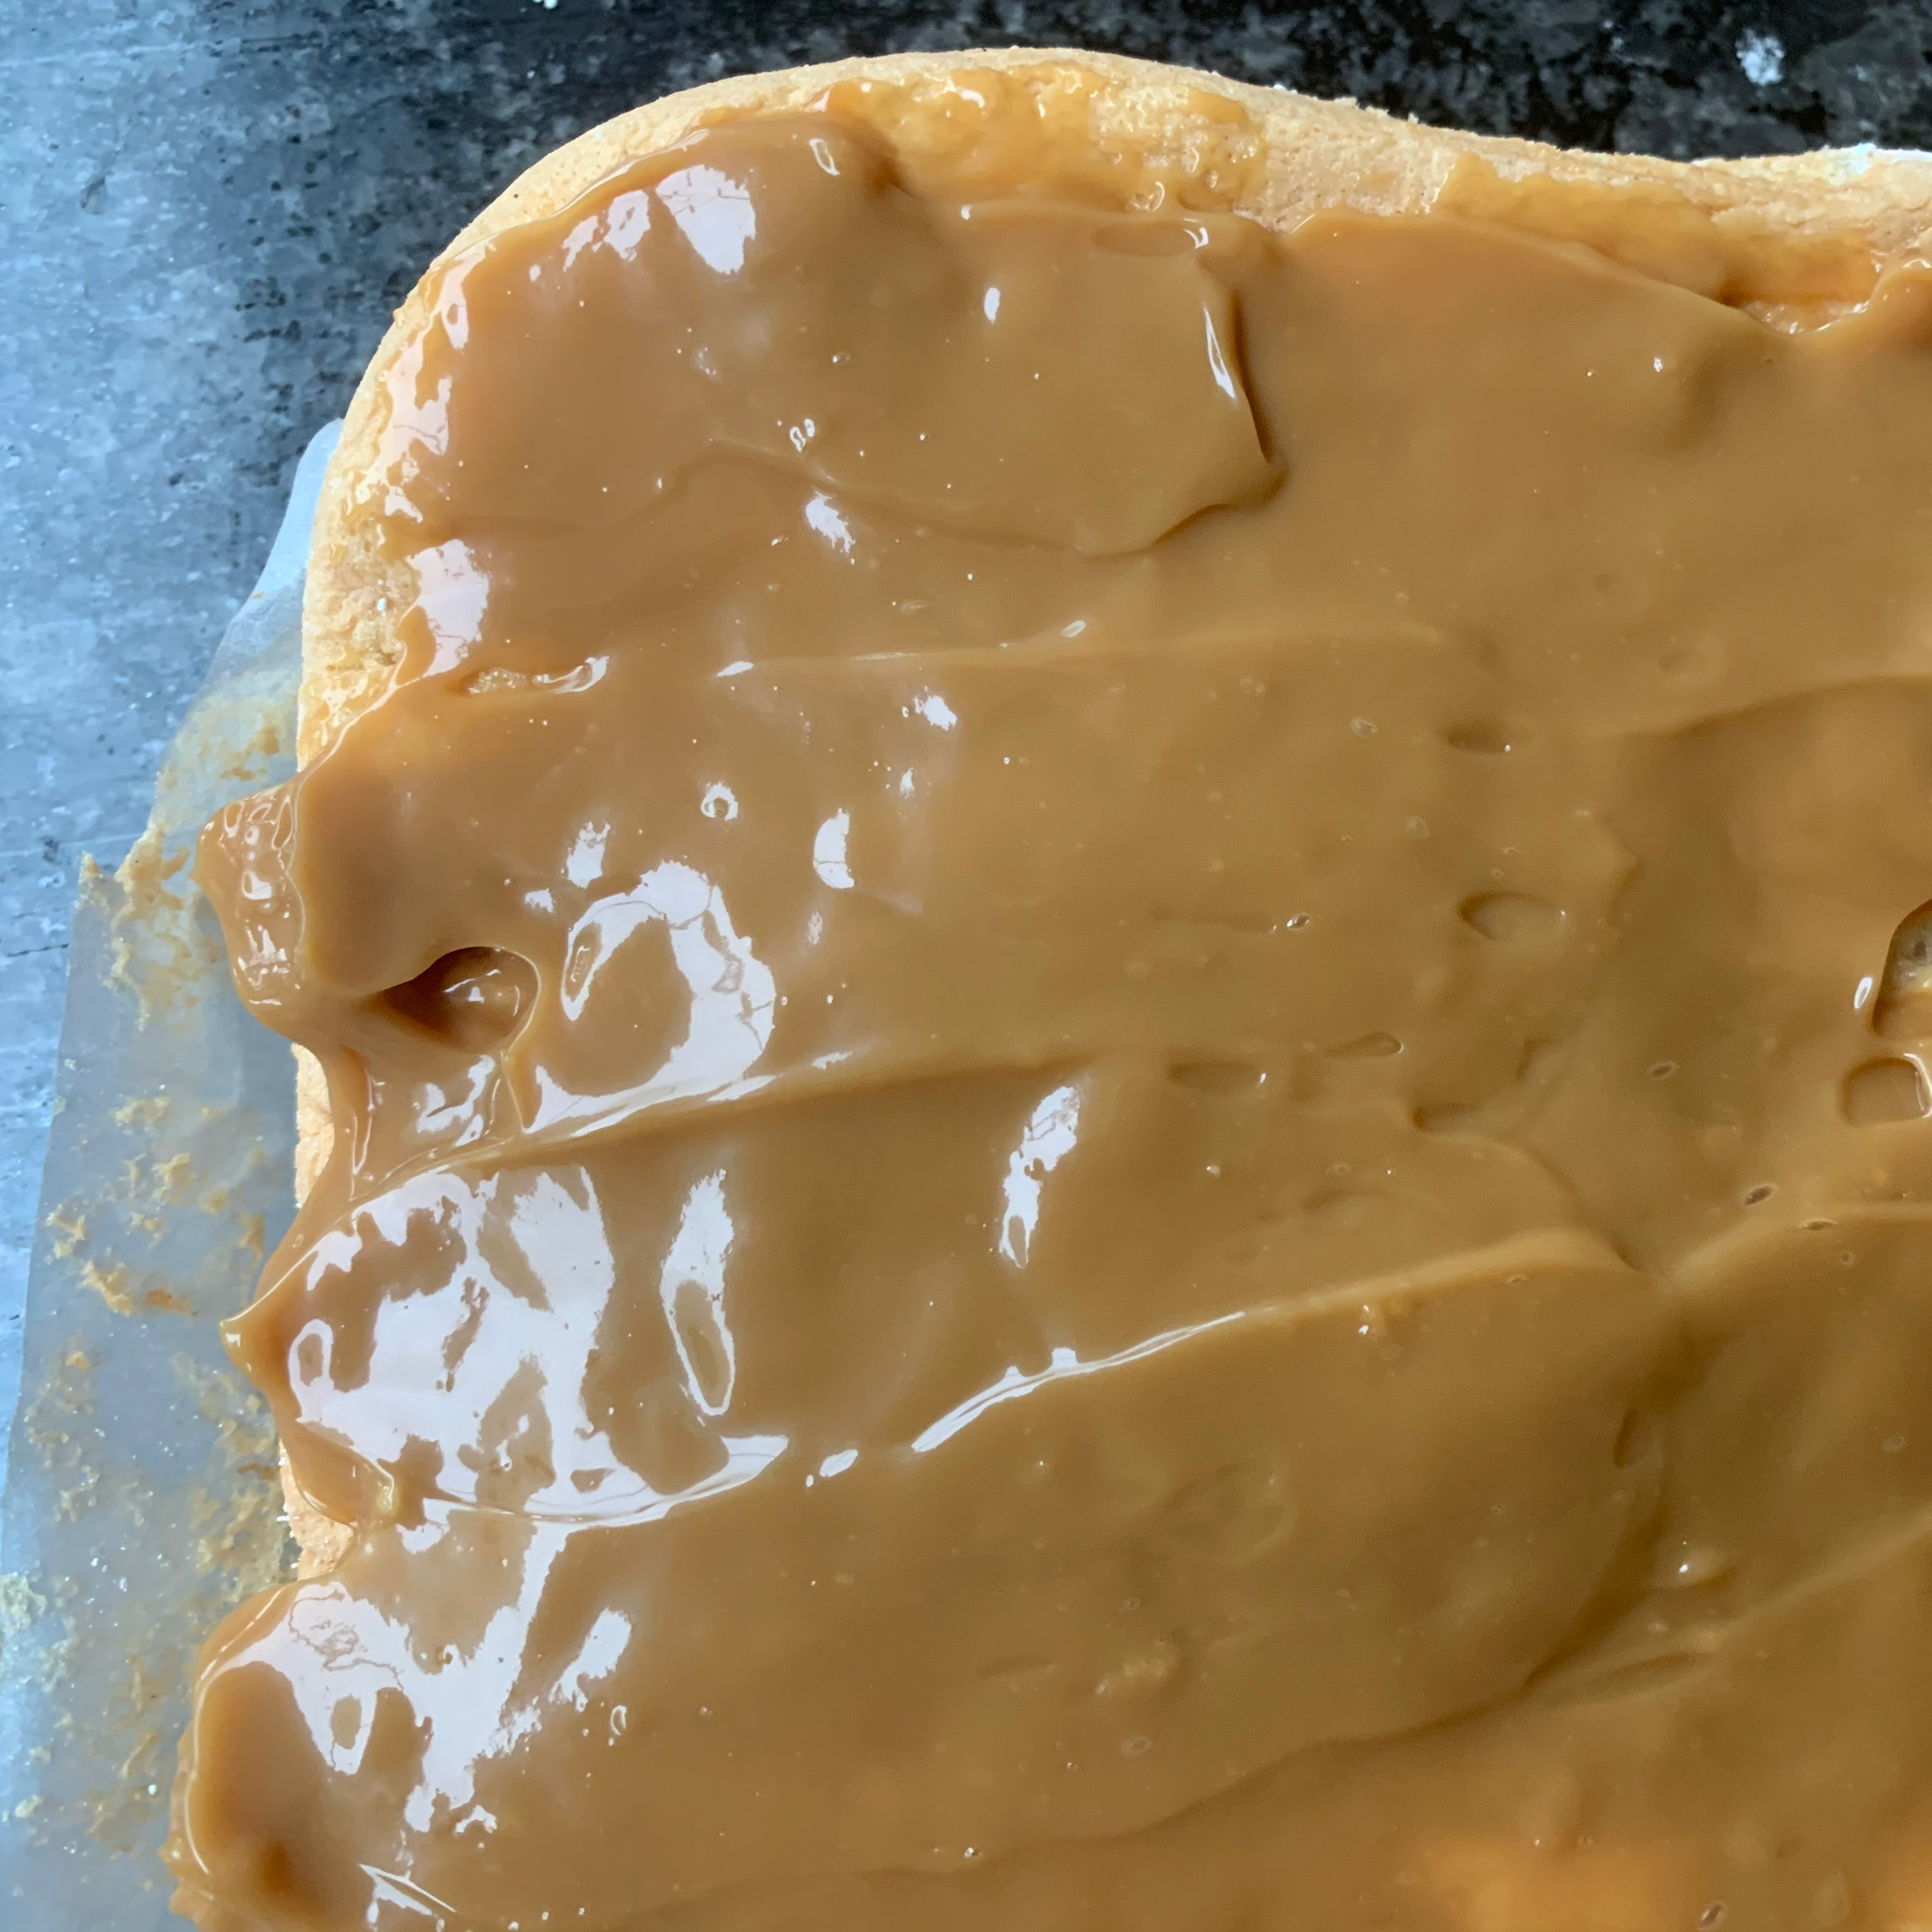
The last time I made dulce de leche, for Argentinian alfajores, I baked the condensed milk in an oven tray, which worked OK but was fiddly. For this recipe, I found the ultimate cheat method in the Brazo da Reina recipe in a blog called Curious Cuisiniere – just boil the condensed milk in its can. It’s close to zero effort and worked perfectly. Their advice for rolling up the cake seemed sensible too: this is the first time I’ve tried a roll cake, so I can’t speak for how well other methods work.
You’ll want a Swiss roll tin, around 30cm x 20cm.
The dulce de leche filling
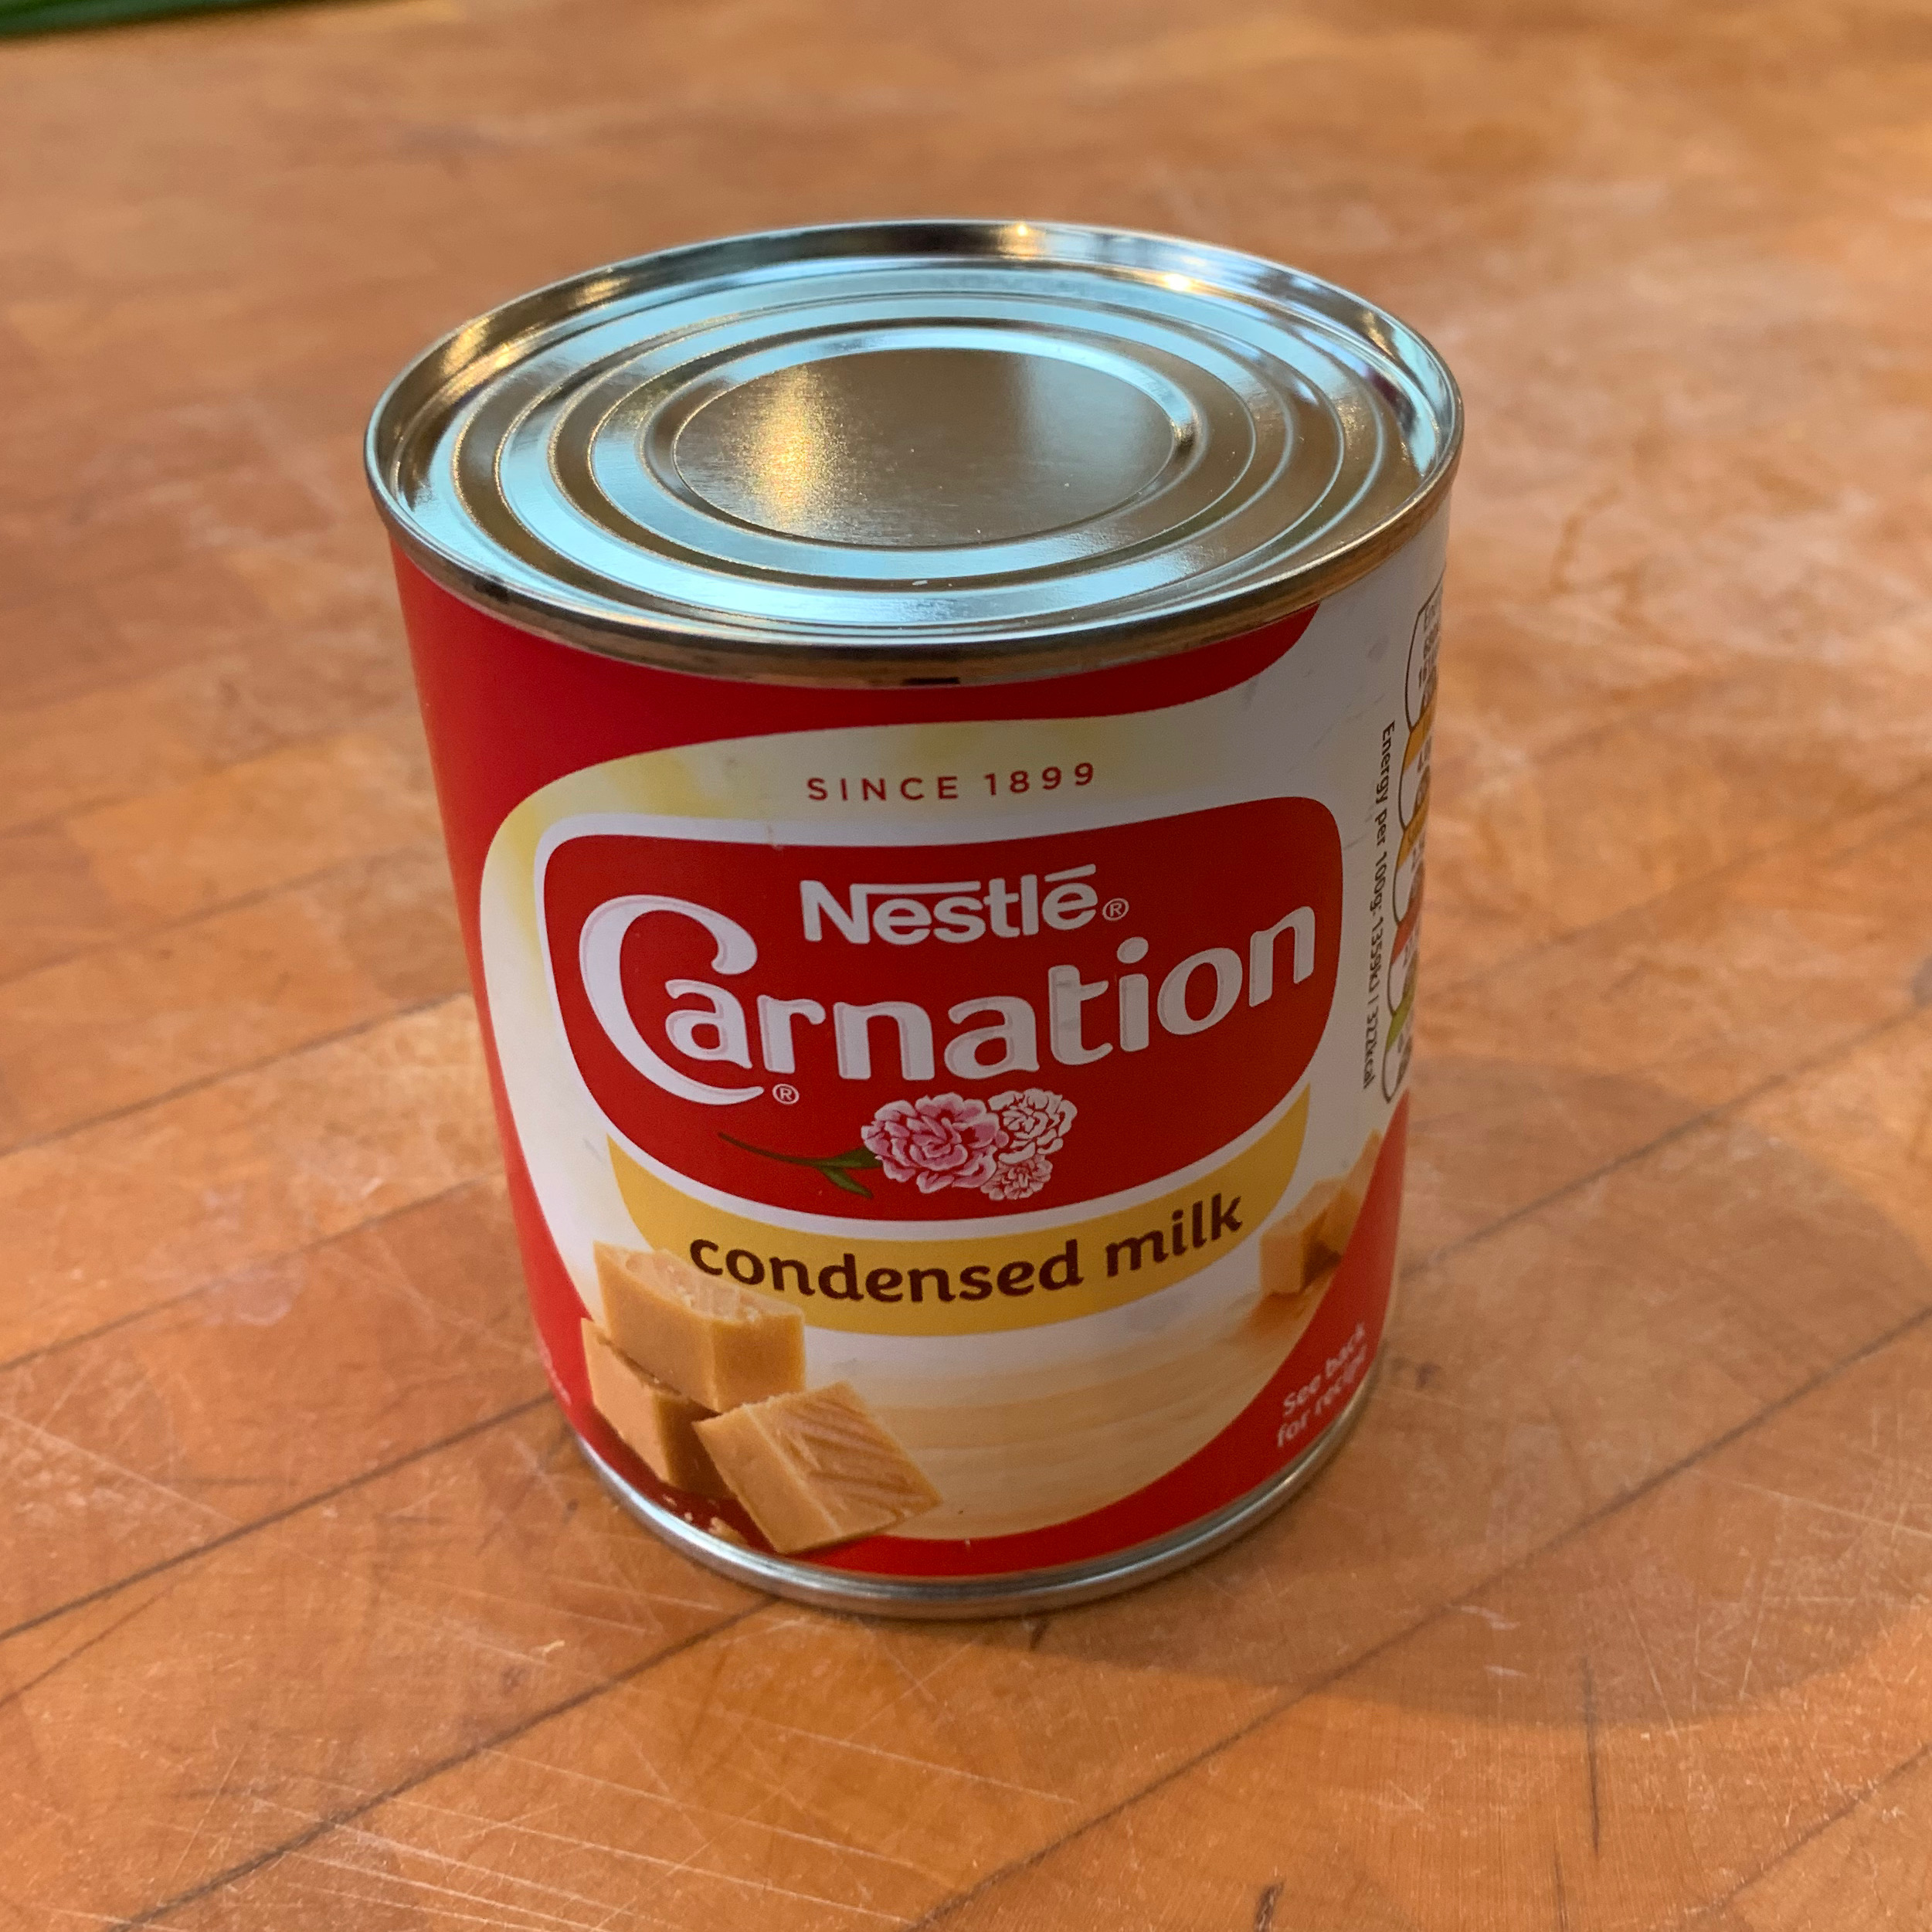
400g can of condensed milk
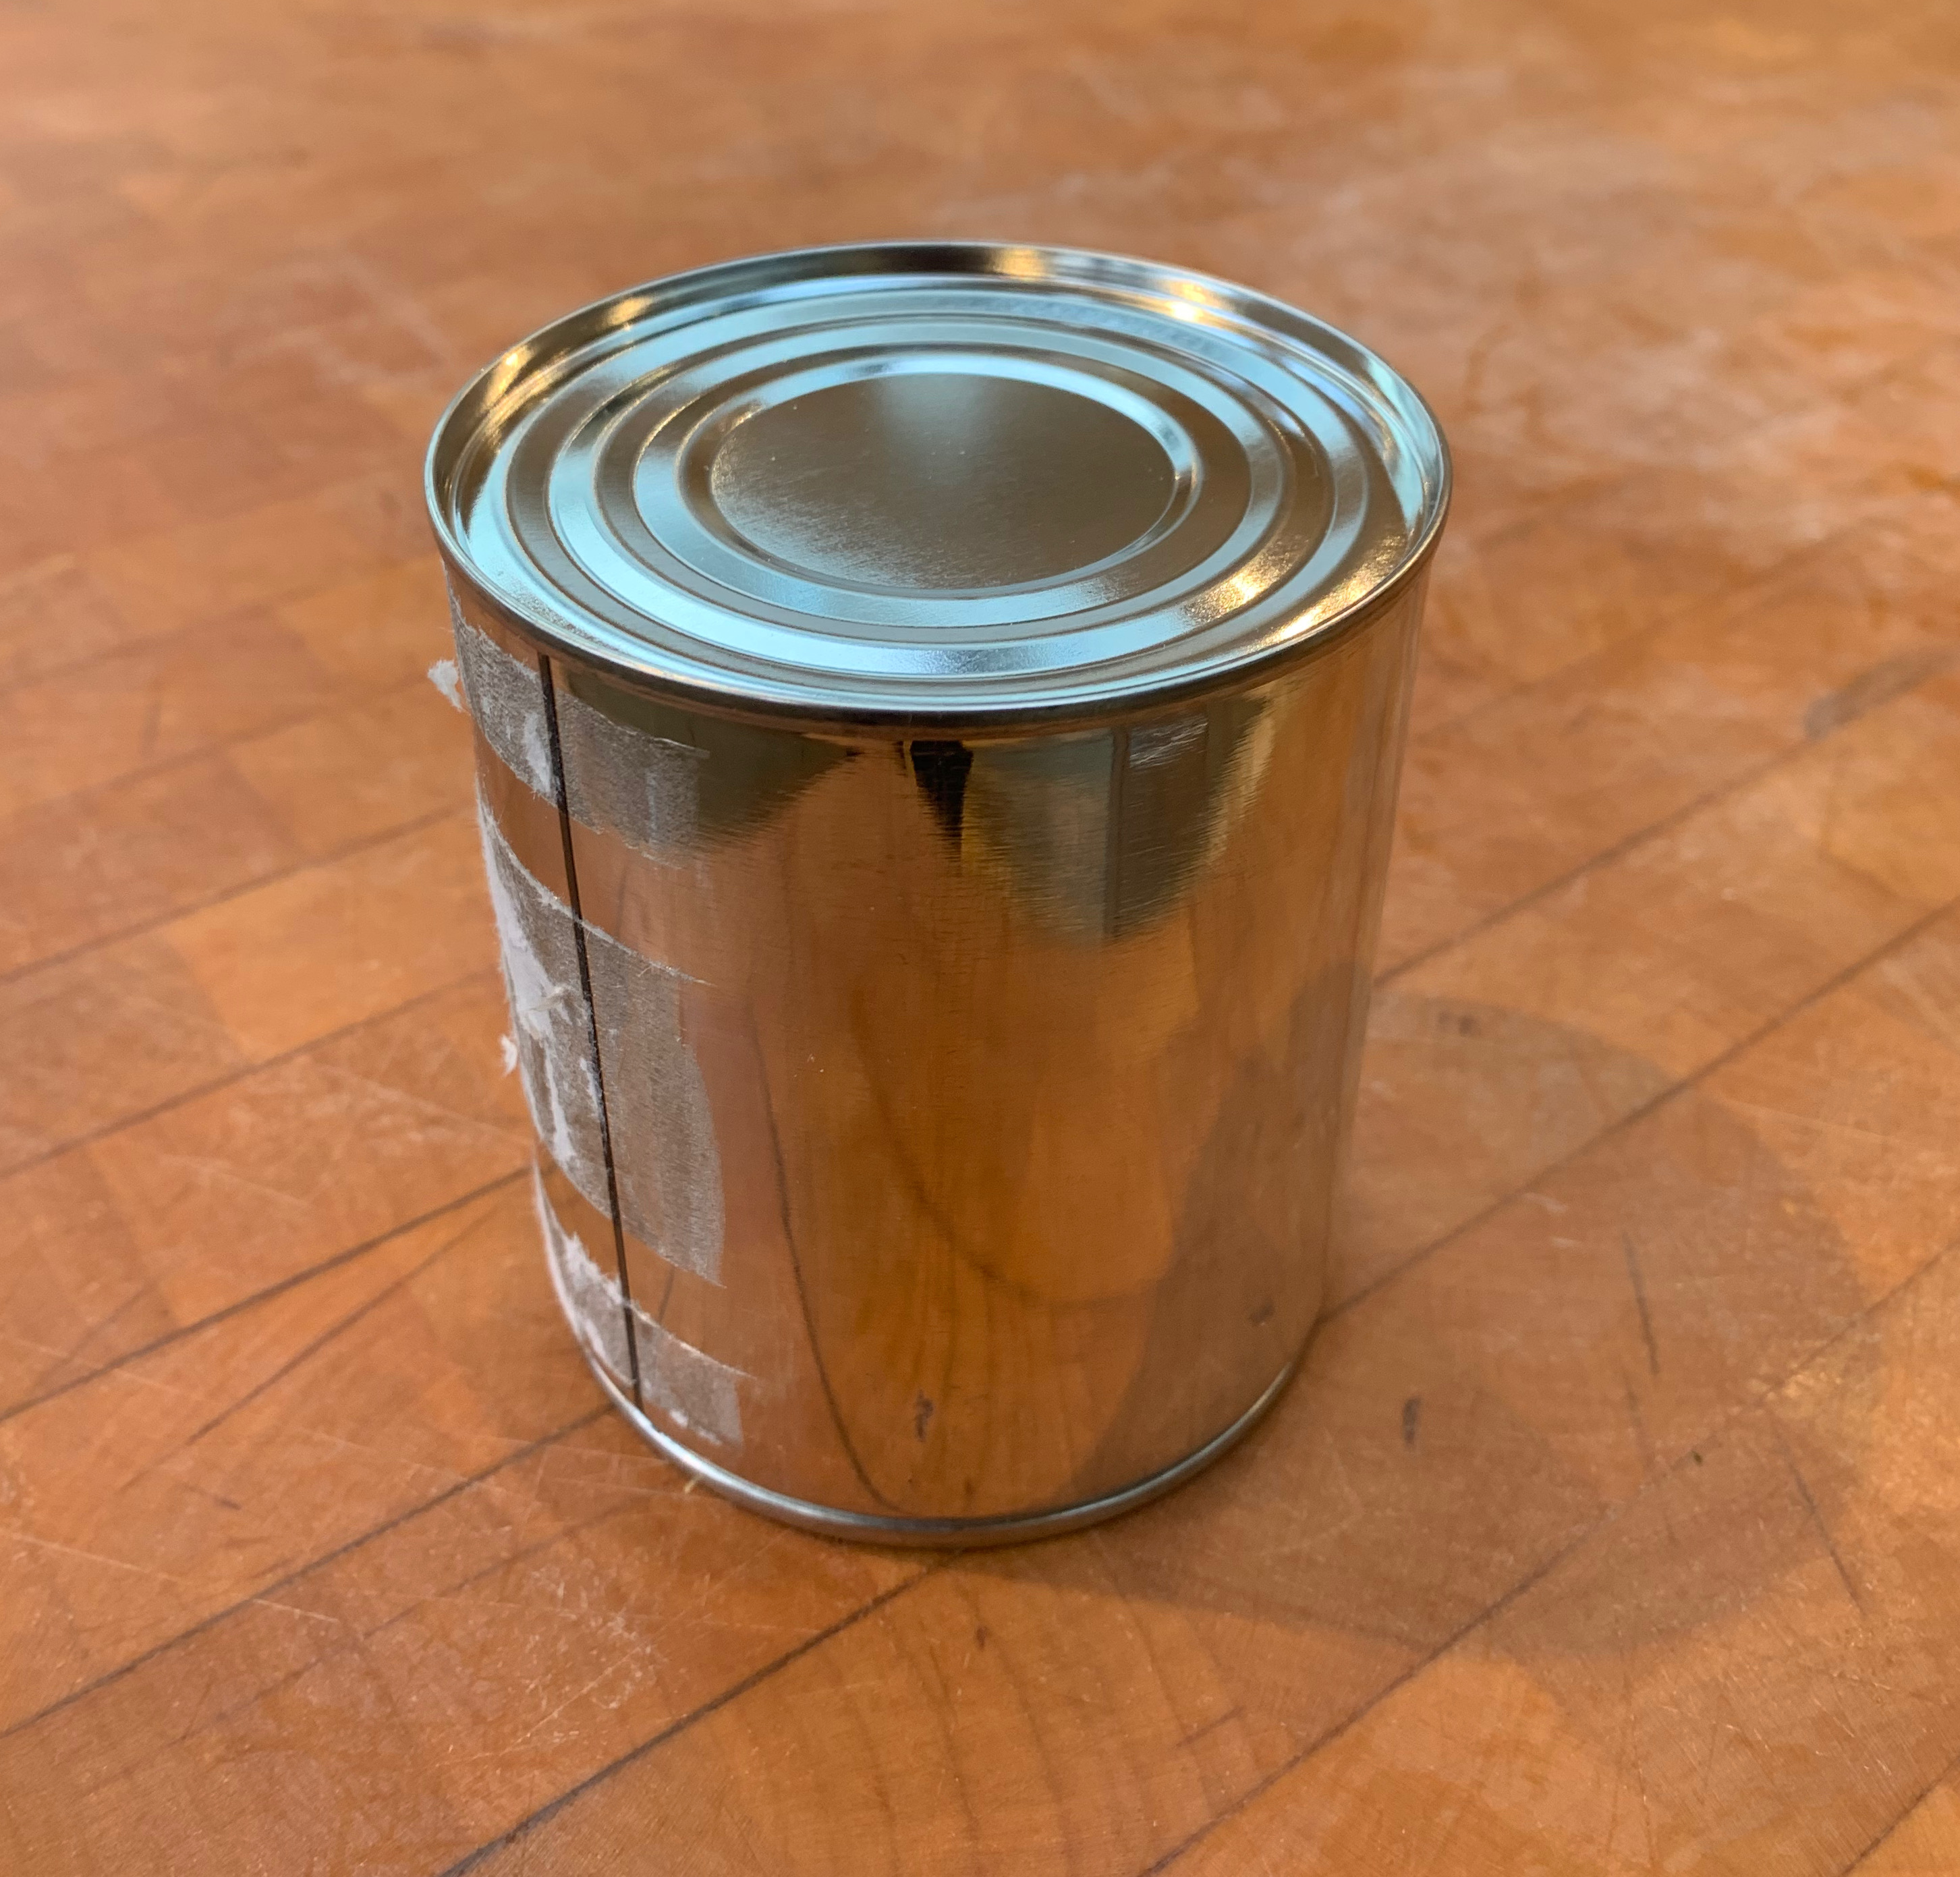
Put the tin of condensed milk (unopened, but you may want to take the paper off) into a saucepan, pour water to cover it (with some spare, since it will evaporate), and bring it to the boil.
Leave it to simmer for 2-3 hours (two will get you a light caramelisation, 3 will get you a more golden-brown and stronger tasting result.
Remove the tin from the pan and leave it to cool.
The cake
Butter for greasing tin
6 eggs
240g flour
10g baking powder
180g caster sugar
icing sugar for dusting
Preheat oven to 175℃
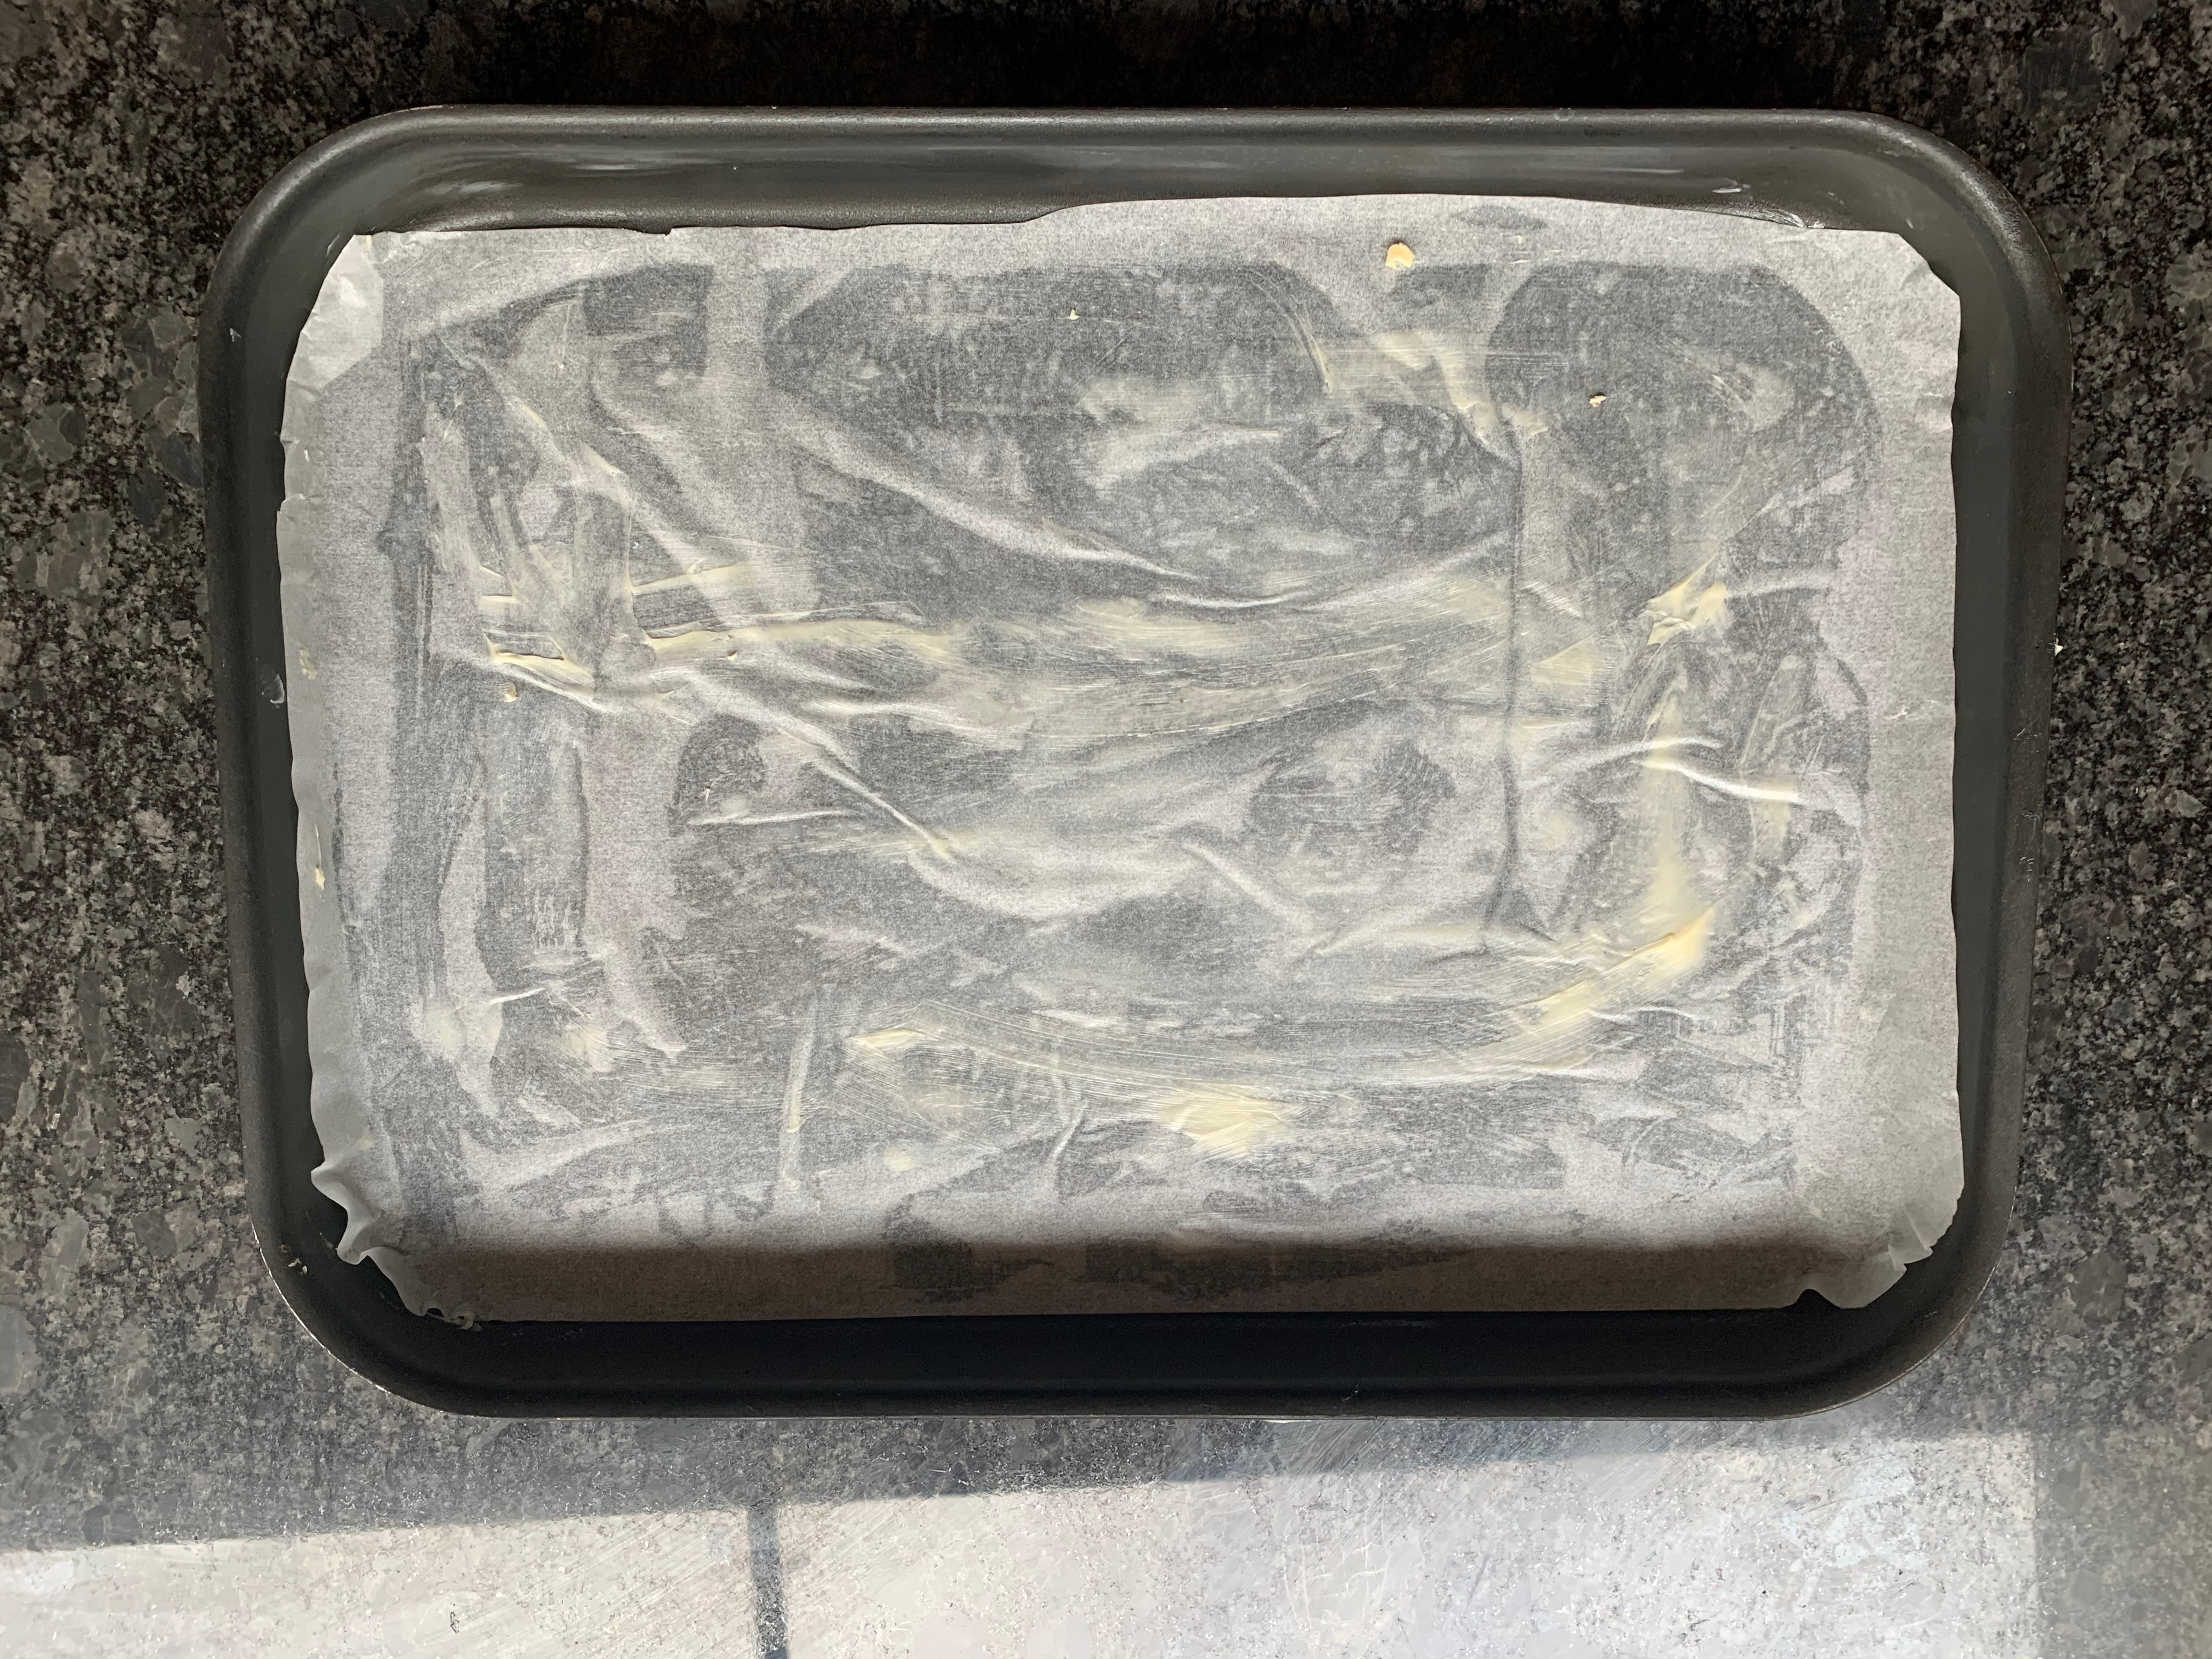
Grease your tin with butter, then line it with baking paper, then grease the baking paper generously.
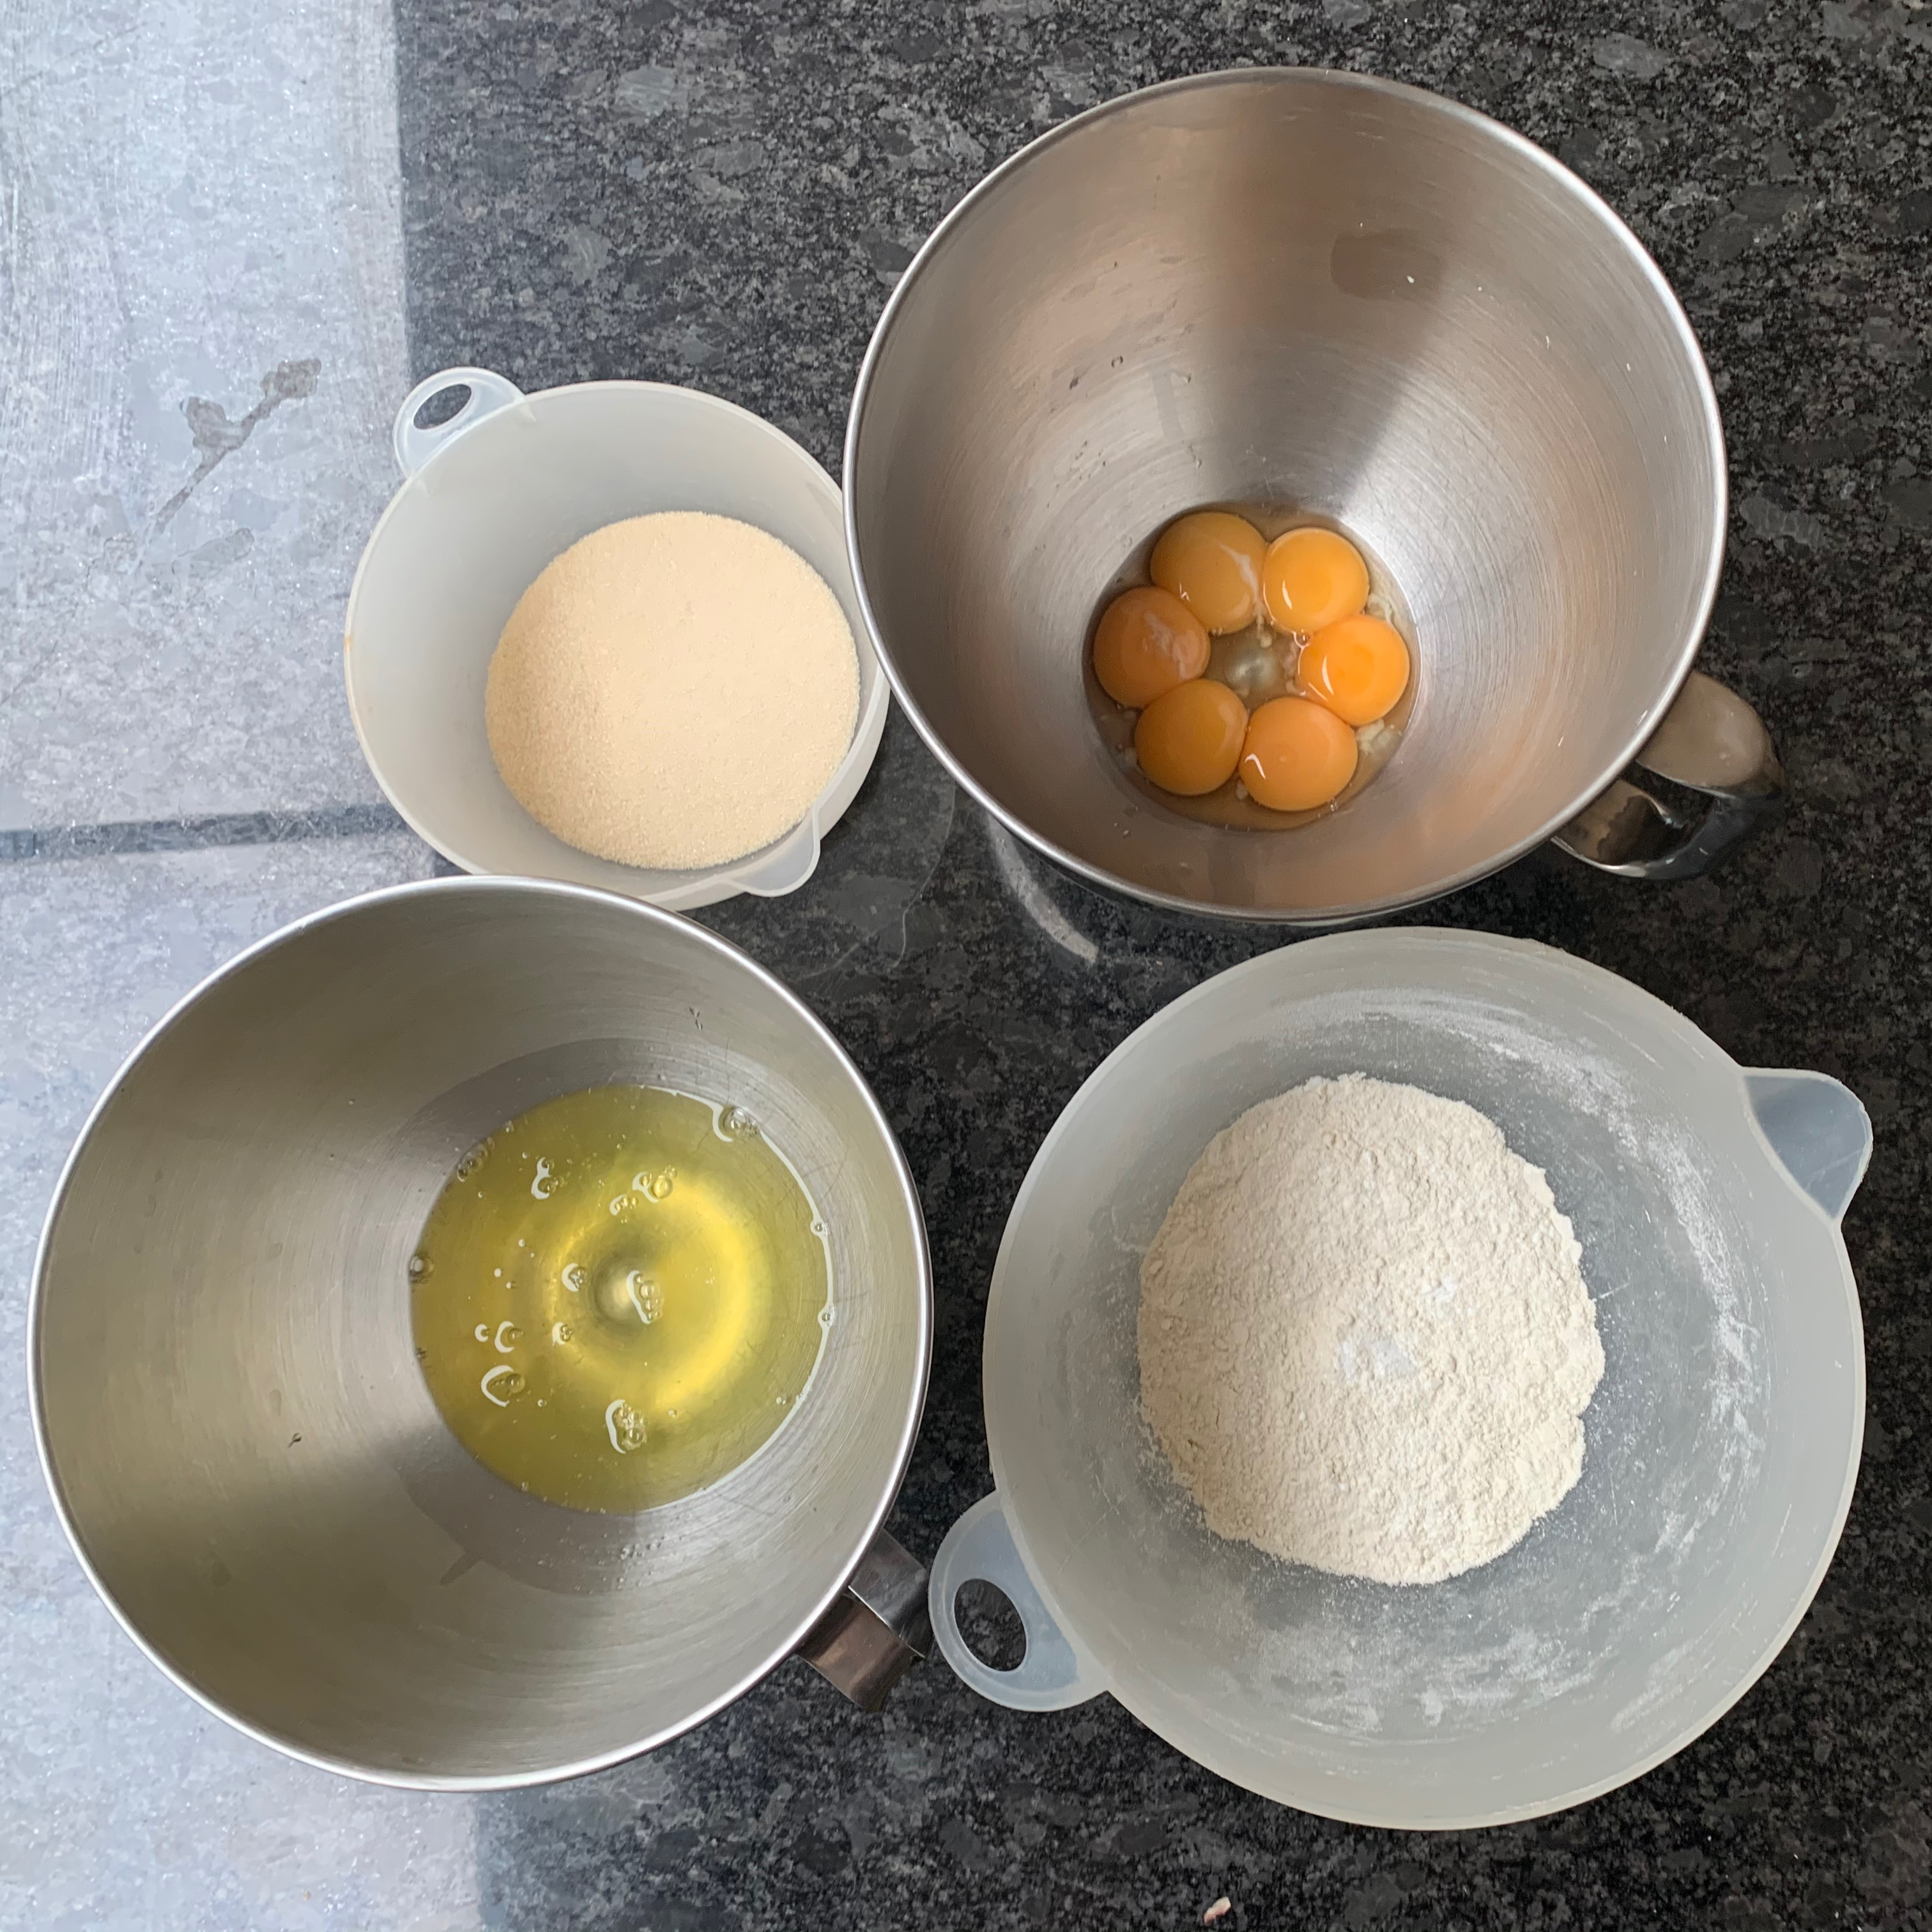
Separate the eggs into two mixing bowls.
Sift the flour and baking powder together.
Beat the egg yolks and add half the caster sugar. Then add the flour and baking powder and mix until well blended. The mixture will be quite stiff.
In the other bowl, beat the egg whites until soft peaks form, add the remaining caster sugar and whisk at high speed until you have a stiff meringue
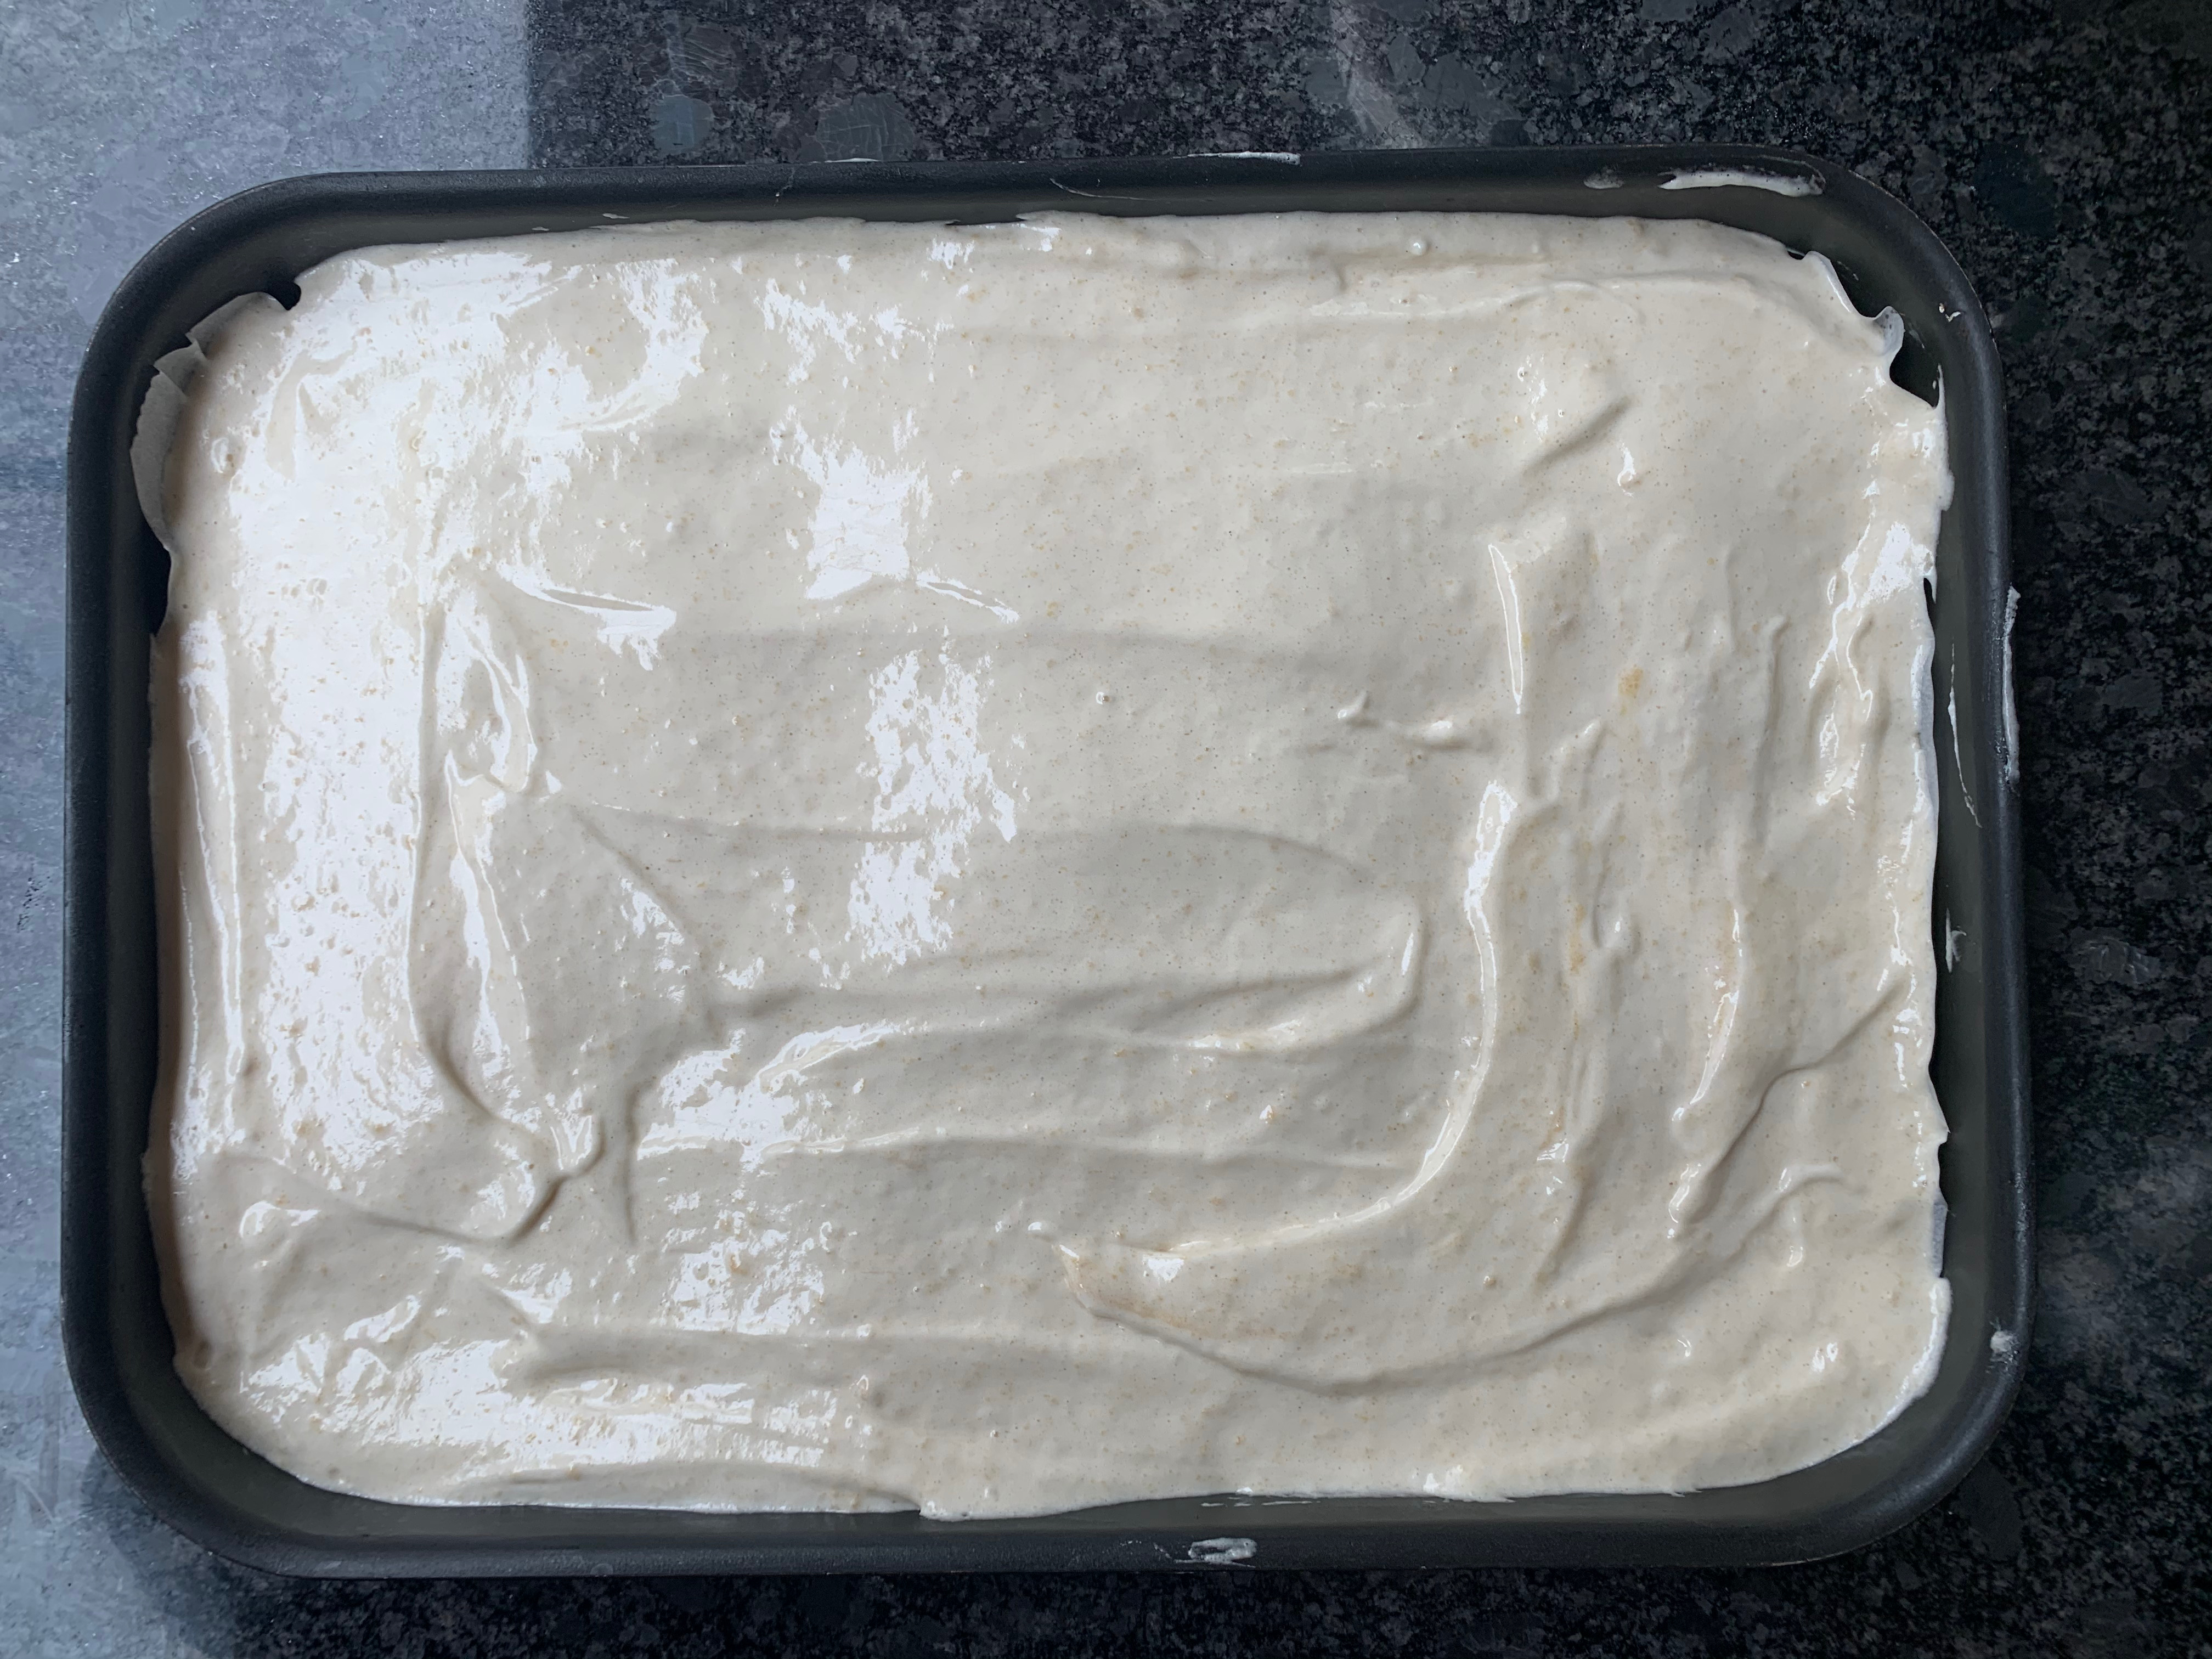
Add around a quarter of the meringue to your flour mixture and mix in until smooth. Do the same with another quarter, now taking care to keep as much air in the meringue as you can. Now fold in the remaining meringue, working really hard to keep the air in.
Spread the mixture evenly into your tin. Ideally, use an offset spatula to get it really level (I don’t have one, so I just did my best.
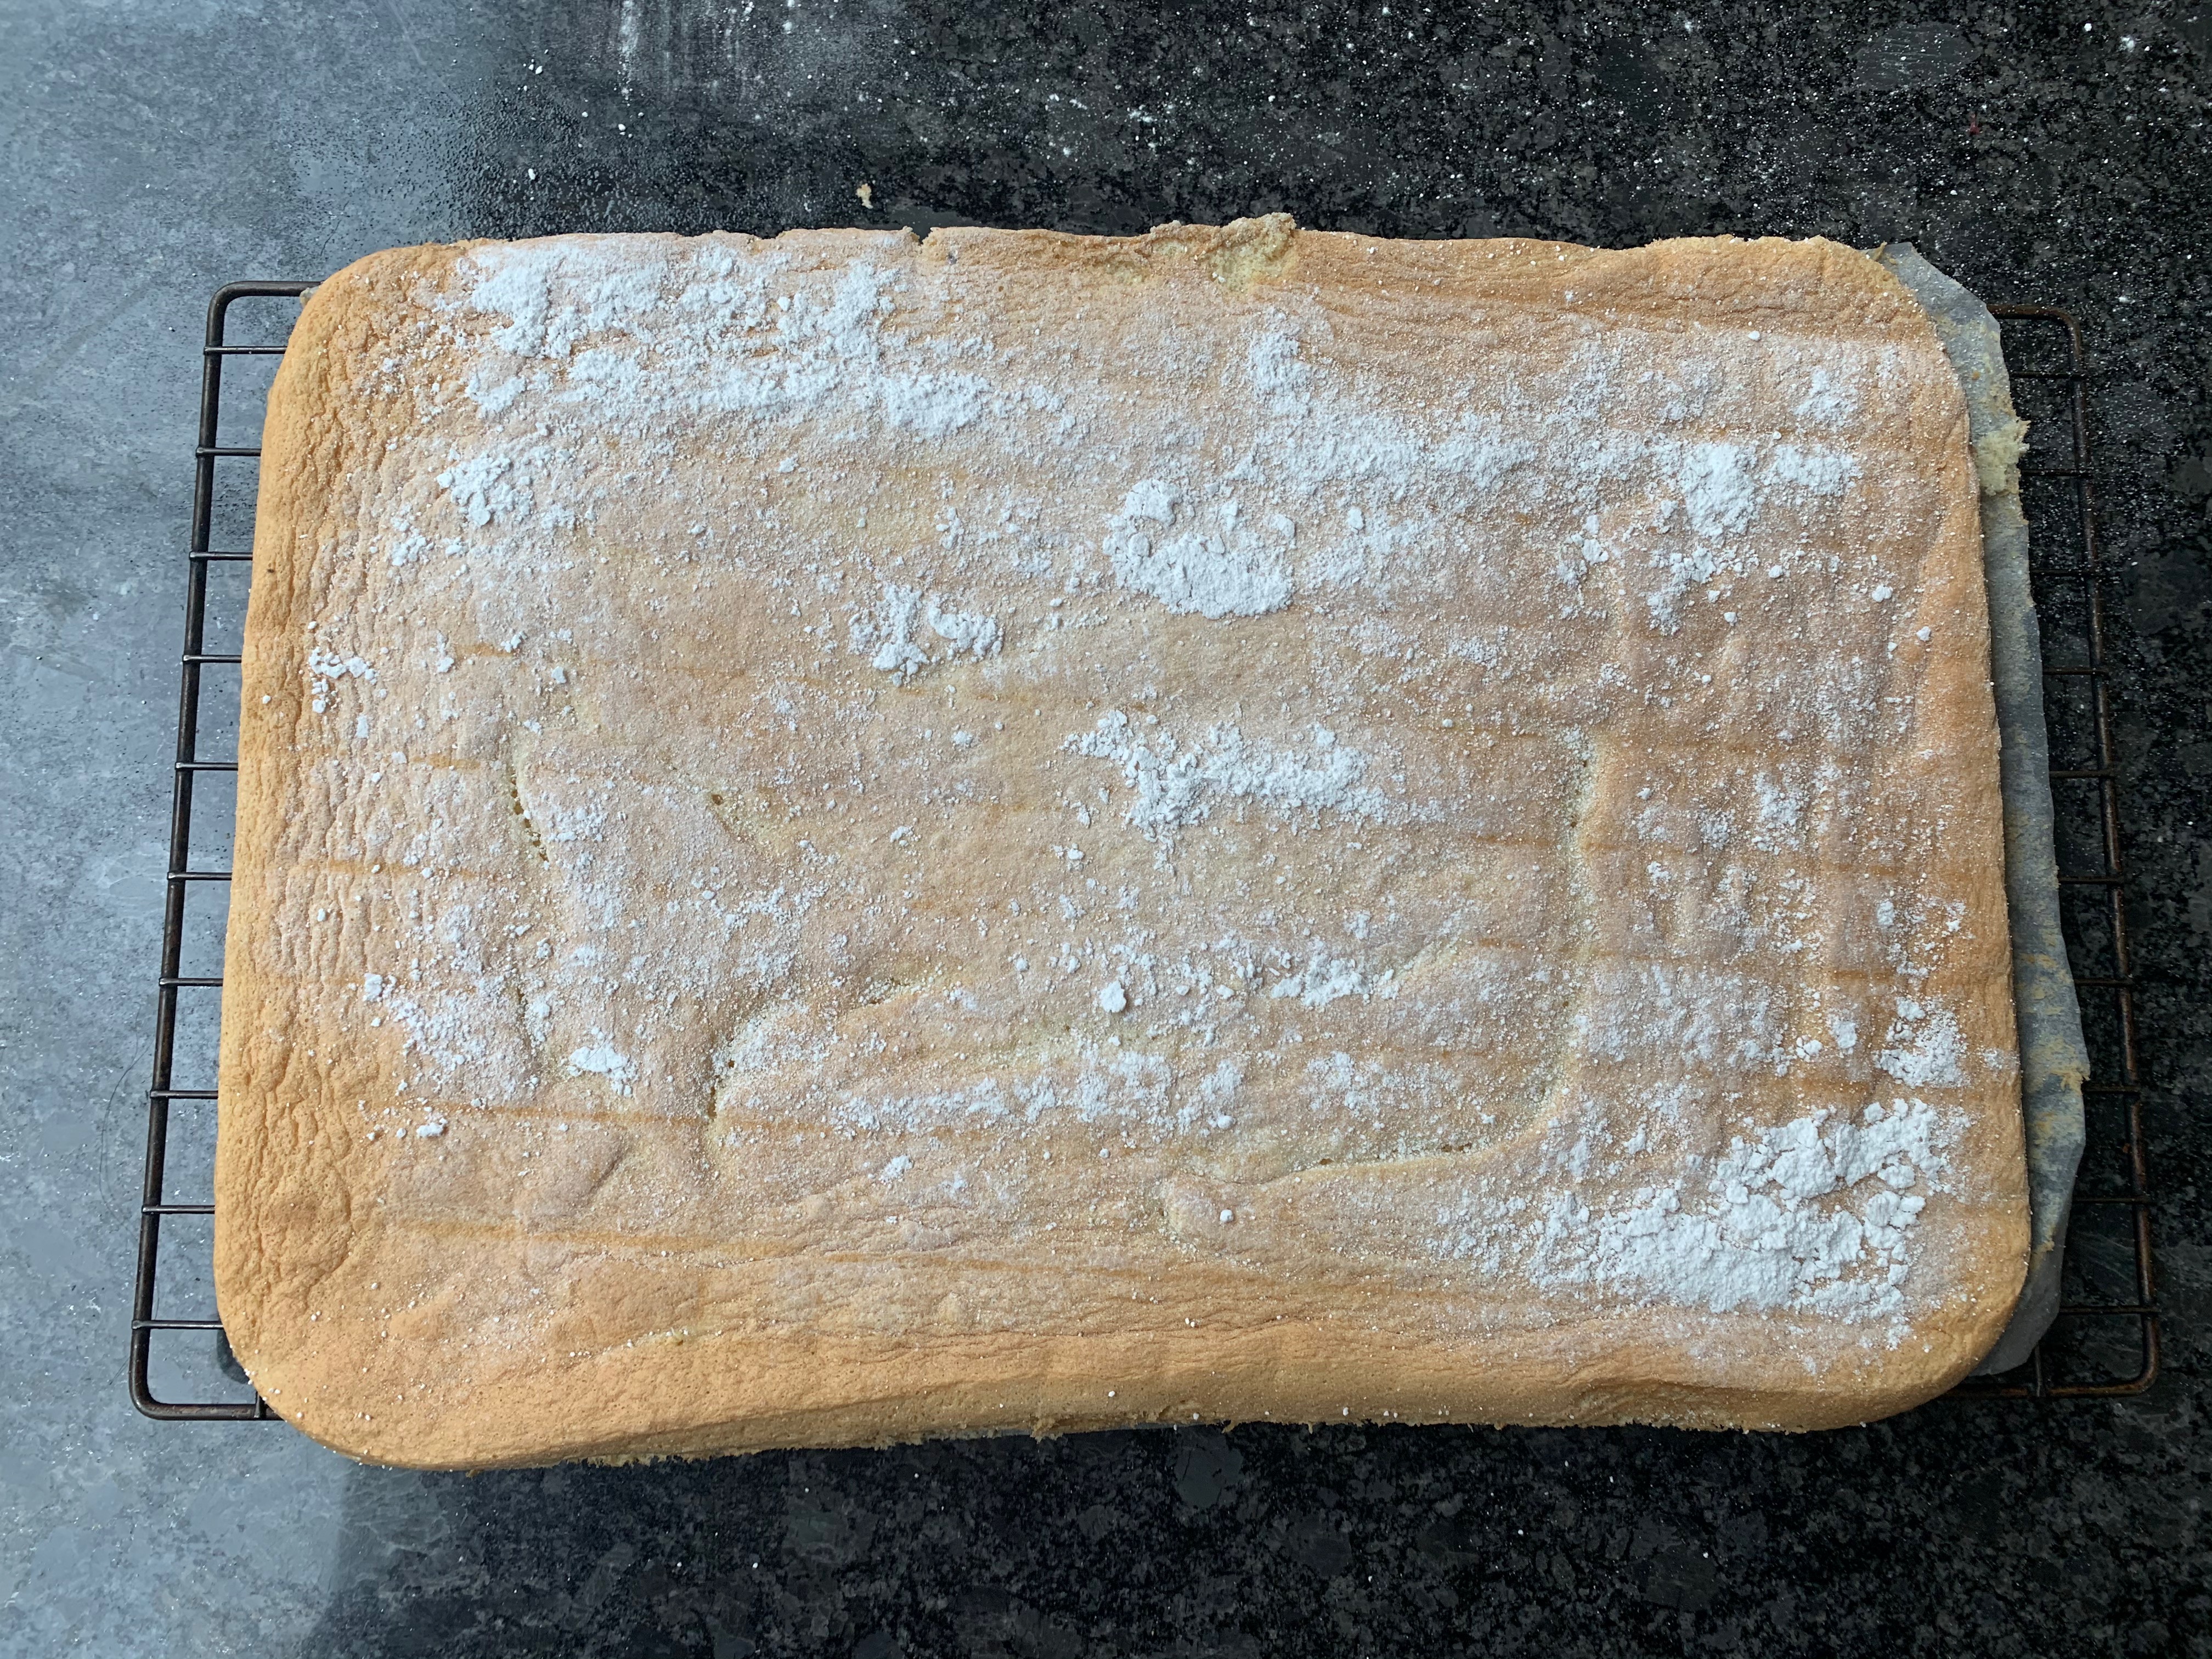
Bake for around 10 minutes. You do NOT want to overbake the sponge or you stand no chance of rolling it intact.
Leave to cool for a minute or two, then run a palette knife round the edge to make sure the cake is not sticking to the edge. Sprinkle some icing sugar over the cake.
Spread a tea towel over the cake, and then an inverted cooling rack. Turn the whole assembly upside down. As gently as you can, remove your cake tin. The cake should sit on its tea towel in one piece.
Very gently, pull off the baking paper almost all the way, then put it back in place.
Now roll the cake up as tightly as you can, and leave to cool for an hour or so.
Unroll the cake (this is the part where it’s hard to stop it tearing), spread the filling over it, then roll it up again.
(Optional – I didn’t) dust the cake with more icing sugar.
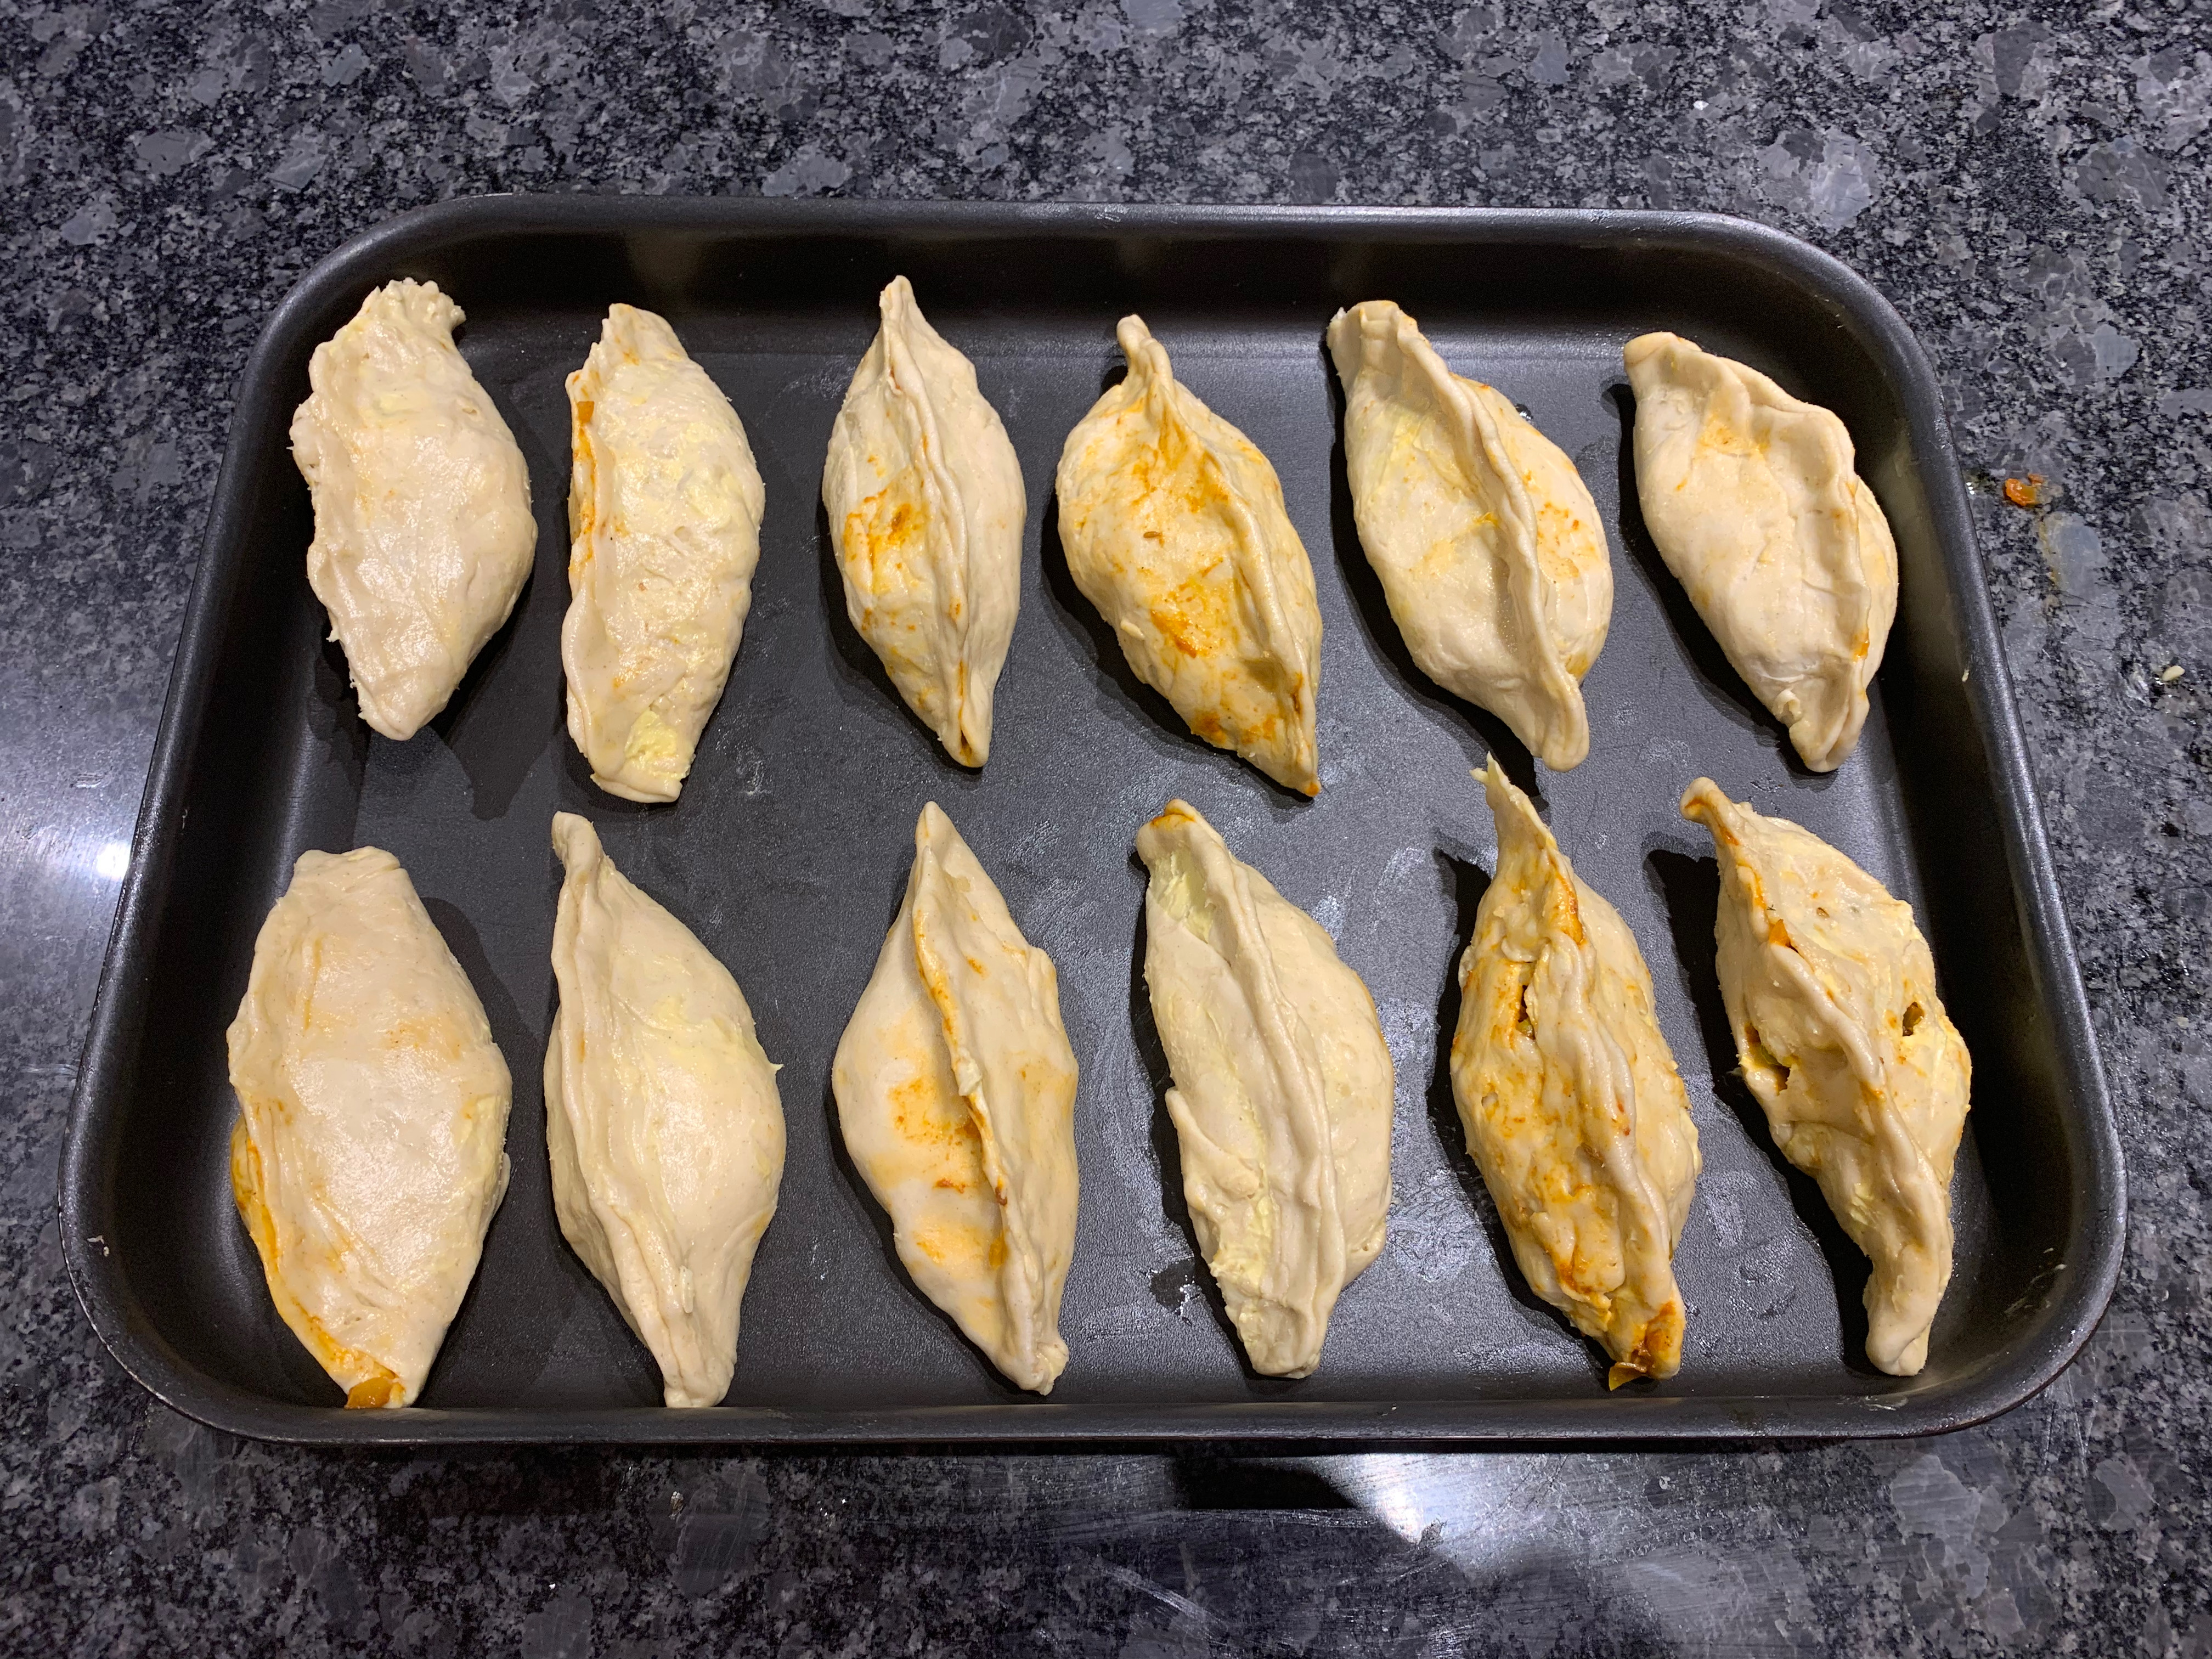
The styles and sizes vary, but most food cultures have a filled parcel that you can eat on the street: China has bao dumplings, Japan has onigiri, most Latin countries have empañadas, and so on. The Maltese version is the pastizz, which is somewhere in size between a samosa and a Cornish pasty. Its case is flaky pastry which is made by creating a spiral cross-section of dough and shortening (the same trick, roughly, as used in Portuguese pastéis de nata); the filling can be pretty much anything but is often either based on ricotta cheese or peas.
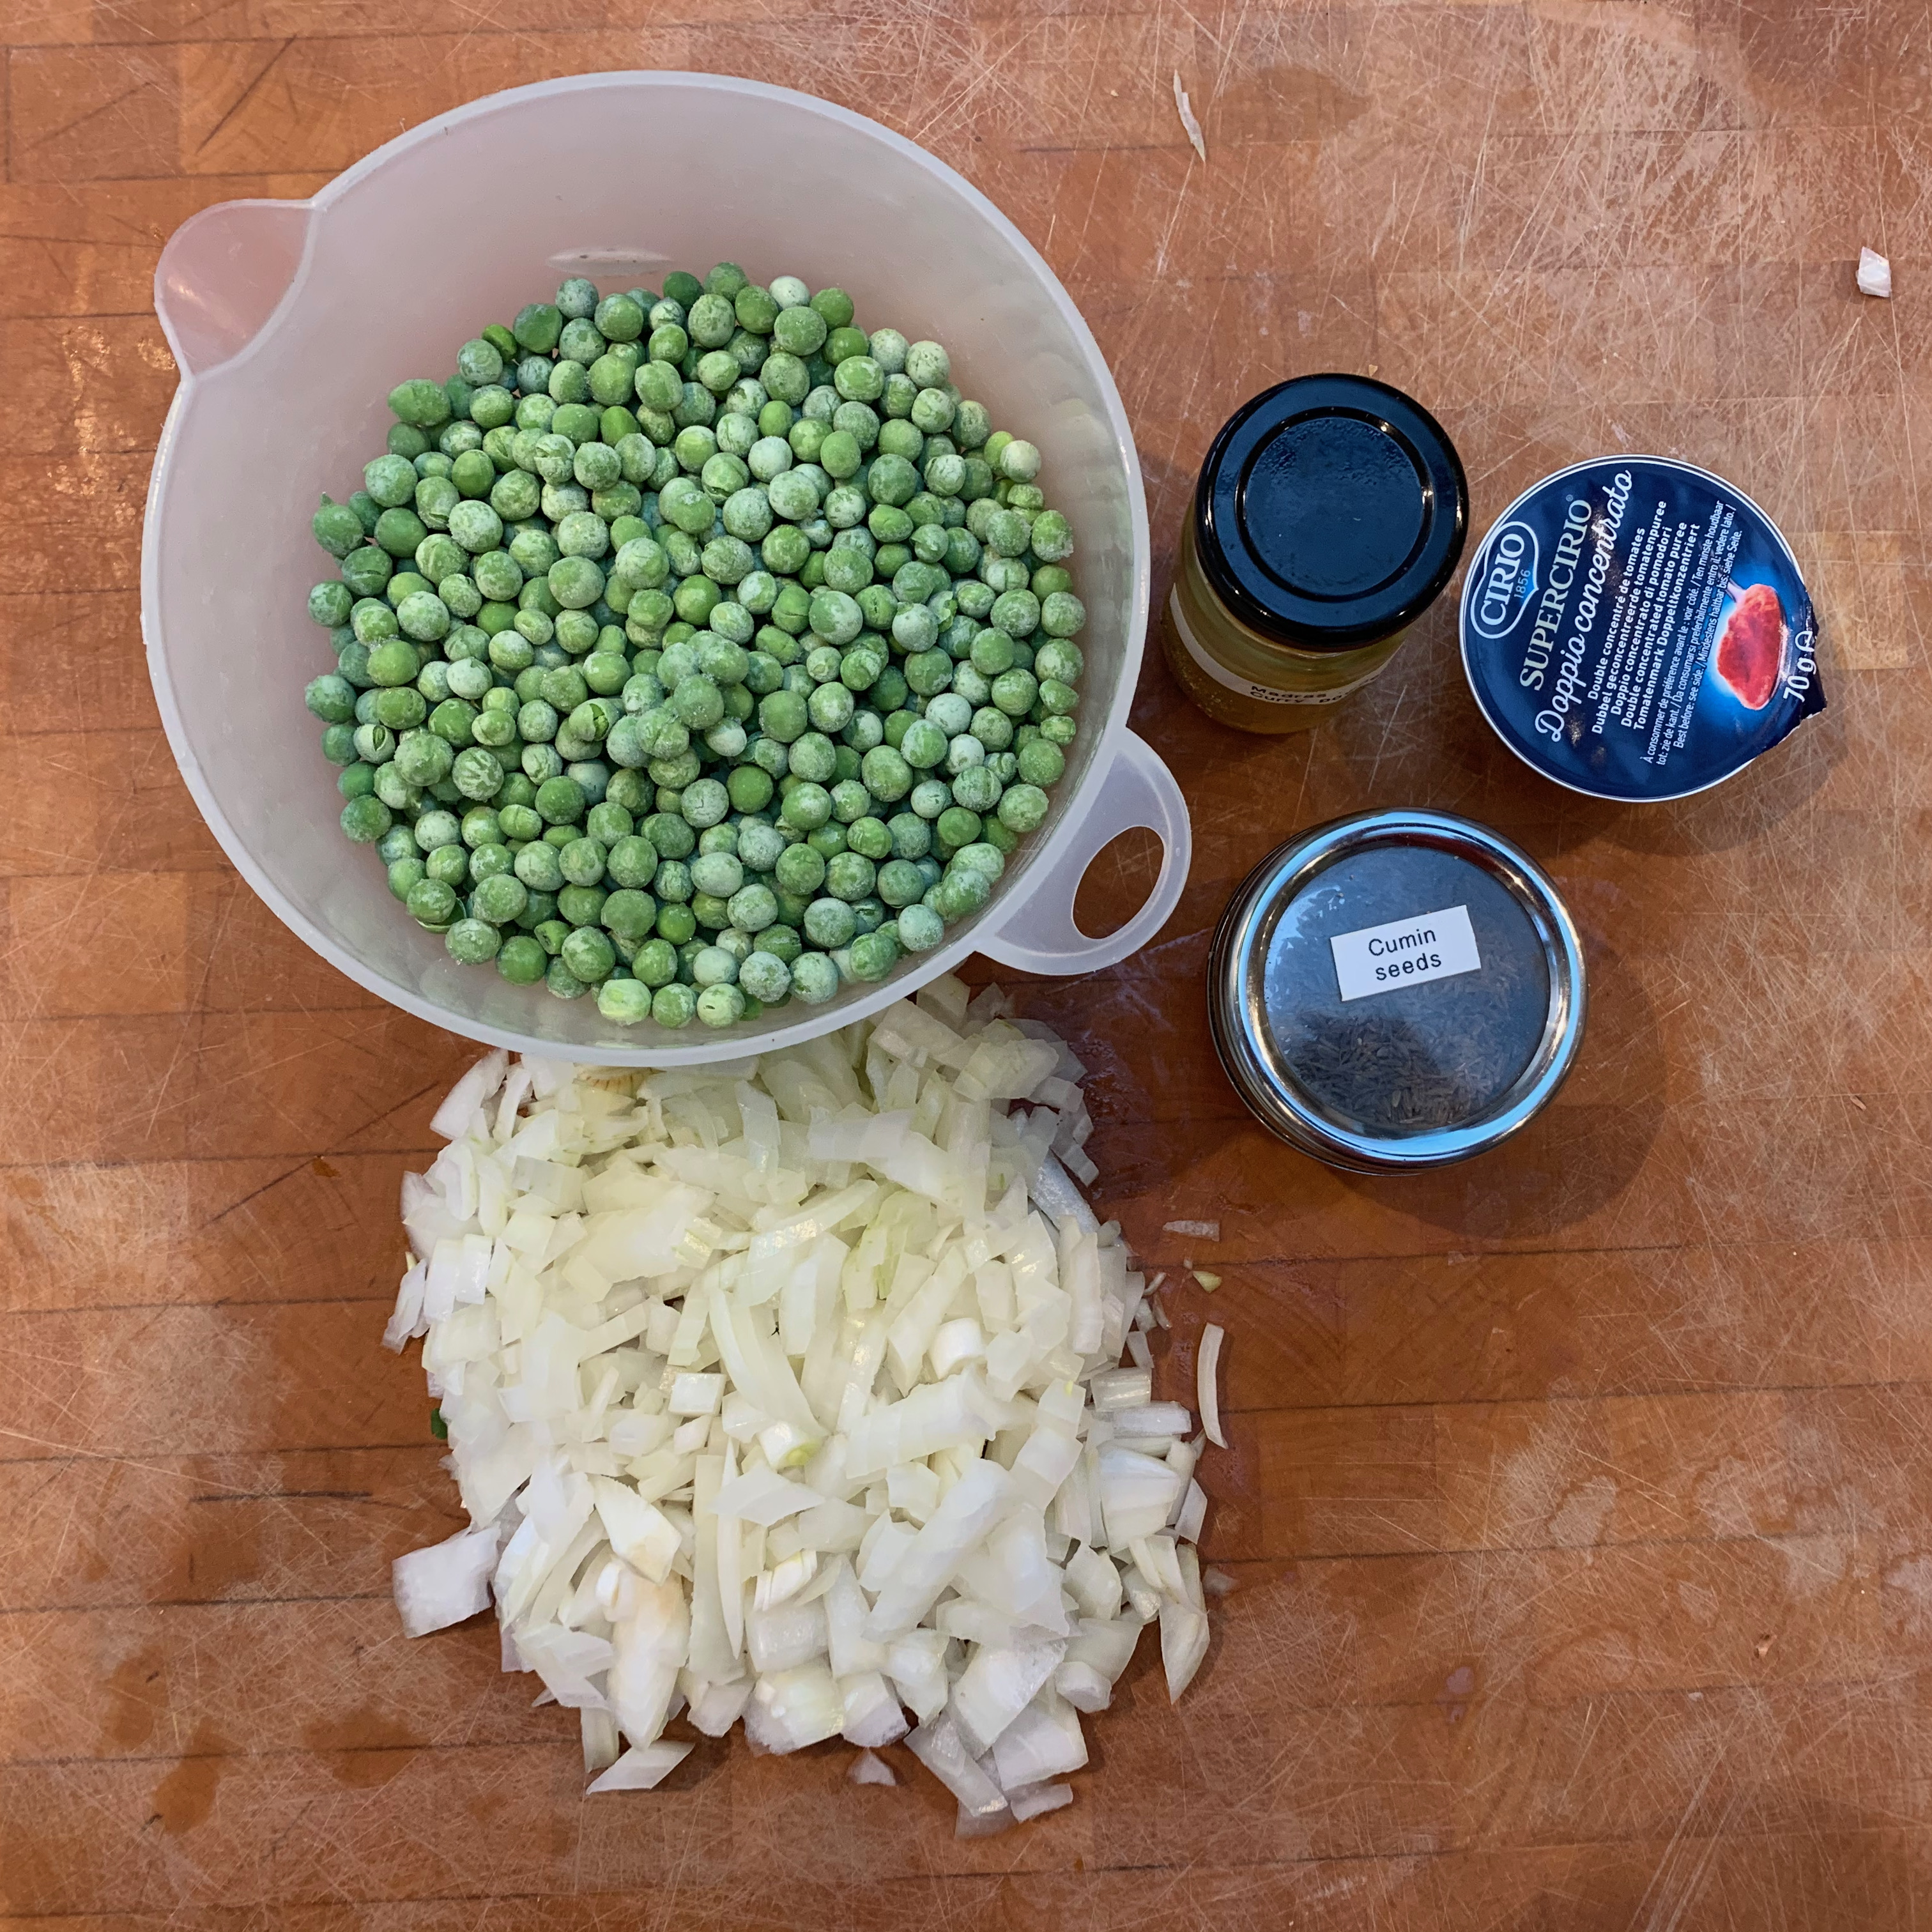
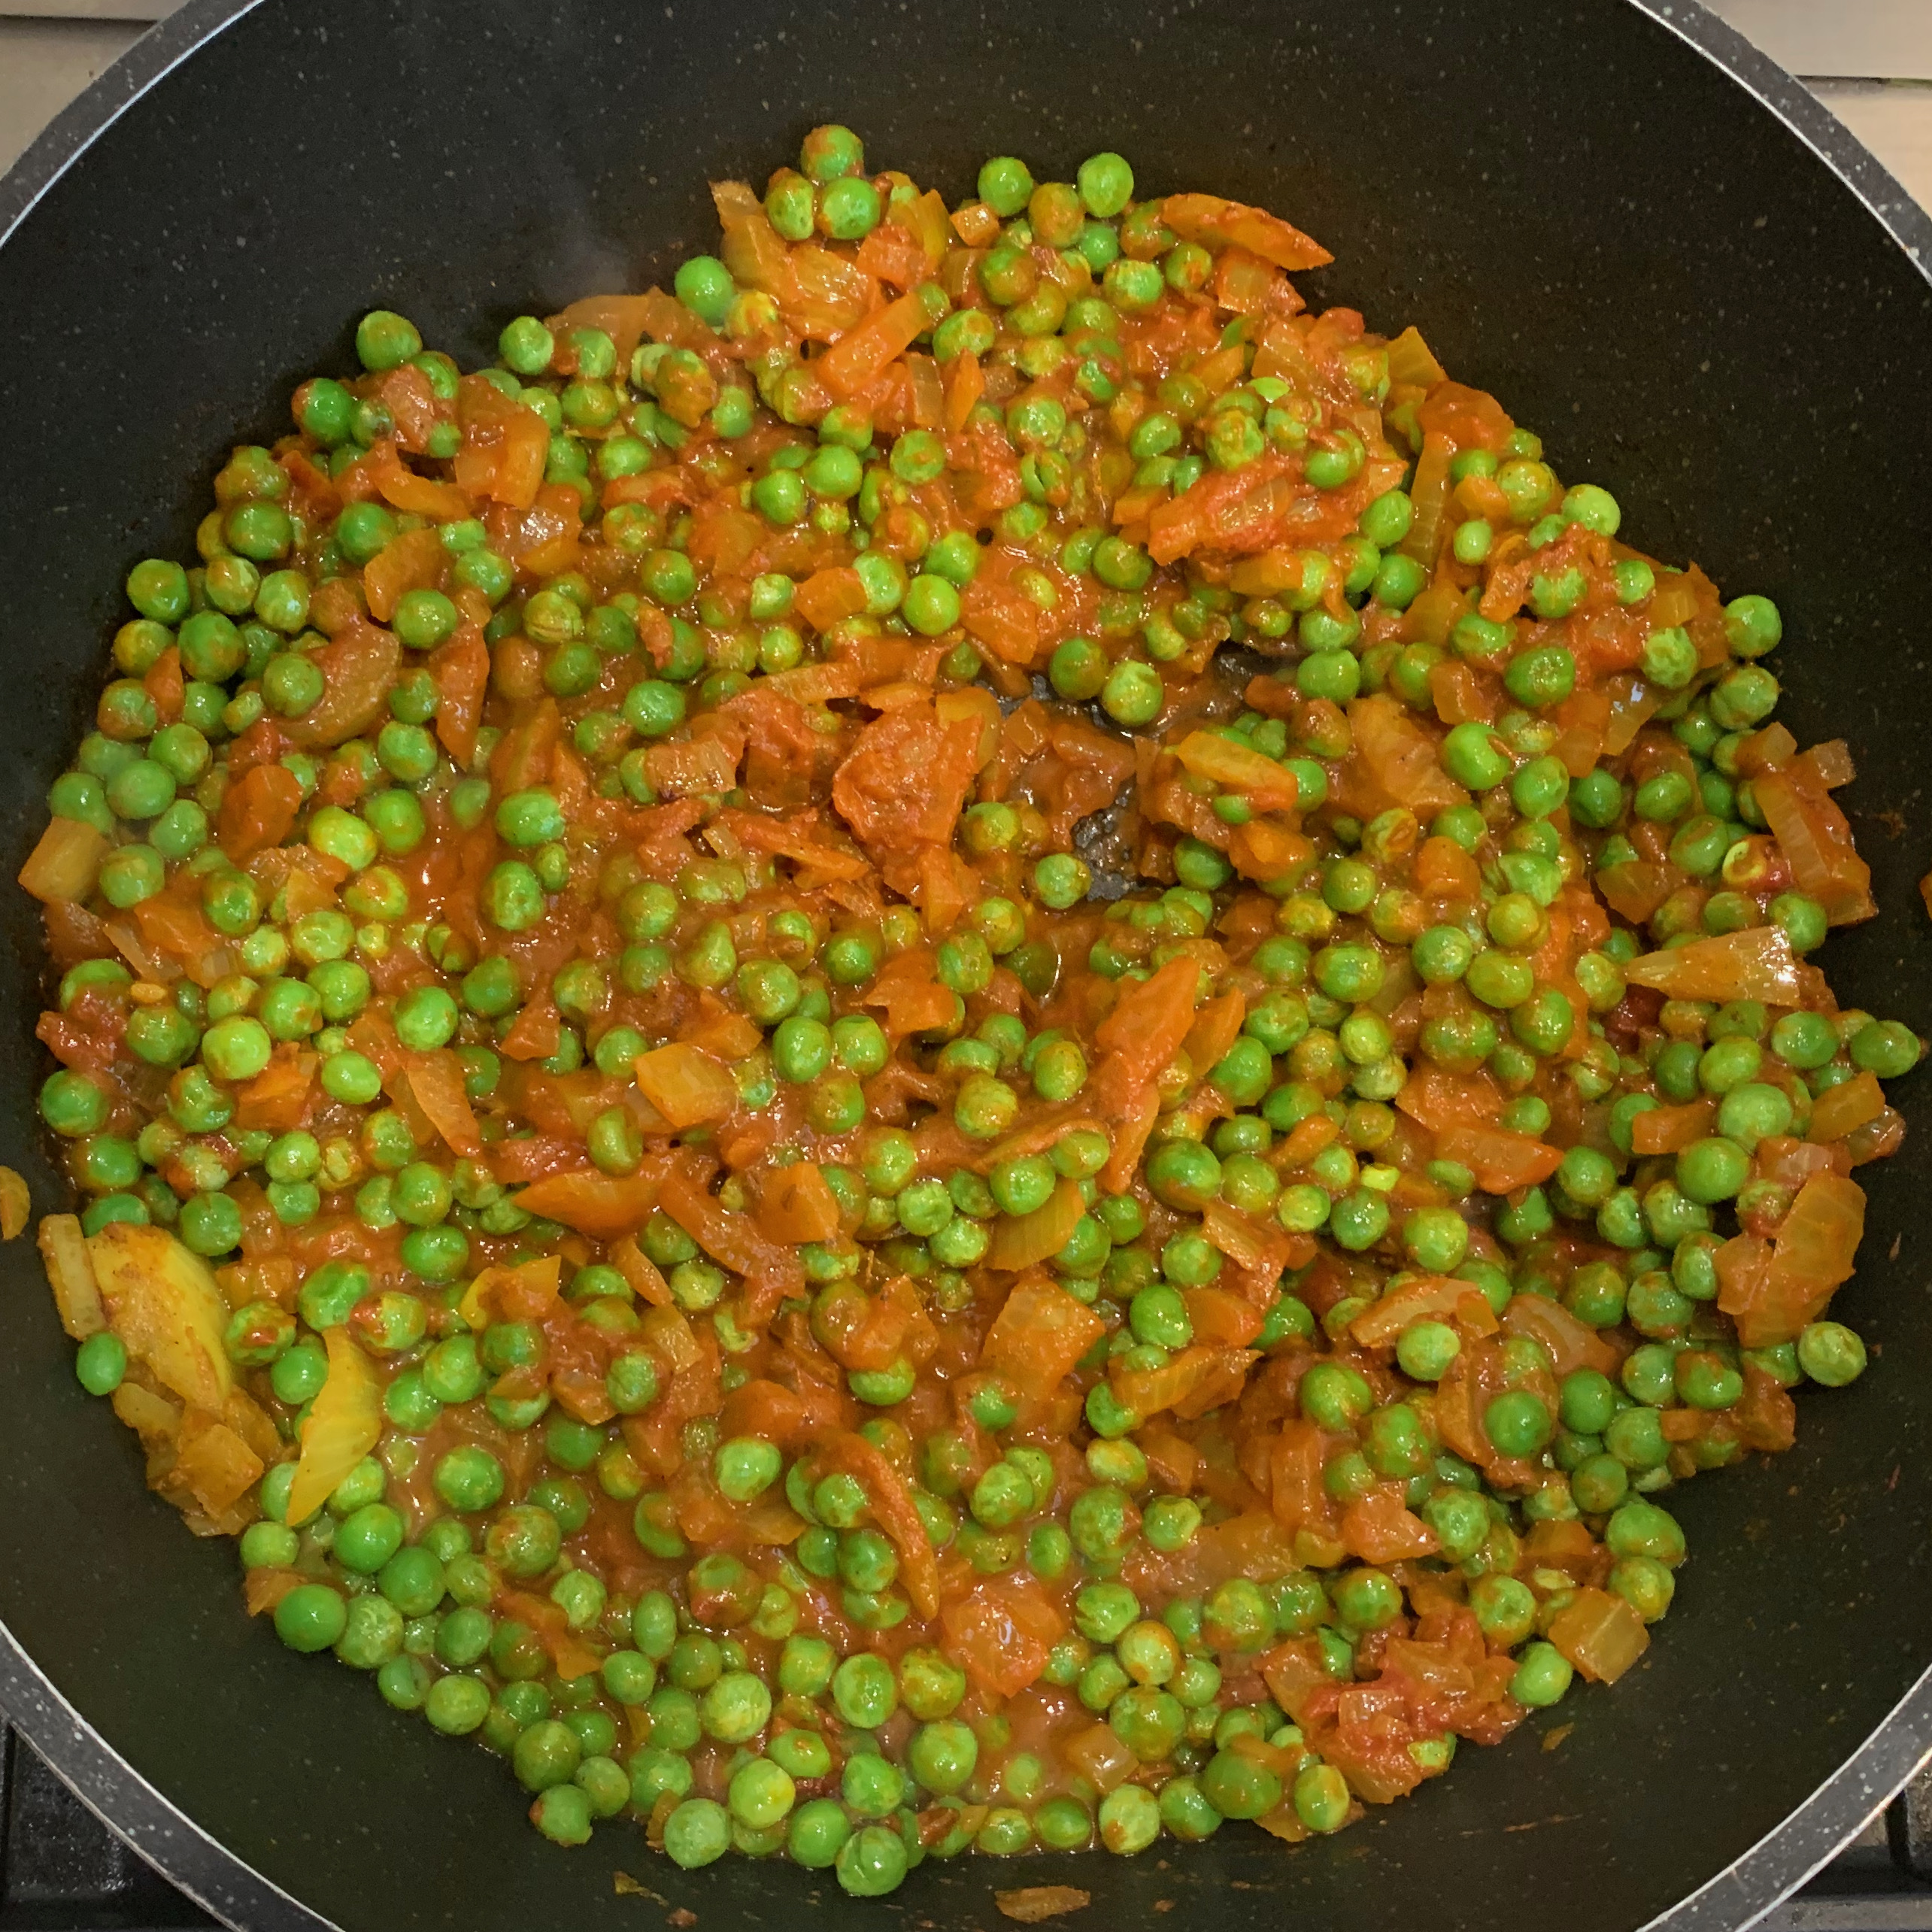
Starting from a Maltese Youtube video and halving the quantities, I chose a lightly curried pea-and-tomato filling, which is pretty straightforward and comes out rather like one of my favourite Indian dishes, mutter paneer (without the paneer, but I can’t see a good reason not to include that if you want). If you are looking carefully at the photos, you’ll see that I ran out of peas on one of my runs and substituted some mixed veg.
As with all versions of puff pastry, getting the layers right is tricky, and I got it spectacularly wrong on my first attempt, not least because the ratio of flour to water in the recipe is way off what it needs to be. This isn’t the most time consuming puff pastry recipe you’ll ever see: there’s a lot of elapsed time for resting, but it’s not too bad on actual work. But it’s fiddly to get the layers thin enough and roll them up into a good shape without breaking them. If you’re like me, you’ll need practise.
Anyway, the results are well worth it: they make a really good mid-morning or mid-afternoon snack, tasty, filling and nutritious.
Filling
Although I’m giving the filling recipe first, you’ll almost certainly want to start the dough first and make the filling during the extensive resting times.
You could add any of garlic, ginger or chilies to this if you want a spicier version. I like adding curry leaves, too, which isn’t exactly Maltese but adds aroma.
Sunflower or other neutral oil for frying
2g (1tsp) cumin seeds
220g onion
7g curry powder (or your own favourite mix of ground coriander, cumin, turmeric, chili powder)
70g double concentrated tomato paste (my favourite brand is Cirio)
350g frozen peas
Take the peas out of the freezer. You can do this in advance, but you don’t have to.
Chop the onion finely
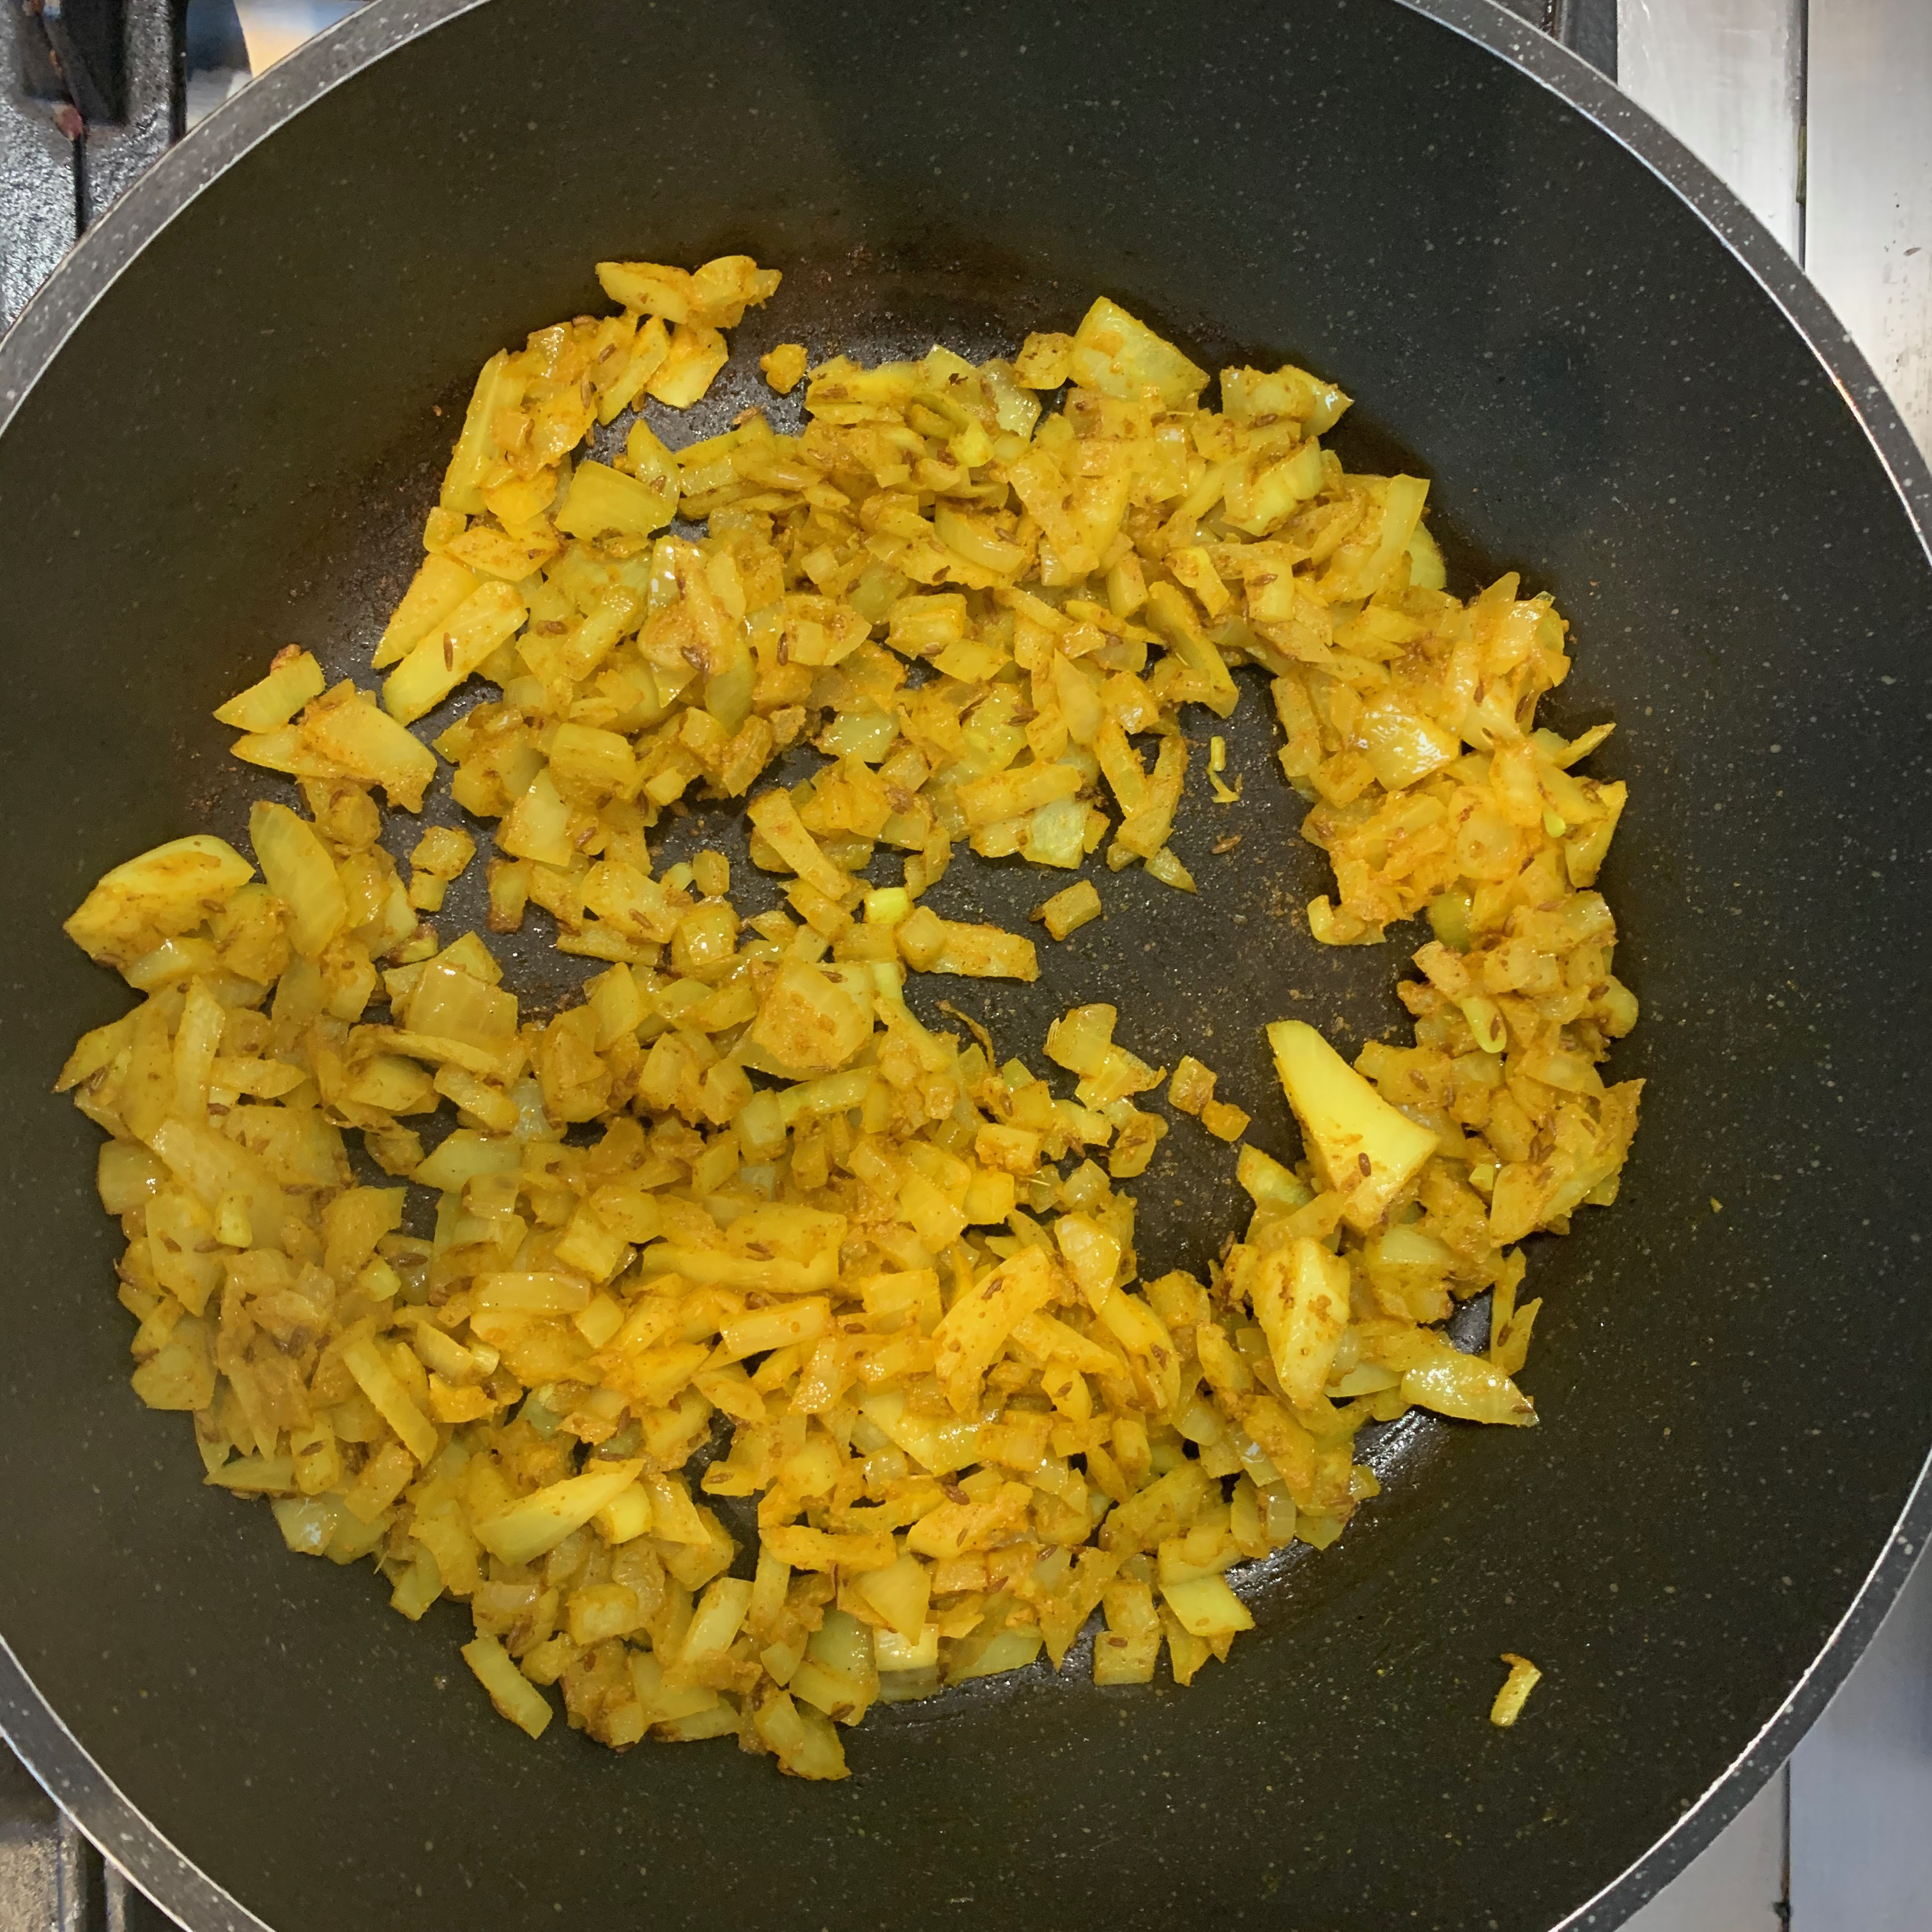
Heat cumin seeds in oil in a wok or medium size pan
Once the cumin seeds are spitting, add the onion and stir fry for a couple of minutes
Add the curry powder and continue frying until the onions are soft
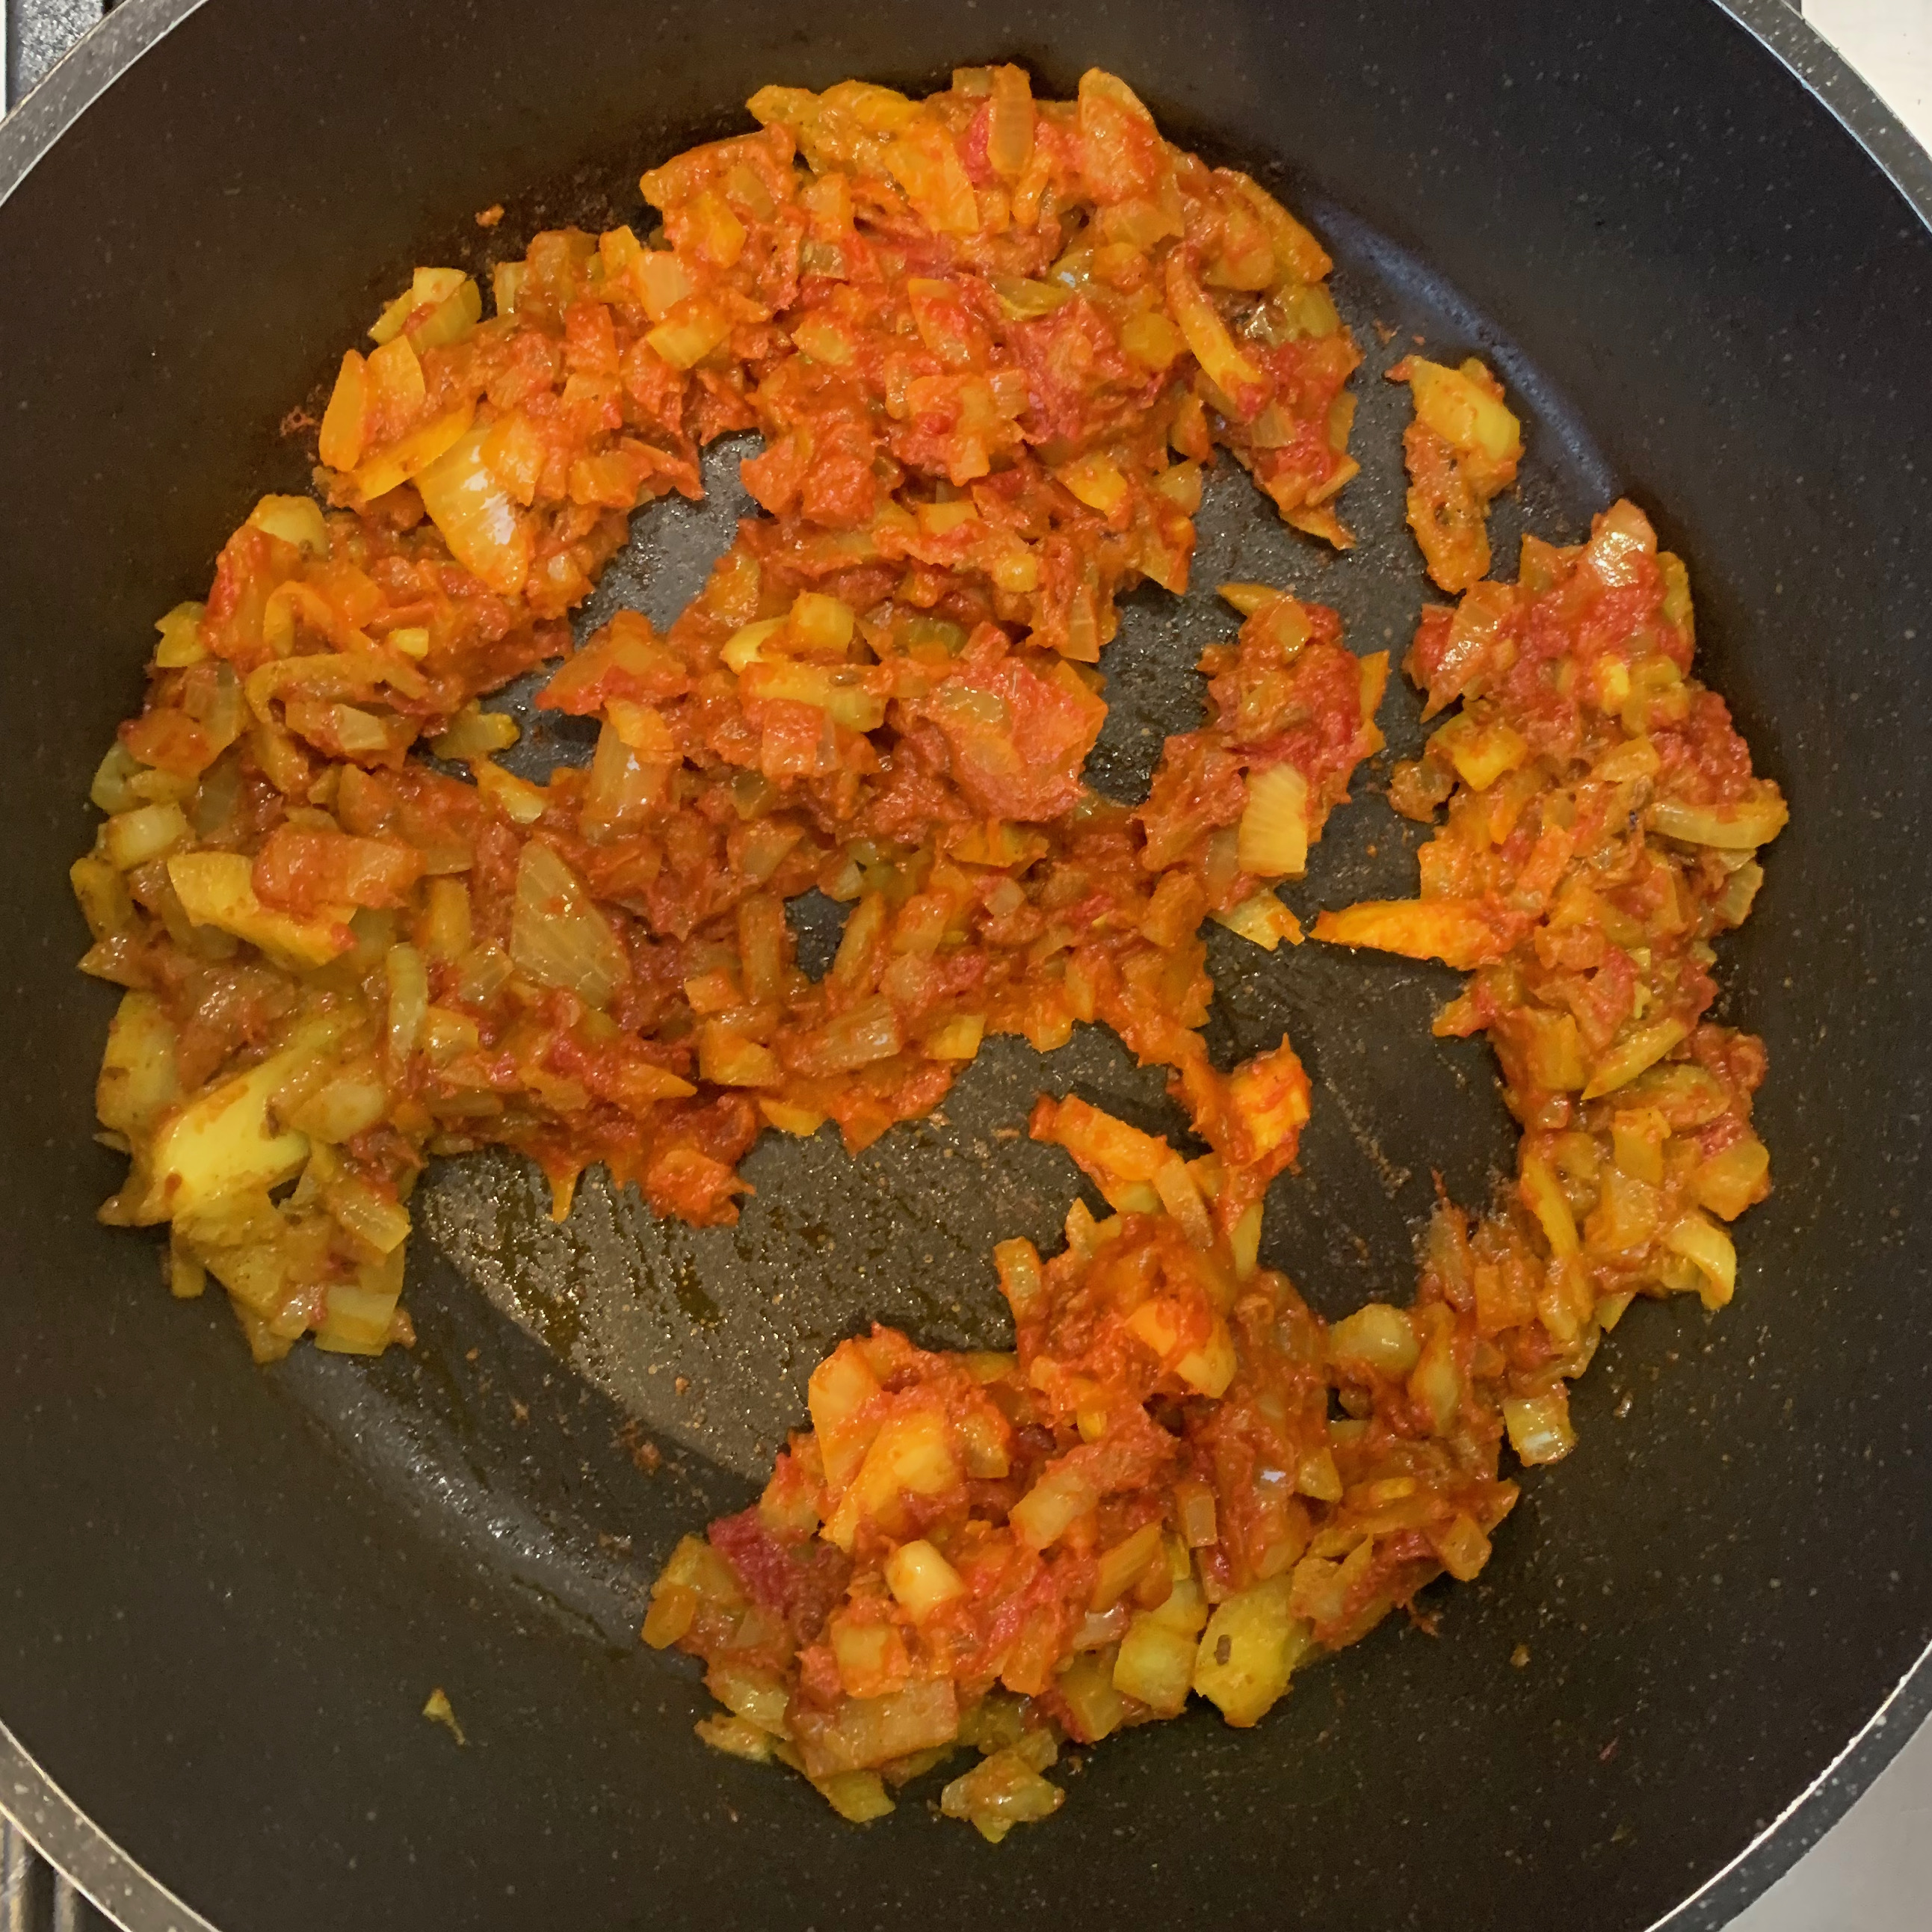
Add the tomato paste and 100ml or so of water, stir until blended.
Add the peas, bring back to the boil, turn the heat down and simmer until the peas are cooked and the sauce is very thick.
Turn the heat off and leave until needed.
Dough
420g flour +40 second time, + 15g sunflower oil
250ml water
10g salt
125g shortening – Maltese recipes specify a vegetable shortening like Trex or Crisco, but you can almost certainly substitute ghee or melted butter if you prefer the taste (or use a mixture)
A little olive oil
Mix flour and salt in the bowl of your stand mixer; add water and knead on low to medium speed with the dough hook until you have a smooth but fairly stiff dough. You need enough water that you don’t have lots of uncombined flour, but not so much as to make the mixture sticky.
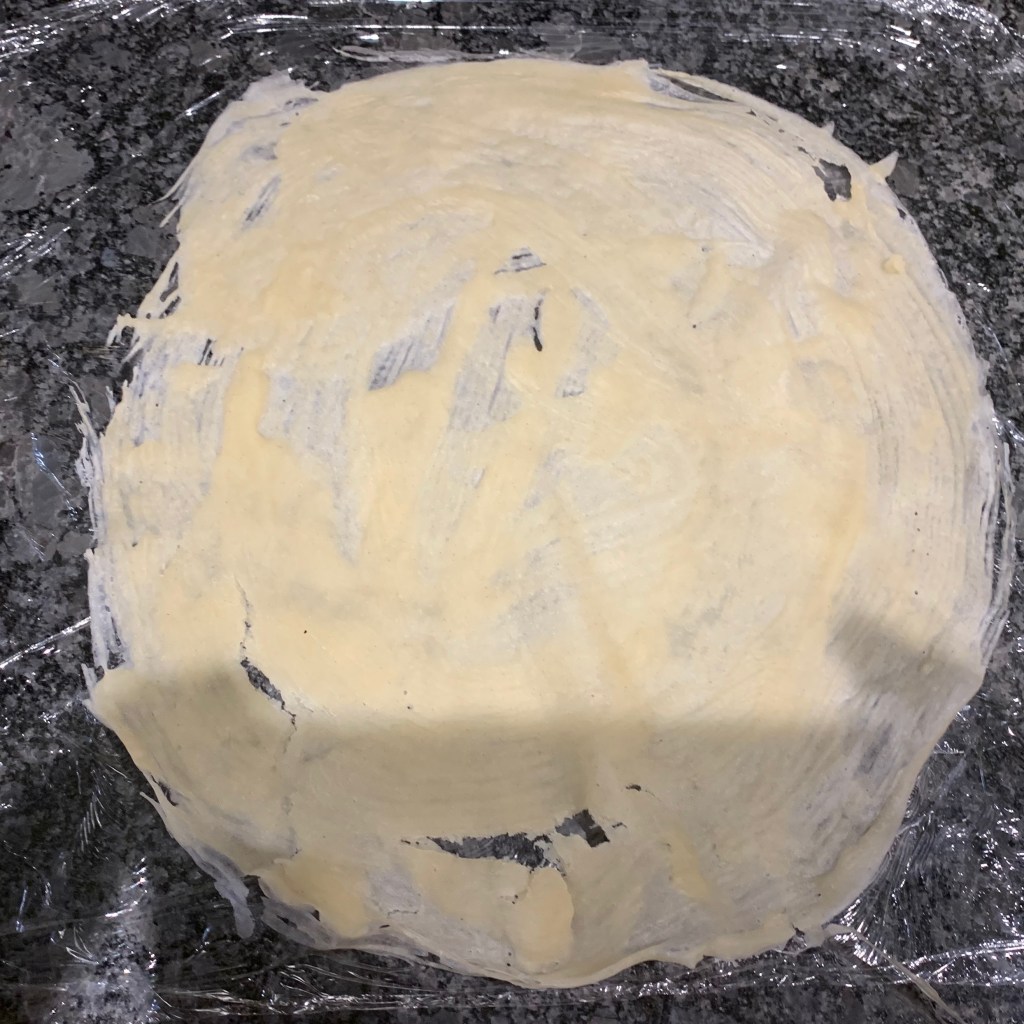
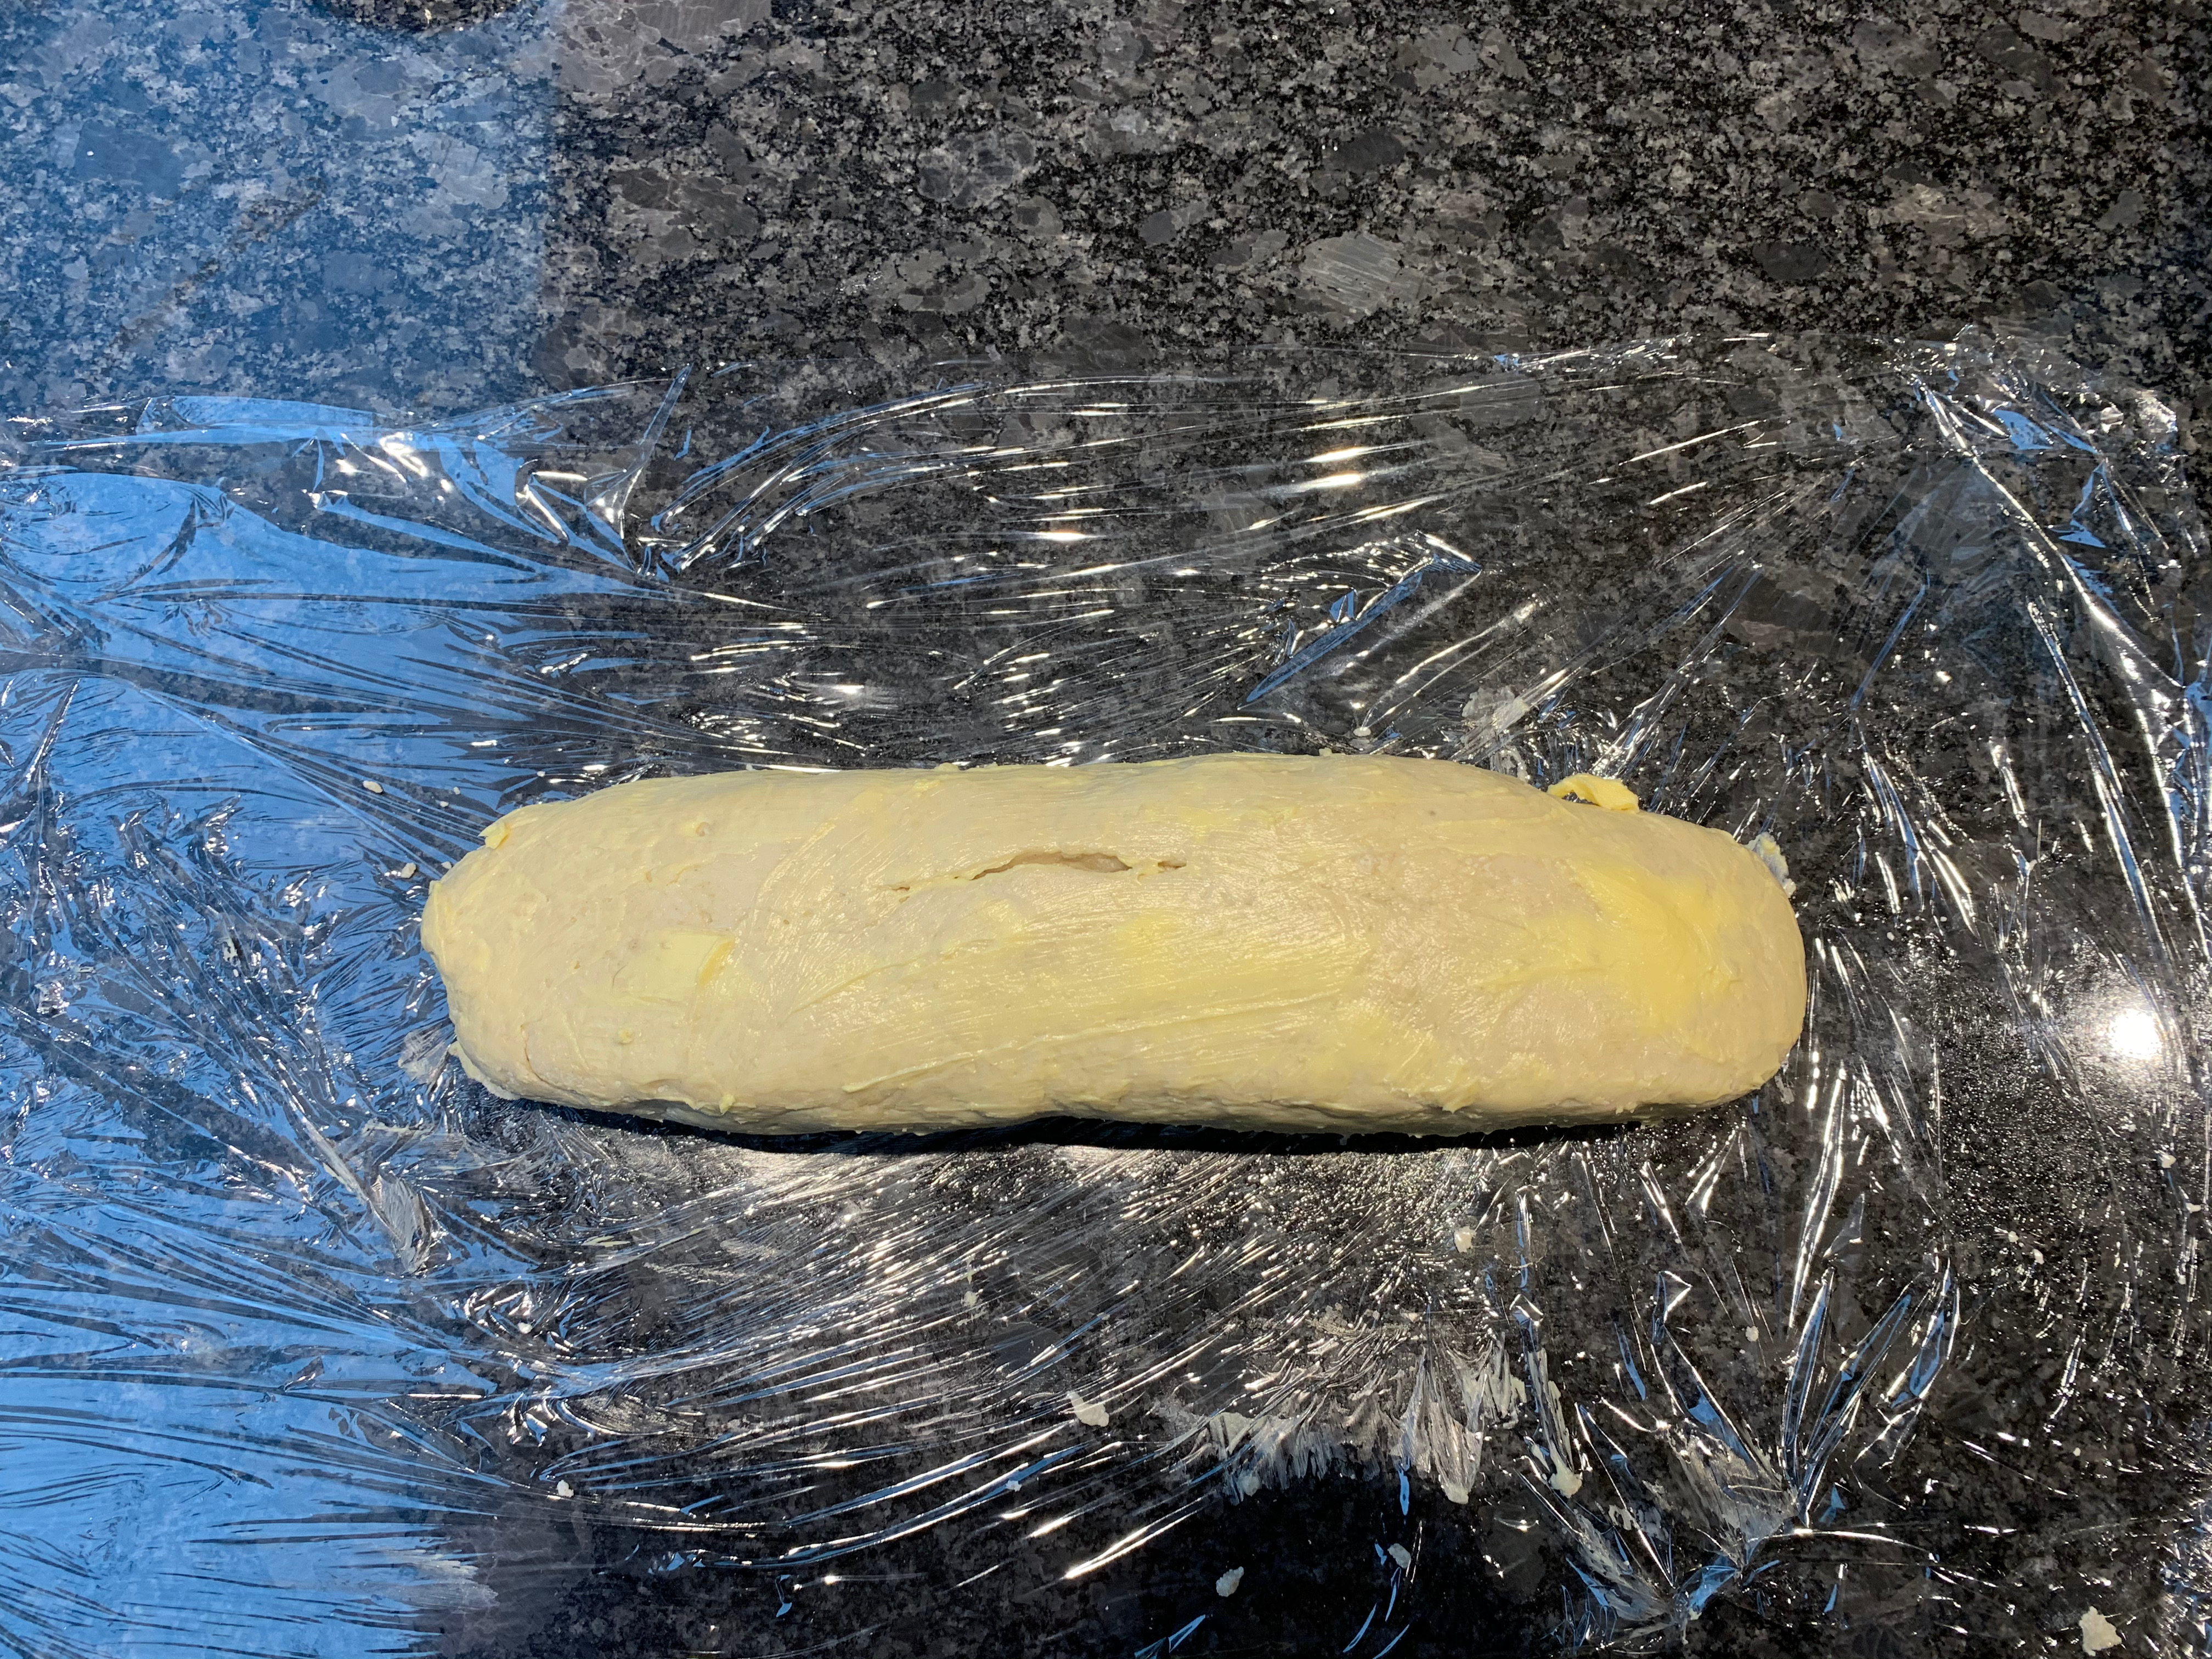
Form your dough into a thick cylinder, spread with shortening, wrap with cling film and leave to rest for around 30 minutes.
Roll the cylinder into a reasonably long and thin rectangle, spread with more shortening on both sides, place cling film over the top and rest again for another 30 minutes.
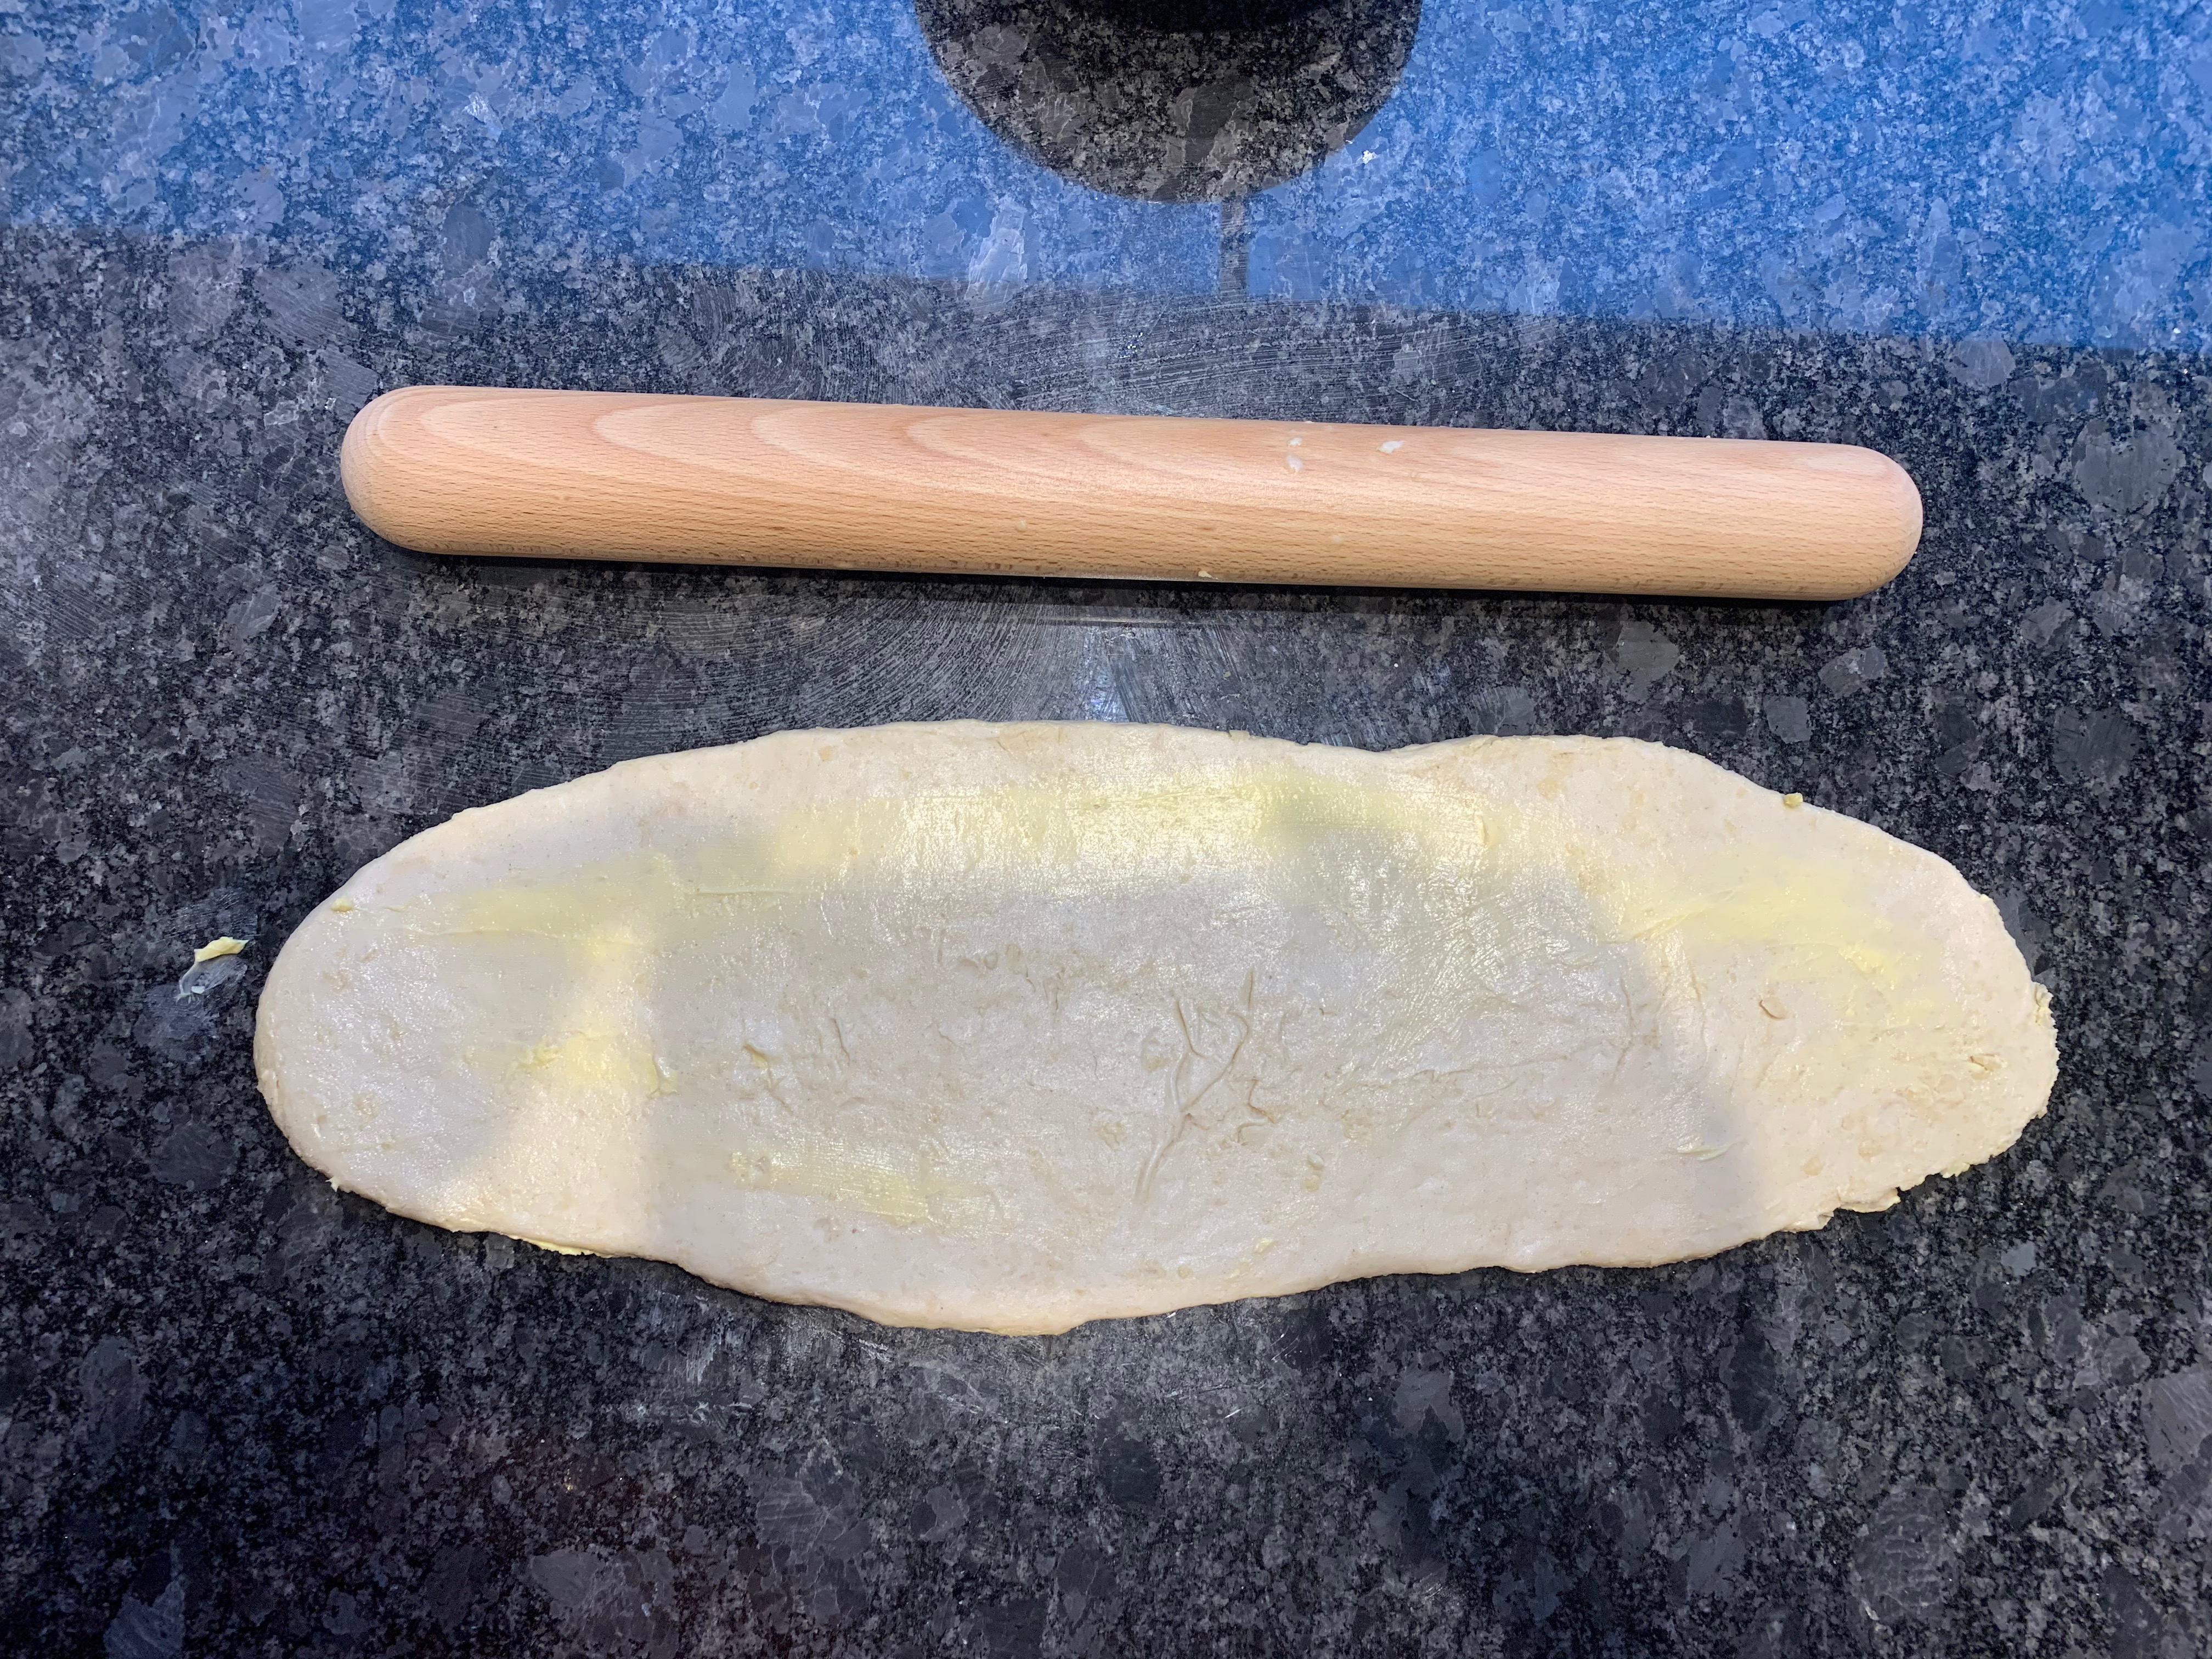
Now roll the dough as thin as you can possibly make it – still in a long, rectangle. Spread with shortening over the top.
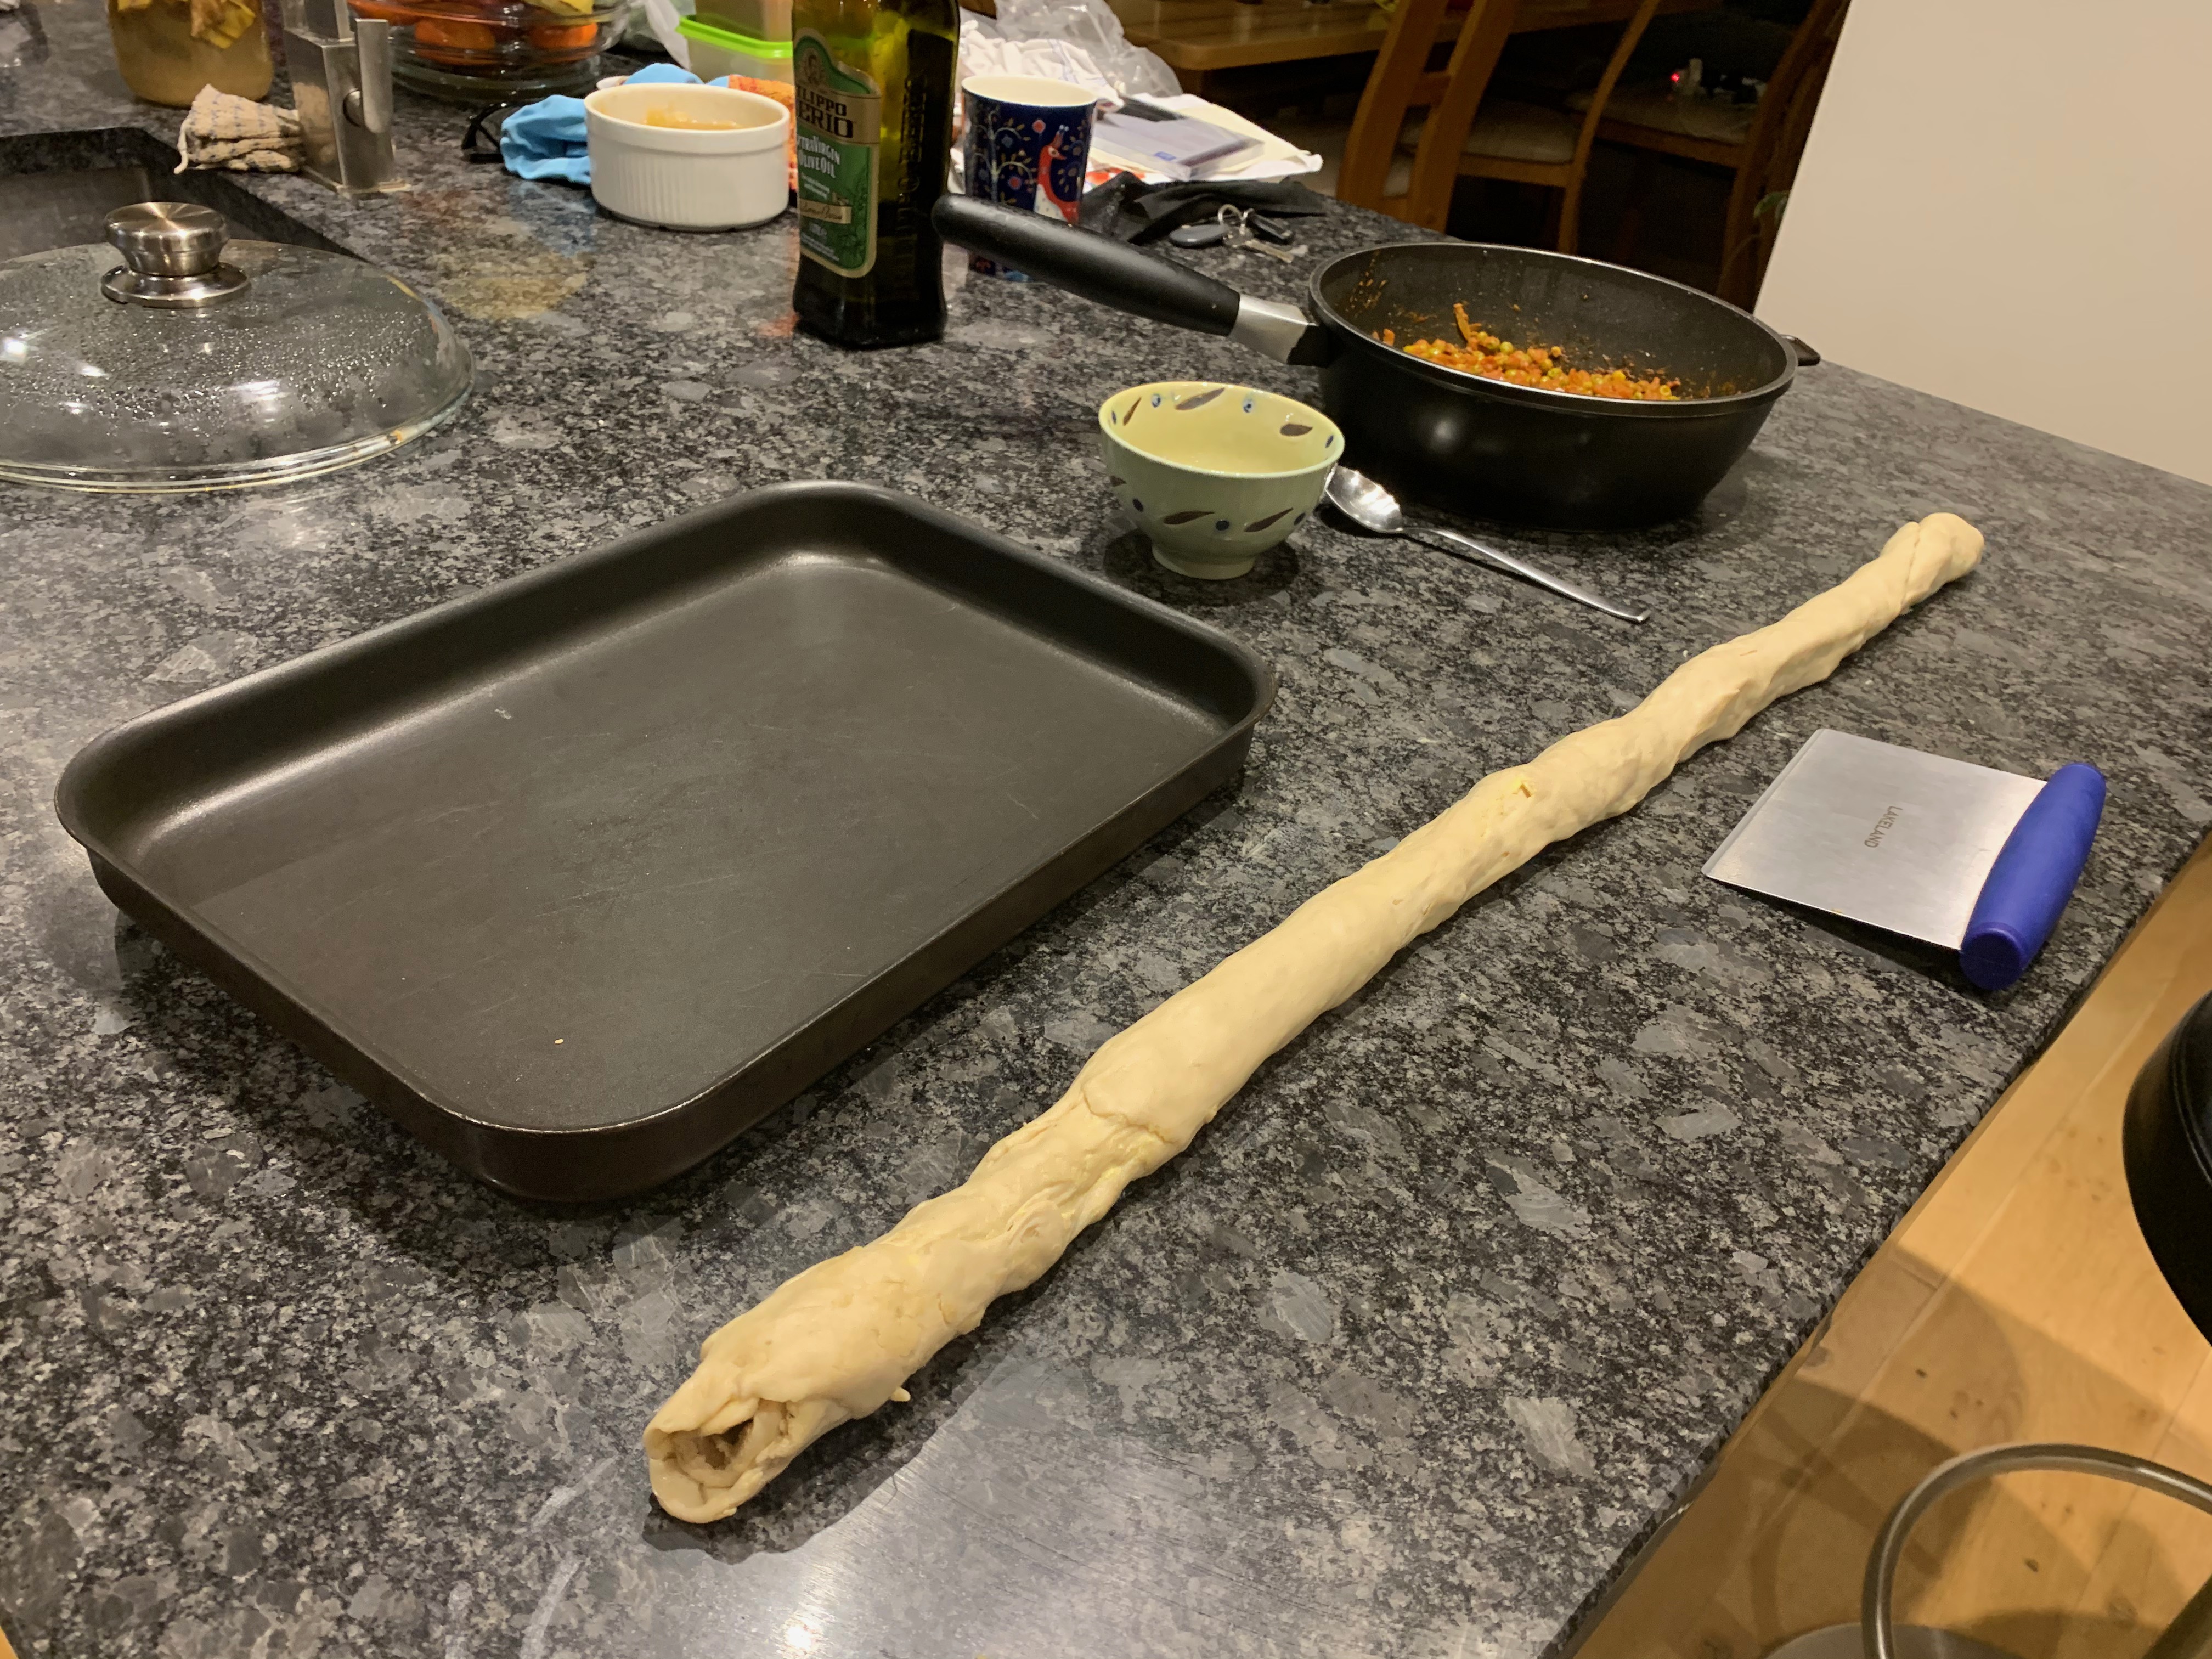
Starting from one end, roll your dough into a long cigar shape, pulling the pastry as you go and making sure you get all the air out. You will need to go from side to side and back again, pulling and rolling. Leave to rest for another hour or two. Towards the end of this, preheat your oven to 200℃ fan.
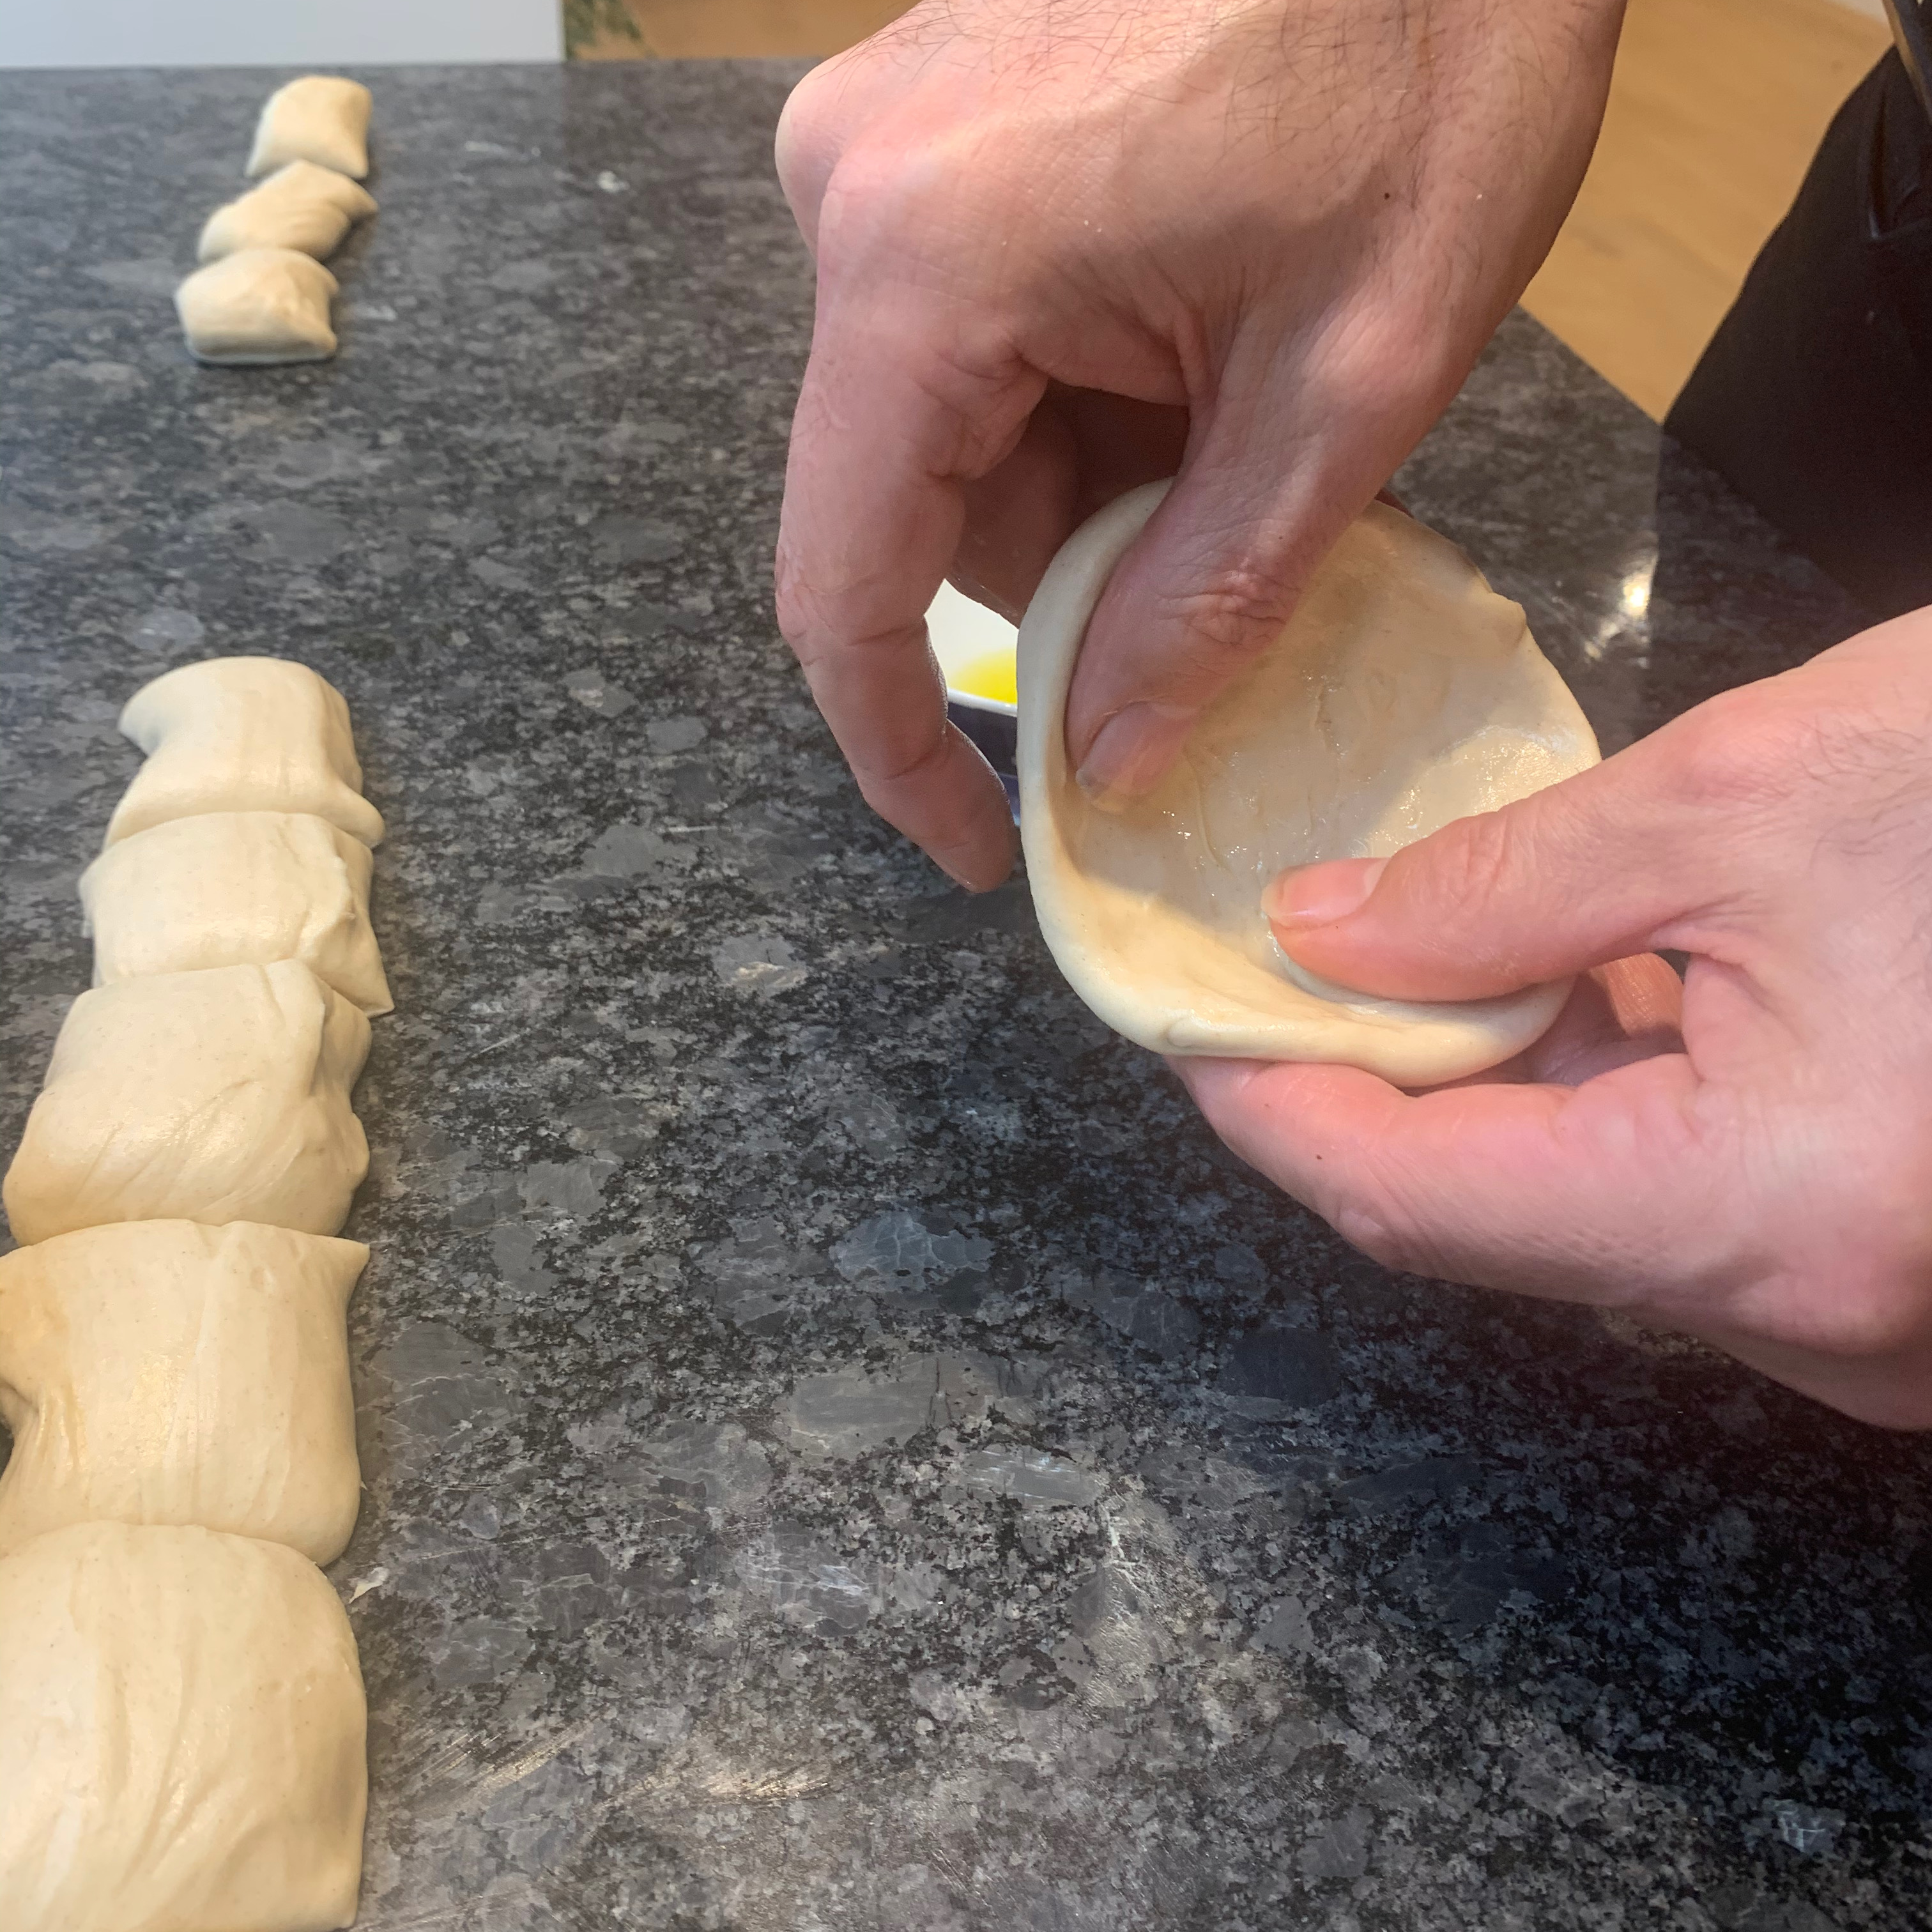
Pull your cylinder so that it’s now very long. Cut the resulting cylinder into around twelve pieces.
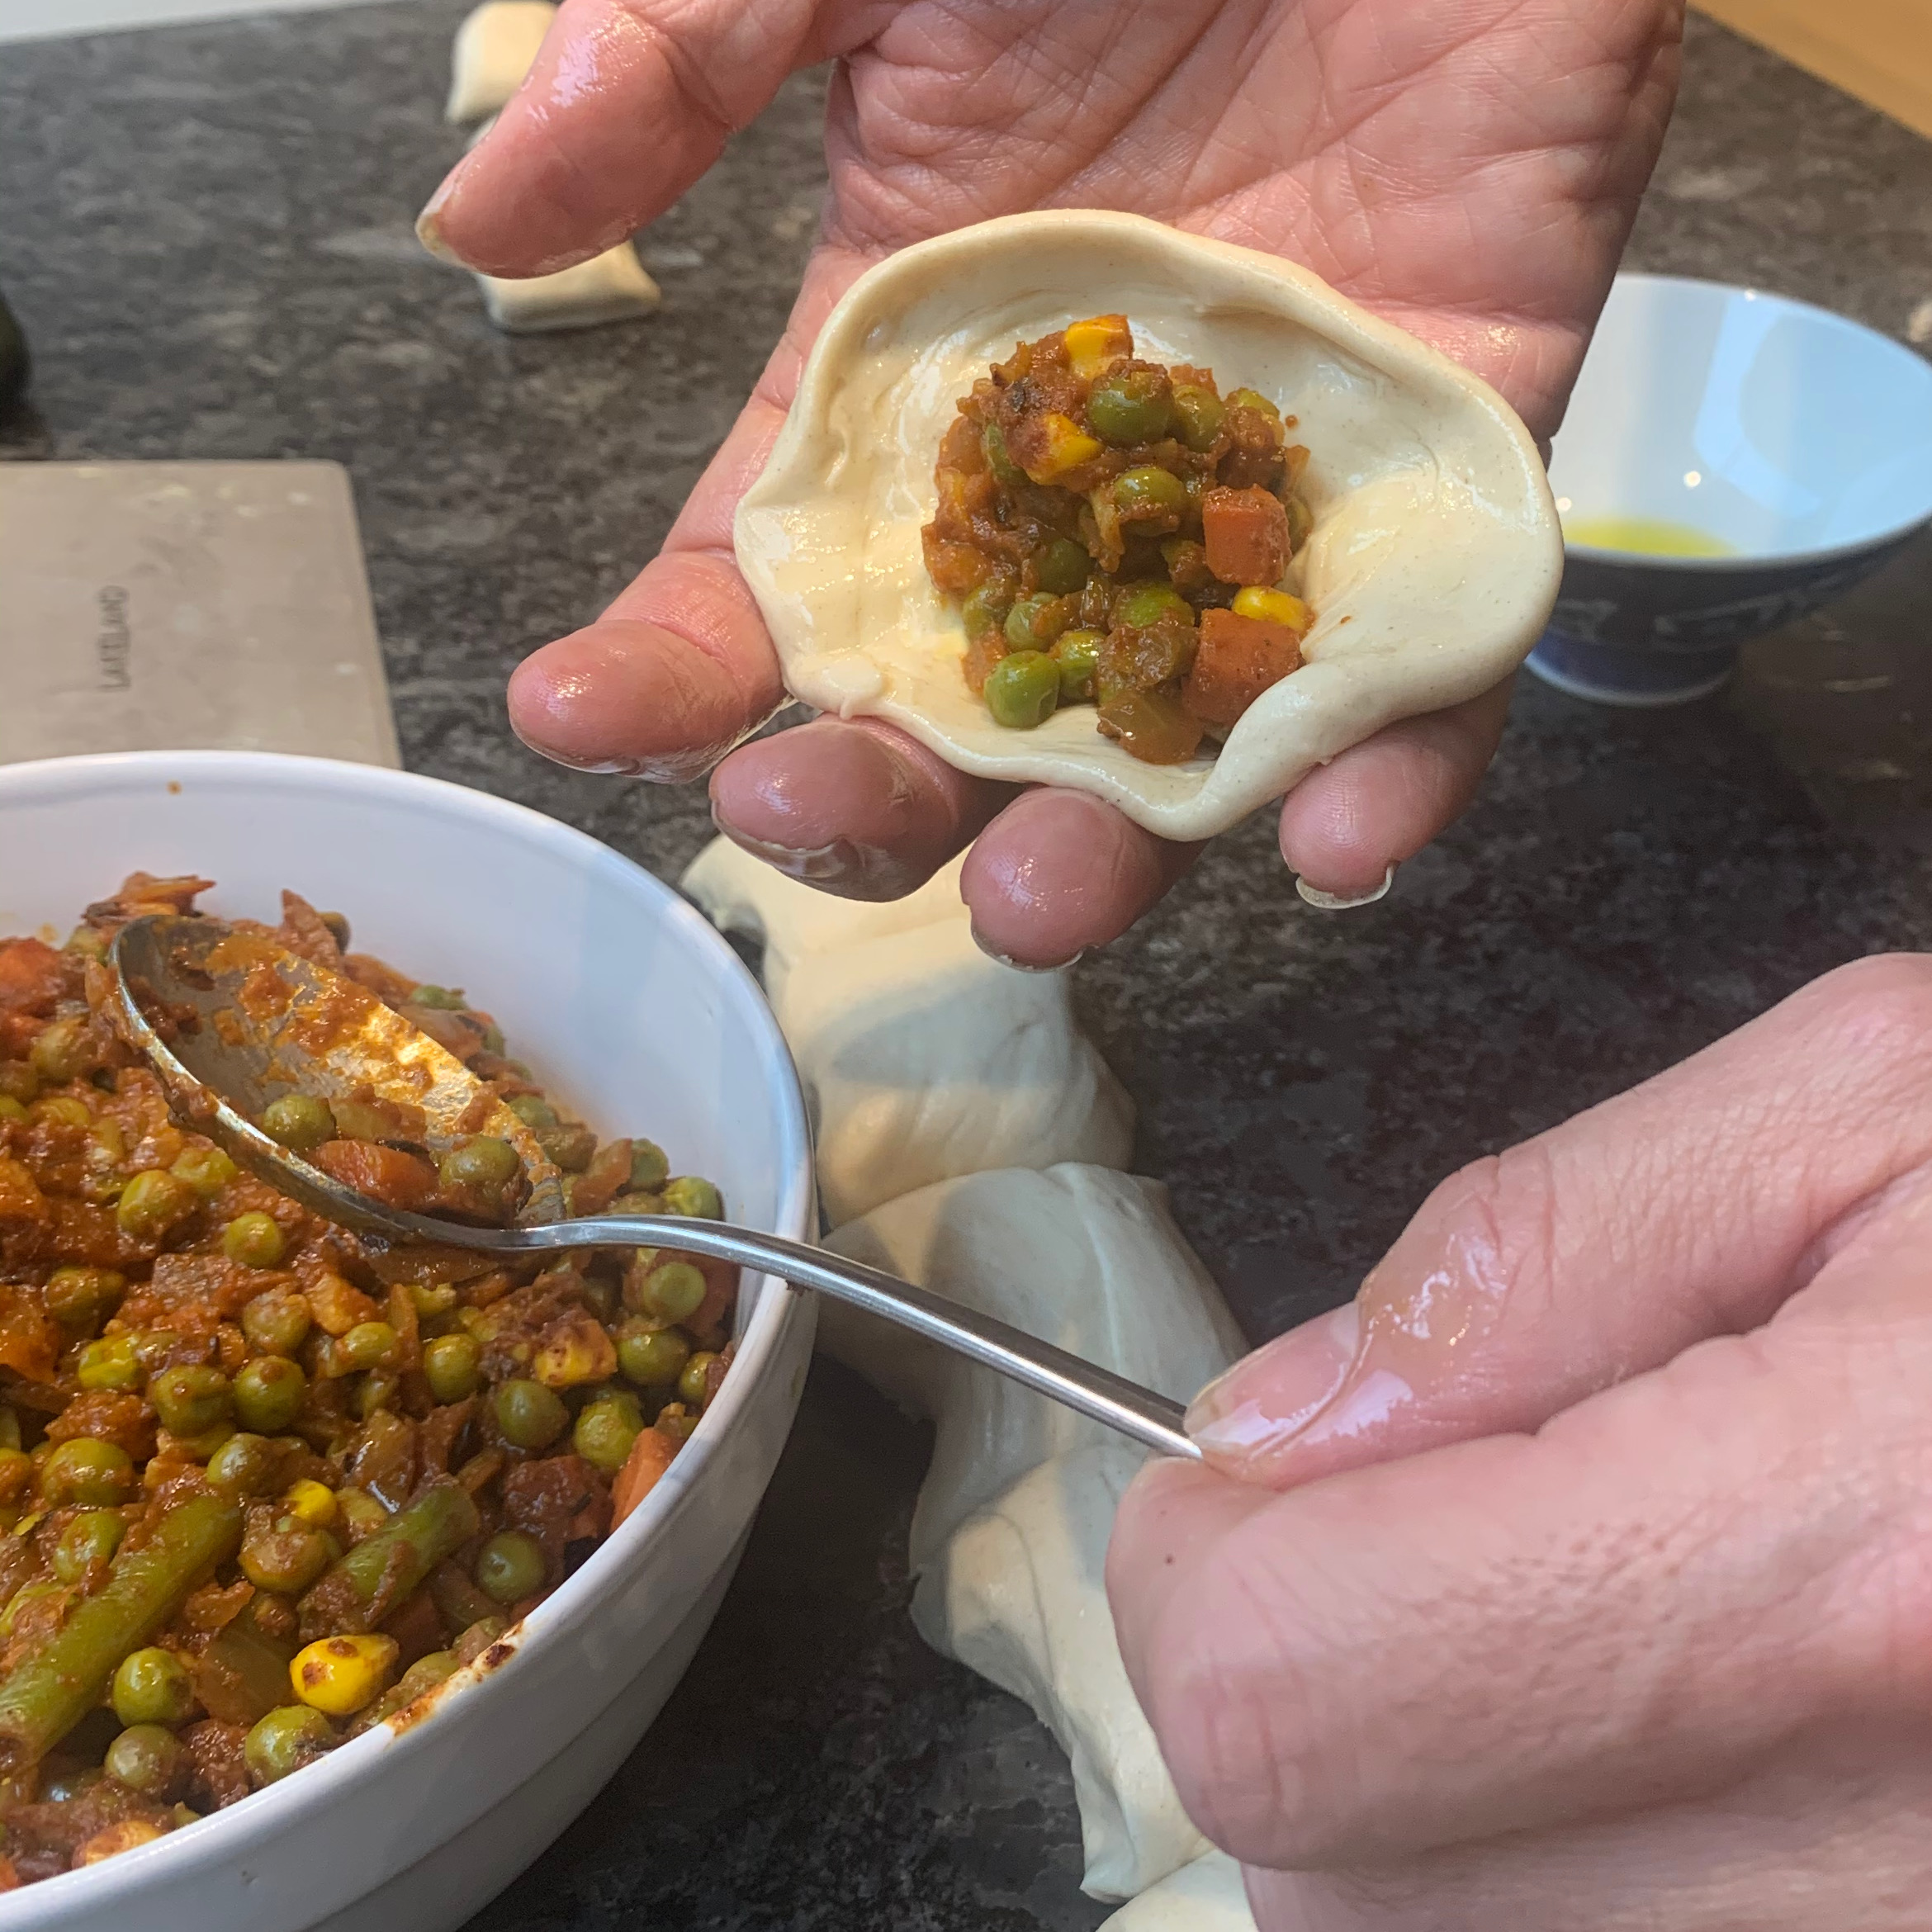
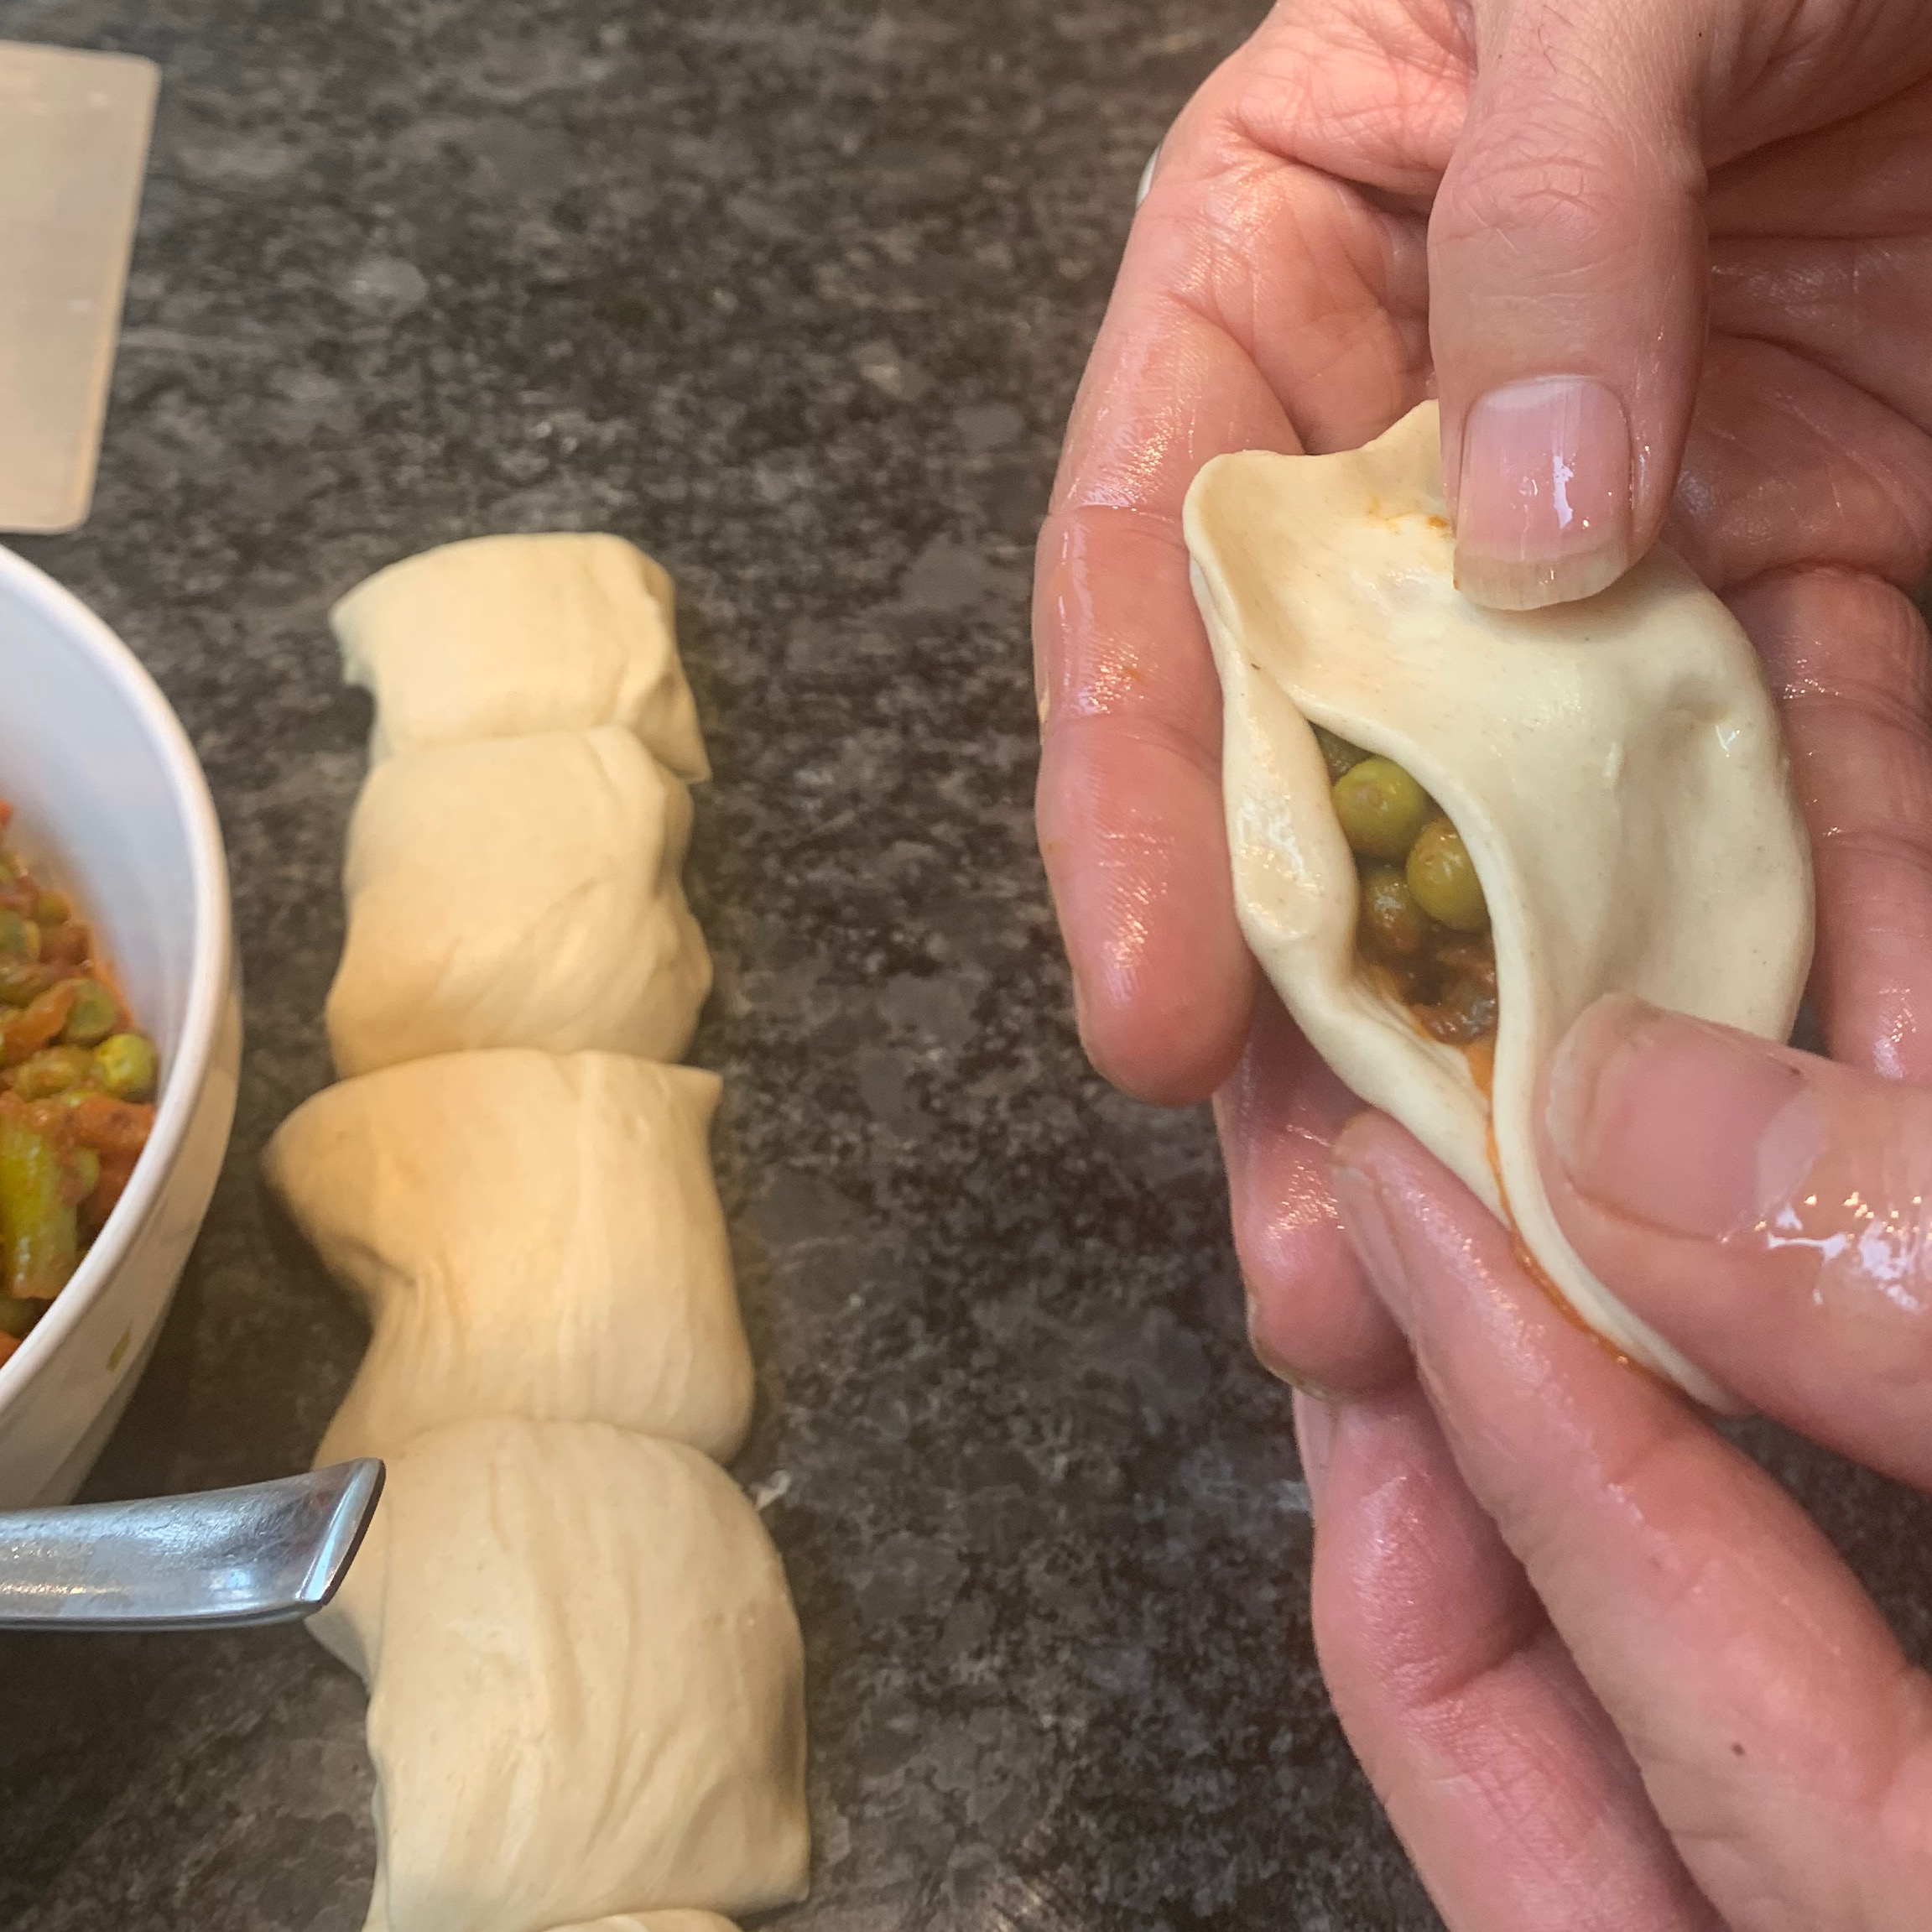
Have a small bowl of olive oil ready. Dip both thumbs in oil, then pick up a piece of dough, dig both thumbs into one end and shape and stretch it into a cup – this may or may not remind you of primary school pottery classes.
Flip the cup inside out (so that the bit with the olive oil is on the outside, spoon a dollop of filling into it, and pinch the outside together to seal. When it’s done, put it on a baking tray, lying it roughly flat (don’t try to leave the seam pointing upwards). Repeat for the other eleven pastizzi.
Bake for around 30 minutes. Take out of the oven when golden (and, we hope, flaky).
While leaving to cool, attempt to sing Maltese folksongs. Or not.
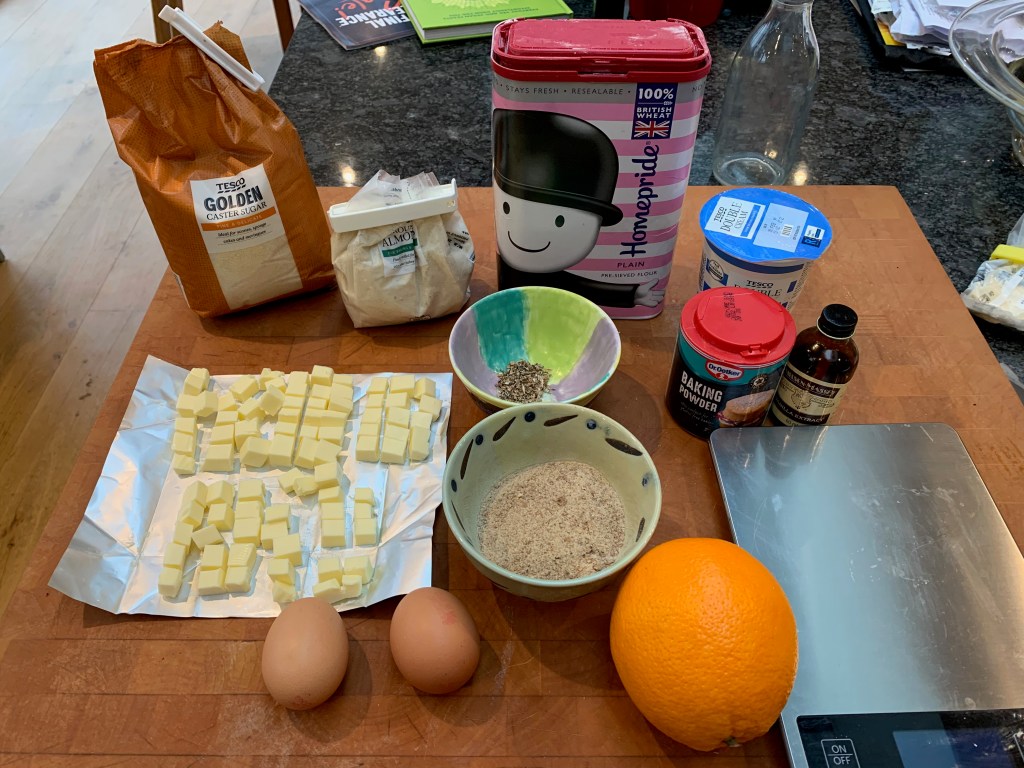
The weather in London today has been unremittingly grey with continuous drizzle, reminding me of a trip to Savonlinna in Finland, which is also the country which provided us with the biggest northern hemisphere rainstorm of our lives. So here, in homage to Finland and in honour of the poet Johan Ludvig Runeberg’s birthday next week, are Runebergintorttu or Runeberg Cakes.
To be fair on my many Finnish friends and on Savonlinna, which is a truly fabulous festival set in an impossible atmospheric mediaeval castle, it’s drop-dead gorgeous when the sun comes out (which it did the following day). And the Finns have a lot going for them, not least the best rainproof gear I’ve ever bought and also the best loudspeakers on the planet (with all those forests, the Finns really know their wood) and a surprisingly dry sense of humour (opera lovers need to check out Covid fan tutte).
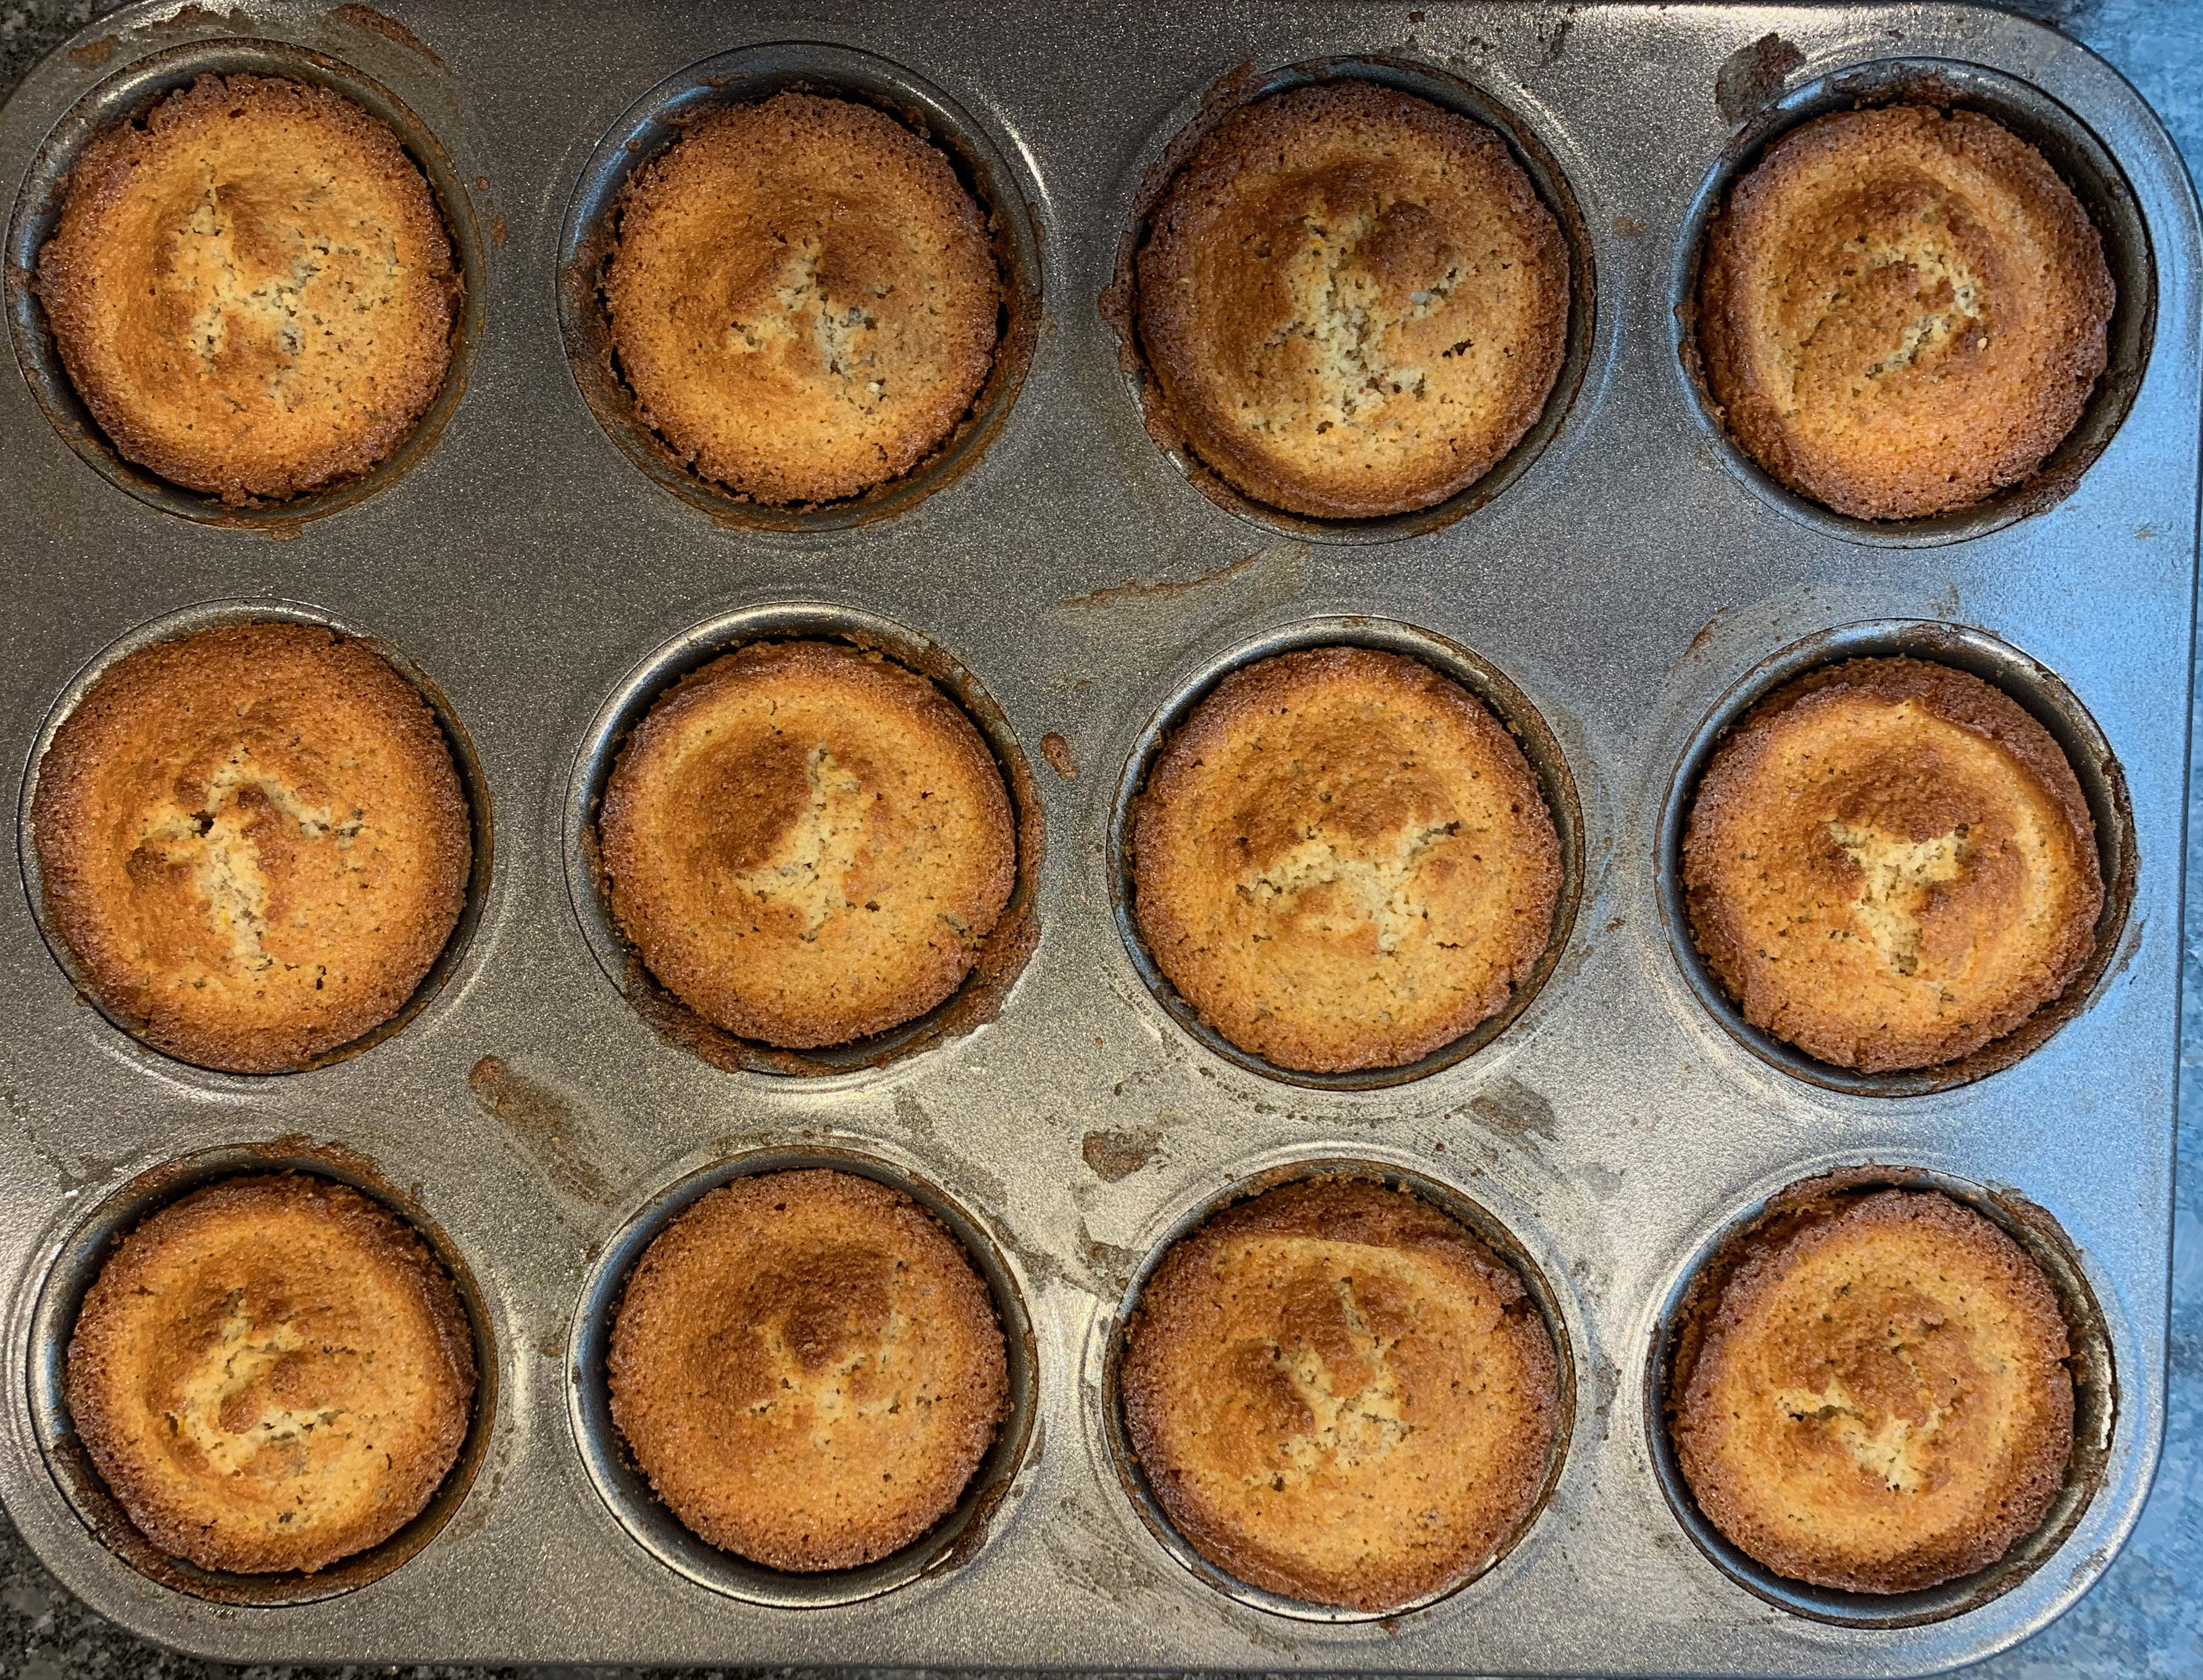
One note on the photos: I don’t have the tall cylindrical moulds that you need to make Runebergintorttu properly, so mine are baked in a standard muffin tin. But they taste the same… If that level of authenticity bothers you, this is the kind of thing that should work.
I started with a recipe from scandikitchen.co.uk and only changed a few things: I couldn’t get hold of Leksands crispbread, but I did find some dark Ryvita which I believe to be pretty similar. I used blackberry jam rather than raspberry. Vanilla essence is easier to find than vanilla sugar in these parts. I didn’t have any amaretto either, so I grated the zest of the orange that made the orange juice and added that. Personally, I think the combination of orange, cardamom and rye turned out to be an absolute winner.
125g butter, plus some for greasing
50g ground almonds
100g plain flour
6g (1 tsp) baking powder
2g salt
50g crispbread (Leksands, Ryvita or whatever), or just use breadcrumbs
80g caster sugar
1 whole egg plus 1 egg yolk
100ml cream
50ml orange juice, plus zest of the orange
Vanilla essence to taste
80g icing sugar
Raspberry jam (or, in my case, blackberry jelly) to finish
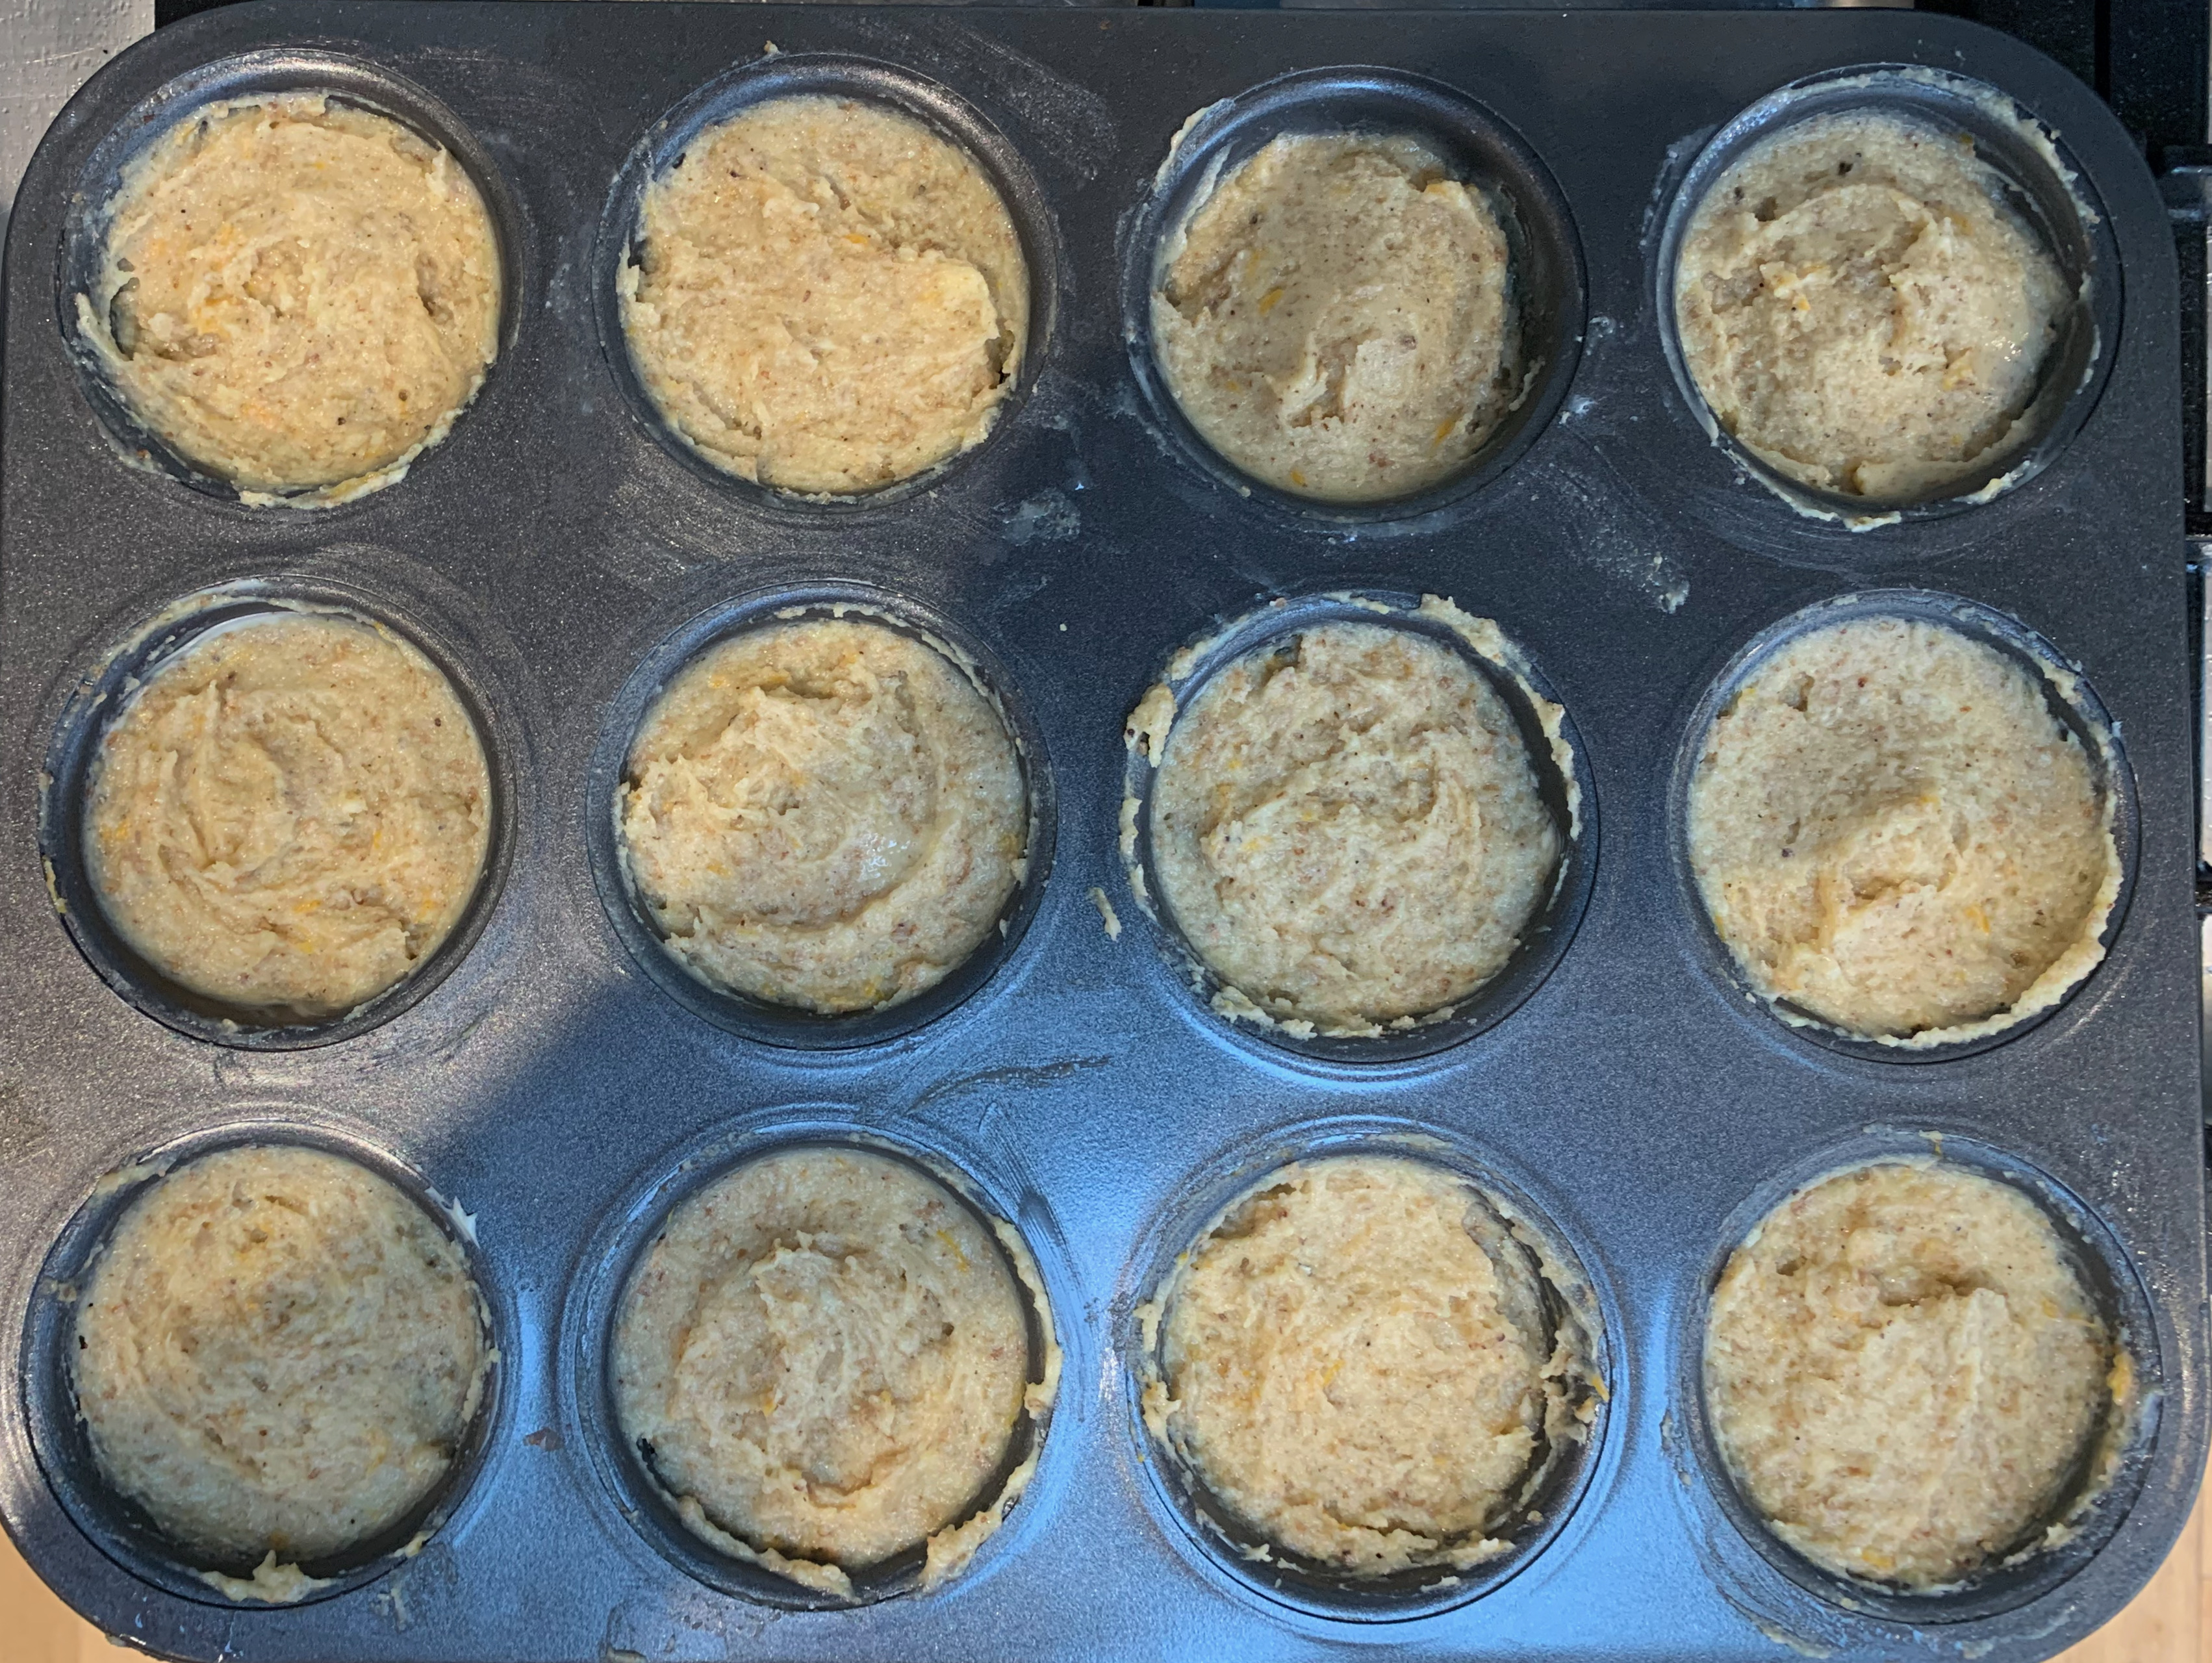
Preheat oven to 180℃ fan.
If your butter isn’t soft, cut it into small cubes and leave to soften.
Grease your muffin tin (or other cake mould) with some more butter.
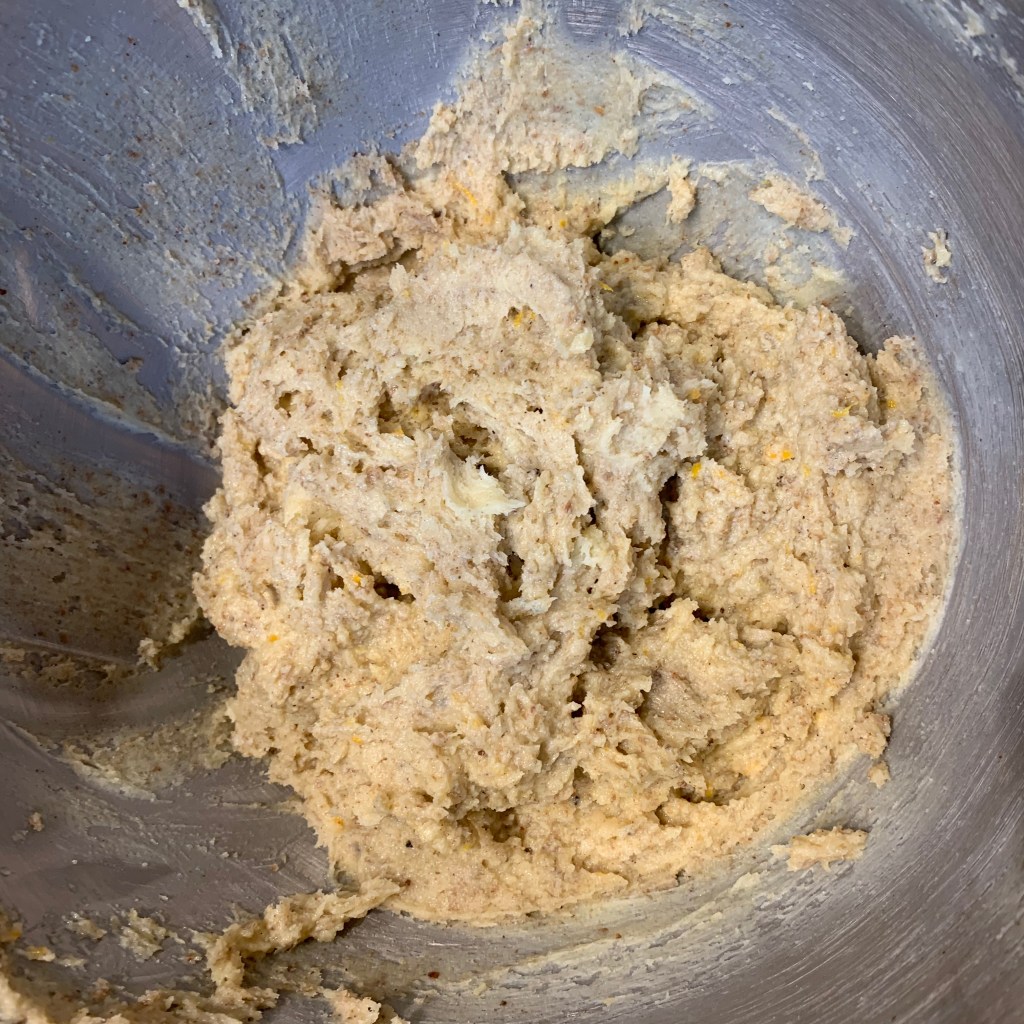
Mix your flour, baking powder, ground almonds and salt.
Grind your crispbread into breadcrumbs
Cream the butter and sugar together
Add the eggs and mix
Add the flour mixture and combine
Add the breadcrumbs and cream and combine
Add the orange juice, zest and vanilla essence and mix thoroughly. You should now have a fairly thick, sticky batter.
Divide the batter into the moulds in your cake tin.
Bake for around 15 minutes.
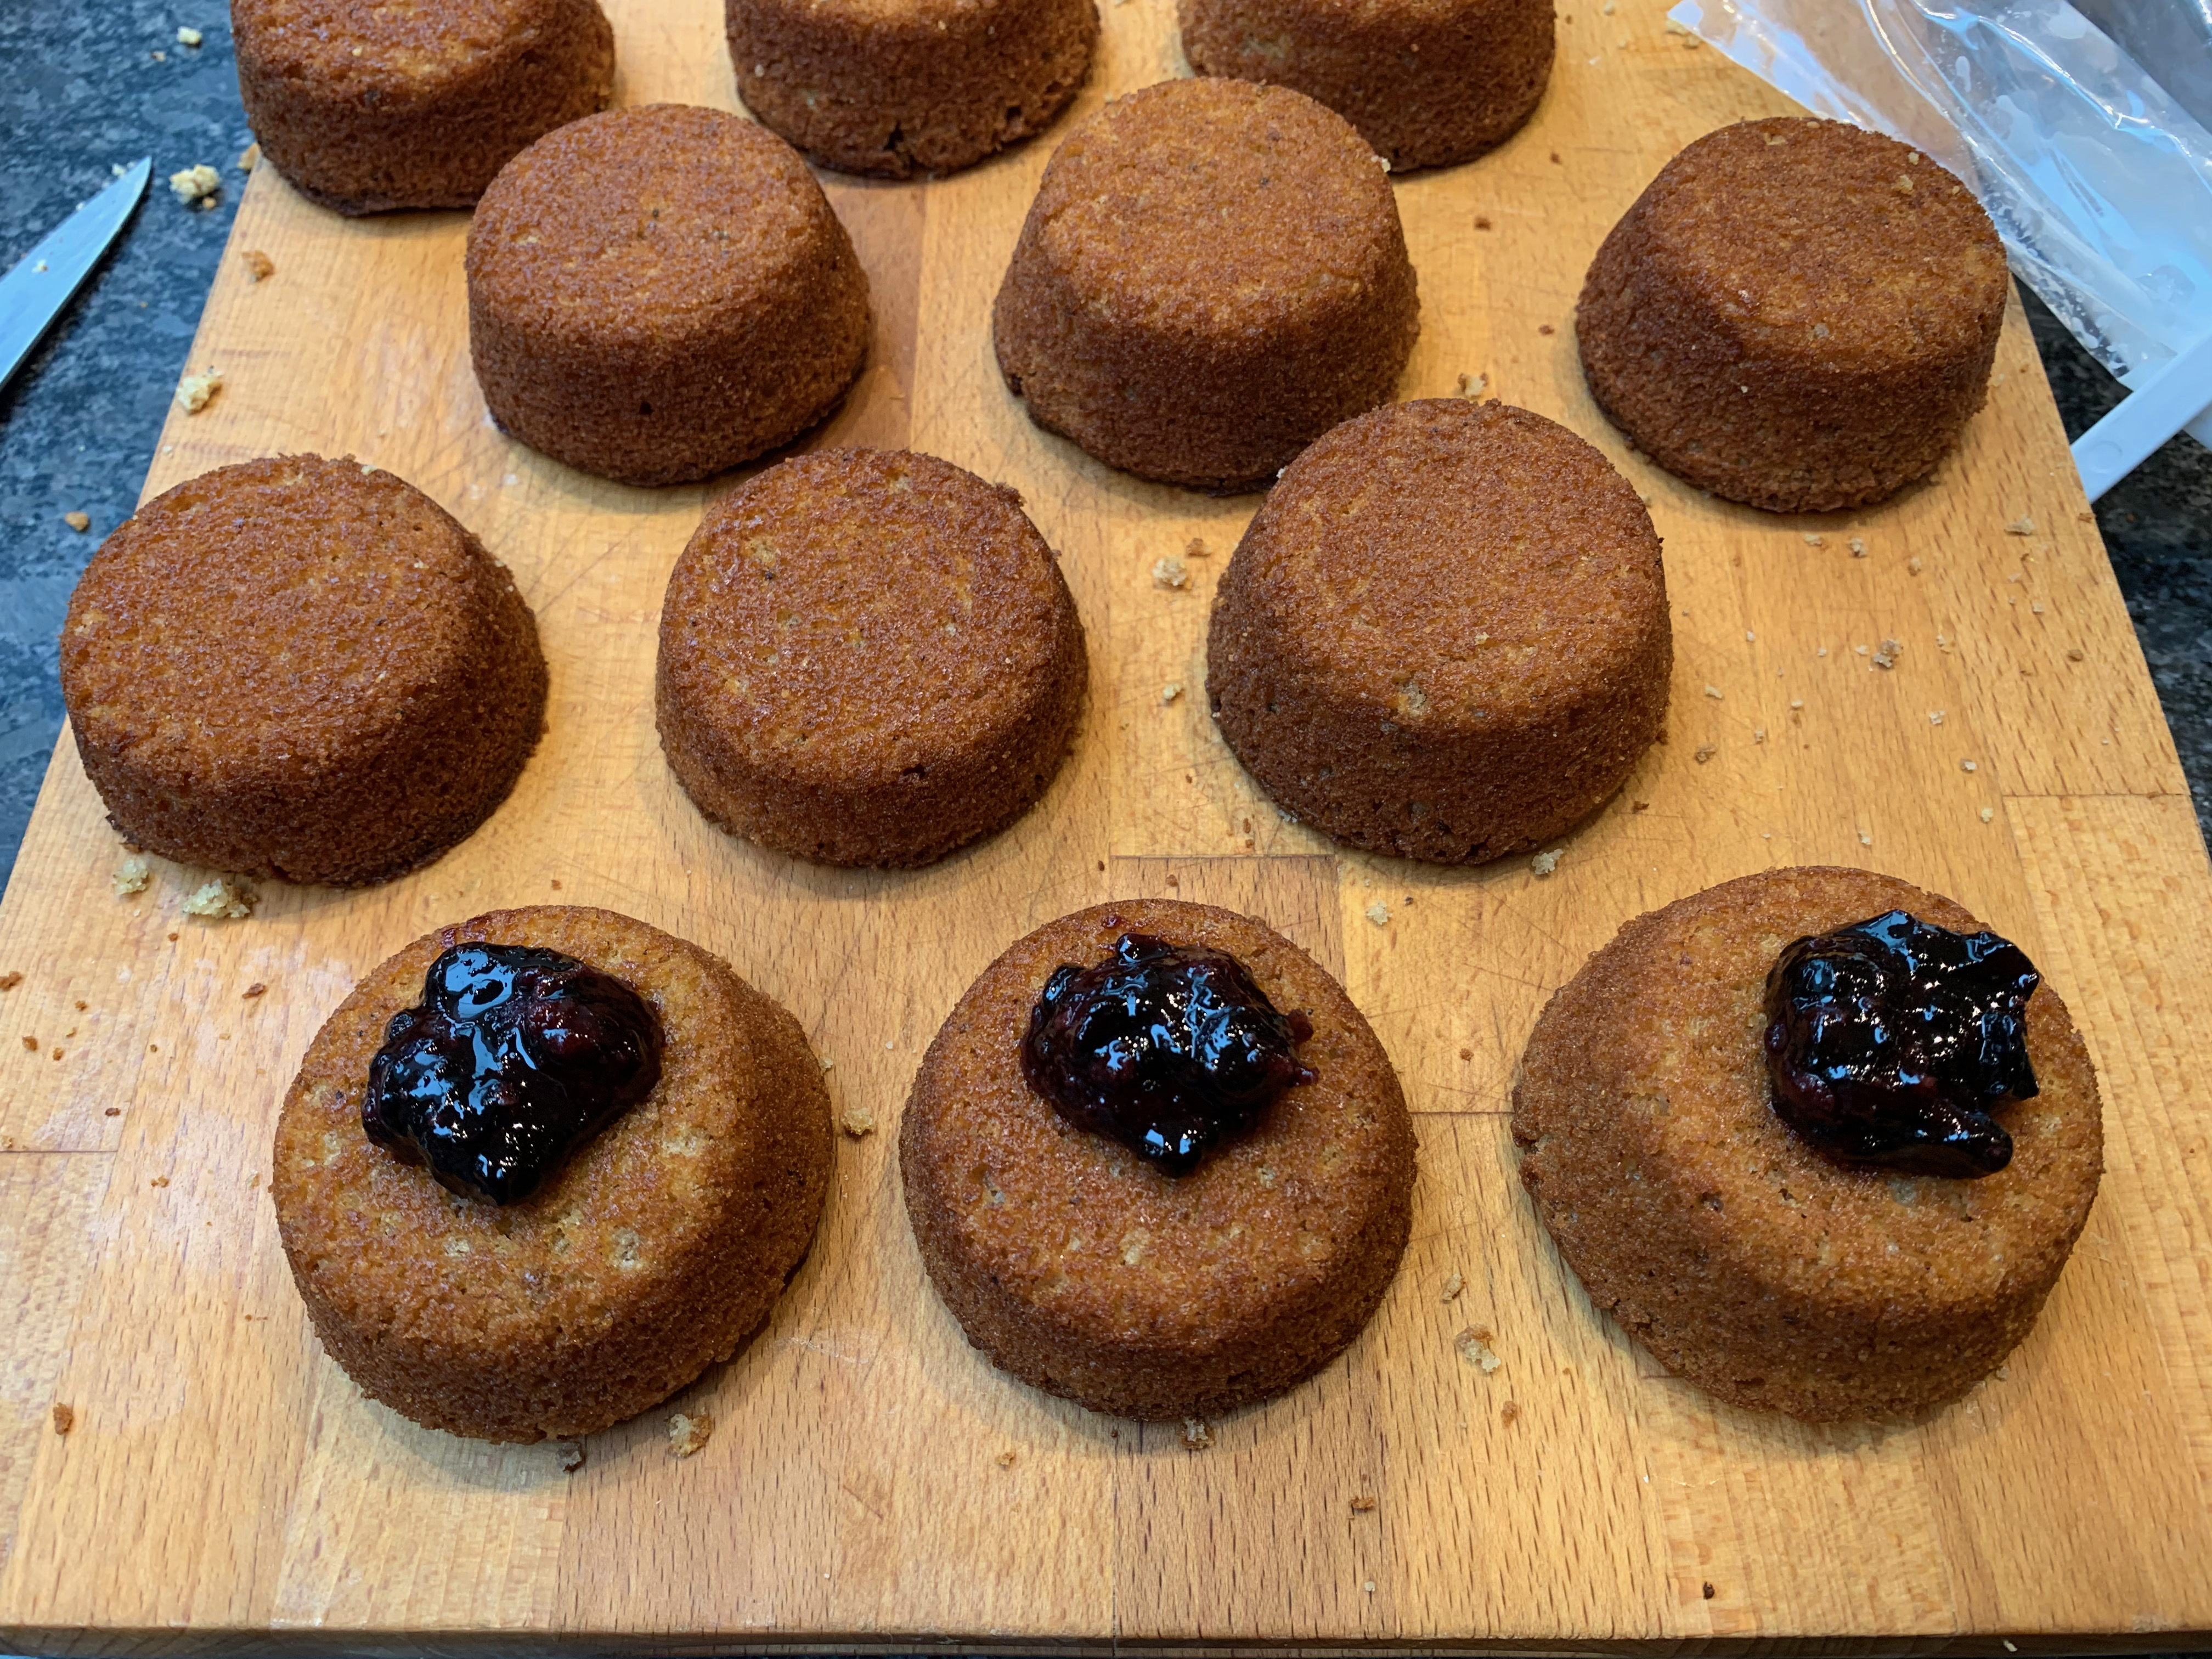
Leave to cool in the tin for a short while, then turn them out.
You will serve the cakes upside down. Since they have probably domed somewhat, cut them reasonably flat so that they stand upright.
Mix the icing sugar with about 10ml warm water until you have a thick paste. Transfer this to a piping bag.
Pipe a circle of icing around the top of each cake. Put a dollop of jam into the middle of the circle. I found this easier than the original recipe, which suggests doing the jam first (as per the photos).
Leave the icing to dry (or don’t bother) and enjoy!
Continuing with the Austro-Hungarian Empire’s coffee-and-cake tradition, here’s a cake from Croatia that deserves to be close to the top of the best-seller list, particularly with a coffee after a brisk morning winter walk (I speak from immediate experience).
In point of fact, Mađarica (or Madjarica, if you prefer to avoid the “d with stroke”) is the Croatian word for “Hungarian girl”, and the cake bears a distinct resemblance to the Hungarian Dobos torte, created in 1885 for the National General Exhibition of Budapest. Who knows (or, for that matter, who cares) which came first?
Croatians seem to bake this cake for the thousands: all the recipes I came across were for seriously large quantities. I went for this recipe from Tamara Novacoviç and halved it, which still made for a generous cake.
Mađarica is one of those multi-layer cakes where you’re trying to get the layers as thin as you possibly can. Croatian recipes tend to assume that you’re using a standard cake tin and baking the layers one at a time. Since you’re trying to make a rectangular cake, I figure it’s easier to use large flat tins (Swiss roll tins or similar) and then cut the layers to size after baking. Obviously, how you tackle this is going to depend on what tins you have available.
Filling
25g plain flour
25g cocoa powder
500ml milk
100g sugar
vanilla extract or paste to taste
25g dark chocolate
90g butter
½ tbsp rum
Mix the flour and cocoa powder in a bowl and set aside. Have a balloon whisk ready.
Put the milk, sugar and vanilla into a saucepan and bring to the boil. When just boiling, take it off the heat, pour about a quarter of it into the bowl with the flour and cocoa powder, and whisk until thoroughly dissolved.
Pour the mixture back into the saucepan and return the saucepan to the heat. Add the chocolate, reduce the heat and keep whisking until the mixture thickens.
Take the mixture off the heat, give it a minute or so to cool slightly, then add the butter and whisk until thoroughly melted.
Stir in the rum.
Cover (to avoid too much skin forming – you can’t avoid having a bit) and leave to cool while you make the rest of the cake.
Cake layers
300g plain flour
½ tsp (2g) baking powder
1 egg white
90g sour cream
90 g sugar
90g butter, at room temperature
I’m going to confess at this point (in case it isn’t obvious from the photos) that I wimped out: I had two 33x22cm Swiss roll tins ready but I didn’t dare roll the dough thin enough to use more than one of them. I should have had the courage to use both – my layers are definitely twice the thickness they should be – so that’s what I recommend that you do.
Preheat oven to 180℃.
Prepare two 33cm x 22cm Swiss roll tins (or whatever other baking trays you have) by greasing them and lining them with baking paper.
Sift the flour and baking powder into a bowl.
Cut the butter into cubes and put it with the sugar, sour cream and egg white into the bowl of your mixer; beat until smooth.
Add the flour mixture and knead to a smooth dough. Add a bit more sour cream or water if your dough is too crumbly.
Now the tricky part: divide the dough into two, and roll each half thinly enough to spread out evenly over its baking tin. It’s probably easiest to do this by rolling the dough between two sheets of baking paper. Transfer your rolled dough to the tin.
Bake for around 8-10 minutes.
Leave to cool on a wire rack.
Assembly and glaze
50g dark chocolate
25g butter
20g sunflower oil (or other neutral oil)
Cut each cake/biscuit layer into three, using a ruler or measuring tape to make pieces that are as close to identical in size as you possibly can.
Place the first layer on your serving plate.
Spread around one fifth of the filling evenly over the layer, then add the next layer. Repeat this four more times to build up your cake.
Melt the chocolate and butter together (30s in a microwave should do this fine, if you can’t be bothered to wash up a double boiler).
Add the oil and mix thoroughly.
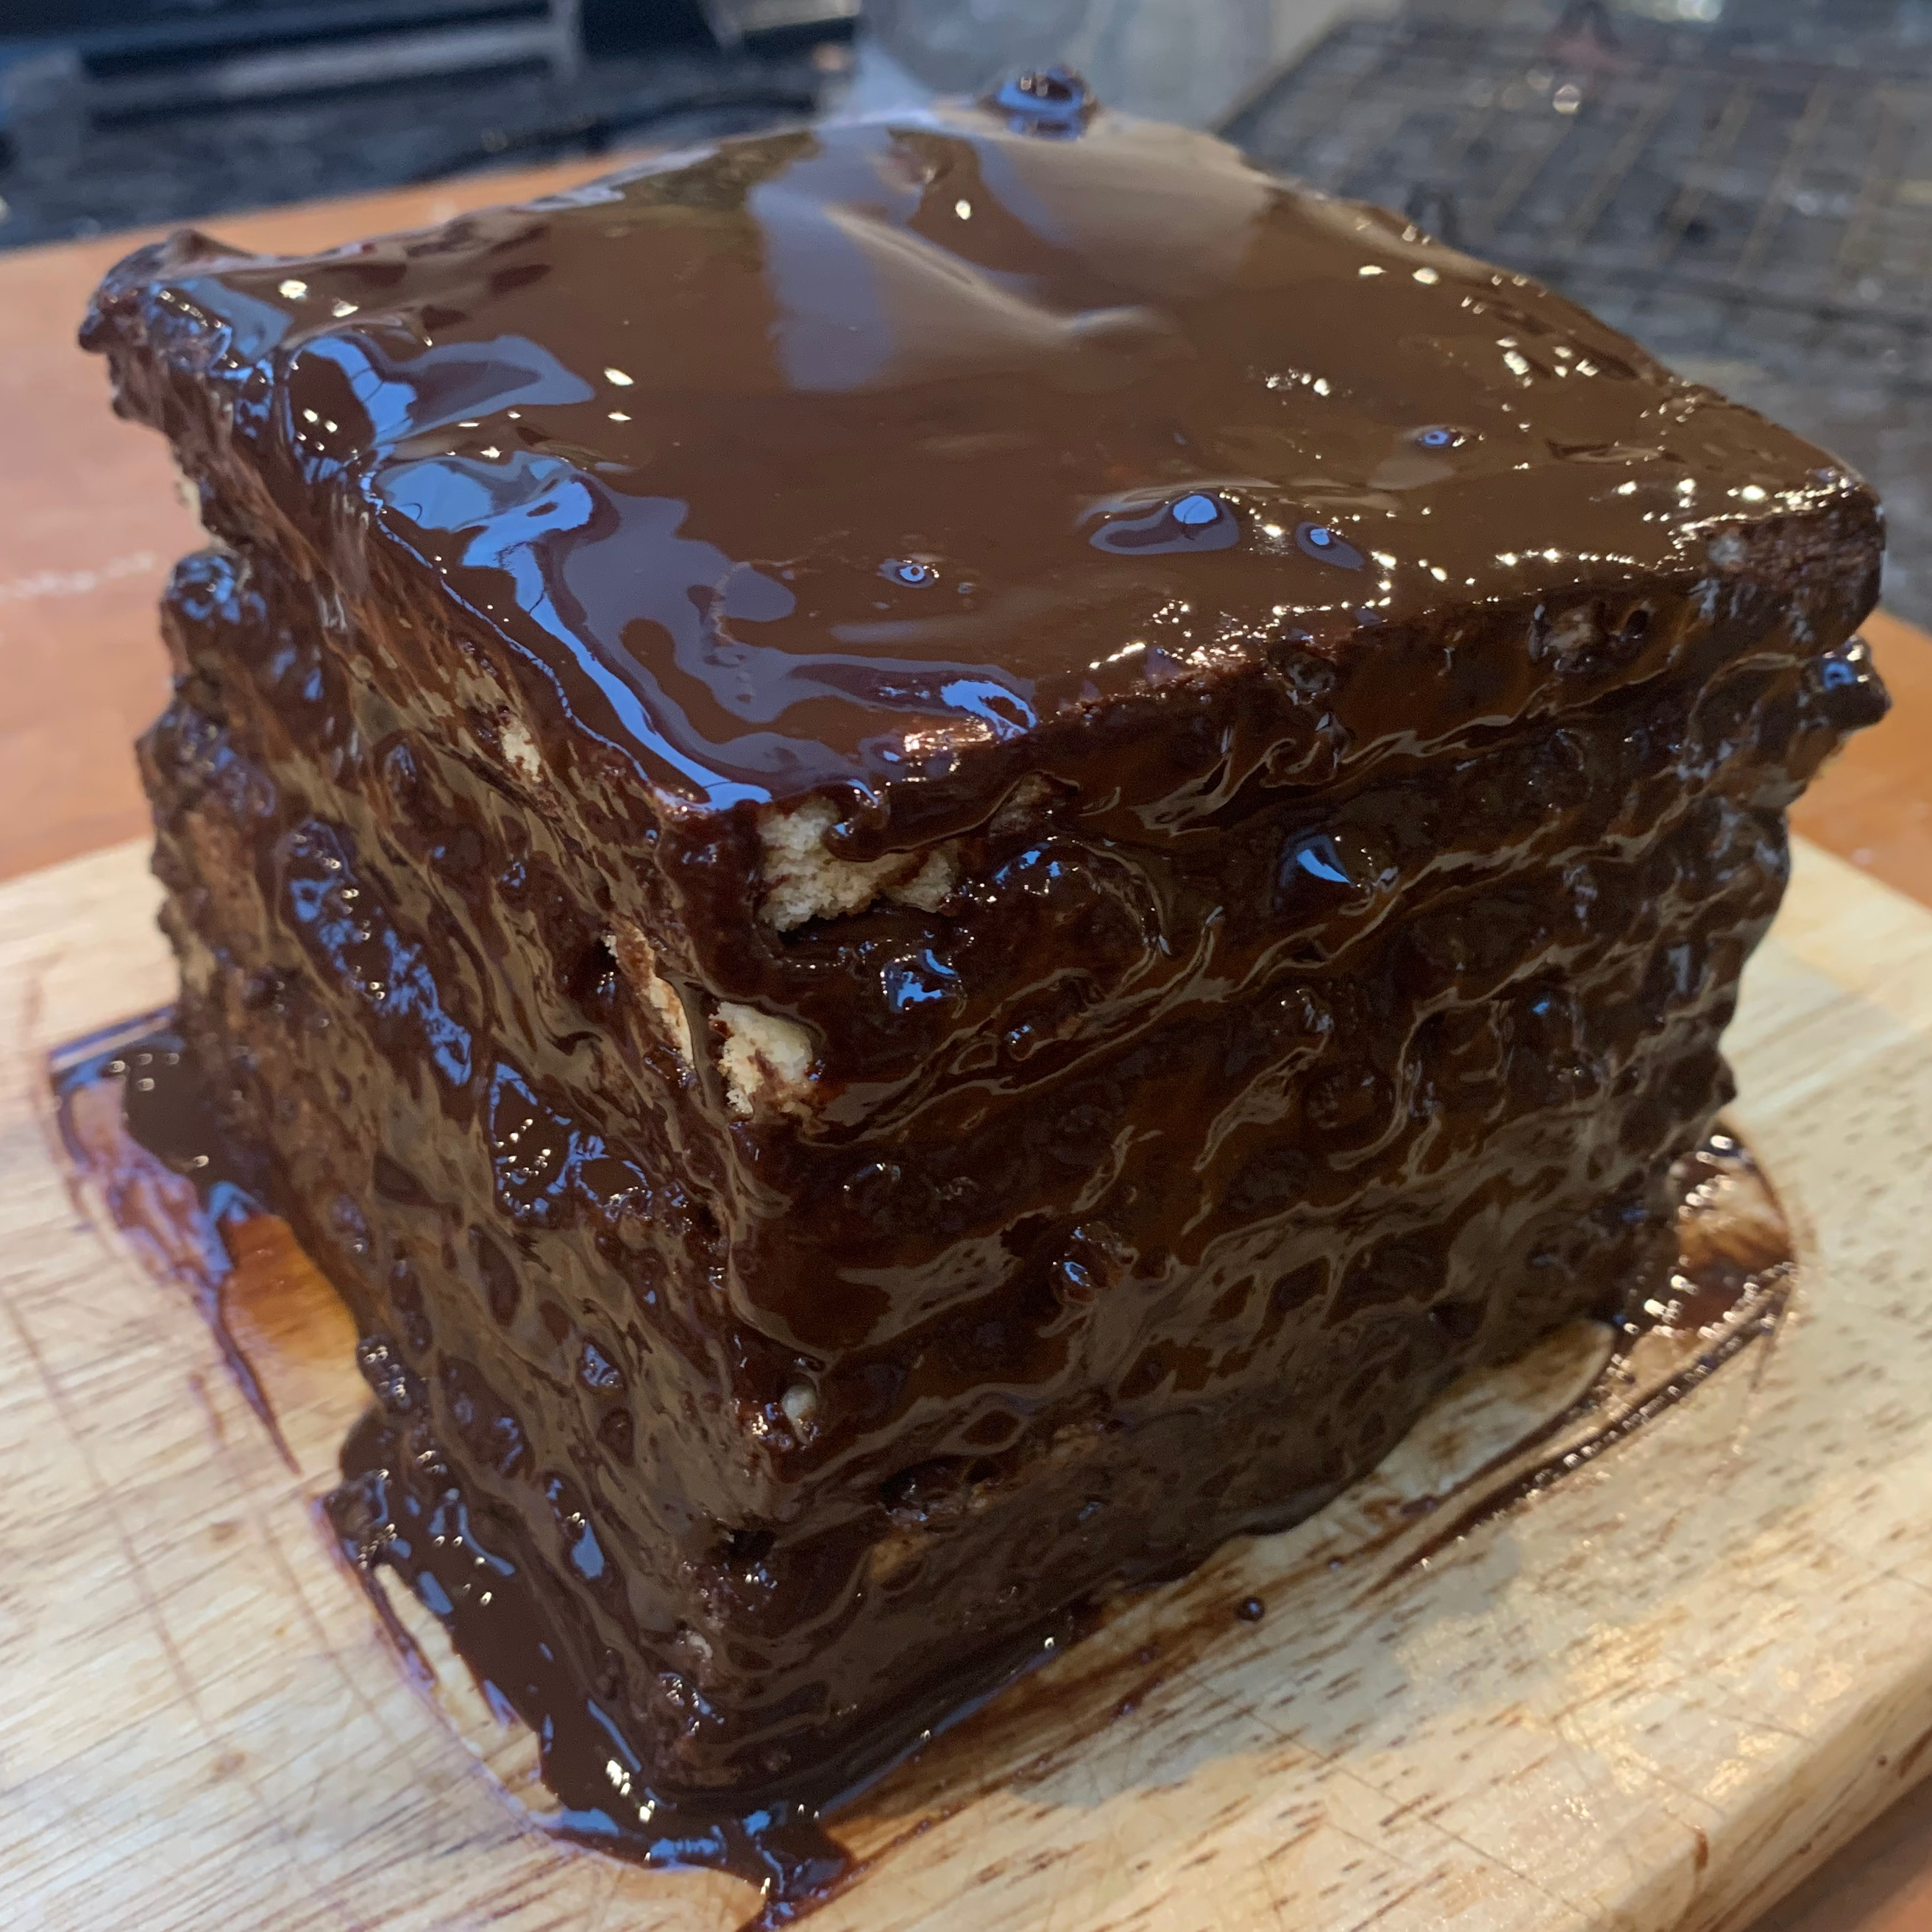
Pour the glaze over the top of the cake, making sure that you cover the whole cake with an even layer of glaze. Some of the glaze will have dripped over the sides: if you want, even this off with a palette knife.
Refrigerate for several hours (or overnight) until the glaze hardens.
Let’s start 2021 and the second half of this trip around the world with an easy, cheerful bake from the Czech Republic. Like every country in the former Austro-Hungarian empire, Czech has a strong coffee-and-cake culture, and the bake that you see everywhere is a light cake made with fresh fruit called Bublanina – a close relative of the French clafoutis.
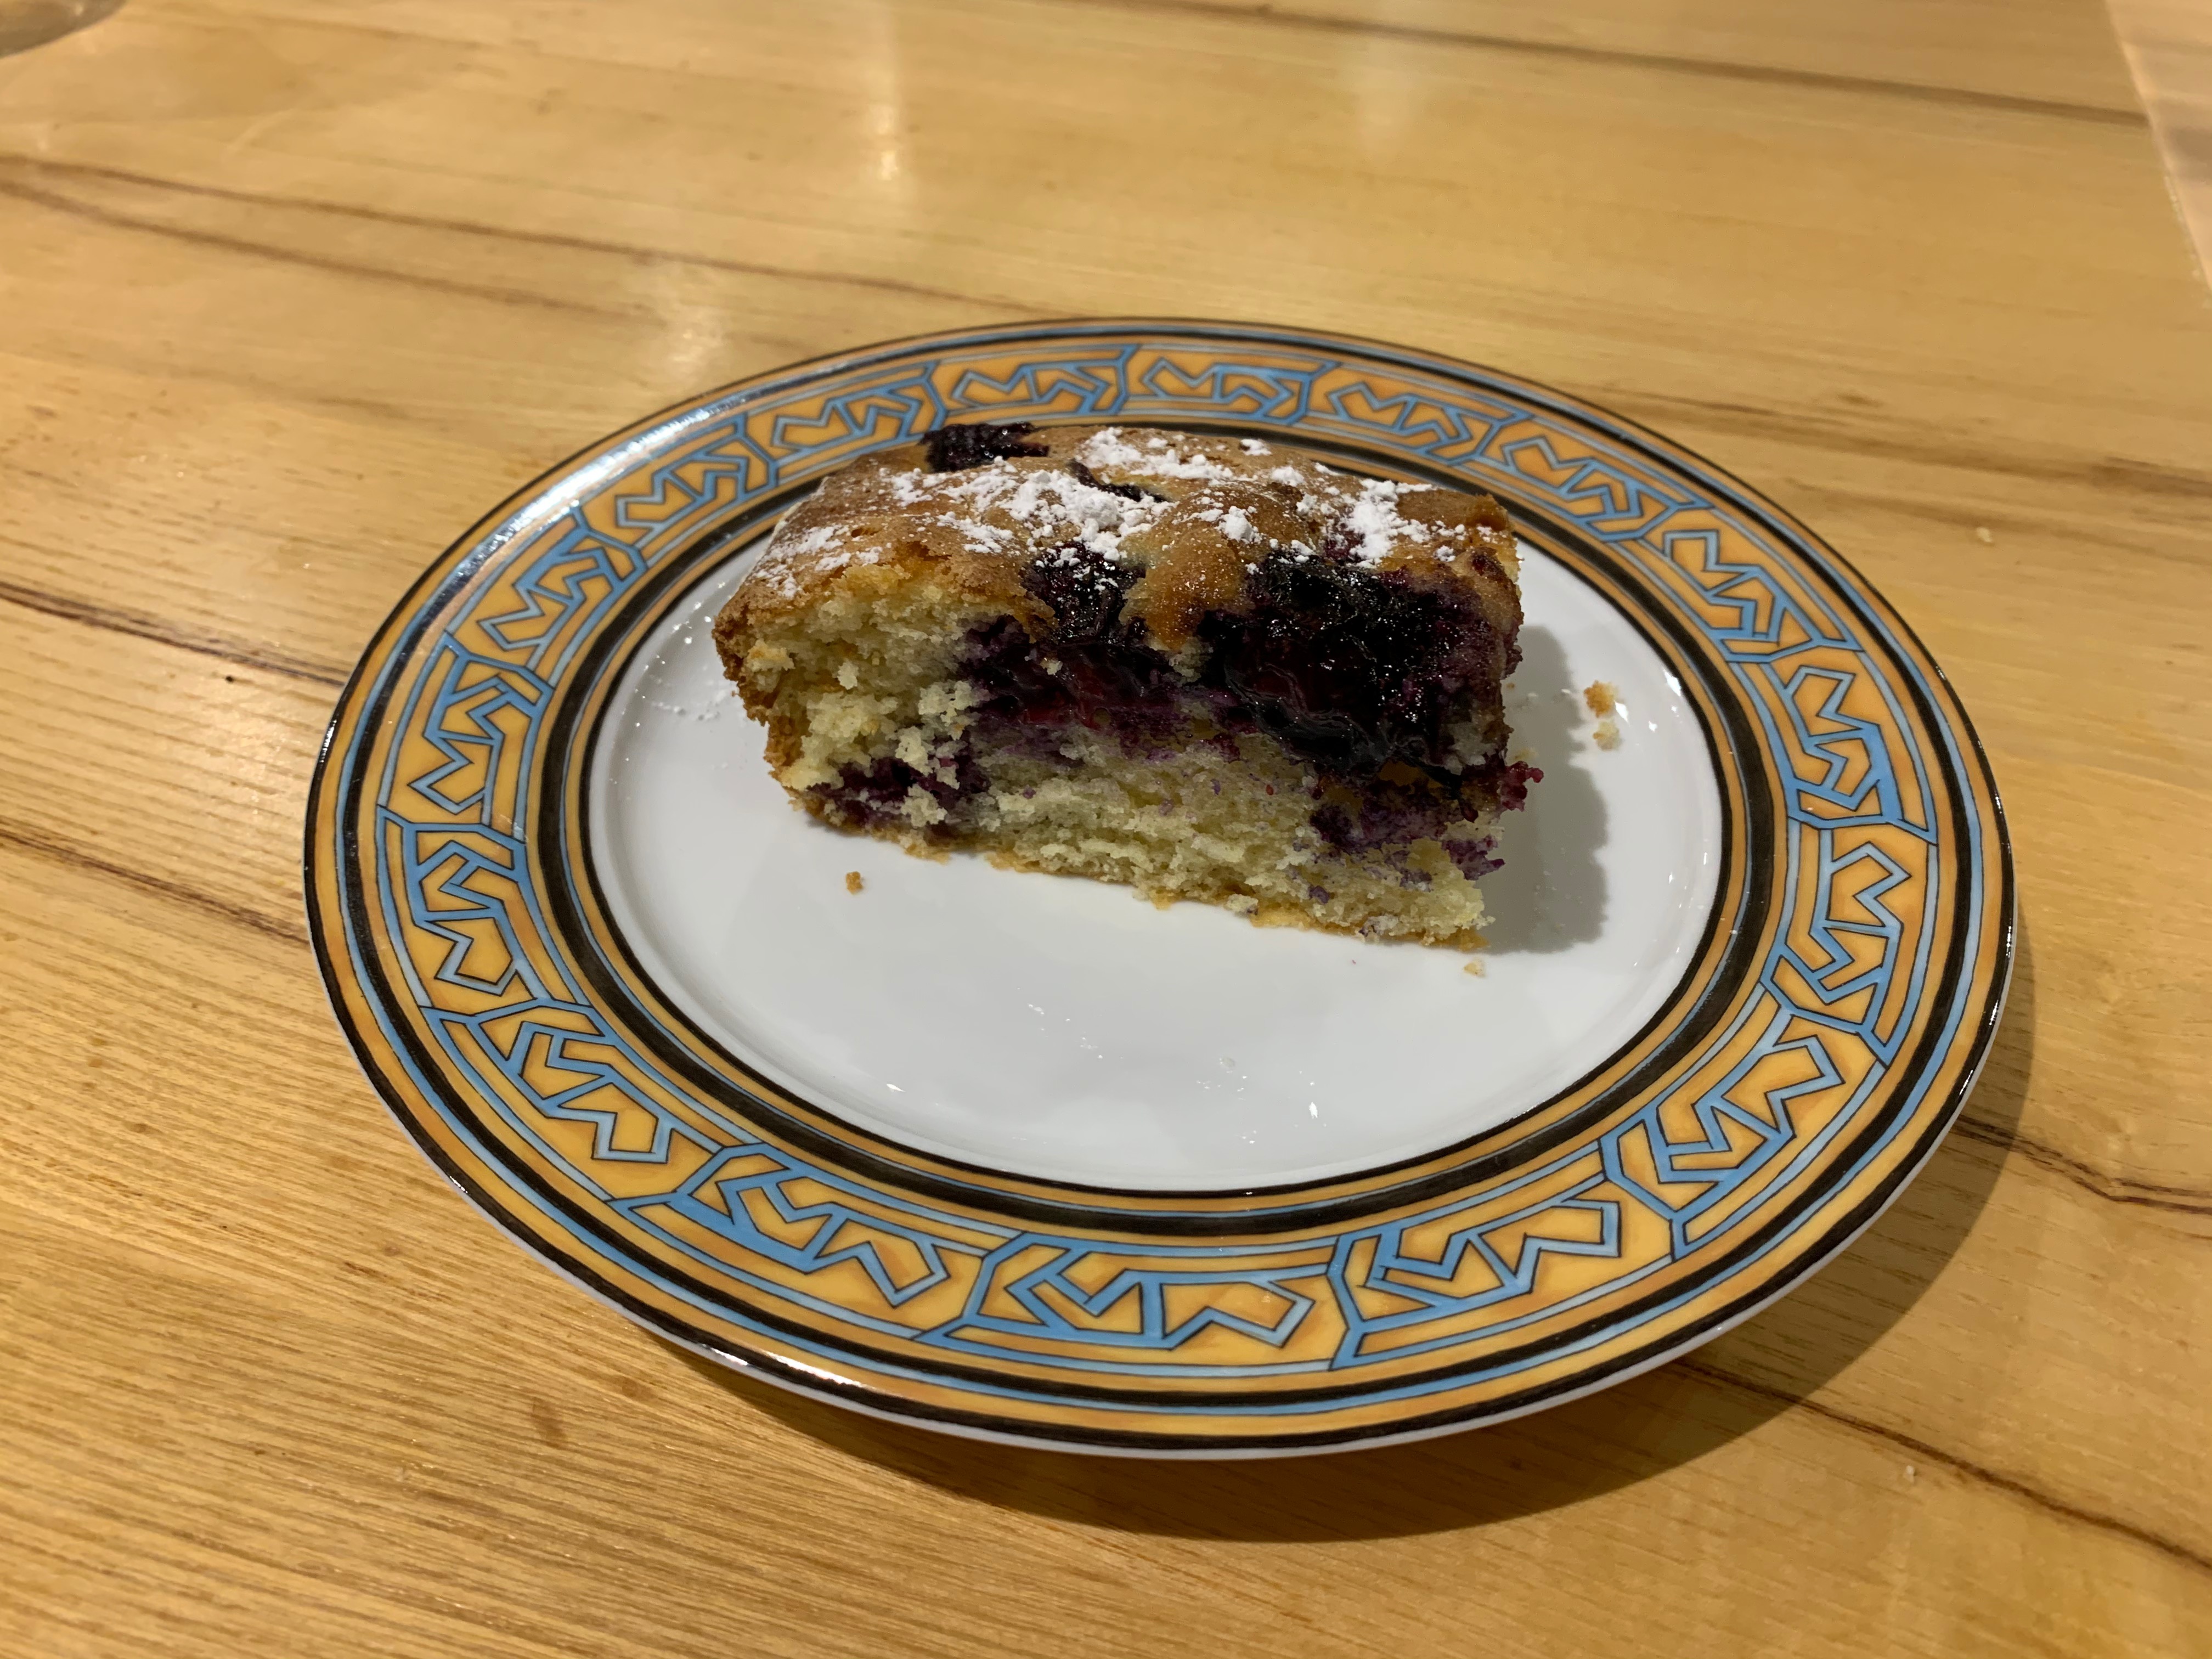
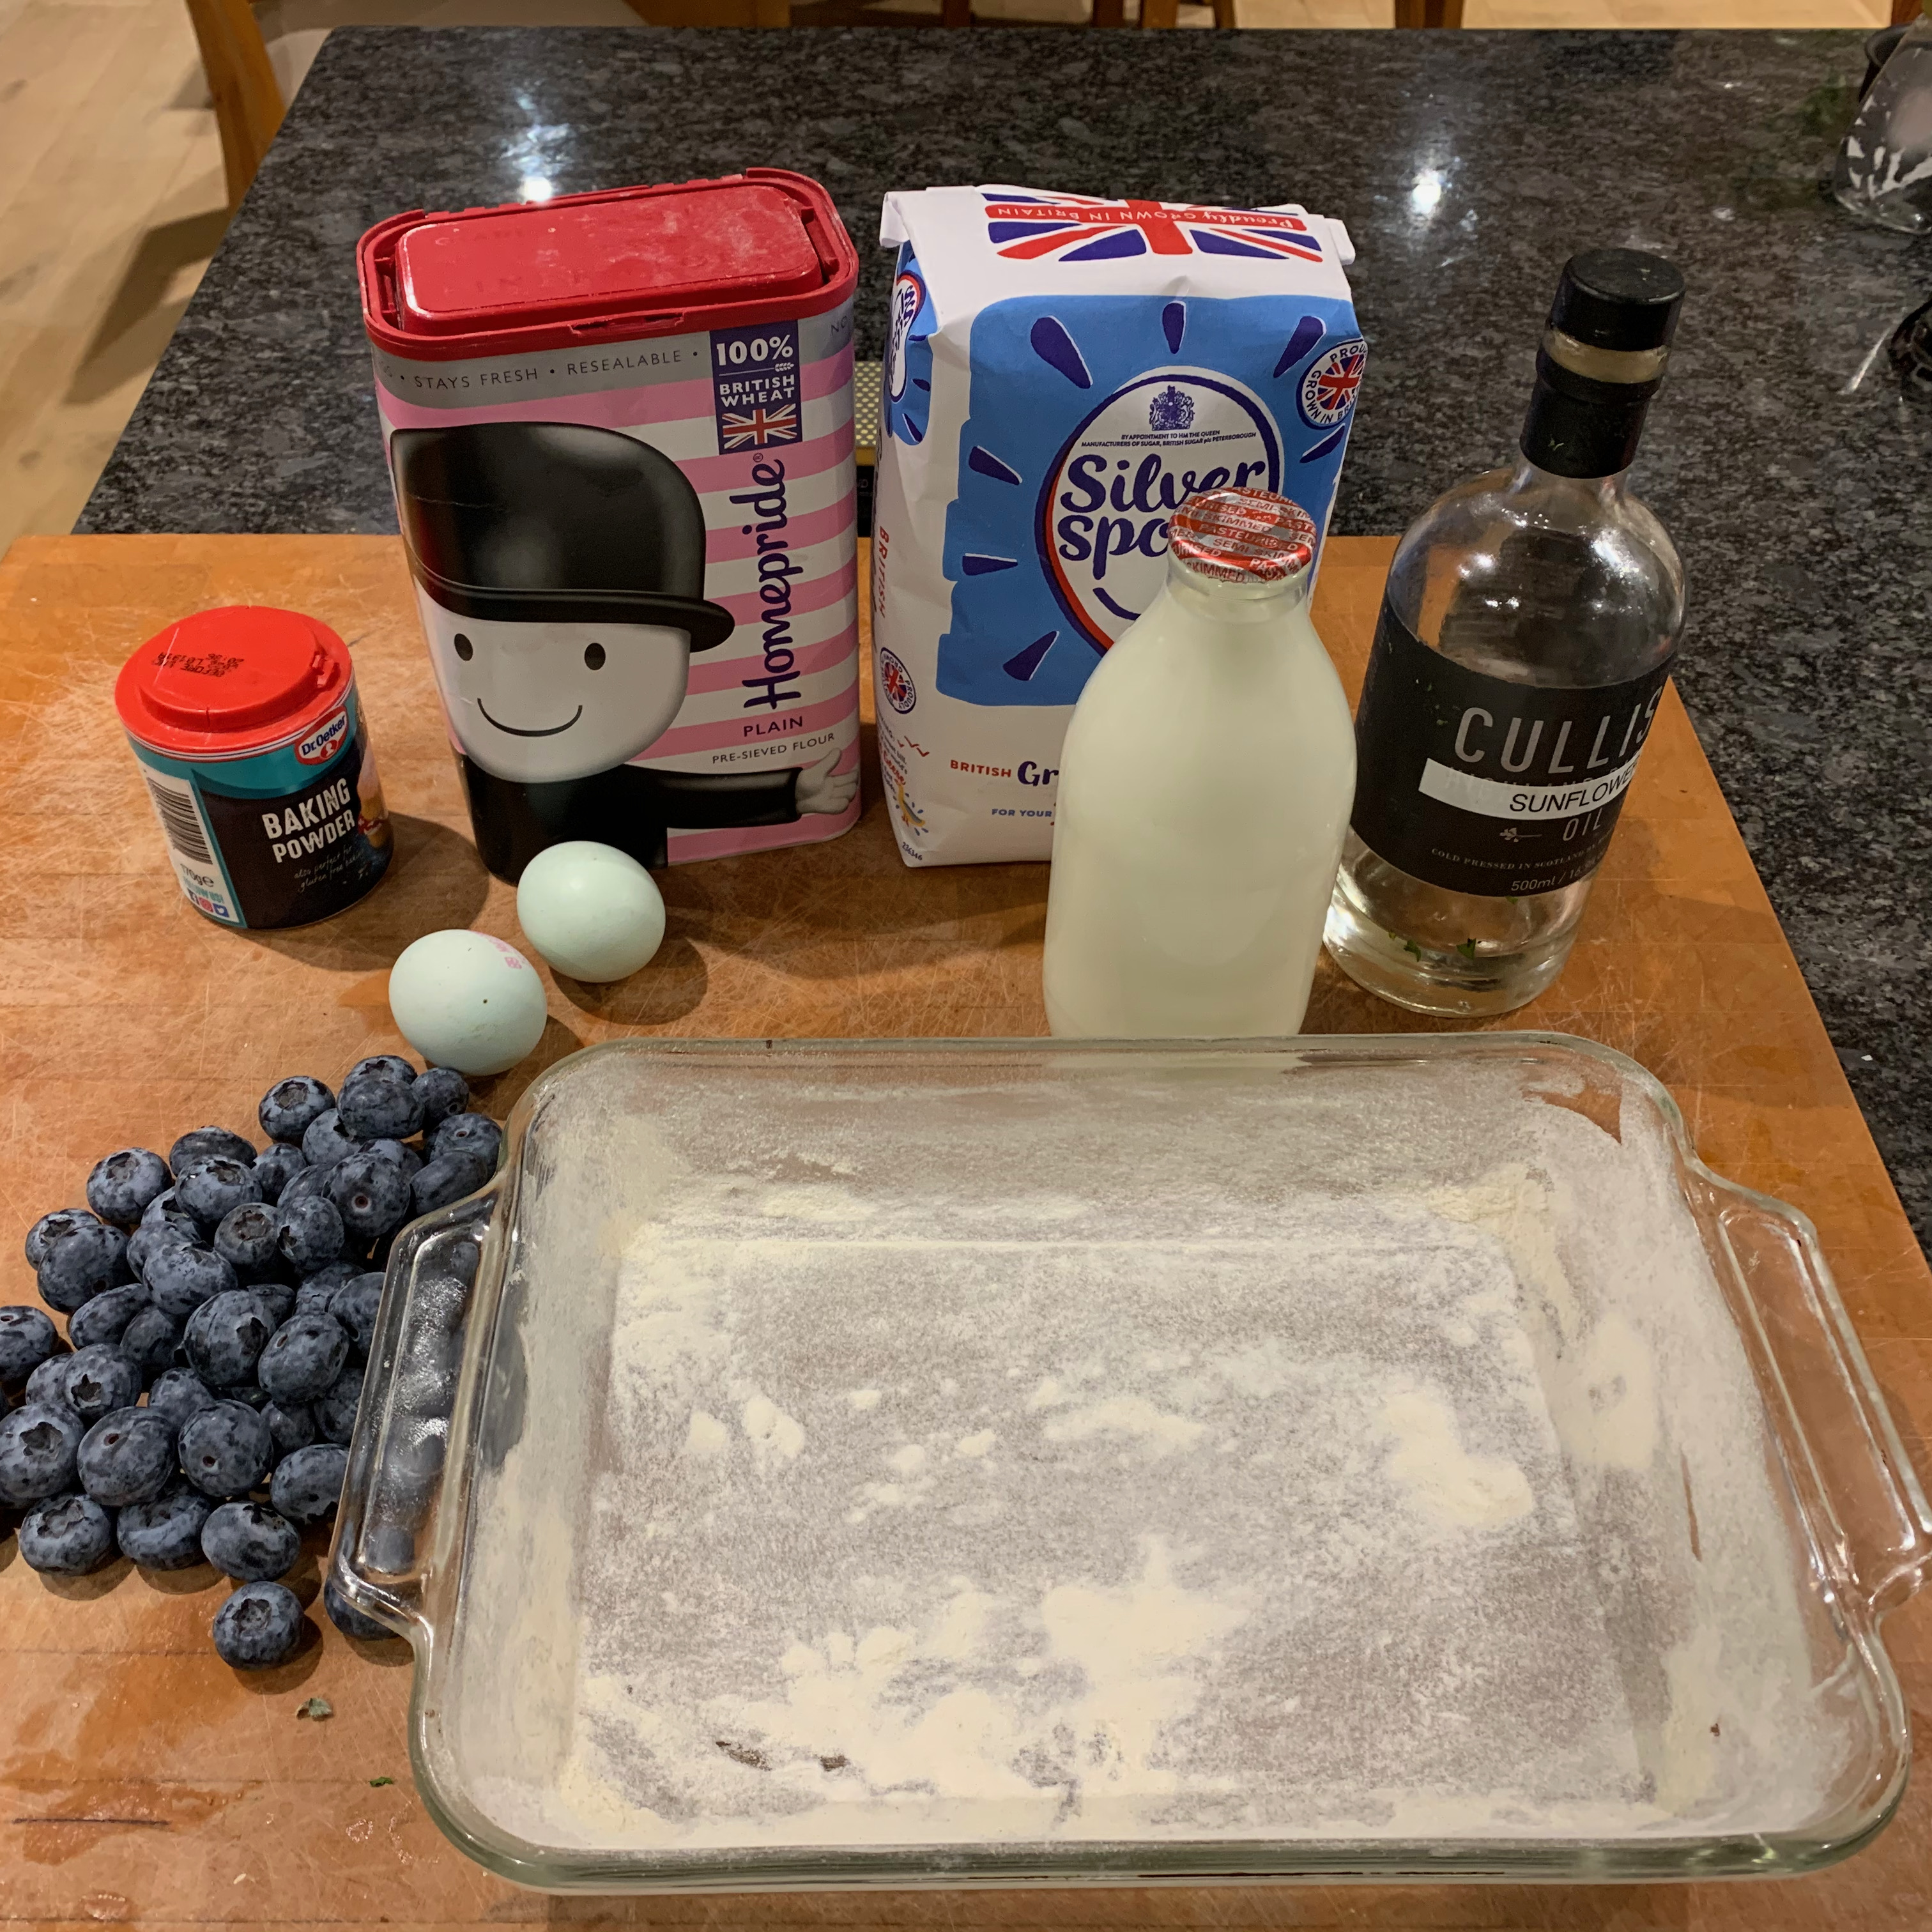
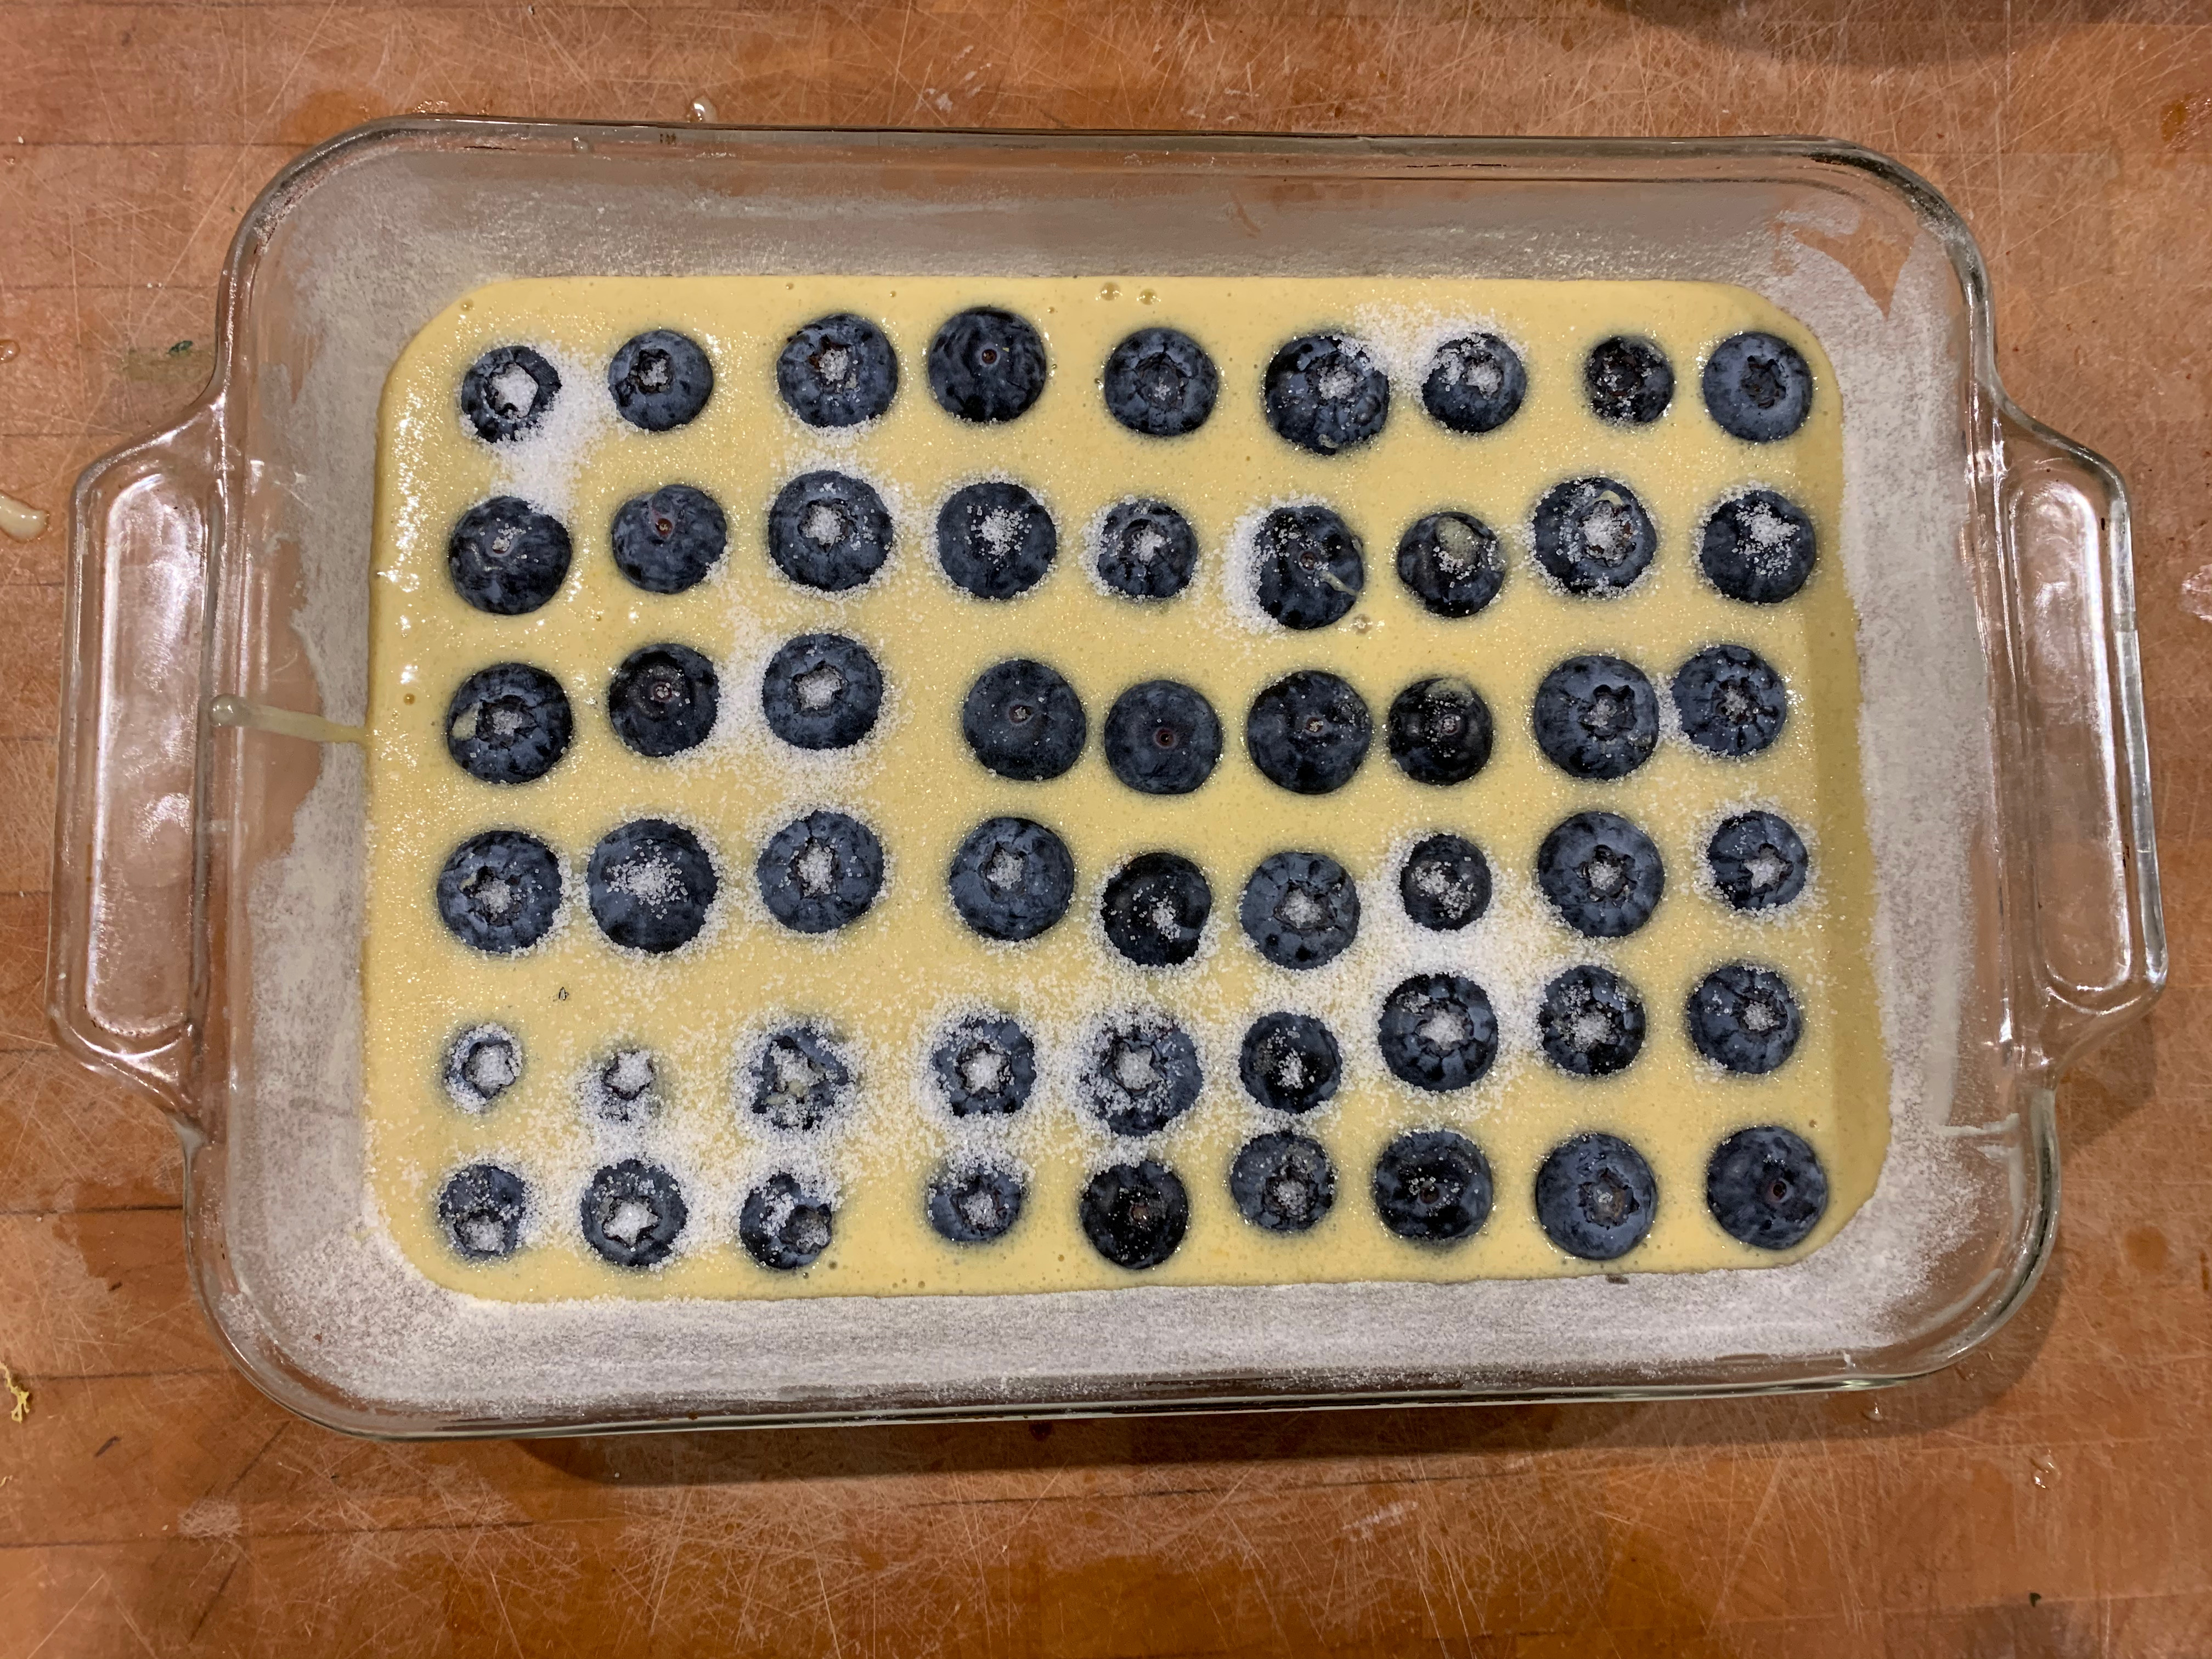
The idea of a Bublanina is that the cake batter bubbles up around the fresh fruit. The trick is to use enough fruit that’s fresh enough that the cake is moist and fruity, but not so much that it’s damp and soggy. There’s no prescription about what fruit to use: it’s really a case of whatever’s in season. In the middle of a London winter, I went for blueberries (which are presumably in season somewhere across the globe), but strawberries, cherries, peaches and plums are all possible.
You have various options on the batter. At one of the end, you can just shove everything into a bowl and mix it; at the other, you can separate the eggs and pack air into the whites as a raising agent, soufflé-style. You can make the batter more traditional by using some semolina flour, can emulate the clafoutis by adding ground almonds, you can use various flavourings (vanilla, orange or lemon zest, Grand Marnier, etc). I’ve kept it simple and gone with a recipe from czechcookbook.com by Kristýna Koutná, a native of Brno, one of my favourite places in Czech; I’ve added lemon zest and changed the amount of flour slightly (my batter was definitely coming out runnier than Kristýna’s video).
A couple of notes on the photos: (1) I used 250g of blueberries, which was all I had. 400-500g would have been better. (2) The ingredients shot is missing the vanilla and lemon.
Butter for greasing cake tin
320g plain flour (plus 20g or so for sprinkling)
200g sugar (plus 30g or so for sprinkling)
8g baking powder
Grated zest of 1 lemon
240 ml milk
2 eggs
40 ml oil
Vanilla extract to taste
400g fresh fruit in season
Icing sugar for dusting
Preheat oven to 180℃ fan
Grease a cake tin or baking dish (I used a rectangular Pyrex dish or around 30cm x 20cm, but you can use any shape you like). Dust it with flour and shake out the excess.
If you’re using fruit like peaches or large strawberries that need to be cut up, do so now: make sure the fruit isn’t too wet.
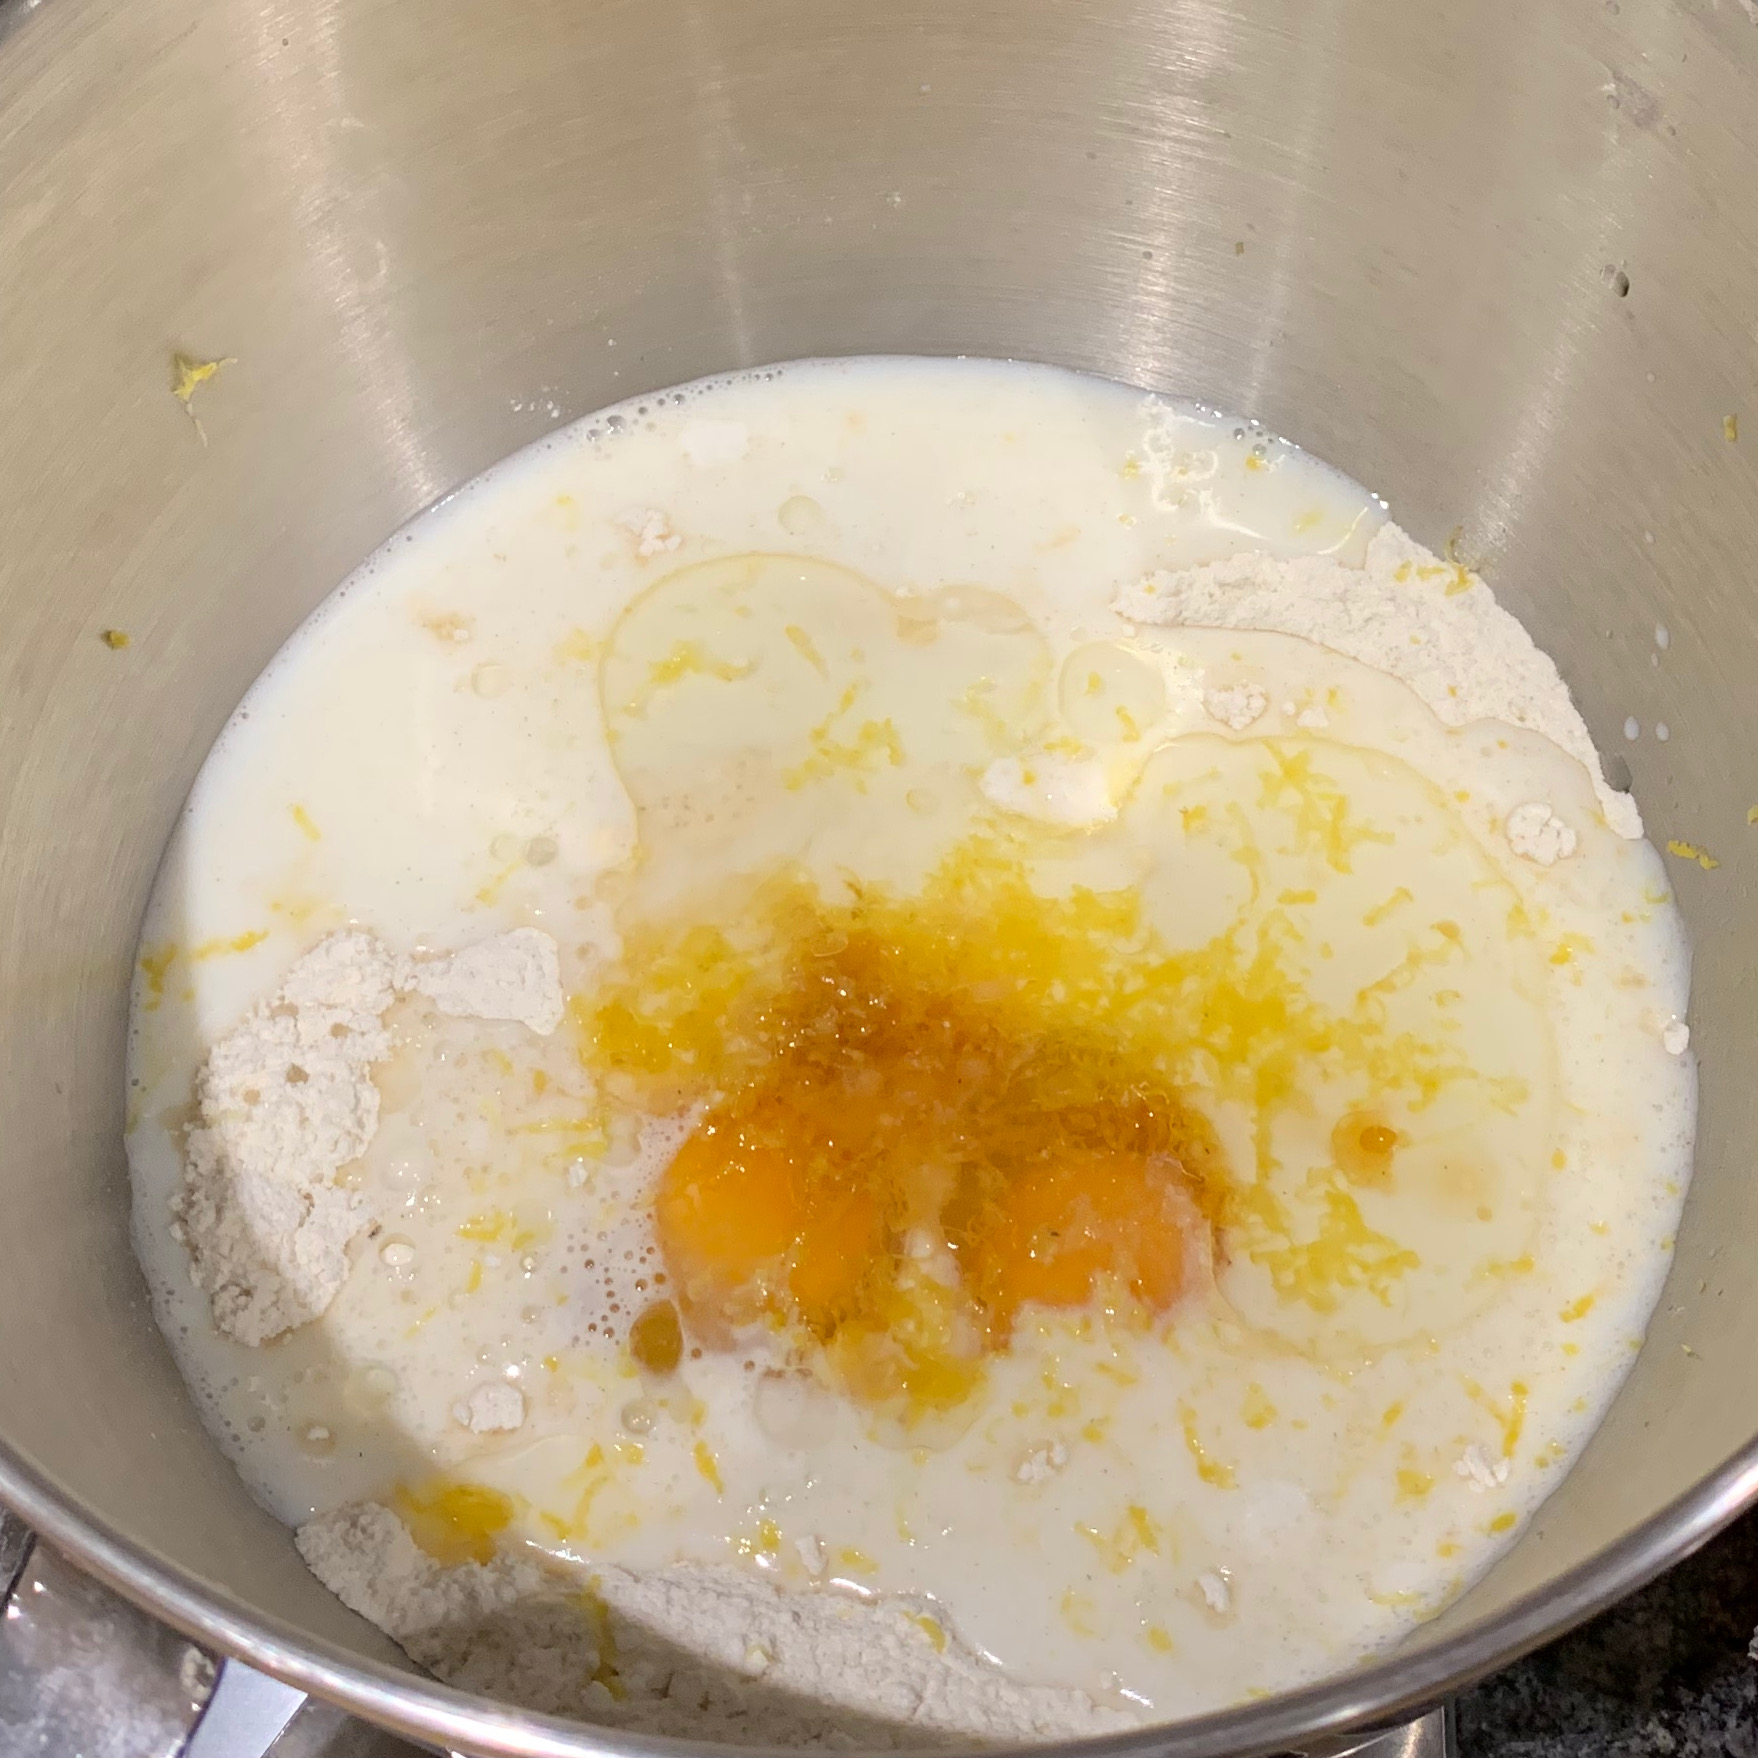
In the bowl of a stand mixer, mix flour, sugar and baking powder and blend.
Add lemon zest, eggs, milk and oil
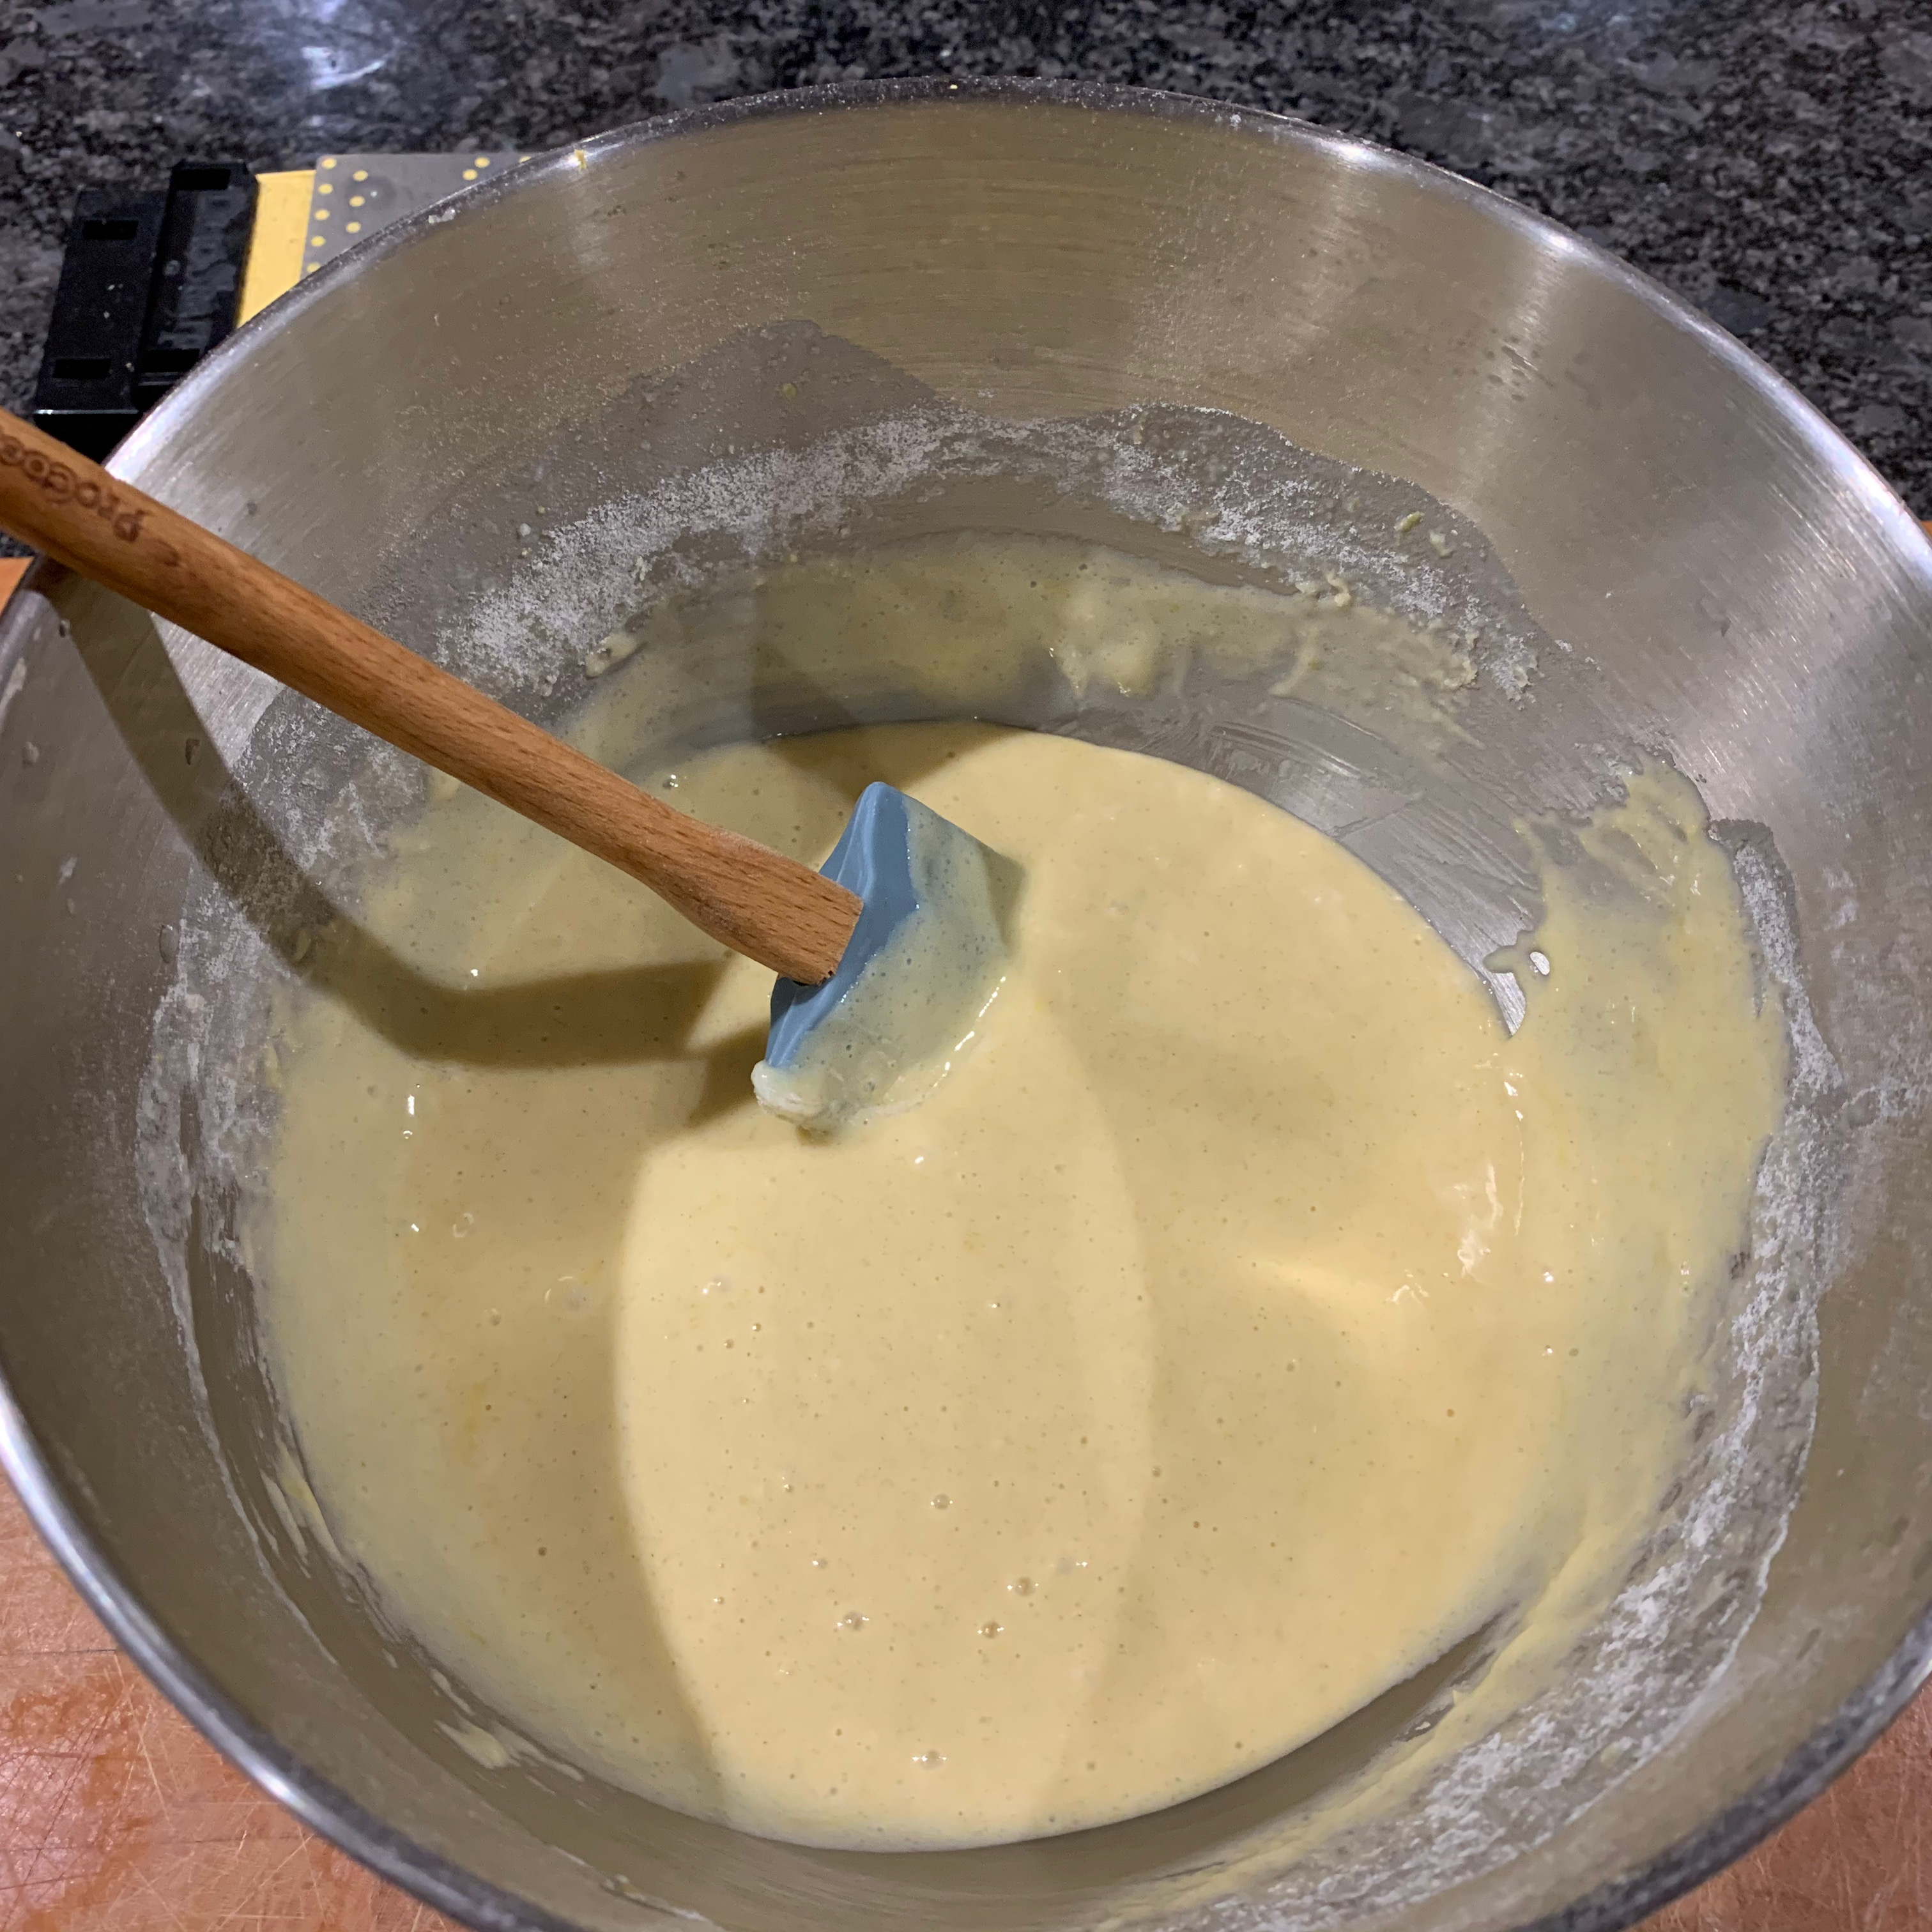
With the standard beater, mix until smooth – do not overbeat.
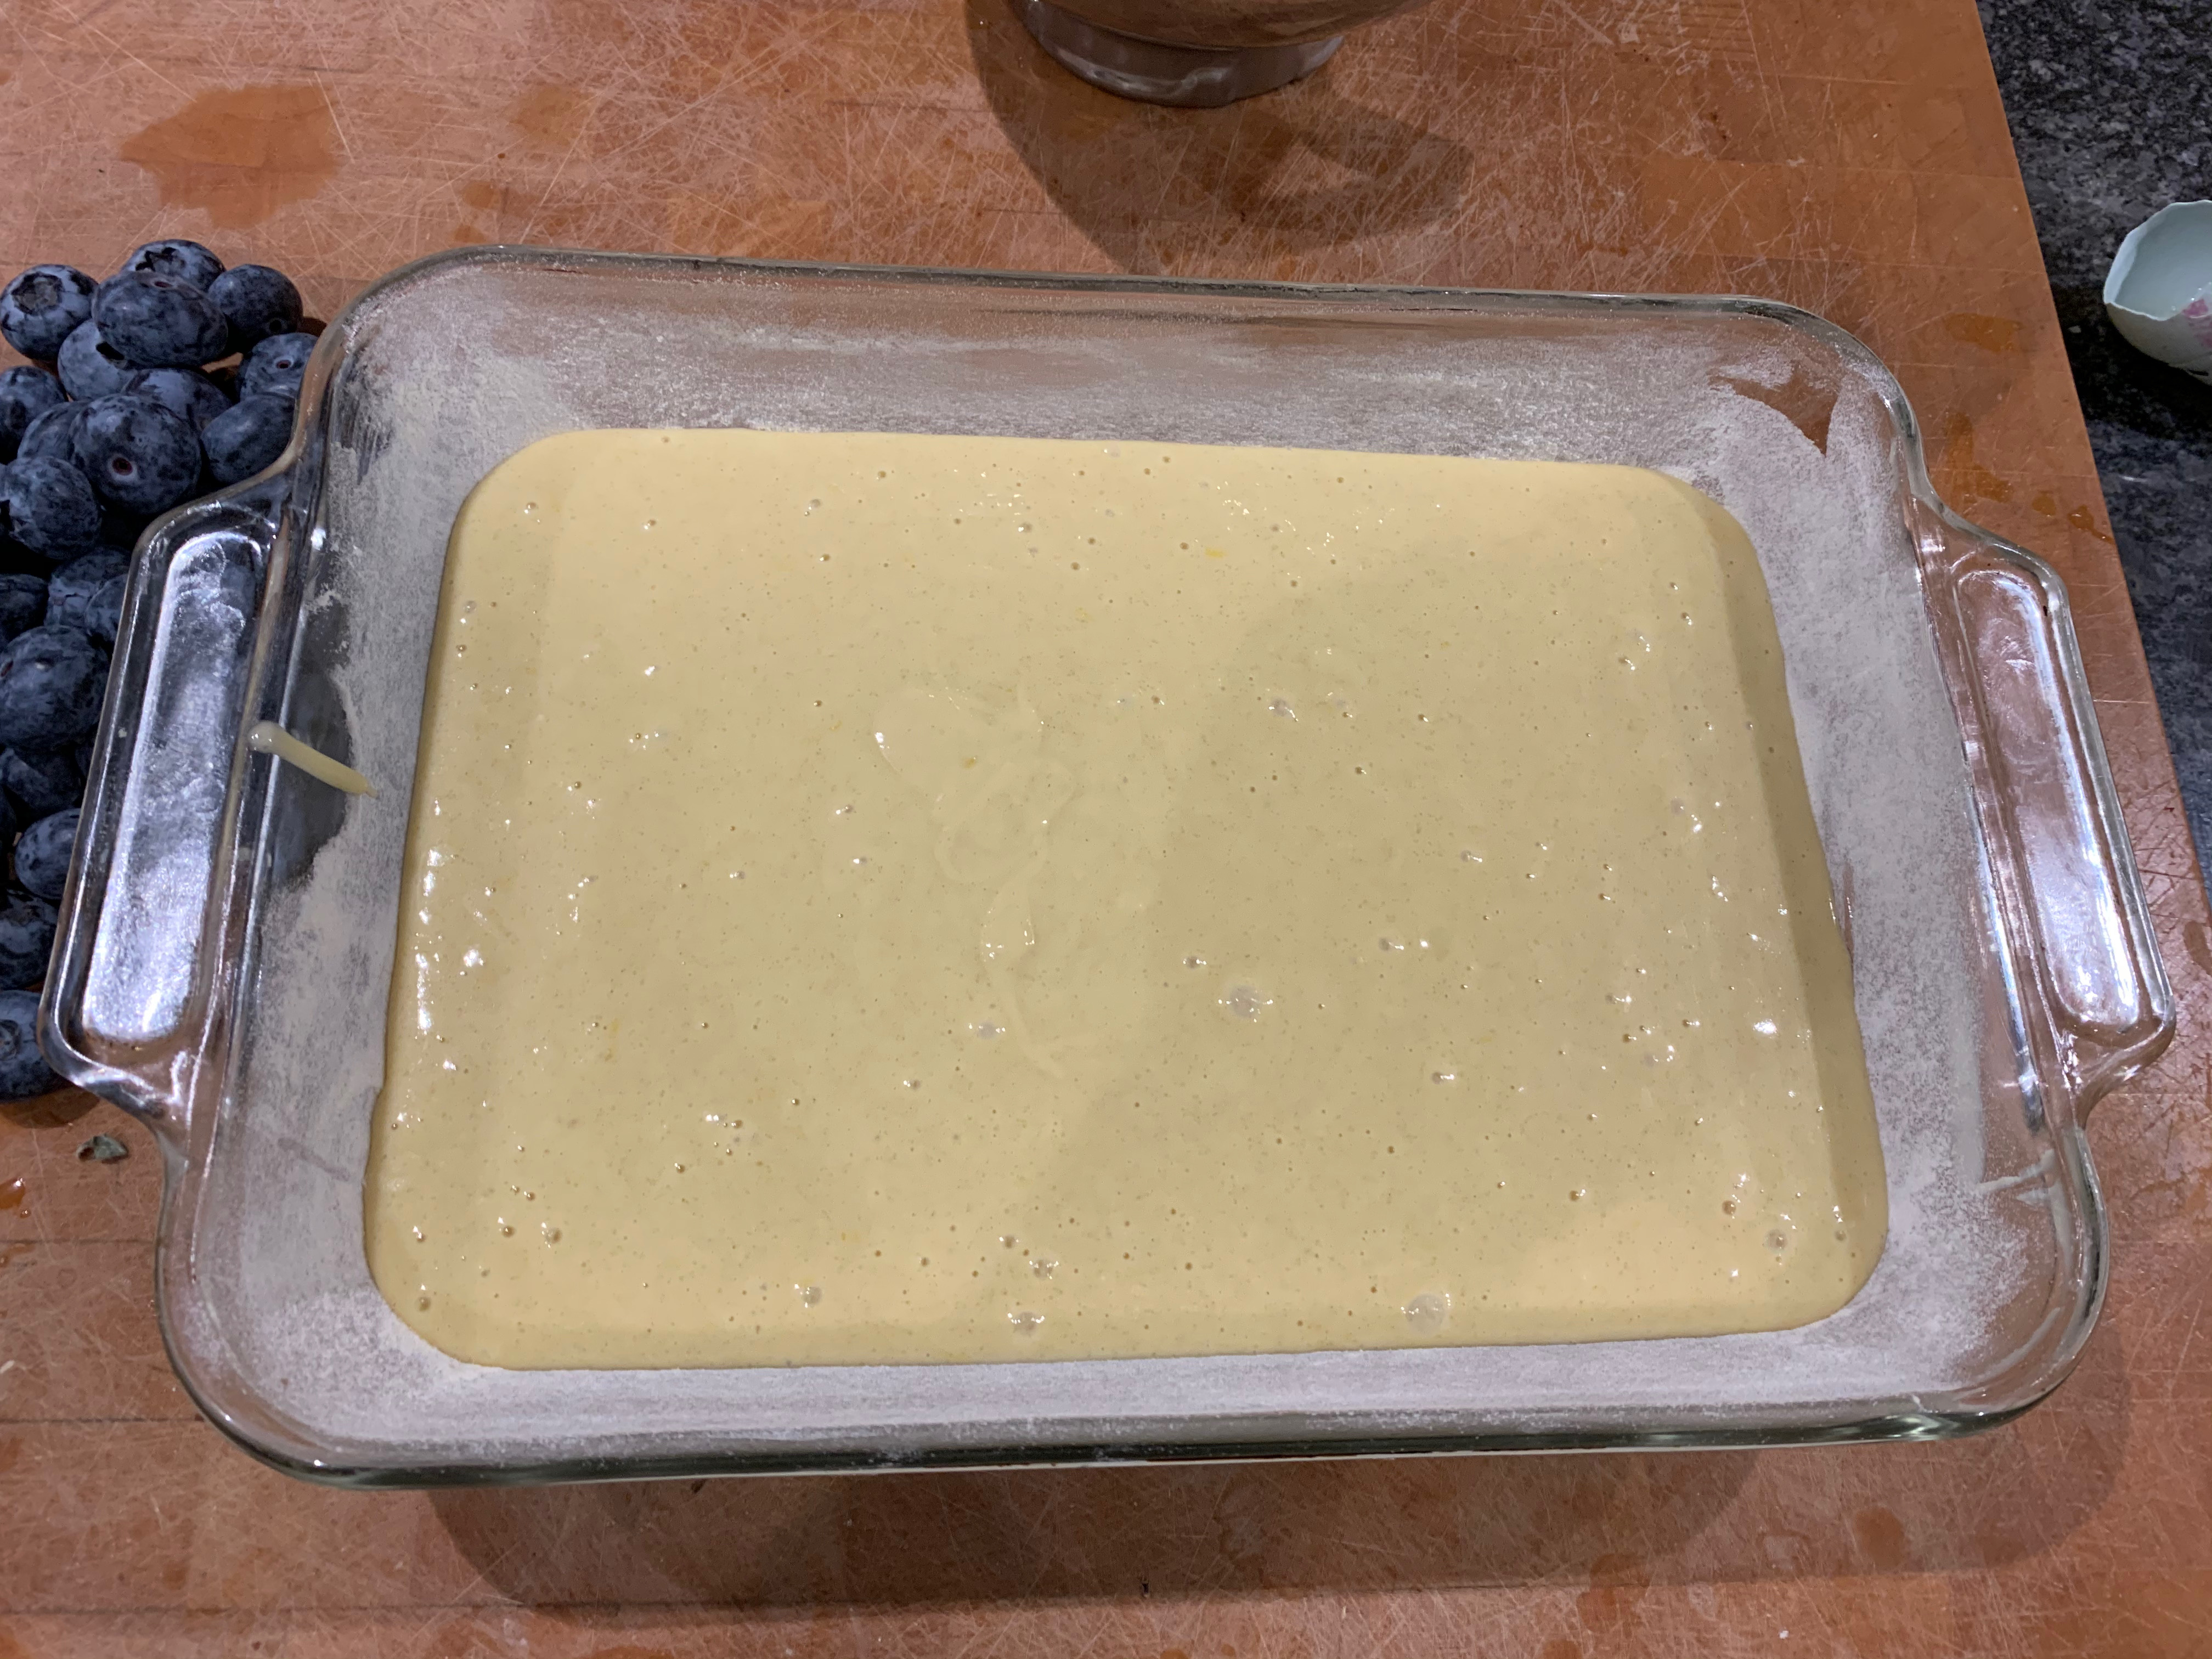
Pour the batter into your cake tin or dish
Lay out the fruit on the batter. If it sinks, it doesn’t matter.
Sprinkle a bit of sugar over the top.
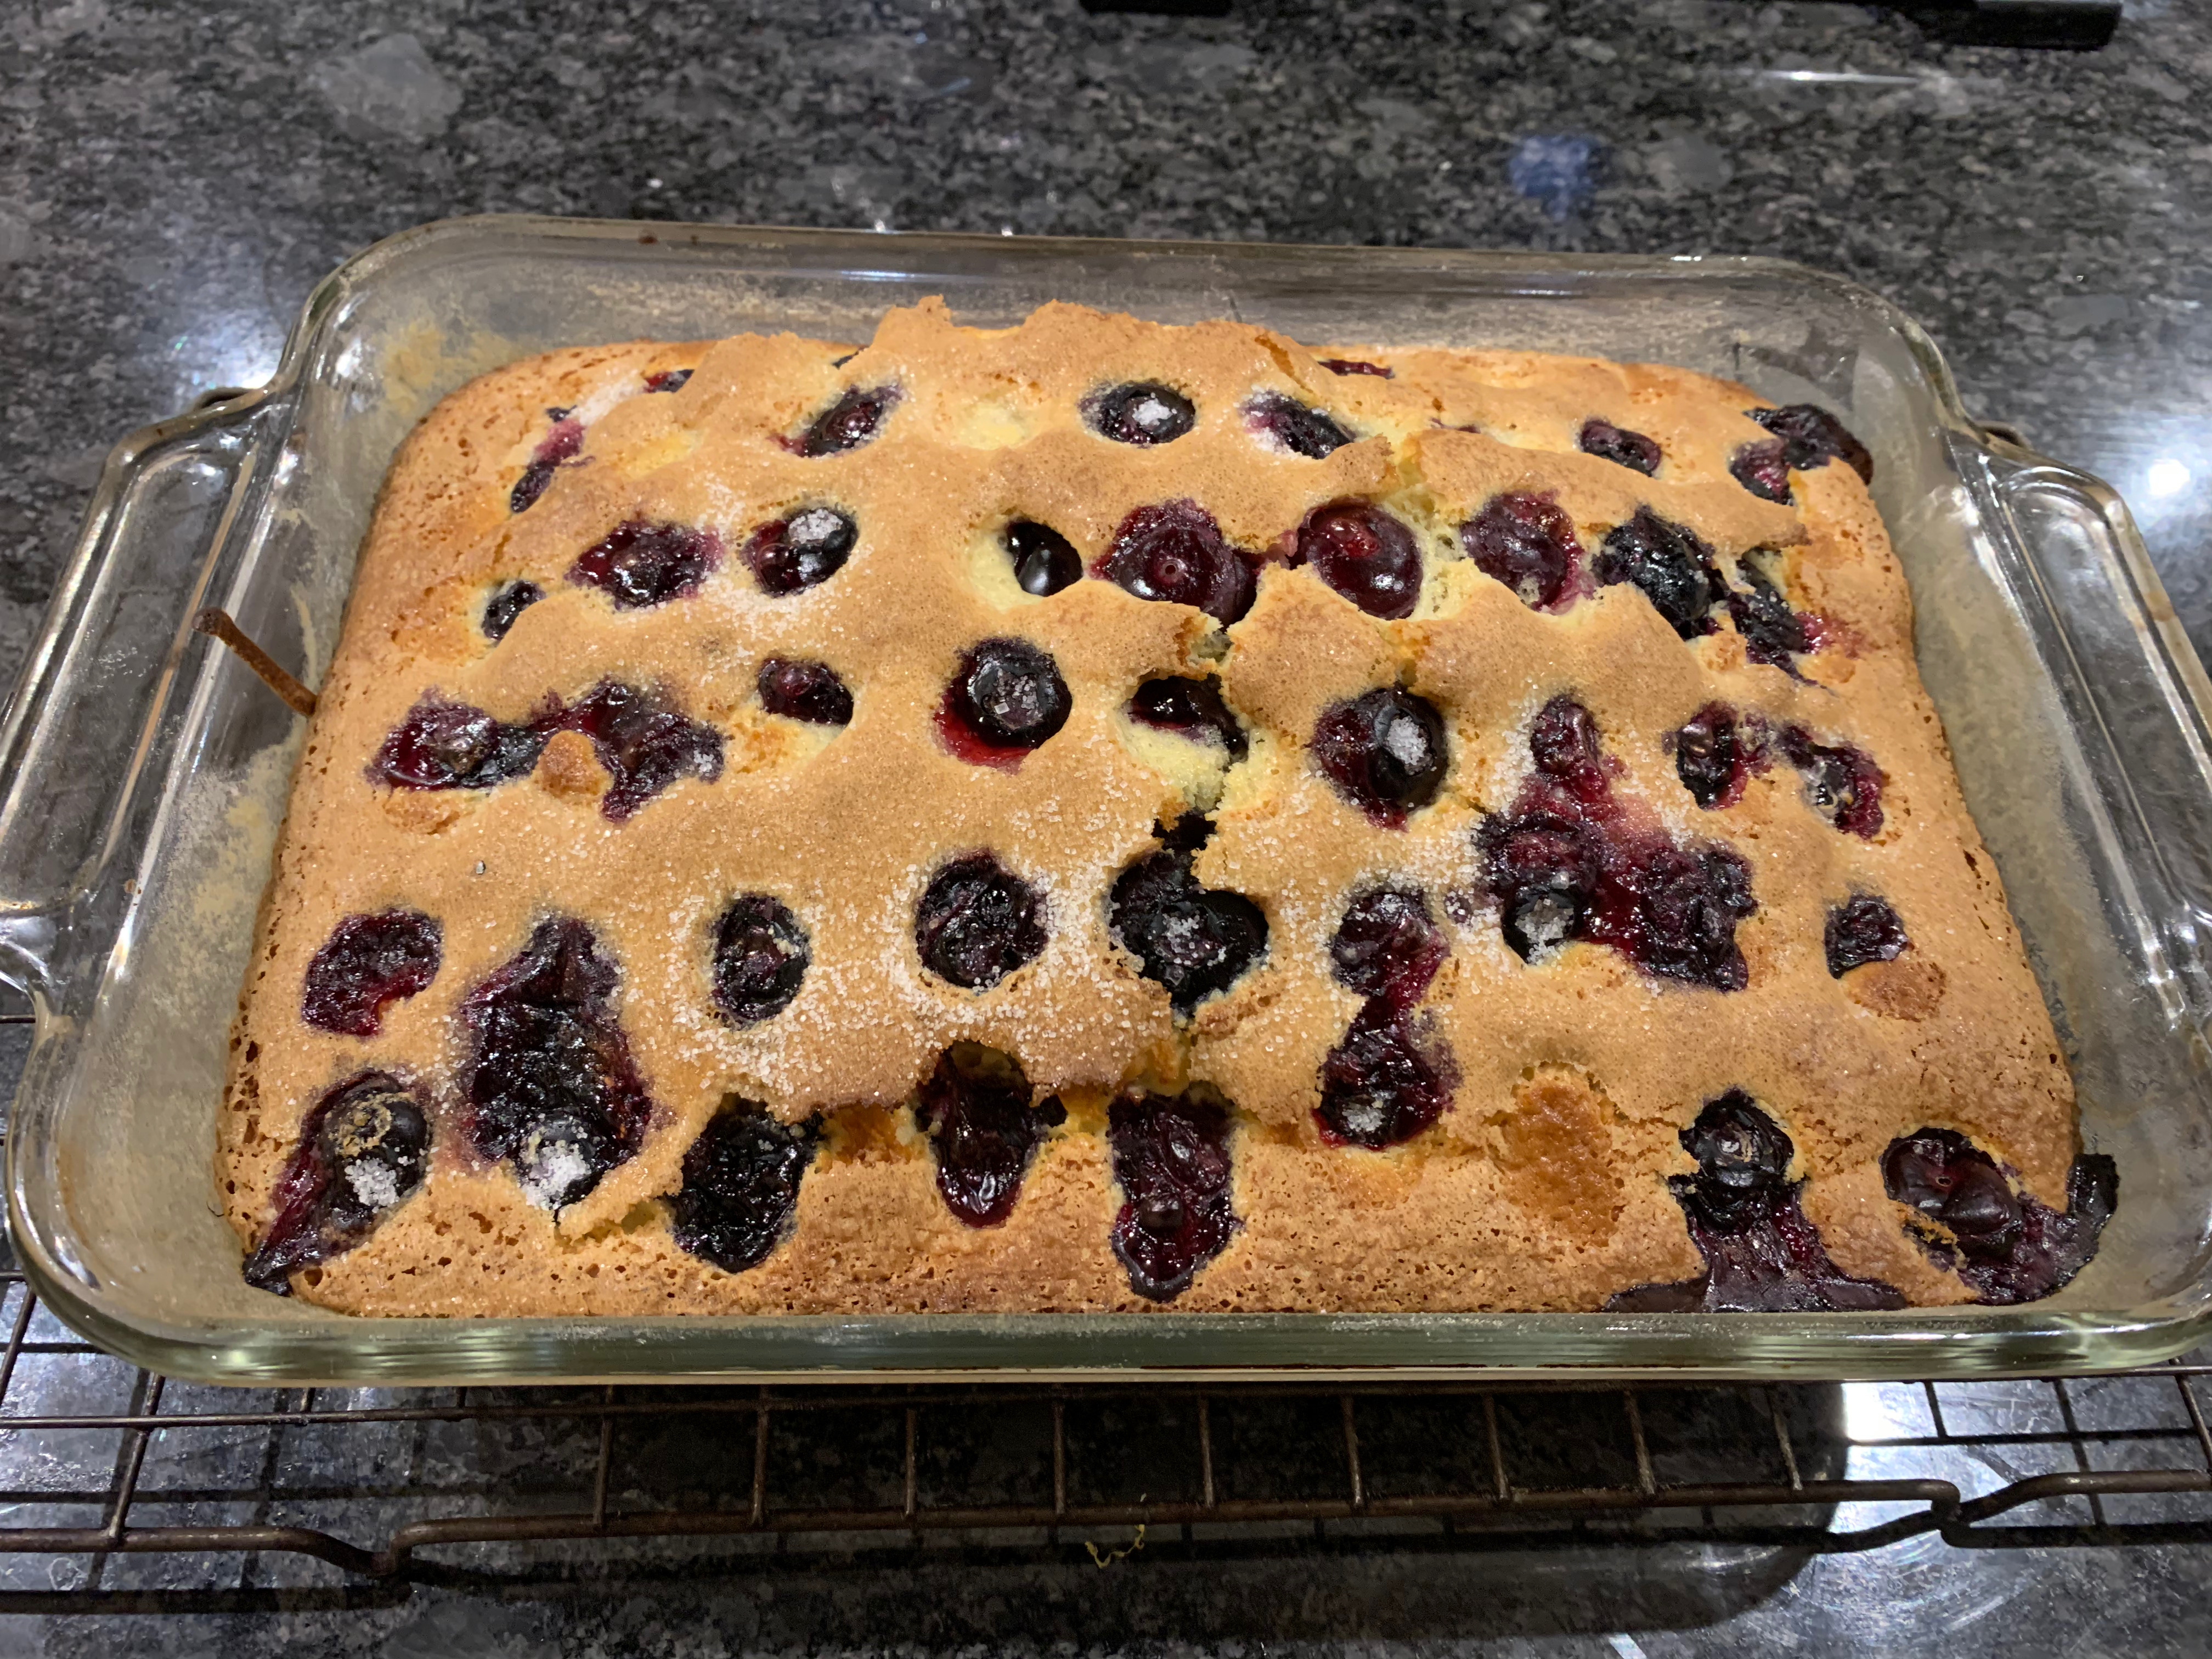
Bake for around 40 minutes until golden brown on top
Leave to cool
Dust with icing sugar before serving
You can eat bublanina warm or cool it to room temperature. If you find it a bit dry on its own (particularly if, like me, you were a bit short of fruit), add a fruit coulis.
It being that time of year, I was casting around for a Christmas cake that was suitably exotic for this blog, but still had that fruit-laden richness for cold winter evenings. To my surprise, the one that leapt out at me was a recipe from Sri Lanka, which makes something that’s recognisably in the English Christmas Cake tradition, but softer and moister. The ever-reliable sbs.com.au provided the recipe.
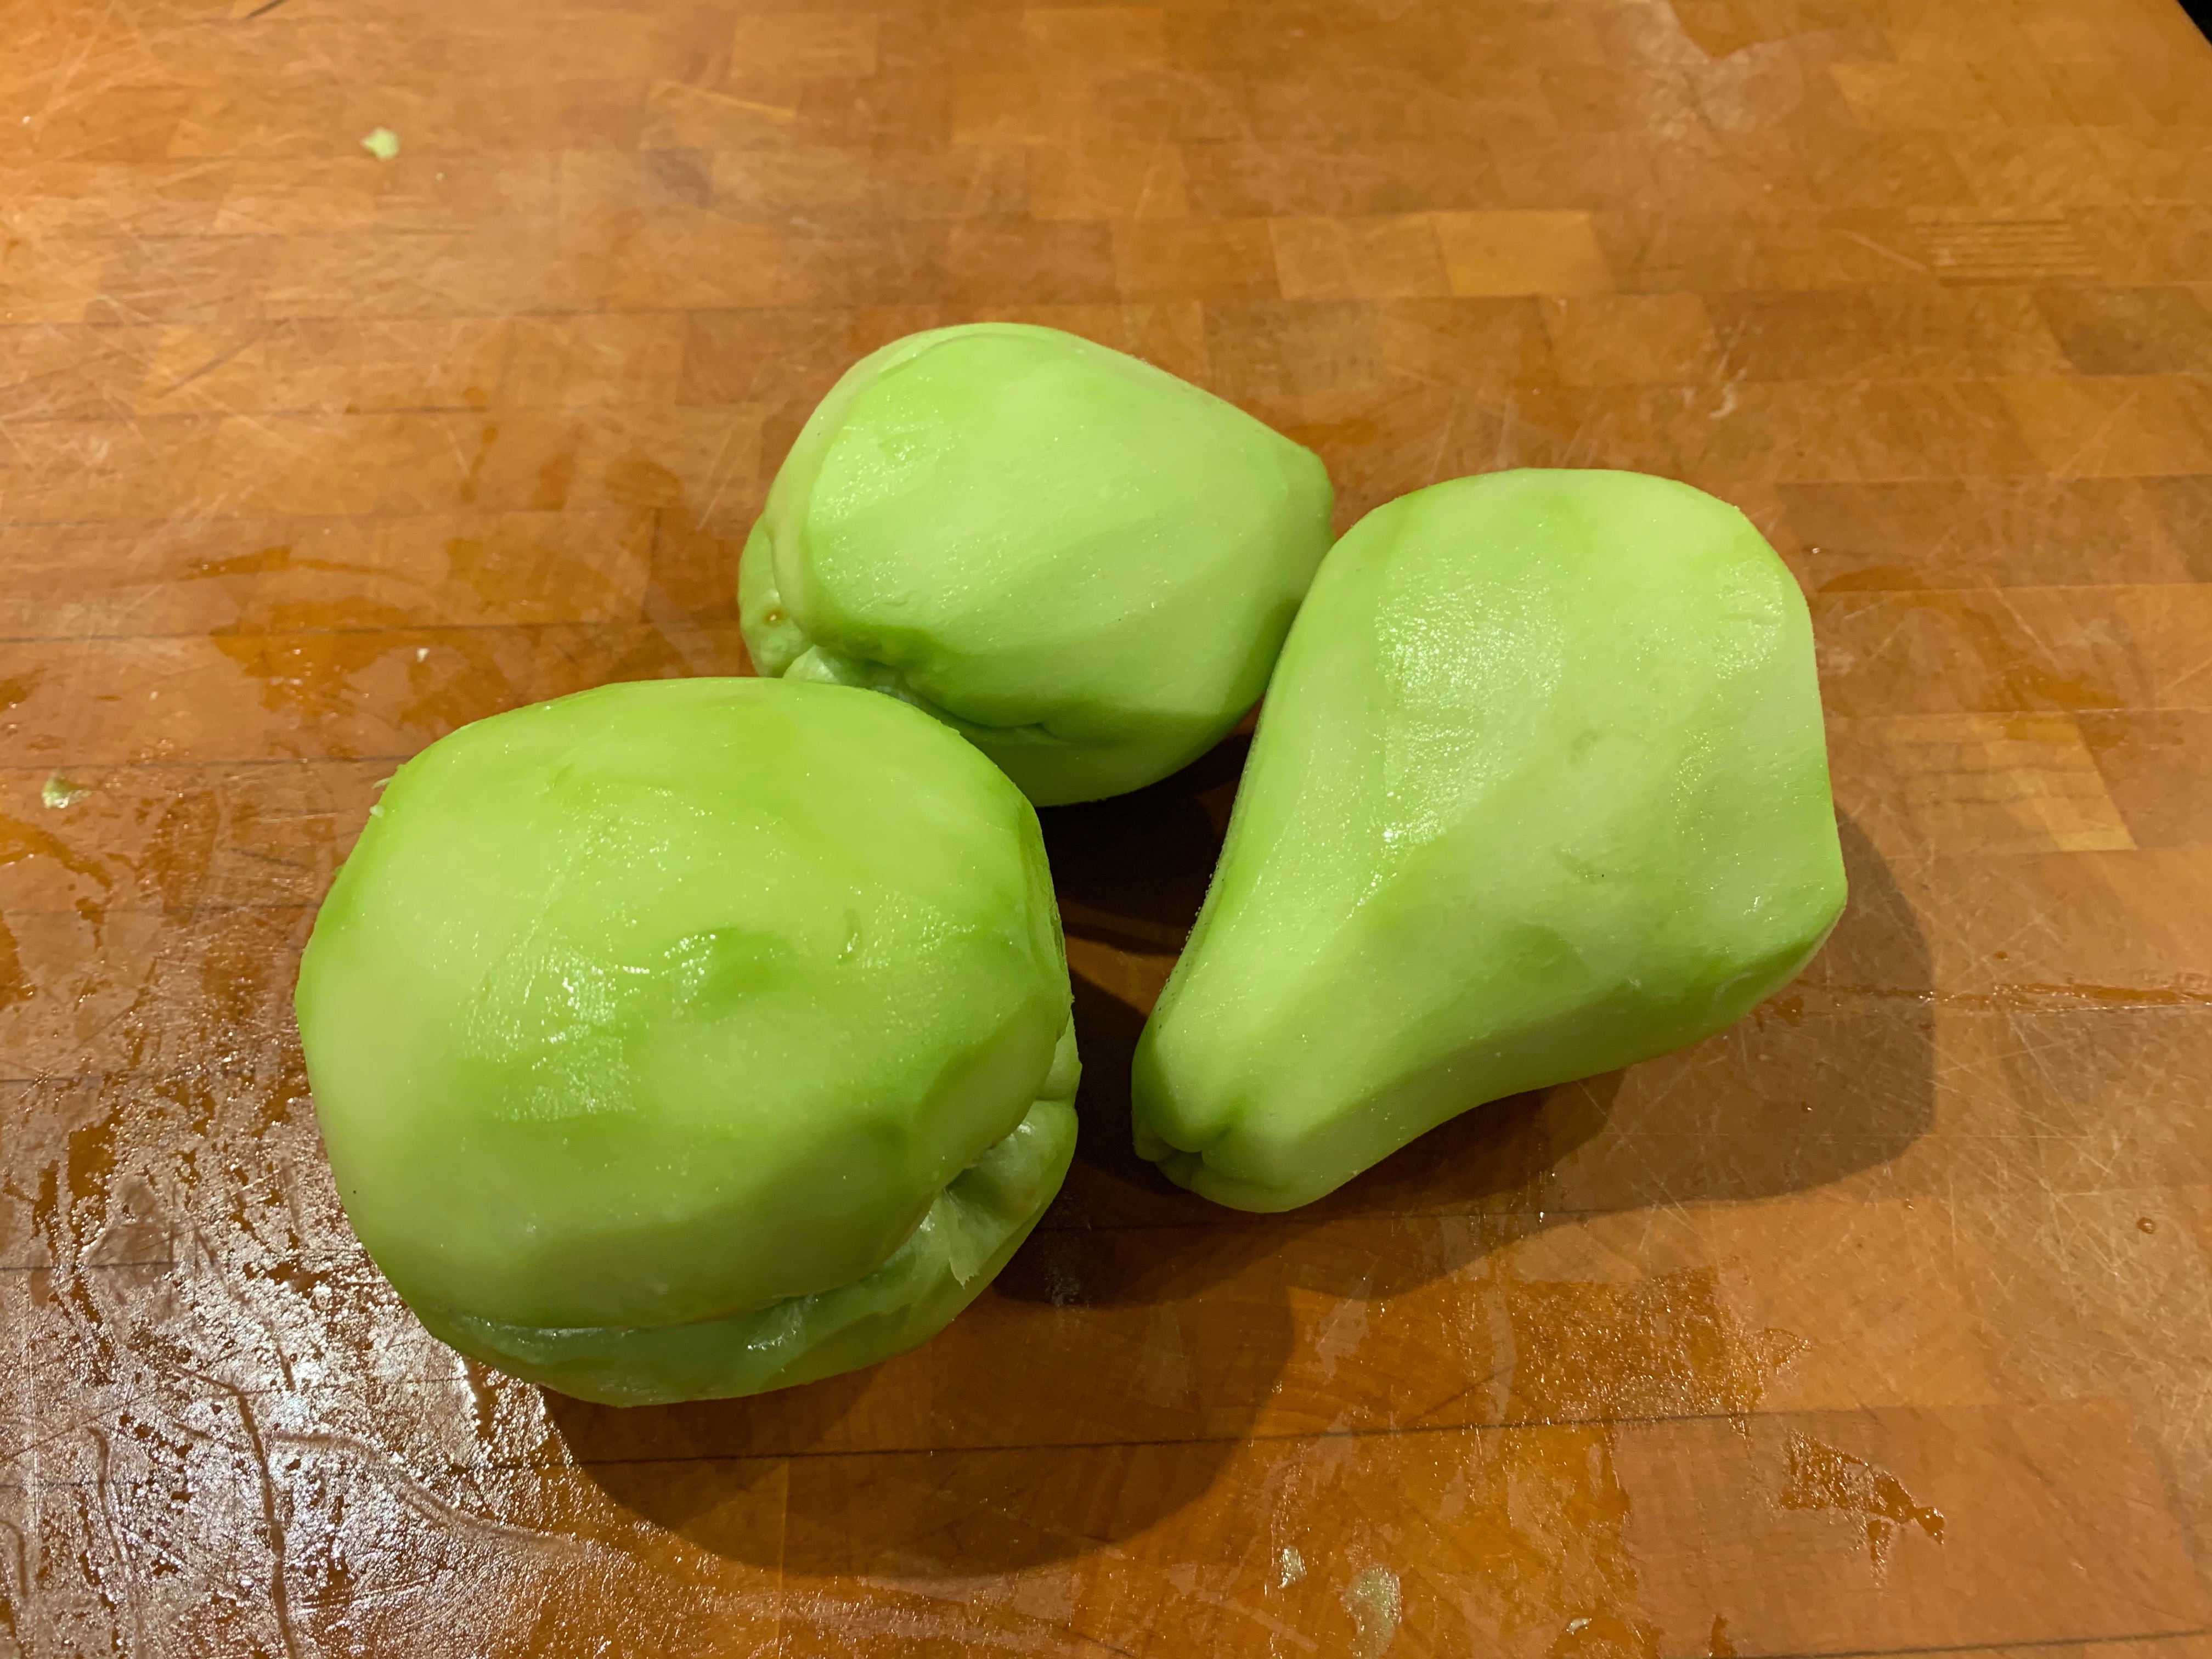
What distinguishes the Sri Lankan version is a hefty dose of chow-chow preserve (other Sri Lankan touches are the addition of rosewater and cardamom). Chow-chow is a fruit with many names: choko, chouchou, mirliton, chayote; it’s roughly the shape and consistency of a quince, with a bright green skin reminiscent of a Granny Smith apple. I couldn’t find the preserve locally, but the fruit was readily available in Indian or Caribbean stores, of which we have plenty in London, so I made my own preserve, which wasn’t difficult. (Admission: I did leave mine on the stove for way too long, so it crystallised on setting: this didn’t seem to damage the cake overly.)
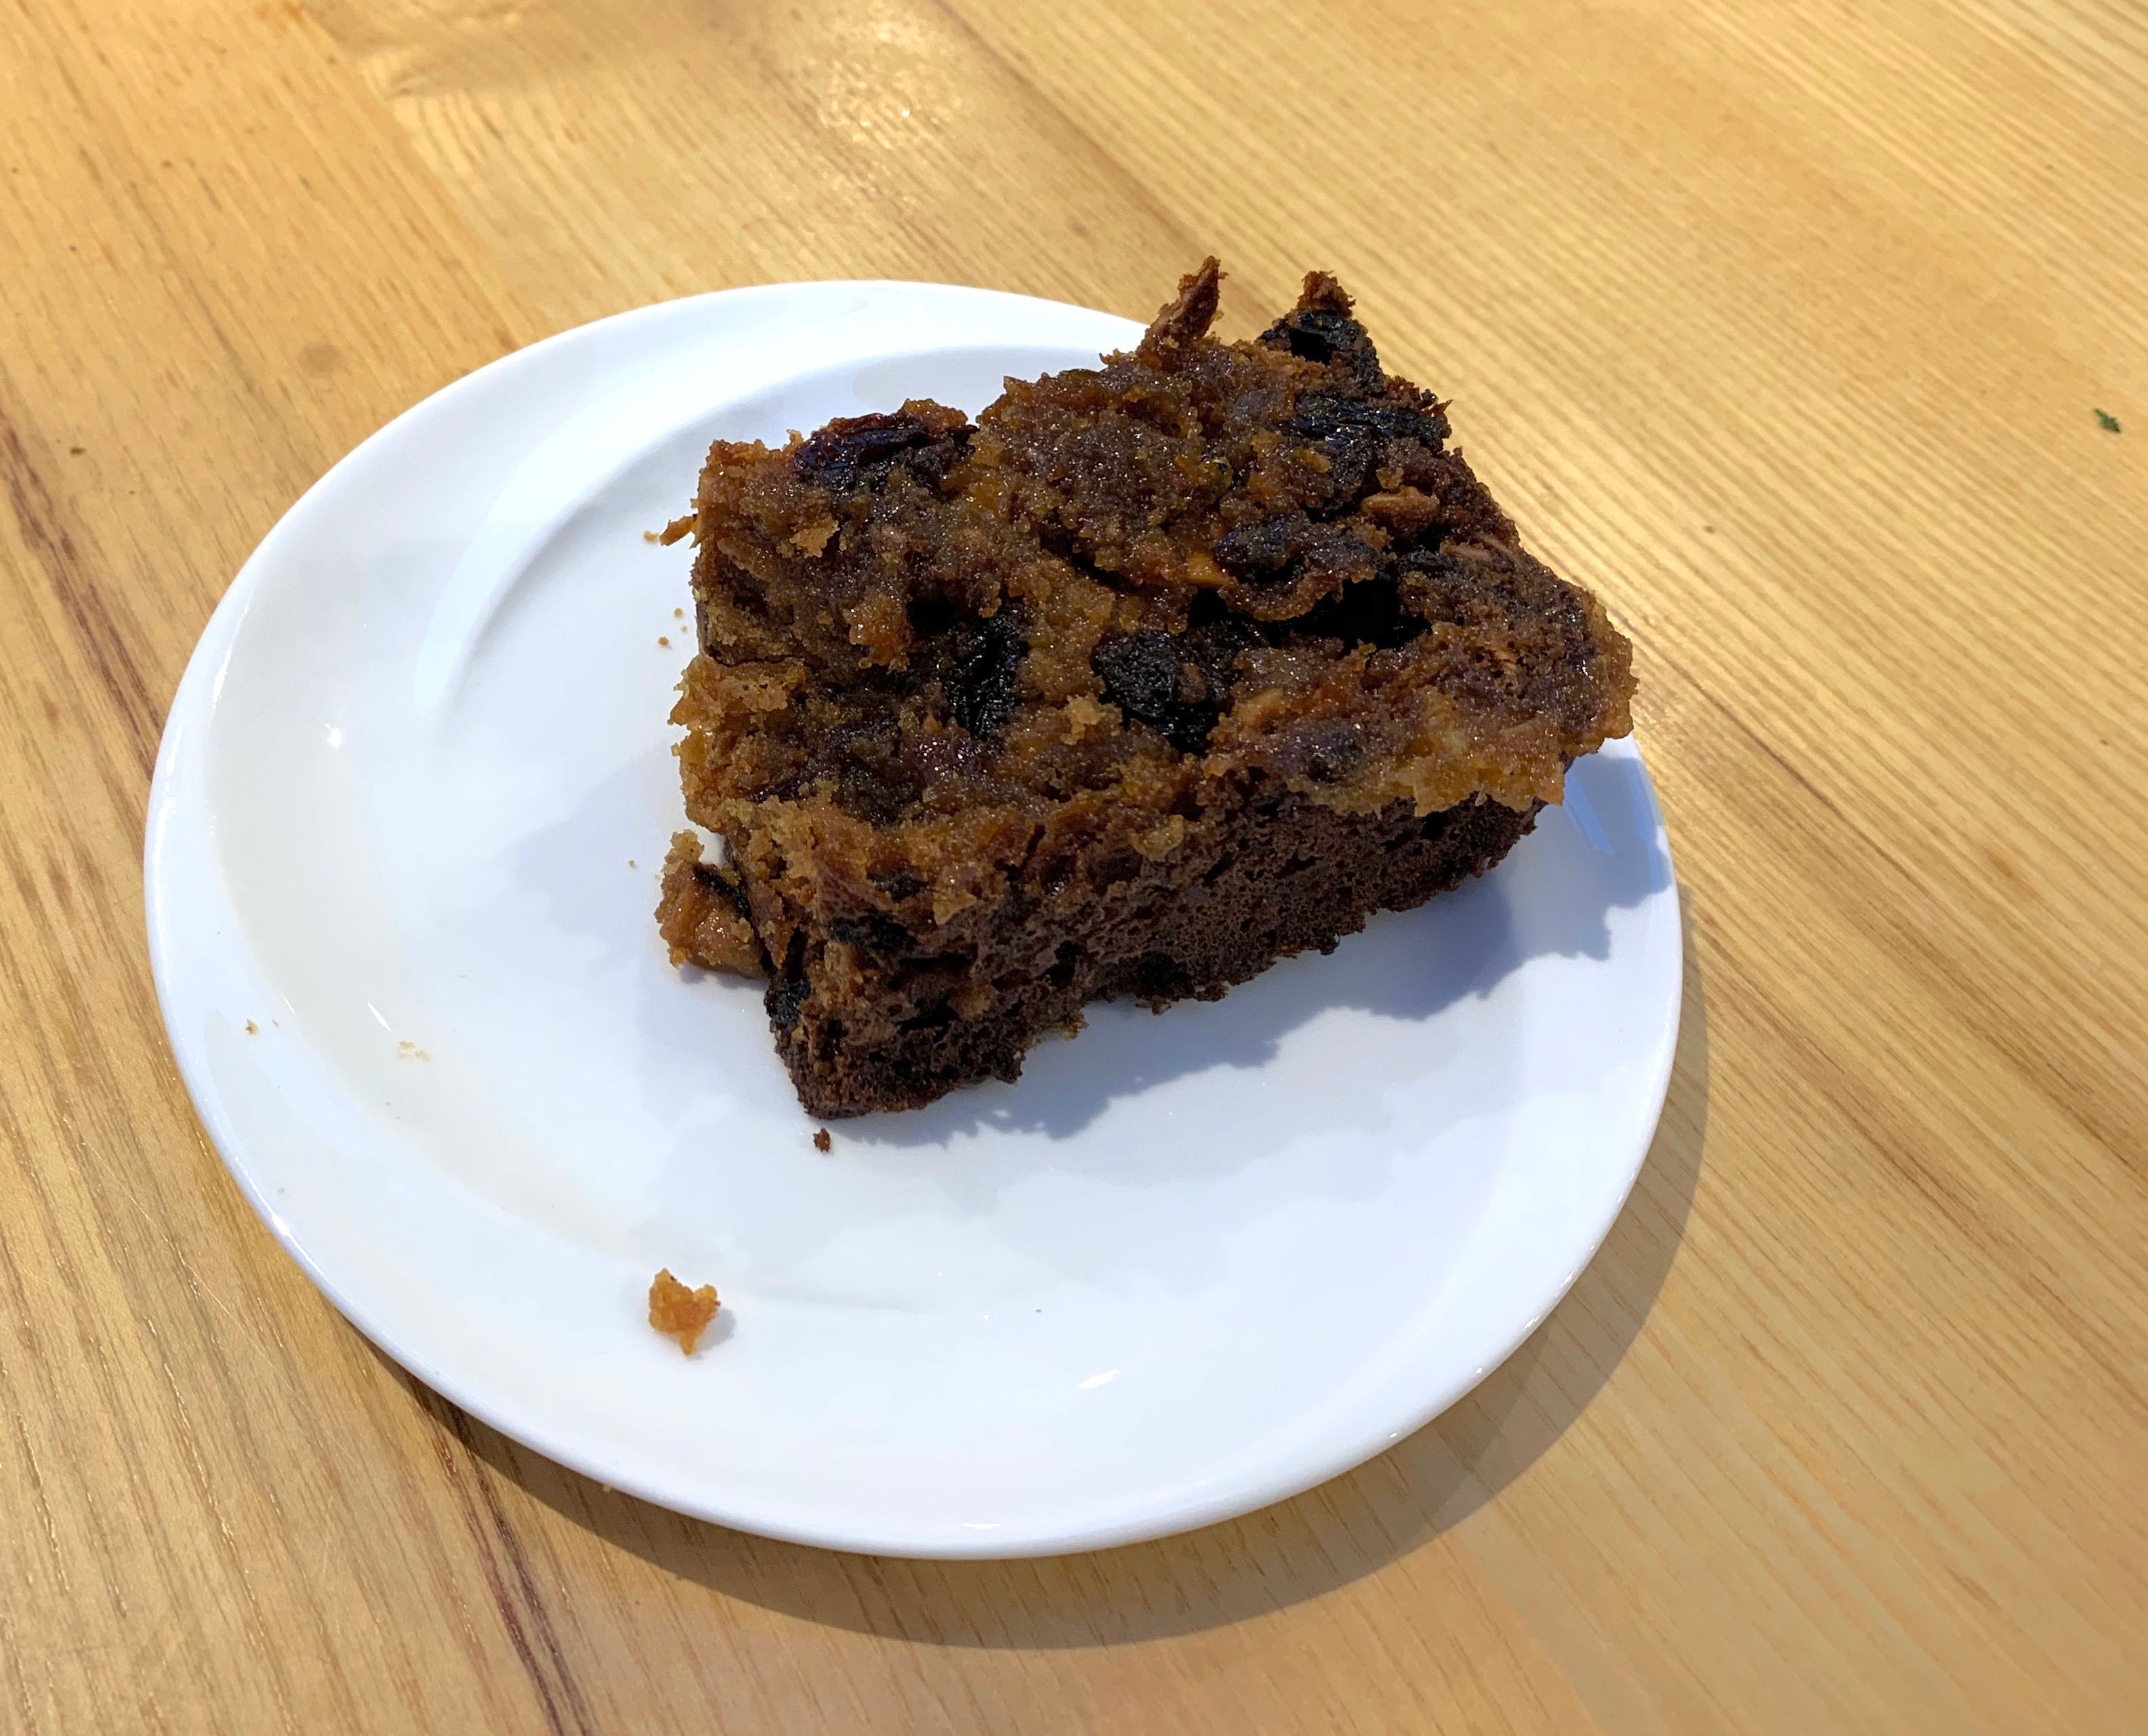
Traditionally, you would cover the cake with marzipan and hard icing. That’s too much sweetness for me, so I just made the fruit cake. I also left mine relatively soft and gooey, which is really delicious, at the expense of being tricky to cut. You may want to leave yours in a bit longer than I did.
The chow-chow preserve
Starting with this recipe, this made enough for two cakes. You may want to halve the amounts.
1.1 kg chayote (3 fruits)
1.5 kg sugar
380 ml water
¾ tsp salt
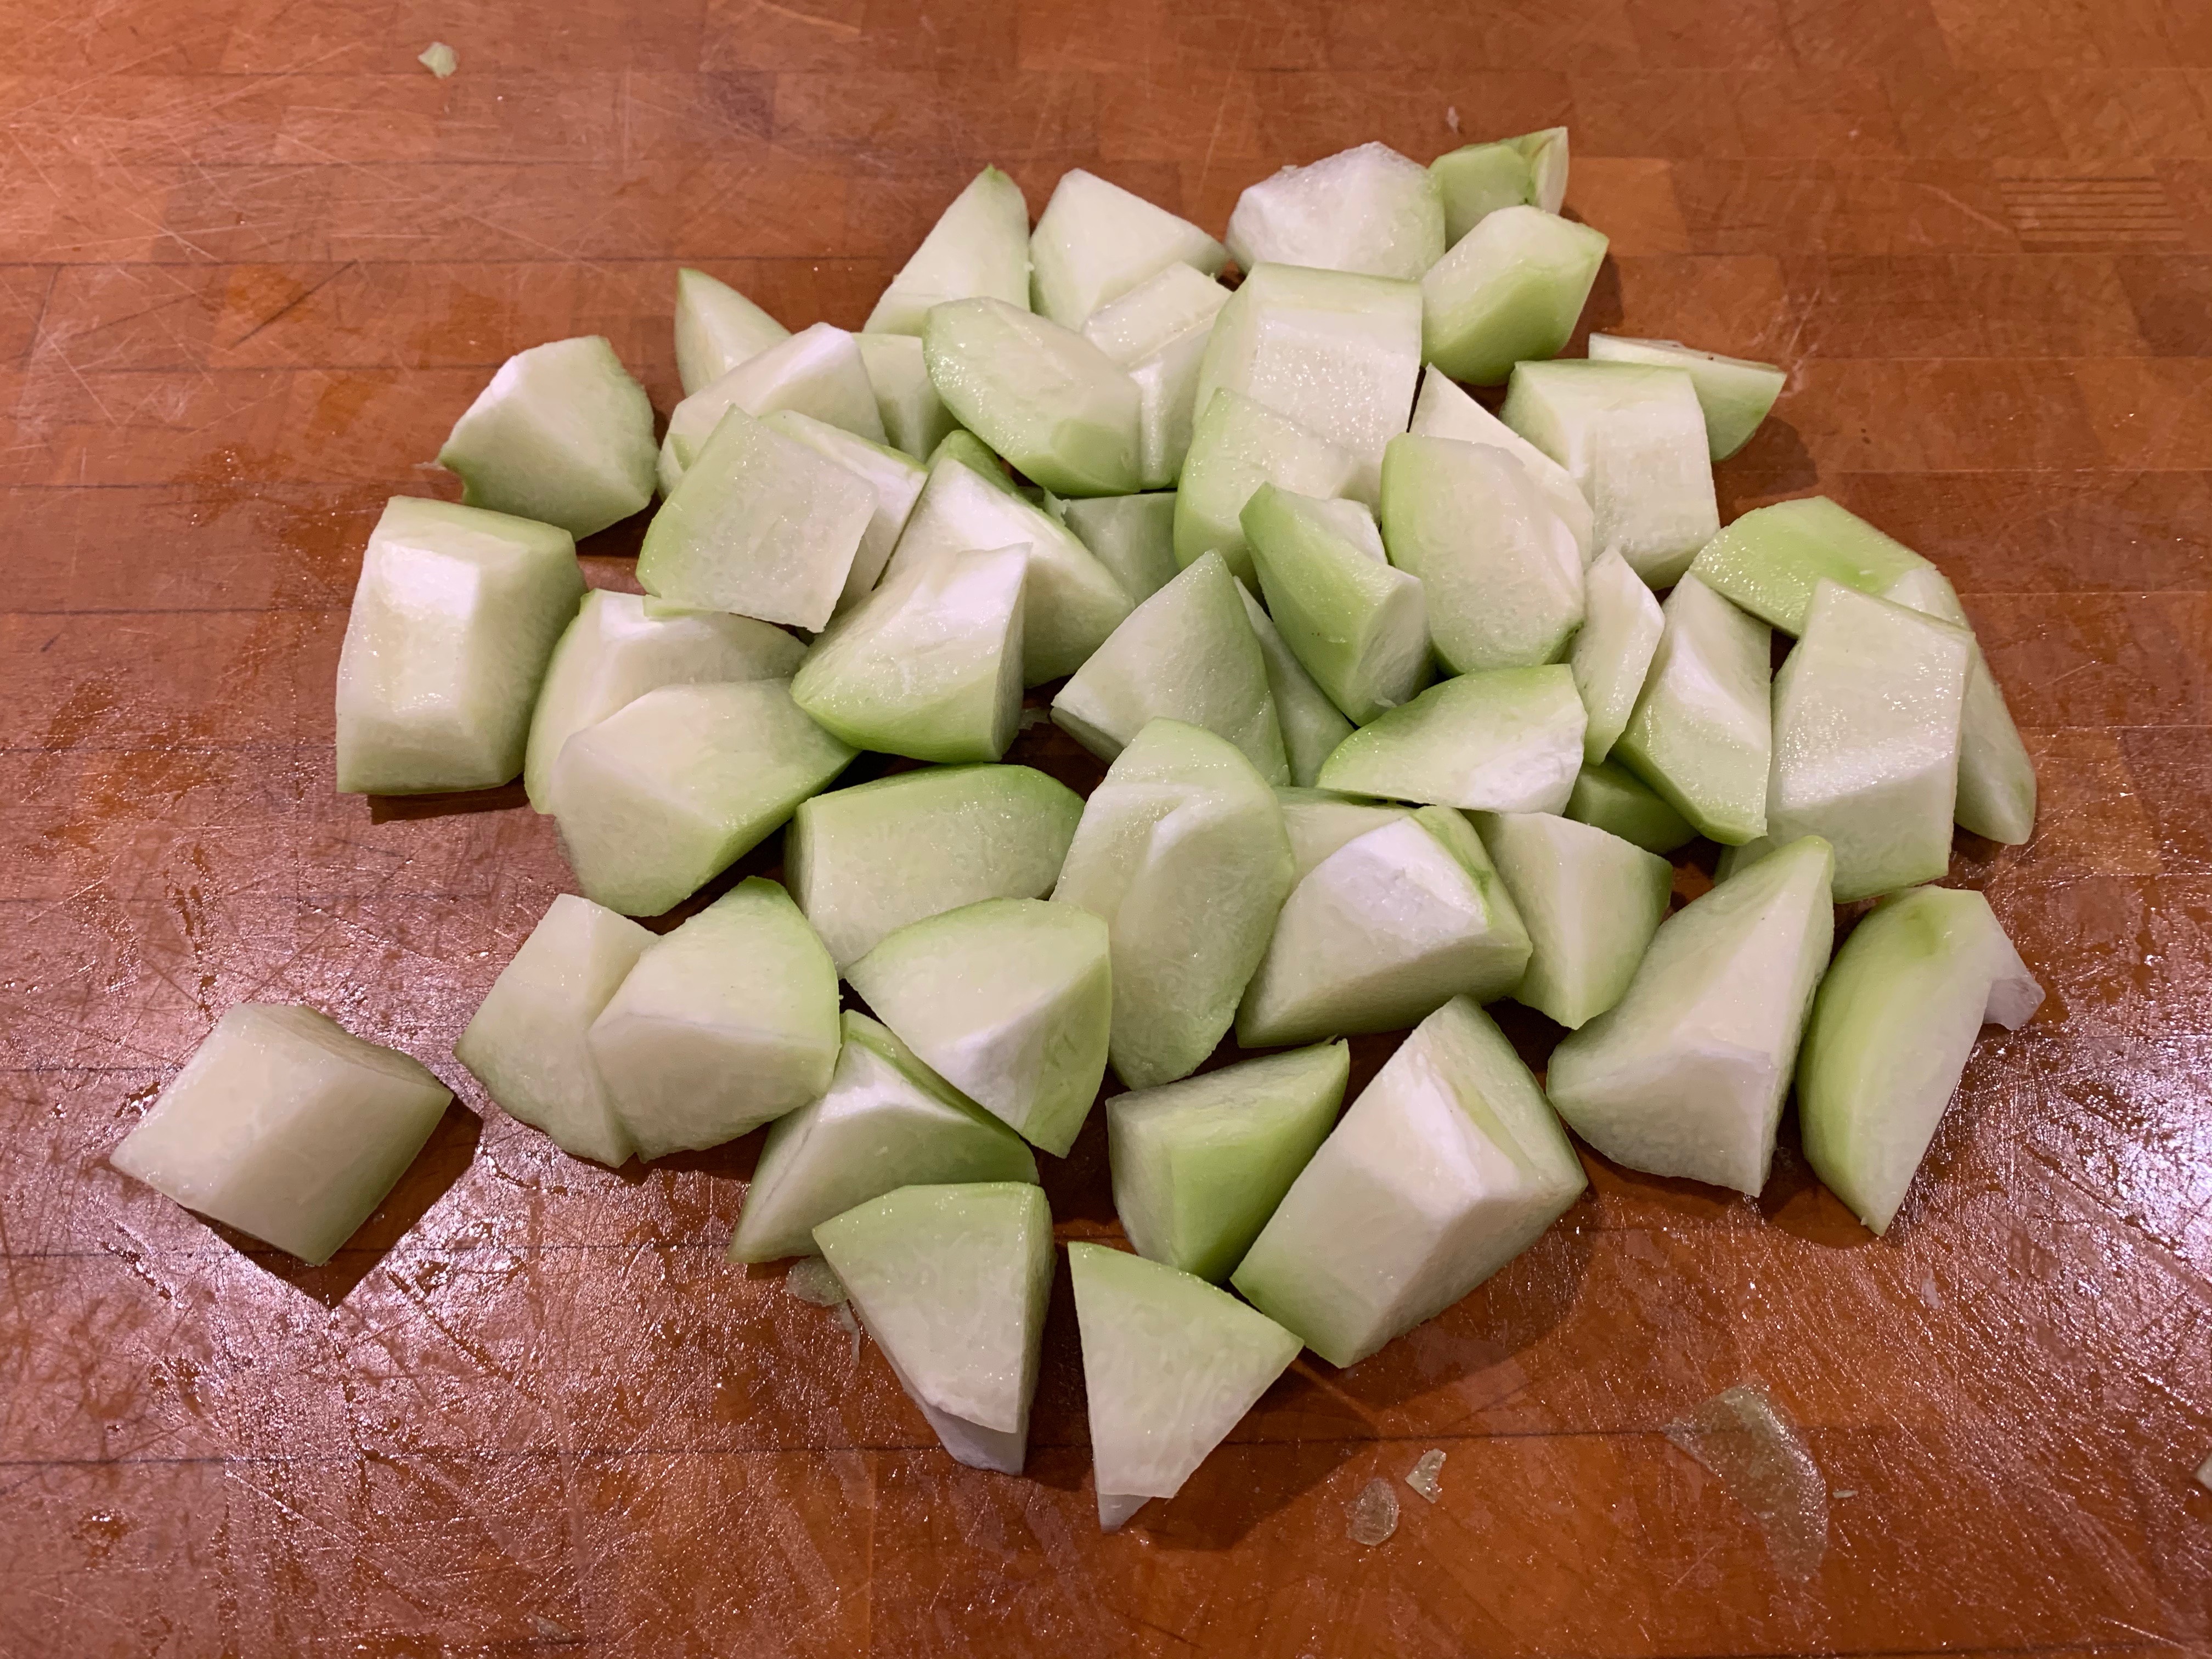
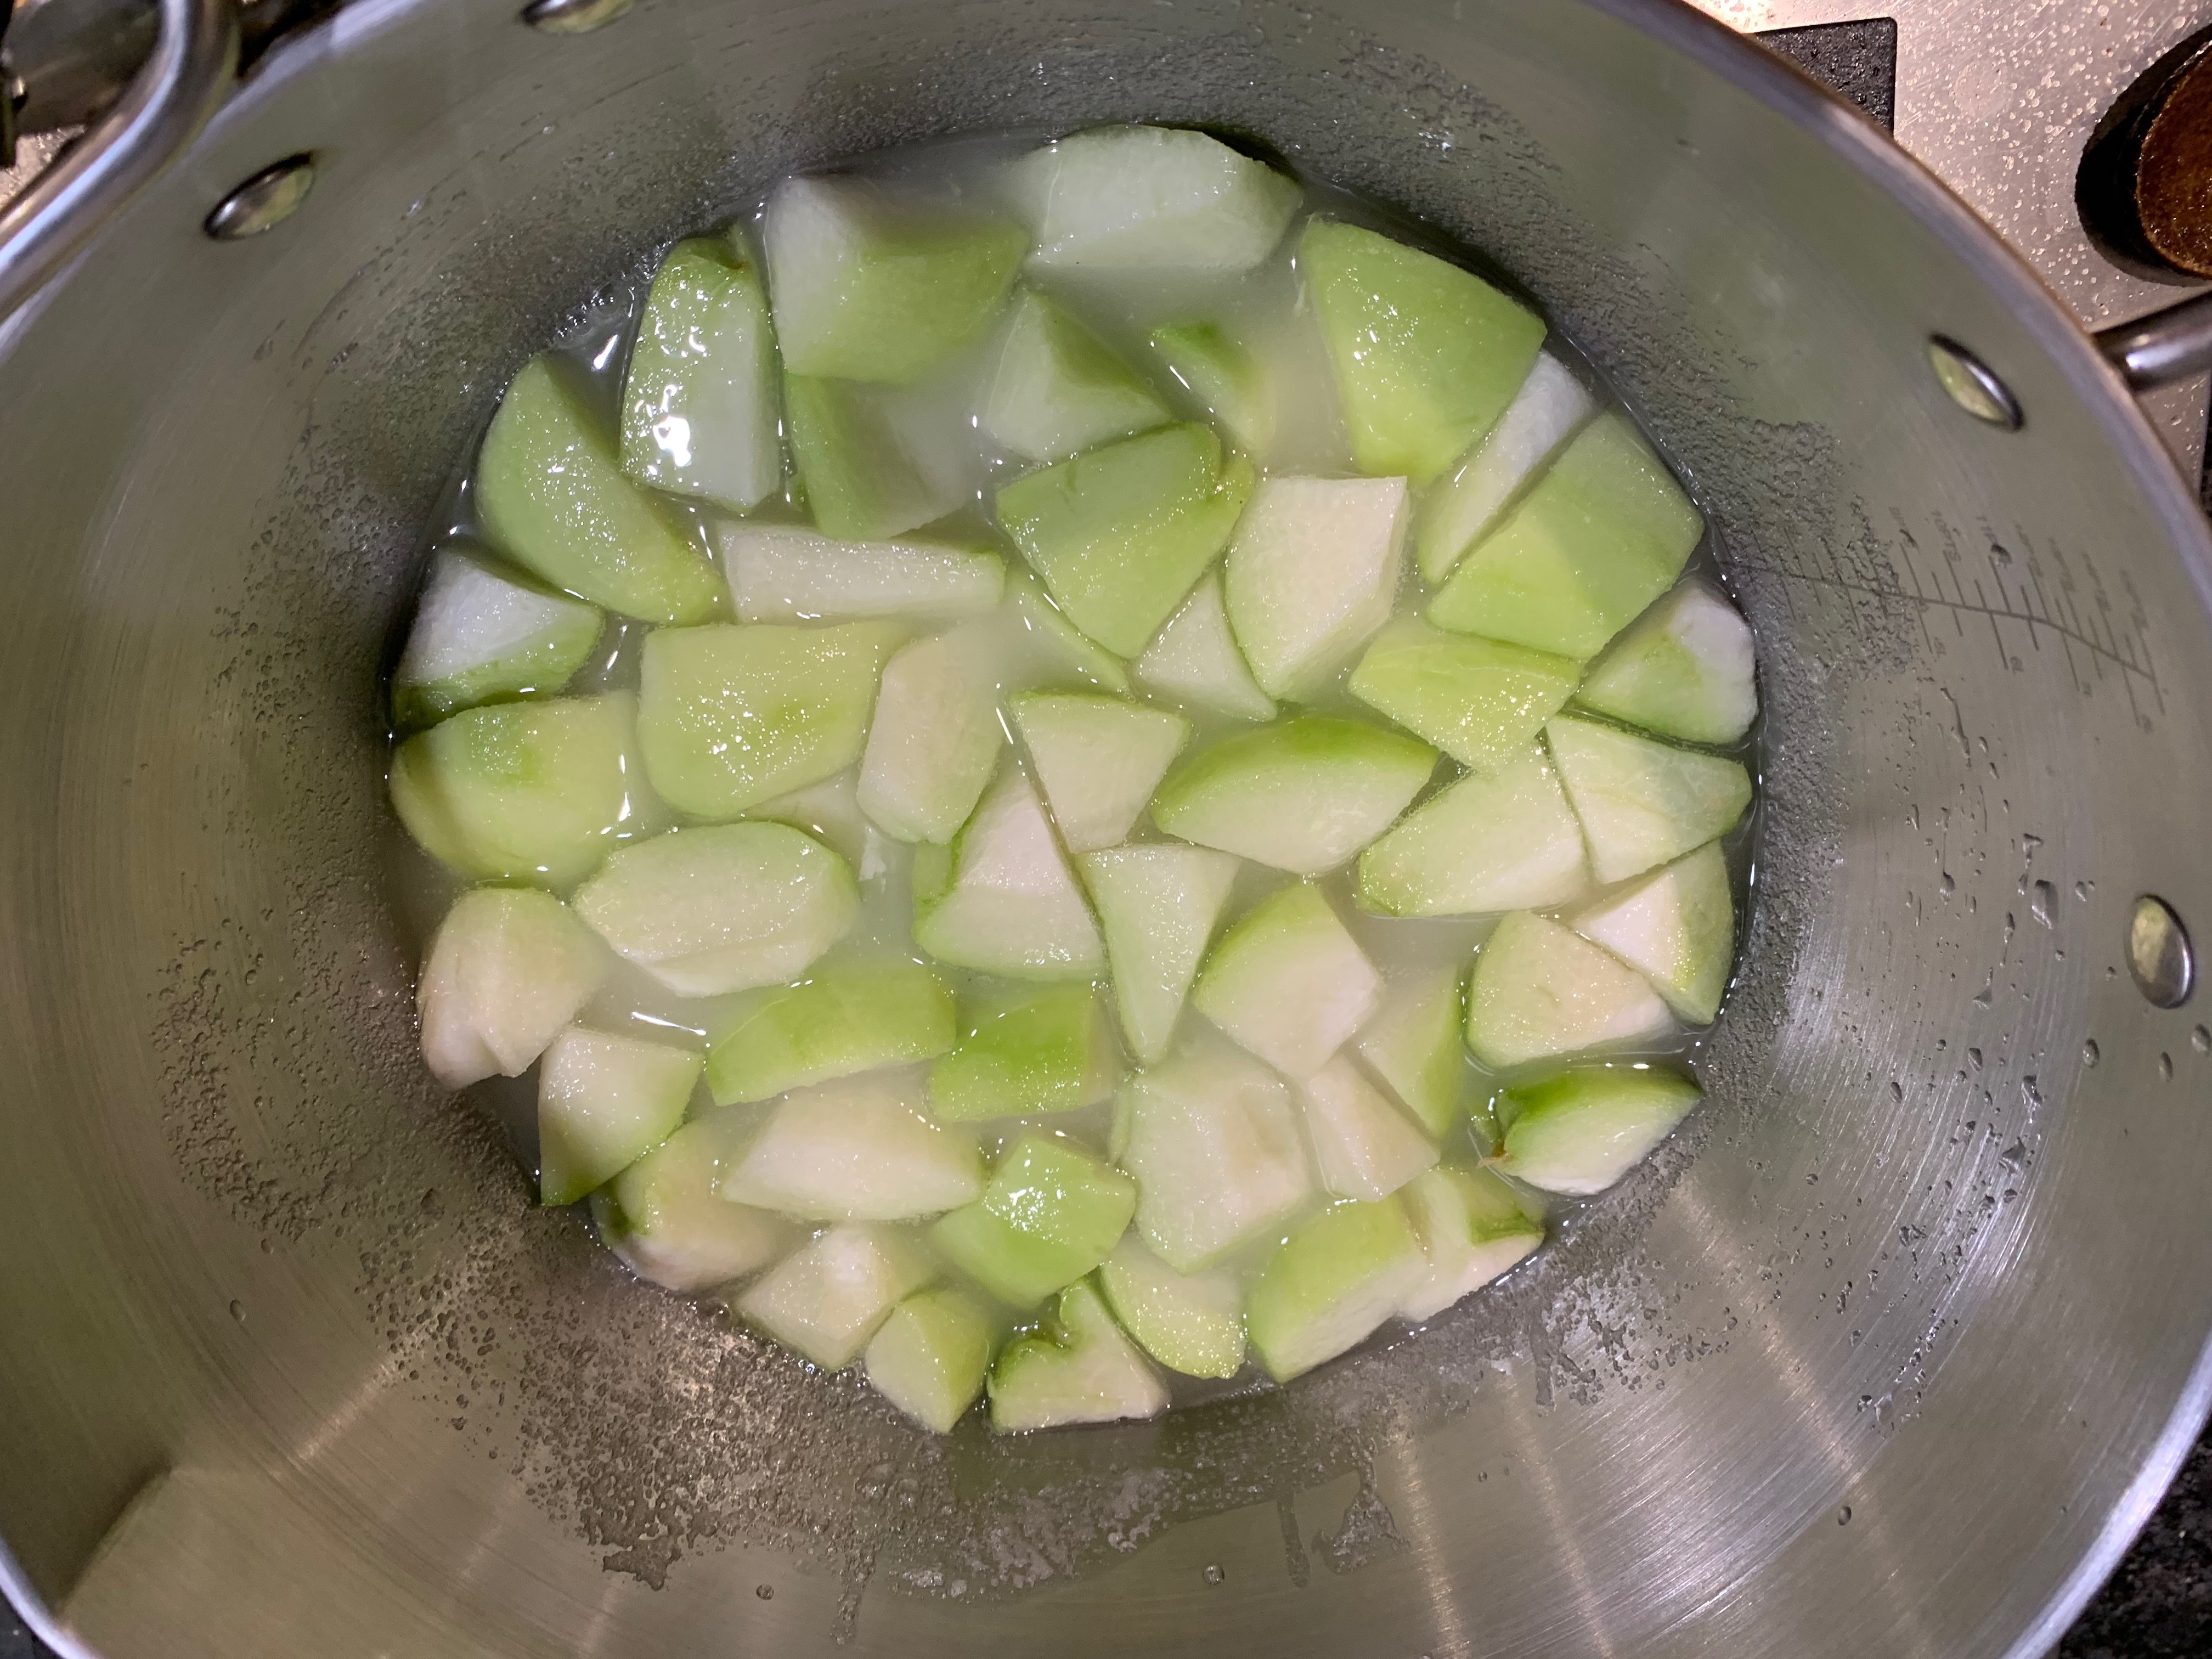
Peel and chop the chayote.
Put everything into a preserving pan and cook until the fruit is soft and the syrup is thick. You probably want a sugar temperature of around 105℃ – I went well over that.
Cool, and put into sterilised jars until needed.
The cake
150g unsalted cashews
150g unsalted almonds
200g glacé cherries
500g chow-chow preserve
150g glacé pineapple
240g raisins
240g sultanas
1 tsp ground cinnamon
1 tsp ground cardamom
½ tsp ground cloves
1 tsp rosewater (see Note)
Grated zest of 1 orange
Grated zest of 1 lemon
60 ml brandy
250g unsalted butter
385g caster sugar
6 eggs
180 g semolina flour
Preheat oven to 140℃ fan
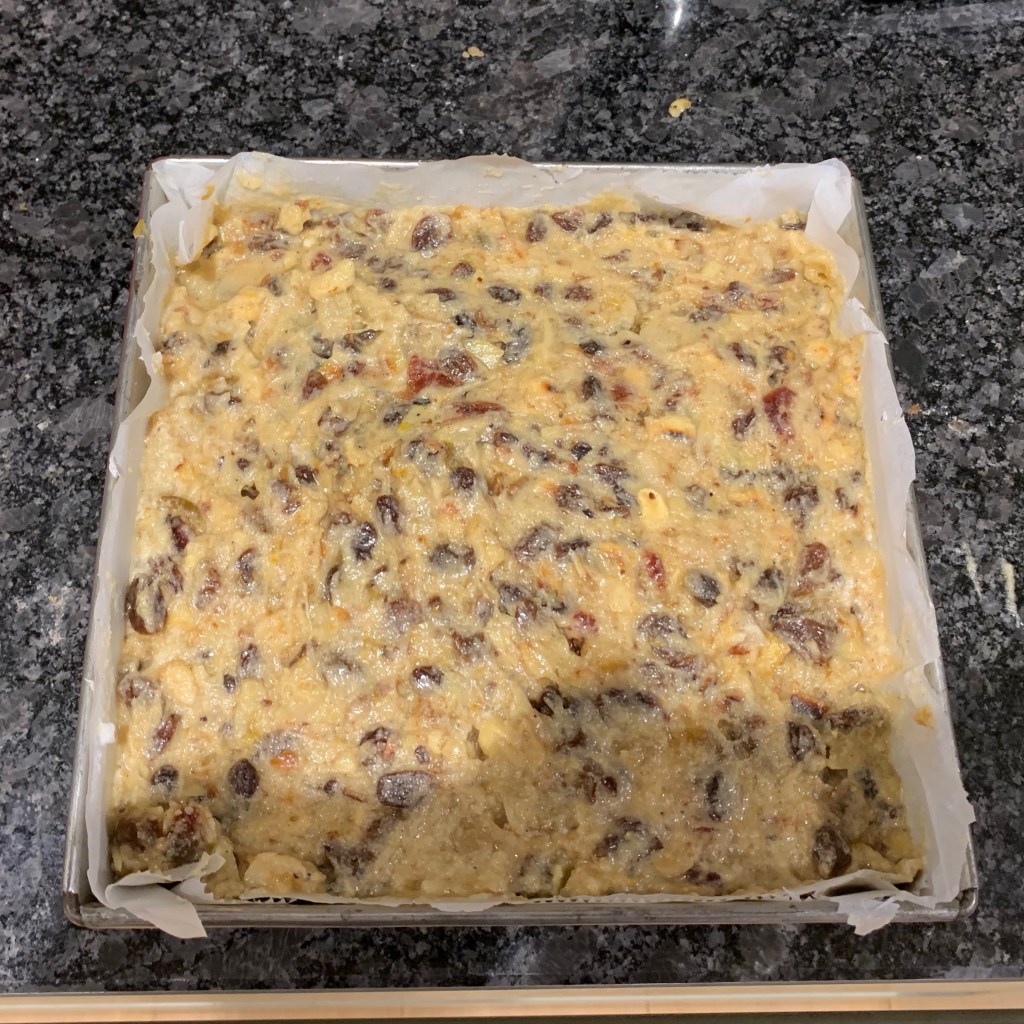
Line a cake tin with baking paper (these quantities work perfectly for a fairly tall 20cm x 20cm tin)
Chop the almonds, toast them in a dry pan, set aside to cool
Chop the cashews, toast them in a dry pan, set aside to cool
Halve the cherries (if they weren’t already bought that way
Chop the pineapple and chow-chow preserve so that the pieces are smaller than half a glacé cherry. How small you want to go is up to you.
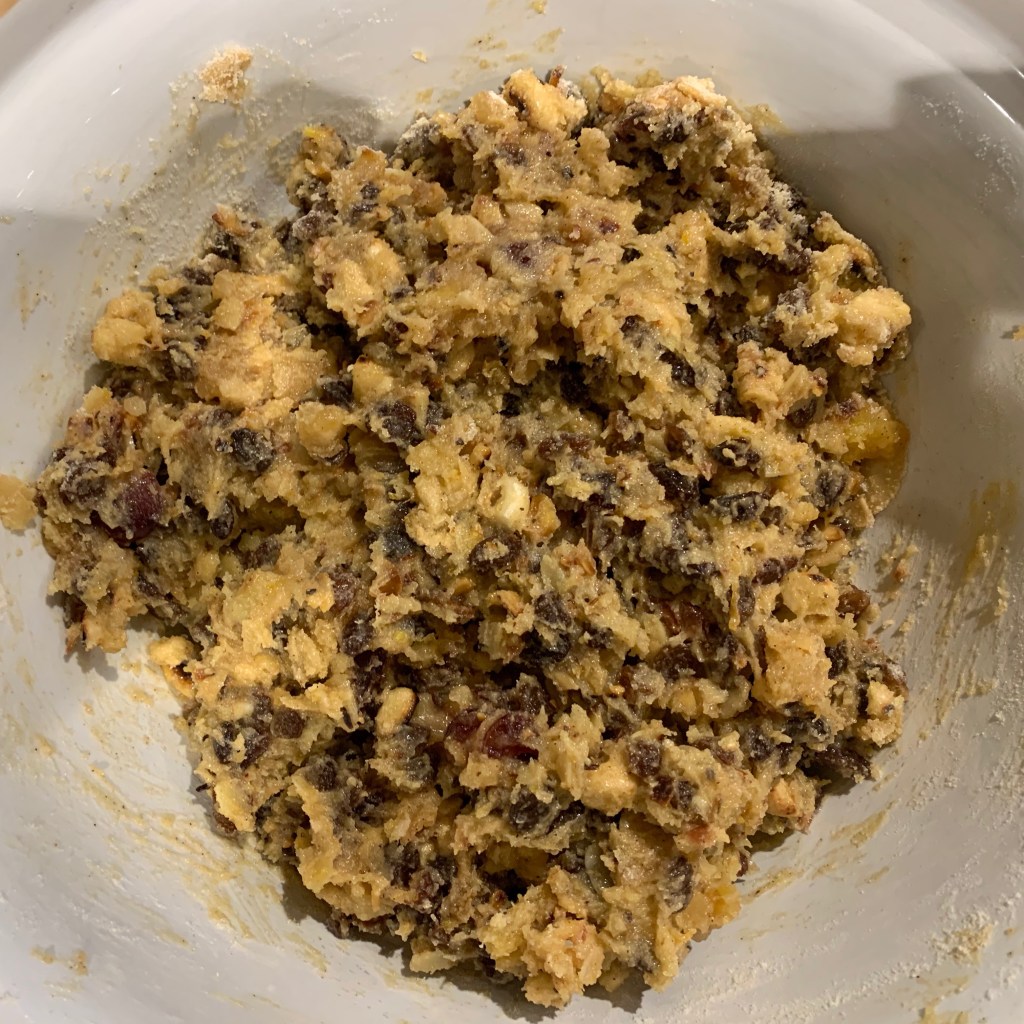
Put all fruits, zest, spices, rosewater and brandy into a large bowl and mix them up.
When the nuts are cool, add them also and mix
Chop the butter into small pieces and cream it with the sugar in the bowl of a stand mixer
One a time, separate the eggs, adding the yolk to the butter-sugar mix and incorporating it, and reserving the white in another bowl.
Combine the egg yolk/sugar/butter mix with the fruit-nut mix, add the semolina flour and stir until evenly spread.
Beat the egg whites until soft but not hard, fold into the mix.
Spoon the mixture into your lined tin, pressing it to the edges to smooth out any ruffles in the baking paper.
Cut another square of paper and place it on the top: this will stop the cake drying out
Bake for around 3 hours, or more if you prefer a less gooey cake